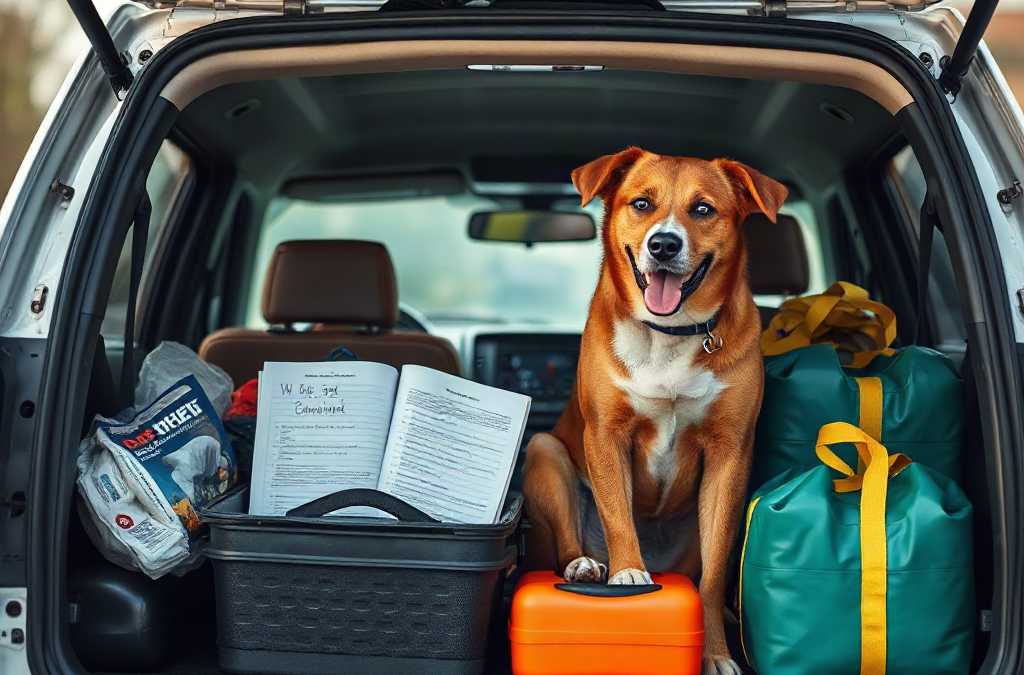
Usable transport capacity is determined by secured positions, not by the apparent amount of empty cargo space. Count every person, pet carrier, restraint location, mobility aid, and piece of equipment that must travel. Then inspect which doors must remain accessible and where air circulation could be restricted. A carrier that physically fits behind a seat may still be unsuitable if it prevents the seat from locking or leaves the animal beside shifting cargo.
Measure each carrier at its widest and tallest points, including handles and projecting fasteners. Measure the intended vehicle location with seats in the positions passengers will actually use. Test whether carriers can enter through the planned door; cargo openings and interior spaces often have different dimensions. Cats and small animals should have individual secure enclosures unless a veterinarian or species-specific transport authority advises otherwise. Dogs need an appropriately sized carrier or vehicle restraint suited to the animal and vehicle.
A common mistake is assuming pets can share passenger laps or move loose in the cabin to save room. That arrangement may interfere with the driver, complicate a rapid exit, and allow an frightened animal to escape when a door opens. Treat every unsecured animal position as unresolved capacity rather than usable space.
Illustrative Capacity Audit
Transport Need
Assigned Position
Check Before Departure
Two adults
Front seats
Full seat movement and belt access
One medium dog
Rear-seat secured carrier
Door closes and carrier cannot shift
Two cats
Separate carriers in cargo area
Ventilation openings remain clear
Pet supplies
Soft bag beside carriers
No loose items above or against animals
This example is a layout test, not a universal recommendation. Vehicle design, carrier construction, pet size, temperature, and restraint options may require a different arrangement.
Assign Safe Transport Positions
Animals should receive fixed transport positions before food bins, suitcases, and other replaceable cargo are loaded. Place each carrier on a stable surface where it can be restrained according to its instructions and reached without unloading the entire vehicle. Keep ventilation panels unobstructed, and do not stack carriers unless the products are designed for that use and remain stable under travel conditions.
Loading order should reflect exit needs. Animals most likely to panic, require medication, or need frequent observation should not be buried behind bulky gear. Keep a leash or species-appropriate transfer enclosure immediately beside each carrier, but avoid opening carriers beside traffic or in an unsecured public area. Attach identification to carriers as well as to collars or harnesses because either item can become separated from the pet.
When the vehicle cannot safely accommodate every animal, do not solve the shortage by squeezing carriers into unstable positions. Divide animals between prearranged drivers, use a second trip only when conditions and official instructions permit it, or identify a trusted boarding, veterinary, or sheltering option outside the affected area. Confirm acceptance requirements beforehand; a destination that allows people may not accept pets, and some facilities may require records or specific carrier types.
Heavy objects present another load-order hazard. Water containers, litter, tools, and canned food can shift during abrupt braking. Place dense supplies low and secure them away from carrier doors and ventilation openings. A neat arrangement that moves when pushed firmly is not ready for travel.
Build a Space-Efficient Pet Kit
A compact evacuation kit should preserve care essentials while replacing bulky packaging with safe, labeled formats. Pack food in sealed portions suitable for the expected travel period, but retain product identification and feeding information. Use collapsible bowls, compact waste bags, a small cleaning cloth, and an absorbent liner appropriate for the carrier. Water must remain accessible rather than being wedged beneath other cargo.
Medication deserves protected, reachable storage. Keep it in its original labeled container when possible, include dosing instructions, and discuss temperature-sensitive products or travel anxiety with the pet’s veterinarian before an evacuation occurs. Do not improvise sedatives or change a dose solely to make transport easier. Copies of vaccination information, prescriptions, recent photographs, microchip details, and veterinary contacts consume little room when stored in a waterproof pouch, with a secure digital backup where practical.
Prioritize the kit in three layers:
Immediate control: carrier, leash or harness, identification, medication, and handling supplies.
Basic care: water, food, bowls, sanitation materials, and species-appropriate bedding.
Bulky toys, full-size food sacks, rigid storage tubs, and duplicate grooming supplies should not displace secure carrier positions. One familiar cloth or small toy may be more space-efficient than an entire bedding set. Vacuum-compressed soft goods can save room in storage, but they are less useful if unpacking them blocks access during a roadside stop.
Rehearse the Load and Create Backup Options
A full rehearsal reveals conflicts that measurements alone miss. Load the vehicle with all passengers, empty or normally weighted carriers, mobility equipment, and the intended supply bags. Check driver visibility, door operation, seat-belt use, carrier stability, ventilation clearance, and access to medication and water. Then time the process without rushing and note which items cause delays.
Introduce pets to carriers and vehicle entry during calm periods, using methods appropriate to their temperament and health. The aim is not to force prolonged confinement but to reduce novelty and identify handling problems. Warning signs include a carrier that flexes excessively, a dog backing out of its harness, a cat escaping during transfer, or a pet showing severe distress. A veterinarian can advise on health or behavior concerns that make travel unusually difficult.
The backup arrangement should be specific enough to use under pressure. Record who can transport which pet, where the handoff can occur, what carrier accompanies the animal, and which records or medications must transfer with it. Confirm that the backup vehicle has compatible space rather than relying on a verbal promise.
Recheck the layout after changing vehicles, carriers, passenger needs, or the number and size of animals. A plan is failing if supplies must be removed to close a door, carriers block an exit, animals cannot be reached, or the driver’s movement and visibility are reduced. Correct those conflicts before adding convenience items.
Frequently Asked Questions
Should pets ever travel loose to save carrier space?
No. A loose pet may distract the driver, escape through an open door, or be injured by shifting occupants and cargo. Use a suitable carrier or vehicle restraint and verify that it fits before departure.
What should be removed first when the vehicle is too full?
Remove bulky, replaceable convenience items before reducing secure pet positions, essential medication, water, identification, or basic sanitation supplies. Large food packages can often be replaced with labeled travel portions.
Can two cats share one evacuation carrier?
Separate carriers are generally easier to handle and reduce conflict under stress. Ask a veterinarian about animals with medical, behavioral, or bonded-pair considerations rather than assuming shared transport will be safe.
Where should pet medication be packed?
Keep medication in a protected, quickly reachable bag with its label and dosing instructions. Ask the prescribing veterinarian how to transport products requiring refrigeration or other controlled conditions.
What if all pets cannot fit safely in one vehicle?
Arrange a compatible backup driver or confirmed destination before an evacuation. Document the handoff, carrier, records, medication, and contact details; do not rely on unsafe crowding or an unverified shelter option.
Conclusion
Limited vehicle space should be allocated first to secure animal positions, accessible care supplies, and unobstructed passenger movement. Measure carriers and door openings, test the complete load, and remove bulky replaceable items when conflicts appear. If every pet cannot travel safely in the primary vehicle, confirm a second driver or suitable destination now. Repeat the rehearsal whenever the vehicle, pets, carriers, or passenger needs change.
Identify Each Medication’s Refrigeration Requirements
A useful inventory separates medicines that must remain refrigerated from products that may be kept at room temperature for a limited period after opening or removal from refrigeration. Those conditions are product-specific. Different formulations of a similar medicine may have different limits, so a rule remembered for one insulin, injection, or liquid medication should not be applied to another.
For every refrigerated item, record the exact product name, strength, dosage form, lot number, expiration date, labeled storage range, and whether it has been opened. Add the date on which an opened product was first used. Keep photographs of the package and pharmacy label with the written record, because cartons and inserts may be unavailable during an evacuation.
Ask the dispensing pharmacist what to do if that particular product becomes too warm, freezes, or loses its label. The answer may depend on temperature, duration, packaging, and prior storage history. A common planning mistake is writing only “keep cold,” which gives no usable threshold for making a decision after an outage.
Planning Record
Why It Matters During a Failure
Exact product and formulation
Storage allowances may differ between similar medicines.
Labeled temperature range
Defines the conditions against which an excursion is assessed.
Opened or unopened status
May change the allowable storage period.
Time and temperature log
Helps a pharmacist or manufacturer evaluate exposure.
Clinical priority
Guides replacement and continuity decisions when resources are limited.
Build Backup Cooling and Temperature Monitoring
Backup refrigeration should preserve the labeled temperature range without exposing medication to freezing. A refrigerator connected to a properly operated backup power source may be appropriate at home, while an insulated medication cooler may be more practical during transport. Neither option is reliable without a thermometer that records current temperature and, preferably, minimum and maximum readings.
Cold packs create a frequent failure mode: medication placed directly against a frozen pack may freeze even though the cooler feels suitably cold. Use a barrier, such as insulating material recommended for the container, and keep medicines away from meltwater. Do not use dry ice unless the product manufacturer and container instructions specifically support that method; extremely low temperatures can damage products that must not freeze.
Match equipment to the likely interruption. A short local outage may call for keeping the refrigerator closed and watching the temperature. Evacuation requires a portable container, thermometer, medication list, charging options for powered devices, and a destination where refrigeration has been confirmed. Longer disruptions also require a refill strategy, not simply more ice.
Primary option: the normal refrigerator with monitored backup power.
Transport option: an insulated medication carrier with a temperature monitor and freeze protection.
Replacement option: contact details for the pharmacy, prescriber, insurer, and product manufacturer.
Documentation: printed and digital copies of prescriptions, labels, and the storage log.
Test the setup with an empty container before relying on it. Place the thermometer where the medicine would sit, load the intended cold packs, and observe whether the temperature stays within the target range. A plan is failing if readings fluctuate outside that range, condensation reaches the medication packaging, or frozen packs touch the intended storage compartment.
Respond to a Refrigeration Failure
The first response is to stabilize conditions and preserve evidence about the exposure. Note when power or cooling was lost, read the thermometer without repeatedly opening the door, and record the current, minimum, and maximum temperatures if available. Avoid transferring products impulsively to an unmonitored cooler; the move may replace a mild warming excursion with damaging freezing.
Keep the refrigerator closed while checking whether power is likely to return soon.
Record the outage time and all available temperature readings.
Move medication only to a prepared, monitored alternative that can maintain its required range.
Separate questionable products from confirmed usable supplies and label them “do not use pending advice.”
Contact a pharmacist or the manufacturer with the product details, exposure duration, and temperature record.
Arrange replacement or clinical instructions if safe storage cannot be verified.
Consider an illustrative evacuation: a refrigerated injection must leave the home after an extended outage. The prepared carrier contains a thermometer and conditioned cold packs separated from the medicine by insulation. The user logs the departure time, checks the display during travel, and confirms refrigeration at the destination. Without the barrier and temperature record, the injection could freeze unnoticed, leaving no sound basis for a usability decision.
People who rely on medication for time-sensitive control of a serious condition should discuss missed-dose and replacement procedures with their prescriber before a disaster. Do not improvise a different dose, substitute another formulation, or extend a medicine’s use because replacement is difficult. Storage planning supports continuity, but it does not replace individualized clinical instructions.
Decide Whether Medication Is Usable
A temperature excursion does not automatically prove that a medicine is unusable, but appearance alone cannot establish that it remains effective. Cloudiness, particles, discoloration, cracks, leakage, or a damaged seal are reasons to withhold the product and seek professional advice. A normal-looking medicine may still have lost potency after heat or freezing exposure.
The most defensible decision uses the exact product, whether it was opened, the temperatures reached, total time outside labeled storage, and any earlier excursions. Give those details to a pharmacist or the manufacturer rather than asking only whether the medicine “got warm.” If no reliable temperature history exists, say so; uncertainty is itself relevant to the recommendation.
When advice cannot be obtained immediately, balance the danger of interruption against the uncertainty of using an exposed product with a qualified clinician or pharmacist. The consequences differ for a medication needed promptly to manage a serious condition and one that can safely await replacement. Disaster conditions do not create a universal rule to use or discard every exposed product.
Keep replacement products separate and mark the original package with the exposure date and status. Save receipts and photographs if an insurer, pharmacy, assistance program, or disaster-relief service may request documentation. The common mistake here is discarding the package before recording the lot number and storage history, which can make expert assessment or replacement more difficult.
Practice and Maintain the Plan
A refrigeration plan remains dependable only when medication records, contact information, and equipment are kept current. Review the inventory whenever a prescription, formulation, dose, pharmacy, or storage instruction changes. Check thermometer batteries, power banks, cooler seals, and cold packs on a regular household schedule, and replace supplies that are damaged or expired.
Run a short drill that starts with a simulated power loss. The person responsible should locate the thermometer, retrieve the product record, prepare the backup container, and identify whom to call without opening the refrigerator repeatedly. If another family member, caregiver, school, or workplace may handle the medication, give that person the same written instructions.
Location matters as much as equipment. Confirm that an evacuation destination can accept and refrigerate medication; access to a refrigerator should not be assumed at a shelter, hotel, or temporary residence. If power-dependent medical equipment is involved as well, plan its electricity needs separately so the medication cooler does not compete for an undersized power source.
Signs of a working plan include accessible records, traceable temperatures, a tested transport method, and a clear route to professional advice or replacement. Missing temperature data, unlabeled medicines, depleted batteries, frozen packs touching containers, and reliance on a single pharmacy indicate that the plan needs correction before the next disruption.
Frequently Asked Questions
How long can refrigerated medication stay out during an outage?
There is no universal duration. It depends on the exact product, whether it is opened, the temperature reached, and previous exposure. Check the package information and ask a pharmacist or manufacturer using recorded time and temperature details.
Should medication be placed directly on ice?
No. Direct contact with ice or frozen packs can freeze medication. Use an insulated barrier and a thermometer, following the product and cooler instructions.
Can appearance show whether exposed medication is safe to use?
Visible damage can identify a reason not to use a product, but a normal appearance does not confirm potency. Obtain product-specific advice before using or discarding exposed medication.
What information should be given to a pharmacist after a failure?
Provide the product name, strength, formulation, lot number, opened status, expiration date, highest and lowest recorded temperatures, exposure duration, and any visible changes.
What belongs in a refrigerated medication evacuation kit?
Include the labeled medication, insulated carrier, temperature monitor, protected cold packs if appropriate, prescription records, contact numbers, backup power where applicable, and written product-specific storage instructions.
Conclusion
Effective preparation connects each medicine’s storage instructions to a monitored backup method and a clear professional decision path. Document products before an outage, test the cooling arrangement without medication, and prevent accidental freezing during transfers. When refrigeration fails, preserve temperature records, isolate questionable stock, and seek product-specific guidance promptly. Update the plan whenever prescriptions or evacuation arrangements change.
A useful emergency pantry must match the conditions in which the food will be eaten. A sealed bag of rice stores efficiently, but it is a poor first-line choice when tap water is unavailable, fuel is scarce, or cooking indoors would be unsafe. Ready-to-eat foods cost more per serving and create more packaging waste, yet they remain usable during the most restrictive part of an outage.
Start with foods that are shelf-stable before opening and familiar to the people who will eat them. Practical proteins include canned chicken, tuna, salmon, beans, lentils, shelf-stable tofu, nut or seed butters, and commercially packaged meat snacks. Add canned fruit, applesauce cups, canned vegetables, crackers, tortillas, dry cereal, granola, and shelf-stable milk or fortified plant beverages. Read labels if allergies, sodium limits, texture restrictions, infant feeding, or other medical nutrition needs affect the household.
Package design matters almost as much as the food. Pull-tab cans are convenient but may be damaged more easily than standard cans, so keep a manual can opener with the supply. Single-serving packages reduce leftovers, while larger cans usually cost less. Without refrigeration, a large opened container can become waste unless everyone can finish it during the same meal.
A common mistake is stocking foods solely for long storage life. Very salty snacks can increase thirst, unfamiliar freeze-dried meals may go uneaten, and foods that depend on abundant hot water can strain limited resources. A sound first tier consists of foods that can be opened and eaten immediately; cooking-dependent staples belong in a secondary tier for situations where water and a safe heat source remain available.
Build Balanced No-Refrigeration Meals
Emergency meals should combine energy, protein, and foods that add variety rather than relying on snack items alone. Crackers and sweets are easy to store, but repeated meals built only around refined carbohydrates may leave people hungry and make a stressful disruption harder to manage. Protein, fat, and fiber generally make a shelf-stable meal more substantial.
A simple meal pattern is one protein, one grain or starchy food, and one fruit or vegetable. Examples include tuna with crackers and canned peaches; beans with tortillas and salsa from a small shelf-stable container; or peanut butter with whole-grain crackers and an applesauce cup. Shelf-stable milk with cereal can work for breakfast, provided the package is small enough to finish after opening. Choose no-cook versions first, then add heat-and-eat foods if a safe cooking method is available.
Meal Role
No-Cook Choices
Tradeoff to Check
Protein
Canned fish, beans, nut or seed butter
Allergens, sodium, opened leftovers
Grain or starch
Crackers, tortillas, ready-to-eat cereal
Fragility and shorter quality life
Fruit or vegetable
Canned produce, fruit cups, dried fruit
Added sugar, thirst, package size
Beverage or milk
Bottled water, small shelf-stable cartons
Storage space and use after opening
Comfort and appetite deserve practical consideration. Stress, heat, illness, and repetitive menus can reduce food intake. A few familiar seasonings, drink mixes, or favored snacks may make the reserve easier to use, but they should complement rather than replace meal components. For children, older adults, or anyone with chewing or swallowing limitations, test shelf-stable textures before an emergency instead of assuming that every stored item will be manageable.
Do not treat an emergency pantry as medical nutrition therapy. Anyone dependent on prescribed formulas, tube-feeding products, controlled carbohydrate intake, renal restrictions, or another clinical diet should develop a disruption plan with an appropriate healthcare professional and the relevant supplier.
Calculate Food, Water, and Package Sizes
Quantity should be calculated from people, days, meals, and actual package yields. Buying a random collection of cans can produce too much of one ingredient and too few complete meals. Count usable servings from the label, then assign those servings to a simple menu before purchasing more.
Consider an illustrative three-day reserve for two adults eating three times daily. The requirement is 2 people × 3 days × 3 meals, or 18 individual meals. If breakfast is cereal plus a fruit cup, lunch is canned fish with crackers, and dinner is beans with tortillas and canned vegetables, the shopping list should provide six two-person meal sets. The exact amount of each food depends on appetite, package labeling, dietary needs, and whether the same item supplies more than one meal.
Water must be planned separately from food. Drinking needs vary with temperature, exertion, health, age, pregnancy, and other conditions, while preparation and hygiene increase total use. Follow current local emergency-management guidance for storage amounts, and select foods that do not consume the same water reserve needed for drinking. Dried beans, pasta, powdered beverages, and dehydrated meals all impose a water cost that canned or ready-to-eat alternatives may avoid.
Use this compact planning sequence:
List every person, dietary restriction, and feeding requirement.
Choose a no-cook menu for each meal in the initial disruption period.
Multiply each menu by the number of people and planned days.
Check label servings, required water, fuel needs, and opened-package waste.
Add a modest variety of snacks and familiar foods without displacing complete meals.
The plan is working when every stored item has a role, meals can be assembled with available tools, and packages can be consumed without depending on cold storage. It is failing when most calories require boiling, one missing ingredient prevents several meals, or opened containers would have to sit at room temperature for later use.
Store, Rotate, and Use Food Safely
Storage conditions determine whether an otherwise suitable food remains dependable. Keep supplies in a cool, dry location away from pests, household chemicals, flooding risk, and large temperature swings. Do not use cans that are bulging, leaking, badly rusted, or deeply dented around seams. Discard packaging that is open, punctured, or otherwise compromised.
Rotation should follow the dates and storage directions printed by the manufacturer rather than a single rule for every product. Mark the purchase month where it is easy to see, place earlier-dated items at the front, and use them in ordinary meals before replacing them. A twice-yearly inspection can identify damaged packages, missing utensils, expired dietary products, or foods the household no longer eats.
Once a shelf-stable package is opened, its storage requirements change. If refrigeration is unavailable, select portions that can be consumed at one sitting and discard perishable leftovers rather than saving them for an uncertain period. Never taste questionable food to decide whether it is safe. Odor and appearance cannot reliably identify every foodborne hazard.
Power outages create a separate issue for food already in refrigerators and freezers. Keep appliance doors closed as much as possible and use official food-safety guidance to decide what can be retained; guesswork based only on how cold an item feels is weak evidence. A thermometer provides better information when available. Emergency foods should remain separate and unopened until chilled food has been assessed, preventing the shelf-stable reserve from being consumed unnecessarily.
Test the plan without staging a crisis. Prepare one day of stored meals using only the water, utensils, lighting, and cooking equipment intended for an outage. This exposes hard-to-open packages, inadequate portions, unwanted flavors, missing can openers, and excessive water demand while those problems are still easy to correct.
Conclusion
A dependable no-refrigeration pantry begins with an actual meal schedule, not a pile of long-lasting ingredients. Build the first meals around ready-to-eat proteins, grains, produce, safe water, manageable portions, and the tools needed to open them. Add cooking-dependent staples only after accounting for water, fuel, and ventilation. Review dates and package condition routinely, then run a one-day practice menu to uncover waste, missing equipment, and foods nobody wants to eat.
Frequently Asked Questions
What foods last well without refrigeration?
Unopened canned proteins and produce, nut or seed butters, crackers, tortillas, dry cereal, fruit cups, and small shelf-stable beverage cartons are practical choices. Follow each product’s storage directions and inspect packaging before use.
Should emergency food be ready to eat?
At least the initial supply should be usable without cooking. Foods requiring heat can expand the menu, but they should not be the only option when fuel, ventilation, or safe water may be unavailable.
Can opened canned food be saved without a refrigerator?
Plan to finish opened perishable food during the same meal when reliable cooling is unavailable. Smaller cans or pouches reduce waste and avoid depending on unsafe room-temperature storage.
How should dietary restrictions affect an emergency pantry?
Store foods that already fit the person’s allergies, texture needs, cultural preferences, and health requirements. Specialized medical diets or formulas warrant a separate continuity plan developed with the appropriate clinician or supplier.
Is dry food better than canned food for emergencies?
Dry food is often lighter and compact, but many items require water and fuel. Canned food is heavier and bulkier yet often ready to eat, so a mixed supply usually handles more conditions.
Further Reading
Authoritative Sources
Food Safety During an Emergency ready.gov
Provides federal emergency-planning information on food supplies, storage, preparation, and outage conditions
Food Safety in an Emergency fsis.usda.gov
Explains how to evaluate refrigerated, frozen, and shelf-stable foods during power failures and other disruptions
Keep Food Safe After a Disaster or Emergency cdc.gov
Offers practical food-safety precautions for outages, floods, and compromised food packaging
Food and Water Safety During Power Outages and Floods fda.gov
Covers decisions about food, drinking water, appliance temperatures, and damaged containers during emergencies