
Planning Your Outdoor Toilet Location
Choosing the Right Spot
When it comes to building an outdoor toilet, the first step is picking the right location. I usually scout for a spot that’s remote enough to provide privacy yet close enough for convenience. Think about accessibility—especially for family gatherings or camping trips. You don’t want to trek miles just to use the loo!
It’s also essential to consider factors like drainage and wind direction. Placing the toilet downwind from your main living area can make a huge difference in comfort. And don’t forget about natural features like trees or bushes for added seclusion.
Lastly, I recommend checking with local regulations. Some areas have specific guidelines about distance from water sources or property lines. A little research here can save you from unwanted headaches down the line!

Planning for Waste Management
Next up on my list is how we’re going to handle waste. I’ve found that composting toilets are an effective option, especially if you’re keen on sustainability. They’re eco-friendly and can be surprisingly easy to maintain.
If composting isn’t your jam, check out traditional pit toilets. Just make sure the pit is deep enough (about 5 to 6 feet is ideal) and situated well to avoid contamination of groundwater. It’s all about making sure that what goes in, stays safe!
Another option I’ve considered is using a portable camping toilet. These can be a perfect solution for short-term needs and are usually much easier to set up and maintain, especially for the less handy among us!
Thank you for reading this post, don't forget to subscribe NOW for FREE!

Gathering Materials and Tools
Once I have a plan, the next step is gathering materials and tools. Trust me, nothing brings your project to a screeching halt like missing supplies. For the structure, I typically choose wood or durable plastic. If you’re feeling adventurous, you can also explore recycled materials!
As for tools, I’ve learned that having the basics like a saw, hammer, and measuring tape handy makes a world of difference during the build. I also recommend grabbing a shovel, especially if you’re digging a pit. And let’s not forget about nails and screws for assembly!
Gathering everything beforehand means you won’t need to make multiple trips to the store, which can definitely save time and sanity during the process.
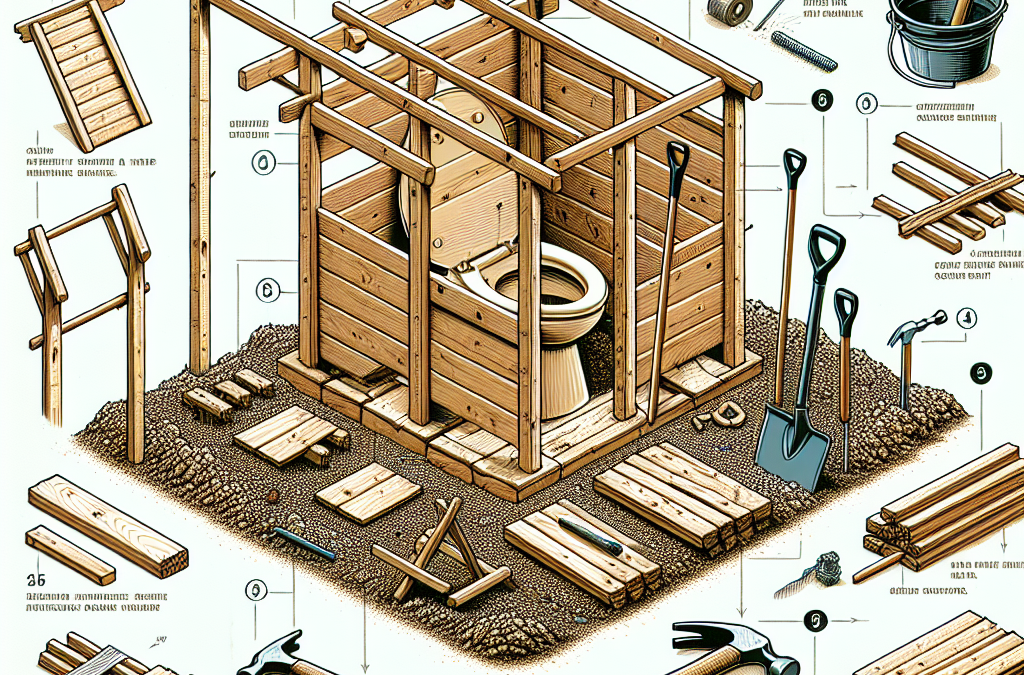
Building the Structure
Constructing the Base
The base is where it all begins! I usually start with leveling the ground where the toilet will sit. This ensures that the whole structure is steady. I’ve made the mistake of skipping this step before—it didn’t end well!
Once I have a solid base, I construct a simple frame using treated lumber. This helps protect against rot and insect damage. I can’t tell you how many times I’ve wished I’d thought of this earlier in past projects!
Raising the base a bit off the ground also allows for better drainage and keeps things clean. I love a clean outdoor loo, don’t you?
Framing and Roofing
Next, I move on to framing the sides. I like to keep it simple—two-by-four studs are my go-to for strength and durability. Plus, they’re easy to nail together. It’s a quick way to get that classic cabin feel!
When I think about the roof, I often choose a slanted design. This helps with rain runoff and keeps everything dry inside. I’ve learned that a roof can make or break your outdoor toilet experience, so don’t skimp on this part!
Covering the roof with metal or shingles provides extra protection against the elements. After all, we want this toilet to last for years, right?
Finishing Touches
No outdoor toilet is complete without some finishing touches! I love adding a door for privacy. A simple latch is key here—it keeps everything secure, helping you to feel comfortable.
Don’t forget ventilation! Trust me, you’ll be grateful for this when the weather heats up. I usually install a small vent near the top of the structure. It helps keep odors at bay.
Finally, I like to decorate a bit—maybe some plants or a little sign to make it feel welcoming. It’s all about creating a space that’s functional yet inviting!
Maintaining Your Outdoor Toilet
Regular Cleaning
Now that the hard work is done, let’s talk maintenance. Regular cleaning is key. I like to set a schedule to keep mine fresh. A quick rinse down and a thorough scrub can work wonders. Plus, it’s so much easier than letting it linger!
I also recommend keeping cleaning supplies handy, like biodegradable soap and a scrub brush. That way, it’s a breeze to tackle messes when they happen. Nobody wants to deal with an overflowing toilet, right?
And while I’m at it, I often remind friends and family to keep it tidy after use. A friendly reminder goes a long way in maintenance!
Waste Management Practices
Depending on your waste management choice, regular checks are essential. For composting toilets, I like to monitor the composting process. It’s amazing how quickly waste breaks down! I make it a habit to turn the compost every once in a while to speed things up.
If you’re using a pit toilet, ensure that it doesn’t get too full. You might need to dig a new pit or cover the old one and start fresh after a few years. This is all part of ensuring a safe outdoor toilet that won’t contaminate your space!
Whatever system you choose, being proactive can make all the difference. Know your limits and don’t be afraid to reach out for help if needed!
Seasonal Considerations
Depending on where you live, I recommend adjusting maintenance routines seasonally. For instance, if you’re in an area with cold winters, insulating your outdoor toilet might be a good idea to protect against freezing.
Once the snow melts, don’t forget to check for any seasonal damage. Weather can be unpredictable, and a little inspection can help prevent bigger issues down the road.
In summer, I like to ensure good ventilation and keep the area around the toilet clear of debris. This can make a significant difference in keeping the space inviting and fresh!
FAQs
1. How do I choose the right location for my outdoor toilet?
Look for a private spot that’s accessible, away from any water sources, and downwind from your living area. Make sure it complies with local regulations too!
2. What materials do I need to build an outdoor toilet?
You’ll typically need wood for the structure, a shovel for digging, screws and nails for assembly, and some roofing material to keep it dry. Don’t forget about cleaning supplies!
3. How often should I clean my outdoor toilet?
I recommend cleaning it regularly—at least every couple of weeks or after heavy use. Be sure to have cleaning supplies and tools handy for easy maintenance!
4. Can I use an outdoor toilet year-round?
Yes, but you’ll want to consider weather conditions! Insulating it for winter and ensuring good ventilation for summer can help it last longer and remain comfortable.
5. What’s the best waste management system for an outdoor toilet?
It varies based on personal preference. Composting toilets are great for sustainability, while pit toilets can be efficient for longer-term setups. Choose what fits your needs best!


