by Preparation | Apr 16, 2025 | Preparedness
Embracing Challenges with Optimism
Finding the Silver Lining
One of the first things I learned on my journey toward developing a survivor’s mindset is to find the silver lining in every challenge. It’s so easy to get caught up in the negatives, but shifting my perspective has been a game changer. Instead of dwelling on what’s wrong, I try to focus on what I can learn from the situation.
For example, when faced with an unexpected setback, I challenge myself to think about the lessons it offers. Sure, it can be frustrating, but every obstacle presents a unique opportunity for growth. I often remind myself that hardships make me stronger.
Practicing this mindset daily has transformed my outlook. By training my brain to seek out positives, I’ve been able to bounce back from tough situations more quickly. It’s all about flipping the script, and it’s something I wholeheartedly recommend doing!
Developing Resilience
Resilience isn’t just an innate trait — it’s a skill you can cultivate. When I began recognizing that resilience could be developed, I felt empowered to control my response to adversity. The first step for me was acknowledging my emotions, which allowed me to work through them instead of burying them.
I started to embrace hardships as natural parts of life. It’s not about avoiding difficulties, but rather how I respond to them that defines my resilience. I began practicing meditation and mindfulness exercises that helped me nurture a sense of calm and focus when under pressure.
A key strategy that really helped me was setting small, achievable goals. Every time I overcame a minor challenge, it boosted my confidence and fortified my resilience. It made me feel like I could tackle anything life threw my way!
Surrounding Yourself with Positivity
The people I surround myself with play a huge role in my attitude toward life’s challenges. I’ve found that being around positive, encouraging individuals can uplift my spirit and inspire me to adopt a more optimistic mindset. It’s like being on a team where everyone cheers each other on!
I consciously choose to invest my time in relationships that foster a sense of community rather than negativity. There’s something refreshing about connecting with others who share a similar mindset, and it can be contagious! I feel more motivated and enthusiastic about finding solutions with supportive friends and mentors.
Whenever I start feeling low, I reach out to my circle of positivity. Whether it’s a simple message, a phone call, or a casual meet-up, it reminds me that I’m not alone in my journey. Trust me, finding your tribe can make all the difference!
Taking Action: The Power of Proactivity
Assessing the Situation
When it comes to problem-solving, the first thing I do is assess the situation at hand. And, honestly, it’s about cutting through the noise and getting to what really matters. Understanding the core issue helps me address it head-on rather than letting it fester.
I ask myself key questions: What’s really going on? What are my options? And what can I do right now? These questions guide my thought process and prevent me from spiraling into panic. I’ve learned that clarity is my best friend during tough times.
This approach has allowed me to move from a state of anxiety to one of empowerment. Taking the time to assess allows me to devise a plan that is both effective and manageable, rather than feeling overwhelmed by the situation.
Implementing Solutions
After I’ve assessed the situation, it’s time for action! I’ve discovered that taking even small steps toward a solution helps ease feelings of helplessness. By breaking tasks into smaller, manageable actions, I feel a sense of accomplishment with every step I complete.
For instance, when I faced a significant personal hurdle, instead of overwhelming myself by tackling everything at once, I created a checklist. It sounds simple, but crossing items off gives me a boost of motivation! I realize that every little action takes me closer to overcoming the bigger challenge.
Additionally, being open to adapting my solutions based on new information has been crucial. Life is dynamic, and so are our challenges. Adapting my approach—rather than sticking rigidly to a plan—has led to better outcomes and less stress.
Learning from Experiences
Post-action reflection is something I can’t emphasize enough. After I work through a challenge, I take a moment to reflect on what went well and what could have been done better. This isn’t about beating myself up; rather, it’s an opportunity for growth.
I jot down my experiences and insights, turning them into valuable lessons for the future. I’ve discovered that these reflections contribute directly to my preparedness for the next challenge—I’m literally building a toolkit for resilience!
This cycle of action and reflection reinforces my survivor’s mindset and boosts my self-confidence. Knowing that I have a rich reservoir of past experiences to draw upon is incredibly reassuring. It’s a continuous process of growth, and I embrace it wholeheartedly.
Staying Grounded and Mindful
Practicing Mindfulness
Mindfulness is a practice I’ve integrated into my daily routine that has profoundly shifted my perspective. By being present in the moment, I cultivate a deeper awareness of my emotions and the situations around me. This practice grounds me, especially during turbulent times.
I often kick off my day with a few minutes of mindful meditation or deep-breathing exercises. This helps me set a calm tone for the day ahead and prepares me to face challenges with a clear and focused mindset. It’s like prepping my mental armor!
Mindfulness has also enhanced my ability to recognize negative thought patterns. By observing my thoughts without judgment, I learn to respond rather than react impulsively. This has created space for more constructive thoughts and a more balanced outlook on life.
Recognizing Stress Triggers
Identifying my stress triggers has been a game changer. Once I learned what situations or thoughts set me off, I could prepare myself better. It’s like shining a light on hidden fears, making them less daunting.
I keep a journal where I note my stress responses, and over time, I’ve been able to see patterns. Knowing what triggers my stress helps me equip myself with coping strategies in advance. Whether it’s practicing deep breathing or taking a walk, having a plan in place reduces my anxiety levels significantly.
Understanding my triggers also sets the stage for proactive decision-making. Instead of getting caught off-guard, I’ve become more adept at navigating stressful situations with a level head. That knowledge alone can be incredibly empowering!
Creating a Balanced Lifestyle
Lastly, a well-rounded and balanced lifestyle is essential in cultivating a survivor’s mindset. I strive to nurture my physical, emotional, and mental health through a mix of good nutrition, exercise, and leisure. It’s about fueling my body and soul to withstand life’s hurdles.
I prioritize creating a routine that incorporates physical activity. Whether it’s hitting the gym, a dance class, or a moonlit stroll, I’ve found that movement clears my mind and boosts my mood. It’s a win-win!
Ultimately, life is about enjoying the journey, not just surviving it. Investing in activities that bring me joy, like hobbies or spending time with loved ones, helps create that balance. Embracing a holistic approach goes hand-in-hand with my survivor’s mindset, ensuring I stay resilient no matter what.
Frequently Asked Questions
1. What is a survivor’s mindset?
A survivor’s mindset is an attitude of resilience, optimism, and proactivity in facing life’s challenges. It’s about embracing setbacks as opportunities for growth and maintaining a positive outlook.
2. How can I develop resilience?
Resilience can be developed by recognizing your emotions, setting small achievable goals, surrounding yourself with positivity, and learning from your experiences to build confidence for the future.
3. Why is mindfulness important in cultivating a survivor’s mindset?
Mindfulness helps you stay present and aware of your emotions. By practicing mindfulness, you can reduce stress, recognize negative thought patterns, and respond to challenges more effectively.
4. How do I recognize my stress triggers?
To identify stress triggers, keep a journal of your experiences and emotional responses. Over time, you’ll notice patterns that can help you better prepare yourself for future challenges.
5. What lifestyle changes can help with a survivor’s mindset?
Creating a balanced lifestyle that includes good nutrition, regular exercise, and activities that bring you joy can strengthen your resilience and enhance your overall well-being, empowering you to tackle life’s challenges!

by Preparation | Apr 16, 2025 | Preparedness
1. Keep Your Vehicle Well-Maintained
Routine Checks
One of the first things I learned was the importance of keeping my vehicle in tip-top shape. Regularly checking your tires, brakes, and lights is essential. You don’t want to be caught in the middle of nowhere with a flat or a headlight out. I mean, who wants to deal with that stress, right?
What I like to do is set reminders on my phone for these checks. It can be as simple as checking my tire pressure every month or giving my car a regular oil change. This keeps everything running smoothly and helps me avoid breakdowns when I least expect them.
Plus, a well-maintained vehicle usually saves money in the long run. You avoid those expensive repair bills that can sneak up on you if you’re not careful. Trust me, learning this the hard way wasn’t fun at all!
Fluid Levels
Another crucial aspect of maintenance is ensuring your fluids are at the right levels. This includes engine oil, coolant, brake fluid, and transmission fluid. It’s kind of like feeding your car; if it doesn’t get the right stuff, it’ll run into problems.
Checking these levels can be a quick task. I usually do it while I’m waiting for my coffee to brew in the morning. Just pop the hood, take a look, and top them off if needed. It honestly doesn’t take much time and can really save you a lot of headaches later.
If you’re unsure about how to check them, there are plenty of video guides out there. They can walk you through the process step-by-step. Once I learned how easy it was, I was hooked on keeping my fluids in check!
Battery Health
Let’s not forget about your battery. A dead battery can leave you stranded faster than you can say “help!” and knowing how to check its health is crucial. Look for corrosion on the terminals and make sure the connections are tight.
If you’re running into issues with starting your car or if the lights look dim, it might be time for a battery replacement. I remember once, my battery died out of the blue before a big trip, and I had to scramble for a jump start – not a fun scenario!
I recommend having a simple multimeter at home. It’s a small investment that can be a lifesaver. You’ll be able to check if your battery is still holding a charge effectively. Just a quick check before heading out can make all the difference.
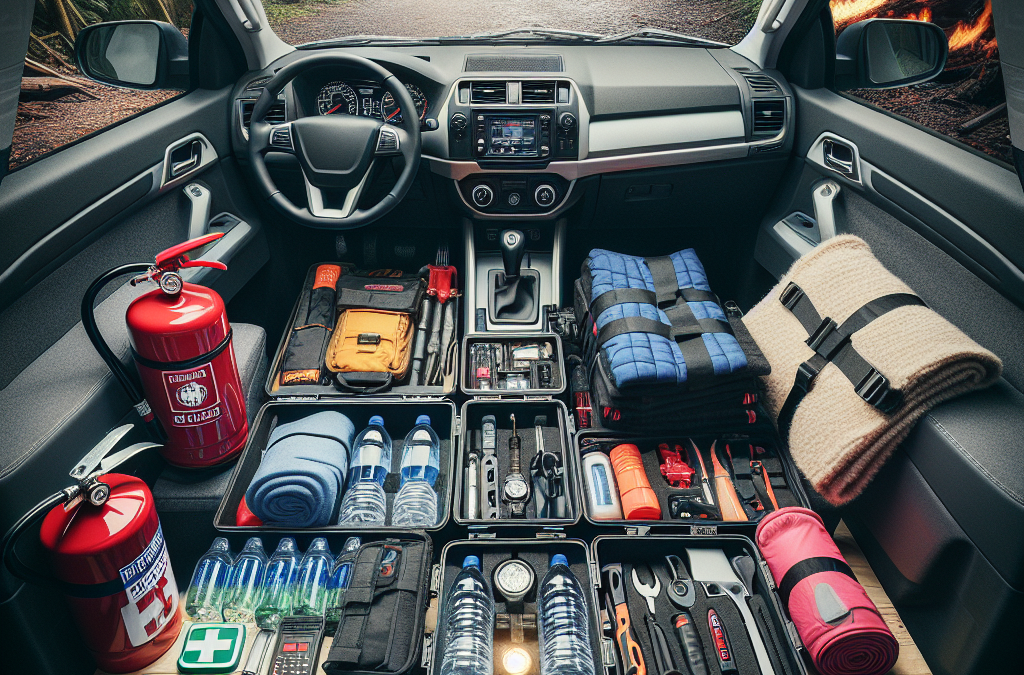
2. Create an Emergency Kit
Basic Supplies
Now let’s talk about creating an emergency kit. I can’t stress how important this is! I’ve put together a bag loaded with the basics: first aid supplies, water, non-perishable snacks, and a flashlight. These items can come in handy if you find yourself stuck somewhere.
I usually keep everything in a sturdy backpack in the trunk of my car. That way, it’s easy to grab if I need it. And it’s really good peace of mind to know that I’m prepared for whatever could happen on the road.
Also, don’t overlook things like a multi-tool or a blanket. They may seem minor, but trust me—they’re lifesavers in tricky situations. Having them can keep you comfortable and safe until you get help!
Roadside Assistance Tools
Having the right tools is essential too. I always make sure to have a spare tire, jumper cables, and a basic tool kit in my vehicle. You never know when you might need to change a tire or jump your battery.
Learning how to use these tools can really help you feel empowered during emergencies. I remember the first time I had to change a tire by myself. It took some time, but I felt so accomplished afterwards! Plus, it saved me from waiting for a tow.
Consider joining a roadside assistance club as well. Having quick access to help can be a game changer, especially if you’re in a sketchy area or late at night.
Staying Informed
Part of being prepared is staying informed about any potential emergencies in your area. I’ve signed up for alerts on my phone, which notifies me about severe weather or road conditions. It’s a simple step, but it can prevent you from being caught off guard.
Additionally, familiarize yourself with local emergency services and how to reach them. Knowing the quickest route to the nearest service station can save precious time if you ever face a breakdown.
Educating yourself about common road issues in your area is also super helpful. If you’re in an area known for heavy snowfall, for example, just know what to expect and how to handle such conditions. It’s all about staying a step ahead!
3. Develop a Communication Plan
Who to Contact
In case of an emergency, having a plan for who to contact is crucial. I’ve designated a couple of friends and family members who I can call if I ever get into a pickle. It’s reassuring to know that I’ve got people who will drop everything to help me out if needed.
Make sure your emergency contacts are saved in your phone. I even have a little note in my wallet with important numbers, just in case my phone dies. Old school, but it works!
Think about what information you would need to relay in an emergency. You’ll want to share your location and a brief summary of your situation. Practice that communication in advance, so you’re ready to go when the time comes.
Sharing Your Plan
Don’t just keep your emergency plan to yourself—share it with those close to you. Talk through it with your family, so they know what to do if something goes wrong while driving. It can be helpful to discuss how each person would handle different scenarios.
I’ve found that meeting up with my family and discussing our emergency plans has really boosted everyone’s confidence. It’s a relief knowing we’re all on the same page and can help each other out if need be.
Consider using a messaging app where everyone can access important information like your routines or schedules for added convenience. It keeps communication flowing smoothly during emergencies.
Using Technology
Leverage technology as much as you can. There are some fantastic apps out there designed for emergency assistance. I have a few on my phone that allow me to quickly reach out for roadside help or know where local emergency services are located.
GPS tracking apps can be useful too. If you find yourself lost or in trouble, these apps can help responders know exactly where you are. Just sharing your location with a trusted contact can make all the difference.
Always ensure that your phone is charged before embarking on long trips, and consider investing in a portable charger. That little bit of preparation can be a lifesaver when you find yourself in a tough spot.
4. Understand Road Conditions
Seasonal Changes
Understanding how road conditions change with the seasons is also key. I’ve learned that winter weather can catch you off-guard if you’re not prepared. Snow, ice, and rain can turn a routine drive into a real adventure, and not always in a fun way!
During winter, I take extra precautions—more than just putting snow tires on. I keep an ice scraper and salt in my trunk, just in case. I also make it a point to check the weather before heading out so I’m not blindsided by unexpected storms.
Similarly, in the rainy season, watching out for areas prone to flooding can be a lifesaver. Knowing which routes to avoid can keep you safe and dry.
Traffic Patterns
A solid understanding of local traffic conditions helps as well. I like to use navigation apps to find the best routes during rush hour or when there’s an accident. Those little shortcuts can save a ton of time and frustration!
Beyond knowing traffic patterns, it’s good to be aware of common trouble spots in your area. For instance, if a certain intersection is known for accidents, always approach with caution. Keeping those mental notes can help prevent more serious situations.
Being proactive about these conditions means I can focus on driving safely instead of stressing over unexpected delays. It’s really made my driving experience much smoother!
Vehicle Preparedness for Environment
Your vehicle should be prepared for your specific driving environment. For example, if you live in a rural area, you might want to have a bit more gear handy compared to someone in the city. Out here, you might face more wildlife or even remote terrain challenges.
Understanding how your car performs in different conditions is important, too. I’ve spent time learning how to manage my vehicle’s braking and traction control in various scenarios. This knowledge can be a real lifesaver when the conditions turn tricky.
Sometimes, simply swapping out air filters or using the right fluids for hot or cold climates can help your vehicle perform optimally. The more I’ve learned about my car’s needs, the better prepared I feel!
5. Practice Your Skills
Hands-on Learning
Finally, practice makes perfect! I can’t tell you how many times I’ve watched tutorials on car care and emergency maneuvers, but nothing beats actually getting my hands dirty. Whether it’s changing a tire or using a first aid kit, putting knowledge into action builds confidence.
This past summer, I took a little weekend workshop on basic automotive skills. And let me tell you, it was a game changer! I left not only feeling proud of my new skills but also more prepared for any situation.
Ask a friend or family member if you can practice with them. You can swap skills—teach each other what you know. It’s a great way to bond and reinforce your emergency response skills!
Simulating Scenarios
I also like to simulate emergency scenarios. It sounds a bit silly, but role-playing what to do if my car breaks down or if I get into an accident really helps me think on my feet. You can even practice using your emergency kit!
This isn’t about creating anxiety; it’s about being prepared. Remember the first time I got stranded? My buddy and I had practiced what to do beforehand, and it made a world of difference in how calm I could stay.
Don’t forget to include your loved ones in these scenarios. It’s important they know what to do too. The more you all practice, the smoother it’ll go if you ever find yourselves in a tough spot.
Regular Refreshers
Lastly, keep learning and refreshing your knowledge. I like to read articles or watch videos every few months on car care and emergency preparedness. Things can change, and what I learned a couple of years ago might need updating!
Taking a class or seeking out local workshops can also help. Staying up-to-date makes sure I won’t be shaking in my boots if something goes wrong. Plus, it’s a good excuse to meet new people and share experiences!
So, always keep that curiosity alive! The more you know, the better prepared you’ll be in every driving scenario. Your future self will thank you!
FAQs about Preparing Your Vehicle for Emergency Situations
1. What should be included in my emergency kit?
Your emergency kit should include basic supplies like a first aid kit, non-perishable snacks, water, a flashlight, and a multi-tool. Items tailored to your specific needs, like jumper cables, blankets, and tire-changing tools are also really helpful.
2. How often should I maintain my vehicle?
I recommend doing routine checks every month. This includes looking over your fluids, tire pressure, brakes, and lights. Regular maintenance can catch small issues before they become big problems.
3. What technology can I use for emergency preparedness?
Using navigation apps can help you get roadside assistance quickly. Additionally, there are apps that offer local emergency services, and can even share your location with someone you trust in an emergency.
4. Why is it important to know local road conditions?
Being aware of seasonal changes, traffic patterns, and potential hazards in your area allows you to drive more safely and confidently. Knowledge about road conditions helps you avoid accidents or getting caught in bad situations.
5. How can I practice my emergency response skills?
Hands-on learning is key! Try changing your tire or going to a workshop on basic car care. Simulating scenarios with friends or family can also help prep you for real-life emergencies.
by Preparation | Apr 16, 2025 | Preparedness
Understanding Altitude Sickness
What Is Altitude Sickness?
From my own adventures in the mountains, I quickly learned that altitude sickness isn’t just a myth. It’s a real condition that kicks in as you ascend. The air gets thinner, which means less oxygen gets to your muscles and brain, leading to headaches and nausea.
It’s essential to recognize the symptoms early. Mild forms can leave you with a headache and fatigue, but serious cases may result in confusion or even pulmonary edema. Knowing the signs can be your first line of defense on the mountain.
I remember the first time I experienced it – it felt like a hangover without the fun night before. Knowledge is power here, so do not dismiss the importance of educating yourself on altitude sickness.
How to Prevent Altitude Sickness
Prevention is better than cure, right? What I’ve found really works is to ascend slowly. Give your body time to adjust to the change in altitude. Take regular breaks and don’t skip your hydration; dehydration only worsens the symptoms of altitude sickness.
Another surprising tip I’ve discovered is to eat carbs before embarking on a hike. Your body uses carbohydrates for energy, which can help mitigate some of the effects of altitude sickness. Trust me, your body will thank you later.
And don’t forget to listen to your body. If you feel like crap, don’t push your limits. It’s okay to turn back, as frustrating as that may seem—your health is paramount.
First Aid for Altitude Sickness
If altitude sickness hits you hard, it’s essential to have a plan. Descending quickly can often relieve symptoms, which I learned the hard way. If someone in your group is struggling, keep an eye on them, and don’t hesitate to initiate a descent.
It’s a good idea to carry medications like ibuprofen or prescribed drugs such as acetazolamide. I’ve used them during high-altitude hikes, and they can make a world of difference.
Being prepared with first aid knowledge is crucial. Know how to recognize severe symptoms, like difficulty breathing or unconsciousness, and don’t shy away from asking for help if you need it.
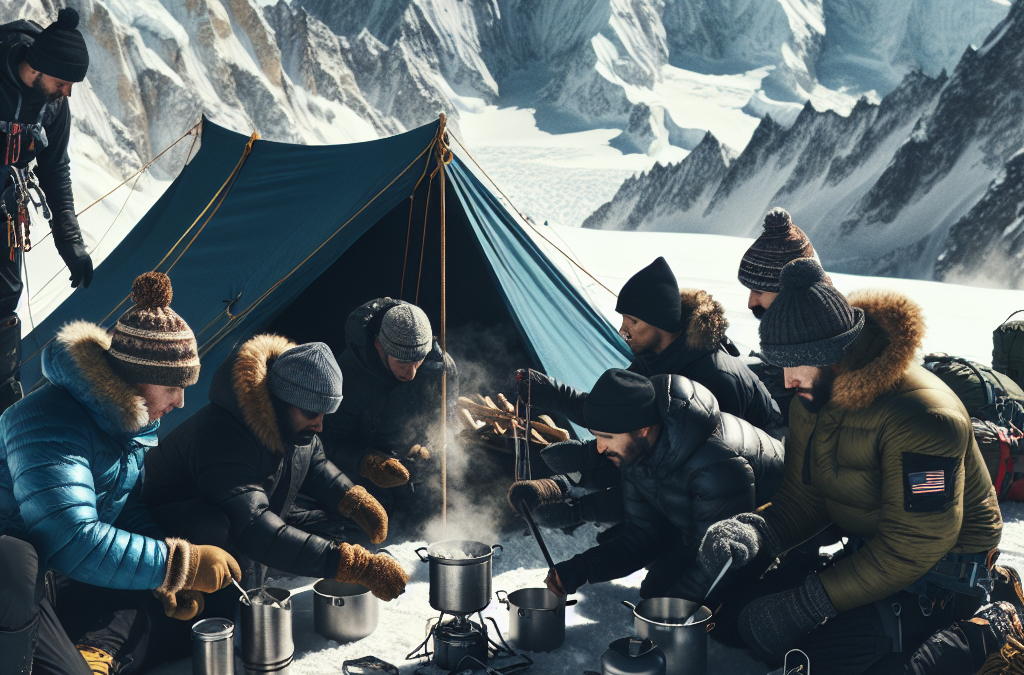
Essential Gear for High Altitude
Packing Wisely
Your gear can literally make or break your high-altitude adventure. I’ve packed plenty of times with half the stuff still sitting in my closet. So, I learned to pack lightweight, moisture-wicking clothing as it helps regulate body temperature.
Don’t forget a high-quality pair of hiking boots; trust me, your feet deserve the very best, especially with rough terrains at high altitude. I made the mistake of choosing style over comfort once, and my feet were not happy campers!
A good backpack is also essential. It needs to be spacious but not cumbersome. I often go for backpacks that allow easy access to water and snacks on the go. Trust me, your future self will appreciate that foresight!
Hydration Systems
At high altitudes, staying hydrated is even more critical than at sea level. I personally recommend a hydration reservoir system. It’s easy to sip while trekking and doesn’t involve fumbling with bottles.
Try to drink regularly, even when you don’t feel thirsty, because you might not feel it at altitude. Trust me, chugging water when I remember isn’t enough. Maintaining hydration is a commitment!
Also, consider electrolyte supplements; they can work wonders in keeping your energy levels up when you’re sweating through your layers while tackling tough climbs.
Cold Weather Check
Cruising through high altitudes often means dealing with cold weather. I remember one hike where I was woefully unprepared, and let me tell you, chills up by those peaks are no joke.
Layering is your best friend. Go for thermal base layers, insulating mid-layers, and a good waterproof shell. I typically follow this setup, and it keeps me cozy regardless of the temperature!
Don’t skimp on gloves and hats! I learned that the hard way when my fingers felt like ice cubes. Keep those extremities warm as they can be the quickest to suffer in the cold!
Navigating Terrain
Understanding Your Route
Whether you’re shuffling up a snowy trail or scaling rocky inclines, knowing your route is an absolute game changer. I can’t emphasize enough how scouting the area, even doing some online research, can save you from getting lost.
Use topographical maps or GPS devices. I once got caught in a snowstorm, and if it hadn’t been for my trusty GPS, I would’ve been even more disoriented than I already was.
A little planning goes a long way. Always have a backup route planned, and let someone know your itinerary. It’s not just smart; it’s necessary—trust me!
Footing Techniques
I’ve learned that good footing can mean the difference between a triumphant ascent and a nasty fall. Pay close attention to your steps; it’s easy to get distracted by the scenery.
Practice your footing when you encounter tricky areas: lean slightly forward for balance and distribute your weight wisely. I know it sounds simple, but every mountain has its hidden obstacles!
And remember, it’s okay to take your time. I’ve had to remind myself that slow and steady wins the race, especially when fog rolls in or the terrain gets tough.
Emergency Navigation
Even with all the planning, things can go south quickly. If you find yourself in an emergency, being able to navigate without a clear path becomes crucial. Always carry a compass and know how to use it. I’ve seen too many adventurers rely solely on technology.
In challenging situations, try to stay calm. Panic can lead to poor decisions, which I’ve seen firsthand. I’ve learned to focus on small steps: finding landmarks, retracing my steps, and staying put if necessary.
You never know who might be able to help if you wait. A little patience and a solid plan can lead you back to safety. Always have that safety net in place, folks.
Team Communication
Pre-Hike Briefing
Before you start your journey, gather your group for a pre-hike briefing. Discuss everyone’s skills, limitations, and expectations. This has been invaluable for me in ensuring everyone is on the same page.
Set clear signals for communication during the hike—like hand signals or specific whistles. When we used these, it really minimized confusion and kept the group moving smoothly.
Encourage an open floor where everyone feels comfortable sharing their concerns. I’ve seen too many hikes derail because someone felt they couldn’t speak up. Make safety your priority!
In-Trail Check-Ins
During the hike, it’s smart to have regular check-ins. Whether you’re taking a breather or just finding a good view, this is a great time to gauge how everyone’s feeling. I often do brief stops every hour or so to see where we stand.
These moments are also an excellent chance to assess energy levels and adjust the pace as necessary. I like to maintain an adaptable mindset, recognize group dynamics, and be ready to focus on supporting each other.
Don’t rush! This is all about enjoying the experience together. Building camaraderie while navigating the trails is typically what sticks with me long after the hike.
Emergency Response Strategies
If things go awry, it’s vital to have a clear and concise emergency response plan. I always involve everyone in this discussion before hitting the trails—no one wants to be in a panic later on.
Be prepared to designate a leader if an emergency arises, and have clear responsibilities. This helps keep chaos at bay. I learned that having a plan makes people more likely to step up when the going gets tough.
Don’t forget to practice this plan sometimes! It’s crucial everyone knows what to do. A little rehearsal can make all the difference when you’re faced with a real crisis.
Conclusion
Navigating altitude challenges can be daunting, but with the right skills and preparation, you can take on even the highest peaks. Use knowledge to your advantage and definitely listen to your body along the way.
Embrace the journey, learn from the experience, and never hesitate to adapt to unpredictable mountain conditions. Happy hiking!
FAQ
What is altitude sickness?
Altitude sickness is a condition that occurs when your body cannot get enough oxygen due to a high elevation. Symptoms include headaches, nausea, and fatigue.
How can I prevent altitude sickness?
To prevent altitude sickness, ascend slowly, stay hydrated, eat carbs, and listen to your body. If you feel unwell, don’t hesitate to descend.
What essential gear do I need for high-altitude hikes?
You should have moisture-wicking layers, sturdy hiking boots, a good backpack, a hydration system, and weather-appropriate outer layers.
How can I improve my navigation skills in the mountains?
Familiarize yourself with your route, learn how to use a map and compass, and practice good footing techniques to navigate effectively in challenging terrains.
What should I do if there’s an emergency during the hike?
Have a clear emergency plan. Make sure everyone knows their roles, and practice your strategies beforehand. Staying calm and communicating effectively can save lives.
by Preparation | Apr 16, 2025 | Preparedness
Assessing Your Food Supply
Check Expiration Dates
Alright, first things first—let’s take a good look at what you’ve got in your pantry and fridge. The first step is to check those expiration dates on everything. This may seem tedious, but trust me, it’s totally worth it when you’re staring down the barrel of a blackout.
Don’t just shove items to the back and forget about them! You’d be surprised how quickly stuff can go bad. Make a little checklist if you need to. This way, you won’t get stuck with expired food when you might really need it.
Once you’ve got everything sorted, make sure to toss out anything past its prime. There’s no sense in keeping items that could potentially make you sick. Your health is the priority!
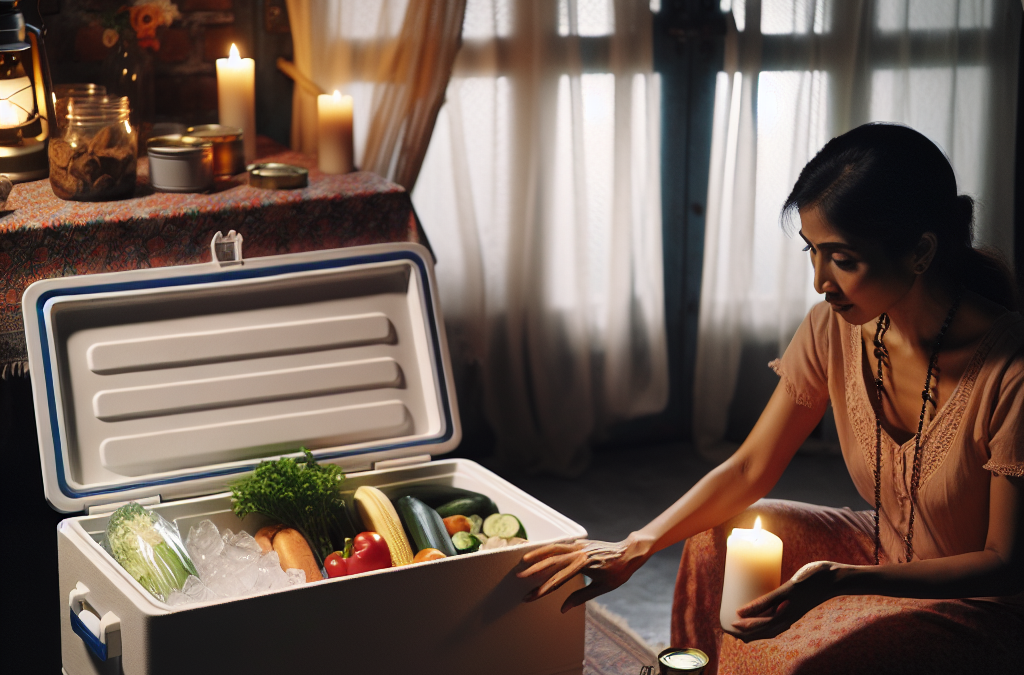
Organizing Your Coolers
Now that you’ve checked for expiration dates, it’s time to gather your coolers. Yes, those plastic boxes that just sit in the garage most of the time! If the power goes out, these will be your best friends. I like to keep a couple handy for emergencies just like this.
Fill them up with ice or frozen gel packs before a blackout hits. If your power is out for an extended period, you can use the cooler to keep essential items cold—like milk, meat, and leftovers. Just make sure you have everything form-fitted to avoid any mess. Ain’t nobody got time for that!
Also, try to minimize how often you open the cooler. Each time you pop that lid, you let cold air escape, which can raise the temperature inside. A little patience here goes a long way!
Prioritize Food Storage
If you have a deep freezer, take advantage of it. Fill it with essential items! But here’s the trick: always remember to keep it as full as possible. A full freezer will maintain its temperature longer than a half-empty one.
In the unfortunate event that the power shuts off, don’t open the deep freezer unless it’s absolutely necessary. Most full-freezers will keep food frozen for about 48 hours if kept closed. That’s some solid insulation work!
If you suspect that the blackout is going to last longer than 48 hours, consider cooking some of the food in advance. This way, you have meals ready to go, and you won’t end up losing anything important.
Keeping Track of Food Temperatures
Using a Thermometer
Okay, let’s talk about temperatures. This is super important! Investing in a good refrigerator thermometer is one of the best things you can do. I can’t stress enough how vital it is to know exactly what’s going on inside your fridge.
You should aim to keep your fridge below 40°F (4°C). If it goes above that, you might need to toss out some items, especially perishables. So make sure to keep that thermometer handy and check it frequently.
If you don’t have a thermometer, just know that if the fridge is cool to the touch, you’re probably in the clear. But just remember, a solid thermometer takes the guesswork out of the equation!
Timing is Everything
Another great tip is to write down when the power goes out. This can help you keep track of how long your food has been out of refrigeration. The general rule? If the food has been exposed to temperatures above 40°F for more than two hours, it’s safer to throw it away.
Keep an eye on your food and check the temperature regularly. Trust me, it’s a small effort that can save you from a nasty case of food poisoning later on.
Also, having a timeline helps when connecting with your friends or neighbors. You can all team up to track your food safety—safety in numbers!
Communicating with Power Providers
Don’t forget about the importance of keeping in touch with your local power provider. If you know a blackout is on the way, call them to get updates. They can give you an idea of how long you might be in the dark.
A lot of providers these days have apps or websites where you can report outages and get real-time updates. This can be a huge help in planning how to manage your food storage strategically.
Staying connected will definitely help ease your mind and allow you to make effective decisions when it comes to your food supply during uncertain times like a blackout.
Utilizing Emergency Meal Kits
Stocking Up on Essentials
If you haven’t already thought about it, having an emergency meal kit is a game-changer. I’m all about being prepared. Canned goods, dried foods, and any non-perishables should be your go-to items.
Make it fun! Try to involve your family in picking out foods they like. When they help, they’ll be more inclined to eat them when the time comes. Plus, a little teamwork goes a long way in stressful situations like a power outage.
Don’t forget about water, either. Every person needs at least a gallon a day, so stock up accordingly. It’s amazing how fast it can disappear when you least expect it!
Creating Balanced Meals
It’s not just about having food, but also about having nutritious food! When setting aside your emergency kit, think about the balance. Include protein, grains, and some fruits or vegetables if possible.
When you’re making your emergency kit, aim for foods that can be easily cooked over a camp stove or even eaten straight from the can. I mean, who wants to cook during a blackout?
Give some thought to including comfort foods as well. In those moments when things get a bit overwhelming, a little taste of home can help lift spirits. Choose wisely, my friend!
Regularly Review Your Kit
Lastly, don’t just toss everything in a box and forget about it. You need to check your emergency meal kit regularly! I like to do this every few months. Check expiration dates and refresh your stock as needed.
Sometimes the things you thought weren’t going to expire for ages suddenly turn into little time bombs of stale food. Keeping your kit updated is crucial for spending those unexpected blackout hours worry-free.
Plus, it’s a great excuse to have a little fun with food! Try out new recipes, taste-test some items, and who knows—you might even discover a new favorite meal for future emergencies!
FAQs
1. How long can food stay safe during a blackout?
Generally, a full freezer can keep food frozen for 48 hours if the door remains closed. A refrigerator will keep food safe for up to 4 hours if it stays closed.
2. What should I do with food in the fridge during a blackout?
If the power is out for more than 4 hours, check the temperature. If it’s above 40°F for two hours or more, it’s best to toss it.
3. How can I keep food cold without power?
Use coolers packed with ice or frozen gel packs. Limit how often you open them to keep the cold air inside.
4. Are emergency meal kits necessary?
Absolutely! Having an emergency meal kit ensures you have safe, non-perishable food available during unexpected outages.
5. When should I replace food in my emergency kit?
Check your emergency kit every few months and replace items as needed before their expiration dates. Keeping it updated is key!

by Preparation | Apr 16, 2025 | Preparedness
Understanding the Basics of Foraging
What is Foraging?
Foraging for edible plants and mushrooms is one of the most exhilarating and rewarding outdoor activities you can engage in. Imagine strolling through a forest or meadow, knowing that nature is a buffet of goodies just waiting for you to discover them! It’s a fantastic way to connect with nature, but it does come with its own set of rules. Safety is key—both for your health and for the environment.
Learning the basics involves more than just recognizing a few mushrooms or handy plants. It’s a mix of knowledge, instincts, and a good bit of practice. There are many edible plants that look similar to toxic ones, making it all the more important to get your identifications right. Getting familiar with the bell curve of foraging will really set you up for success!
I always say, start small! You don’t have to become an expert overnight. Aim to learn a handful of common plants and mushrooms each season. It’s all about building your foraging knowledge little by little, building confidence along the way.
Identifying Edible vs. Toxic Species
The Importance of Research
Before you even dream of plucking a plant or mushroom, you’ve got to hit the books—or the internet, rather! Doing your research can literally be the difference between a tasty snack and a trip to the emergency room. Start with reliable guides or apps specifically designed for foragers. I always keep one in my backpack for quick reference.
Look for field guides with clear images and detailed descriptions of edible species. Make sure to emphasize local flora since plants can vary greatly depending on your geographical location. It’s also helpful to join local foraging groups. Catching up with experienced foragers can provide invaluable knowledge and tips.
And don’t forget—many edible plants have toxic look-alikes. For example, the good old wild carrot can be confused with poison hemlock. Take your time to learn the differences, and remember: it’s better to miss out on a meal than take a risky bite!
Best Practices for Foraging
Respecting Nature
When I head out foraging, I always carry a “leave no trace” mentality. This means being respectful of the environment by not over-harvesting. I usually only take what I need and leave enough for wildlife and for the plant to continue growing. It’s our responsibility to ensure that future generations can enjoy the same bounty.
Staying on trails when foraging and avoiding areas that seem to have a lot of pollution or runoff is also a good practice. You don’t want to sunset your mushroom soup with toxic waste! It’s all about being a good steward of nature while enjoying the outdoor spoils.
Another good practice is to ensure proper harvesting techniques. For example, when picking mushrooms, use a knife to cut them at the base rather than pulling from the ground. This helps preserve the mycelium so it can grow back next season.
Techniques for Collecting Edible Plants and Mushrooms
Gathering Tools and Tips
When I go foraging, I’ve found it really helps to have the right tools at my disposal. A nice basket is a must! It allows for proper air circulation, which is super important to keep your finds fresh. A small knife is also essential for cutting mushrooms and tricky plants. I’ve learned to avoid plastic bags since they can turn into a sweaty mess, ruining your beautiful finds.
Keep a notebook handy to jot down where you found what! This way, you can revisit your favorite spots without having to rely on memory. It’s also a great way to track the seasonal changes of your local flora—some plants can be foraged in varying seasons.
And don’t skimp on safety gear! Having gloves and a suitable first aid kit is a smart move, just in case you accidentally encounter nettles or anything prickly. I’ve had my share of scrapes while being too eager on my hunt!
Cooking and Enjoying Your Foraged Finds
Preparing Edible Plants and Mushrooms
Now, here’s where the fun really begins! After gathering edible plants and mushrooms, the next step is preparing them for delicious meals. Wash them thoroughly to get rid of any dirt or bugs. I always soak them in cold water and gently rinse them under running water—being gentle so I don’t bruise the delicate leaves of herbs.
There are endless cooking possibilities with foraged foods, from salads to soups to hearty casseroles. It might feel tricky at first to experiment, but trust me, it’s super rewarding! I always try to incorporate them into simple recipes so I can really taste what nature offers.
Also, don’t be shy about sharing your foraged finds with friends and family. I love to host a little foraging dinner where each dish incorporates something I’ve gathered. Watching people savor and enjoy the flavors while sharing stories about our outdoor adventures is one of my pasta bakes’ greatest joys!
Frequently Asked Questions
What is the simplest way to identify edible plants?
The simplest way to identify edible plants is by using a reliable field guide or foraging app specifically for your region. Always cross-reference multiple sources to ensure accuracy.
Are there any risks associated with foraging?
Yes, there are risks! Mistaking an edible plant for a toxic one can lead to serious health issues. It’s crucial to properly identify each item before consuming anything.
What tools do I need to start foraging?
Some essential tools include a basket for collecting, a knife for cutting plants or mushrooms, and a field guide for identification. Gloves and a first aid kit can also be very helpful!
How can I prepare foraged food?
Preparation starts with a good wash to remove dirt and bugs. After that, you can experiment with various recipes. I recommend keeping things simple to highlight the natural flavors!
Can beginners forage safely?
Absolutely! Beginners can forage safely by starting with easily recognizable and commonly found plants or mushrooms. Join local foraging groups or take guided tours to gain confidence!


