by Preparation | Apr 20, 2025 | Preparedness
Evaluate Your Needs
Consider Your Environment
When putting together a survival kit, the first thing I think about is the environment where I live and possibly travel. For example, if you’re in a region prone to earthquakes, your gear will differ significantly from someone living in a forested area where wildfires are a concern. I always suggest evaluating seasonal factors too—winter gear, for instance, would include items for cold weather survival.
It’s critical to make a list of potential survival scenarios you might encounter. This can include anything from natural disasters to being lost in the woods. Each situation requires a nuanced approach to gear selection. Taking the time to think about your needs will save you time and potentially your life down the road.
Finally, keep in mind that your personal skills also dictate what gear you might need. If you’re a skilled fisherman but not a hunter, include fishing gear over hunting tools. Tailoring your kit to your abilities enhances your chances of survival in stressful situations.
Identify Key Situations
Next up, I recommend identifying key situations you might face and which gear is essential for each. For example, if you find yourself outdoors frequently, having the right navigation tools is crucial. A compass or a reliable GPS should be part of your primary gear list. There’s no excuse for getting lost, especially when a little preparation could make all the difference.
You might also want to think about emergencies at home. If you live in a flash flood zone, gear that’s waterproof is essential. You never realize how much you need certain tools until it’s too late, so prepping for specific situations can help you choose wisely among the available gear.
Lastly, keep your local threats in mind. Hurricanes? Pack a weather radio. Wildfires? Ensure you have breathing masks and fireproof blankets. The more prepared you are, the less likely you’ll feel overwhelmed when a real emergency arises.
Assess Group Size
The size of your group is another vital consideration. If you’re prepping for just yourself, you can get away with more minimalistic gear. However, if you’re packing for a family of four, you’ll need to rethink your entire kit. I remember hearing a friend share his survival story where he underestimated how much food and water he would need for his kids. It really drove home the point that you can’t ignore group size!
In a larger group, I’ve found it helpful to break down gear assignments. If everyone knows their roles and the gear they’re responsible for, it minimizes chaos when the pressure hits. Everyone can’t have a giant backpack; distributions of smaller, specialized items work wonders.
Ultimately, every person needs gear that fits their skills and needs. A smaller, lightweight pack works for kids, while adults might need something more robust. It’s all about finding that balance to keep everyone safe during tough situations.
Choose Essential Survival Gear
Prioritize Basic Needs
Confession time: I used to think I needed all sorts of gizmos in my survival kit. But after a bit of trial and error, I learned that the basics—food, water, shelter—are what you must prioritize. You can have all the fancy gadgets in the world, but if you don’t have clean drinking water or food that you can cook, you’ll be in serious trouble.
Food in your kit should ideally be non-perishable. Think energy bars or canned goods. I’ve found freeze-dried meals to be a game-changer too—they’re lightweight and easy to prepare. You just add water, which you better make sure you have as a backup!
Water, on the other hand, can be more challenging to store. I always keep a portable water filter on hand, as it allows me to purify water from creeks or ponds. And let’s not forget about shelter: a durable tarp or a lightweight tent can be a blessing when the weather turns nasty.
Add Tool Variety
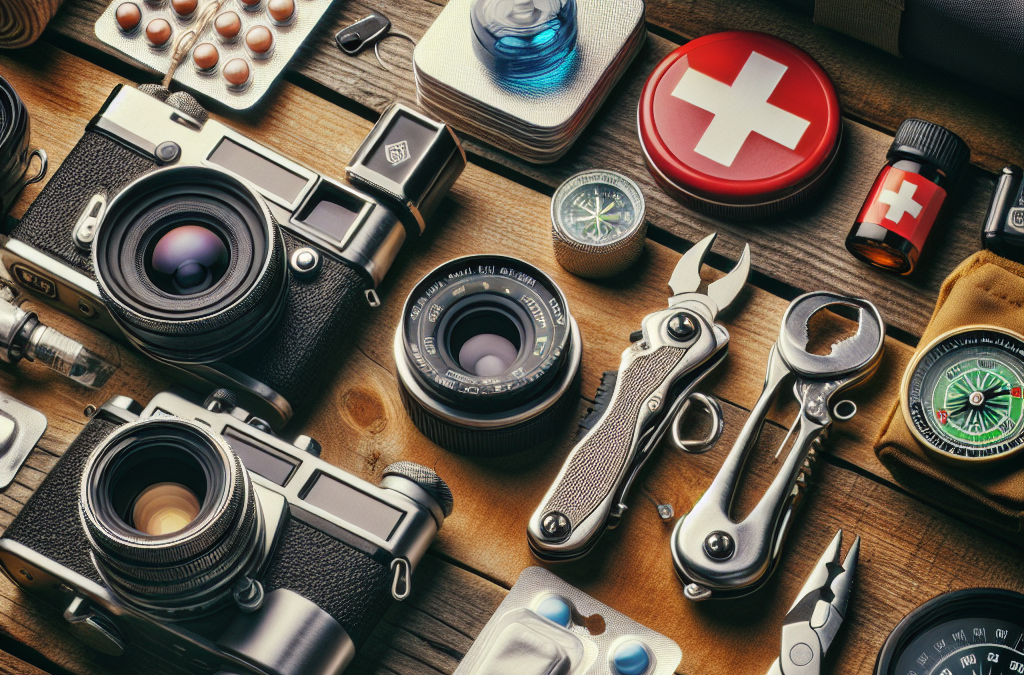
When I began my survival journey, I learned the importance of variety in the tools I carried. A multi-tool can function like a Swiss Army knife with various uses for cutting, screwing, and opening. I’d say it’s one of the must-have items in your kit. You never know when you need to fix something or build a makeshift shelter!
Don’t underestimate the importance of a first-aid kit either. Accidents happen, and having basic medical supplies can provide immediate help. I consider including things like antiseptics, bandages, and even scissors crucial for dealing with common injuries. Your fists can only do so much in a pinch!
Lastly, think about self-defense tools if that’s a concern in your area. A whistle or a simple personal alarm system can be a lifesaver when you’re trying to draw attention to yourself. Covering all your bases will ensure you’re better prepared for whatever comes your way.
Include Comfort Items
Now, this may sound odd, but don’t overlook the comfort items in your survival gear. After a long day in the wild, the last thing you want is to be miserable. Items like a decent sleeping pad or lightweight blanket can make a world of difference. I tell ya, having a comfortable place to sleep at night is a game-changer for morale!
You might also consider packing a portable charger or solar charger, depending on your situation. Keeping your phone charged for emergencies seems trivial, but it’s essential for navigation and communication. I can’t stress enough how useful that connectivity is even in outdoor scenarios.
And let’s face it, mental well-being matters too. A book, journal, or even a small pack of cards can help break the monotony. Laughter can do wonders in tough times, so bringing along something to lift spirits can turn a dire situation into a bonding experience.
Package and Maintain Your Gear
Organize Your Kit
Once you’ve sourced all your gear, I can’t stress enough how important it is to keep everything organized. I’ve had instances where I’ve frantically searched for items only to find them buried under an avalanche of stuff. A well-organized kit is easy to navigate, making chaos that much more manageable when you’re in a survival situation!
I recommend using labeled zip bags or compartments in your backpack. When everything has its own spot, you can easily grab what you need without turning into a hot mess. Not to mention, you’ll know if something is missing, which means you can restock long before you need it.
Also, don’t forget to check your kit regularly. Gear can wear out or expire, and I’ve been guilty of forgetting about items until it’s too late. Create a routine—maybe once a season—for checking everything so that you’re always prepared.
Train with Your Gear
Now that you’ve nailed down your gear and organized it like a pro, the real fun begins: training! Yep, knowing how to use your gear is just as important as having it. I’ve learned this the hard way during a camping trip when I struggled to set up my tent in the dark. Talk about embarrassing!
Consider doing a trial run of your kit in a safe environment. This helps you understand what works and what doesn’t without the pressure of a real emergency. Practice making quick meals, setting up your shelter, or even using your first-aid kit. Knowledge and familiarity can give you the confidence you need during a real-life situation!
Additionally, I suggest connecting with local survivalists or groups. Learning from others not only exposes you to new techniques and gear but can also lead to a strong support network. Trust me, having friends who are on the same path can provide a much-needed experience boost!
Stay Updated on New Gear Options
The world of survival gear is extensive and continuously evolving. I often find exciting new products that make survival more manageable and efficient. Keeping up with new supplies can better your kit and adapt to modern challenges. I keep an eye on blogs, forums, and even outdoor expos to stay informed about the latest trends.
Sometimes, social media can be a treasure trove for discovering innovative gear. Following enthusiasts and survival experts can introduce you to tools others have found effective. Plus, you can read reviews and feedback, making it easier to determine what suits your unique needs.
Also, don’t shy away from trying DIY. Some of the best survival gear I’ve made have come from experimentation. You might find that you can easily tailor existing items to your needs. Just keep safety and functionality in mind as you explore your options!
FAQs about Choosing the Right Gear for Your Survival Kit
1. What are the most essential items for a survival kit?
The essentials include food, water, shelter, a first-aid kit, and multi-tools. Prioritizing basic survival needs ensures you can stay safe in various scenarios.
2. How often should I check my survival gear?
I recommend checking your survival gear at least once a season. This ensures everything is in good condition and ready for use when needed.
3. Can I make my survival gear?
Absolutely! DIY solutions can provide custom adaptations tailored to your needs. Just ensure you’re considering functionality and safety when creating your gear.
4. Is it necessary to train with my survival gear?
Yes! Training with your gear can build confidence and ensure you know how everything works, which is vital in emergencies.
5. What should I do if I realize I don’t have a needed item in my kit?
Don’t panic! Assess the situation, and if time allows, source the needed item. Regular checks can help prevent this scenario, but adaptability is key!

by Preparation | Apr 20, 2025 | Preparedness
Understanding Basic Hygiene Practices
Cleanliness is Key
Let’s start with the basics because, honestly, you can’t go wrong here. Teaching my family about cleanliness has been my go-to strategy. Simple habits like washing hands can make all the difference in avoiding common illnesses. I always remind my kids to wash their hands before meals and after playing outside.
You’d be amazed at how just a few seconds of handwashing can help to fend off the nasties. Make it fun! I turn it into a little song, and now they know to scrub for 20 seconds. Clean hands equal less sickness, period.
Also, don’t forget to keep surfaces clean. I keep disinfecting wipes around the house, especially in high-touch areas like doorknobs and the kitchen. You’d be surprised how fast germs can spread if we let our guards down.
Healthy Eating Habits
Nurturing a healthy diet is another defense mechanism I swear by. I’ve found that food is not just fuel; it’s our frontline defense against diseases. With that, I try to prepare meals that include plenty of fruits and vegetables. They’re packed with vitamins and minerals essential for keeping our immune systems strong.
I’ve also turned grocery shopping into a fun family outing. We explore the produce section together, picking colorful veggies and fruits. This not only teaches them about nutrition but also encourages healthy eating habits that’ll stick with them.
Let’s not forget hydration! Drinking enough water is crucial for overall health. I’ve set reminders on my phone, and now we have a little water challenge going in our household. It’s important that they understand what a good diet can do for their body’s defenses.
Staying Active Together
Physical activity isn’t just for fun; it’s vital for our health. I try to be a role model by getting everyone up and moving. Whether it’s biking, hiking, or just a simple walk around the neighborhood, staying active helps boost our immune systems.
I find that involving the whole family keeps it enjoyable. We’ve started weekend game days, which includes some serious physical challenges. Trust me, you’ll find laughter and exercise can go hand-in-hand!
Exercise isn’t only about being fit. It’s about reducing stress and maintaining overall well-being. I remember a period of time when we focused more on couch time rather than workout time, and it made us all feel sluggish. Now, we prioritize our activity levels, and it’s been a game changer.
Staying Informed About Health Risks
Educating Ourselves
One key to protecting my family is staying informed. I regularly check reliable health resources. Knowledge is power, right? When I learned about the flu season and the importance of vaccinations, I made it a priority to educate my family about it as well.
Discussing health topics around the dinner table has helped demystify a lot of concerns. I encourage my family members to ask questions so they can express their thoughts and fears regarding health issues. This dialogue opens the door to education.
Part of being informed also means knowing your family’s medical history. I’ve found that understanding hereditary conditions helps us take proactive steps in our health management. On family days, we even talk about our health backgrounds and what we can do to mitigate risks.
Regular Health Check-ups
I can’t stress enough the importance of regular check-ups. We schedule annual visits with our doctor for comprehensive health assessments. It may not be the most thrilling way to spend a Saturday, but it’s essential to catch potential health issues before they become serious.
Sometimes we stack appointments together to make it more fun. I plan little rewards after our visits to keep spirits high. Plus, I’ve noticed that my kids model this behavior and are now more open about seeking help when they need it.
Checking in with our healthcare provider is a way to communicate health changes too. It’s not just about looking at charts; it’s about being proactive about our health as a family, and I think that unity strengthens our protective measures against diseases.
Staying Updated on Vaccinations
Let’s chat about the big “V” word: vaccinations. Keeping all of our shots up-to-date is crucial in protecting against various diseases. I make it a point to research vaccinations for both children and adults, and I talk openly about it with family and friends.
When it’s time for vaccines, I treat it like a family event. I’ve found that a little bit of fun and distraction can ease anxiety. Plus, we always follow up with a small treat afterward to celebrate being proactive about our health.
Being informed about what vaccines are out there and when they are recommended has helped me take charge of this aspect of our health. It gives me peace of mind knowing I’m taking steps to safeguard my family’s well-being.
Promoting Mental Health Awareness
Creating an Open Environment
Health isn’t just physical; mental health is super important too. I’ve learned that creating a supportive environment where family members feel free to share their thoughts can’t be overlooked. Sometimes the stresses of life can take a toll, and we need to be there for each other.
Regular family check-ins about how everyone is feeling have become part of our routine. Kids have worries just like adults, and I want my family to know they can come to me with anything. Listening openly has strengthened our bonds.
We’ve also incorporated mindfulness activities like yoga and meditation at home. I love joining my kids in simple breathing exercises, making them feel relaxed and focused. It teaches us ways to cope with stress together and reduces anxiety about health issues.
Promoting Emotional Expression
I firmly believe that allowing emotional expression is crucial. I encourage my kids to share their feelings, whether they’re happy, sad, or worried. Allowing space for those feelings fosters resilience in handling challenges.
One fun way we’ve done this is through art. Crafting sessions become our emotional outlet, where we draw or paint what we’re feeling. It’s an engaging way to express emotions without the pressure of words sometimes.
Recognizing signs of emotional distress in each other has also been key. When one person is off, we all rally around that individual to provide support. It’s a beautiful thing to see openness thrive in our home.
Seeking Professional Help
If things ever feel overwhelming, I remind my family that seeking professional help is a sign of strength, not weakness. I have always been transparent about my own experiences and have chosen therapy sessions when needed. It’s important that we break the stigma surrounding mental health.
I guide my family to understand it’s okay to ask for help, whether it’s talking to a therapist, a guidance counselor, or even a trusted friend. Connecting with the right resources can be life-changing and strengthens our family unit.
In the end, we want to ensure that both our physical and mental health are thriving. That balance is important, and as a family, we are committed to supporting each other through thick and thin.
Practicing Preparedness
Creating a Family Emergency Plan
No one wants to think of emergencies, but trust me, being prepared can save a lot of heartache. I’ve established a family emergency plan that we review together. This includes what to do in case of illness, natural disasters, or any other emergency situations.
We even practice our plan with drills (yes, they can be fun!). Simulations allow everyone to understand their roles and to feel confident if the real deal ever happens. We’ve made it seem like a game, so it doesn’t feel burdensome.
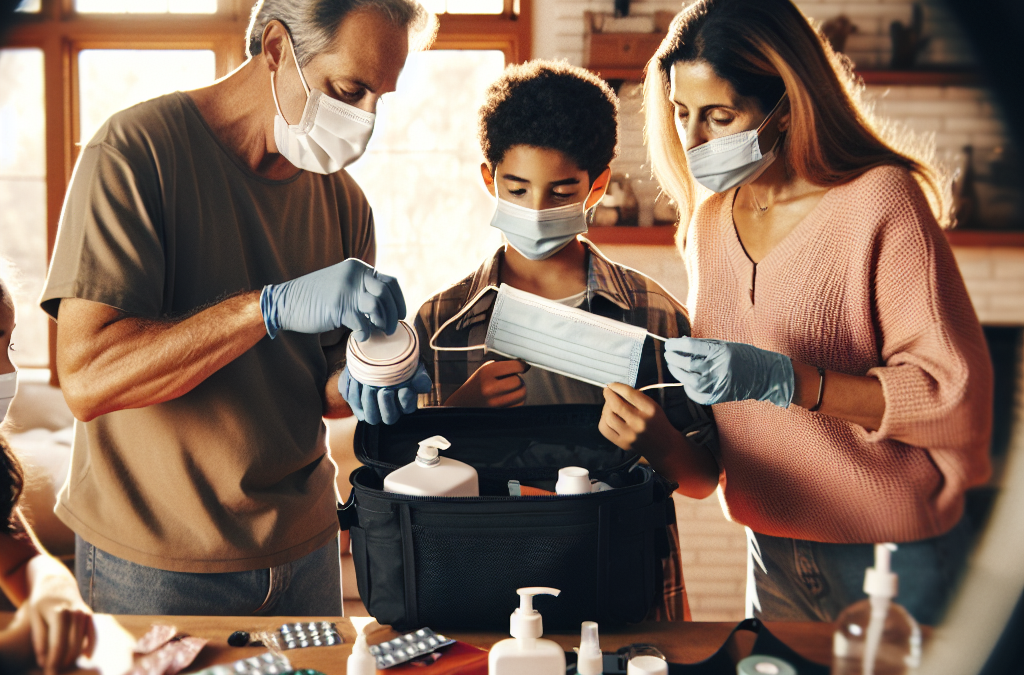
With kids, it’s important to keep things light yet informative. Knowing where our first aid kit is and what it contains has been essential. Teaching them basic first aid skills has empowered my kids to be proactive in emergencies.
Stocking Up on Essentials
Alongside our emergency plan, I keep a well-stocked supply of essentials. This includes medications, first aid supplies, non-perishable foods, and hygiene products. Trust me, being caught without these items during a crisis is no fun.
We even have a rotation system where my family takes turns checking expiry dates of our supplies. This teaches responsibility and ensures we’re always ready. Plus, we’ve made it a habit to build these supplies into our monthly budget.
I encourage you to personalize your supplies based on your family’s needs. Knowing I have what I need in a pinch brings me peace of mind, and I want my family to feel secure, knowing we’re ready for whatever comes our way.
Regularly Reviewing Emergency Plans
This one might seem obvious, but it’s worth repeating: regularly review and test your preparedness plans. We sit down at least every six months to discuss our family emergency strategies. It keeps it fresh in our minds.
Having open discussions allows my family to voice any concerns or questions they have. Together, we can confirm that everyone knows how to evacuate, and that we have transportation arranged if needed. When they know what to do, they feel safer.
I truly believe being proactive is the best prevention. It generates a sense of safety and responsibility within our family, reinforcing the idea that we can navigate challenges together no matter what happens.
FAQ
1. What are the most important hygiene practices to teach my family?
Start with handwashing, maintaining clean surfaces, and practicing good food hygiene. These habits lay a strong foundation for preventing the spread of germs.
2. How can I encourage my family to eat healthier?
Make it a group effort! Involve them in grocery shopping and meal prep, and offer diverse but delicious options. Lead by example by enjoying nutritious foods yourself.
3. Why are regular health check-ups necessary?
Regular check-ups help detect potential health issues early. They serve as a preventive measure for our overall health and well-being.
4. How can I promote mental health within my family?
Create an open environment for communication, encourage emotional expression, and seek professional help when needed. Mental health should be approached with the same seriousness as physical health.
5. What should be included in a family emergency plan?
Your plan should outline procedures for various emergencies, contact information, a location to meet, and basic supplies. It’s essential to review and rehearse it regularly.
by Preparation | Apr 20, 2025 | Preparedness
Access to Immediate Help
During Emergencies
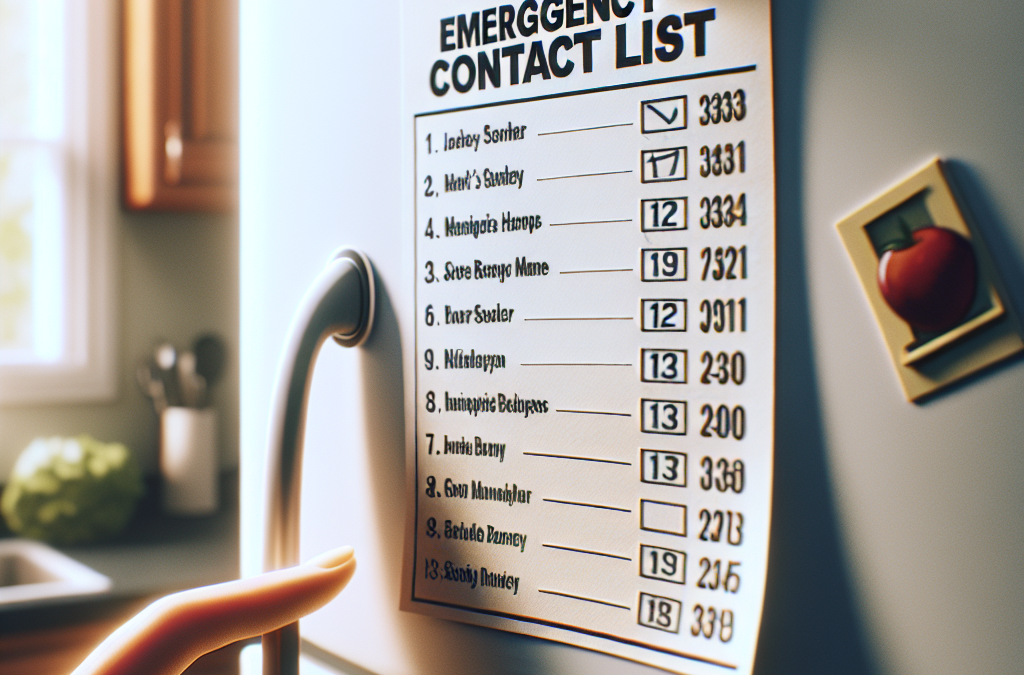
Think about the last time you were in a pinch—the kind where you needed help ASAP. Having a solid emergency contact list can be a lifesaver. Seriously! Whether it’s a medical emergency or a car breakdown, knowing who to call can make a world of difference.
When we’re caught in the chaos of an emergency, our minds can go blank, and panic sets in. Don’t let this happen to you! With a prepared list, you’ll have instant access to trusted people who can step in and help when you need it most.
Plus, a good emergency contact list brings peace of mind. Just knowing that there are folks ready and willing to help can help keep your anxiety in check when things get stressful. It’s like having a safety net at your fingertips.
Peace of Mind for Family
I can’t stress enough how comforting it is for family members to know there’s a plan in place. If something happens to you, having their names and numbers readily available can help save precious time when it matters the most.
Your loved ones will feel more secure knowing they can quickly connect with the right people. It alleviates so much worry—and trust me, I’ve seen this firsthand with my relatives who are always fretting over each other.
Imagine your family being able to call your doctor or your best friend instantly. This can be a crucial difference in the heat of the moment. Preparing that list is a simple yet effective way to ease their minds in uncertain situations.
Easier Coordination with Services
Let’s face it—emergencies often require coordination with multiple services. Whether it’s contacting a neighbor to check on your pets or calling roadside assistance, a contact list keeps everything tidy.
In my experience, trying to remember who to call while I’m panicking isn’t the best approach. If you have important numbers stored in one handy spot, you can keep your focus on resolving the emergency rather than scrambling for phone numbers. This way, you can think clearly and take charge!
And hey, it’s not just about you! Your contacts will appreciate being made aware that they’re on your emergency list. Being organized shows you care and understand the gravity of situations.
Organizing Your Contacts
Identifying Key People
The first step to taking your emergency contact list from concept to reality is determining who should be on it. Start with close family members and friends, then think about important professionals like your doctor, pediatrician, or a trusted neighbor.
Having a variety of contacts, from family to professionals, ensures you have the right help for different situations, and doesn’t just limit you to one type of emergency. You never know when an accident or unexpected event may happen, so better safe than sorry!
As you identify key people, consider what role they might play. Maybe it’s your sibling for family emergencies or a colleague for work-related issues. This will save you time in the moment and give everyone clarity on who to reach out to.
Updating Regularly
I learned the hard way that contact information can change faster than you think. You can’t just jot down phone numbers once and forget about them! It’s crucial to revisit your emergency contact list every few months to make sure everything’s current.
Sometimes friends move, family changes their numbers, or health professionals retire. Keeping your list updated means it will be useful when it really counts. So, set a reminder on your phone or calendar—whatever works for you.
It takes just a few minutes, and you’ll feel so much better knowing that your list is accurate. Trust me, future you will be grateful!
Storing Your List Safely
Next up, how and where to store your emergency contact list is just as important as creating it. You might think putting it on the fridge is enough, but I’d suggest more secure options. Consider keeping a digital version on your phone or in a cloud app where you can access it from anywhere.
Printable versions are also handy. If you’re like me, and often forget your phone when heading out, a hard copy stashed away in your wallet or glove compartment can save you a headache on the road.
And don’t forget to share it! Make sure key people in your life know where to find it. Sharing means they can also help maintain it—teaming up for safety never hurts!
Legal and Medical Considerations
Health Care Proxy
If you’ve ever been in a medical emergency, you probably understand how vital it is to have a health care proxy listed on your contact sheet. This ensures that your wishes are known and respected during critical times.
It’s someone you trust to make medical decisions on your behalf if you cannot. It can seem a bit daunting to think about, but seriously, having this planned out is a huge relief. I’ve even discussed this with my family to clarify our preferences over dinner!
Make sure the person you choose understands your values and preferences. It’s a conversation that may feel uncomfortable, but it’s worthwhile for everyone involved.
Emergency Medical Information
Alongside your contacts, don’t forget to include important medical information! This could be allergies, medications you’re taking, or key health conditions. If you ever need to go to the hospital, having this info can help healthcare providers give you the best care.
Including this information on your emergency list means that there won’t be any delays in treating you. There’s nothing worse than being in a bind and having to rely on others to piece together your medical history.
This section can save lives, honestly. You don’t want to be in a situation where someone’s scrambling to figure out what meds you’re on while you’re in distress.
Legal Contacts
Finally, don’t overlook the importance of including legal contacts. Whether it’s your attorney or someone from your insurance company, knowing who to talk to can be super beneficial in legal emergencies.
Things like accidents, property issues, or even disputes can crop up at any moment, and having legal support readily available can relieve a ton of stress. I once found myself in a sticky situation and having an attorney’s number was a lifesaver!
Reach out beforehand to your legal contacts, let them know they’re on your list, and ensure they are willing to assist when necessary. Setting these expectations upfront smooths out potential bumps in an already stressful situation.
Creating a Communication Plan
Designating a Point of Contact
As I work on my emergency contact list, I also ensure I designate a single point of contact among my family and friends. This person becomes the go-to for relaying information during a crisis, keeping it streamlined and preventing confusion.
Having a designated person can help coordinate updates and ensure that information gets passed on without everyone trying to contact each other simultaneously. Trust me—it can get chaotic otherwise!
It’s great to involve this person in your discussions about emergency protocols, so they know what to expect and can effectively manage the flow of information. It’s also helpful for them to feel empowered in that role.
Utilizing Technology
In today’s age, we’ve got tech at our fingertips, so let’s use it to our advantage! There are some fantastic apps available specifically designed to manage emergency contacts and information. You can program your list into your phone or even set up alerts for your loved ones.
I’ve found that tech can be unreliable sometimes, so having backups is key. Just remember to ensure your devices are charged and functioning properly. In an emergency, you don’t want to scramble to get your phone working!
By blending traditional methods with modern tech, you can create a comprehensive system that serves you well, regardless of the circumstance.
Practicing Your Plan
All the planning in the world won’t help if you don’t practice your communication plan! It may sound silly, but rehearsing what to do and who to contact can make a world of difference when things go south.
Share your plan with everyone on your emergency contact list so they also know what to expect and how to react. It’s a way to ensure everyone is on the same page, which can lighten the mood when the unexpected happens.
Run through scenarios—what happens if there’s a fire? What if someone gets injured? Practicing helps turn nervous energy into confidence, which is critical during genuine emergencies!
FAQs
1. Why is it important to have an emergency contact list?
Having an emergency contact list ensures that you have quick access to people who can help you or provide important information during urgent situations.
2. How often should I update my emergency contact list?
It’s best to revisit your list every few months or whenever there’s a significant life change, like moving or changing your doctor. Keeping it updated is key!
3. What kind of information should I include in my emergency contact list?
Your list should include names and numbers of family, friends, healthcare providers, and any other professional contacts. Don’t forget to add critical medical info like allergies and medications!
4. How do I store my emergency contact list?
You can keep a hard copy in your wallet, stored in your phone, or use a cloud app so you can access it easily. Just make sure key people know where to find it!
5. What’s the best way to create a communication plan for emergencies?
Designate a point of contact, utilize technology for quick access to information, and practice the plan with everyone involved. Rehearsing can greatly reduce panic during emergencies!
by Preparation | Apr 20, 2025 | Preparedness
Assess the Situation
Understand the Type of Disaster
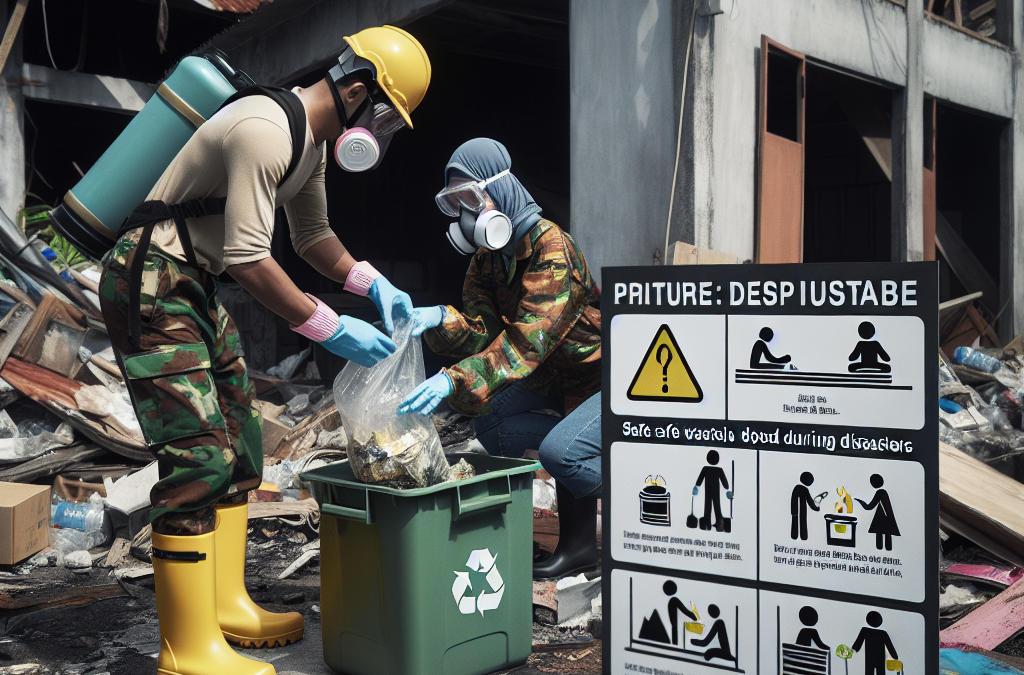
When a disaster hits, whether it’s a natural calamity like a flood or a man-made situation such as an industrial accident, the first step is to understand what kind of waste you’re dealing with. Is it hazardous, recyclable, or general trash? This helps you prioritize your disposal methods. In my experience, this initial assessment is crucial, and it sets the tone for everything that follows.
Take a quick mental inventory of the situation. For instance, in the aftermath of Hurricane Katrina, many faced types of debris ranging from household items to hazardous materials. Knowing what you’re dealing with can save time and keep you and your loved ones safe. Be sure to wear protective gear like gloves and masks to protect yourself from exposure.
Also, ensure you have a solid grasp on the classification of the waste based on local regulations. Each municipality might have different rules, and I can tell you from experience that ignoring these can lead to complications. Trust me, no one wants added trouble when they’re just trying to pick up the pieces.
Evaluate Available Resources
After assessing the waste, the next step is to evaluate what resources are at your disposal. This includes local disposal services, community programs, or even volunteers who can help. Sometimes, there are organizations that quickly mobilize to offer assistance, and knowing how to tap into these resources can be a lifesaver.
I once found myself in a pinch during a localized flooding event where the normal waste collection services were down. I had to get creative and work with a community group that was organizing a clean-up drive. They had all the right contacts, and this made disposal a lot smoother than I could have managed alone. When in doubt, the power of community is something not to be underestimated.
Don’t forget to consider personal resources like your own tools or vehicles for transporting waste. In a disaster, having a truck or even a sturdy wheelbarrow can make a significant difference. The more prepared you are, the easier the process becomes, and you end up achieving more, faster.
Prepare for Safe Disposal
Now that you know what you’re dealing with and what you can use, it’s time to get ready for safe disposal. This involves gathering the right materials such as bags, bins, and possibly some cleaning supplies. A well-stocked clean-up kit can be your best friend in these times.
I’ve learned the hard way that having everything ready to go speeds things up considerably. For example, using biodegradable trash bags can be great for organic waste, especially if you’re doing composting. Just remember, however, not to mix different types of waste; this creates more problems down the line.
If hazardous waste is part of the equation, ensure you have containers that are specifically designed for that purpose. You don’t want any nasty surprises while you’re trying to do the right thing. Safety first, folks. It’s all about protecting ourselves and our environment during these challenging times.
Implement Waste Segregation
Sorting Waste on-site
Implementing waste segregation is one of the best practices I’ve adopted during disaster clean-ups. It’s about sorting your waste into categories right there where the disaster recovery is happening. There are some items you just can’t throw together – like hazardous materials and everyday trash.
Creating designated areas for each type of waste can minimize risk and make the entire process much more manageable. For instance, I usually set up separate bins for recyclables, compostables, and general waste. This not only eases my own stress but also helps everyone involved understand what goes where.
I’ve found that marking the bins clearly can really help others pitch in. If you’re leading a group, having visuals can streamline participation and make sure no one mistakenly contaminates a non-hazardous area. Trust me; it helps keep tempers calm during what could easily become a chaotic situation!
Involve the Community
Community involvement can be instrumental when managing waste during a disaster. Not only does it create a sense of teamwork, but it can also sacrifice the grueling work of waste disposal into something much more manageable and, dare I say, enjoyable?
In my own experience, reaching out to neighbors and local organizations has fostered a great teamwork spirit. We even set up a schedule for shifts so that no one was overwhelmed. It felt good knowing that we were all in it together, and this camaraderie really eased some of the stress involved.
Of course, safety training sessions can also be very helpful. Organizing a quick talk on how to handle waste appropriately can ensure everyone knows what they’re doing, which, in turn, minimizes risk. Community engagement is powerful, and it’s been inspiring to see how many hands can transform a challenging situation.
Educate on Proper Disposal Techniques
One of the biggest challenges after a disaster is ensuring people know the proper disposal techniques. You’d be surprised how many come into a clean-up without a clue about the right way to handle waste. It’s something I make it a point to educate about during any clean-up efforts.
This can range from how to safely collect and store hazardous materials to knowing what can and cannot be recycled. Most folks genuinely want to do the right thing, so sharing knowledge goes a long way in helping the environment and the community. I often hand out flyers or even hold impromptu workshops when I can!
By sharing experiences and educating others, we collectively empower ourselves. Proper disposal methods contribute to a more effective recovery process, allowing communities to bounce back faster from disasters. I believe education is key – and it’s never too late to learn something new!
Monitor and Follow Up
Track Waste Disposal Progress
Once you’ve got the ball rolling, it’s important to keep tabs on how things are going. Having a tracking system can make you aware of what’s working and what’s not. It’s easy to get lost in the chaos of disaster recovery, but a little oversight can make all the difference.
I like to keep a checklist of what type of waste has been collected, how much has been disposed of, and what still needs attention. This provides transparency to everyone involved and helps strategize for the future, particularly if other challenges arise. Keeping detailed records has saved me a lot of headaches.
Plus, monitoring helps ensure that waste is being disposed of responsibly and not just left to pile up somewhere. Waste management isn’t complete until you know everything is taken care of, so keep that in mind when managing your efforts!
Follow Local Protocols
Every community usually has specific protocols for post-disaster waste disposal. It’s essential to stay informed about local rules and adhere to these guidelines. I remember participating in a community clean-up where protocols were crucial in ensuring no one got into legal trouble over improper waste disposal.
Sometimes these rules can change based on the situation on the ground, and staying updated is vital. Participating in community meetings can also be really helpful because that’s where decisions are made, and you can raise any issues you see. I often found that people appreciate being informed about these regulations.
Your local waste management department can provide invaluable insights into proper practices, so don’t hesitate to reach out. This way, you’ll not only protect yourself legally but also contribute to a more efficient recovery process.
Evaluate Overall Effectiveness
After you’ve wrapped up the disposal efforts, it’s worthwhile to sit down and evaluate the overall effectiveness of your approach. What worked well? What could have gone better? Reflecting on this can help you improve future waste management strategies.
In my clean-up experiences, I often engage with volunteers during evaluation sessions, allowing everyone to provide feedback. This can uncover insights that can be easy to overlook during the chaos. Plus, it’s great for building camaraderie and support among all involved.
Ultimately, these evaluations can also impact policy if shared with local officials. What you learned can provide vital information for future disaster preparedness efforts. It’s all about learning and evolving to create a culture of safety and efficiency in our communities!
Frequently Asked Questions
1. What type of waste should I be concerned about during a disaster?
Generally, waste can be categorized into hazardous, recyclable, and general waste. It’s critical to identify each type so you can manage them appropriately and ensure safety during disposal.
2. How can I encourage my community to participate in waste management?
Create a sense of community by organizing clean-up events and sharing knowledge about how to dispose of waste correctly. Engaging activities and clear communication can improve participation rates significantly!
3. What should I do with hazardous waste after a disaster?
Hazardous waste needs careful handling. Always use designated containers and follow local guidelines for disposal. Contact local waste management for specific instructions to ensure safety.
4. How can I keep track of our disposal efforts?
Maintain a checklist or a log of what waste has been collected, sorted, and disposed of. This will help you keep tabs on progress and identify any areas that might need additional attention.
5. Why is it important to follow local guidelines for waste disposal?
Local guidelines are designed to protect public health and the environment. Following them reduces the risk of contamination and legal problems while ensuring that waste is disposed of properly.

by Preparation | Apr 20, 2025 | Preparedness
Choose the Right Location
Seek Natural Shelters
When trying to build a fire in wet conditions, the first thing I look for is a natural shelter. This can be anything from a thick patch of trees to a rock overhang. These spots can protect your fire from falling rain and wind, making it much easier to get your fire going. One time, I found a little nook between two large rocks that shielded my fire from a downpour!
Being near natural shelters also helps with firewood sourcing. You’ll typically find dry materials still intact under a thick canopy. Plus, the ground is less harmed by rain here, saving you from trying to dig through puddles for wet wood.
Always be mindful of how close you are to these shelters, though. Safety is paramount! You want enough space so that any sparks won’t unintentionally cause a wildfire. Natural shelters are great, but you gotta use common sense too.
Clear Away Debris
Once I’ve picked the spot, I make sure to clear away any debris from the area where I’m going to build my fire. Old leaves, sticks, and other organic matter can actually absorb moisture, making it tougher for your fire to take hold. I usually clear a spot about three feet in diameter to start.
It can be a bit of a workout, but trust me – it’s worth it! Make sure to toss the debris far enough away so it doesn’t end up blowing back into your fire. This way, you’re not just clearing your space but also reducing fire hazards.
This cleaning step also helps you keep an eye on the ground. If it’s muddy or soaked, I always consider raising my fire source using rocks or logs. This little effort can prevent cold, soggy ground from stealing your fire’s heat. Happy fire-building!
Assess the Wind Direction
I’ve learned the hard way that wind direction is crucial when building a fire. The last thing you want is smoke blowing directly in your face or embers being carried away before the fire even starts. Pay attention to the trees – they’ll give you hints about which way the wind is blowing.
When I pick where to set up my fire, I often angle myself so the wind helps rather than hinders. If I can find a place where the breeze flows behind me and towards the fire, it makes the whole process much easier. Whenever you feel the wind shift, adjust your setup accordingly.
Also, ensure there’s nothing highly flammable close by. You want to have a roaring fire, not a bonfire that takes the whole forest with it! Control and awareness are your friends out here, especially in unpredictable conditions.
Gathering Dry Materials
Finding Dry Tinder
Okay, so you’ve secured your spot—now it’s time for the real treasure hunt: finding dry tinder! I’ve had decent luck with looking under tree bark, in hollow logs, or even breaking apart smaller branches. These tend to retain some dryness even when everything else is soaked.
You can also look for materials that are lighter and fluffy, like dry grass or pine needles. I like to collect a good fistful for that initial spark. But don’t stop there! Gathering a mix of different kinds will give you a better shot. Variety is key!
One of my favorite tricks is to carry some fire starters, too. Whether it’s dryer lint or small waxed paper, a little backup never hurts. It always makes the difference when things get rough; I promise you’ll appreciate being prepared!
Collecting Kindling and Fuel
Next up, kindling! This is the stage where you transition from tinder to something that can hold a flame longer. I typically gather sticks about the thickness of a pencil and some larger branches to keep things rolling. Keep your eyes peeled for anything that isn’t too damp.
Sometimes, I even bring my hatchet along to break down larger pieces of wood. Just make sure it’s dry, as splitting the wood exposes the moisture trapped inside. Bonking it on the ground can also get a bit messy, so I find a flat spot to avoid too much chaos.
Once I’ve gathered what I need, I set it all up in a nice little teepee structure. This allows for airflow and helps the fire burn more efficiently. For those of us who are truly adventurous, you can even create a “fire log cabin” setup. Just get creative, and always think about airflow!
Using Fire-Starters and Techniques
Now that I have my wood collected, I usually move on to the ignition part. A good fire starter can save the day when sticks and twigs aren’t cooperating. I never thought I’d say it, but I’ve become a big fan of using cotton balls soaked in petroleum jelly. These beauties help get my fire going even in the wettest conditions!
I also like to be strategic about how I handle my spark. I use matches that are wax-coated or a lighter, but I have been known to get crafty with my flint and steel when the conditions dictate it. Every method can be a fun challenge!
For those of you who love a good survival skill, consider learning the bow drill method. It takes time but once you get it down, you’ll feel like a fire-starting wizard! As with everything in life, practice makes perfect—don’t be discouraged if it doesn’t work on the first try.
Building the Fire Structure
Choose an Efficient Structure
Building your fire doesn’t have to be all that complicated. My go-to method is always to create a teepee structure. It’s simple and allows for lots of airflow, which is crucial in wet conditions. Plus, it’s an efficient use of your gathered materials.
Start by placing your tinder in the center, then surround it with kindling. Once that’s set, slowly build out with larger branches, ensuring to leave openings to promote airflow. Just like with any building project, a solid base will lead to a strong finish!
As always, watch the orientation of your pieces. You want to avoid setting them up in a way that traps moisture instead of shedding it. So, don’t stack things too tightly; give your fire room to breathe and thrive!
Lighting the Fire
Once my structure is up, it’s go-time! I typically light it in several places to ensure it catches evenly. I focus on getting the tinder lit first, then let it catch onto the kindling. I always keep a close eye on it, gradually adding larger pieces once the flames are established. I’ve learned the hard way that trying to rush this part can extinguish your hard work!
A great tip is to have a few extra flames ready, just in case the first tries fizzle out. Sometimes, all it takes is one little breeze to ruin a hard-fought flame. Having a backup plan can ease that stress and allow you to enjoy the process.
If things are still being stubborn, don’t hesitate to adjust your fire structure slightly. Airflow is key! I’ve had moments where just shifting a branch a couple of inches made all the difference in igniting the whole setup. Never lose faith!
Maintaining Your Fire
Alright, you’ve got your fire crackling, but maintaining it is the next step. I like to watch how my fire behaves and make sure to add wood gradually. I measure the supply based on its needs. Sometimes it might need smaller pieces; other times, I can introduce larger logs.
The beauty of a fire is the way it evolves. I’ve learned to respect its rhythm and add accordingly. It’s almost like having a pet that requires care and attention. There are times when I’ll even shift the logs around to keep the airflow steady.
Lastly, if it’s consistently drizzly, remember that the surroundings will also accumulate moisture. Having a collection of dry tinder handy helps me combat this issue. It’s those little details that render wet fire-building a successful venture!
Extinguishing the Fire Safely
Putting It Out Properly
Now, if you’ve had a successful fire, the end is fast approaching. It’s essential to safely put out your fire. I fill a bucket with water beforehand to keep nearby, and when it’s time, I generously douse the coals. I can’t stress enough: being hasty won’t do, and just using dirt might not fully extinguish it!
As I extinguish, I’m always checking for hot spots. Sometimes, a little heat can linger, so it’s better to be safe than sorry. I often mix soil with the ashes to ensure that everything is thoroughly cooled down.
Lastly, I make a habit of leaving a clean site after I’m done. Whether it’s an official campsite or just the great outdoors, it’s about respecting nature and leaving it as I found it, or better!
Check for Residual Heat
After extinguishing, I’ll often run my hand over the area to check for any residual warmth. This act not only ensures my own safety but also helps keep my fellow outdoor lovers safe. Coals can stay hot for a long time, especially if they’re buried under dirt. I don’t want anyone stepping in the wrong spot!
Learning to understand how fires work has been a gel in my outdoor adventures. The more aware I am of my fire’s behavior, the better I can manage it effectively. It’s like being in harmony with the elements, super cool!
This serves as a reminder that we all share this land, and practicing fire safety keeps us all safe and healthy while enjoying Mother Nature.
Leave No Trace Principles
Finally, I’ve found that adopting Leave No Trace principles is vital. This means ensuring the area looks like I was never even there. I search for any bits of garbage that might have been left behind and pack them out with me. Every little bit counts, right?
It’s about being responsible in nature, understanding that our actions create ripples. Teaching others these principles helps spread awareness and fosters a greater respect for the environment.
So, whenever we gather around a campfire, I remind my friends to take a moment and appreciate how it connects us. Doing it safely and sustainably ensures we can enjoy these experiences for years to come. Cheers to great fires and beautiful memories!
FAQs
1. What should I do if I can’t find dry tinder?
If you can’t find dry tinder, look under tree bark, inside hollow logs, or break apart branches. You can also pack dryer lint or cotton balls for a backup, which work wonders!
2. How do I prevent my fire from being extinguished by rain?
Look for natural shelters like trees or rocks to protect your fire from rain. Also, build your fire above the ground using stones or logs to keep it away from moisture.
3. What type of wood is best for wet fire conditions?
In wet conditions, I find using split wood more effective, as it exposes drier interior layers. Look for standing dead wood (called snags), as they tend to have less moisture.
4. Can I use lighter fluid to start a fire in the rain?
While it can help, lighter fluid is not recommended as it can cause flare-ups and may be less effective in wet conditions. Natural fire starters are safer and easier to manage.
5. Why is it important to practice fire safety?
Practicing fire safety ensures that we protect ourselves and the environment. Controlled fires minimize the risk of wildfires, and leaving no trace helps preserve nature for future outdoor enthusiasts.


