First things first, you gotta know your surroundings. Living in an urban area means you’re surrounded by tall buildings, busy streets, and a lot of people. Take the time to walk around your neighborhood and identify key landmarks, such as hospitals, police stations, and grocery stores. Familiarizing yourself with the layout can seriously enhance your confidence in a crisis.
Also, take a look at potential hazards. Are there areas prone to flooding? What about places with heavy traffic that could become chaotic during an emergency? Knowing these details can help you avoid dangerous situations and find safe routes to evacuate if needed.
Remember, your environment is like a puzzle. You need to piece together every part to understand how it fits into the bigger picture of safety. Map it out, and make it a challenge – I often find it a fun way to engage with the community, and you end up learning a lot!
Establish Communication Protocols
In an urban survival situation, clear communication is crucial. I personally recommend setting up a family communication plan. This includes selecting a meeting point where everyone can gather if cell service drops. Talk openly about your plan, so everyone is on the same page.
Also, consider a backup means of communication. In addition to cell phones, having a list of local radio frequencies can be a lifesaver during emergencies when typical services are disrupted. I’ve found that simple walkie-talkies can also be great for families, especially when separated in crowded areas.
Finally, make sure everyone knows how to reach out to neighbors. Building those relationships can create a stronger support system, and in a crisis, every connection matters. So don’t be shy – introduce yourself to the folks next door; it could pay off big time later!
Create a Bug-Out Bag
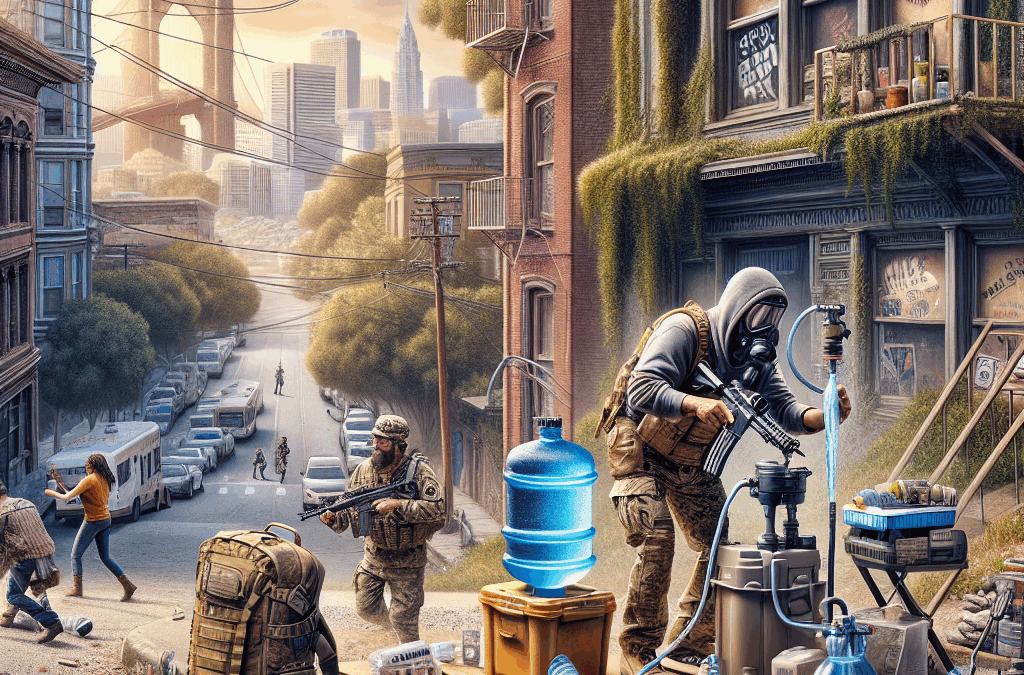
This is something I swear by. A bug-out bag is essentially a portable kit that contains everything you might need to survive for at least 72 hours. You want to make sure it’s packed with essentials that suit your environment and personal needs. Mine packs food, water, first aid supplies, and even a flashlight. You never know when these items might come in handy!
When selecting your bag, go for something durable but lightweight. You don’t want to lug around a giant backpack that’s gonna tire you out before the real challenge kicks in. I often have my essentials organized in smaller bags within my main pack; it makes finding stuff way easier when time is of the essence.
Finally, make sure to update your bug-out bag regularly. Rotate out food and other items that have expiration dates. I keep a checklist so that I can always remember what needs updating, ensuring I’m never caught off-guard during an emergency.
Maintain Situational Awareness
Stay Informed
Being aware of what’s happening around you is key to urban survival. I always keep track of local news and weather reports, especially if there’s a hint of trouble brewing. There’s nothing worse than being blindsided by a situation because you weren’t paying attention!
Another critical aspect is considering your personal intuition. If something feels “off” in your environment, don’t brush it off. Trust your gut instincts – they often know better than we do! Carry a small notebook to jot down observations or potential changes in your neighborhood.
Finally, join local community groups, like neighborhood watch programs, to stay in the loop about safety updates in your area. Collaboration is key; I’ve found that more heads are better than one when it comes to spotting trouble early on!
Watch for Potential Threats
It’s vital to recognize and assess potential threats in your surroundings. This doesn’t mean you should walk around paranoid; rather, it’s about being attuned to patterns in behavior and movement. I keep my eyes peeled for anything out of the ordinary – be it suspicious people lurking or vehicles behaving strangely.
Also, consider how certain situations might escalate. For instance, if a large group is gathering and the mood seems tense, it might be wise to steer clear. I’ve learned that it’s often better to observe quietly from a distance than to insert myself into a potential conflict.
Sometimes you see things that make you uneasy, and that’s okay! Trusting your instincts and having an action plan for different scenarios can help enhance your overall safety. Your personal security is paramount, so always be on guard without being anxious.
Practice Self-Defense
It never hurts to know how to protect yourself. Engaging in a self-defense class has not only been great for my confidence but also for my physical fitness. Knowing some basic techniques can empower you in situations where you may feel threatened. I actually found a great local class that makes it fun while teaching practical skills.
Furthermore, situational self-defense strategies can go beyond physical confrontation. Learning to de-escalate tense situations verbally can be incredibly beneficial. I often practice these techniques with friends, helping each other prepare for unexpected social dynamics.
Finally, think about carrying a personal protection item (like pepper spray) if it feels appropriate for you. Just be sure you know the laws in your area about carrying self-defense items. Always use them responsibly and only in genuine self-defense scenarios!
Build a Community Network
Connect with Neighbors
Taking the time to know your neighbors can have a huge payoff when it comes to urban survival. I’ve attended street parties and local events that were a blast! Through those experiences, I’ve met some amazing people who I can rely on during tough times. Plus, let’s face it – it’s a whole lot nicer to have someone to lean on, rather than facing challenges alone.
Furthermore, building a community network isn’t just about forming friendships; it’s also about creating a safety net. Neighbors can team up to look out for each other during emergencies, sharing resources and skills that might come in handy. I often swap resources like food, tools, and even skills with those around me to build that bond further.
Lastly, consider forming a local preparedness group. It could be a small book club focused on survival techniques or a broader community initiative to prepare for urban emergencies. The possibilities are endless, and the best part is that you’re contributing toward not just your safety, but also the safety of your community. Let’s lift each other up!
Share Resources and Skills
If I’ve learned anything from urban living, it’s that pooling resources can make all the difference. If you have a skill, share it! Maybe you’re good at gardening, cooking, or first aid – offer a workshop in your community center or among friends. It’s a great way to reinforce bonds while enhancing survival skills.
On the flip side, don’t hesitate to reach out for help when you need it. If you require supplies, check if a neighbor has extras to share. I often utilize a community-sharing platform in my area to exchange items and information with other residents. It fosters a collective spirit that feels empowering.
Lastly, think about organizing community preparedness drills. Practice can make a world of difference when the real thing happens, and doing it as a group builds commitment and cooperation. The camaraderie that develops during these sessions can be both incredible and crucial in times of need!
Engage in Local Preparedness Initiatives
Many cities have established programs aimed at encouraging preparedness and resilience. I previously participated in a local training offered by my city that focused on disaster response. It was both informative and interactive, and I got to know people who shared similar interests while enhancing my skills.
Getting involved with local organizations can amplify the voice of preparedness within your community. Volunteer opportunities often arise around emergency management or safety initiatives where you can contribute your time and effort. Plus, it makes for a great addition to your resume!
Staying engaged not only helps you stay better prepared but also sends a message to others that preparedness is important. Gather your friends, and create a community that prioritizes readiness and resilience by participating in these local initiatives. Together, we can make our urban environment a safer place to live.
FAQ
1. What is the best way to start my urban preparedness plan?
The best way to start is by understanding your environment and developing a comprehensive plan. Familiarize yourself with key locations, potential hazards, and create a list of supplies you may need.
2. How do I build a bug-out bag?
Start with essential items like water, food, a first aid kit, and emergency tools. Choose a comfortable bag that fits your lifestyle, and make sure to update it regularly with fresh supplies.
3. How can I improve my situational awareness?
Stay informed about your surroundings by following local news and observing the behavior of those around you. Trust your instincts if something feels off, and engage with community groups for better connection and information sharing.
4. Is self-defense training necessary for urban survival?
While it’s not mandatory, self-defense training can empower you and help you feel more secure. Understanding both physical and verbal de-escalation techniques can be invaluable.
5. How can I connect with my neighbors?
Attend neighborhood events, join local groups, or even have casual gatherings. Building relationships with those around you fosters a supportive community that can enhance everyone’s safety in emergencies.
When I’m in the wild, I’ve learned that wounds can vary significantly. You might experience simple cuts or abrasions, and then there are deeper lacerations that require more attention. It’s essential to identify the type of wound you’re dealing with.
Cuts and scrapes, while often unpleasant, can usually be treated with basic supplies. However, a deep laceration might require stitching or a more complex approach. I remember one time I had a buddy who slipped and fell on jagged rocks. Knowing how to classify the wound was crucial to how we treated him.
Moreover, I always consider the possibility of infection or significant blood loss with deeper wounds. Understanding the signs and symptoms can help in early intervention, which can save a lot of trouble later.
Cleaning and Dressing
The next phase is cleaning and dressing the wound. It’s one of those tasks that, believe me, you don’t want to rush through. First, I always try to keep things sterile—clean water, soap, and antiseptics are your best friends here.
Once you’ve cleaned the wound, the way you dress it can make all the difference. I usually opt for sterile bandages but have been known to improvise with what I find lying around when necessary—just ensure it’s clean! Make sure to cover the wound adequately to shield it from dirt and debris.
Don’t forget, observing the wound regularly is something I can’t stress enough. If it’s showing signs of infection or not healing, further action may be necessary.
Treatment of Major Bleeding
In the wilderness, I’m always prepared for the possibility of dealing with major bleeding. It’s critical to act quickly. I learned a long time ago that applying direct pressure is usually the first step you take. I’ll often use my hands—if you’ve got gloves, awesome, but if not, improvise!
If the bleeding doesn’t stop, elevating the injury can help, and if that fails, you may need to apply a tourniquet. One time, I had to apply a tourniquet to my friend’s arm after he got into a nasty scrape with a sharp branch. Fortunately, knowing when and how to do this was a game-changer.
Ultimately, seeking professional medical help is essential, especially after dealing with a severe bleed. Don’t underestimate the importance of getting the right care after you stabilize the situation.
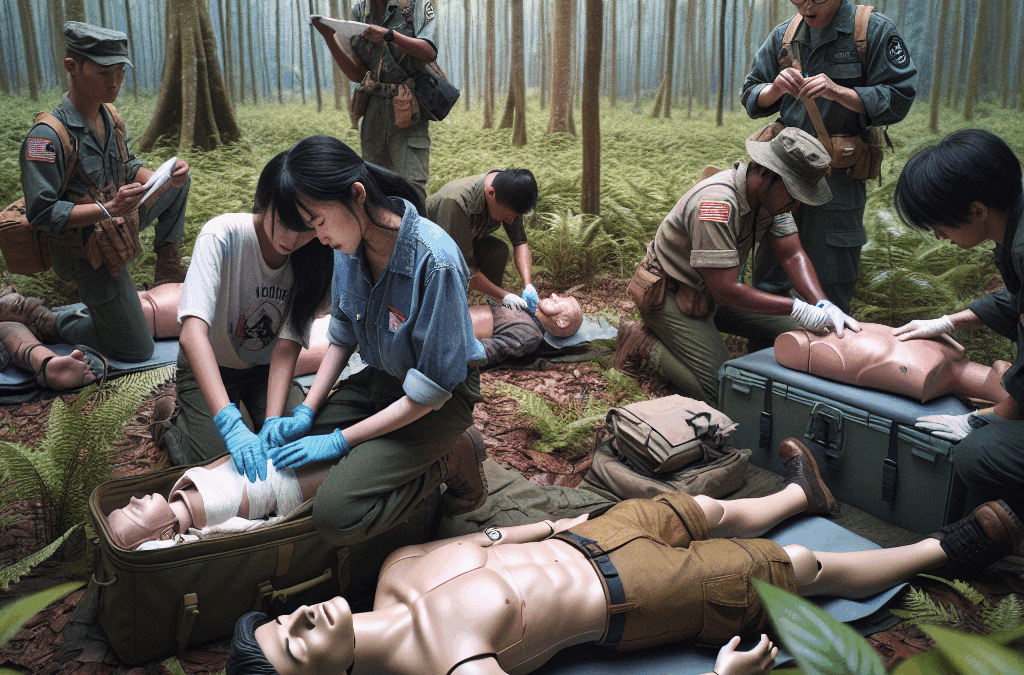
CPR and Basic Life Support
Recognizing Cardiac Arrest
I can’t stress how important it is to recognize the signs of cardiac arrest. During my outdoor adventures, I always remain vigilant. If someone collapses and isn’t responsive, that’s a major red flag.
Look for signs of breathing—if you don’t see any, it’s time to take action. I remember a time when a fellow hiker had a sudden episode; spotting the signs quickly allowed us to act before it was too late.
Also, don’t hesitate to ask others for help as you begin administering aid. It can feel overwhelming, especially in a remote situation, but teamwork makes a significant difference.
Performing CPR
So, let’s talk about the nitty-gritty—doing CPR correctly. First off, remember the cycle: 30 chest compressions followed by two rescue breaths. The compressions should be firm—think of them as pushing down hard enough to ensure blood circulates.
When you’re in the wild, it’s often more challenging than it sounds, especially with the adrenaline pumping. I’ve had a few practice sessions, and those are seriously invaluable. They give you the confidence to perform if you ever need to!
Always keep an eye out for any signs of life after you’ve started—sometimes, people come around after a few cycles, and knowing when to stop CPR is just as critical as knowing when to start.
Using an AED
If you’re lucky enough to have access to an AED (Automated External Defibrillator)—use it! I like to familiarize myself with tools like this before heading into the wild because you never know what can happen. Many public places have them, and it’s good to be aware.
Using an AED is pretty straightforward. Just follow the audio prompts; they guide you through the process. Just remember to stay calm and act quickly; every second counts.
Having this extra tool at your disposal can be a lifesaver. One of my most memorable experiences was being in a group where we had an AED on hand, and we managed to stabilize someone until the professionals arrived. It makes a difference!
Handling Sprains and Fractures
Recognizing the Injury
When it comes to sprains and fractures, my first instinct is often to assess the situation. Check for swelling, pain, and the ability to move the joint. I’ve found that understanding the difference can help in deciding how to proceed.
One of my friends sprained his ankle while hiking, and recognizing those signs right away meant we could take immediate action to minimize the pain. I make a habit of assessing the level of pain and the mechanism of injury when I’m handling these situations.
Knowing whether it’s a sprain or fracture can sometimes be tricky, but if they really can’t move it and you notice deformity, I typically lean toward treating it as a fracture. Better to err on the side of caution!
Immediate First Aid
The first aid for sprains and fractures is rest, ice, compression, and elevation—often shortened to R.I.C.E. I swear by this method. Resting the affected area is crucial; limited movement can help reduce further damage.
Applying ice can significantly reduce swelling and numbs pain. I usually wrap some ice in a cloth and keep it there for 15-20 minutes at a time. Compression with a bandage snugly wrapped around the injury is next, but be careful not to cut off circulation!
Finally, elevating the injury helps further reduce swelling. Prop them up on a backpack or even a fallen log while you manage the other aspects of the situation. Trust me, it helps!
When to Seek Help
Knowing when to seek help is one of the crucial lessons I’ve learned. If someone is experiencing intense pain, unable to move the affected area, or if you see obvious deformities, it might be time to call for assistance.
There’s no shame in seeking professional help. I recall a hiking trip where one of my friends ended up with a suspected fracture. Despite our first aid efforts, it was clear we needed medical assistance to ensure a proper diagnosis.
Always keep a means of communication when you’re out in the wild; you never know when it will come in handy, especially with something as serious as a fracture. It’s better to be safe than sorry!
Dealing with Allergic Reactions
Identifying Allergies
During my adventures in the outdoors, I’ve learned to be observant of symptoms of allergic reactions. You’d be surprised how many people have allergies they either don’t know about or underestimate—things like bee stings or certain plants can trigger a response.
Signs typically include hives, itching, or swelling, and for some, it can escalate to anaphylaxis. One time, my buddy thought he just had a little rash, but it spiraled into something much more serious. It was a wake-up call for me to pay close attention.
Always inquire about allergies before heading out with others—it’s super important to know what you’re working with to act fast if something does happen!
Using Antihistamines
Having antihistamines on hand is something I always advocate for. They can work wonders when it comes to combating mild allergic reactions. When a reaction starts, I usually give an antihistamine as soon as possible.
It’s always good to be aware of the dosing and any precautions—some antihistamines can make you drowsy! I’ve learned this the hard way, going from one adventure to another completely zonked out. Not fun.
If my friend is experiencing a moderate reaction, I usually monitor closely. However, for severe cases where breathing becomes difficult, it’s essential to have an EpiPen or similar device on hand if you know they’re at risk.
Emergency Action Plan
Having an emergency plan is key when you’re dealing with allergies. I’d advise sitting down with your group before any wilderness adventure to discuss what to do in case of an allergic reaction. This is an area where being proactive makes all the difference.
Know where the nearest medical help is, and have a plan for how to get there quickly if someone starts reacting badly. I always familiarize myself with the route to nearby facilities just in case!
If you have anyone in your group with known allergies, make sure they know where their medications are located. It’s all about teamwork and being prepared for any situation that may arise.
Basic Wilderness Survival Skills
Navigation Skills
Being able to navigate is an underrated skill in the wilderness. I’ve had my fair share of moments drifting off the path! Learning to read a map and use a compass can save you from wandering aimlessly.
The essential takeaway for me is that practice makes perfect. Before heading out, I set aside some time to practice my navigation skills, maybe even get lost in the backyard—who knew it could be a training ground?
Always keep a backup plan; if technology fails you, knowing how to read the stars or the lay of the land can help you find your way back.
Making a Shelter
Being able to create a shelter can be a lifesaver if you’re caught in a bind. I always scout for adequate materials nearby—branches, leaves, anything natural. It’s fascinating to see just how quickly you can whip something together when you need to!
Your shelter doesn’t need to be fancy but should provide some protection from the elements. I usually aim for something that can keep me dry and out of the wind. During a particularly rainy trip, I was grateful for my quick shelter-building skills!
Take the time to learn different shelter styles so that you can build appropriately based on the environment you’re in. Each region has its own unique needs!
Finding Food and Water
Finally, survival skills wouldn’t be complete without knowing how to find food and water. I’ve relied on sources like streams and rivers for clean drinking water more times than I can count. Vegetarian options include foraging for edible plants, but I always double-check to make sure they’re safe!
Fishing can also be rewarding and is a skill worth learning. I remember when I successfully caught my first fish during a camping trip; it was both thrilling and resourceful.
It’s essential to understand your surroundings and what resources are available. Knowing how to purify water can prevent issues down the line, and recognizing edible fruits can make your trip enjoyable. Plus, nothing beats the taste of food you’ve sourced yourself!
FAQs about Essential First Aid Skills for the Wilderness
1. What should I pack for first aid in the wilderness?
Always ensure you have basic supplies like adhesive bandages, antiseptic wipes, gauze, and tape. But don’t forget additional items like insect bite cream, antihistamines, or a splint for serious injuries.
2. How do I perform CPR?
CPR involves a cycle of 30 chest compressions followed by two rescue breaths. Ensure the area is clear, and compress the chest firmly at the center, at a rate of about 100-120 compressions per minute.
3. How do I know if a wound requires stitches?
If a wound is deep, gaping, or doesn’t stop bleeding after basic first aid, it likely needs stitches. It’s always better to err on the side of caution—do seek professional help in such cases.
4. What should I do if someone has an allergic reaction?
Identify the allergy and administer antihistamines if available. If breathing becomes impaired, use an EpiPen if the person has one, and seek emergency medical support immediately.
5. How can I prepare for navigation in the wilderness?
Learn to read a map and utilize a compass; practice these skills before your trip. Knowing how to recognize natural landmarks can also help guide you back to your campsite.
When it comes to natural disasters, preparation can make all the difference. Whether it’s hurricanes, earthquakes, floods, or wildfires, understanding your risks and preparing accordingly is vital for safeguarding your family. Here’s how you can disaster-proof your life with essential steps every household should take.
*Understanding the Risks: Assessing Your Vulnerabilities**
The first step in disaster preparedness is assessing the specific risks that affect your area. Are you living in a flood zone? Is your region prone to seismic activity? Understanding these vulnerabilities allows you to tailor your preparedness plan effectively. Start by researching local hazards through government resources or community organizations. Take note of historical data regarding past disasters and identify any patterns that may inform your planning. Engaging with neighbors can also provide valuable insights—after all, they’ve experienced similar challenges and can share their own strategies for coping.
*Building Your Emergency Kit: What to Include**
Once you have assessed potential risks, it’s time to gather an emergency kit tailored to those threats. Essential items should include non-perishable food supplies, clean drinking water (at least one gallon per person per day), a flashlight with extra batteries, a first-aid kit, and necessary medications. Don’t forget about sanitation supplies such as moist wipes and garbage bags! Other important inclusions are multi-tools or Swiss Army knives, blankets for warmth, and even cash in small denominations—credit card machines may not work during emergencies. Aim for a kit that can sustain each family member for at least three days while maintaining mobility; consider packing everything into durable backpacks or containers that are easy to carry if evacuation becomes necessary.
*Creating a Family Emergency Plan: Communication and Evacuation Strategies**
An emergency plan is crucial in ensuring that everyone knows what to do when disaster strikes. Gather your family together to discuss potential scenarios and outline communication protocols. Designate an out-of-area contact whom everyone can reach if local phone lines fail; this person will serve as a central point of information during crises. Identify safe meeting spots both near home and further away—think parks or community centers where you could regroup after evacuating.
Additionally, develop clear evacuation routes from home based on various disaster types; practice these routes regularly so everyone feels comfortable navigating them under pressure. Be sure every family member understands their role in the event of an emergency—a well-rehearsed plan minimizes panic when seconds count!
*Staying Informed: The Importance of Emergency Alerts and Resources**
In our digitally connected world, staying informed is easier than ever—but only if you know where to look! Subscribe to local news alerts via apps specific to weather changes or emergencies in your area. Many regions also offer text alert systems that notify residents about impending dangers like severe storms or evacuation orders.
Familiarize yourself with local resources such as shelters or recovery centers; knowing where these are located ahead of time will save precious moments during an actual crisis.
*Practicing Preparedness: Drills and Regular Reviews for Household Readiness**
Finally, regular practice solidifies preparedness efforts within the household. Conduct drills that simulate different disaster scenarios so everyone understands what actions they need to take without second-guessing themselves in real situations.
Equally important is scheduling periodic reviews of your emergency plans and kits; needs change over time! Ensure supplies remain stocked and up-to-date while revisiting communication protocols as children grow older or circumstances shift.
By taking proactive measures today—assessing risks, building kits, creating plans—you’ll be better prepared tomorrow when disaster threatens your peace of mind! Remember: preparedness isn’t just about surviving—it’s about thriving even amid chaos!
In a world that often feels unpredictable, the importance of emergency preparedness cannot be overstated. Natural disasters, health crises, and unexpected emergencies can strike at any time. Understanding the need for preparation is the first step in safeguarding yourself and your loved ones.
*Understanding the Need: Why Emergency Preparedness Is Critical**
Why should you invest time and resources into preparing for emergencies? The answer is simple—uncertainty. From hurricanes to pandemics, various events can disrupt our lives without warning. These situations may lead to power outages, food shortages, or even evacuation orders. Preparedness allows individuals and families to respond effectively rather than react impulsively when faced with a crisis.
*Essential Supplies: What to Include in Your Emergency Kit**
An effective emergency kit is your frontline defense. Start by stocking up on essentials such as water (one gallon per person per day for at least three days), non-perishable food items, a flashlight with extra batteries, a first-aid kit, and any necessary medications. Don’t forget important documents like insurance papers and identification—store them in a waterproof container! It’s also wise to include tools like multi-tools or duct tape; these versatile items could prove invaluable during an unforeseen event. Tailor your kit based on the specific risks you face in your area—whether it’s floods, earthquakes, or wildfires.
*Creating a Family Emergency Plan: Communication and Safety Strategies**
Having supplies is only part of the equation; creating a family emergency plan is equally crucial. Sit down with your family members and discuss potential scenarios you might encounter. Determine meeting points in case you’re separated and designate an out-of-area contact who can relay messages if local communication fails. Practice escape routes from your home; ensure everyone knows how to respond when danger strikes. This proactive approach not only enhances safety but also fosters unity among family members during stressful times.
*Staying Informed: The Role of Information in Crisis Situations**
Knowledge is power—especially during emergencies! Make staying informed part of your preparedness strategy by subscribing to local alerts through weather apps or community notification systems. Social media platforms can provide real-time updates as well but remember to verify information before acting on it; misinformation can lead to panic or poor decision-making. Also consider keeping a battery-operated radio handy—it can be a reliable source of updates if power goes out.
*Practicing Preparedness: Drills and Training for All Scenarios**
Preparedness isn’t just about gathering supplies; it requires practice too! Conduct regular drills with your family so everyone understands what actions they need to take during various emergencies—from fire evacuations to severe weather warnings. Consider enrolling in classes that teach basic first aid or CPR techniques; these skills could save lives when seconds matter most.
*Beyond the Basics: Community Resources and Support Networks**
Finally, don’t underestimate the value of community resources! Local organizations often provide training sessions or disaster response workshops that equip residents with vital skills and knowledge. Building relationships within your neighborhood creates a support network that can be indispensable during tough times—a united front tends to weather storms better than individuals alone.
Emergency preparedness isn’t just about surviving; it’s about thriving amid chaos. By understanding its importance and taking proactive steps now, you’ll feel more secure facing whatever uncertainties lie ahead!
Urban foraging is essentially the quest for edible plants and food sources within city environments. It can be a thrilling adventure, akin to a treasure hunt, but with a delicious twist! What’s even better is it connects us with nature, even in the most urban settings.
From foraging for berries in a park to harvesting herbs from a community garden, there are plenty of opportunities. Plus, there’s an undeniable joy in finding something fresh and free. It’s about making the best of what our cities can naturally offer.
As I delved into foraging, I discovered the vast amount of edible flora often overlooked. Like, did you know that dandelions are not just pesky weeds, but also packed with vitamins and can be tossed in salads? It’s eye-opening!
Why Urban Foraging is Beneficial
One of the main perks of urban foraging is that it’s eco-friendly. By sourcing food locally, even within our city streets, we reduce our carbon footprint. It’s a win-win for both our health and the planet!
Additionally, foraging can save you some cash. Imagine strolling through your neighborhood and picking fresh herbs instead of buying them at a store. It’s not just budget-friendly; it’s also a fun way to spice up your meals!
Finally, foraging invites curiosity and learning. Every time I headed out, I learned to identify different plants and their uses. This not only sharpened my knowledge but also deepened my respect for local ecosystems.
Getting Started with Foraging
If you’re keen to start your own foraging journey, it’s essential to first educate yourself about what to look for. I recommend using field guides or mobile apps that help identify edible plants. Believe me, it makes a huge difference.
Next, start simple. I remember my first adventure included gathering wild garlic in a nearby park. It was a small step but felt like an epic success. Starting small ensures that you don’t feel overwhelmed.
Lastly, join community foraging groups or workshops. Not only will you learn a lot, but you’ll also meet fellow food lovers. Many of these experiences are filled with laughter and camaraderie—it’s just a bonus!
Identifying Edible Plants
Look at the Environment
When I first started foraging, I quickly learned that the local environment plays a big role in identifying safe edible plants. Certain areas in the city may have pollution or chemicals that can contaminate what you’re looking to eat, so the location matters!
Urban parks, gardens, and even backyards can often provide safer choices compared to well-trafficked streets where dirt and grime may end up on the plants. Pay attention to where the plants grow and avoid areas near roads, factories, or heavy foot traffic.
During my early outings, I’d often take pictures of plants in different environments and research afterward. It’s a fantastic way to learn beyond what you might find in books!
Know Your Plants
Identifying specific plants is pivotal, as many have look-alikes that can be toxic. I’ve made it a habit to get up close and personal with plants—their leaves, stems, and roots all tell a story. Familiarize yourself with the characteristics of common edible plants in your area.
Field guides or apps can be phenomenal resources. One time, a friend and I stumbled upon a patch of stinging nettles. I almost walked away thinking they were weeds, but after checking my app, we were able to identify them and cook them up as a delicious soup!
Also, smell and taste are your friends. Many edible plants have distinct aromas. Just remember to only taste a tiny bit at first to ensure you don’t have any adverse reactions!
Practice Responsible Foraging
As you venture into foraging, it’s crucial to respect the environment. This means only taking what you need and being conscious of the overall ecosystem. Foraging isn’t just about getting your fill; it’s about maintaining the balance of nature.
I’ve experienced cities that have particular regulations on foraging. Researching and ensuring you are complying with local laws is essential, and it helps preserve these areas for other foragers in the future.
Lastly, spread the word about responsible foraging! The more we educate others, the greater the chances we can keep our foraging spots healthy and plentiful for years to come. Plus, it fosters a sense of community!
Cooking and Using Foraged Foods
Experimenting with Recipes
Once you’ve gathered your kitchen treasures, the fun truly begins in the kitchen! Using foraged plants can elevate your meals and add seasonal flair. I’ve experimented with fresh wild greens in salads, added berries to my morning oatmeal, and even made pesto out of dandelion greens!
One delicious find was wild mustard. It added a sharp and piquant twist to my grilled cheese sandwiches—definitely a dish to be proud of. It’s simply amazing how foraged foods can make me feel like a gourmet chef.
Don’t hesitate to get creative. Try making herbal teas from foraged leaves, or use the flowers in your salads for some colorful garnishing. There are endless possibilities, and experimenting is part of the fun!
Preserving Your Finds
If you’ve foraged more than you can eat right away, preserving your foods can ensure their longevity. You can dry herbs, make jams out of fruits, or even pickle wild vegetables. I love making pesto and freezing it in ice cube trays for later use.
Once, I went wild raspberry picking and made a whole batch of raspberry jam. It was nostalgic, reminding me of summer days as a kid. Those flavors captured in jars are perfect for spreading joy on cold winter days!
Don’t forget about freezer space too—blanching and freezing wild greens is a lovely way to have fresh flavors handy when out of season.
Sharing Your Foraging Adventures
Finally, sharing your foraging experience with friends and loved ones enhances the joy of this buddy-up journey. Organizing foraging picnics where everyone brings a dish made from foraged foods is an incredible way to celebrate your bounty.
Social media can be fun for this too! I often post my finds and what I’ve cooked up to inspire others. You never know, your adventures might ignite someone else’s passion for nature and foraging!
Plus, sharing knowledge with friends makes it even more fulfilling. I’ve learned so much from friends, and I’ve been happy to pass my knowledge onto others as well.
Safety Tips for Urban Foraging
Stay Informed
As with any culinary endeavor, safety is paramount when foraging. I always research species thoroughly before trying anything new. An evening spent reading up on local flora can make all the difference when you’re outdoors.
Be mindful of potential allergens! That means knowing if you’re allergic to any plants. I’ve shared foraging experiences where someone had a reaction. Ensuring everyone knows what they can and cannot eat is key when foraging in groups.
Remember the old saying: “When in doubt, throw it out.” If you can’t identify a plant confidently, it’s better to err on the side of caution.
Climate Awareness
Climate factors like pollution can affect the edibility of the plants. I always consider the surroundings of where I’m foraging. It’s wise to avoid areas with heavy pesticide or herbicide use. Gathering from well-maintained gardens or community plots is a safer bet.
Also, pay attention to seasonal changes. Some plants may only be edible at certain times of the year, while others may carry toxins in different growth stages. Education and awareness go hand in hand when foraging.
I often jot down notes on when I found which plants, making it easier in future seasons to know the best times to go back for more.
Be Cautious with Wildlife
Be on the lookout for wildlife too! Bugs, snakes, and other critters can sometimes share your foraged space. They might be lurking around, especially in little patches of wild urban greenery.
Always respect their habitats and stay safe. I’ve had my encounters with bees when picking nearby flowers—just a friendly reminder to watch where you tread!
Bringing a buddy along can also be a great safety measure. Sharing this journey with a friend not only boosts morale but ensures you’re safer if an unexpected situation pops up.
Conclusion
Urban foraging has been such a rewarding experience for me, both for my culinary creations and my appreciation for nature within the city. I encourage everyone to give it a shot; you might just find yourself with the tastiest meals and a newfound love for the plants around you!
FAQs
1. What are some common edible plants found in the city?
Common edible plants include dandelions, clover, wild garlic, and various berries. Always research and verify before consumption!
2. How do I know if a plant is safe to eat?
Use reliable field guides, apps, or consult with experienced foragers. If in doubt, don’t consume it!
3. Can I forage anywhere in the city?
Not necessarily. It’s essential to check local laws and regulations regarding foraging in public spaces and parks.
4. What should I bring for a foraging trip?
A good foraging guide, a basket or bag, gloves, a small knife, and possibly a notebook for jotting down notes are excellent essentials.
5. Are there any risks associated with urban foraging?
Yes, risks include polluting, mistaken identity of plants that may be toxic, and potential allergens. Always ensure you know what you’re gathering!