by Preparation | Oct 9, 2024 | Preparedness
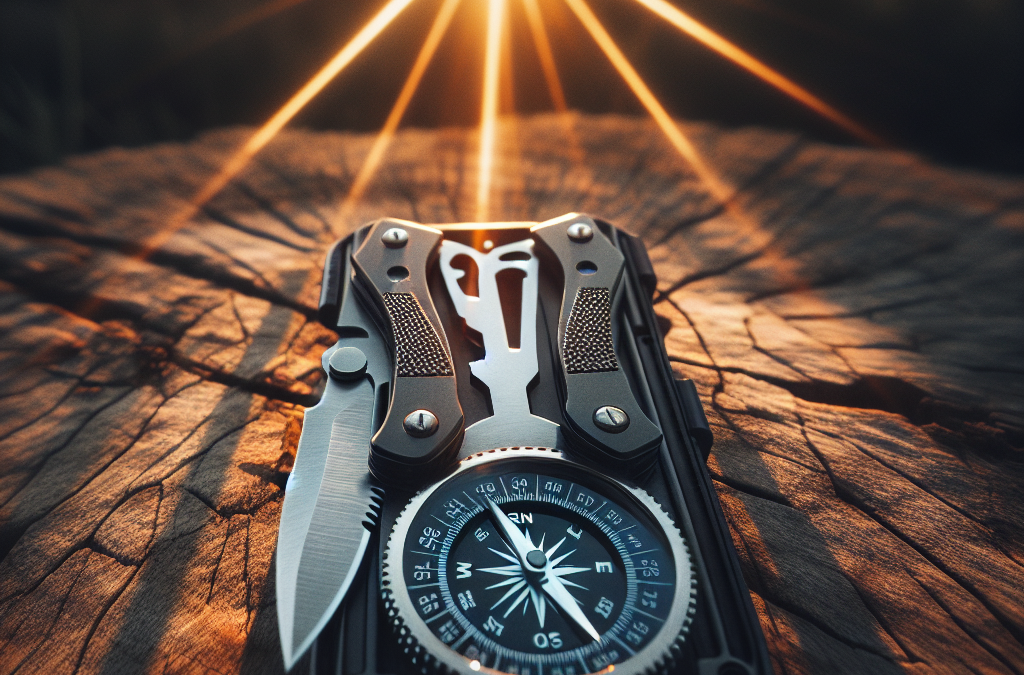
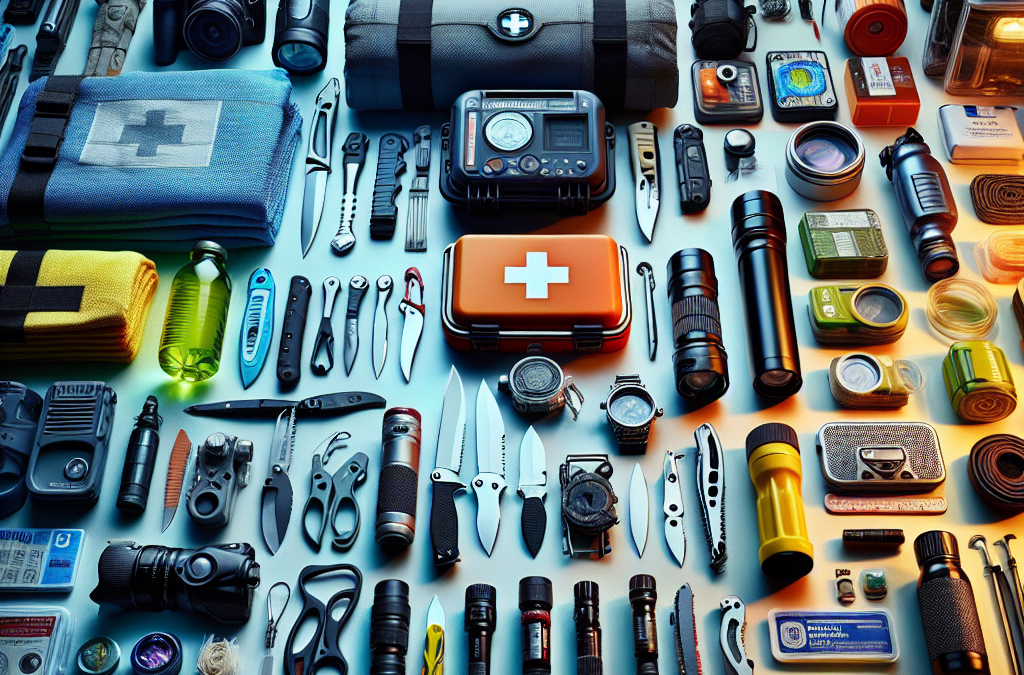
When it comes to survival, I’ve always believed that having the right tools is essential. Over the years, I’ve realized that there’s one tool that stands above the rest — something that truly can’t be overlooked. In this article, I’m going to break down the key areas of this tool and share why it’s an absolute must-have for anyone who’s serious about their survival skills. Let’s get into it!
Unmatched Versatility
This tool isn’t just good at one thing; it’s a multi-tasking marvel. Here’s why that versatility matters.
Adapts to Multiple Situations
In my experience, you never really know what situation you’re going to find yourself in. Whether it’s an outdoor adventure gone wrong or a sudden hit of a natural disaster, having a tool that adapts is invaluable. I can’t tell you how many times I’ve had to MacGyver a situation because I had the right tool on hand.
For example, during a recent camping trip, a fellow camper used their survival tool to open a can of food, cut rope, and even start a fire! I was blown away by how many things they could do with just one tool!
This adaptability cuts down on the number of tools you need to carry, making your pack lighter and more efficient. It’s truly a game-changer when you’re packing light.
Cost-Effective Solution
You might think that getting a tool with so many functions would break the bank, but that’s not necessarily the case. I’ve found plenty of multi-tools that won’t decimate your budget while still providing a ton of utility. Investing in this kind of tool is smart economics, especially if you’re an outdoor enthusiast or survivalist.
Think about it: instead of spending money on separate gadgets for cutting, sawing, or opening bottles, why not get one tool that does it all? This approach saves money, space, and headaches!
Trust me, I’ve tried to skimp on tools before, and I’ve regretted it. Spending a little more upfront on something versatile often pays off in the long run.
Easy to Learn
Another fantastic feature of this tool is that it’s straightforward to master. I’ve seen countless friends struggle with complex gadgets that come with too many instructions and features they never end up using. With this tool, however, you can get the hang of all of its functions in no time.
When I first used my versatile tool, I was able to figure it out in mere minutes. The intuitive design is user-friendly and perfect for anyone, whether you’re a seasoned pro or just starting.
With a little practice, you’ll be amazed at what you can do with it. Plus, learning to use it only adds to the fun of your survival journey!
Durability and Reliability
Let me tell you, when push comes to shove, you want a tool that can take the heat. This is where durability shines.
Built to Last
In any kind of survival situation, durability is the name of the game. I once made the mistake of buying a cheap tool that broke on me halfway through a wilderness hike. It was so frustrating! You want something that will withstand the elements and the test of time.
Investing in a high-quality tool usually means you’ll get something engineered to last. Whether you’re cutting through rope or prying open something stubborn, it should hold up under pressure.
I’ve had my multi-tool for years, and it still works as beautifully as the day I bought it. Durability gives me peace of mind when dealing with unpredictable scenarios.
Field-Tested Performance
There’s a reason some tools become favorites in the survival community. They’ve stood the test of real-world challenges and proven themselves time and again. I’ve read countless testimonials about tools that have saved lives in emergencies, and I can personally vouch for mine!
Using this tool in various scenarios has consistently yielded positive results. From starting a fire to making quick repairs, it’s been a dependable ally in sticky situations. I often share my stories of its reliability to encourage friends to invest in a tool they can trust!
It’s crucial to choose something that has a solid reputation. Nothing beats hearing about how well a tool has performed in someone else’s hands.
Weather Resistance
When you’re in unpredictable weather conditions, having a weather-resistant tool is essential. I can’t even count how many times rain or humidity could have ruined my gear if I hadn’t chosen wisely!
My go-to survival tool made from stainless steel and high-quality materials has remained unaffected by the elements, allowing me to focus on survival without worrying about my equipment failing.
This attribute is especially critical in survival situations — you need to know your tool will function properly no matter what Mother Nature throws your way.
Enhanced Safety Features
Safety, first and foremost! The right survival tool can pave the way for safer experiences during outdoor activities or emergencies.
Reduced Risk of Injury
Let’s get real here: using the wrong tool or a flimsy option can lead to injuries. I’ve had my fair share of close calls because I didn’t prioritize safety features.
Having a well-designed tool means better ergonomics and reduced risk of accidents. The grip is solid, and the blades are designed for precision, minimizing mishaps during use. I’ve seen friends get hurt while using slippery or poorly made tools — it’s never pretty!
I always recommend testing out any tool before relying on it in live situations, especially during training. Knowing its safety features will give you confidence in using it when needed.
Multi-Function Locking Mechanism
Another critical safety aspect of a reliable survival tool is its locking mechanism. You don’t want something that can accidentally close on your fingers, right? Trust me, it’s not worth the risk.
Every time I deploy my multi-tool, I feel secure knowing that its locking feature keeps it safely in place while I’m using it. This aspect is often overlooked, but it’s immensely valuable in preventing accidents.
If you’re feeling unsure about a tool’s lock, always look for reviews or consult experienced users to see if they’ve faced any issues.
Emergency Features
Many top-notch tools are equipped with emergency features you might not even think about! For example, my multi-tool includes a safety whistle and a small compass. Surprisingly handy, right?
These features can make a significant difference during distressing situations. I once found myself a bit lost while hiking, and having a compass gave me the peace of mind I needed to get back to safety.
Always consider what extra features your tool offers, as they could make your survival experience much smoother and safer!
Personal Stories of Survival
Let’s wrap it up with some personal accounts to drive this point home. Nothing beats real-life stories!
A Quick Fix in a Pinch
I’ll never forget a day when I camped out with friends, and we brought just about everything except a proper knife. My multi-tool saved the day with its sharp blade. We were able to prepare food and set up our space without any hiccups!
The smiles on everyone’s faces when we realized we weren’t left hanging felt great! This tool became the unsung hero of the trip, reinforcing my belief that preparation is half the battle.
Each of us took turns using it, which gave everyone in the group a chance to appreciate its functionality. It was a real bonding moment and a highlight of our adventure.
Staying Safe in the Wilderness
During another experience, I ended up needing my tool for more than just convenience. I got tangled in some thick brush, and my multi-tool helped me free myself without getting hurt. The blade managed to cut through some stubborn vines that were constricting my movement.
In a moment of panic, having that tool made all the difference. Had I not had it, who knows how long I would have been stuck?
This moment taught me that even in routine situations, it’s vital to have the right gear on hand. You never know when things will take an unexpected turn!
Lessons Learned
Through these experiences, I’ve grown to respect the importance of a reliable survival tool. Not only does it have incredible versatility, but it also can keep you safe, help you adapt, and guide you home when times get tough.
These aren’t just lessons I read in a book; they come from my personal experiences in the great outdoors. I love sharing these insights to help others prepare just as I have!
So when you’re gearing up, don’t overlook the one survival tool you can’t afford to miss. You’ll thank yourself down the line!
FAQ
1. What is the best survival tool to have on hand?
The best survival tool often varies by personal preference, but a versatile multi-tool is typically a top choice due to its ability to handle various tasks efficiently.
2. Why is versatility important in a survival tool?
Versatility allows a single tool to perform multiple functions, reducing the number of items you need to carry and ensuring you’re prepared for a range of situations.
3. Can I trust inexpensive survival tools?
While there are some reliable budget-friendly options, it’s generally worth investing a little more for quality and durability to ensure it performs when you need it most.
4. How can I ensure the safety of my survival tool?
Always check for features such as ergonomic designs, locking mechanisms, and emergency features to enhance the safety of your survival tool.
5. How does personal experience influence the choice of survival tools?
Personal experiences can provide valuable insights into what works best in real-life scenarios, helping you choose tools that are proven and reliable based on firsthand use.
by Preparation | Oct 8, 2024 | Preparedness
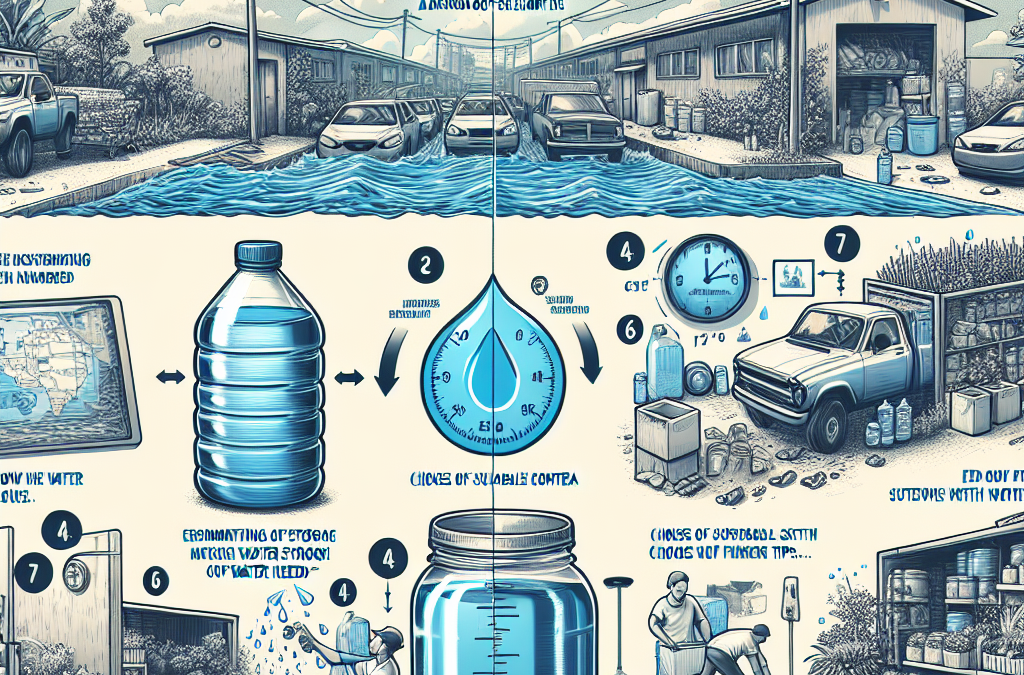
Understanding Your Water Needs
Assessing Your Household Water Usage
So, first things first: how much water does your household actually use? You might be surprised! A good general guide is about 1 gallon per person, per day. This includes drinking, cooking, cleaning—basically everything you do that involves water. I like to keep track for a week or two to get a solid number that reflects my lifestyle.
Think about seasonal changes and any extra needs you might have. If you have kids, they often need a bit more, especially if they’re running around and getting thirsty. Pets also add to your water usage, so don’t forget about them!
Being aware of your water usage not only helps you understand how much you need to store but can also inspire you to conserve water where possible. It’s a win-win!
Calculating Total Water Storage
Now that you know your daily water needs, let’s calculate how much water you’ll need for six months. For a household of four people, that’d be roughly 720 gallons! Yikes, right? But don’t fret, we’ll break it down and make it manageable.
I recommend sitting down with a calculator (or using an app) to figure out your total. It’s a bit of math, but it’s essential to know what you’re aiming for. Plus, this will help you as you plan out your storage solutions.
By knowing your total requirement, you’ll also feel a sense of security knowing that you’ve prepped for potential emergencies—because you never know when you might need it!
Planning for Water Quality
While storing water is essential, we mustn’t overlook the importance of keeping it clean and safe. After all, clean water is crucial for our health! I always make sure to use food-grade containers specifically designed for water storage.
Also, it’s wise to treat your water with a purification method, especially if you’re storing it long-term. I’ve used water treatment tablets and bleach—just a few drops will do! Make sure to follow the proper guidelines for whichever method you choose.
Don’t forget to label your containers with the date of storage. This way, you can track how long you’ve had the water and replace it as necessary. Freshness is key!
Choosing the Right Storage Containers
Types of Containers
There are plenty of options when it comes to water storage containers. Personally, I’m a fan of those giant food-grade polyethylene barrels. They can hold about 55 gallons each and are durable and relatively easy to find online.
If you’re looking for smaller options, there are also 5-gallon jugs, which I’ve found to be super versatile. You can store them easily in your pantry or garage, plus they’re convenient for day-to-day use as well.
Just ensure whatever container you use is specifically made for storing water. Regular containers can leach chemicals into your water, and that’s something nobody wants!
Buying vs. DIY Containers
Some folks even consider DIY solutions! You know, those big soda bottles or juice containers you’ve been meaning to throw out? If they’re clean and food-grade, they can make decent storage. Just remember to clean them out thoroughly!
However, I recommend investing in proper water storage containers if you can. It’s about making a long-term commitment, and starting with the right foundation makes all the difference.
This could be the time to check out local stores or online retail, compare prices, and maybe snag a deal on bulk purchases. It’s worth it for peace of mind!
Where to Store Your Water
Finding a suitable storage place is just as crucial as storing the water itself. I’ve found that my basement works brilliantly—it stays cool and out of direct sunlight. Too much light can promote algae growth, which no one wants in their water supply!
If you don’t have a basement, look for a cool, dark space—maybe under a sink or in a closet? Just ensure it’s a spot that stays dry and won’t lead to contamination.
Additionally, make sure your containers are off any concrete floors to avoid leaching and contamination. I use wooden pallets or plastic sheets to elevate them a bit; it’s a simple adjustment that goes a long way!
Maintaining Your Water Supply
Regular Checks on Quality
Now that you’ve stored your water, the next step is ongoing maintenance. I like to check my stored water about every six months. If you haven’t rotated it out, take a sample and give it a sniff and a taste!
If things taste off or smell funny, it’s best to discard that batch and refill with fresh water. It’s all about keeping things safe and ensuring the quality stays up to par.
Remember, even sealed containers can develop issues over time, so don’t just set it and forget it! Checking keeps you informed and ready for any situation.
Best Practices for Rotating Supplies
I can’t stress enough the importance of rotation. The last thing you want is to find out your water supply is stale when you need it most. I like to keep a calendar reminder to rotate my water every six months to a year, depending on how often I need to use it.
This way, I’m always guaranteed freshness, and it keeps me in a routine. Plus, it’s a great chance to clean my containers and check for any potential leaks.
Keep each batch of water clearly labeled with the date saved to help me track things more effectively. Sticking to this routine has saved my behind more than once!
Planning for Emergencies
Finally, let’s talk about how to prepare for emergencies. Having a solid water supply is only part of the equation. I also recommend creating a grab-and-go emergency kit that includes some of the water you’ve stored.
Include a mix of your larger and smaller containers; you never know what situations you might face. Having that ready to go gives me a sense of peace whenever I think of potential disasters.
Keep in mind that having purification tablets in your kit can go a long way, too. If you ever run out of water, you can treat and use nearby sources safely.
Frequently Asked Questions
1. How much water do I need to store for six months?
It generally depends on your household size. A good rule of thumb is 1 gallon per person per day, meaning a household of four would need about 720 gallons for six months.
2. What types of containers are best for storing water?
Food-grade plastic or glass containers are ideal. Look specifically for water storage containers or barrels designed for this purpose to avoid contamination.
3. How often should I check my stored water?
I recommend checking your stored water every six months. This allows you to ensure the quality and freshness of your supply.
4. What should I do if my water smells or tastes off?
If your water smells or tastes bad, it’s best to discard it immediately and refill your containers with fresh water to ensure safety.
5. How can I prepare my water storage for emergencies?
Create a grab-and-go emergency kit that includes smaller containers of stored water and purification tablets. This ensures you’re ready for any situation!
by Preparation | Oct 7, 2024 | Preparedness
Stay Calm and Assess the Situation
Take a Deep Breath
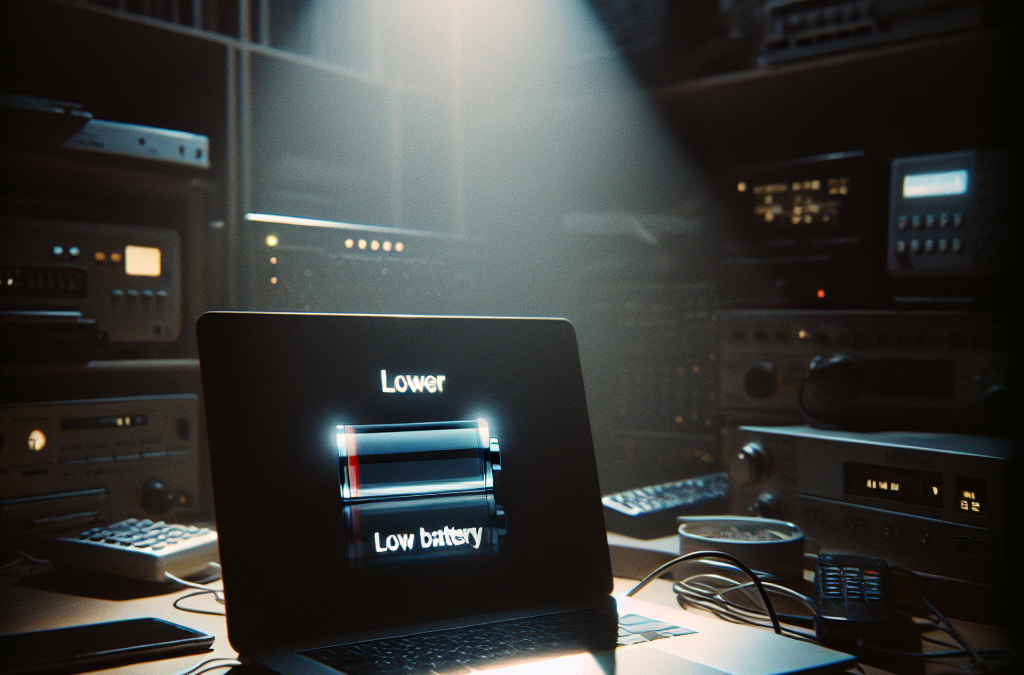
I’ve been there before, standing in the dark, looking at my dead phone, and panicking a little. The first rule? Just breathe. It sounds simple, but that deep breath helps clear the fog of frustration. When you stay calm, you can think rationally about your next steps.
Frustration can lead to poor decisions—like wandering off to find a charger when you’ve forgotten where you put it. In my experience, a moment of calm is all it takes to focus your thoughts. Make sure to remind yourself that power outages are temporary.
Instead of spiraling into panic mode, try to assess your immediate need for power. Is it your phone that’s dead, or is it something more necessary like your fridge? Knowing what’s most important can help you prioritize what to do next.
Check Your Devices
Next up, check your devices. You might be surprised by how many electronic gadgets can still hold a charge. Sometimes my laptop has a little juice left that I can use to get by for a while. Knowing the status of your devices helps shape your plan.
Don’t forget to check wall chargers, power banks, or even if you’ve got a spare battery lying around. I once found an old battery pack while looking for my hairdryer! It saved me a lot of hassle that day.
If all else fails, remember things like handheld gaming devices, e-readers, or any gadget that might have some battery life you forgot about. Those little things can turn into lifesavers in a pinch!
Know Your Options
After assessing the situation, it’s time to explore your options. I’ll admit, there were times when I was genuinely clueless about what to do next. Turns out, understanding your power needs and resources can steer you in the right direction.
Consider who in your circle has power. A friend down the road may have extra battery packs or even a generator. Also, think about public places. Coffee shops and libraries often have outlets available for desperate folks like us!
And don’t overlook your car! If you have a vehicle, there’s a good chance it can charge your electronics. I’ve plugged in my phone in the car so many times, and it’s usually a quick solution when I’m in a jam!
Find a Backup Power Source
Utilize Portable Power Banks
A portable power bank is a game-changer. I can’t stress enough how having one charged and handy makes life easier. These small devices can keep your phone and other gadgets alive long enough to get you through a power outage.
My first power bank was a lifesaver while traveling. Having that little gadget meant I wasn’t tied to finding outlets every five minutes. Make sure to keep it charged and ready to go, just in case your regular power supply fizzles out.
Power banks come in all shapes and sizes, so invest in one that meets your needs. You don’t need anything fancy; just ensure it’s reliable and powerful enough to do the job!
Explore Solar Chargers
Solar chargers have come a long way, and they’re quite handy during a power outage. When the sun is shining, my solar charger can keep my devices alive all day. I’ve even used these while outdoors, camping, or hiking.
What’s great is that they don’t need a traditional power source. Your outdoor adventures or even a lazy day in the backyard can turn into convenient charging sessions, saving your gadgets and sanity!
Just ensure you have enough sunlight during the day. And make sure your solar charger is compatible with the devices you’ll need to juice up!
Consider Generators
If you’re facing a lengthy outage, generators might be worth the investment. They can be a bit pricey, but I’ve learned they can pay off when you’re in a bind. Whether it’s for keeping food from spoiling or for your essential devices, they really work wonders.
Before buying one, assess your power needs. I took some time figuring out how much power my home requires during a blackout, and it made all the difference when choosing the right generator.
Remember, safety first! Operating a generator requires proper ventilation and following all safety guidelines. It’s essential for your peace of mind and well-being while you navigate through the power crisis.
Stay Connected
Leverage Social Media
Social media is a great tool to stay in touch with what’s happening around you during a power outage. I would often turn to Twitter for real-time updates on power restoration in my area. Just a quick hashtag search can connect you to neighbors and updates from the local utilities!
Sometimes, you can also find nearby locations with available power or community resources that can help. Keeping track of local news can be a lifesaver during an outage.
Don’t underestimate the power of online communities! Sharing your outage experience could lead to discovering helpful tips or offers for power sharing among friends and neighbors.
Communicate with Neighbors
A friendly chat with your neighbors can sometimes lead to unexpected resources. I’ve found myself combining efforts with neighbors during outages—sharing devices, planning meals, or even setting up a mini BBQ for everyone to enjoy while we wait for the lights to flicker back on!
Communication can also mean looking out for one another, especially if someone needs help or is in a more challenging situation. When we unite, we can create a better plan for getting through the tough times together.
Don’t hesitate to reach out, a friendly face or a helping hand can make a world of difference when we’re all facing the same issue. Plus, you’ll build stronger relationships with those living around you!
Use Alternative Communication Methods
When the power is out, my phone isn’t the only thing that goes dead. It’s always a good idea to have alternative forms of communication lined up. Investing in walkie-talkies or having some good old-fashioned landlines can work wonders.
Even if power is down, you could still connect with nearby family or friends without relying solely on cell towers. I love playing with gadgets, especially in times of need, and you’d be surprised how tactical a small handheld device can be!
So, if you’re picking up some gear, add a couple of alternative communication tools to your shopping list. You might find them surprisingly handy beyond just a power outage!
Reevaluate Your Habits
Improving Device Usage
Running out of power often calls for a reassessment of how we use our devices. I’m guilty of having too many unnecessary apps running in the background. Taking a moment to streamline your device can save significant battery life!
Consider an app audit. Delete those that you hardly use; you’ll be amazed at how much performance improves when you cut the clutter. The fewer the apps, the more battery you get!
Also, adjust settings to prioritize battery life. Lowering screen brightness or turning off auto-updates can stretch your battery’s life and keep you connected for just a little longer during an outage.
Consider Backup Plans
Life’s unpredictable, and so are power outages. It’s a good idea to map out backup plans in advance. I’ve learned the hard way to have a strategy; stocking up on essential items before disaster strikes is a must!
Things like bottled water, canned goods, batteries, and emergency lighting should be part of your regular grocery runs. Having these handy can save you from running around like a headless chicken when you lose power.
And, yes, let’s not forget a good old-fashioned flashlight! Planning ahead and being proactive will make any outage a lot less troublesome to handle.
Be Aware of Future Solutions
Finally, keeping an eye on innovative solutions for power management is crucial in today’s tech-savvy world. I love discovering new technology that can make my life easier, especially when it revolves around power.
For instance, options like smart home devices can help monitor your power consumption so you can better manage your usage. They also often come with alerts to let you know when power runs low—super handy, right?
Plus, always consider new developments in the renewable energy sector. More homes are incorporating solar power solutions every day, and they’re becoming more accessible than ever. Staying informed means you might be able to avoid future outages!
FAQs
1. What should I do first when the power goes out?
First, take a deep breath and stay calm. Assess which devices you need to keep functional and check the remaining battery levels of those devices.
2. Are portable power banks really worth it?
Absolutely! They can be lifesavers during outages. Just make sure to keep them charged and ready to go. A little investment can save you a lot of headaches!
3. How can I stay connected during an outage?
Leverage social media and communicate with your neighbors. Alternative communication methods like walkie-talkies also come in handy when phones are down.
4. What essential items should I have for a power outage?
Stock up on bottled water, non-perishable food, batteries, flashlight, and a portable charger. Planning ahead makes a big difference when the lights go out!
5. How do I prepare for unexpected power outages?
Map out a backup plan. Regularly audit your device usage, and stay informed about new technologies that can help with power management in the future.
by Preparation | Oct 6, 2024 | Preparedness
One Size Does Not Fit All
Personalizing Your Kit
When it comes to emergency kits, one of the biggest myths floating around is that there’s a universal kit that works for everyone. Trust me, I used to think that way! But after learning the hard way, I’ve realized how crucial it is to personalize your emergency supplies based on your specific needs. Don’t just throw a bunch of stuff into a bag; really think about who you are and what challenges you might face!
For instance, if you live in an area prone to hurricanes, your kit should definitely include items like tarps and water purification tablets. Conversely, if you’re in a colder climate, you need to consider warmth, food rations, and tools to assist you in snow-related emergencies. Making your kit personal can truly make a difference when you’re faced with a crisis.
Another thing to keep in mind is the size of your family. If you’re prepping for a family of five, that needs to be part of the equation. Kids have unique needs, so ensure you pack items that cater to them, such as comfort items or medications. It’s all about tailoring your kit to suit your lifestyle and risks!
Outdated Supplies Can Be Dangerous
Regularly Check Your Kit
So, here’s the deal: an emergency kit is not something you just stuff in the closet and forget about. I can’t tell you how many times I’ve found expired food or outdated medical supplies chilling in my emergency kit. It’s alarming! Imagine needing a first-aid item only to realize it expired two years ago. Talk about risky business!
This is why I stress the importance of regular maintenance for your emergency supplies. Set a calendar reminder to check your kit every six months. This doesn’t have to be a daunting task—just grab a checklist and go through each item. If you find anything broken or expired, swap it out. Stay proactive!
Moreover, consider evolving your kit as your life changes. Did you move to a different state? Maybe you should reassess your supplies! Gained or lost family members? Adjust accordingly. Keeping your kit fresh is key to ensuring your safety.
Don’t Forget About Water
The Lifeblood of Your Kit
Water is probably one of the most critical components in any emergency kit, yet many overlook it. In my experience, I made the classic mistake of thinking I could just get by with some snacks and a couple of bottles of water. Wrong! You can survive for weeks without food, but just a few days without water can be detrimental.
The optimal amount of water to keep in your emergency kit is one gallon per person per day. When I first realized this, I had to revamp my entire setup! Make sure you have enough for at least three days. Trust me, you don’t want to be stuck in a sticky situation lacking this most essential resource.
Also, remember to focus on the storage aspect. I recommend using sturdy, BPA-free containers to avoid any chemical leaching. Liquid can get heavy quickly, so store your water in manageable portions. I usually keep a mix of larger containers and smaller ones for easy transport if needed.
Communication Is Key
Plan for Contact
Another crucial but often neglected area is how you plan to communicate during an emergency. Early on, I learned that having a designated point of contact and an emergency communication plan is essential. You can’t rely solely on your phone; what if the power goes out or the cell towers are down? It’s definitely not fun when chaos strikes!
Start by identifying a family member or close friend who lives outside your immediate area as your point of contact. This will give everyone a central place to check in with, alleviating some stress in chaotic situations. Share this plan with your family, making sure everyone understands their role.
Additionally, consider investing in a good quality two-way radio or walkie-talkies if your area is prone to natural disasters. This can be a game changer for neighborhood communication when phones fail. You might think it sounds a bit old-school, but believe me, there’s real power in having an alternative that works when technology doesn’t!
Training and Drills Matter
Practice Makes Prepared
This might sound surprising, but assembling a kit is just one half of emergency readiness. The other half? Practicing how to use it! After putting together my first emergency kit, I realized I knew how to use some items but not all. Guess what? I had to go back and learn how to use my supplies effectively!
You can plan for any scenario imaginable, but if you don’t know how to utilize the tools at your disposal, you’re only setting yourself up for failure. I recommend running through drills with your family at least once a year. Whether it’s a fire drill, power outage, or even a basic first-aid practice, getting familiar with your supplies is crucial.
Don’t shy away from training. Sign up for local emergency preparedness classes, or more importantly, learn valuable skills like CPR or how to bandage wounds correctly. Knowledge is power, and in emergencies, you’ll be glad you put in the work ahead of time!
FAQ
1. What should I include in a basic emergency kit?
A basic emergency kit should include water (one gallon per person per day), non-perishable food, a flashlight with extra batteries, a first-aid kit, tools for basic repairs, and important personal documents.
2. How often should I check my emergency kit?
It’s a good practice to check your emergency kit every six months. This ensures that all supplies are fresh and functional, preventing any surprises during an emergency.
3. Can I store my emergency water supply in plastic bottles?
Yes, but make sure to use BPA-free plastic containers to avoid any harmful chemicals leaching into the water. Keep them in a cool, dark place and replace them every six months.
4. How do I choose a reliable communication method during emergencies?
Identify a contact outside your area, invest in two-way radios, and establish a communication plan with your family so everyone knows how to remain in touch when situations escalate.
5. Why is training and practicing important?
Training helps everyone understand how to effectively use the supplies in your kit and ensures you’re prepared to handle emergencies calmly and efficiently when they arise.
by Preparation | Oct 5, 2024 | Preparedness
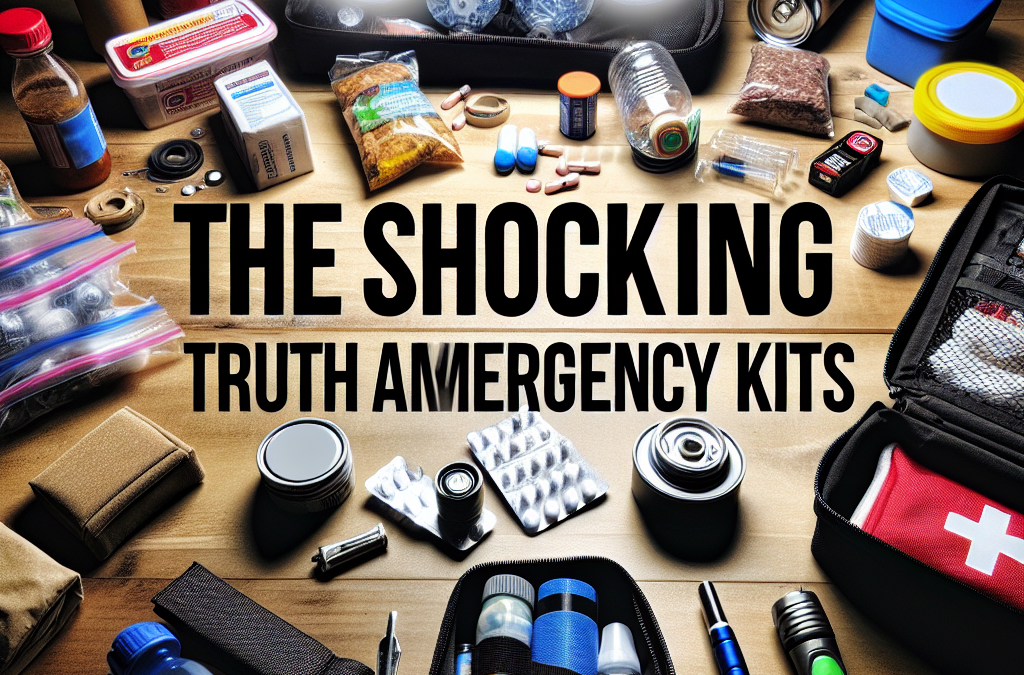
Emergency Kit
Essentials for Your Kit
When I think about emergency preparedness, the first thing that comes to mind is an emergency kit. This is your lifeline in a crisis. I usually include items like first aid supplies, non-perishable food, and water. It’s surprising how many people overlook these basics and then scramble at the last minute. Trust me, having these essentials ready can make all the difference.
As for the quantity, I suggest stocking up on enough supplies to last at least 72 hours. This gives you time to recover from the initial shock and find more resources if necessary. Don’t forget about any personal items specific to your needs, like medications or pet supplies. I’ve made the mistake before of thinking about my needs but forgetting about my furry friend!
Remember, your kit isn’t a one-size-fits-all. Personalize yours based on your unique situation. Think about the climate you live in, your family members, and even your hobbies. For example, if hiking is your jam, pack some gear along with the basic food and water. That way, you’re not only prepared but also comfortable.
Communication Plan
Establishing Your Network
During any disaster, clear communication is crucial. After reflecting on previous experiences, I can’t stress enough how vital this is. Gather your family and friends to discuss who will be in charge of what, should an emergency arise. I can remember a time when we rushed to evacuate but didn’t establish who would contact whom. It added unnecessary stress!
I also recommend using text messaging over traditional calls since text messages can often go through when calls can’t. Create a family group chat specifically for emergencies. Make sure everyone knows how to access this information and practice it so there’s no hesitation when it really matters.
Think about other communication channels too, like social media, local bulletin boards, or community centers that can serve as meeting points. I’ve found that having multiple layers of communication gives everyone peace of mind, especially the little ones who might not understand the gravity of the situation.
First Aid Supplies
Building the Perfect First Aid Kit
A solid first aid kit is a non-negotiable. Trust me on this one; I’ve had my share of scrapes and bruises that needed more than a Band-Aid! Start with the basics: antiseptic wipes, gauze pads, adhesive tape, and a good pair of scissors. You’d be amazed at how often you’ll need these during even minor emergencies.
Don’t forget to add a manual or reference guide, especially if you’re like me and sometimes forget where the aspirin is when you need it most! You can find really handy booklets that talk you through common injuries and their treatments. I also include personal medications, like antihistamines, because allergies don’t take a break during a crisis!
As your skills grow, consider attending a first aid or CPR class. I did this a few years back, and it was enlightening. It’s like being a superhero – you don’t just have a kit; you’ve got the know-how to use it. Plus, it’s fun to learn something new and potentially save a life.
Water Supply
Understanding Your Needs
Water is essential, and I can’t stress this enough. In emergencies, clean drinking water becomes a precious commodity. I always make a plan to store at least one gallon of water per person per day. You might think that’s a lot, but trust me, you’d rather have more than not enough!
Remember to also consider pets and the extra water they might need. I once had a friend who forgot about her dog during a storm, and let’s just say we learned a valuable lesson that day! Consider storage options for water – there are many kinds of containers that can keep your water supply safe and free from contaminants.
And hey, think about purification methods too! Water filters, iodine tablets, and even a good old-fashioned boil could be necessary if local sources are questionable. I’ve used filters during hikes, and they’ve saved me a few times. Just don’t be like me and forget to check the replacement filters!
Emergency Power Supplies
Choosing the Right Power Options
With all the tech we have today, keeping the lights on during a disaster is super important. I always recommend investing in a portable power bank; it’s a lifesaver! It’s no fun when your phone dies while trying to get updates or making emergency calls.
Batteries play a vital role here too. I make sure to stock up on various sizes because you never know what might be in need of a change. I hate being caught off guard by a flashlight with dead batteries. C’mon, no one wants to stumble around in the dark!
If you’re feeling adventurous, consider solar-powered gadgets. I’ve been using a solar charger for my devices, and it’s great. Not only does it help the planet, but it also means less reliance on conventional power sources – which is key when emergencies hit!
FAQ
1. What items should I include in my emergency kit?
Your emergency kit should include essentials like non-perishable food, water, first aid supplies, batteries, and a flashlight. Personalize it by considering your family’s specific needs.
2. How often should I update my emergency kit?
It’s a good idea to review and update your emergency kit at least once a year. Check expiration dates on food and medications, and refresh items that have been used.
3. How do I create a communication plan?
Gather your family to discuss who will contact whom during an emergency. Set up a group chat, specify meeting points, and practice emergency procedures to ensure everyone is on the same page.
4. What is the best way to store water?
Store water in food-grade containers, avoiding anything that previously contained chemicals. A general rule is to have at least one gallon of water per person per day, along with extra for pets.
5. Are there eco-friendly power options for emergencies?
Yes, consider solar-powered chargers and equipment that minimize dependence on traditional power. They are great for sustainability and can provide energy during outages.


