1. Keep Your Vehicle Well-Maintained
Routine Checks
One of the first things I learned was the importance of keeping my vehicle in tip-top shape. Regularly checking your tires, brakes, and lights is essential. You don’t want to be caught in the middle of nowhere with a flat or a headlight out. I mean, who wants to deal with that stress, right?
What I like to do is set reminders on my phone for these checks. It can be as simple as checking my tire pressure every month or giving my car a regular oil change. This keeps everything running smoothly and helps me avoid breakdowns when I least expect them.
Plus, a well-maintained vehicle usually saves money in the long run. You avoid those expensive repair bills that can sneak up on you if you’re not careful. Trust me, learning this the hard way wasn’t fun at all!
Fluid Levels
Another crucial aspect of maintenance is ensuring your fluids are at the right levels. This includes engine oil, coolant, brake fluid, and transmission fluid. It’s kind of like feeding your car; if it doesn’t get the right stuff, it’ll run into problems.
Checking these levels can be a quick task. I usually do it while I’m waiting for my coffee to brew in the morning. Just pop the hood, take a look, and top them off if needed. It honestly doesn’t take much time and can really save you a lot of headaches later.
If you’re unsure about how to check them, there are plenty of video guides out there. They can walk you through the process step-by-step. Once I learned how easy it was, I was hooked on keeping my fluids in check!
Battery Health
Let’s not forget about your battery. A dead battery can leave you stranded faster than you can say “help!” and knowing how to check its health is crucial. Look for corrosion on the terminals and make sure the connections are tight.
If you’re running into issues with starting your car or if the lights look dim, it might be time for a battery replacement. I remember once, my battery died out of the blue before a big trip, and I had to scramble for a jump start – not a fun scenario!
I recommend having a simple multimeter at home. It’s a small investment that can be a lifesaver. You’ll be able to check if your battery is still holding a charge effectively. Just a quick check before heading out can make all the difference.
2. Create an Emergency Kit
Basic Supplies
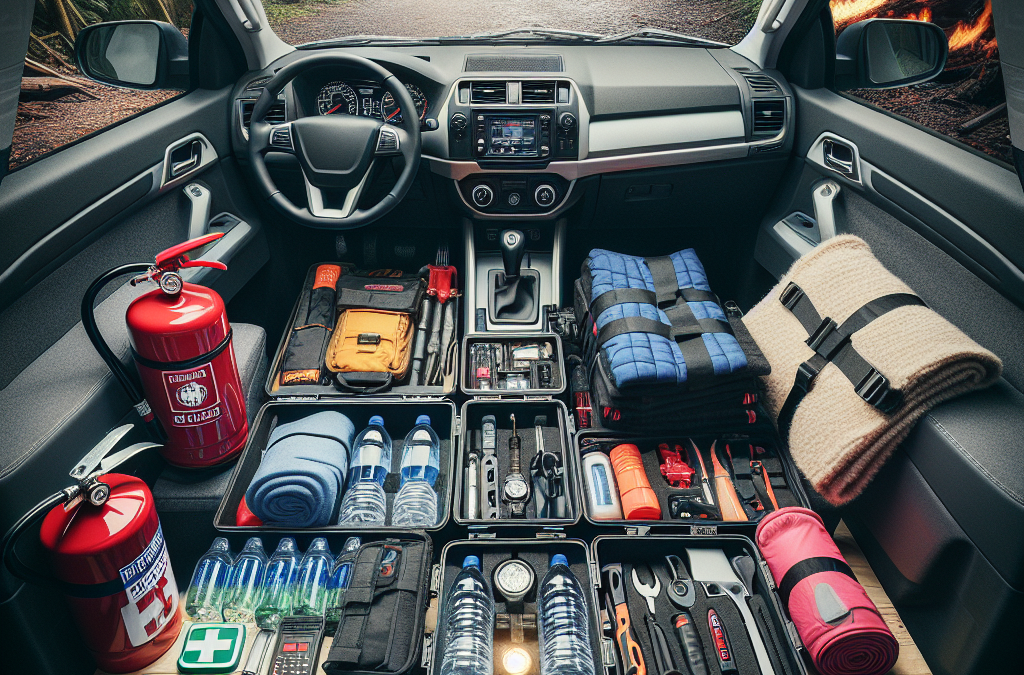
Now let’s talk about creating an emergency kit. I can’t stress how important this is! I’ve put together a bag loaded with the basics: first aid supplies, water, non-perishable snacks, and a flashlight. These items can come in handy if you find yourself stuck somewhere.
I usually keep everything in a sturdy backpack in the trunk of my car. That way, it’s easy to grab if I need it. And it’s really good peace of mind to know that I’m prepared for whatever could happen on the road.
Also, don’t overlook things like a multi-tool or a blanket. They may seem minor, but trust me—they’re lifesavers in tricky situations. Having them can keep you comfortable and safe until you get help!
Roadside Assistance Tools
Having the right tools is essential too. I always make sure to have a spare tire, jumper cables, and a basic tool kit in my vehicle. You never know when you might need to change a tire or jump your battery.
Learning how to use these tools can really help you feel empowered during emergencies. I remember the first time I had to change a tire by myself. It took some time, but I felt so accomplished afterwards! Plus, it saved me from waiting for a tow.
Consider joining a roadside assistance club as well. Having quick access to help can be a game changer, especially if you’re in a sketchy area or late at night.
Staying Informed
Part of being prepared is staying informed about any potential emergencies in your area. I’ve signed up for alerts on my phone, which notifies me about severe weather or road conditions. It’s a simple step, but it can prevent you from being caught off guard.
Additionally, familiarize yourself with local emergency services and how to reach them. Knowing the quickest route to the nearest service station can save precious time if you ever face a breakdown.
Educating yourself about common road issues in your area is also super helpful. If you’re in an area known for heavy snowfall, for example, just know what to expect and how to handle such conditions. It’s all about staying a step ahead!
3. Develop a Communication Plan
Who to Contact
In case of an emergency, having a plan for who to contact is crucial. I’ve designated a couple of friends and family members who I can call if I ever get into a pickle. It’s reassuring to know that I’ve got people who will drop everything to help me out if needed.
Make sure your emergency contacts are saved in your phone. I even have a little note in my wallet with important numbers, just in case my phone dies. Old school, but it works!
Think about what information you would need to relay in an emergency. You’ll want to share your location and a brief summary of your situation. Practice that communication in advance, so you’re ready to go when the time comes.
Sharing Your Plan
Don’t just keep your emergency plan to yourself—share it with those close to you. Talk through it with your family, so they know what to do if something goes wrong while driving. It can be helpful to discuss how each person would handle different scenarios.
I’ve found that meeting up with my family and discussing our emergency plans has really boosted everyone’s confidence. It’s a relief knowing we’re all on the same page and can help each other out if need be.
Consider using a messaging app where everyone can access important information like your routines or schedules for added convenience. It keeps communication flowing smoothly during emergencies.
Using Technology
Leverage technology as much as you can. There are some fantastic apps out there designed for emergency assistance. I have a few on my phone that allow me to quickly reach out for roadside help or know where local emergency services are located.
GPS tracking apps can be useful too. If you find yourself lost or in trouble, these apps can help responders know exactly where you are. Just sharing your location with a trusted contact can make all the difference.
Always ensure that your phone is charged before embarking on long trips, and consider investing in a portable charger. That little bit of preparation can be a lifesaver when you find yourself in a tough spot.
4. Understand Road Conditions
Seasonal Changes
Understanding how road conditions change with the seasons is also key. I’ve learned that winter weather can catch you off-guard if you’re not prepared. Snow, ice, and rain can turn a routine drive into a real adventure, and not always in a fun way!
During winter, I take extra precautions—more than just putting snow tires on. I keep an ice scraper and salt in my trunk, just in case. I also make it a point to check the weather before heading out so I’m not blindsided by unexpected storms.
Similarly, in the rainy season, watching out for areas prone to flooding can be a lifesaver. Knowing which routes to avoid can keep you safe and dry.
Traffic Patterns
A solid understanding of local traffic conditions helps as well. I like to use navigation apps to find the best routes during rush hour or when there’s an accident. Those little shortcuts can save a ton of time and frustration!
Beyond knowing traffic patterns, it’s good to be aware of common trouble spots in your area. For instance, if a certain intersection is known for accidents, always approach with caution. Keeping those mental notes can help prevent more serious situations.
Being proactive about these conditions means I can focus on driving safely instead of stressing over unexpected delays. It’s really made my driving experience much smoother!
Vehicle Preparedness for Environment
Your vehicle should be prepared for your specific driving environment. For example, if you live in a rural area, you might want to have a bit more gear handy compared to someone in the city. Out here, you might face more wildlife or even remote terrain challenges.
Understanding how your car performs in different conditions is important, too. I’ve spent time learning how to manage my vehicle’s braking and traction control in various scenarios. This knowledge can be a real lifesaver when the conditions turn tricky.
Sometimes, simply swapping out air filters or using the right fluids for hot or cold climates can help your vehicle perform optimally. The more I’ve learned about my car’s needs, the better prepared I feel!
5. Practice Your Skills
Hands-on Learning
Finally, practice makes perfect! I can’t tell you how many times I’ve watched tutorials on car care and emergency maneuvers, but nothing beats actually getting my hands dirty. Whether it’s changing a tire or using a first aid kit, putting knowledge into action builds confidence.
This past summer, I took a little weekend workshop on basic automotive skills. And let me tell you, it was a game changer! I left not only feeling proud of my new skills but also more prepared for any situation.
Ask a friend or family member if you can practice with them. You can swap skills—teach each other what you know. It’s a great way to bond and reinforce your emergency response skills!
Simulating Scenarios
I also like to simulate emergency scenarios. It sounds a bit silly, but role-playing what to do if my car breaks down or if I get into an accident really helps me think on my feet. You can even practice using your emergency kit!
This isn’t about creating anxiety; it’s about being prepared. Remember the first time I got stranded? My buddy and I had practiced what to do beforehand, and it made a world of difference in how calm I could stay.
Don’t forget to include your loved ones in these scenarios. It’s important they know what to do too. The more you all practice, the smoother it’ll go if you ever find yourselves in a tough spot.
Regular Refreshers
Lastly, keep learning and refreshing your knowledge. I like to read articles or watch videos every few months on car care and emergency preparedness. Things can change, and what I learned a couple of years ago might need updating!
Taking a class or seeking out local workshops can also help. Staying up-to-date makes sure I won’t be shaking in my boots if something goes wrong. Plus, it’s a good excuse to meet new people and share experiences!
So, always keep that curiosity alive! The more you know, the better prepared you’ll be in every driving scenario. Your future self will thank you!
FAQs about Preparing Your Vehicle for Emergency Situations
1. What should be included in my emergency kit?
Your emergency kit should include basic supplies like a first aid kit, non-perishable snacks, water, a flashlight, and a multi-tool. Items tailored to your specific needs, like jumper cables, blankets, and tire-changing tools are also really helpful.
2. How often should I maintain my vehicle?
I recommend doing routine checks every month. This includes looking over your fluids, tire pressure, brakes, and lights. Regular maintenance can catch small issues before they become big problems.
3. What technology can I use for emergency preparedness?
Using navigation apps can help you get roadside assistance quickly. Additionally, there are apps that offer local emergency services, and can even share your location with someone you trust in an emergency.
4. Why is it important to know local road conditions?
Being aware of seasonal changes, traffic patterns, and potential hazards in your area allows you to drive more safely and confidently. Knowledge about road conditions helps you avoid accidents or getting caught in bad situations.
5. How can I practice my emergency response skills?
Hands-on learning is key! Try changing your tire or going to a workshop on basic car care. Simulating scenarios with friends or family can also help prep you for real-life emergencies.