by Preparation | May 8, 2025 | Preparedness
1. Understanding the Basics of Disaster Preparedness
What is Disaster Preparedness?
First off, let me tell you, disaster preparedness isn’t just about having a bunch of supplies stacked up in your basement. It’s about having a plan, knowing what to do, and being ready for anything that comes your way. When I first started looking into this, I realized it’s like creating a roadmap for safety; you need to know the routes you’d take during an emergency.
Different disasters require different plans. Whether it’s a natural disaster like a hurricane or a human-made one, like a power outage, understanding what’s at stake will guide your preparations. For me, having that understanding was like flipping a switch; it made everything else fall into place.
A thorough understanding of potential risks ensures you’re not caught off guard. So grab a pen and jot down what disasters might affect your area. You’ll thank yourself later when you’ve got your bases covered!
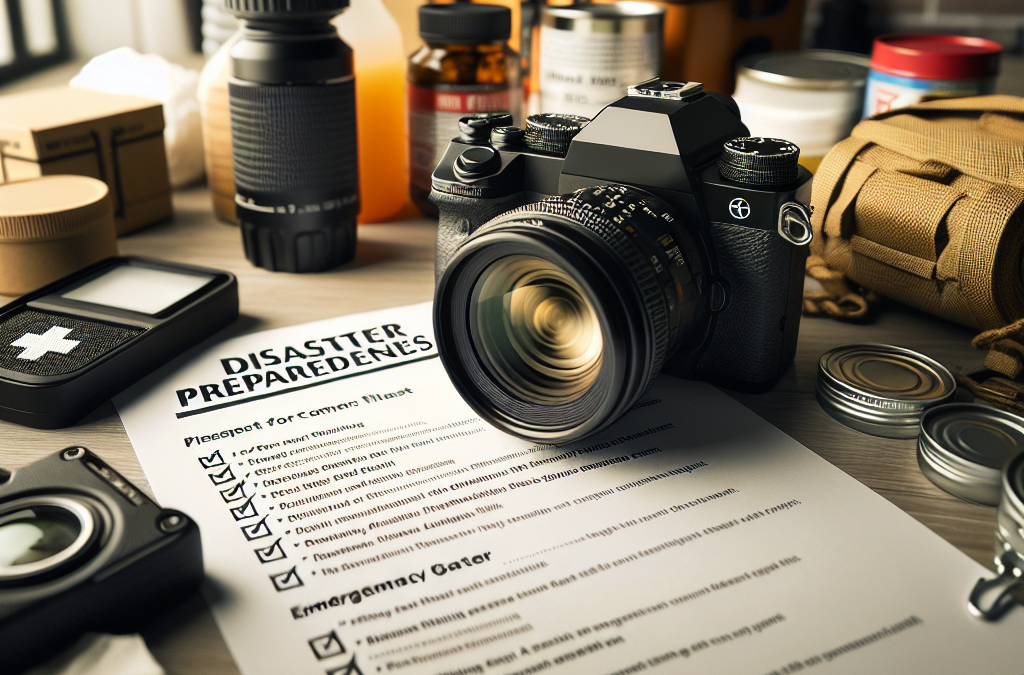
Why Create a Disaster Checklist?
Creating a disaster checklist is like packing your bag before a big trip. You want to make sure you’ve got everything to keep you safe and comfortable. In my opinion, having a checklist gives you peace of mind—it can be pretty nerve-wracking not knowing if you have everything in place.
Moreover, a checklist helps you stay organized. When chaos strikes, your brain might just go to mush. It’s easy to forget critical things! By having a prepared list, you make sure you don’t miss anything essential. Trust me, nothing is worse than realizing you left the flashlight behind in the dark!
Lastly, a checklist is a living document. It should evolve with you; update it regularly as your life changes—new kids, new pets, or even a move. Keeping it fresh ensures you’ll be ready no matter what gets thrown your way!
Components of a Good Preparedness Checklist
Now, let’s break down what goes into these checklists. First, you’ll need basic supplies—think non-perishable foods, water, a first aid kit, and emergency tools. I remember when I built my first kit, and I was amazed at how much stuff I had to consider; I felt like a survivalist!
Then there’s the important aspect of communication. Who do you contact after a disaster? Having a list of family and friends, complete with phone numbers and addresses, is crucial. You don’t want to be searching through your phone in a crisis!
Finally, don’t overlook your insurance and important documents. I learned the hard way that keeping digital copies of essential documents in a cloud storage or a safe place makes everything easier in a pinch.
2. Sources for Reliable Checklists
Government Websites
One of the best places to start looking for reliable disaster preparedness checklists is through government websites. Agencies like FEMA (Federal Emergency Management Agency) have extensive resources that are detailed and regularly updated. These checklists are tailored to various types of disasters, and they really know their stuff!
When I first explored FEMA’s site, I was impressed at how straightforward their materials were. They break down everything you need depending on the disaster you might face. Plus, it’s nice to know you’re getting this info straight from the source!
Sometimes, local government websites can have more specific advice tailored to your area. If you live somewhere with unique risks, they’ll have the goods to keep you prepared!
Non-Profit Organizations
Another great resource is non-profit organizations focused on disaster relief. Groups like the Red Cross not only aid after disasters, but they also publish incredible preparedness materials. I often find their checklists comprehensive and to the point, perfect for someone who wants information without the fluff.
These organizations frequently update their materials and have volunteer programs that can educate you further on preparedness. Participating in their programs has been eye-opening, giving me a greater understanding of what to include in my own plans.
Don’t forget to check their websites for community events or workshops focused on disaster preparedness; you might meet some like-minded folks while getting the intel you need!
Community Resources and Local Workshops
Sometimes, the best resources are right in your community! Local fire departments or community centers often hold workshops or informational sessions on disaster preparedness. I attended one not too long ago—it was surprisingly informative and I met some cool neighbors!
Community discussions are also a fantastic way to learn about what types of disasters are most common in your area. Just listen to others’ experiences, and you’ll pick up helpful tips you might not have thought of.
Don’t miss out on the local library either. They often have books and pamphlets specifically geared towards disaster preparedness that can be a goldmine of information!
3. Tailoring Your Checklist to Personal Needs
Assessing Your Unique Risks
When you create your disaster checklists, you really need to think about your unique situation. What risks do you face? Is it flooding? Earthquakes? Or maybe tornadoes? The first step in tailoring your checklist is acknowledging those risks because what’s relevant for me might not hold true for you.
I’ve found that when I took a close look at what I might face in my region, I could tailor my supplies and preparations accordingly. You’ll be amazed how much peace of mind you get just by knowing you aren’t over- or under-prepared for your circumstances!
Don’t hesitate to consult with friends, family, or local experts to really nail down what you should prioritize based on real-world conditions.
Including Family Preferences and Needs
Now let’s talk about your family. If you have kids, pets, or elderly relatives, you need to consider their specific needs in your checklist. For instance, I learned the hard way that packing some comfort items for my kids made a huge difference in their stress levels during an emergency!
Additionally, any family members with medical conditions may need specialized supplies. Make sure you have extra medications, mobility aids, or anything else critical for their comfort and safety. Tailoring your checklist isn’t just practical; it shows your loved ones you care.
This attention to individual needs creates not only a more effective plan but fosters a sense of teamwork among family members—no one wants to be left out in tough times!
Review and Revise Regularly
One thing I learned through this whole planning process is that a checklist isn’t static. Needs change, and new threats emerge. Make it a habit to sit down once or twice a year and review your checklist, updating as necessary. This way, nothing will slip through the cracks!
It might sound boring, but I often make it a family event. We all gather around and discuss what worked, what didn’t, and what we could do better. It turns into a really good bonding experience, and we often come up with great ideas while chatting!
Plus, regular review keeps everyone on the same page and ready for action if disaster strikes. It’s all about staying informed and being flexible!
4. Online Tools for Disaster Preparedness
Mobile Applications
In this tech-savvy world, there are tons of mobile apps designed specifically for disaster preparedness. Apps like FEMA’s own can send you emergency alerts and reminders about your preparedness tasks. It’s like having a little preparedness buddy in your pocket!
When I downloaded one of these apps, it made my life way easier. I could track what supplies I had at home and even set reminders to review my checklist every few months. This tech could make all the difference when you’re running on adrenaline or just plain busy.
Don’t forget to check the reviews—some apps are more user-friendly than others, so find the one that vibes with your needs!
Online Forums and Communities
The internet is a treasure trove of forums and communities focused on survival and preparedness. Engaging in these spaces not only gives you access to a wealth of knowledge but also connects you with enthusiastic folks who share your interests!
I’ve learned a ton just from reading about other people’s experiences and recommendations. People are always happy to share tips on improving checklists or adding to your disaster preparedness repertoire.
Plus, there’s a certain comfort in knowing you’re part of a community that takes this stuff seriously. It makes the process feel less daunting.
Interactive Educational Resources
Lastly, look out for interactive courses or webinars offered by organizations dedicated to disaster preparedness. I took one a while back, and it changed my perspective completely! Learning from experts kept me engaged, and I picked up some valuable skills along the way.
Many of these courses provide downloadable templates for building your own checklist, which I found incredibly helpful. They guide you through the nitty-gritty details without overwhelming you.
Don’t underestimate the power of hands-on learning—being involved in discussions or simulations really solidified concepts and gave me more confidence in my planning.
5. Sharing Your Preparedness Knowledge
Teaching Family and Friends
It’s great to be prepared yourself, but sharing that knowledge with family or friends amplifies the impact. Have a little family night where everyone discusses the checklist. You can even role-play some emergency scenarios together!
Seeing those around you educated and prepared can ease your own worries. Trust me; I feel way less anxious about emergencies when I know my family has done their homework. Plus, it encourages a culture of responsibility!
Sharing your checklist and experiences can empower those around you to prepare; birdies of a feather flock together, right?
Engaging with Your Community
Consider organizing community preparedness fairs or workshops! You’d be surprised how many folks are willing to join in. Just a little gathering can start discussions and raise awareness about disaster preparedness.
Sharing resources can help ensure that everyone in your area has access to vital information. I’ve seen communities come together after disasters, and laying the groundwork beforehand makes a huge difference.
Encouraging informed conversations about preparedness helps foster resilience in the community, allowing you all to bounce back together in times of crisis!
Using Social Media for Outreach
In today’s world, social media can be a powerful tool for sharing knowledge. Posting tips, resources, or inspiring stories can ignite interest among your followers. I often share little snippets of what I’ve learned because it’s a conversation starter!
Plus, platforms like Facebook or Instagram can help you create groups focused on disaster preparedness. This way, everyone can share their knowledge and support each other in being proactive.
Letting people know you care about their safety not only enhances your preparedness but enriches your connections with others.
Frequently Asked Questions
1. Where can I find the most reliable disaster preparedness checklists?
Government websites like FEMA and non-profit organizations such as the Red Cross are excellent places to find reliable and updated disaster preparedness checklists.
2. How often should I update my disaster preparedness checklist?
It’s a good idea to review and potentially update your checklist at least once or twice a year. Changes in living situations, health, and available resources should be reflected in your plans.
3. What should I include in my disaster supplies kit?
Your disaster supplies kit should include basic supplies like non-perishable food, water, a first aid kit, communication tools, necessary medications, and important documents.
4. How can I engage my community in disaster preparedness?
You can engage your community by organizing workshops, sharing resources on social media, or even hosting community gatherings focused on preparedness. Collaboration increases overall safety!
5. Are there any apps to help with disaster preparedness?
Yes! There are several mobile applications designed for disaster preparedness, such as FEMA’s app, which can send alerts and provide you reminders for your checklist tasks.
by Preparation | May 8, 2025 | Preparedness
1. Increased Confidence in Personal Skills
Empowerment Through Knowledge
One of the first things I noticed when I started focusing on self-reliance was a huge boost in my confidence. Learning new skills, whether it’s growing my own food, repairing my home, or knowing how to cook from scratch, made me feel empowered. There’s something about being knowledgeable that does wonders for your self-esteem. It’s like I finally realized, “Hey, I can do this!”
Every time I learned a new skill, such as sewing or woodworking, I felt less reliant on others. The first time I fixed a leaky sink by myself, I was on cloud nine. It’s incredible how small achievements can lead to a mountain of confidence over time. Because when you rely on yourself, you start believing in yourself.
This newfound confidence spills over into other aspects of life too. It changes your mindset—suddenly you see challenges as opportunities to grow. Instead of running for help at the first sign of trouble, you start to think, “What can I do to fix this?” It shifts your whole perspective!
Preparedness for Unexpected Situations
Life is unpredictable, right? When I made self-reliance a priority, I felt much better prepared for whatever might come my way. Whether it was a sudden job loss, an emergency at home, or even the global pandemic, I found that I was able to handle situations better simply because I was more self-sufficient.
This preparedness not only applies to physical emergencies like power outages or natural disasters, but also to economic ones. Knowing how to can your own food or even have a small emergency fund set aside gives you a sense of security that is priceless.
As I became more proactive, I started to see problems from a different angle. Instead of feeling overwhelmed by emergencies, I felt like they were just challenges waiting to be tackled. I mean, who wouldn’t want that level of calm in chaotic times?
Developing Problem-Solving Skills
With every obstacle I faced, whether big or small, I began honing my problem-solving skills. The more I relied on myself, the more I had to think creatively about how to solve problems. I can’t tell you how many times I had to figure out how to patch a hole in my car without a mechanic!
This creative thinking spills out into everyday life too. It’s amazing how you can adjust your approach to small nuisances in life; say, fixing up old furniture instead of buying new. That’s not just self-reliance at play, but a way to make life a little more exciting and fulfilling.
It’s like becoming your own personal MacGyver. And hey, who wouldn’t want to feel like they could tackle anything that comes their way—whether it’s an unexpected bill or an appliance that’s on the fritz?
2. Financial Independence and Savings
If I Can Do It, Why Pay for It?
When I embraced self-reliance, one of the first things I noticed was my finances reshaping in a positive way. Tackling tasks myself—like landscaping or home repairs—cut costs significantly. It’s kind of wild how you can save a chunk of change just by putting in some elbow grease!
After a while, I could type up a lengthy list of things I no longer paid for. Fancy dinners out were replaced with home-cooked feasts, and I found myself spending less on clothes thanks to thrifting and upcycling. The savings added up pretty fast! It’s a collective effort, and the best part is you usually end up with a bigger sense of accomplishment.
This financial independence means I have more freedom with my money now. I have the ability to invest and save for what actually matters to me rather than dishing it all out for services I can provide myself. You get a real sense of control over your financial future.
Strategic Budgeting Skills
Not only have I saved money, but I’ve also sharpened my budgeting skills. It’s crucial to keep track of what I spend versus what I save. I started paying attention to my expenses in a way I never did before, which is super empowering. You really start to see where your money goes!
I began using apps and tools to help me track where I could cut back, and it became almost a fun little game. I set challenges for myself around savings, and it became satisfying seeing those numbers go up. It’s like playing Monopoly but in real life!
Moreover, this skill applies in multiple areas—whether it’s planning a trip or figuring out how to allocate money for emergencies. The growing ability to strategize makes me feel more stable overall.
Investing in Future Security
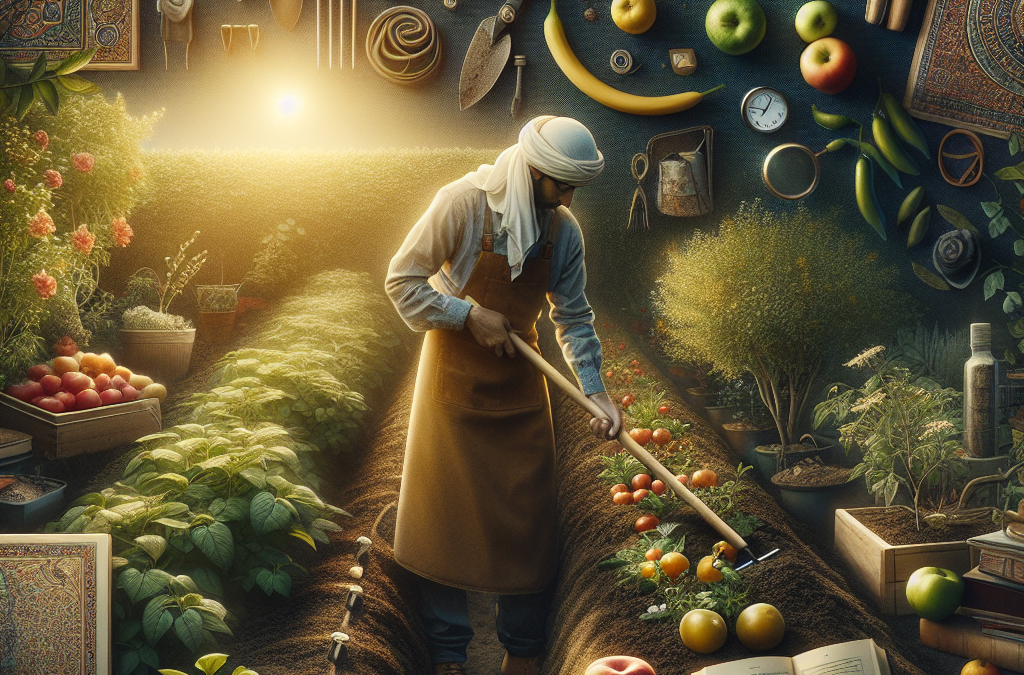
Another major perk of self-reliance is the ability to invest in things that will boost my long-term security. I’ve prioritized learning how to grow my own food, which not only helps with the grocery bill but also sets me up for sustainable living.
This type of investment isn’t just a financial one. It’s about investing time in learning new skills that will benefit me in the long run. I’ve even found some community resources that guide you in sustainable agriculture—a double win!
Ultimately, all these smart moves lead to a sense of safety, knowing that I have the tools to be less reliant on the system. It’s comforting to know I’m building a future based on sustainable choices and not simply reacting to whatever life throws my way.
3. A Deeper Connection to Nature
Understanding the Natural World
As I delved into self-reliance, I found myself connecting with nature in ways I never anticipated. From growing my own vegetables to foraging for wild edibles, I developed a genuine appreciation for the environment surrounding me. It’s not just about living off the land, but about understanding it.
This exploration led to countless “aha!” moments. I discovered the subtle changes in seasons, learned how various plants can offer nourishment, and connected with local wildlife. My backyard became a mini-laboratory where I stopped and just observed.
There’s something grounding about being more attuned to nature. I feel more centered and harmonious with my surroundings. Plus, the environment is just downright beautiful and knowing how to co-exist with it adds a layer of richness to my life.
Promoting Environmental Sustainability
Self-reliance isn’t just about personal skills; it’s also about making more sustainable choices. I transitioned to using biodegradable materials and reducing waste, and let me tell you, it feels incredible! It’s nice to know that I’m playing a part in preserving the environment while also feeding myself.
Gardening, composting, and upcycling have become super rewarding projects. It feels good to know I’m making a positive impact. Plus, I’ve seen just how little I can live on without contributing to the waste that often comes with consumerism. Every small step counts!
This aligns perfectly with my belief that our planet deserves care and respect. It’s about being mindful and living with purpose. So, embracing self-reliance also turned into a chance to promote greater environmental consciousness.
A Sense of Community and Collaboration
While self-reliance often makes me think of solitary pursuits, it also opened doors to amazing community connections. By diving into this lifestyle, I found neighbors sharing resources, ideas, and skills. We banded together to learn from one another, whether it was sharing gardening tips, hosting workshops, or trading home-grown produce.
The feeling of camaraderie is great. It shows that self-reliance isn’t solely an individual endeavor; rather, you gather a supportive network along the way. It enhances the whole experience. Knowing there’s a tribe behind you can make even the toughest projects feel manageable.
I’ve learned so much from others’ experiences and enthusiasm. It’s an enriching cycle where everyone wins. We share knowledge and resources, and it turns into a challenge that’s way more fun and engaging.
4. Enhanced Emotional Well-being
Improved Mental Resilience
Focusing on self-reliance has done wonders for my mental well-being. I’ve cultivated a resilience that allows me to tackle challenges head-on. When you’re self-sufficient, you learn to adapt. Whether it’s dealing with a tough job or personal issues, I feel I’ve grown more stubborn in a good way.
This resilience has helped me deal with stress and anxiety in a healthier manner. As I embrace challenges, I find myself becoming better equipped to handle life’s ups and downs. There’s a sense of empowerment that comes with knowing you can navigate troubling waters by relying on your own strength.
It’s like building muscle for your brain. The more you exercise that ability to adapt and overcome, the stronger and more capable you become in various situations, which greatly lifts your emotional state.
Creating a Sense of Purpose
Living a self-reliant lifestyle infuses my daily routine with purpose. I find satisfaction in caring for myself and my surroundings, which is a big mood booster. Whether it’s cooking a meal from scratch or completing a DIY project—those little victories accumulate into an overwhelming sense of accomplishment.
This newfound purpose extended to my broader life goals. I became more intentional about how I spend my time and energy, which has led to happier living. I’ve crafted a life that’s focused on what truly matters to me. This clarity lifts up my spirits every day.
Also, having purpose means having something to look forward to. Whether it’s growing a new crop or mastering a new skill, there’s always a next step to chase, which boosts my overall happiness and satisfaction in life.
Building Stronger Relationships
Surprisingly, choosing self-reliance has strengthened my relationships. As I began sharing my knowledge and experiences with friends and family, I noticed the warmth that came from connecting over common projects or goals. Even simple tasks like making jam or gardening together turned into memories we cherished.
This collaborative spirit has helped foster a sense of belonging. When you’re part of a community that values resilience, it only enhances your connections with one another. We uplift each other through shared expertise and experiences.
Ultimately, those stronger relationships lead to a more fulfilled and balanced life. There’s something heartwarming about doing life alongside others who appreciate the journey toward self-sufficiency. Togetherness coupled with resilience can create powerful bonds.
5. Lifelong Learning and Growth
Endless Opportunities for Learning
One of the coolest aspects of embracing self-reliance is that there’s always something new to learn. From knitting to woodworking or solar power—every day offers up a lesson. This lifestyle keeps me on my toes and stirs my curiosity, which keeps life vibrant and refreshing.
Learning new skills ignites that childhood excitement of “what’s next?” It can be anything from diving into homesteading or exploring natural remedies. Once you get started, the possibilities are truly endless!
Furthermore, I’ve made it a habit to remain adaptable and open-minded. It’s no fun to stagnate. The more skills I learn, the more I notice that I want to keep pushing myself. This creates a hunger for knowledge that’s hard to beat.
Pursuing Passion Projects
Self-reliance has also opened doors for me to pursue projects I’ve always dreamed about but never dared to tackle. For instance, I’ve been dabbling in writing and photography while documenting my progress in self-sufficiency. It’s super rewarding to see the fruit of that labor unfold!
These passion projects fill my life with happiness and creativity. Instead of spending free time idly, I’m crafting stories and taking photos that tell my journey. They represent all the trials, errors, and ultimate successes that come from stepping out of my comfort zone.
It’s about living fully and allowing the things I love to intertwine with the skills I’m mastering. It nurtures my soul while keeping life interesting, and honestly adds spark to my everyday routine. What a combination!
Embracing Change and Growth
Self-reliance naturally fosters a mindset that encourages personal growth. The more I embrace this lifestyle, the more I recognize change as an opportunity instead of a hurdle. It morphs your outlook and helps you tackle any changes head-on rather than hiding or running away from them.
This growth mindset translates into so many areas of life: relationships, career, personal development—the way I tackle challenges has transformed. It fosters adaptability and encourages me to embrace the unpredictability of life.
Moreover, acknowledging that growth can be uncomfortable allows me to find comfort in discomfort. It’s truly liberating! I feel more prepared for changes down the road, and that’s a beautiful thing to carry into my future.
Frequently Asked Questions (FAQs)
1. What are the main benefits of self-reliance?
Some of the key benefits include increased confidence in personal skills, financial independence, a deeper connection with nature, and enhanced emotional well-being. It really transforms the way you approach life!
2. How can self-reliance affect my financial situation?
Self-reliance encourages you to manage your resources better. By doing things yourself—like cooking and DIY projects—you reduce expenses and learn valuable budgeting skills, leading to better financial health overall.
3. Is self-reliance purely an individual endeavor?
No way! While it promotes independent living, it also fosters community. You’ll often find connections with neighbors or friends who share interests and support each other’s goals, making it a collaborative effort!
4. How do I start on a path to self-reliance?
Begin by identifying skills you want to learn or projects you want to undertake. Start small and gradually build your skill set as you gain confidence. Whether it’s a DIY project or learning to grow your food, every step counts.
5. Can self-reliance contribute to personal happiness?
Absolutely! By gaining control over your skills, finances, and environment, you create a fulfilling lifestyle. The sense of accomplishment and deeper connections that come from self-reliance can lead to greater happiness and emotional well-being.
by Preparation | May 8, 2025 | Preparedness
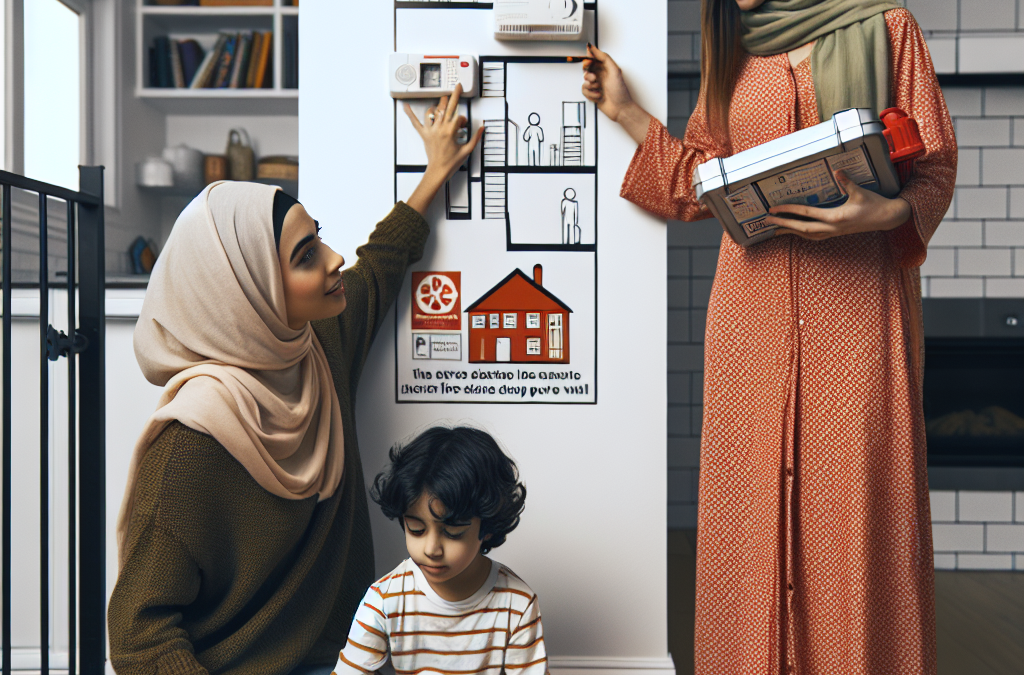
Create an Emergency Plan
Gather Your Family
So, the very first thing I did was bring the family together. It’s super important to sit down as a unit. I made sure everyone, from the little ones to the adults, understood the gravity of the situation—any emergency can knock on our door at any time.
We talked about what emergencies could happen—natural disasters, fires, and even home intrusions. It’s not all doom and gloom, but knowledge is power! Each family member felt more involved and it made the discussions way less scary.
Everyone had a voice; we tossed around ideas about the best ways to react in emergencies. This isn’t just a mom or dad thing; it’s a team effort to make sure we’re all on the same page when things hit the fan.
Assign Roles
After we established our plan, the next step was assigning roles. This was something that truly made me feel comforted! I assigned simple and clear responsibilities, so if something happens, everyone knows what to do without scrambling.
For instance, I designated one of my kids to grab the emergency kit, while another was in charge of keeping track of our pet. Knowing who’s doing what helps a ton to keep our minds clear during chaos. It made them feel important, and that little boost of confidence is key.
Every role was age-appropriate. I remember my youngest was proud to help by dialing an emergency number. Making them part of the solution really eased my nerves—if everyone knows their part, we’re much more likely to succeed!
Regular Drills
Next up was the fun part—practicing! We started conducting regular drills. I turned them into games to keep the atmosphere light and engaging. Kids love playtime, and it makes learning less intimidating!
Doing these drills made it clear what needed to be done without panic. It’s amazing how these repetitive actions became second nature for us all. We’d practice logging out of our home quickly, taking our emergency kit, and checking in with each other afterwards.
I can’t stress enough how vital those moments are; when the real deal comes knocking, it’s too late to be figuring things out. So, we made it a tradition—silly but effective in getting our kid’s little hearts ready for the “what ifs.”
Emergency Supplies
Pack an Emergency Kit
Now, let’s talk about emergency supplies! I can’t stress this enough: having an emergency kit ready is crucial. I created a checklist, or as I like to call it, our ‘survival backpack’!
This kit is stocked with essentials like water, snacks, first aid supplies, and flashlights. I made it a rule to check it every six months and rotate the snacks. Trust me, you don’t want scampering kids and expired granola bars when the stress is high!
There’s a certain peace of mind that comes with knowing you have what you need ready to go. Next time a storm is brewing, I know I won’t be flying by the seat of my pants—I’ve got our backs covered!
Plan for Basic Needs
Aside from just the emergency kit, I made sure we had plans for basic needs too. That means knowing where to find alternative sources of food, light, and warmth. We diversified our supplies beyond the initial kit.
For instance, we now keep extra blankets and warm clothes in our car, just in case we find ourselves stuck somewhere. It’s about being proactive rather than reactive. No one wants to find themselves cold and hungry; it’s about ensuring comfort in discomfort.
We even researched local shelters and resources, so we’d know where to turn in case home isn’t safe. Making these plans gave me an overwhelming sense of responsibility; the “What ifs?” could now have answers.
Regular Updates
Just as important as packing the kit is making sure it’s updated! I learned the hard way that supplies can change, kids grow, and what we need may vary over time. So, keeping our emergency kit fresh was essential!
I began scheduling those refreshes on our family calendar to make them a priority. A simple reminder helps us remember, “Hey, it’s time to sift through the emergency stuff!” and we all get excited about it together!
It’s a great bonding time, sorting out what’s still useful and perhaps letting go of things we no longer need. Update your kit, and it gives another angle of peace, knowing you’re all prepared for whatever comes your way.
Communication
Establish Safe Words
The next gem I discovered is communication. Establishing safe words can be a literal lifesaver. We came up with words that would signify we need to act securely without creating too much panic.
For example, if I shout “pineapple,” everyone knows it isn’t a joke—they need to gear up and follow the backup plan. It’s fun to see the kids shout it out around the house, knowing it means serious business when it counts!
This ability to communicate effectively brought us much closer. By establishing these codes, we ensure that a stressful situation does not spiral into chaos; clarity transforms what could have been confusion.
Emergency Contacts
Another crucial aspect of communication is having updated emergency contact lists. I made it a habit to have my family’s contacts written out, including out-of-town relatives who can help.
We put this list on the fridge to ensure it’s visible. The kids learned how to dial those numbers, giving them a solid grasp of who to reach out to when needed. It’s all about making sure they feel a sense of safety in their ability to communicate.
This is doubly important in an age where phones can die. A little old-school paper works, too! We even laminated our list so it stays intact. I encourage you to gather those numbers, as it truly saves worry when the chips are down.
Community Resources
Engaging with community resources and emergency services can bolster our safety protocol. We reached out to our local sheriff’s office to understand better what resources were available, which led to some invaluable insights!
They provided resources for neighborhood watch programs and local shelters. That networking helped us stay informed about community drills or exciting family safety events, encouraging more families to be aware and prepared.
Once we participated in a local emergency preparedness fair, the kids loved learning about it while also earning some fun giveaways. Getting involved nurtured a supportive environment for the whole family. Two heads are better than one, right?
Stay Informed
Emergency Alerts
Staying informed is key. I’ve set up emergency alerts through our local government and weather services. Getting these alerts can really help navigate through potential disasters before they strike.
There’s nothing worse than being caught off guard! Our phones buzz, and I gather everyone around to explain what we need to do next. This knowledge ahead of any emergency is empowering and helps decrease panic levels.
Besides, it’s cool to be in the know. I mean, who doesn’t love feeling like the family hero with timely updates? It has also encouraged my kids to pay attention to the world around us.
Trustworthy Sources
In our digital age, there’s a ton of info online—but not all of it is trustworthy. I’ve established a list of reliable sources that I check for updates, like the CDC or local government pages.
I talk with my family about fact-checking and distinguishing between real news and clickbait. I think it’s so important to instill that understanding in them early on; it builds a strong knowledge base.
We even decided to turn it into a family project; they’d grab a news source and share what they found, and we’d discuss it. Keeps them engaged while learning what’s trustworthy, and earns parental brownie points!
Regular Family Meetings
Lastly, I can’t emphasize enough the importance of regular family meetings. We set aside time to gather everyone to share updates on our emergency plan. It’s as much about sharing knowledge as it is a reunion.
This leads to open discussions about any concerns, adjustments in plans, and sharing our success stories from practicing drills. It warms my heart to see the kids taking pride in what they’re learning!
Reinforcing this ongoing open communication fosters a safety net of support and knowledge that will carry us through any emergencies. It’s more than just plan updates; it’s our family growing together!
Conclusion
Keeping my family safe in an emergency boils down to preparation, communication, and education. From creating a solid emergency plan to building bonds through practice, every step I’ve taken has been rewarding.
It gives me peace to know that we are well-prepared. Setting everything in motion has not only enhanced our safety but transformed our family dynamic—creating an encouraged and united front.
So, I encourage you not to wait. Take that next step in preparing your family—it’s one of the best things you can do for peace of mind. Remember: it’s a journey, and every small effort counts!
FAQ
1. What should be included in an emergency kit?
Ideal items include water, food, a flashlight, batteries, a first aid kit, and personal medication. Tailor it to the specific needs of your family!
2. How often should I review and update my emergency plan?
It’s a good idea to review your plan at least every six months or after any significant life changes, like moving or adding new family members.
3. What is a good way to establish a family communication plan?
Gather your family and discuss roles and safe words, and ensure everyone knows how to contact each other during an emergency. Keep that list handy!
4. How do I find trustworthy emergency resources online?
Stick to official resources like government websites, the CDC, and trusted news outlets. Always cross-check information for accuracy!
5. Can community resources help during an emergency?
Absolutely! Engaging with community resources can provide critical support, and networking helps you stay informed about local safety initiatives.
by Preparation | May 8, 2025 | Preparedness
1. Strengthening the Structure
Assessing Current Structural Integrity
When I started thinking about disaster resilience, my first step was to take a hard look at my home’s structure. I poked around, checking for any signs of disrepair. Cracks in the walls or a shaky foundation can be big red flags. I even called in a local contractor who had experience with disaster preparedness. They gave me a thorough assessment and made some recommendations that really opened my eyes to potential risks.
One thing I found super helpful was understanding the different materials used in my home. For example, masonry buildings tend to be stronger against wind and water damage compared to wood. Knowing what I was working with helped me prioritize which areas needed the most attention.
After the assessment, I made a list of repairs and upgrades, from bolstering beams to reinforcing roofs. It was a bit of an investment, but I knew these changes could save me a heap of trouble if disaster ever struck. Plus, feeling safe in my home is totally worth it!
Upgrading Materials
Once I knew what needed fixing, I focused on upgrading materials to something sturdier and more disaster-resistant. I swapped out old windows for impact-resistant ones, which is a game changer if you live in a hurricane zone like I do. It took some getting used to seeing the price tag, but man, the peace of mind was unbeatable.
I also tackled my roofing. By choosing a durable metal roof, I not only improved the lifespan of my home’s covering but also its resistance to extreme weather. It was a big chunk of change upfront, but it paid off when I had lower insurance premiums and fewer worry lines on my forehead!
Lastly, I added some exterior features, like storm shutters and reinforced doors. These upgrades made me feel like I could batten down the hatches and keep the bad elements at bay. Trust me, these little tweaks can make a world of difference!
Creating Safe Spaces
I knew I had to think about where to hang out during a disaster. For that reason, I dedicated a part of my basement as a safe room. The combination of sturdy construction and stored supplies created a reassuring atmosphere. I furnished it with comfy blankets, some food, and even a little entertainment, just in case we were in there for a while.
I also took a moment to think about my yard. I removed any big trees that could potentially come crashing through if high winds hit. It’s such a bummer to lose some greenery, but I always remind myself it’s better than losing my roof or worse!
Having a safe space didn’t only mean physical safety. Psychologically, it helped my family feel more secure. We even did some emergency drills together, which eased those pre-disaster jitters and made for some bonding along the way!
2. Emergency Preparedness Plans
Creating a Family Plan
Setting up an emergency preparedness plan with my family was probably one of the most important aspects I tackled. We gathered around the kitchen table and discussed various scenarios – everything from flooding to tornadoes. Just getting it all out there started some great conversations.
Each family member had a role to play, which made things less overwhelming. We established a meeting point and reviewed multiple escape routes out of the house. Knowing we were all on the same page put me at ease. In a chaotic moment, it’s comforting to know exactly what to do.
I made sure to jot everything down and keep copies handy. Plus, digital copies stored safely in the cloud were a lifesaver. Trust me, having a plan ready gave me a sense of control over any situation. It’s kind of like having a backup battery for your phone – you never realize how essential it is until it’s needed!
Building an Emergency Kit
Next up was assembling an emergency kit. I scoured some checklists online and began gathering essentials like non-perishable food, water, flashlights, and first-aid supplies. I won’t lie, it felt like a bit of a scavenger hunt, but it was oddly satisfying slotting each item into my designated storage bins.
Incorporating some personal touches to that kit made it less of a chore. I added my favorite snacks and books to keep everyone’s morale high. Trust me, when you’re hunkered down, a little comfort food can go a long, long way!
I also made sure to rotate the food and check expiration dates regularly. There’s nothing worse than thinking you’re all prepared only to find outdated supplies when you need them most. A little upkeep every month kept my kit ready for action!
Staying Informed
I finally realized that being disaster-ready also means staying informed. I signed up for local weather alerts and followed the news to stay on top of any approaching threats. Having that information at my fingertips helped me make timely decisions and stay a step ahead.
I also talked about important resources with my neighbors. Community is everything, and knowing my neighbors had a plan made me feel like we were all in this together. Plus, we exchanged tips that opened my eyes to additional resources I had never considered before.
And let me tell you, I also developed a trust in the Red Cross apps that can provide safety information during disasters. It became one of those things I didn’t want to live without, ensuring I had access to critical information no matter what!
3. Insurance and Financial Preparedness
Reviewing Insurance Policies
Now, let’s talk about a less exciting topic: insurance. It might not be as thrilling as picking out new plants for your garden, but trust me, understanding your insurance policy is crucial. I spent an afternoon going through my coverage, and it was eye-opening, to say the least.
Many policies vary widely in what they cover. I learned that my standard homeowners’ insurance didn’t cover flood damage, and that would have left me hanging out to dry. After some research, I found additional policies that fully covered me, especially since living in a flood-prone area is a reality I face regularly.
Reviewing and adjusting my coverage regularly became a habit – just like changing the batteries in smoke detectors. I set reminders a couple of times a year to ensure I’m never caught off guard, and I suggest making a plan to do the same!
Financial Preparedness
You know how they say cash is king? Well, that phrase becomes particularly valid in a disaster. I decided to stash away some cash, just in case bank access was restricted. I learned that having emergency funds on hand can ease so many worries during a turbulent time.
Additionally, creating a detailed inventory of my possessions was a game changer. I took pics and recorded values, which could help with insurance claims later. I stored everything on a secure cloud service, so I could access it whenever necessary.
Cleaning out old stuff and documenting it also felt surprisingly therapeutic. Who knew disaster prep could lead to a decluttering spree? Not to mention, it made my home a bit more organized, which I love!
Community Resources
Finding out what local resources are available is another significant step that often gets overlooked. I discovered a ton of programs through my local government and community organizations designed specifically for disaster preparedness. They had training sessions and even offered discounts on emergency kits!
Joining a local neighborhood group helped me network with others who share similar concerns about preparedness. We’ve had some epic book exchanges, but more importantly, we strategized and learned from each other’s experiences, which was invaluable.
And don’t get me started on the workshops! Some were even hosted by retired professionals who shared electric information. I learned so much and made friends along the way, too. The power of community can do wonders when it comes to facing potential disasters!
4. Landscaping for Safety
Choosing the Right Plants
Let’s dig into landscaping because, boy, did it make a difference for my disaster resilience. I took a good hard look at my garden, and I realized I could use my plant choices to my benefit. Certain trees and shrubs are more wind-resistant, which can help during storms.
For example, choosing deep-rooted trees like oaks over shallow-rooted species like pine can provide better stability, and they resist uprooting during a storm. I carefully planned my garden thinking about potential wind patterns and the best spots to plant those sturdy plants!
I also made sure to keep my landscaping away from home structures. Fire-resistant plants like native grasses are not just great for controlling erosion, but they create a buffer zone if wildfires hit. It’s all about creating a protective barrier while still rocking that garden aesthetic!
Drainage Solutions
Another essential factor in my yard was proper drainage. Being near a waterway, I learned the hard way that standing water can wreak havoc during heavy rains. I invested in grading my yard to encourage water to flow away from my home, which literally saved my foundation from water damage.
I also added features like French drains and rain gardens, making my garden not only beautiful but functional. These installations not only help absorb rainwater but also give wildlife a little place to thrive!
Plus, it’s a fun conversation starter during BBQs – trust me, friends dig it when they hear about your awesome environmental consciousness!
Wildfire Defensible Space
If you live in an area prone to wildfires like I do, establishing a defensible space is a must. I made a ten-foot buffer around my home by cutting back branches and ensuring that any flammable materials were nowhere near the structure. It felt like I was building a fireproof fortress!
I added gravel paths, which help break the continuity of vegetation, as well as some strategically placed stones. It was kind of like creating my very own mini-defense station and helped keep my house safe no matter the season.
Talking to a fire mitigation expert opened my eyes to even more incredible strategies. Having backup plans and strategies for fire spread provided some serious relief and put me on high alert!
5. Regular Drills and Maintenance
Emergency Drills
Just like every good team, practices make perfect. I realized that conducting regular emergency drills with my family was not just beneficial but downright essential. Every few months, we would run through our plan from start to finish.
It became almost routine – we would practice how to exit our home quickly and gather at our designated safe spot. I incorporated fun elements to break the tension, such as timing ourselves to see how fast we could evacuate. It’s amazing how much laughter and preparation can go together!
Having kids made it even more enjoyable. They loved playing their roles, while it reinforced the seriousness of being prepared. It sparked some discussions, too, about what to keep in our kits and how to stay calm in emergencies!
Regular Maintenance Checks
Routine home maintenance checks became my new weekend project. I set aside time every month to inspect my home — from checking smoke detectors to ensuring gutters were clear. There’s nothing quite like that feeling of being proactive!
I also made sure my emergency kit remained fully stocked and updated. Just last month, I swapped out my old flashlights for some new ones, and I even added a portable charger for my phone. Staying ahead of the game kept me relieved and ready!
And let me tell you, keeping up with yard work and repairs not only helps with disaster prep but gives my home that homely vibe, you know? It’s like a double win!
Reviewing and Adapting Plans
As life changes, so must our emergency plans. I regularly took time to review and update them. When I got a new pet, for example, I made sure to adjust our drills and kits accordingly. Keeping the family on the same page was key.
I also sought feedback from family members about our plans. This way, I could tweak things based on preferences and ideas. After all, resilience isn’t just about stockpiling supplies; it’s also about having everyone engaged in the process.
Mixing it all up kept things interesting and reminded us that being prepared is ultimately a team sport!
FAQs
1. What is disaster resilience?
Disaster resilience refers to the ability of a home or community to prepare for, respond to, and recover from various disasters, such as floods, hurricanes, or fires. It involves a combination of structural integrity, emergency preparedness, and community involvement.
2. How often should I review my disaster preparedness plan?
It’s best to review your disaster preparedness plan at least twice a year. However, each time there are significant changes in your living situation, such as new family members or moving, you should take the time to adjust your plan accordingly.
3. What should I include in my emergency kit?
Your emergency kit should include essentials like non-perishable food items, a battery-powered or hand-crank radio, water, a first-aid kit, a flashlight, extra batteries, and any necessary medications. Personal touches like favorite snacks or comfort items are excellent additions, too!
4. Can landscaping help in disaster preparedness?
Absolutely! Choosing the right plants, ensuring proper drainage, and creating defensible spaces in your yard can significantly enhance your home’s resilience against natural disasters. It’s a great way to combine beauty with functionality!
5. What role does community play in disaster preparedness?
Community plays a crucial role in disaster preparedness. Sharing resources, supporting each other during emergencies, and participating in local training initiatives can strengthen overall resilience. Together, communities can create a robust safety network that benefits everyone!
by Preparation | May 8, 2025 | Preparedness
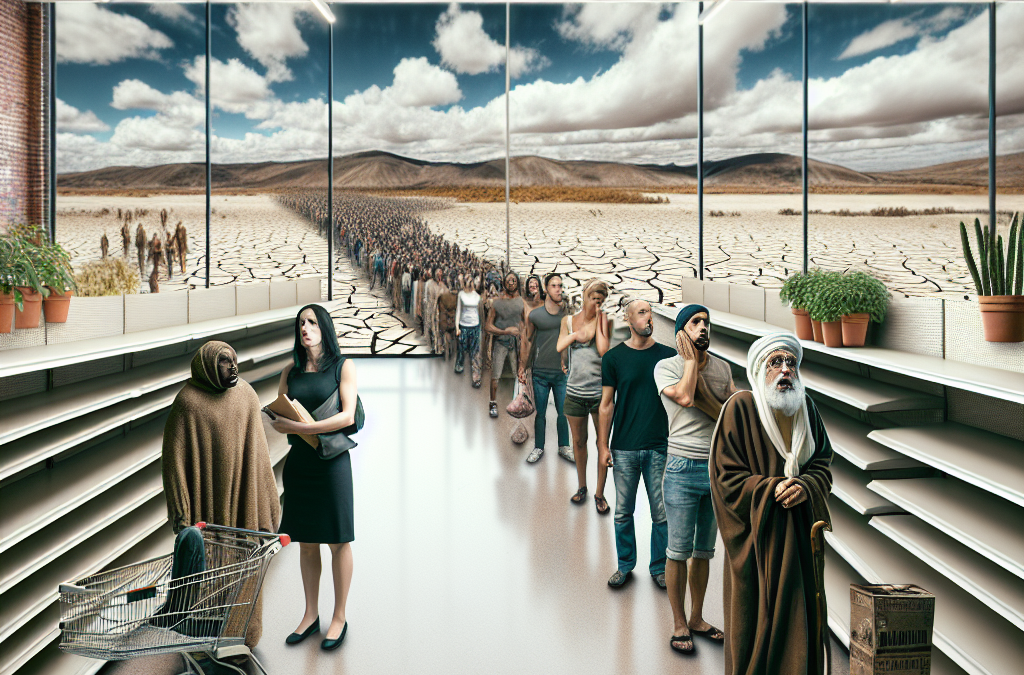
Increased Food Prices
Understanding Supply and Demand
One of the first things that come to mind when I think about food shortages is how supply and demand work. If there’s less food available, the prices naturally spike. I’ve seen this during various crises, where folks scramble to grab what they can, driving prices up dramatically. It’s like watching a stock market surge, but this time, it’s your groceries!
Let me tell you, if you’re not prepared for this unpredictability, it can hit your wallet hard. Imagine needing basic staples like rice or flour but finding that the price has doubled or even tripled overnight. Trust me, that’s a tough pill to swallow.
To avoid this, keeping a stockpile of essentials can save you not just money, but a lot of stress. You won’t have to rush to the store, and you can avoid those inflated prices when things get tight.
Long Lines and Empty Shelves
As someone who has been through the panic buying phase, I can tell you firsthand that the sight of empty shelves can be gut-wrenching. Picture this: you head into the grocery store expecting to grab some milk and bread, only to find that everyone else had the same idea! Long lines and bare aisles quickly become the norm during food shortages.
If you’re not prepared, you risk running out of necessary items. Plus, those long waits can eat up your precious time, leaving you frazzled and frustrated. It’s one experience I wish on no one!
By planning ahead, you can stock up on what you need without feeling that rush. You’ll have your essentials at home, and you won’t have to worry about the chaos as everyone else starts panicking.
Dependency On Others
Another downside to not preparing is becoming overly reliant on others. If food shortages hit and you find yourself without supplies, you’ll be dependent on what’s available around you. This dependency isn’t just about struggling to find food; it can also lead to vulnerability.
I’ve seen people feel uneasy about asking neighbors for help, and it’s tough to witness. It’s frustrating to know that you could have been self-sufficient if only you had prepped a bit more. You don’t want to find yourself in a position where you’re scrambling for help when you could have been covered.
Being independent means confidence. By stocking up before an emergency, you can stand your ground, knowing you have what you need without scrambling for assistance from others.
Health Concerns
Nutritional Deficiencies
When food becomes scarce, I worry about nutrition. If you’re not stockpiling nutritious food, your meals may lean towards whatever is available. This can lead to significant nutritional deficiencies, which is no joke, folks!
I recall a time when I let my pantry run low, and I ended up eating takeout way more often than I’d like to admit. It was only after a few weeks that I noticed a dip in my energy levels and overall mood. It’s easy to overlook this until it slaps you in the face.
To prevent these health issues, make sure to stock up on a variety of foods—nuts, grains, and canned veggies can be lifesavers. This way, you can keep a balanced diet, even during a shortage.
Food Spoilage and Waste
One aspect that saddens me about food shortages is the waste that can often accompany them. If you’ve got extra food that you’re not using, it can spoil and rot away. I’ve experienced this, where I had too much food that went bad before I could finish it. It’s a frustrating loss that can easily be avoided with better planning.
Understanding what you’ll realistically use can help mitigate spoilage. I started keeping track of what my family actually consumes, and it has helped tremendously. Not only do you save money, but you’re also reducing waste—good for your wallet and the planet!
So, while preparing is essential, knowing how to prep wisely is equally vital. Stock just enough to maintain a balance without relying on excess that can spoil.
Emotional Stress
One thing I can’t emphasize enough is the emotional toll of food shortages. The thought of having insufficient supplies weighs heavily on a lot of people, including me! The feelings of anxiety can be overwhelming, and I’ve heard this from friends and family as well.
No one wants to face the uncertainty of where their next meal is coming from. It affects your overall outlook, leading to stress not just for you but for those around you too. Keeping a well-stocked pantry can bring peace of mind as you know you’re covered.
I’ve found that staying prepared helps keep panic at bay, allowing me to focus on what’s truly important—family, well-being, and daily life without unnecessary stressors. Just think, with a plan in place, you can focus on enjoying life rather than worrying about potential shortages!
Conclusion
In retrospect, preparing for potential food shortages is not just a practical issue; it’s a holistic approach to ensuring well-being for yourself and your loved ones. From preventing financial stress to keeping yourself healthy, the benefits of being prepared really shine through.
So, whether it’s stocking up on non-perishables, ensuring a good balance in your pantry, or maintaining your peace of mind, carving out that preparation time is crucial. After all, you never know what tomorrow might bring!
Frequently Asked Questions
1. What are some essentials I should stock up on for potential food shortages?
Focus on non-perishables like canned goods, dry beans, rice, pasta, and grains, as well as some frozen fruits and veggies. Having a variety also helps with nutritional balance!
2. How can I avoid food spoilage when stocking up?
Keep track of what you buy and rotate stock, using older items first. Make sure you’re not over-purchasing items that have a short shelf life.
3. What’s the best way to handle food shortages emotionally?
Being prepared ahead of time can significantly reduce anxiety. Additionally, practicing mindfulness and focusing on what you can control will help. Surrounding yourself with supportive people is key!
4. How should I budget for stocking up on food?
Set a monthly budget for pantry staples and gradually increase your stock over time. This method helps ease financial stress and allows you to prep without breaking the bank!
5. Can I rely on my community during food shortages?
While community support can be valuable, it’s best not to fully rely on it. Prepping ensures you’re self-sufficient and reduces pressure on others during tough times.


