by Preparation | Apr 26, 2025 | Preparedness
Choose the Right Type of Fuel
Understand the Different Fuel Types
When it comes to storing fuel for emergency use, it’s crucial to know what type you’re dealing with. Gasoline, diesel, propane – each has its unique properties and storage requirements. From my own experience, picking the right fuel type can make all the difference during a crisis.
For instance, gasoline is readily available, but it has a short shelf life. If you’re planning to store it for emergencies, you might want to invest in some fuel stabilizers; they really help extend its usability. Diesel on the other hand lasts longer and can be a better option if you have the means to store it correctly.
Don’t ignore propane! It’s efficient and has an indefinite shelf life. Plus, if you have a grill or a generator that runs on propane, you’ll want to stock up. Understanding these types helps you make informed decisions that are specific to your needs.
Evaluate Your Energy Needs
Before diving into storage, take a moment to assess your actual energy needs. For instance, consider how often you rely on fuel-guzzling machinery. In my case, I realized my demands fluctuated based on seasons, especially in winter when I needed more heating supplies.
By mapping out my expected fuel consumption, I could determine how much fuel I needed to keep on hand to last during a power outage or emergency situation. This also allowed me to plan for the long term, ensuring I wasn’t left high and dry when the unexpected happened.
Taking stock of your energy needs prevents over-purchasing, which, let me tell you, can be overwhelming and costly. Plus, it’s easier to find a proper storage solution when you have a clear idea of what you’re working with.
Research Local Regulations
This might seem like a hassle, but trust me, it’s worth your time! Different regions have different rules for storing fuel. I’ve bumped heads with legalities before, but now I make it a priority to check local laws before I store any substantial amount of fuel.
For example, certain areas may have restrictions on the amount of gasoline you can maintain at home. Knowing these regulations upfront means you avoid the stress of potentially facing penalties later. I often visit my local fire department’s website, which provides a load of helpful guidelines!
Understanding these regulations can also guide your choice of storage containers and safety measures. It keeps your operation above board while ensuring your family’s safety.
Proper Storage Techniques
Select the Right Containers
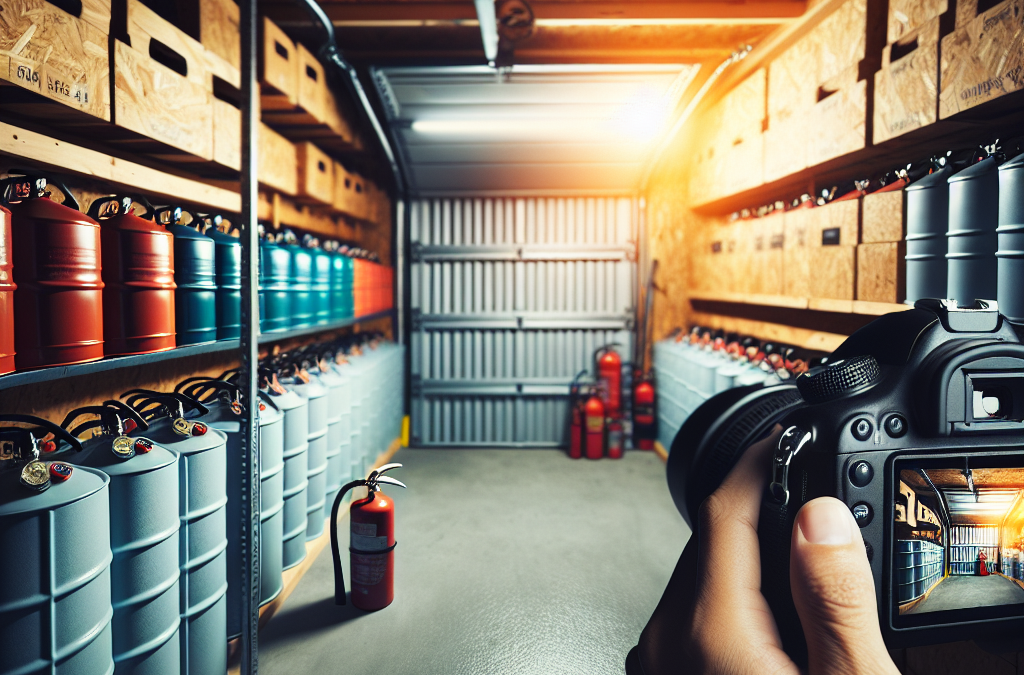
In my experience, the type of container can make or break your fuel storage efforts. When I started, I learned the hard way that cheap plastic containers were not a great idea for storing gasoline. Instead, investing in high-quality, approved fuel containers makes a world of difference.
You want durable materials that can withstand temperature fluctuations and other outside elements. My go-to now is using metal containers designed specifically for fuel storage – they’re sturdy, and I feel that they provide safety against leaks.
Just remember, always check for labels that indicate the container is “approved for fuel storage.” It’s a simple check that can save you loads of headaches down the line.
Optimize Your Location
Have you ever thought about where you store your fuel? I initially had my storage container over by the garage, but shifting it to a well-ventilated area far from sources of ignition made me breathe a little easier. Choosing the location is critical to ensure safety!
Look for a cool, shaded area away from direct sunlight and heat sources. I’ve found that keeping it in an enclosed shed is great because it adds an extra layer of protection – just remember to ventilate it! It’s such a simple step, but it really helps maintain safe conditions.
Always ensure that there are no flammable materials nearby. I learned this after an accidental small fire on my patio – let’s just say it was quite the learning experience. Putting a safe distance between your fuel and other potential hazards is super important.
Maintain Regular Checks
Yes, regular maintenance checks should become part of your routine! I know it sounds a bit tedious, but inspecting your stored fuel can prevent many problems down the line. For instance, keeping an eye on the container’s integrity ensures there are no leaks or deformities.
One of my favorite tips is to rotate my fuel every season. This way, I ensure nothing is sitting around longer than it should, while also allowing me to restock with fresh supplies. You wouldn’t believe how quickly I learned this is a great way to maximize storage efficiency.
Additionally, do not forget to clean your storage areas. Dust and debris can be a fire hazard, so routinely ensure that everything stays tidy and in its proper place. Creating a maintenance schedule helps ensure I don’t overlook these important checks.
Safety Measures to Consider
Invest in Protective Gear
Now, I know this sounds excessive, but having protective gear is a must when handling fuel. I was once careless and ended up with some nasty splashes that could have been easily avoided. Simple items like gloves and goggles go a long way in ensuring safety.
Think about having a fire extinguisher nearby, specifically one that’s rated for flammable liquids. It’s an investment that brings peace of mind! I make it a point to check its expiry date regularly to avoid any surprises in case of an emergency.
Another piece of gear that’s saved me many headaches is having a simple first aid kit nearby. Accidents happen, so being prepared is always a smart idea. You’ll thank yourself later!
Develop an Emergency Plan
Okay, this one is a total game changer! Having a fuel storage plan is excellent, but what if something goes wrong? My family and I have sat down a few times to create an emergency plan in case we need to evacuate or there’s a serious fuel-related incident. That’s right; I believe in a proactive approach!
Include routes, procedures, and essential contacts in your emergency plan. Trust me, panic can lead to poor decisions! Also, practicing the plan helps everyone understand what to do when the real deal hits. I’ve practiced evacuation routes with my kids, and it’s actually become a fun family activity.
Don’t forget to keep a copy of your emergency plan accessible. I’ve put mine on the fridge and in a digital folder. People might think I’m a bit paranoid, but I believe that preparation is key!
Stay Educated
Knowledge is power, right? Staying informed about the best practices for fuel storage keeps me on my toes! Whenever I handle fuel, I make sure to read up on safety, new technologies, and regulations. This has helped me adapt my strategies over time.
There are plenty of online resources and courses that provide valuable information! I’ve signed up for a few webinars, and honestly, they were eye-opening. I love sharing what I learn with family and friends – knowledge really is better when it’s shared!
Also, don’t underestimate the value of community experience. Chatting with local experts and neighbors about their fuel storage practices has given me new insights. They’ve shared their stories and lessons learned, and that real-life insight is priceless.
Frequently Asked Questions
- 1. What is the best fuel for emergency storage?
- The most common fuels are gasoline, diesel, and propane. Gasoline is easy to access but may require stabilizers due to its shorter shelf life. Diesel lasts longer, making it a solid choice, while propane is very versatile and has an indefinite shelf life.
- 2. How often should I check my stored fuel?
- I recommend routine checks every season. This means inspecting containers for leaks or damage and ensuring everything is cleaned up and in order.
- 3. Where is the safest place to store fuel?
- The best location for fuel storage is in a cool, well-ventilated area, away from any heat sources or flammable materials. A sturdy shed can often be a great choice!
- 4. Should I rotate my fuel stocks?
- Absolutely! Rotating your fuel every season helps ensure you use the oldest fuel first, allowing you to maintain freshness while avoiding potential spoilage.
- 5. Why is it important to have protective gear when handling fuel?
- Protective gear, like gloves and goggles, can prevent accidents and injuries. Fuel is hazardous, and it’s better to be safe than sorry. Plus, having gear nearby adds an extra layer of safety for those unforeseen moments.

by Preparation | Apr 26, 2025 | Preparedness
Stay Calm and Assess the Situation
Take a Deep Breath
First things first: staying calm is crucial. When you’re faced with a medical emergency, your body may go into panic mode, but taking a deep breath can help you regain focus. I remember my first experience with this. A close friend collapsed at a party, and my first instinct was pure panic. However, I took a moment to breathe and clear my mind, and it made a world of difference.
When you find yourself in a similar situation, try to close your eyes for a second, inhale deeply, and slowly exhale. This technique switches your body’s stress response to a calmer state, allowing you to think more clearly.
Calmness will help you assess the situation more effectively. Observe your environment, the person in need of help, and identify any potential dangers. Trust me; a level head will make handling an emergency much smoother.
Evaluate the Severity
Next up, you need to gauge how serious the situation is. Not every sneeze or cough warrants a trip to the emergency room, right? Assess whether the person is more sore than hurt, or if it’s something demanding immediate attention. This is where I learned that a little knowledge goes a long way. Basic first-aid training can be incredibly helpful here.
You don’t have to be a medical professional to recognize signs of serious issues. Look for symptoms like unresponsiveness, heavy bleeding, or severe pain. Being aware of these signs can help you act accordingly.
If you’re unsure, it’s always better to err on the side of caution. If the situation seems serious, don’t hesitate to call for help.
Use Your Resources
In emergencies, knowing how to utilize your resources effectively can be a game-changer. This means taking advantage of everything at your disposal—from your smartphone to anyone nearby who might be able to help.
For instance, if you have access to a first-aid kit, check it for supplies. I’ve been in dire situations where just the basics—a bandage or antiseptic—made a difference in helping someone feel better until help arrived.
Additionally, don’t shy away from reaching out. Whether it’s a friend, family member, or even a neighbor, someone may have more experience or knowledge in handling medical situations than you do. It’s all about pooling resources!
Know Basic First Aid
Get Comfortable with First-Aid Skills
Basic first aid isn’t just for doctors or nurses—everybody can and should know the essentials. Think of CPR, the Heimlich maneuver, or how to clean and dress a wound. I took a basic first-aid course a couple of years back, and it’s been one of the best decisions of my life.
Learning these skills can make you feel more confident when facing a medical emergency. When I’ve found myself in sticky situations, I often remembered the practices I learned during my training, and it made responding feel less overwhelming.
Practice makes perfect. Use online resources or even YouTube videos to familiarize yourself with different techniques. After all, confidence in your skills can significantly impact the outcome of an emergency.
Practice, Don’t Panic
During my training, one of the key takeaways was practicing the skills I learned. It’s vital not just to know what to do but to rehearse it until it becomes second nature.
For example, if I had to perform CPR, I’d visualize the steps before they even happen. Practicing this each year, through refreshers or drills, can help solidify that knowledge in your mind, so it’s readily accessible when you need it the most.
The more you practice, the less likely you’ll freeze in a moment of crisis. It’s kind of like learning to ride a bike; once you’ve done it enough, you just know how to do it without thinking!
Stay Updated on Health Guidelines
Medical guidelines can change, and what might have worked a few years ago may not be relevant today. Make it a habit to stay informed on health and first aid protocols. I often check local health departments or credible online resources to see if there are updates.
Subscribing to health newsletters or following relevant social media pages can be a great way to stay in the loop. Plus, you might discover handy tips that come in handy during emergencies, which could be a lifesaver!
Being informed empowers you to handle emergencies effectively, so don’t slack on this one!
Communicate Effectively
Speak Clearly and Calmly
Effective communication during an emergency can save lives. Whether you’re speaking to the affected person or calling for help, clarity matters. I’ve found that speaking in a calm, clear voice not only helps others understand what’s happening but also reassures the person in distress.
Try to avoid jargon, as not everyone will understand technical terms. Instead, communicate your observations simply. For example, instead of mentioning specific medical symptoms, describe what you see in layman’s terms.
This also includes being succinct, especially when relaying information to emergency services. Time is of the essence, so avoiding unnecessary rambling can be crucial in an urgent scenario.
Document Everything
Whenever I’ve faced emergencies, one thing that has helped immensely is documenting details. If I need to call for medical assistance, I jot down crucial information like symptoms, time of onset, and vital signs if possible. This practice has consistently proven itself invaluable.
When relaying this information, especially to paramedics or doctors, every detail can help them make informed decisions faster. It might seem tedious, but trust me, knowing you’ve got a clear record can take some pressure off!
Additionally, having smart devices at the ready can aid this process. Taking a video or sending a quick voice note about the situation can be perfectly acceptable in the right circumstances!
Ask for Help
Don’t hesitate to ask for help, whether it’s calling a friend or dialing emergency services. I used to think I needed to ‘tough it out’ and handle everything solo. But I’ve learned that there’s no shame in reaching out for support.
Sometimes just having another pair of hands can completely change the situation. If a friend is nearby, they might assist you directly or even help you to keep the patient calm.
Remember, the goal is to ensure safety and provide help until more qualified care arrives. It’s a team effort, and there’s strength in numbers!
Follow Up and Learn from the Experience
Check on the Affected Person
Once the acute situation has been dealt with, it’s important to follow up. If someone needed help, checking in on their recovery is significant. I often make a point to visit or keep in contact with the individual to see how they’re doing after the fact.
Being caring and present not only helps the affected person recover emotionally but could also provide you with insight into how they’re feeling physically. Sometimes they might even have advice or recommendations based on their experience.
This follow-up also opens a door for feedback on your response. If there were areas for improvement, they can enlighten you, and that’s a valuable learning opportunity!
Reflect on Your Actions
Taking time to reflect on your choices during the emergency is also important. Ask yourself: what did I do well? What could I have done differently? Institute that practice for every event, whether it went well or not.
After my first big emergency, I spent time writing down my thoughts and feelings. It allowed me to see areas of improvement and build on my strengths. Reflection leads to growth, and we all want to be better in these situations than we were before.
Plus, it helps alleviate some anxiety about the unknown—by practicing these reflective habits, I felt more equipped for future incidents!
Take Action if Necessary
After reflecting, if there are significant gaps in your knowledge or skills that could have improved your response, take action. This might mean taking a first-aid class, reading up on relevant topics, or even just chatting with a medical professional for their insights.
Continuing education helps build confidence and preparedness for whatever may come your way in the future. After a tough experience, I often commit to upskilling myself and have found it incredibly rewarding.
At the end of the day, every medical emergency is a chance for growth. Embrace it and aim to be the best self you can be in a crisis!
FAQ
- What should I do first in a medical emergency?
- Stay calm, breathe, and assess the situation to understand its severity. This will guide your actions.
- Do I need special training to handle medical emergencies?
- While formal training is beneficial, knowing basic first aid techniques can make a huge difference, and many courses are available to help.
- How do I communicate effectively during an emergency?
- Speak clearly, keep it simple, and document any important information that emergency services may need.
- Is it okay to ask for help?
- Absolutely! Asking for help not only reinforces teamwork but can also lead to better outcomes in emergencies.
- What should I reflect on after an emergency?
- Consider what went well, what could improve, and how you can ensure better preparedness for next time. Reflection leads to growth!
by Preparation | Apr 26, 2025 | Preparedness
Choosing the Right Waterproof Bags
Understanding Different Materials
When it comes to waterproof bags, not all materials are created equal. I’ve spent my fair share of time researching and experimenting with various options. For instance, nylon is popular due to its lightweight nature and tear resistance. However, you’ll want to look for nylon that comes with a waterproof coating to really get the most bang for your buck.
Then there’s PVC, which is super tough and entirely waterproof, making it a go-to for many adventurers. It might be a bit bulkier, but its durability can’t be overlooked. Just picture those heavy rain days; you wouldn’t want your stuff soaking wet!
I’ve found that materials like tarpaulin offer a good balance between weight and protection. They’re also easy to clean, which is a huge plus when you’re dealing with muddy outdoor environments.
Sizes and Capacities
Choosing the right size of waterproof bags can be critical, depending on your emergency kit needs. Personally, I prefer a variety of sizes—from small pouches for essentials like first aid kits to larger bags for clothes and bulk supplies. Small bags are great for keeping your key items organized without drowning in a sea of chaos.
When I’m packing for emergencies, I always think about the capacity. It’s all good to have a big bag, but if it’s stuffed to the brim, you’ll struggle to find what you need when seconds count. Trust me, selecting the right size helps keep your gear manageable.
Another tip: choose bags with attachment points or loops! I’ve found that this little feature helps make carrying and organization way easier, especially when you’re in a hurry. It’s like having a secret weapon in your emergency arsenal.
Features to Look For
Now, let’s talk features. I love bags with reliable zippers that don’t let water sneak in. Trust me, there’s nothing worse than discovering your gear is wet because of a cheap zipper. Look for heavy-duty weather-resistant zippers that can handle the elements.
Also, adjustable straps can be a game changer. Carrying a heavy bag might feel like lugging around a sack of bricks, so having comfortable straps can make a world of difference. My back always thanks me when I invest in ergonomically designed straps!
Finally, consider visibility. Bags with reflective elements are fantastic for safety, especially if you’re trying to navigate in low-light conditions. You want to be seen, and having some reflective gear can make a huge difference if you’re in a pinch.
Waterproofing Your Gear
Pre-treating Items for Extra Protection
Before you even think about heading out, I always pre-treat my gear with a waterproofing spray. It’s a neat little trick I’ve learned over the years. Just remember to reapply it regularly, especially if your gear sees a lot of action.
Spraying can be a bit of a chore, but it’s worth it for peace of mind. The first time I tried it, I thought, “No way is this going to work,” but let me tell you, it’s like magic—my gear has been through so much water and stays dry!
Don’t skip this step, folks! It’s the difference between wet socks and dry ones in an emergency situation, and nobody wants soggy feet when they’re trying to stay focused on keeping safe.
Using Sealing Methods
Sealing methods can really ramp up your waterproofing game. I’ve been known to use heat sealing for my critical items. It’s not only effective but also quite simple to do. A heat source can seal the edges of bags to create a waterproof barrier that gives me an extra layer of confidence.
Just a note: while considering sealing options, take time to assess which items need the most protection. I’ll usually seal my electronics and important documents separately—that way, if something goes astray, I know where my most crucial items are safe and sound!
Another method I’ve found handy is using strong, waterproof tape on vulnerable areas of bags that might get extra wear. It’s a quick fix, and you’d be surprised what a difference it can make.
Routine Maintenance Checks
Just like anything else, your gear deserves a little TLC. I like to schedule routine maintenance checks to ensure everything is still up to snuff. It’s like a health check for my emergency kit!
During these checks, I inspect for any signs of wear and tear. It’s likely nothing serious, but you’d be amazed what a tiny hole can do to your waterproof goals! If I find any, I make necessary repairs or replace the item altogether.
Pro tip: keep a waterproofing checklist handy to make sure you don’t forget any crucial steps. It’ll save you a lot of stress when packing your gear before an adventure, and trust me, you’ll be grateful you took the time to stay organized.
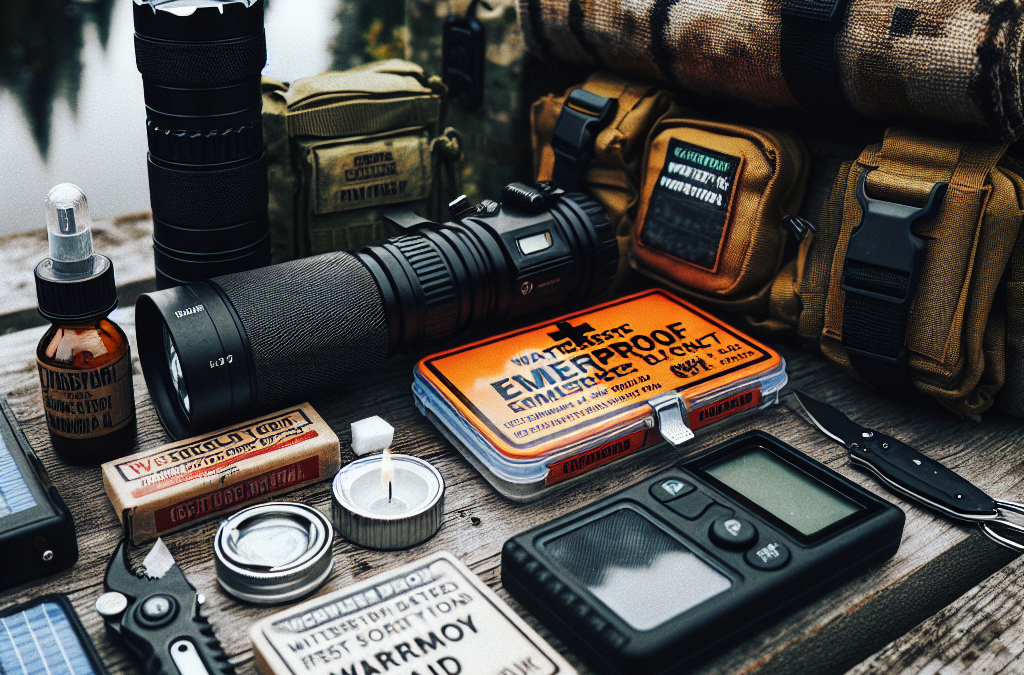
Emergency Gear Essentials
Packing a Waterproof First Aid Kit
Let’s be real—when emergencies hit, it’s essential to have a well-stocked first aid kit on hand. I always opt to keep my first aid supplies in a waterproof bag. You’d be shocked at how many injuries can worsen due to water damage on medical supplies. It’s a simple step that makes a big impact.
For maximum efficiency, I store items separately in smaller pouches within the kit. Bandages, antiseptic, and medications all have dedicated spots. It means I’m not fumbling around when time is of the essence; I can grab what I need quickly.
Regularly checking expiration dates is also crucial. We can sometimes forget that those ointments and tablets have a shelf life. Knowing everything is fresh and usable gives me a huge sense of security.
Storing Clothing Properly
In my experience, keeping my clothing dry in emergencies is super important. I always invest in a waterproof sack for clothes, especially if I might be out for days. There’s nothing worse than putting on cold, damp clothing; trust me, it makes everything just miserable.
I pack clothing based on the climate and season, adding layers and not overstuffing to keep things compact. Just remember to roll clothes rather than folding them—this trick saves space and keeps them less wrinkled, ready for action!
Also, consider packing an emergency poncho or waterproof jacket on top of your clothing stash. You never know when you might need that extra layer of protection from the elements!
Waterproofing Your Electronics
Electronics in an emergency can be a lifeline, but they’re useless if they’re damaged by water. I utilize waterproof cases for my phone and other gadgets. It’s just essential when heading into unpredictable weather, and I’ve learned the hard way why it matters.
For devices that can’t be stored in a waterproof case, I rely on zip-lock bags for temporary protection. I keep this in the back of my mind during packing; you don’t want your power bank in a soggy situation!
Finally, I never forget to keep a backup power supply in a waterproof bag. Whether it’s a power bank or extra batteries, these can be lifesavers during prolonged emergencies, ensuring I can stay connected if I need to.
Conclusion and Maintenance
Regular Inspections
Regularly checking your waterproof items is just as important as making sure they’re initially protected. I try to set a calendar reminder every few months to thoroughly inspect everything in my emergency kit.
During these checks, I look for leaks or damage to my waterproof bags and replace anything that doesn’t meet my standards. It’s my way of ensuring I’m always ready to face whatever comes my way!
It’s easy to forget about these things in the hustle and bustle of life, but keeping up with maintenance has saved me many headaches (and wet clothes!).
Staying Informed and Updated
It’s super important to stay updated on the best practices for waterproofing emergency gear. I follow relevant blogs, watch videos, and even join discussion forums where fellow enthusiasts share tips and tricks. You never know what you might learn!
Sharing my own experiences also helps. Engaging with others not only broadens my knowledge, but I also become part of a supportive community, and there are always new things to share and learn.
Knowledge is power when it comes to prepping for emergencies. If I can learn from others while sharing what I’ve experienced myself, I consider it a win-win!
Final Thoughts
In the end, waterproofing your emergency gear is more than just a good idea; it’s an essential part of being prepared. My personal experiences have taught me the importance of keeping my gear dry and functional. I hope sharing my journey helps you create your own waterproofing plan!
When you think you’ve got everything sorted out, take a moment to rethink. Prevention is far more effective than dealing with the aftermath. A small effort now can lead to big rewards later on.
Thanks for reading! Let’s keep striving for preparedness together!
FAQs
1. Why is waterproofing important for emergency gear?
Waterproofing is essential because it protects your gear from water damage, keeping items like clothing, electronics, and first aid supplies dry and functional during emergencies.
2. What types of materials are best for waterproof bags?
Nylon with waterproof coatings, PVC, and tarpaulin are excellent options for waterproof bags, as they offer durability and effective water resistance.
3. How often should I check my waterproof gear?
I recommend checking your waterproof gear every few months to ensure everything is in good condition and ready for use when you need it most.
4. What should I include in my waterproof first aid kit?
Your waterproof first aid kit should include bandages, antiseptic wipes, pain relievers, any necessary medications, and other essential medical supplies stored in waterproof bags.
5. Can I improve the waterproofing of existing bags?
Yes! You can improve the waterproofing of existing bags by treating them with waterproof sprays, sealing vulnerable areas, and regularly maintaining them for any wear and tear.
by Preparation | Apr 26, 2025 | Preparedness
Stay Connected with Others
Establish Communication Channels
One of the best things I learned during long emergencies is the importance of staying connected. Whether it’s through social media, phone calls, or even good old-fashioned letters, make an effort to reach out to family and friends. This connection can be a lifeline, reminding you that you’re not alone in your struggle.
During tough times, I found that setting up regular check-ins with my crew—whether it was a weekly video chat or a group text—really helped keep spirits high. Knowing there’s someone out there thinking of you can work wonders for your morale.
Don’t underestimate the power of shared experiences. When we break bread together—virtually or in person—over shared stories about our days, it creates a bond that can uplift everyone involved.
Participate in Virtual Gatherings
As someone who loves a good get-together, transitioning to virtual gatherings was initially a challenge. But boy, did it open up a whole new world! Online meetups, game nights, or even virtual happy hours can provide much-needed moments of joy and distraction from ongoing stress.
Sometimes we think, “Oh, it won’t be the same,” but trust me, it can still be a blast. Whether it’s a trivia game or karaoke night over Zoom, find creative ways to connect. You’ll be surprised by the laughter and smiles that can emerge from a screen.
And remember, the goal is not perfection. It’s about those warm moments where we can feel a sense of normalcy and community. Let loose, enjoy, and remind yourself that you’re all in this together!
Build a Support Network
Having a solid support network is indispensable. I’ve learned to surround myself with people who lift me up, even during the heaviest times. Find those who understand what you’re going through and can offer a listening ear or helping hand.
As you build this network, don’t shy away from expressing your needs. It’s okay to admit when you’re struggling or when you need support in certain areas. Trust me, people are often more willing to help than we expect.
Creating a mix of close friends for emotional support and acquaintances to expand your perspective can contribute significantly to morale-boosting. Your network can become a rich tapestry of shared hope and encouragement that brings light during the darkest days.
Engage in Routine and Structure
Set Daily Goals
Finding a rhythm during long emergencies is key. I realized that establishing daily goals helped me keep my focus and boosted my motivation. Little tasks, even as simple as preparing a healthy meal or doing a home workout, can provide that sense of accomplishment.
When you set these achievable goals, they become stepping stones towards feeling productive again. Start small; over time, you’ll feel more empowered and equipped to tackle bigger challenges, keeping moral high.
Documenting your accomplishments, no matter how minor, helps to reinforce a sense of progress. Even on the toughest days, ticking off a few small items can work wonders for your mindset.
Create a Balanced Schedule
Having a structured yet flexible daily schedule is crucial. I like to break my day into blocks that include work, relaxation, hobbies, and connection with others. This balance helps to stave off burnout, which can affect morale drastically.
Don’t forget to leave some wiggle room—life happens, right? However, having those time slots carved out ensures that I still devote time to essential activities while allowing for spontaneity when needed. It’s about balance and not letting routines grow stale.
Moreover, intentionally scheduling relaxation time often becomes a cherished respite that reinvigorates my spirit during challenging times. Allow yourself those pauses; they are just as vital to your overall well-being.
Incorporate Self-Care Practices
Let’s talk about self-care, because boy, it’s crucial! I often remind myself that taking care of my physical and mental health directly impacts my morale. Whether it’s practicing mindfulness, meditation, or simply enjoying a hot bubble bath—make time for yourself.
Getting enough sleep is a big part of that. When I skimp on sleep, everything feels heavier. Rejuvenating rest and downtime enhances our capacity to handle stress, which can seemingly drop overnight.
Lastly, exercise is my outlet. Even when I lack motivation, a quick walk outdoors or a few stretches can lead me to a better headspace. Prioritize activities that keep you feeling good, even in small doses.
Cultivate Positivity and Resilience
Practice Gratitude
During long emergencies, I found the practice of gratitude to be a game changer. Each day, I try to list a few things I appreciate. They can be as simple as a hot cup of coffee or a moment of laughter with a friend. Shifting focus towards what’s going well can alter your outlook dramatically.
Try keeping a gratitude journal. Writing down my thoughts helps me acknowledge the positives and can act as a comforting reminder during difficult times, encouraging a more optimistic view.
When you share your gratitude with others, it creates a beautiful ripple effect. This act not only uplifts your spirit but also encourages the people around you to recognize and appreciate their blessings.
Build Resilience Through Learning
I’ve come to realize that resilience isn’t just about toughness; it’s also about learning and adapting. Embrace new skills, whether it’s picking up a new hobby or pursuing online courses. Personal growth can ignite a sense of purpose and accomplishment.
As you navigate through challenges, those skills can empower you, making you more confident in facing uncertainties. Reflecting on past challenges that you’ve overcome also reinforces your ability to handle what’s thrown your way.
Surround yourself with stories of resilience. They can inspire you and remind you that none of us are alone in our struggles. Sharing stories not only fosters a bond with others but can also serve as fuel to stay resilient through difficult times.
Maintain a Positive Environment
Creating a positive environment is essential to maintaining morale. I’ve learned that decluttering and organizing my space helps to promote clarity and calmness. Surrounding myself with uplifting music, art, or anything that inspires joy is key to uplift the energy in my home.
Consider invoking elements of nature. Indoor plants or even natural light can significantly enhance moods, making spaces feel alive and vibrant. I can’t stress how much a green companion has transformed my workspace.
Lastly, humor is a fantastic booster. Incorporate laughter into your life through comedy shows or light-hearted content. Finding joy in the moments can act as a powerful remedy during tough situations.
FAQs
1. How can I stay connected with others during long emergencies?
Utilize digital tools for communication such as social media, video calls, and messaging apps, and consider scheduling regular check-ins with friends and family to stay in touch.
2. What practices can help maintain daily structure during emergencies?
Create a balanced schedule that incorporates goals, relaxation, and self-care. Start with small, achievable tasks that bring a sense of accomplishment.
3. What role does gratitude play in maintaining morale?
Practicing gratitude shifts focus from negative aspects to positive ones, helping to cultivate a more optimistic outlook and improving overall emotional well-being.
4. How can I improve resilience during tough times?
Building resilience involves learning new skills, reflecting on past challenges, and surrounding yourself with inspiring stories that cultivate a mindset of growth and adaptability.
5. Why is humor important in tough situations?
Humor serves to lighten the mood and provide relief during difficult times. It fosters connection and helps us break away from stress through joy and laughter.
by Preparation | Apr 26, 2025 | Preparedness
Building a Strong Foundation in Basic Outdoor Skills
Understanding Navigation
When I first delved into outdoor survival skills, the concept of navigation was a game changer for me. Learning how to use a compass and read a map took my confidence from zero to hero. I remember getting all turned around in the woods, feeling completely lost. But with practice, I became adept at triangulating my position and understanding landmarks.
It’s not just about knowing where you are; it’s about understanding where you’re going. A few outings with my family, practicing using a compass and reading maps together, turned what could be a frustrating experience into an exciting adventure. We even turned it into a little scavenger hunt!
And let’s not forget the joy of using the sun and stars! I remember being outside at night, gazing up, and realizing that the Big Dipper was my guide. For families, mastering navigation is a unifying experience, building trust and teamwork as you explore together.
Creating Shelter
After mastering navigation, my next focus was on shelter building. You really don’t appreciate the value of a good shelter until you’re stuck outside with no protection from the elements. We did a weekend workshop as a family, learning to use natural materials to create a makeshift home. Some of the best laughs came from our first few failed attempts!
Building a shelter is not only a practical skill but also an incredible bonding activity. We’d challenge each other to see who could build the most creative shelter using just what nature provided. Plus, it instills a sense of survival in the kids, showing them how to think on their feet and make do with what they have.
Involving the whole family in this process fosters problem-solving skills and creativity. The first night we spent in a shelter we built together? I’ll never forget the stories we shared and the warmth of our little campfire—it felt like pure magic!
Fire Making Techniques
Ah, fire—the ultimate survival tool! Learning how to start a fire was a fun and thrilling experience for my family and me. I started with the traditional matches and lighter method, but once I ventured into friction-based techniques like the bow drill, it was like entering a whole new world. It took practice and a lot of patience, but the feeling you get when you finally strike that spark? Unmatched!
Teaching my kids how to gather tinder and kindling turned into some hilarious moments as they’d scavenge for the best materials. Who knew that finding the perfect piece of dry grass could be so serious? Fire not only keeps you warm; it can also be a great way to prepare meals and purify water.
What I love most about fire making is how it brings everyone together. There’s something primal about gathering around the flames, sharing stories, or roasting marshmallows that strengthens family bonds. Plus, it’s a chance to teach the importance of fire safety, an essential lesson in today’s world.
Essential Wilderness First Aid Skills
Basic First Aid Training
As a family, we quickly learned that no outdoor adventure is complete without some basic first aid training. I remember when my son tripped and scraped his knee during a hike; it was great to be able to apply the skills we had practiced. Having a first aid kit on hand isn’t just about being prepared for the worst; it’s about being confident that you can handle minor injuries as they arise.
During our training sessions, we practiced bandaging wounds, treating blisters, and learning how to identify shock. I can’t stress enough how empowering it feels to know you can take care of your loved ones in times of need. Plus, it’s a good reminder of how to stay calm in stressful situations.
Creating a first aid kit together was another fun family project. We made a checklist and involved everyone; kids loved picking out items they thought were essential. This not only prepared us for emergencies but also instilled a sense of responsibility and awareness in my children.
Recognizing and Responding to Allergies
One important aspect of first aid that we often overlook is recognizing allergies, especially when in nature. After a near-miss incident where my daughter accidentally touched poison ivy, we had serious conversations about identifying and avoiding plants that can trigger allergic reactions.
We learned what common allergens look like, and now my kids can spot a troublesome plant from a distance. It’s an essential skill for any family that spends time outdoors. Plus, we discussed how to respond if someone has a severe allergic reaction, like using an EpiPen—it’s empowering to know you can be prepared.
Understanding allergies has significantly increased our awareness in the wild. Now, every hike begins with a conversation about what to look for and how we can all look out for one another. It’s just another way our shared experience in the wild brings us closer together.
Dealing with Environmental Hazards
We also took time to learn about various environmental hazards—be it wildlife encounters, weather changes, or even natural disasters. I remember going through scenarios with my kids about what to do if they see a bear or how to prepare for sudden weather shifts.
Role-playing these situations brought the importance of safety to life and provided my family with valuable tools to handle unexpected challenges. We spent afternoons talking about what wildlife we might encounter and how to respect their space, preparing us for safe explorations.
By focusing on environmental hazards, we learned the importance of preparation and respect for nature. It’s fascinating and enriching to understand that these adventures can be both beautiful and hazardous, further fostering respect for the great outdoors.
Food and Water Sourcing Techniques
Finding Clean Water
One of the first things you learn in survival training is the importance of clean water. I remember the excitement my family felt when we learned to locate and purify water sources. It started with identifying streams and rivers, and progressed to learning about filtration methods, which is both practical and fun!
We practiced using natural filters—a combination of sand, gravel, and charcoal—to clean water. The kids got their hands dirty, and it turned into a memorable family project. The realization that we could create a drinkable water source in the wild was empowering. It became clear that understanding water sourcing is essential for long-term survival.
Teaching this skill wasn’t just about survival; it developed a deeper appreciation for our everyday water and made us more conscientious about conservation as well. Now, we carry that knowledge into our daily lives, making us more aware of hydration needs even at home.
Foraging for Edible Plants
Getting into foraging for edible plants was another eye-opening experience. I started learning about the basics of wild edibles, and soon my family joined in the exploration. We spent days collecting dandelions, clovers, and other wild greens, which became a favorite topic of discussion at family meals.
Every time we successfully identified an edible plant, it felt like a tiny victory! Plus, it sparked fun conversations about what to do with our finds—maybe a dandelion salad or clover tea. The benefits of foraging also became an easy lesson in sustainability and eating healthy!
Through this journey, my kids became more engaged with their food. They now understand where their meals come from and have developed healthier eating habits. And honestly, who doesn’t love exploring and finding bites of nature to enjoy during a picnic?
Cooking with Wild Foods
Speaking of foraging, cooking with our finds has been a family favorite. I’ve found that when kids participate in cooking, they are more likely to try new foods. We set up campfires and experimented with different cooking methods—a whole new level of creativity emerged.
From wild plant salads to infused teas, we found joy in exploring flavors together. Every recipe became a team effort, mixing, measuring, and experimenting. I recall the pride on their faces when they tasted something delicious they helped make!
Learning to cook outdoors not only strengthens our culinary skills but also deepens our love for nature’s bounty. Each meal shared outdoors has created lasting memories that we cherish. This blending of cooking, nature, and family makes it one of the most rewarding aspects of our survival skills training.
Emergency Preparedness and Planning
Creating an Emergency Plan
An often overlooked aspect of survival skills is emergency preparedness. We dedicated time to creating an emergency plan, covering everything from lost items to natural disasters. It felt a bit daunting at first, but breaking it down made it manageable.
We discussed evacuation routes, communication methods, and what to do if someone gets separated during an adventure. It felt empowering knowing that we had strategies in place for dealing with the unexpected. I stressed the importance of practicing these plans regularly, and it was both engaging and enlightening for my kids.
When you have a solid plan, you pave the way for resilience in the face of challenges. A family that plans together is a family that stays calm together. It’s also a great conversation starter about responsibility and awareness during adventures.
Building a Preparedness Kit
Part of our emergency preparedness involved constructing a family preparedness kit. This became a family project where everyone picked out items they felt were crucial. From flashlights and batteries to non-perishable snacks, every item was chosen with care.
The best part? It sparked discussions about why each item mattered. We learned how to prioritize essential items based on scenarios, which turned into playful debates. The kids loved having a hand in creating our family’s safety net, fostering a sense of ownership over our preparedness.
Having a kit on hand isn’t just for emergencies; it brings peace of mind on regular outings. Now we have a designated place for our kit, and each trip starts with a fun checklist to ensure we’re equipped for anything.
Practicing Emergency Scenarios
Finally, we put our plan to the test by practicing emergency scenarios. This part was super engaging, filled with both laughter and lessons. We acted out different situations and practiced our responses, making it both informative and entertaining.
Setting up realistic scenarios encouraged critical thinking and fast decision-making. Did we panic? Sure, a little! But through the fun chaos, we learned how to stay calm and collected when faced with challenges. It made our family feel more equipped and confident for any outdoor adventure!
With each practice round, my kids ended up using their problem-solving skills more effectively. It turned out, not only do we build knowledge this way, but we also strengthen family bonds and create lasting memories.
Frequently Asked Questions
What are the key outdoor survival skills I should focus on as a family?
Key skills often include navigation, shelter building, fire making, first aid, and food/water sourcing. These foundational skills prepare you for a variety of outdoor situations!
How can I make survival training fun for my kids?
Incorporating games, hands-on activities, and role-playing scenarios makes learning exciting! Use creativity to turn each skill into a fun family adventure.
How often should I practice survival skills with my family?
Regular practice is beneficial. Integrating survival skills into monthly outdoor activities keeps knowledge fresh and reinforces learning in a practical setting!
Is there an age limit for starting survival skills training with kids?
Not at all! Kids can start learning basic concepts as early as they can walk. Adapt the complexity of the skills based on their age and understanding to maintain engagement.
What resources can I use to learn more about survival skills?
There are tons of books, online courses, videos, and workshops focused on survival skills. Local community centers or outdoor education programs often offer classes suitable for all ages.


