by Preparation | Apr 26, 2025 | Preparedness
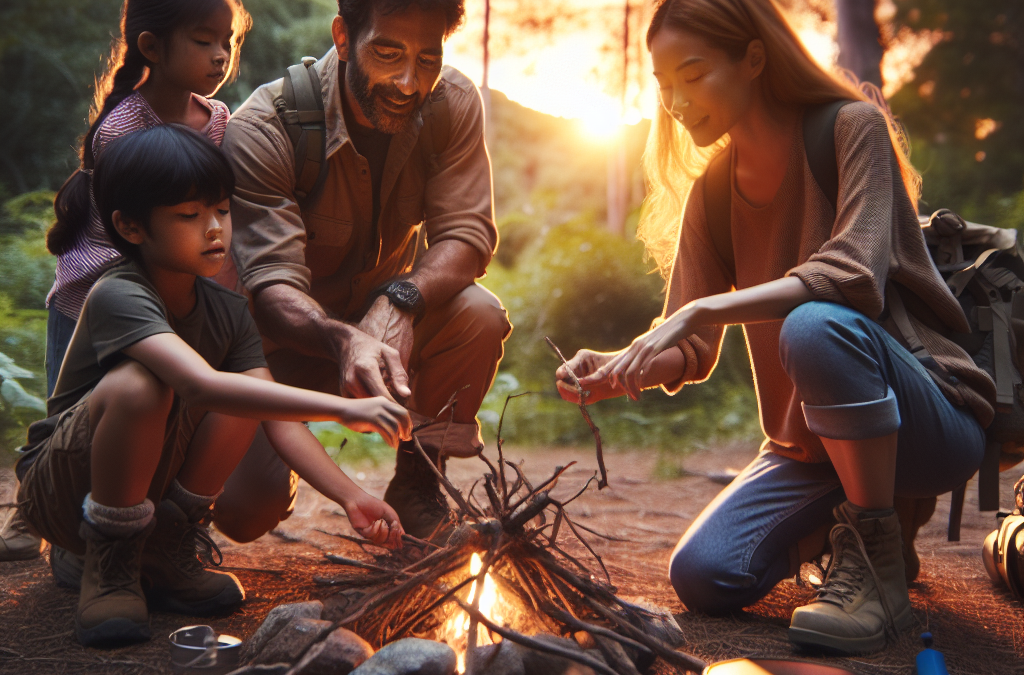
Building a Strong Foundation in Basic Outdoor Skills
Understanding Navigation
When I first delved into outdoor survival skills, the concept of navigation was a game changer for me. Learning how to use a compass and read a map took my confidence from zero to hero. I remember getting all turned around in the woods, feeling completely lost. But with practice, I became adept at triangulating my position and understanding landmarks.
It’s not just about knowing where you are; it’s about understanding where you’re going. A few outings with my family, practicing using a compass and reading maps together, turned what could be a frustrating experience into an exciting adventure. We even turned it into a little scavenger hunt!
And let’s not forget the joy of using the sun and stars! I remember being outside at night, gazing up, and realizing that the Big Dipper was my guide. For families, mastering navigation is a unifying experience, building trust and teamwork as you explore together.
Creating Shelter
After mastering navigation, my next focus was on shelter building. You really don’t appreciate the value of a good shelter until you’re stuck outside with no protection from the elements. We did a weekend workshop as a family, learning to use natural materials to create a makeshift home. Some of the best laughs came from our first few failed attempts!
Building a shelter is not only a practical skill but also an incredible bonding activity. We’d challenge each other to see who could build the most creative shelter using just what nature provided. Plus, it instills a sense of survival in the kids, showing them how to think on their feet and make do with what they have.
Involving the whole family in this process fosters problem-solving skills and creativity. The first night we spent in a shelter we built together? I’ll never forget the stories we shared and the warmth of our little campfire—it felt like pure magic!
Fire Making Techniques
Ah, fire—the ultimate survival tool! Learning how to start a fire was a fun and thrilling experience for my family and me. I started with the traditional matches and lighter method, but once I ventured into friction-based techniques like the bow drill, it was like entering a whole new world. It took practice and a lot of patience, but the feeling you get when you finally strike that spark? Unmatched!
Teaching my kids how to gather tinder and kindling turned into some hilarious moments as they’d scavenge for the best materials. Who knew that finding the perfect piece of dry grass could be so serious? Fire not only keeps you warm; it can also be a great way to prepare meals and purify water.
What I love most about fire making is how it brings everyone together. There’s something primal about gathering around the flames, sharing stories, or roasting marshmallows that strengthens family bonds. Plus, it’s a chance to teach the importance of fire safety, an essential lesson in today’s world.
Essential Wilderness First Aid Skills
Basic First Aid Training
As a family, we quickly learned that no outdoor adventure is complete without some basic first aid training. I remember when my son tripped and scraped his knee during a hike; it was great to be able to apply the skills we had practiced. Having a first aid kit on hand isn’t just about being prepared for the worst; it’s about being confident that you can handle minor injuries as they arise.
During our training sessions, we practiced bandaging wounds, treating blisters, and learning how to identify shock. I can’t stress enough how empowering it feels to know you can take care of your loved ones in times of need. Plus, it’s a good reminder of how to stay calm in stressful situations.
Creating a first aid kit together was another fun family project. We made a checklist and involved everyone; kids loved picking out items they thought were essential. This not only prepared us for emergencies but also instilled a sense of responsibility and awareness in my children.
Recognizing and Responding to Allergies
One important aspect of first aid that we often overlook is recognizing allergies, especially when in nature. After a near-miss incident where my daughter accidentally touched poison ivy, we had serious conversations about identifying and avoiding plants that can trigger allergic reactions.
We learned what common allergens look like, and now my kids can spot a troublesome plant from a distance. It’s an essential skill for any family that spends time outdoors. Plus, we discussed how to respond if someone has a severe allergic reaction, like using an EpiPen—it’s empowering to know you can be prepared.
Understanding allergies has significantly increased our awareness in the wild. Now, every hike begins with a conversation about what to look for and how we can all look out for one another. It’s just another way our shared experience in the wild brings us closer together.
Dealing with Environmental Hazards
We also took time to learn about various environmental hazards—be it wildlife encounters, weather changes, or even natural disasters. I remember going through scenarios with my kids about what to do if they see a bear or how to prepare for sudden weather shifts.
Role-playing these situations brought the importance of safety to life and provided my family with valuable tools to handle unexpected challenges. We spent afternoons talking about what wildlife we might encounter and how to respect their space, preparing us for safe explorations.
By focusing on environmental hazards, we learned the importance of preparation and respect for nature. It’s fascinating and enriching to understand that these adventures can be both beautiful and hazardous, further fostering respect for the great outdoors.
Food and Water Sourcing Techniques
Finding Clean Water
One of the first things you learn in survival training is the importance of clean water. I remember the excitement my family felt when we learned to locate and purify water sources. It started with identifying streams and rivers, and progressed to learning about filtration methods, which is both practical and fun!
We practiced using natural filters—a combination of sand, gravel, and charcoal—to clean water. The kids got their hands dirty, and it turned into a memorable family project. The realization that we could create a drinkable water source in the wild was empowering. It became clear that understanding water sourcing is essential for long-term survival.
Teaching this skill wasn’t just about survival; it developed a deeper appreciation for our everyday water and made us more conscientious about conservation as well. Now, we carry that knowledge into our daily lives, making us more aware of hydration needs even at home.
Foraging for Edible Plants
Getting into foraging for edible plants was another eye-opening experience. I started learning about the basics of wild edibles, and soon my family joined in the exploration. We spent days collecting dandelions, clovers, and other wild greens, which became a favorite topic of discussion at family meals.
Every time we successfully identified an edible plant, it felt like a tiny victory! Plus, it sparked fun conversations about what to do with our finds—maybe a dandelion salad or clover tea. The benefits of foraging also became an easy lesson in sustainability and eating healthy!
Through this journey, my kids became more engaged with their food. They now understand where their meals come from and have developed healthier eating habits. And honestly, who doesn’t love exploring and finding bites of nature to enjoy during a picnic?
Cooking with Wild Foods
Speaking of foraging, cooking with our finds has been a family favorite. I’ve found that when kids participate in cooking, they are more likely to try new foods. We set up campfires and experimented with different cooking methods—a whole new level of creativity emerged.
From wild plant salads to infused teas, we found joy in exploring flavors together. Every recipe became a team effort, mixing, measuring, and experimenting. I recall the pride on their faces when they tasted something delicious they helped make!
Learning to cook outdoors not only strengthens our culinary skills but also deepens our love for nature’s bounty. Each meal shared outdoors has created lasting memories that we cherish. This blending of cooking, nature, and family makes it one of the most rewarding aspects of our survival skills training.
Emergency Preparedness and Planning
Creating an Emergency Plan
An often overlooked aspect of survival skills is emergency preparedness. We dedicated time to creating an emergency plan, covering everything from lost items to natural disasters. It felt a bit daunting at first, but breaking it down made it manageable.
We discussed evacuation routes, communication methods, and what to do if someone gets separated during an adventure. It felt empowering knowing that we had strategies in place for dealing with the unexpected. I stressed the importance of practicing these plans regularly, and it was both engaging and enlightening for my kids.
When you have a solid plan, you pave the way for resilience in the face of challenges. A family that plans together is a family that stays calm together. It’s also a great conversation starter about responsibility and awareness during adventures.
Building a Preparedness Kit
Part of our emergency preparedness involved constructing a family preparedness kit. This became a family project where everyone picked out items they felt were crucial. From flashlights and batteries to non-perishable snacks, every item was chosen with care.
The best part? It sparked discussions about why each item mattered. We learned how to prioritize essential items based on scenarios, which turned into playful debates. The kids loved having a hand in creating our family’s safety net, fostering a sense of ownership over our preparedness.
Having a kit on hand isn’t just for emergencies; it brings peace of mind on regular outings. Now we have a designated place for our kit, and each trip starts with a fun checklist to ensure we’re equipped for anything.
Practicing Emergency Scenarios
Finally, we put our plan to the test by practicing emergency scenarios. This part was super engaging, filled with both laughter and lessons. We acted out different situations and practiced our responses, making it both informative and entertaining.
Setting up realistic scenarios encouraged critical thinking and fast decision-making. Did we panic? Sure, a little! But through the fun chaos, we learned how to stay calm and collected when faced with challenges. It made our family feel more equipped and confident for any outdoor adventure!
With each practice round, my kids ended up using their problem-solving skills more effectively. It turned out, not only do we build knowledge this way, but we also strengthen family bonds and create lasting memories.
Frequently Asked Questions
What are the key outdoor survival skills I should focus on as a family?
Key skills often include navigation, shelter building, fire making, first aid, and food/water sourcing. These foundational skills prepare you for a variety of outdoor situations!
How can I make survival training fun for my kids?
Incorporating games, hands-on activities, and role-playing scenarios makes learning exciting! Use creativity to turn each skill into a fun family adventure.
How often should I practice survival skills with my family?
Regular practice is beneficial. Integrating survival skills into monthly outdoor activities keeps knowledge fresh and reinforces learning in a practical setting!
Is there an age limit for starting survival skills training with kids?
Not at all! Kids can start learning basic concepts as early as they can walk. Adapt the complexity of the skills based on their age and understanding to maintain engagement.
What resources can I use to learn more about survival skills?
There are tons of books, online courses, videos, and workshops focused on survival skills. Local community centers or outdoor education programs often offer classes suitable for all ages.

by Preparation | Apr 26, 2025 | Preparedness
Assessing Your Pet’s Needs
Understanding Common Health Issues
As you embark on the journey of creating a first aid kit for your furry friend, it’s crucial to understand what kinds of health issues you might encounter. Every pet is unique, and knowing their specific needs can make a huge difference in an emergency. When I first started thinking about my pets’ health, I made a list of common problems like cuts, bites, and allergic reactions. It gave me clarity on what to include in my kit.
For instance, my dog, Max, is prone to ear infections, while my cat, Bella, occasionally gets into tussles with other animals. By identifying these issues, I ensured I was prepared for any situation that might arise. Consider chatting with your vet about potential concerns—they can offer customized advice based on your pet’s age, breed, and health history.
Being proactive is key! Think about your pet’s lifestyle, whether they are active and adventurous or more relaxed. This can help you predict potential emergencies and prepare accordingly. It’s all about being one step ahead.
Talking to Your Veterinarian
One of the best resources I found while preparing my pet’s first aid kit was actually my veterinarian. They have a wealth of knowledge and could suggest essential items for my kit based on my pets’ unique needs. Just asking simple questions during our regular check-ups gave me valuable insights.
Don’t be shy about asking specific questions! For example, “What should I have on hand for a bee sting?” or “How can I handle a sudden illness?” These conversations can help you build a tailored kit that’s efficient and effective.
Make it a practice to update your kit according to your vet’s advice, as recommendations might change with seasons or health developments. Keeping an open line of communication with your vet can ensure that you’re always prepared for anything life throws your way with your pet.
Regularly Updating Your Kit
Over time, I realized that just building the kit wasn’t enough. Regularly updating it is super important! Just like you check the pantry for expired food, keep an eye on the contents of your first aid kit, too. If your pet’s health changes or they age, you may need to add new supplies.
Also, I’ve learned that I should check items like gauze and antiseptics to ensure they remain sealed and effective. Rotating supplies can also help ensure anything that needs attention is taken care of promptly. Make it a habit to do this every few months. You never know when you’ll need it!
Additionally, every few seasons, let’s say every six months, it helps to re-evaluate what’s in there. Some items might get used up or become obsolete. If you’ve had a change in your pet’s activities or health, adapt the kit to suit those new circumstances!
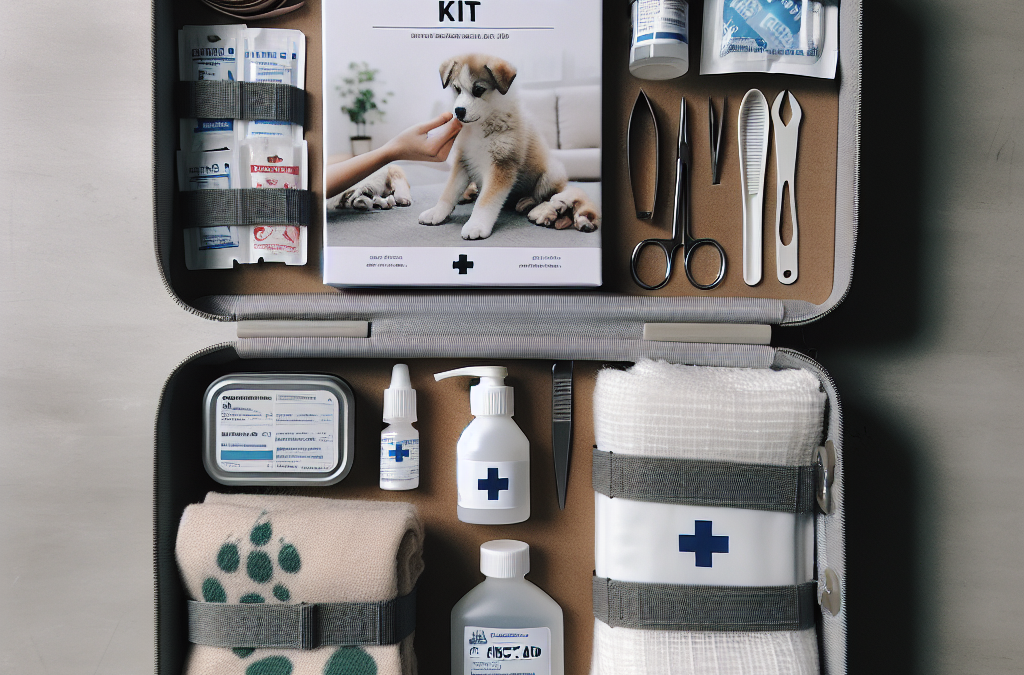
Essential Items for Your Kit
Bands and Wraps
When I think of first aid, one of the first things that comes to mind is bandages. The world of bandages is vast, and I’ve learned that having a variety is key. From adhesive bandages for small cuts to elastic wraps that can secure gauze on a more serious injury, each plays an essential role in pets’ first aid.
Having a set of stretchy bandages is great for wrapping injuries on a leg or paw, while smaller adhesive bandages work perfect for those tiny scrapes. Just keep in mind, don’t use human bandages, as they can contain materials that might be unsafe for pets if swallowed!
Stocking a few different types ensures you’re ready for small everyday boo-boos to bigger accidents. Trust me; after a couple of mishaps with Max and Bella, I learned this the hard way. The right bandage can really speed up healing and help minimize infections!
Cleaning Supplies
Next, we have cleaning supplies, an absolutely necessary component of any pet first aid kit. Keeping wounds clean is essential, and I often use sterile saline solution and antiseptics to help with that. It’s something I learned after witnessing a minor cut turn serious due to lack of proper cleaning!
Even knowing you can use natural options like witch hazel can help soothe your pet’s skin after cleaning. However, I always consult with my vet before trying new products, just to be on the safe side. You just never know what works best, especially if they have allergies.
Keep some cotton balls and swabs handy, too. They can really help with applying cleaning solutions, making things easier and more controlled. And let’s face it; the last thing you want is a messy clean-up job!
Medication and Treatment Essentials
I’ve faced the tough decision of having to give Max medication for unexpected allergies, and that’s when I realized having the right medications is crucial. Over-the-counter choices like Benadryl and activated charcoal can come in handy for treating mild allergies or poisoning.
However, it’s vital to consult your vet about dosages and what medications are safe for your specific pet. I always keep a little guide with standard dosages for my pets and maintain a line of communication about any changes to their health or medication needs.
Having a thermometer specific for pets is another essential tool that has saved me from guessing too much. If ever in doubt, taking a quick temperature gives definitive information. Those little pieces of knowledge make you feel more in control in an emergency.
Storing Your Kit
Choosing the Right Container
When I first built my first aid kit, I didn’t put much thought into the container. Boy, was I wrong! I later realized that having a good sturdy container makes a huge difference. You need something that’s durable, waterproof, and easy to carry around, please! I recommend a plastic box with labels for each section inside, so you know exactly where everything is in a moment’s notice.
Also, think about where you plan to keep this kit. Evaluate the environment; if it’s in a humid area, you might need to think about sealing everything inside properly. Keeping medications and supplies in their original packaging can also help prevent any mix-ups.
Once, I had everything scattered in a drawer, and it took me ages to find what I needed in an emergency. Trust me; it’s worth investing some time into organizing it properly to make things smoother later!
Labeling and Organizing Items
Another crucial aspect is labeling. I figured out that simply throwing things together isn’t enough; organizing by type helps a lot. Using labels for different sections like ‘bandages,’ ‘medications,’ or ‘cleaning’ copies not only saves time but ensures that others who might need to use the kit can find what they need in a hurry.
Consider creating a quick reference guide to put inside the kit. It could include emergency numbers for vets, poison control, or even your regular vet’s info. On one stressful occasion, I was frantically looking for numbers, only to realize I could’ve had that on hand!
Also, regularly checking and re-labeling supplies as needed keeps everything up to date. It’s a simple practice that can prevent any mishaps where you think you have the right item only to find out it expired or was used last week.
Location Accessibility
Finally, where you store your kit can make a world of difference. It’s an easy mistake to hide it away in the back of a closet; I did that once, and you can imagine how fun that was trying to dig it out during an emergency! Instead, I’ve learned to keep my first aid kit in a place that’s easily accessible yet safe from small hands and paws.
Keep a small kit in your car too, just in case emergencies happen while you’re out and about. This has been a lifesaver during long walks or hikes. Trust me, having it on hand prevents panic when unexpected problems arise.
Finally, maybe consider having a separate smaller kit specifically for travel, just to keep it all ready to tackle whatever comes your way during adventures. You’ll thank yourself later for being prepared and confident in handling situations when they pop up!
Training and Practice
Learning Basic First Aid Techniques
Honestly, having a first aid kit is just one part of the equation—knowing how to use it is another. I took a weekend class on basic pet first aid, and it was a game-changer! They walked us through techniques like how to bandage a leg and when to apply pressure to stop bleeding.
Hands-on techniques taught me to perform CPR on pets, which I certainly hope I never have to use, but it gives peace of mind to know what to do in a scary situation. I’d recommend checking for local classes, as many community programs offer these invaluable skills.
Alternatively, there are several online resources and videos to guide you. Just make sure they come from reputable sources or certified professionals. Knowing these skills can make that crucial difference if an emergency arises, and being prepared is so empowering.
Practicing with Your Pet
Another thing I found super helpful was practicing how I would handle my pets in an emergency. I set aside time to get used to the equipment and practice where all the items in my kit are located. It felt a bit silly at first, but it actually built confidence for me—and my pets were great sports about it!
Since my pets are pretty calm, practicing nudging their paws or holding them still for a bandage helped me prepare for the real thing. It was reassuring to know how they reacted and how I could best calm them if they were stressed.
Having my pets accustomed to being handled during these training sessions really paid off when things got tense. Your pets might surprise you by being more cooperative if they’ve had a little practice in advance!
Creating a Family Plan
Finally, involving the family in the process can create a sense of teamwork about your pets’ health and safety. I often include my kids in discussions about the first aid kit and what supplies we have. They’ve learned where to find everything and how to assist if needed in an emergency.
This also lays a foundation for valuable life lessons about responsibility and care of pets. My kids take pride in knowing they can help care for our animals and are more attentive during our walks and outings. It’s all about creating that bond between them and our pets!
Every few months, we have a family refresh on knowledge about the first aid kit, discussing what’s in it and why. What could be a mundane chore becomes a bonding session over our beloved pets. Teamwork makes the dream work, right?
FAQs
1. What should be included in my pet’s first aid kit?
Your kit should contain bandages, antiseptics, gauze, medications, and a thermometer, along with a few basic first aid tools like scissors and tweezers. Tailor it to your pet’s specific needs.
2. How often should I check and update my first aid kit?
I recommend checking your kit every few months, replacing expired items, and ensuring everything is in good condition. This keeps you prepared for any emergencies!
3. Is it necessary to take a pet first aid class?
While not mandatory, it’s incredibly beneficial. Learning basic first aid techniques increases your confidence and equips you with the skills you may need during a pet emergency.
4. Can I use human medications on my pets?
Some human medications are safe for pets, but you must consult your veterinarian before giving anything. Dosages vary widely, and some medications can be harmful to pets!
5. Where should I store my first aid kit?
Keep your first aid kit in an easily accessible, safe place that your pet can’t reach. Consider having smaller kits for your car and travel to ensure preparedness wherever you go!
by Preparation | Apr 26, 2025 | Preparedness
Creating a Flexible Mindset
Understanding Uncertainty
One of the most enlightening moments I’ve had was realizing that uncertainty is simply a part of life. Instead of viewing it as a barrier, I started to see it as a doorway to new possibilities. Life is full of surprises, right? By opening myself up to the idea that things may not always go according to plan, I found a deeper sense of freedom and less anxiety.
When we talk about uncertainty, it’s easy to think of it in a negative light. But here’s the thing: it can also be an adventure. By acknowledging that tomorrow might bring unexpected changes, we can begin to prepare ourselves to adapt and thrive in those situations. This shift in perspective has helped me tackle challenges with a can-do attitude.
The key takeaway here is to embrace the unknown. Fill your mind with the thought that surprise can lead to personal growth. The more we equip ourselves with this flexible mindset, the better we can handle whatever curveballs life throws at us!
Practicing Adaptability
Okay, so once I acknowledged uncertainty, I realized that adaptability was my best friend. It’s like having a toolbelt for life’s unpredictability. When things inevitably don’t go as I planned, I remind myself to pivot. For me, being adaptable means not clinging too tightly to one path or plan.
One way I practice adaptability is by regularly stepping out of my comfort zone. Whether that’s trying a new hobby, taking a different route to work, or even striking up a conversation with a stranger—every little experience helps me build that muscle of flexibility.
So, when life throws a wrench in your plans, don’t panic! Instead, look for alternative routes or methods. The more I train myself to adapt, the less daunting the unpredictable becomes. It’s empowering to know that I can handle whatever comes my way.
Embracing Change
Here’s a truth bomb for you: change is inevitable. We can’t escape it, but we can choose how we react. I’ve seen folks cling to routines and structures, and when change comes knocking, it’s often a messy ordeal for them. But I’ve learned to welcome change as a part of my growth journey.
Each time I’ve embraced change instead of resisting it, I’ve discovered beautiful opportunities on the other side. It’s not always easy, but being open to change has led me to exciting collaborations, new friendships, and different adventures I never saw coming.
Change really can be a friend, but it requires a mindset shift. Approach change with curiosity rather than fear. Ask yourself what you can learn and how you can grow—it’s a game changer!
Developing a Support Network
Identifying Your Tribe
Ever been in a tight spot and thought, “Man, I wish I had someone to talk to?” That’s where a solid support network comes in. Surrounding myself with like-minded individuals has been a lifesaver when facing unpredictable circumstances. Friends, family, or even colleagues who understand me can be a secure base when life gets wild.
The journey doesn’t have to be lonely. I actively seek those who uplift me, offer different perspectives, and genuinely care about my well-being. Having those conversations can really lighten the load, trust me!
So, take a moment to evaluate your support network. Are they people who help you rise? If not, think about how you can expand your circle to include those who inspire you and encourage resilience.
Communication is Key
Let me be real with you: one of the biggest lessons I’ve learned is that open communication makes a world of difference. When I’m going through a rough patch, sharing what I’m experiencing with people in my support network has been transformative. You’d be surprised at how many insights and solutions come from simply being open about my struggles.
Whether it’s sharing my feelings with friends over coffee or discussing hurdles with a mentor, each conversation helps me feel less alone. It’s like shaking off the dust and seeing things from a fresh angle. Plus, there’s often relief in knowing that others have faced similar unpredictable moments and came out the other side stronger.
So, don’t bottle it up! Talk about what’s going on in your life. You might find that the right words at the right time can spark the inspiration you need to tackle the unpredictable.
Leveraging Resources
Let’s talk tangible help. Sometimes, I need more than friendly chats; I need actual resources! Whether it’s courses, books, or even online communities, tapping into various resources can fortify your ability to face unpredictability.
I’ve found that taking workshops or joining online groups can offer a treasure trove of information and strategies for dealing with unpredictable situations. You never know where inspiration will strike! It’s kind of like adding tools to a toolbox—you never know when you might need that extra wrench.
Always be on the lookout for resources that can help build your skills, expand your knowledge, or connect you with others. Combining community support with the right resources equips us even further to handle whatever life throws our way.
Anticipating Possible Scenarios
Scenario Planning
Here’s where things get a bit nitty-gritty but super useful! We all have dreams and goals, but what if we took some time to think through potential bumps along the journey? I call this scenario planning. By thinking ahead and contemplating various “what-if” situations, I can often prepare myself mentally for what lies ahead.
This doesn’t mean I’m living in fear or anxiety, but rather I’m equipping myself with solutions and strategies for various possibilities. For instance, if I’m anticipating a job interview but fear a potential curveball question, I can practice my responses ahead of time. It’s a game-changer!
Also, throw in a bit of creativity! When you brainstorm potential scenarios, allow yourself to think outside the box. Who knows what innovative solutions you might uncover with a little bit of imagination?
Assessing Risks
Every adventure comes with some level of risk, right? But when I assess risks beforehand, I feel a sense of control over situations. It’s about weighing the pros and cons. When faced with life’s unpredictability, I always ask myself: What’s the worst that could happen, and can I handle that?
This isn’t about being pessimistic; it’s about being realistic. By having an honest discussion with myself about potential downsides, I can prepare for them and lessen their impact. I often find that most risks are manageable, especially when I back myself up with a solid plan or coping strategy.
So, when your gut tells you something’s off, take a second to evaluate it. This awareness not only helps in reducing anxiety but also empowers me to step forward confidently!
Building a Contingency Plan
Alright, moving on to a more proactive approach: the contingency plan. I’ve learned that having a backup plan can be a game changer when creating a safety net amid uncertainty. It’s like knowing there’s a safety rope attached when I’m trying something new and risky.
When I’m mapping out my goals or projects, I always take a moment to think about what I would do if things didn’t go as planned. By strategizing multiple routes to my goals, I build confidence and resilience. It feels less daunting when I know I have options.
So take the plunge! Outline your backup plans, and know that you can switch gears if needed. The more prepared I feel, the better I manage the unpredictables in life!
Practicing Self-Care
Prioritizing Mental Health
Self-care isn’t just a buzzword; it’s a necessity, especially when dealing with unpredictability. I’ve experienced periods where stress took a toll on my mental health, making every little setback feel like a mountain. By prioritizing my mental health, I’ve found I can handle surprises with grace.
For me, this means incorporating mindfulness exercises, meditation, or even just quiet time into my daily schedule. I’ve made it a habit to check in with myself and acknowledge my feelings. It’s amazing what a little self-reflection can do for my overall well-being!
When life gets overwhelming, taking time for mental health isn’t selfish—it’s self-preservation. So remember to be kind to yourself and keep mental wellness on your radar!
Physical Well-Being
But let’s not forget about physical health! Taking care of my body has a magnetic effect on my ability to manage stress and unpredictability. I’ve noticed that when I’m active and eating well, my mindset shifts into a more positive and resilient space.
Exercise is my go-to stress reliever. Whether it’s a brisk walk, hitting the gym, or dancing around my living room, getting my body moving does wonders for my mood. Plus, the endorphins?! Pure magic!
So, if you’re feeling the pressure of unpredictability, consider investing some time and energy into your physical health. It might just be the boost you need to adapt and overcome challenges!
Establishing Routines
Finally, let’s talk routines! Yes, I know routines can sound boring, but hear me out—they’re my anchors in unpredictable waters. Establishing a daily routine gives me a sense of stability and control over my day, even when life outside feels chaotic.
Simple rituals like morning coffee, reading, or exercise help me ground myself. Routines offer comfort during uncertain times. So, I encourage you to create a structure for your day that makes you feel secure and ready to tackle whatever comes your way.
Life is unpredictable, but having routines can be your steady rhythm in the dance of life’s ups and downs.
Conclusion
Preparing for the unpredictable is like arming yourself with tools for whatever life has in store. It takes a few thoughtful strategies—fostering a flexible mindset, building your support network, anticipating scenarios, and practicing self-care. The beauty of being ready for unpredictability is that we can turn challenges into golden opportunities for growth and learning. Whenever life throws a curveball your way, remember that you’ve got what it takes to handle it!
FAQ
1. What is the first step in preparing for unpredictability?
The first step is creating a flexible mindset that embraces uncertainty rather than fearing it. By shifting your perspective, you can open yourself up to new possibilities.
2. How can I build a support network?
Start by reaching out to friends, family, or colleagues who uplift you. It’s crucial to foster relationships with people who can offer insight and support during tough times.
3. What does scenario planning involve?
Scenario planning is the process of anticipating potential challenges and formulating proactive solutions. It’s about asking yourself “what-if” questions so you can prepare mentally.
4. How can self-care help me manage unpredictability?
Prioritizing self-care ensures your mental and physical health are optimized. By taking care of yourself, you’re better equipped to handle stress and uncertainty.
5. Why are routines important in dealing with unpredictability?
Routines provide stability and control in your daily life. They act as an anchor amid chaos, giving you a structure that helps you feel secure even when things are unpredictable.
by Preparation | Apr 26, 2025 | Preparedness
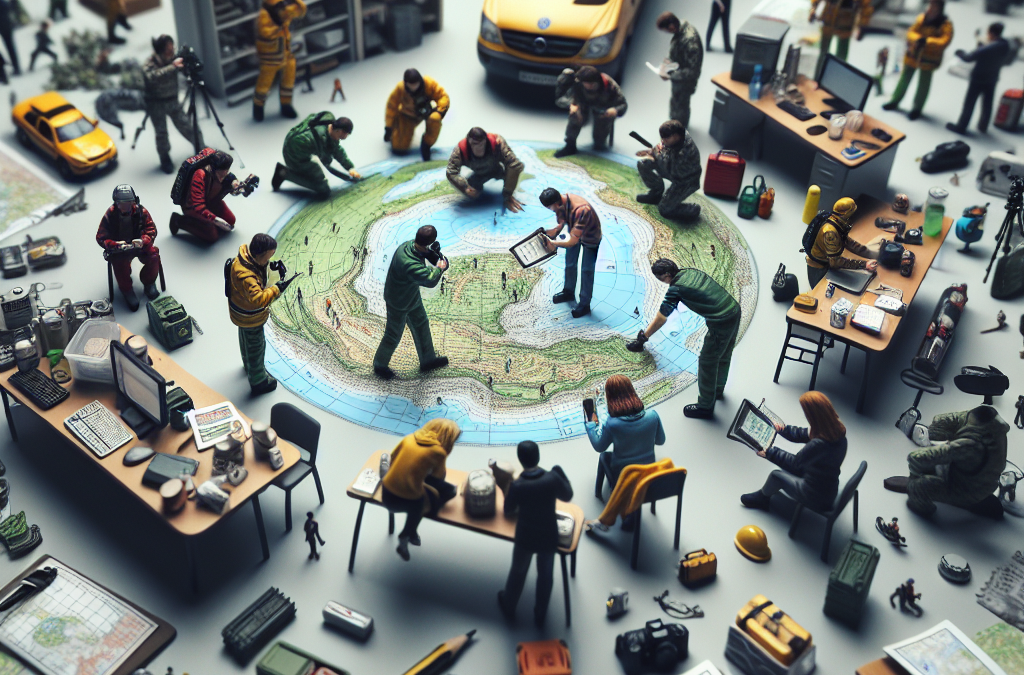
Assessing Your Situation
Understanding the Emergency
In any emergency, the first step is figuring out what’s going on. Trust me, panic can cloud your judgement and that’s when mistakes happen. I’ve been there—stressed out and not thinking straight. Take a deep breath and try to get the situation under control. Is it a natural disaster, a medical emergency, or perhaps something else entirely? Knowing the nature of the emergency helps determine the local resources you’ll need.
Once you know what’s happening, you can focus your energy on what you need to do next. For instance, if it’s a flood, you might need to consider evacuation routes or local shelters. If it’s a medical emergency, knowing where the nearest hospital is can make all the difference. It can feel overwhelming, but breaking it down into smaller, understandable pieces will help you manage your response effectively.
Also, remember to think about timing. Emergencies can evolve quickly, and the resources available to you might change. Keep assessing the situation as you gather information. Being adaptable during times of crisis might just save the day!
Connecting with Local Authorities
Finding Reliable Information
When you’re in an emergency, local authorities are a crucial lifeline. They can provide vital information regarding evacuations, safety procedures, and resources available to assist you. Never underestimate the power of a quick phone call or a check on local news stations. Even social media can serve as a real-time information source during crises.
I’ve always found that having the contact information for local emergency services saved time when it came to figuring out what needed to be done. Whether it’s the local fire department, police, or emergency management offices, they are well-informed. Reach out to them if you’re unsure of what’s happening or what to do next. It’s like having a compass in a storm; they can guide you back to safety.
And don’t forget about community bulletins or websites. Many local governments have online portals where they post updates during emergencies. Staying connected and informed through these channels can provide insights that are crucial to navigating challenges effectively.
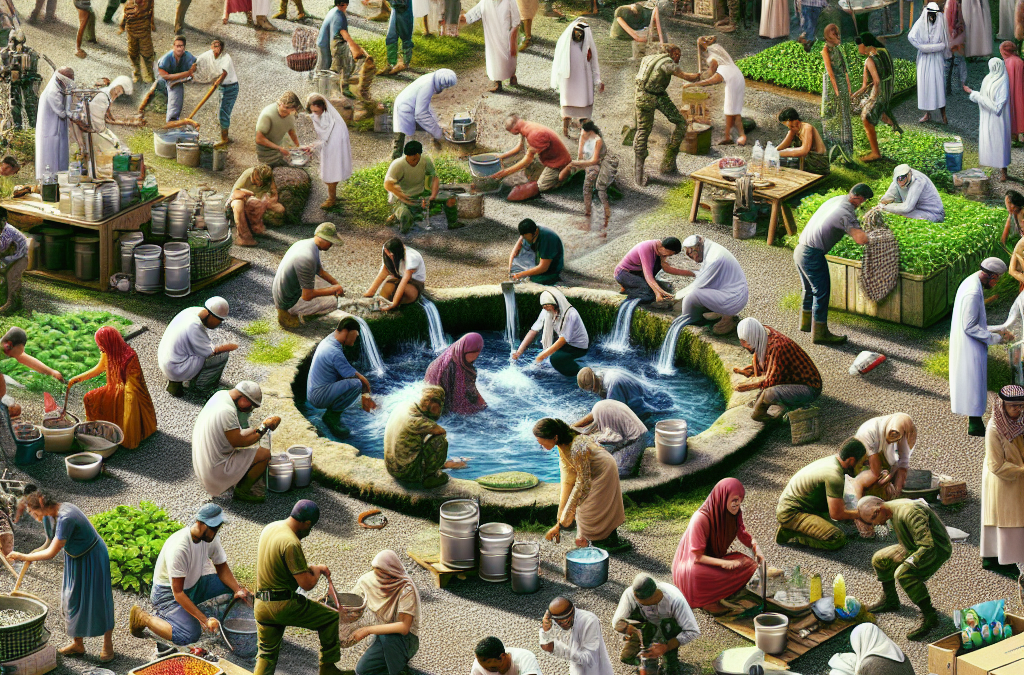
Utilizing Community Resources
Engaging with Local Organizations
Your community is a treasure trove of resources during emergencies. Local organizations—like Red Cross branches or food banks—often spring into action when crises hit. They come equipped with supplies, food, and emotional support services. I can’t emphasize enough how important it is to know who these organizations are before disaster strikes.
I remember once when there was a major storm in my area, and our local Red Cross set up a shelter. They provided food, blankets, and, most importantly, a safe space for those who were displaced. Don’t hesitate to reach out to nearby organizations; they are ready and willing to lend a helping hand in tough times.
Also, local churches and community centers often have resources or can connect you with those who do. You’d be amazed how people come together during emergencies. They really know how to rally and support each other in times of need, so be proactive in tapping into that network!
Creating a Support Network
Reaching Out to Neighbors
Never underestimate the power of your neighbors. Having a support network can be a lifesaver. I remember during a local crisis, we banded together to share resources like food, water, and even generator power. Just a quick chat or a message can let you know who’s around and ready to help!
Consider forming a neighborhood group to discuss emergency plans. Being proactive about this can ease fears and strengthen bonds. If you know each other’s strengths—like having someone with medical training—you can create plans that maximize everyone’s resources during an emergency.
And let’s not forget about the emotional support. When you’re in a crisis, simply knowing someone else is right there with you can make all the difference in the world. Keep that line of communication open and support one another as best as you can.
Preparing for Future Emergencies
Developing an Action Plan
Once the dust settles, it’s time to reflect on the experience and prepare for the future. Think about how you responded and what resources helped the most. Maybe you discovered that your local organizations were super helpful, or perhaps you found that your network of friends and neighbors was absolutely invaluable. Whatever it is, jot it down!
Creating a solid action plan for future emergencies is essential. Make a checklist of handy contacts, important resources, and a strategy to utilize them effectively. I even keep a “go-bag” with supplies just in case, which I’ve found handy during unexpected emergencies.
Lastly, don’t forget to share your insights with others. Help build a culture of preparedness in your community. When the next emergency strikes, everyone will be better equipped to handle it, and you’ll inspire others to take action, too.
FAQ
1. What should I do first in an emergency?
Assess your situation to understand what kind of emergency you’re facing. This will help in determining the resources and the actions you need to take.
2. How can I find local resources during an emergency?
Reach out to local authorities, check community boards, or browse social media channels where local emergency updates might be posted.
3. Are community organizations really helpful in emergencies?
Absolutely! Local organizations, like the Red Cross, are usually quick to mobilize resources and support during crises. They can offer food, shelter, and essential supplies.
4. How can I strengthen my support network?
Get to know your neighbors and build connections ahead of time. Forming a neighborhood plan can foster cooperation and ensure everyone knows how to support each other.
5. What is the best way to prepare for future emergencies?
Reflect on past emergencies and create a detailed action plan. Include emergency contacts, resources, and keep a well-stocked go-bag ready for any unforeseen situations.
by Preparation | Apr 26, 2025 | Preparedness
Practice Regularly
Set Up a Routine
When it comes to sharpening survival skills, consistency is key. Personally, I carved out a chunk of my weekend to practice things like fire-starting or setting up a tent. It doesn’t have to be an all-day affair; even dedicating an hour can make a difference. The more you practice, the more second nature these skills become.
Setting a specific day or time to practice can help solidify this routine. For example, I decided that Sundays are my “Survival Sundays.” Every week, I challenge myself with a new skill or scenario, which keeps it fresh and exciting. Plus, I like to bring a friend along to make it a fun activity rather than a chore.
And let’s be real, it’s not about perfection. It’s about improvement. You’ll stumble and make mistakes, but that’s part of the learning process. Each practice session builds confidence and, ultimately, expertise when you really need it.
Join a Community
Connecting with like-minded folks has been a game-changer for me. Finding a community—whether it’s through online forums, social media groups, or local meetups—gives you a chance to learn from others and share your experiences. I’ve met some incredible people who have expanded my knowledge and pushed me to try things I’d never have tackled alone.
In these groups, I’ve found people of varying skill levels, which means I’m always learning something new. Sometimes, seeing someone else demonstrate a technique can really help it click for me. Plus, they can offer tips from their own experiences, which is often more relatable than a textbook.
Community support also comes in really handy when you’re tackling larger projects or challenges. Teaming up to learn survival skills prepares you for real-world scenarios where collaboration can be essential. It makes it more enjoyable and less daunting.
Create Realistic Scenarios
Bringing real-life situations into your practice can really level up your learning. I often create scenarios at local parks, simulating being lost, or forced to survive with limited resources. This kind of applied learning sticks with me way more than just reading about it.
The beauty of crafting your own scenarios is that you can tailor them to challenge yourself. Maybe it’s trying to build a shelter in under an hour or foraging for edibles during a hike. Whatever it is, make it as real and practical as possible. This not only helps you learn but also boosts your problem-solving skills.
Also, don’t forget to have fun with it! Sometimes, I’ll even turn these scenarios into friendly competitions with friends to see who can complete a task the fastest. It keeps the energy up and makes learning feel like more of an adventure rather than a chore.
Stay Updated with Resources
Read Books and Articles
Books have been my go-to source of survival knowledge. I’ve got a shelf dedicated to survival manuals and adventure stories that not only teach but inspire. They come with diagrams and step-by-step instructions that you can refer back to anytime.
Additionally, online articles and blogs provide more current information, along with personal anecdotes that often fill in the gaps traditional books might miss. I love finding authors who really dive into their personal survival stories—it gives you context and makes the learning more relatable.
There’s also a lot of newer research out there regarding wilderness safety and first-aid techniques that can come in handy. So, keeping up with fresh content keeps my knowledge relevant and sharp, preparing me for any circumstance.
Watch Instructional Videos
These days, there’s no shortage of great survival content online, especially on platforms like YouTube. Watching someone demonstrate a skill can make a huge difference in my understanding. It’s one thing to read about making fire with a bow drill; it’s another to see someone do it successfully.
Instructional videos are often informal and relatable. I’ve picked up tons of tips and tricks I wouldn’t come across in a book just by seeing how others tackle challenges. Plus, many creators have a unique approach that might resonate differently depending on your learning style.
And if you find a channel you really vibe with, you can follow their journey, getting updates on new techniques or gear recommendations. Remember to look for videos that emphasize safety practices, as this is a critical aspect of survival training.
Utilize Mobile Apps
Mobile apps are a lifesaver (pun intended) when it comes to enhancing survival skills. There are countless apps out there for wilderness survival, first-aid, and even navigation. I like to have a few loaded on my phone before heading out, just as a precaution and quick reference guide.
Many of these apps include survival guides, foraging information, and even emergency hacks for when things go awry. They tend to be concise and easy to understand, making it a breeze to get the information you need when you need it. I’ve had moments in the wild where pulling up quick tips made all the difference.
Moreover, some apps also offer interactive features, like quizzes or challenges, which help reinforce what you’ve learned. Staying engaged through a fun format makes it less like studying and more like a game.
Learn from the Experts
Take Classes or Workshops
Attending survival classes has been one of the best investments in my skill-building journey. Learning from professionals who’ve been in tough situations gives you a well-rounded education that’s hard to replicate. They offer hands-on experiences in a safe environment and answer all those questions you have along the way.
I’ve participated in everything from basic wilderness survival to advanced navigation and bushcraft workshops. Each class built on the last, giving me more confidence and deeper knowledge. Plus, the camaraderie and motivation from being with peers is another great reason to participate.
You can often find these classes offered by local outdoor organizations or community colleges, so there’s usually something accessible nearby. Keep an eye out for specialized workshops on topics that interest you personally!
Follow Survivalist Blogs and Podcasts
I’m always on the lookout for blogs and podcasts dedicated to survival skills. It’s such a flexible way to learn because I can absorb the information while I’m on the go—driving, hiking, or even just chilling at home. These platforms often share the latest trends in survival techniques, gear reviews, and inspiring personal stories.
Some of my favorite podcasts feature in-depth interviews with experienced survivalists who share lessons learned from their adventures. Hearing stories from the field can be incredibly motivating and enlightening, revealing what works and what doesn’t in real-life situations.
Plus, many bloggers and podcast hosts encourage community interaction, so you can discuss ideas or ask questions directly. It creates a sense of connection, even though I’m just listening from my couch.
Attend Expos and Conferences
If you ever get the chance to go to a survival expo or conference, jump on it! These events gather an incredible array of experts, enthusiasts, and vendors all in one place. I attended one last year and met folks who’ve got a wealth of knowledge and experience to share. They often conduct live demos, which are super helpful!
Approaching different booths and chatting with various vendors is a unique opportunity to learn about the latest gear and techniques. Many times, you can even try things out firsthand. This kind of exposure can spark new interests or perspectives that you might not have considered.
Plus, being around passionate, skilled individuals instantly raises my motivation. Everyone’s excited about learning and sharing, which creates this awesome atmosphere that’s infectious. It reminds me that we’re all in this together, pushing the envelope of our abilities.
Stay Physically and Mentally Fit
Regular Exercise
It might not seem related at first glance, but being in good shape physically can seriously enhance your survival skills. I’ve noticed that endurance matters when you’re out there; being able to hike long distances or carry gear becomes a breeze when you’re regularly active. I try to incorporate activities like hiking, running, and strength training into my weekly routine.
This doesn’t mean you have to be a professional athlete, but being fit helps you maintain focus and handle stress better. Plus, when you build stamina, it allows you to focus on learning new skills without tiring out too quickly. Every little bit counts!
As I’ve pushed my physical limits, I’ve also felt a boost in my mental resilience. Knowing that I’m capable of handling physically demanding situations makes it easier to believe in my other skills when the going gets tough.
Meditation and Mindfulness
You might think meditation is just for relaxation, but it can be a vital part of your survival toolkit. Practicing mindfulness has helped me enhance my focus, which is crucial in high-pressure situations. Spending a few minutes every day practicing techniques lets me clear my head and remain calm when things get dicey.
In times of stress, it’s easy to feel overwhelmed. Engaging in mindfulness has taught me to take a step back, assess my surroundings, and make logical decisions, rather than reacting instinctively. This skill has helped me significantly in both day-to-day life and during my wilderness adventures.
Plus, the mental discipline gained through dedicated practices positively impacts all facets of survival skills—from the way I tackle obstacles to how I interact with others in a group setting.
Develop Problem-Solving Skills
Survival situations are often unpredictable, which means you’ll need to think on your feet! I’ll often throw myself into unexpected situations to strengthen my problem-solving skills. This could be something simple, like figuring out how to build a shelter with materials on hand, or more complex, like navigating without the aid of a map or GPS.
Incorporating brain games and puzzles into my routine has also sharpened my quick-thinking abilities. The more I practice identifying potential solutions, the more adept I become at applying these strategies outdoors. Engaging with challenging situations keeps my brain agile, preparing me for whatever adventures lie ahead.
Plus, I’ve learned that collaborative problem-solving can offer new insights. When I work with others, I see alternative approaches and solutions that I wouldn’t have thought of on my own, so finding partners for practice is always a good idea!
Frequently Asked Questions
1. What are the best resources for learning survival skills?
Books, online articles, instructional videos, and mobile apps are some of the best resources available. They can provide detailed guidance and real-life applications that make learning easier.
2. How can I practice survival skills at home?
You can set up small challenges or tasks that mimic survival situations, such as starting a fire, building a makeshift shelter, or practicing first aid techniques using materials at home.
3. Is it necessary to take a class for survival skills?
While it’s not absolutely necessary, taking a class can greatly enhance your learning experience. You get hands-on practice and learn from experienced instructors, helping you build confidence in your abilities.
4. How important is physical fitness in survival situations?
Being physically fit can significantly improve your chances in survival scenarios. It enhances stamina, agility, and mental resilience, which are all crucial when you’re in challenging situations.
5. How can I stay motivated to keep learning survival skills?
Joining community groups, setting personal challenges, and keeping the learning fun and varied can help you stay motivated. Engaging with others who share your passion also boosts enthusiasm!


