by Preparation | May 8, 2025 | Preparedness
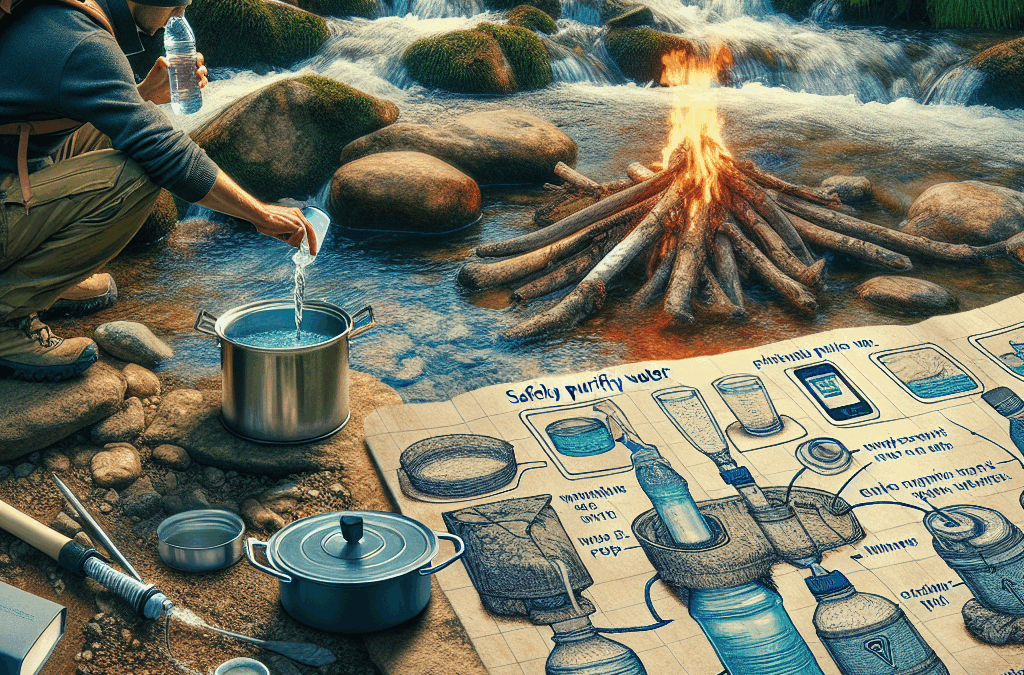
Hey there! So, you’re out in the wild, maybe hiking or camping, and you realize you need water. The good news is that nature provides, but you gotta be smart about it. Let me share what I’ve learned about purifying water in the great outdoors, covering five major methods that can keep you hydrated without getting sick!
Boiling Water
Why Boiling is Effective
Boiling water is one of the oldest and simplest methods, and it always amazes me how straightforward it is. The high temperatures kill off bacteria, viruses, and parasites. Basically, if you bring water to a rolling boil for at least one minute, you’re in the clear. If you’re at higher altitudes, you might wanna crank it up to three minutes just to be safe!
In my experience, I usually look for clear water—it’s a good sign that it’s probably cleaner than murky options, even though it’s not a guaranteed sign. Once I’ve got my water boiling, I’ll wait for a few minutes, and I can usually go back to enjoying the scenery while I wait.
One thing to remember when boiling water: it can take time. If you find yourself in a rush, this method could delay your plans a bit. Just keep your fire going and make sure you have everything set up before you get parched!
How to Boil Safely
Setting up an efficient boiling process is crucial. First up, make sure you’ve got a clean and suitable pot to hold that water, something you can use without worrying about toxins melting into your drink. Camping gear is often designed for this, but if you’re improvising, feel cautiously creative.
Next, keep your fire and the pot steady. Fire tends to just have its own feelings sometimes, especially when the wind kicks in. I always say, find a nice sheltered spot where you can keep the flames going strong.
Lastly, once you’re done, let the water cool before sipping. Trust me; you don’t wanna gulp down boiling hot water and end up with a nasty burn. Patience is key here!
Limitations of Boiling
While boiling is fantastic, it’s not without its limits. First off, it won’t remove chemical contaminants. If your water source is near industrial activities or agricultural areas, boiling might not help much. So it’s important to take a good look at where your water is coming from.
Another thing to keep an eye on is that boiling can use up precious firewood. If you’re in a spot where resources are limited, you might want to save that energy for cooking or warming up instead.
Lastly, don’t forget about the taste! Some folks find boiled water can taste a bit flat. You can always let it cool and add a bit of flavor if that’s your thing. A pinch of salt or some herbs might make your hike a bit more enjoyable!
Using Water Filters
The Benefits of Filtering
Water filters are arguably one of my go-to tools when I’m out exploring. They’re portable, usually lightweight, and super efficient. Filters can remove a range of contaminants, including sediment and bacteria. Plus, they often improve the taste of your water—definitely a bonus after a long day of hiking!
When I use my filter, I love how easy it is. Just scoop up your water and let it pass through. It’s like magic! Many personal filters can handle a surprising amount of water before needing replacement, which is a game-changer for those longer trips.
It’s essential to know that not all filters are created equal, though. Some are designed for wilderness conditions, while others are more suited for treating water that is already relatively clean. So definitely do your homework on what you’re buying!
Setting Up Your Filter
Setting up a filter is usually straightforward. I generally start by checking my filter’s instructions (not the most fun part, I admit!). It’s important to know how to assemble and use it properly so you don’t find yourself in a bind.
You’ll want to attach it to your water container or drink directly from the outlet if you can. I have found that there’s some finesse involved; make sure there are no leaks to avoid wasting good water. Once you’re set up, just collect the water as per the guidelines!
Don’t forget to clean your filters after use; they can get clogged up quickly if you don’t. Keep them washed and stored properly for your next adventure to keep them in tip-top shape.
Potential Downsides of Filters
While handy, filters can have their downsides too. For starters, they generally don’t handle chemicals or heavy metals well, which is another reason to keep an eye on your water source. Depending on your location, you may still catch a nasty illness.
Also, filters can be finicky. If you don’t maintain them, they can jam, leading to a frustrating experience when you’re in a pinch. I’ve had to deal with a slow filter before—talk about an exercise in patience!
Lastly, while many are lightweight, carrying a filter along with all your other gear can add extra ounces to your pack. Just keep that in mind when you’re packing for your trip!
Treating Water with Chemical Purification
Understanding Chemical Purification
Chemical treatments like iodine or chlorine tablets are lifesavers. They’re lightweight and simple to use—just pop one in a bottle of water and wait. I love how efficient they are, especially when I’m carrying a lot of gear and need to conserve weight.
These chemicals work by killing harmful bacteria and viruses. Most of the time, a simple wait of about 30 minutes is all it takes before you’re good to drink! They don’t need boiling water—another big plus when you’re on the go.

However, be aware that chemical purification does come with some flavor drawbacks. Some people find that the taste of iodine is pretty off-putting. I usually carry a little flavoring to help mask those strong tastes when necessary.
How to Use Chemical Purification
When using chemical tablets, start by following the manufacturer’s instructions closely. More tablets don’t mean faster purification, and that could lead you to a bad experience. I usually set a timer and take a moment to relax while I wait for it to do its magic.
Another tip is to mix the water beforehand if you can. Shaking it up ensures that the chemical distributes evenly. Just don’t get too carried away and splash it everywhere—you’ll only have that much water to work with!
Lastly, keep track of expiration dates on those tablets. Old chemicals can lose their effectiveness, and you definitely want your purification methods to be reliable, especially when you’re far from home.
Safety Concerns of Chemical Treatments
While chemical treatments can be effective, they also have their risks. Iodine is not recommended for pregnant women or those with thyroid issues. Plus, prolonged use isn’t advised either, so it’s best for short trips.
Another thing to remember is how chemicals can affect the taste and smell of water. You might tolerate it, but it could be a bit much for guests. This is when carrying some sugar or flavoring can come in handy to make things more pleasant!
Lastly, don’t forget that chemical purification doesn’t address physical contaminants or sediment. So if you’re dealing with muddy or foul-looking water, it’s best to filter or let sediment settle before you drop those tablets in.
Using UV Light Purifiers
The Magic of UV Light
Ultra-violet light purifiers are some truly cool gadgets. They’re compact and efficient, completely taking out bacteria and viruses with their light. No chemicals, no boiling—just light! I can’t tell you how awesome it feels to push a button and know the water is getting zapped.
However, you need to have batteries or a rechargeable source, which can sometimes be a pain to manage when you’re off the grid. I always try to plan ahead and bring extra batteries just in case!
Another thing to watch out for is water clarity. If your water has a lot of particulates, UV light won’t work as well. Turbid water can block the light, so always aim for clearer sources!
How to Utilize a UV Purifier
Using a UV purifier is typically straightforward. First, check to make sure your unit is functioning and the batteries are good to go. It’s also important to have a clear receptacle for the water—some purifiers require drinking bottles, while others can be used in any container.
Then, immerse the UV light in the water for the time specified in the instructions (usually around 30 seconds to several minutes). I love how simple it is—just watch the light and know that you’re treating your water effectively!
Once time’s up, your water is ready to drink. Just give it a quick shake if your purifier allows for that, and you’re set! Easy peasy.
The Limitations of UV Light Purification
Even though UV light is great, it’s not a complete replacement for other methods. Like I mentioned, it won’t deal with sediment and particulates. If your water is cloudy, you should probably filter it before zapping it with UV light.
Also, when using the UV light method, don’t forget that it requires a power source. If you’re camping for an extended time, keeping those batteries charged might become an issue! I usually scope out solar chargers if I think I’ll be relying on it a lot.
Lastly, make sure you’re aware of how long it takes to purify your water. This method can be quick, but if you don’t pay attention, it may hold you back from your plans. Timing is everything, especially when there’s adventure calling!
FAQ Section
1. Is it safe to drink water directly from rivers or lakes?
Not without purifying it first! Natural water sources can contain harmful bacteria and viruses that can make you sick, so always use a purification method before drinking.
2. How long does it take to boil water for purification?
You need to bring it to a rolling boil for at least one minute. If you’re at a higher altitude, run it for at least three minutes to ensure it’s safe.
3. Are chemical purification tablets effective?
Yes, they are effective for killing bacteria and viruses. Just make sure to follow the instructions and check for any health concerns with iodine if that’s what you’re using.
4. What water filter should I use for wilderness camping?
A good backpacking filter is essential. Look for one that’s lightweight and can handle pathogens and particulate matter. Do your research to find a product that’s reputable for wilderness conditions.
5. Can UV light purifiers handle cloudy water?
No, UV light won’t be effective on cloudy or turbid water as particulates can block the light from reaching pathogens. You should always filter the water first if it appears murky.
by Preparation | May 8, 2025 | Preparedness
Understand Your Environment
Know Your Land
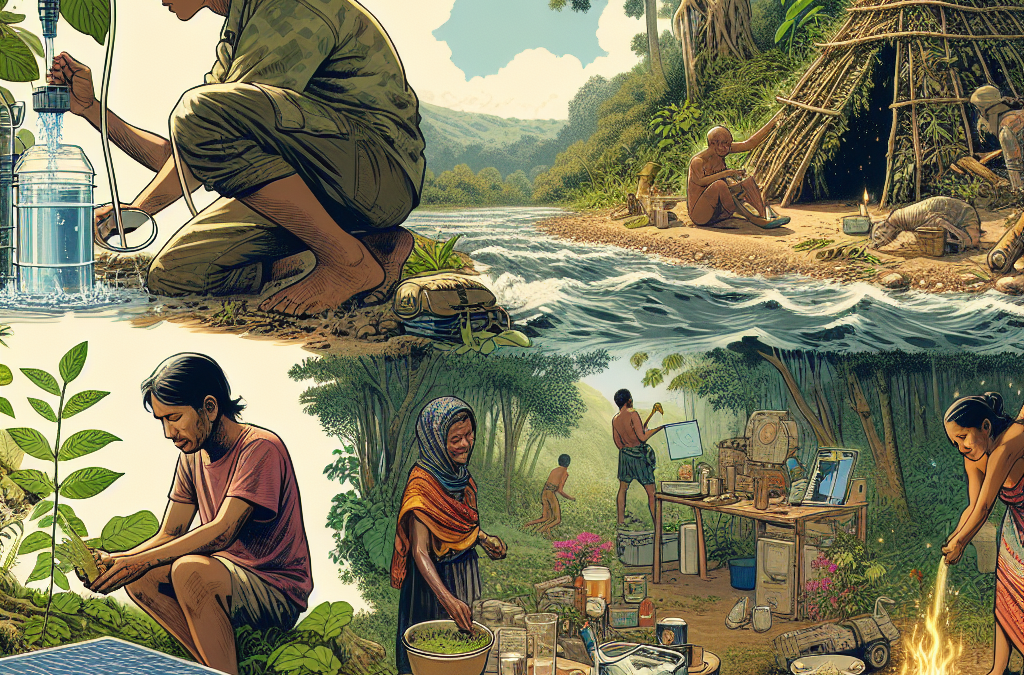
One of the first things I learned when I decided to go off-grid was the importance of really understanding the land I was living on. Every piece of land has its own unique features, whether it’s the types of plants that grow there or the flow of water. I spent a lot of time just wandering around, taking notes on where the sun hit during the day, and which areas stayed wet. This helped me figure out the best spots for gardening and setting up my living area.
Besides the plants and water sources, you have to pay attention to wildlife too. Some critters can turn your dreams of self-sufficiency into a nightmare if you’re not careful. By familiarizing myself with the local animals, I learned to identify which ones were likely to cause trouble, allowing me to take preventive measures like building better fencing or creating barriers.
Last but not least, understanding the weather patterns in my area helped to prepare me for storms, droughts, or extremes in temperature. I remember my first winter off-grid, when I was woefully unprepared for the amount of snow that fell. Now, I always invest time in learning about seasonal changes and climate trends, which makes a world of difference in surviving off the grid.
Master the Art of Food Production
Grow Your Own Food
When I made the leap into off-grid living, I quickly realized that relying on stores for food just wouldn’t cut it. Growing my own food was not only necessary but surprisingly rewarding. I started with the basics: veggies like tomatoes, beans, and lettuce. Learning which plants work well in my climate was a game changer, and I often reference books and online forums for tips from other experienced growers.
About a year in, I discovered companion planting and how it can maximize the efficiency of my garden. For example, growing basil near tomatoes not only helps repel pests but can also boost the flavor of my fruits. It’s a fun experiment and one that adds depth to my gardening skills.
Plus, I learned to forage for wild edibles in my area. This added enormous value to my diet. I couldn’t believe the variety of food available right outside my door! With a good field guide and some practice, foraging turned into a fantastic supplement to my home-grown meals.
Become Handy with Tools
Familiarize with Basic Repairs
One of my biggest lessons about living off-grid was to get comfortable with tools and repairs. I can’t tell you how many times a sudden plumbing issue or broken appliance caught me by surprise. Initially, I felt overwhelmed. But every hiccup presented an opportunity to learn. I began with some basic tools and a lot of YouTube tutorials.
Over time, I developed a knack for simple home repairs, and it saved me a ton of money. Instead of hiring someone to fix leaky pipes or replace fixtures, I now tackle these issues myself. It’s so satisfying when you can fix a problem with your own two hands!
I also learned that preventive maintenance is key. By regularly checking on my systems—like the roof or water supply—I could catch problems early before they spiraled into bigger issues. It’s all part of the off-grid experience, and I genuinely enjoy the sense of accomplishment it brings.
Harness the Power of Renewable Energy
Setting Up Solar or Wind Energy
Energy is a huge part of off-grid living, and I quickly realized that harnessing renewable energy was essential. After a lot of research, I opted for solar panels since I live in a sunny area. Setting them up was easier than I expected, but I took my time to install them correctly.
Learning how to monitor my energy usage was also vital. I became more conscious of how much power my appliances consumed and adjusted my habits accordingly. For instance, doing laundry during peak sunlight hours helped maximize the solar energy I produced.
Wind energy is another avenue I explored. While I eventually decided to focus more on solar, wind turbines are great in windy areas. Understanding how these renewable sources work not only helps keep my energy bills nonexistent but also reduces my footprint on the planet.
Build a Support Network
Connect with Fellow Off-Grid Dwellers
No one does it completely alone, and building a support network has been crucial in my off-grid journey. I first connected with folks in local farmer’s markets and workshops. It’s beneficial to meet people who are on the same path, exchanging tips and experiences is incredibly enriching.
Social media groups and online forums have also become invaluable resources. Sharing experiences and problems with others who understand the lifestyle has saved me countless headaches. There’s nothing quite like hearing someone else’s story and realizing, “Hey, I’ve dealt with that too!”
Moreover, sometimes it’s just about having a friendly face around for moral support or a little help on a big project. From barn-raising to community gardening, finding those who share your passion for self-sufficiency offers the encouragement that makes this lifestyle livable.
FAQs
1. What is the first step to living off-grid?
The first step is to understand your environment. Knowing the land you’re living on is crucial for survival, so spend time learning about local resources and nature.
2. How can I grow food if I’m new to gardening?
Start with easy-to-grow veggies, and consider using companion planting techniques to maximize your yield. There’s a ton of resources available to help you get started!
3. What tools should I invest in for off-grid living?
Basic hand tools and power tools like a drill or saw can be incredibly useful. It’s also good to have plumbing and electrical repair tools, depending on your setup.
4. How do I ensure I have enough energy living off-grid?
Explore solar power and wind energy options. Monitor your consumption to manage your usage effectively and make adjustments based on your energy production.
5. Why is building a support network important?
Having a support network of fellow off-grid dwellers provides encouragement, shared knowledge, and assistance when tackling challenges that come up in this lifestyle.
by Preparation | May 8, 2025 | Preparedness
1. Increased Confidence in Personal Skills
Empowerment Through Knowledge
One of the first things I noticed when I started focusing on self-reliance was a huge boost in my confidence. Learning new skills, whether it’s growing my own food, repairing my home, or knowing how to cook from scratch, made me feel empowered. There’s something about being knowledgeable that does wonders for your self-esteem. It’s like I finally realized, “Hey, I can do this!”
Every time I learned a new skill, such as sewing or woodworking, I felt less reliant on others. The first time I fixed a leaky sink by myself, I was on cloud nine. It’s incredible how small achievements can lead to a mountain of confidence over time. Because when you rely on yourself, you start believing in yourself.
This newfound confidence spills over into other aspects of life too. It changes your mindset—suddenly you see challenges as opportunities to grow. Instead of running for help at the first sign of trouble, you start to think, “What can I do to fix this?” It shifts your whole perspective!
Preparedness for Unexpected Situations
Life is unpredictable, right? When I made self-reliance a priority, I felt much better prepared for whatever might come my way. Whether it was a sudden job loss, an emergency at home, or even the global pandemic, I found that I was able to handle situations better simply because I was more self-sufficient.
This preparedness not only applies to physical emergencies like power outages or natural disasters, but also to economic ones. Knowing how to can your own food or even have a small emergency fund set aside gives you a sense of security that is priceless.
As I became more proactive, I started to see problems from a different angle. Instead of feeling overwhelmed by emergencies, I felt like they were just challenges waiting to be tackled. I mean, who wouldn’t want that level of calm in chaotic times?
Developing Problem-Solving Skills
With every obstacle I faced, whether big or small, I began honing my problem-solving skills. The more I relied on myself, the more I had to think creatively about how to solve problems. I can’t tell you how many times I had to figure out how to patch a hole in my car without a mechanic!
This creative thinking spills out into everyday life too. It’s amazing how you can adjust your approach to small nuisances in life; say, fixing up old furniture instead of buying new. That’s not just self-reliance at play, but a way to make life a little more exciting and fulfilling.
It’s like becoming your own personal MacGyver. And hey, who wouldn’t want to feel like they could tackle anything that comes their way—whether it’s an unexpected bill or an appliance that’s on the fritz?
2. Financial Independence and Savings
If I Can Do It, Why Pay for It?
When I embraced self-reliance, one of the first things I noticed was my finances reshaping in a positive way. Tackling tasks myself—like landscaping or home repairs—cut costs significantly. It’s kind of wild how you can save a chunk of change just by putting in some elbow grease!
After a while, I could type up a lengthy list of things I no longer paid for. Fancy dinners out were replaced with home-cooked feasts, and I found myself spending less on clothes thanks to thrifting and upcycling. The savings added up pretty fast! It’s a collective effort, and the best part is you usually end up with a bigger sense of accomplishment.
This financial independence means I have more freedom with my money now. I have the ability to invest and save for what actually matters to me rather than dishing it all out for services I can provide myself. You get a real sense of control over your financial future.
Strategic Budgeting Skills
Not only have I saved money, but I’ve also sharpened my budgeting skills. It’s crucial to keep track of what I spend versus what I save. I started paying attention to my expenses in a way I never did before, which is super empowering. You really start to see where your money goes!
I began using apps and tools to help me track where I could cut back, and it became almost a fun little game. I set challenges for myself around savings, and it became satisfying seeing those numbers go up. It’s like playing Monopoly but in real life!
Moreover, this skill applies in multiple areas—whether it’s planning a trip or figuring out how to allocate money for emergencies. The growing ability to strategize makes me feel more stable overall.
Investing in Future Security
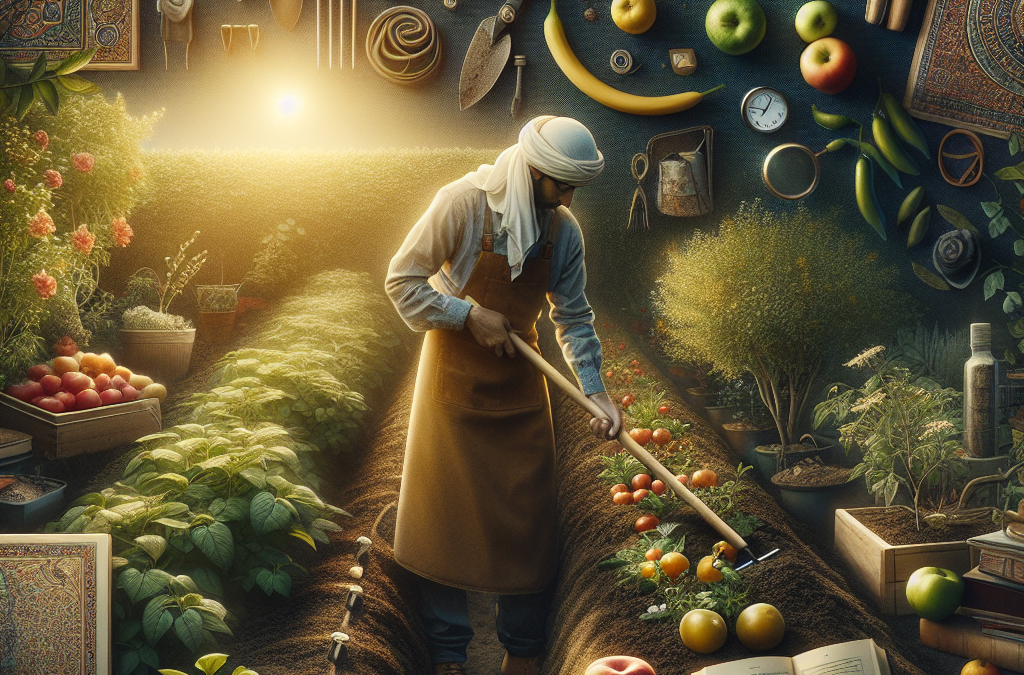
Another major perk of self-reliance is the ability to invest in things that will boost my long-term security. I’ve prioritized learning how to grow my own food, which not only helps with the grocery bill but also sets me up for sustainable living.
This type of investment isn’t just a financial one. It’s about investing time in learning new skills that will benefit me in the long run. I’ve even found some community resources that guide you in sustainable agriculture—a double win!
Ultimately, all these smart moves lead to a sense of safety, knowing that I have the tools to be less reliant on the system. It’s comforting to know I’m building a future based on sustainable choices and not simply reacting to whatever life throws my way.
3. A Deeper Connection to Nature
Understanding the Natural World
As I delved into self-reliance, I found myself connecting with nature in ways I never anticipated. From growing my own vegetables to foraging for wild edibles, I developed a genuine appreciation for the environment surrounding me. It’s not just about living off the land, but about understanding it.
This exploration led to countless “aha!” moments. I discovered the subtle changes in seasons, learned how various plants can offer nourishment, and connected with local wildlife. My backyard became a mini-laboratory where I stopped and just observed.
There’s something grounding about being more attuned to nature. I feel more centered and harmonious with my surroundings. Plus, the environment is just downright beautiful and knowing how to co-exist with it adds a layer of richness to my life.
Promoting Environmental Sustainability
Self-reliance isn’t just about personal skills; it’s also about making more sustainable choices. I transitioned to using biodegradable materials and reducing waste, and let me tell you, it feels incredible! It’s nice to know that I’m playing a part in preserving the environment while also feeding myself.
Gardening, composting, and upcycling have become super rewarding projects. It feels good to know I’m making a positive impact. Plus, I’ve seen just how little I can live on without contributing to the waste that often comes with consumerism. Every small step counts!
This aligns perfectly with my belief that our planet deserves care and respect. It’s about being mindful and living with purpose. So, embracing self-reliance also turned into a chance to promote greater environmental consciousness.
A Sense of Community and Collaboration
While self-reliance often makes me think of solitary pursuits, it also opened doors to amazing community connections. By diving into this lifestyle, I found neighbors sharing resources, ideas, and skills. We banded together to learn from one another, whether it was sharing gardening tips, hosting workshops, or trading home-grown produce.
The feeling of camaraderie is great. It shows that self-reliance isn’t solely an individual endeavor; rather, you gather a supportive network along the way. It enhances the whole experience. Knowing there’s a tribe behind you can make even the toughest projects feel manageable.
I’ve learned so much from others’ experiences and enthusiasm. It’s an enriching cycle where everyone wins. We share knowledge and resources, and it turns into a challenge that’s way more fun and engaging.
4. Enhanced Emotional Well-being
Improved Mental Resilience
Focusing on self-reliance has done wonders for my mental well-being. I’ve cultivated a resilience that allows me to tackle challenges head-on. When you’re self-sufficient, you learn to adapt. Whether it’s dealing with a tough job or personal issues, I feel I’ve grown more stubborn in a good way.
This resilience has helped me deal with stress and anxiety in a healthier manner. As I embrace challenges, I find myself becoming better equipped to handle life’s ups and downs. There’s a sense of empowerment that comes with knowing you can navigate troubling waters by relying on your own strength.
It’s like building muscle for your brain. The more you exercise that ability to adapt and overcome, the stronger and more capable you become in various situations, which greatly lifts your emotional state.
Creating a Sense of Purpose
Living a self-reliant lifestyle infuses my daily routine with purpose. I find satisfaction in caring for myself and my surroundings, which is a big mood booster. Whether it’s cooking a meal from scratch or completing a DIY project—those little victories accumulate into an overwhelming sense of accomplishment.
This newfound purpose extended to my broader life goals. I became more intentional about how I spend my time and energy, which has led to happier living. I’ve crafted a life that’s focused on what truly matters to me. This clarity lifts up my spirits every day.
Also, having purpose means having something to look forward to. Whether it’s growing a new crop or mastering a new skill, there’s always a next step to chase, which boosts my overall happiness and satisfaction in life.
Building Stronger Relationships
Surprisingly, choosing self-reliance has strengthened my relationships. As I began sharing my knowledge and experiences with friends and family, I noticed the warmth that came from connecting over common projects or goals. Even simple tasks like making jam or gardening together turned into memories we cherished.
This collaborative spirit has helped foster a sense of belonging. When you’re part of a community that values resilience, it only enhances your connections with one another. We uplift each other through shared expertise and experiences.
Ultimately, those stronger relationships lead to a more fulfilled and balanced life. There’s something heartwarming about doing life alongside others who appreciate the journey toward self-sufficiency. Togetherness coupled with resilience can create powerful bonds.
5. Lifelong Learning and Growth
Endless Opportunities for Learning
One of the coolest aspects of embracing self-reliance is that there’s always something new to learn. From knitting to woodworking or solar power—every day offers up a lesson. This lifestyle keeps me on my toes and stirs my curiosity, which keeps life vibrant and refreshing.
Learning new skills ignites that childhood excitement of “what’s next?” It can be anything from diving into homesteading or exploring natural remedies. Once you get started, the possibilities are truly endless!
Furthermore, I’ve made it a habit to remain adaptable and open-minded. It’s no fun to stagnate. The more skills I learn, the more I notice that I want to keep pushing myself. This creates a hunger for knowledge that’s hard to beat.
Pursuing Passion Projects
Self-reliance has also opened doors for me to pursue projects I’ve always dreamed about but never dared to tackle. For instance, I’ve been dabbling in writing and photography while documenting my progress in self-sufficiency. It’s super rewarding to see the fruit of that labor unfold!
These passion projects fill my life with happiness and creativity. Instead of spending free time idly, I’m crafting stories and taking photos that tell my journey. They represent all the trials, errors, and ultimate successes that come from stepping out of my comfort zone.
It’s about living fully and allowing the things I love to intertwine with the skills I’m mastering. It nurtures my soul while keeping life interesting, and honestly adds spark to my everyday routine. What a combination!
Embracing Change and Growth
Self-reliance naturally fosters a mindset that encourages personal growth. The more I embrace this lifestyle, the more I recognize change as an opportunity instead of a hurdle. It morphs your outlook and helps you tackle any changes head-on rather than hiding or running away from them.
This growth mindset translates into so many areas of life: relationships, career, personal development—the way I tackle challenges has transformed. It fosters adaptability and encourages me to embrace the unpredictability of life.
Moreover, acknowledging that growth can be uncomfortable allows me to find comfort in discomfort. It’s truly liberating! I feel more prepared for changes down the road, and that’s a beautiful thing to carry into my future.
Frequently Asked Questions (FAQs)
1. What are the main benefits of self-reliance?
Some of the key benefits include increased confidence in personal skills, financial independence, a deeper connection with nature, and enhanced emotional well-being. It really transforms the way you approach life!
2. How can self-reliance affect my financial situation?
Self-reliance encourages you to manage your resources better. By doing things yourself—like cooking and DIY projects—you reduce expenses and learn valuable budgeting skills, leading to better financial health overall.
3. Is self-reliance purely an individual endeavor?
No way! While it promotes independent living, it also fosters community. You’ll often find connections with neighbors or friends who share interests and support each other’s goals, making it a collaborative effort!
4. How do I start on a path to self-reliance?
Begin by identifying skills you want to learn or projects you want to undertake. Start small and gradually build your skill set as you gain confidence. Whether it’s a DIY project or learning to grow your food, every step counts.
5. Can self-reliance contribute to personal happiness?
Absolutely! By gaining control over your skills, finances, and environment, you create a fulfilling lifestyle. The sense of accomplishment and deeper connections that come from self-reliance can lead to greater happiness and emotional well-being.
by Preparation | May 8, 2025 | Preparedness
Understanding the Importance of Evacuation Plans
Why You Need a Plan
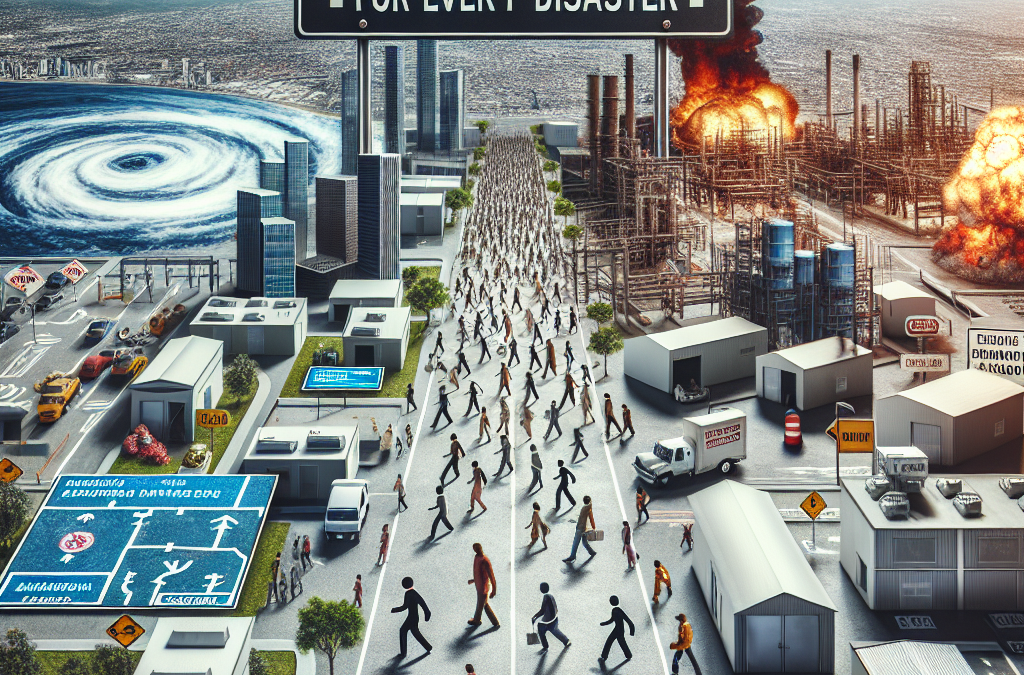
Let’s face it—when disaster strikes, the last thing anyone wants is to be scrambling for solutions while chaos ensues around us. Having an evacuation plan is our first line of defense. It’s like having a map when you’re navigating unfamiliar territory, you just can’t go wrong! A plan gives us clarity and a sense of control in what can often feel like a helpless situation.
From my experience, I’ve seen families torn apart during crises simply because they didn’t know where to go or what to do. It’s heartbreaking. An effective evacuation plan educates everyone involved and minimizes panic, making the process smoother for everyone.
Additionally, it’s important to recognize that not every disaster gives us a heads-up. Sometimes, we need to be ready to act on a moment’s notice, and that’s where a well-rehearsed plan can save the day.
Identifying Risks
Every community has unique risks, whether it’s from hurricanes, floods, wildfires, or even more localized threats like gas leaks. My journey into implementing an evacuation plan started with understanding what could happen in my area. I took the time to research common disasters that affect our local community—because knowledge is power!
Start small: Think about your neighborhood. Are there any weak points that make it vulnerable? Knowing the potential threats helps you tailor your evacuation plan. It’s like customizing a recipe; you can make it work for you and your specific situation.
You should also consider your family and pets—who’s most vulnerable in your group? Tailoring your plan around these factors can help you address risks that might not be so obvious at first glance.
Creating a Communications Strategy
When disaster strikes, communication is often the first to falter. That’s where a solid communications strategy comes into play. I remember during a minor hurricane warning, my family and I had set up a group chat. It ended up being a lifesaver! We knew exactly who was in charge of what, and who would check in on whom.
Make sure everyone knows who to reach out to during a crisis, and have backup plans. Maybe have a designated relative who lives outside the disaster-prone area that everyone can call. This way, you won’t just be relying on the often-overworked phone lines.
Don’t forget to have a way to charge your phones! Maybe consider investing in portable chargers. Just some simple planning goes a long way in ensuring safety and keeping everyone informed.
Practicing Your Evacuation Plan
Why Practice Matters
Alright, here’s where it gets real. Once you’ve got your plan, you need to practice it! It might sound like overkill, but trust me, doing a run-through can make all the difference. Take it from someone who’s done it: it’s way less stressful to practice in a controlled environment than during an actual emergency.
Set aside a day to simulate your evacuation. I usually gather my family, and we walk through all the steps. Timing each part helps us understand how long different portions might take. You’d be surprised by how many small details can trip you up if you’re not prepared.
Make it kind of fun though! Maybe throw in a little reward afterward for getting it right. That way, everyone feels involved and engages more positively with the process.
Assessing and Adjusting Your Plan
Just like life, our circumstances change, and so should our plans. I review my family’s evacuation plan every season—a little date on the calendar just to keep things fresh. New family members, changes in jobs, or even moving houses can all impact how effective your existing plan is.
Make it a team effort! Have family meetings where everyone can share updates on their lives that might affect the plan. I find this also fosters conversations about safety, and it opens doors for everyone to contribute ideas.
And remember, flexibility is key! The best plans can quickly grow outdated, so being adaptable will help maintain a effective evacuation response when needed.
Educating Your Community
Once you’ve got your personal evacuation plan in shape, why not take it a step further? Engage your neighbors or even your kids’ schools in safety dialogues. I’ve hosted informational gatherings, and trust me, it feels good to contribute to public safety. I mean who doesn’t want everyone to be ready?
Sharing resources and opening discussions on emergency preparedness in your community can foster stronger bonds too! We can learn so much from each other’s experiences and specific knowledge. I always encourage people to talk about their own evacuation experiences; it covers a lot of ground!
Plus, it’s empowering! The more people in your community who are prepared, the better off everyone will be when disaster strikes. Together, we can bolster resilience across our neighborhoods.
Conclusion
In conclusion, preparing an effective evacuation plan is crucial, not just for individual safety but for community wellbeing. We must adapt and communicate our plans, practice them often, and share knowledge within our neighborhoods for a comprehensive response to disasters.
Frequently Asked Questions
1. What should be included in an evacuation plan?
An evacuation plan should include escape routes, communication strategies, emergency contacts, and a safe meeting point for everyone to gather.
2. How often should I update my evacuation plan?
It’s a good idea to review and update your evacuation plan at least once a year or whenever there’s a significant change in your personal circumstances.
3. Can I practice my evacuation plan at home?
Absolutely! Practicing at home is a great way to familiarize yourself and your family with the steps needed to take during an actual emergency.
4. What makes a good communications strategy during a disaster?
A good communications strategy includes having multiple methods to reach loved ones, establishing a contact person outside of the affected area, and ensuring everyone knows their responsibilities.
5. How can I encourage my community to prepare for disasters?
Engage your neighbors by hosting meetings or workshops centered around disaster preparedness. Sharing personal experiences and resources can be a big motivator for collective planning!
by Preparation | May 8, 2025 | Preparedness
1. Preparedness for Emergencies
Understanding the Unexpected
You never know when an emergency might strike. I remember a time when my friend cut himself pretty deep while we were out hiking. Luckily, I had my first aid kit with me, and we were able to manage the situation effectively. In a situation like that, being prepared can make all the difference between a minor incident and a major crisis.
Having a complete first aid kit means you’re ready for a variety of situations—from treating cuts and scrapes to more serious injuries. Emergencies can happen anywhere, so it’s essential to be equipped, especially if you’re a parent, traveler, or outdoor enthusiast.
Moreover, preparedness gives you a sense of confidence. Knowing that you have the necessary tools to handle minor injuries or medical emergencies allows you to act swiftly and think clearly during a stressful situation.
Minimizing the Severity of Injuries
In my experience, having the right supplies at hand can greatly reduce the severity of injuries. For instance, if you have bandages, antiseptics, and gauze readily available, you can immediately address wounds before they become infected or worsen. Quick action is crucial.
When we help a person immediately after they’ve sustained an injury, it can significantly minimize pain and complications. A complete first aid kit contains items like cold packs to reduce swelling and pain relief options, which can be invaluable in those first minutes post-injury.
Realistically, not all injuries are severe, but failing to address even minor ones can lead to bigger issues later. A first aid kit lets you take control of the situation right away and keeps things from escalating unnecessarily.
Building Confidence and Knowledge
Investing in a complete first aid kit isn’t just about the supplies; it’s also about empowering yourself with knowledge. I took a basic first aid course after buying my first kit, and it was a game-changer! Understanding how to use the items effectively gives you confidence in emergencies.
Furthermore, certain kits come with pamphlets or manuals that guide you through various procedures. With this knowledge, you’re not just equipped physically but mentally prepared to help those in need.
Having this skill set is something I believe everyone should invest in. You can be a source of comfort and support when someone needs it most, and that’s powerful.
2. Comprehensive Coverage of First Aid Needs
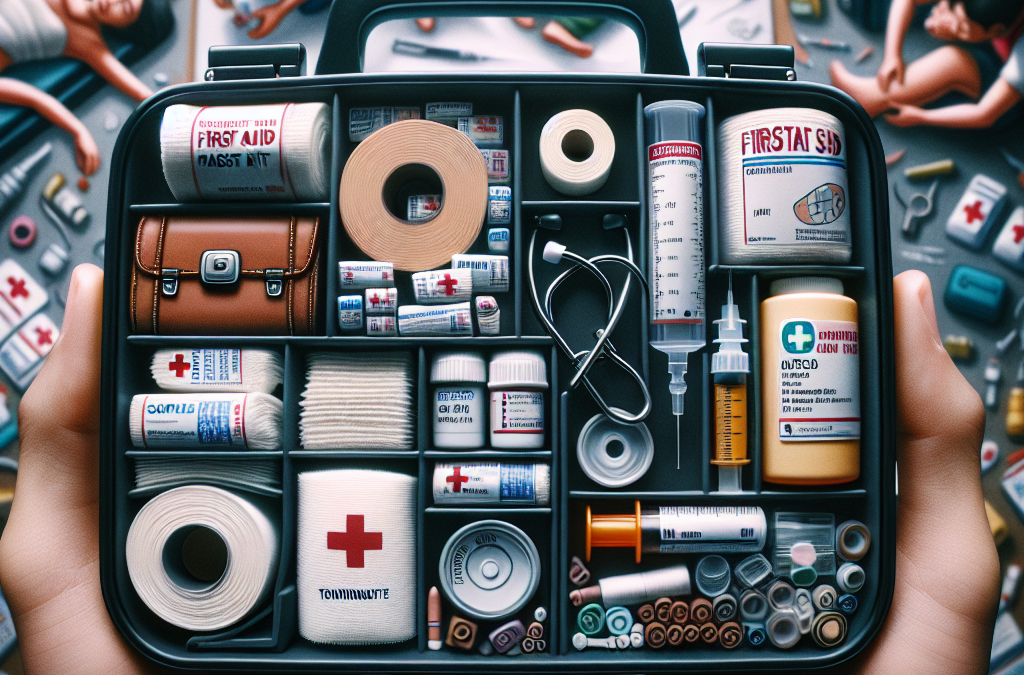
The Essentials of a Complete Kit
A complete first aid kit means you have a wide range of supplies to cover various injuries and ailments. Think about it: band-aids, antiseptics, gauze, medical tape—they all serve different purposes. When I put my kit together, I made sure to think about everything I might need in common scenarios.
Also, consider that not all injuries require the same treatment. Having access to a variety of supplies enhances your ability to respond appropriately. There’s nothing worse than reaching for a bandage only to find out you’re out of it!
A thorough first aid kit caters to different situations, making it much more effective than just a few random supplies thrown in a bag. When you’re prepared, you can act swiftly and effectively, which is incredibly reassuring during an emergency.
Specific Items for Unique Situations
In addition to the basics, I’ve found that thinking ahead about potential unique situations can be really helpful. For instance, if you’re an avid hiker or camper, consider including specific items like splints for fractures or snake bite kits.
Even more, if you travel often, including medications for allergies or stomach upsets makes sense. I always carry a few over-the-counter meds in my personal kit—it’s a lifesaver! These specific items ensure that you are truly ready for any eventuality.
By tailoring your first aid kit to your unique needs, you’re not only better prepared but you also feel more in control. You can’t predict every emergency, but you can make educated guesses based on your lifestyle and needs.
Family-Specific Needs
When considering a first aid kit, think beyond yourself. If you have kids, elderly relatives, or pets, your first aid kit should cater to their specific needs as well. For instance, my daughter has very sensitive skin, so I always pack hypoallergenic bandages.
Moreover, if you know someone in your family takes particular medications, it’s wise to have a plan in place. Keeping spare medications or specific treatments in your kit ensures you’re prepared to handle health issues as they arise.
Ultimately, having a family-oriented first aid kit gives you peace of mind, knowing you’re equipped to handle kid-related scrapes or the unique needs of older family members. It’s a must if you want to ensure everyone feels safe and looked after.
3. Enhancing Home Safety
Proactive Safety Measures
Investing in a complete first aid kit at home is an excellent proactive safety measure that can prevent serious health crises. Imagine the peace of mind you would feel knowing that you’re prepared at home for anything that might happen. I actually keep a well-stocked kit in my kitchen and another one in the living room.
By having a kit close at hand, you’re more likely to take swift action during a small emergency—whether it’s a burn from a hot pot or a scrapped knee from falling off a bike. Timely response can make a world of difference!
Creating a family safety plan around your first aid kit also helps everyone understand its importance. I often hold mini-trainings with my kids on how to use the kit properly—they love it! It becomes a fun family activity rather than a daunting task.
Encouraging a Culture of Safety
Having a first aid kit at home encourages a culture of safety. When you invest in the right supplies, you send a strong message to your family that safety matters. I often talk about safety with my family, and it’s refreshing to see my kids take an interest in being safe.
This culture doesn’t stop at home. It spills over into schools, outings, and other environments where your family exists. By instilling the importance of safety in the early years, you’re teaching them to look out for themselves and others.
There’s something empowering about knowing you can help in an emergency. When your family is on board with this idea, it fosters responsibility and an overall mindset of care for each other, which is something I genuinely cherish.
Creating a Safe Environment
Lastly, let’s not forget that having an organized first aid kit is actually part of creating a safe environment. I have to admit, I used to have a chaotic kit filled with half-used supplies, and it did more harm than good. Now, I regularly check the contents and make sure everything is accessible and well-labeled.
This organization means I can find precisely what I need when an emergency arises, whether it’s a swift bandage application or grabbing some ointment for a sunburn. I can’t stress enough how essential it is to keep your supplies in check!
Moreover, organizing your kit can be a fun little project. My kids help me with it every few months, and they actually enjoy sorting through supplies. It’s a hands-on way to keep safety on everyone’s mind!
4. Cost-Effectiveness in the Long Run
The Price of Preparedness
When I first looked at the price of a complete first aid kit, I thought, “Do I really need to spend this much?” But then I realized the cost of an injury or illness without proper supplies could be much higher. This perspective shift showed me how effective investing in a first aid kit can be.
Let’s say you don’t have the necessary items during an emergency—you may end up spending way more on doctor visits for something you could have handled at home. That realization alone made me a firm believer in investing in good supplies!
Additionally, many kits contain items that are specialized or hard to find elsewhere. Think about how much time and energy you’d waste trying to piece together supplies from various stores in a panic. Investing upfront saves you from that chaos!
Long-Term Use of Supplies
Another consideration is that the supplies in your first aid kit can last long-term if stored correctly. With the right maintenance, items such as bandages and antiseptic wipes have a viable shelf life, so you’re not just throwing money away. I keep an eye on expiration dates and restock as needed, and it’s been a game-changer.
The prolonged utility also means that you save in the long run since you’re prepared over years rather than just months. Plus, a well-maintained kit can handle the unexpected, so you’re less likely to find yourself scrambling for supplies.
This method of cost-effectiveness is practical and intelligent. Imagine how much stress you could avoid simply by having your kit stocked and ready rather than having to make an emergency run to the pharmacy.
Peace of Mind Equals Value
Finally, let’s not overlook the value of peace of mind. Knowing I have a complete first aid kit helps me relax more, whether I’m hosting a party or going on a camping trip. It’s worth every penny to eliminate that worry!
When I’ve got my kit ready, it changes how I approach activities with my family. I’m there to enjoy quality time rather than constantly fretting over what could go wrong. It’s about enhancing the experiences and being genuinely present.
In the end, the cost of a complete first aid kit is a small price to pay for that sense of security. It’s an investment in health, safety, and happiness, allowing you to focus on making memories rather than worrying about the “what-ifs.”
5. Encouraging Community Awareness
Being a Resource for Others
One of the most rewarding aspects of having a complete first aid kit is the opportunity to help others in need. I can’t count how many times my neighbors have come by, whether it was for a scraped knee from a bike accident or a child complaining of allergies at a playdate. I’m always happy to share resources!
This willingness to share encourages others to think more about safety and preparedness, too. When people see you taking action, they’re more likely to step up and follow suit. It’s all about creating a ripple effect in the community.
Also, teaching others about first aid resources can foster a greater sense of safety within your neighborhood or even at the workplace. Who knows, you might inspire someone else to create their first aid kit, and before long, everyone is looking out for each other!
Hosting First Aid Workshops
If you’re feeling ambitious, consider hosting a first aid workshop in your community! I’ve done a couple of these sessions where I walked folks through assembling a first aid kit and demonstrated how to use the supplies effectively.
These workshops can be engaging learning experiences and a great way to bring people together. Plus, I was pleasantly surprised by how many people wanted to learn! It turns into a communal effort where we can all become more aware and knowledgeable about health and safety.
The sense of camaraderie that comes with teaching someone else is powerful. You’re not only helping individuals but contributing positively to a community culture that prioritizes health and safety.
Building a Culture of Preparedness
Lastly, encouraging community awareness helps establish a culture of preparedness. Just like we look out for our families, we can extend that same care to those around us. When emergencies arise, we often lean on one another for support, and knowing our neighbors are trained and prepared is a tremendous relief.
By creating a community that values readiness, we’re also creating a safer space for everyone. It’s a win-win situation where we all can thrive together, knowing we’ve got each other’s backs!
Investing in a complete first aid kit ultimately fosters a connected and aware community. It starts with individuals and can create a ripple effect, making your neighborhood or workplace a safer place for everyone!
Frequently Asked Questions
1. Why is a complete first aid kit better than a basic one?
A complete first aid kit contains a wide range of supplies that prepare you for various emergencies, while a basic kit might only have a few essentials. Having complete coverage can make all the difference in a critical situation.
2. What items should I include in my first aid kit?
A well-rounded kit should include bandages, antiseptic wipes, gauze, medical tape, scissors, tweezers, and over-the-counter medications, among other supplies. Tailor it to your lifestyle and family needs for maximum efficacy.
3. How do I maintain my first aid kit?
Regularly check your kit for expired items and restock any supplies that are running low. I recommend doing this every few months to ensure you have what you need when it’s crunch time.
4. Can first aid kits be customized?
Absolutely! You can customize your first aid kit based on personal needs, activities, or family members’ specific health requirements. Adding unique items can enhance preparedness based on your lifestyle.
5. What’s the best way to educate my family on using the first aid kit?
Hold family training sessions where you go over the contents of the kit and how to use each item. Keeping it interactive and engaging makes it fun, and it empowers everyone to be prepared in emergencies!

by Preparation | May 8, 2025 | Preparedness
1. Enhanced Physical Resilience
Understanding Physical Resilience
When I think of physical resilience, it’s all about your body’s ability to withstand stress and recover from it. In a survival scenario, this is paramount. Whether you’re hiking in harsh terrains or facing unexpected weather changes, the stronger your body, the better you can handle those challenges. It’s like giving your body an upgrade, preparing it to take on whatever comes your way.
One key aspect of resilience is conditioning, which revolves around building muscle strength, endurance, and flexibility. Just think about it: being able to lift heavy objects when building a shelter, or running for a great distance to find help can be life-saving. The more we train, the more we enhance our capacity to deal with physical challenges.
Moreover, resilience isn’t just physical—it’s also about mental toughness. In times of severe stress, our bodies need to keep functioning optimally while our minds work through issues. I’ve often found that a solid fitness routine boosts my mental clarity and focus, which is invaluable when I need to make quick decisions under pressure.
Building Strength and Endurance
Strength and endurance are the bread and butter of physical fitness in survival situations. Practical exercises like weightlifting, running, and even bodyweight workouts contribute to building that essential strength. Picture this: getting trapped or having to scale cliffs. A well-conditioned body means less chance of injury and a higher likelihood of escape.
Endurance training, on the other hand, prepares you for long-duration activities. Whether you’re trekking miles in the woods or swimming across a river, the ability to keep going when fatigue sets in can determine your survival. Honestly, I find that combining both strength and endurance workouts keeps me prepared for any situation.
Consistency is key! I try to follow a balanced routine that targets both these areas weekly. It’s not just about pushing hard for one session; it’s about showing up and putting in the work repeatedly, making it a habit and part of my lifestyle.
Flexibility and Injury Prevention
When discussing physical fitness, flexibility often doesn’t get the credit it deserves. However, in survival, it’s super important. Good flexibility can help prevent injuries, and let me tell you, nobody wants to deal with an injury out in the wild where medical help is far away.
Incorporating yoga and stretching into my routine has really opened up my range of motion and kept my muscles ready for unpredictable movements. I always feel much more agile and less prone to pulls or strains thanks to my flexible body.
Remember, it’s about balance. A balanced approach to fitness makes you not just stronger, but smarter about how you move. So, I make sure to dedicate time to flexibility workouts because being able to move freely is key to surviving any situation.
2. Increased Mental Clarity and Focus
Fitness Boosts Brain Function
We often overlook how physical fitness connects with mental sharpness. But let’s face it: in survival situations, your mind is just as important as your body. When I work out, I feel that rush of endorphins, which not only uplifts my mood but also clears my mind. It’s like hitting a reset button!
Scientific research backs this up too! Regular exercise improves cognition and can boost our ability to make quick decisions. It’s easy to get overwhelmed in stressful situations, but regular physical activity helps me stay sharp. It’s about being prepared mentally as much as it is physically.
So, I encourage folks to incorporate activities like running or cycling into their routine as a way to enhance clarity. You’ll be amazed at how much more focused and alert you can be in tough situations just by hitting the gym or taking a jog outside!
Stress Management
Survival situations are a breeding ground for stress, and how we handle it can make a big difference. I have noticed that staying fit helps me deal with stress way more effectively. Exercising brings down those anxiety levels, allowing me to think more clearly when my heart is racing.
Finding healthy outlets for stress, like hitting the gym or going for a hike, can transform your entire approach to challenges. Instead of panicking when facing adversity, I’m able to channel that energy into physical exertion, which often leads to better decision-making.
Additionally, activities like meditation or breathing exercises paired with physical fitness can be a game-changer. They offer a holistic approach to maintaining both physical and mental well-being, ensuring that I’m ready to face whatever comes my way without succumbing to panic.
Problem-Solving Under Pressure
In survival, it’s not just about muscle power; you need to think strategically too. Regular fitness routines help sharpen my capacity for problem-solving. When I put my body under stress through exercise, I train my mind to stay calm and tackle problems effectively. It’s almost like a rehearsal for when things go south.
Engaging in various forms of training, such as team sports or obstacle courses, teaches you how to adapt and find solutions on the fly. In the face of obstacles during fitness, I’ve learned to think quickly and maintain composure—skills that are invaluable during real-life survival situations.
So, I always remind folks to engage in activities that challenge their mind and body simultaneously. This training creates a seamless integration of fitness and critical thinking that we can all benefit from.
3. Enhanced Metabolism and Energy Levels
Boosting Metabolism
Fitness doesn’t just make you strong; it catapults your metabolism too! When I keep active, my body becomes more efficient at burning calories, even while at rest. This isn’t just great for keeping in shape, but it also contributes to having those necessary energy reserves when adventure strikes!
An improved metabolism helps your body recover quicker after strenuous activities, meaning you can go longer and harder during survival situations without crashing. Plus, the more active I am, the more I find I want to maintain healthy eating habits too. It becomes a natural cycle of energy management.
It’s super beneficial for survivalists because it allows you to maximize the energy from whatever food you can scavenge or hunt. I find that by maintaining an active lifestyle, I can make the most of what I consume. It’s all part of the circle of survival!
Stamina for Adverse Conditions
It’s one thing to be fit and another to possess the stamina to endure tough conditions. In survival situations, you often face long days filled with physical labor without adequate rest. Having built up my stamina through consistent training is what keeps me going when things get hairy.
Interval training has worked wonders for my endurance. By mixing high-intensity bursts with lower intensity activities, I equip my body to handle variable stress. This is super useful when you need to sprint away from danger or hike out of a rough spot and you’re running on fumes.
Additionally, it’s essential to recognize your body’s limits during extended physical activity. I’ve learned to listen to my body and pace myself when necessary; knowing when to push and when to conserve energy is all part of mastering stamina.
Overall Well-Being
The impact of fitness on well-being goes beyond just physical aspects. It shapes your mental and emotional state as well. Staying fit can improve your mood and overall outlook on life. In survival situations, maintaining a positive attitude can be half the battle!
Physical activity releases biochemical substances that enhance our mental state, making us more resilient. I’ve experienced this firsthand—when I feel good physically, I naturally feel empowered and ready to take on challenges, even in less-than-ideal conditions.
Being in great shape means you’re likely to handle hardships with a clear mind and a determined attitude. It contributes to finding joy and positivity even when facing daunting scenarios. I can’t emphasize enough how vital it is to sustain that overall well-being through fitness!
4. Improved Social Connections
Teamwork Through Fitness
Survival isn’t just about the individual; it’s often a team effort! Engaging in group fitness activities fosters camaraderie and trust among participants. I truly believe that keeping fit together can strengthen social bonds that are crucial in challenging situations.
Sweating it out together through a boot camp or a sports team creates connections that go beyond physical fitness. It’s a shared experience where you learn to rely on each other. Trust and communication developed in these settings become invaluable when you’re all working together for survival.
Moreover, these shared experiences help build problem-solving teams. In the face of adversity, knowing you have each other’s backs prepared with what you physically trained for makes all the difference. The connections formed during fitness efforts create a support system that you can rely on in tough times.
Sharing Knowledge and Skills
In fitness communities, it’s easy to learn from one another. I find that sharing knowledge not only helps improve personal skills but also encourages collective growth. When you know how to prioritize physical fitness, you can also share techniques on staying safe, building shelters, or other survival skills that elevate the group’s readiness.
Many of the skills we learn in fitness translate well to real-life situations. Team workouts often come with challenges and tasks that mimic situations we might face in survival. You can swap tips, strategies, and techniques, enhancing everyone’s capabilities in the process.
Plus, this knowledge-sharing builds a repository of collective experiences that we can all lean on later. The friendships and mentorships born from fitness can create a wealth of knowledge about survival tactics that can help you during crunch time!
Community Support
Having a robust support system from your fitness community gives you a solid base. Surviving tough times often requires the motivation and encouragement of others around you. Whether it’s through motivation in workouts or emotional support during rough patches, that community can be your lifeline.
Fitness classes or local clubs often create an environment where everyone is rooting for one another. This shared encouragement leads to overall stronger bonds, and when it comes down to survival, having people ready to rally together can greatly improve your chances of overcoming adversity.
In times of crisis, you discover what someone is made of. Building those connections in fitness can lead to stronger allies when you’re dealing with survival situations. It’s genuinely uplifting to know there’s a tribe behind you when you need it most.
5. Access to Resources and Training
Finding Survival Skills Through Fitness
Fitness isn’t just about lifting weights or running marathons. Many fitness programs offer survival training, and this is a fantastic resource! I’ve participated in workshops that combine elements of fitness with practical survival skills like navigation and first aid, which can be valuable in dire situations.
These trainings equip you with the knowledge to handle a variety of survival challenges. Whether it’s learning about edible plants or how to build a makeshift shelter, these skills can directly translate into real-life survival capabilities. Plus, they keep you physically active as you learn!
Moreover, connecting with survival experts through fitness classes or workshops opens doors to further training opportunities. This continuous learning contributes to increased readiness when faced with adversity.
Access to Essential Gear and Equipment
Many fitness communities focus on hiking, rock climbing, or outdoor activities that require specialized gear. Gaining access to quality equipment not only helps improve your training but also prepares you for survival scenarios. I’ve been part of groups where we shared recommendations on gear that became essential for my outdoor adventures.
This access to information ensures I’m making informed decisions about the best tools to carry in emergency situations. Good equipment can make a substantial difference in survivability, and being part of a fitness community means you are often in the loop on the latest and greatest gear.
Additionally, attending fitness expos or related events can lead to discovering new products that can enhance your survival toolkit. The more knowledge you have about available resources, the better prepared you will be.
Creating Emergency Plans
Lastly, one of the invaluable aspects of fitness communities is the environment where we can strategize. Having accessibility to discussions about emergency plans in a group setting leads to greater preparedness altogether. I’ve participated in fitness meetups that included safety planning, which was eye-opening!
Discussing potential scenarios helps everyone envision what might happen and plan accordingly. Knowing how to react when faced with different challenges can significantly enhance your chances of survival. It’s not just theory; we actually practice drills that can be applied to real situations!
Together with others, we create a support system that works diligently to ensure we’re all prepared. This collaborative planning fosters emotional resilience, making it easier to handle sudden challenges when they arise.
Frequently Asked Questions
1. Why is physical fitness important for survival?
Physical fitness enhances your strength, endurance, mental clarity, and overall well-being, which are critical in emergency situations. Being fit prepares your body and mind to handle unexpected challenges with confidence.
2. What types of exercises should I focus on for survival situations?
A balanced mix of strength training, endurance activities (like running or hiking), and flexibility exercises (such as yoga) will prepare you for a variety of physical challenges during survival scenarios.
3. How can fitness improve my mental resilience?
Regular exercise increases the release of endorphins, which enhances mood and reduces stress. This mental boost helps maintain focus and clarity, which is vital when under pressure in a survival situation.
4. What role does team fitness play in survival training?
Participating in group fitness activities fosters teamwork and communication skills, building relationships that can enhance your chances during difficult survival scenarios.
5. How can I access resources for learning survival skills through fitness?
Look for fitness communities or workshops that emphasize outdoor training and survival skills. Engage with local groups, attend classes, and participate in activities that combine physical fitness with survival education.


