Before heading out into the backcountry during winter, it’s crucial to understand how snowpack operates. Over the years, I’ve spent many hours studying snow layers. Each one behaves differently based on temperature, moisture, and wind. For instance, when new snow falls on a weak layer, it could lead to instability. Recognizing these signs is key to avoiding danger.
I often rely on local reports and guides who provide insights on conditions. Checking resources like the Avalanche Forecast Center can save you from potentially fatal trips. I learned the hard way that even slight changes in weather can make a big difference; for example, a beautiful sunny day can turn a solid snowpack into a risky situation.
Ultimately, understanding the dangers of avalanche terrain isn’t just about knowledge; it’s about being observant. Whenever I’m on the slopes, I make it a point to look for any signs of instability, like cracking or collapsing snow. It pays off to be vigilant.
Planning Your Route
Choosing Safer Terrain
Planning your route is a big deal in the snow. I can’t stress enough how important it is to choose the right terrain. I’ve quickly learned to respect the mountains and dodge steep, open slopes after hearing too many horror stories from fellow adventurers. Ideally, I stick to well-trodden paths or areas known to be safer in winter conditions.
When mapping out my route, I make sure to factor in the current snow stability reports and weather forecasts. Using modern navigation tools like GPS can be a lifesaver; just make sure you fully understand how to use them before you need them. I can’t tell you how many times I’ve had to rely on my device when visibility hit rock bottom!
An important part of route planning is also checking for potential escape routes. When traversing snowy landscapes, keeping your options open can mean the difference between safety and disaster. I have found that mentally navigating the area multiple times can be immensely helpful when you’re focused on getting back safely.
Essential Gear for Survival
Required Avalanche Safety Equipment
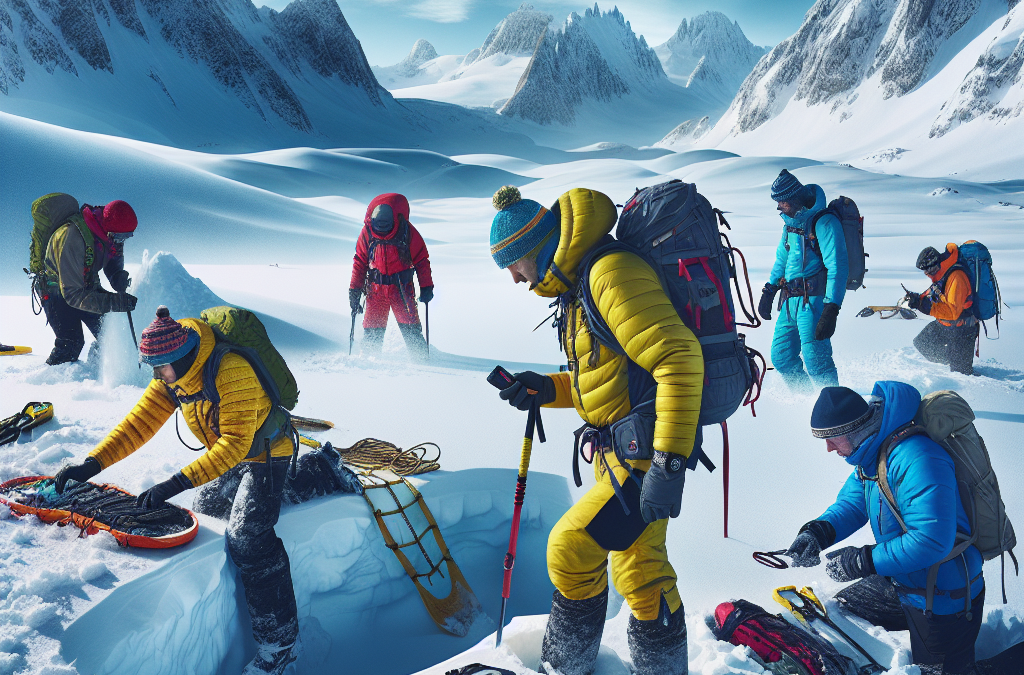
Now let’s chat about gear. There’s a bunch of crucial equipment I never hit the slopes without. A beacon, probe, and shovel are the holy trinity for avalanche safety equipment. I can’t stress enough how wearing a personal avalanche transceiver (beacon) can help rescue teams find you in the event of a tragedy.
Choosing a reliable probe is also essential; it can make the process of locating a buried person faster and more efficient. When I first got equipped, I spent time practicing with it before heading out. Learning how to deploy and use my gear in a controlled environment gives me confidence in real emergencies.
Lastly, my shovel – it might seem basic, but I can tell you that having a lightweight, durable shovel can make digging someone out an achievable task. I recommend going for one that’s easy to handle, especially with gloves on. Trust me, you don’t want to deal with a flimsy shovel in a panic!
Rescue Techniques and Practices
Understanding Search Methods
In the scary event that someone is caught in an avalanche, knowing how to conduct a search is crucial. I remember the first time I went through a search and rescue training. It was eye-opening! You’ve got to utilize your avalanche beacon because it dramatically reduces search time, but if the beacon fails, a systematic search is key.
The foundational technique I practice is the “parallel search.” This means moving back and forth across the likely burial area while listening for beeping signals. It’s like something out of a spy movie at times, but I assure you, it works effectively when you keep your focus. Knowing how to fine-tune your listening and watching for the slightest clue can be what saves a life.
And let’s not forget about teamwork. When I’m out there, everyone needs to play their part, keeping constant communication. We’ve got each other’s backs, so knowing who’s looking where and what techniques each person is using can make a big difference in how smooth the rescue goes.
First Aid in the Wilderness
Addressing Cold Injuries
Cold injuries can sneak up on you faster than you think. I recall a chilly day out on the slopes when I began feeling numb in my fingers. I had to immediately educate myself about frostbite and hypothermia symptoms; sometimes it’s just a little tingle that can lead to serious issues. Always be prepared!
Having basic first aid skills can prove invaluable. I’ve made it a rule to carry a first-aid kit whenever I’m out exploring. Basic supplies, including gauze, adhesive tape, and a good antiseptic, can address minor injuries and keep things from escalating. Nothing’s worse than having a long trek back with an injury you didn’t take care of!
Lastly, if you see someone else showing signs of cold injury, don’t hesitate to step in. I’ve learned that sometimes, a simple hot drink or warm pack of hand warmers can make a gradual difference. Keeping an eye on your friends is crucial because, in the snow, we can all get a little too focused on having fun—and safety often gets overlooked.
Frequently Asked Questions
What should I do before heading into avalanche terrain?
Always check avalanche forecasts, understand snowpack conditions, and learn to recognize signs of instability in the snow. It’s essential to plan your route around safer terrains and stay updated.
What gear do I need for avalanche safety?
Key gear includes an avalanche beacon, probe, and shovel. It’s also a good idea to carry a first aid kit and emergency supplies just in case.
How can I effectively search for someone buried in an avalanche?
Utilize your avalanche beacon first. If the beacon isn’t available, perform a systematic parallel search across the last known location of the victim, looking for clues and listening for signals.
What are the signs of cold injury in the wilderness?
Common signs of frostbite include numbness, discoloration of the skin, and pain. Hypothermia symptoms consist of shivering, slurred speech, and confusion. Be aware of these and act quickly!
How can I best prepare for first aid in snow emergencies?
Take a first aid course focused on outdoor scenarios. Always carry a well-stocked first-aid kit on your trips and familiarize yourself with the contents and their uses before you head out.
From my own adventures in the mountains, I quickly learned that altitude sickness isn’t just a myth. It’s a real condition that kicks in as you ascend. The air gets thinner, which means less oxygen gets to your muscles and brain, leading to headaches and nausea.
It’s essential to recognize the symptoms early. Mild forms can leave you with a headache and fatigue, but serious cases may result in confusion or even pulmonary edema. Knowing the signs can be your first line of defense on the mountain.
I remember the first time I experienced it – it felt like a hangover without the fun night before. Knowledge is power here, so do not dismiss the importance of educating yourself on altitude sickness.
How to Prevent Altitude Sickness
Prevention is better than cure, right? What I’ve found really works is to ascend slowly. Give your body time to adjust to the change in altitude. Take regular breaks and don’t skip your hydration; dehydration only worsens the symptoms of altitude sickness.
Another surprising tip I’ve discovered is to eat carbs before embarking on a hike. Your body uses carbohydrates for energy, which can help mitigate some of the effects of altitude sickness. Trust me, your body will thank you later.
And don’t forget to listen to your body. If you feel like crap, don’t push your limits. It’s okay to turn back, as frustrating as that may seem—your health is paramount.
First Aid for Altitude Sickness
If altitude sickness hits you hard, it’s essential to have a plan. Descending quickly can often relieve symptoms, which I learned the hard way. If someone in your group is struggling, keep an eye on them, and don’t hesitate to initiate a descent.
It’s a good idea to carry medications like ibuprofen or prescribed drugs such as acetazolamide. I’ve used them during high-altitude hikes, and they can make a world of difference.
Being prepared with first aid knowledge is crucial. Know how to recognize severe symptoms, like difficulty breathing or unconsciousness, and don’t shy away from asking for help if you need it.
Essential Gear for High Altitude
Packing Wisely
Your gear can literally make or break your high-altitude adventure. I’ve packed plenty of times with half the stuff still sitting in my closet. So, I learned to pack lightweight, moisture-wicking clothing as it helps regulate body temperature.
Don’t forget a high-quality pair of hiking boots; trust me, your feet deserve the very best, especially with rough terrains at high altitude. I made the mistake of choosing style over comfort once, and my feet were not happy campers!
A good backpack is also essential. It needs to be spacious but not cumbersome. I often go for backpacks that allow easy access to water and snacks on the go. Trust me, your future self will appreciate that foresight!
Hydration Systems
At high altitudes, staying hydrated is even more critical than at sea level. I personally recommend a hydration reservoir system. It’s easy to sip while trekking and doesn’t involve fumbling with bottles.
Try to drink regularly, even when you don’t feel thirsty, because you might not feel it at altitude. Trust me, chugging water when I remember isn’t enough. Maintaining hydration is a commitment!
Also, consider electrolyte supplements; they can work wonders in keeping your energy levels up when you’re sweating through your layers while tackling tough climbs.
Cold Weather Check
Cruising through high altitudes often means dealing with cold weather. I remember one hike where I was woefully unprepared, and let me tell you, chills up by those peaks are no joke.
Layering is your best friend. Go for thermal base layers, insulating mid-layers, and a good waterproof shell. I typically follow this setup, and it keeps me cozy regardless of the temperature!
Don’t skimp on gloves and hats! I learned that the hard way when my fingers felt like ice cubes. Keep those extremities warm as they can be the quickest to suffer in the cold!
Navigating Terrain
Understanding Your Route
Whether you’re shuffling up a snowy trail or scaling rocky inclines, knowing your route is an absolute game changer. I can’t emphasize enough how scouting the area, even doing some online research, can save you from getting lost.
Use topographical maps or GPS devices. I once got caught in a snowstorm, and if it hadn’t been for my trusty GPS, I would’ve been even more disoriented than I already was.
A little planning goes a long way. Always have a backup route planned, and let someone know your itinerary. It’s not just smart; it’s necessary—trust me!
Footing Techniques
I’ve learned that good footing can mean the difference between a triumphant ascent and a nasty fall. Pay close attention to your steps; it’s easy to get distracted by the scenery.
Practice your footing when you encounter tricky areas: lean slightly forward for balance and distribute your weight wisely. I know it sounds simple, but every mountain has its hidden obstacles!
And remember, it’s okay to take your time. I’ve had to remind myself that slow and steady wins the race, especially when fog rolls in or the terrain gets tough.
Emergency Navigation
Even with all the planning, things can go south quickly. If you find yourself in an emergency, being able to navigate without a clear path becomes crucial. Always carry a compass and know how to use it. I’ve seen too many adventurers rely solely on technology.
In challenging situations, try to stay calm. Panic can lead to poor decisions, which I’ve seen firsthand. I’ve learned to focus on small steps: finding landmarks, retracing my steps, and staying put if necessary.
You never know who might be able to help if you wait. A little patience and a solid plan can lead you back to safety. Always have that safety net in place, folks.
Team Communication
Pre-Hike Briefing
Before you start your journey, gather your group for a pre-hike briefing. Discuss everyone’s skills, limitations, and expectations. This has been invaluable for me in ensuring everyone is on the same page.
Set clear signals for communication during the hike—like hand signals or specific whistles. When we used these, it really minimized confusion and kept the group moving smoothly.
Encourage an open floor where everyone feels comfortable sharing their concerns. I’ve seen too many hikes derail because someone felt they couldn’t speak up. Make safety your priority!
In-Trail Check-Ins
During the hike, it’s smart to have regular check-ins. Whether you’re taking a breather or just finding a good view, this is a great time to gauge how everyone’s feeling. I often do brief stops every hour or so to see where we stand.
These moments are also an excellent chance to assess energy levels and adjust the pace as necessary. I like to maintain an adaptable mindset, recognize group dynamics, and be ready to focus on supporting each other.
Don’t rush! This is all about enjoying the experience together. Building camaraderie while navigating the trails is typically what sticks with me long after the hike.
Emergency Response Strategies
If things go awry, it’s vital to have a clear and concise emergency response plan. I always involve everyone in this discussion before hitting the trails—no one wants to be in a panic later on.
Be prepared to designate a leader if an emergency arises, and have clear responsibilities. This helps keep chaos at bay. I learned that having a plan makes people more likely to step up when the going gets tough.
Don’t forget to practice this plan sometimes! It’s crucial everyone knows what to do. A little rehearsal can make all the difference when you’re faced with a real crisis.
Conclusion
Navigating altitude challenges can be daunting, but with the right skills and preparation, you can take on even the highest peaks. Use knowledge to your advantage and definitely listen to your body along the way.
Embrace the journey, learn from the experience, and never hesitate to adapt to unpredictable mountain conditions. Happy hiking!
FAQ
What is altitude sickness?
Altitude sickness is a condition that occurs when your body cannot get enough oxygen due to a high elevation. Symptoms include headaches, nausea, and fatigue.
How can I prevent altitude sickness?
To prevent altitude sickness, ascend slowly, stay hydrated, eat carbs, and listen to your body. If you feel unwell, don’t hesitate to descend.
What essential gear do I need for high-altitude hikes?
You should have moisture-wicking layers, sturdy hiking boots, a good backpack, a hydration system, and weather-appropriate outer layers.
How can I improve my navigation skills in the mountains?
Familiarize yourself with your route, learn how to use a map and compass, and practice good footing techniques to navigate effectively in challenging terrains.
What should I do if there’s an emergency during the hike?
Have a clear emergency plan. Make sure everyone knows their roles, and practice your strategies beforehand. Staying calm and communicating effectively can save lives.
Being prepared for an emergency can help you and your family stay safe and informed in the event of a disaster. It’s essential to have a plan in place that includes building a disaster kit, staying informed during an emergency, practicing your emergency plan, and knowing what steps to take before, during, and after an emergency situation occurs. In this blog post, we will cover everything you need to know about emergency preparedness so you can be ready when it matters most.
Creating an Emergency Plan
The first step in emergency preparedness is creating an emergency plan. This should include identifying potential risks or hazards in your area, such as natural disasters like hurricanes, earthquakes, floods, wildfires, etc., and developing a strategy on how to respond to each one. Your emergency plan should also include evacuation routes, meeting places, and contact information for all family members. Make sure everyone knows what their role is in case of an emergency, including children and elderly family members. Practice your emergency plan regularly with drills and exercises to ensure everyone is familiar with their responsibilities.
Building a Disaster Kit
A disaster kit is crucial to ensuring you and your family are equipped to handle any emergency situation. A basic disaster kit should contain supplies such as water, non-perishable food items, flashlights, batteries, first aid kits, medications, extra clothing, blankets, and important documents (such as passports, birth certificates, insurance policies). Consider adding additional items based on specific needs, such as pet supplies if you have pets, or baby formula and diapers if you have young children. Remember to check your disaster kit regularly to make sure expiration dates haven’t passed and to restock any necessary items.
Staying Informed During an Emergency
During an emergency, it’s critical to stay informed by monitoring local news sources and weather reports. Keep a battery-powered radio handy to listen to updates from authorities and emergency services. If possible, sign up for alert systems through your community’s emergency management agency or download apps that provide real-time notifications of severe weather events. Follow social media accounts of trusted organizations and government agencies to receive timely updates and instructions.
Practicing and Maintaining Your Emergency Plan
Regular practice and maintenance of your emergency plan are key to ensuring its effectiveness. Conduct regular drills and exercises with your family to test your response times and identify areas where improvements may be needed. Update your emergency plan periodically to reflect changes in circumstances, such as new additions to the family or relocation to a different region. Finally, don’t forget to review and update your disaster kit contents regularly to ensure they remain useful and effective in the event of an emergency.
Conclusion
In summary, being prepared for an emergency requires planning, building a disaster kit, staying informed during an emergency, practicing and maintaining your emergency plan, and taking appropriate actions before, during, and after an emergency situation arises. By following these guidelines, you can help keep yourself and your loved ones safe and informed in the face of unforeseen circumstances.
Disasters can strike at any time, and it’s essential to be prepared. Whether you live in an area prone to hurricanes or earthquakes, wildfires or floods, having a plan in place can help keep your family safe and informed during difficult times. In this article, we will cover everything from creating a disaster plan to building an emergency kit and protecting your home and property. Let’s get started!
Introduction to Disaster Preparedness
The first step in preparing for a disaster is understanding what types of emergencies could occur in your area. Research local weather patterns, geological hazards, and other potential risks that may impact your community. Once you have identified these threats, create a plan with your family members on how to respond if one occurs. This includes identifying evacuation routes, safe meeting places, and communication protocols. It’s also important to practice your plan regularly so everyone knows what to do in case of an actual emergency.
Creating a Disaster Plan
A comprehensive disaster plan should include several key components. First, identify potential risks and hazards that could affect your family and community. Next, establish a clear chain of command within your household, including who will make decisions and communicate with others during a crisis. Determine evacuation routes and safe meeting places, as well as methods of communication such as text messaging or social media platforms. Finally, prepare an emergency kit and ensure all necessary documents are easily accessible.
Building an Emergency Kit
An emergency kit should contain supplies to sustain your family for up to 72 hours after a disaster strikes. This includes food, water, medical supplies, flashlights, batteries, and other essentials. Make sure to store these items in a convenient location where they can quickly be accessed when needed. Additionally, consider adding extra supplies like blankets, clothing, and toiletries to your kit in case of extended power outages or displacement.
Protecting Your Home and Property
There are several steps you can take to protect your home and property before a disaster hits. Start by securing loose objects outside like patio furniture or garbage cans. Trim trees and shrubs around your house to reduce the risk of damage from falling debris. Install storm shutters or reinforce windows and doors to prevent breakage. Finally, move valuable possessions to higher ground or elevate them off the floor to avoid water damage.
Important Documents and Information
During a disaster, access to critical information can save lives. Keep copies of important documents like passports, birth certificates, and insurance policies in a secure location like a fireproof safe or cloud-based storage system. Also, program emergency contact numbers into your phone and share them with family members. This includes local police and fire departments, hospitals, and utility companies.
Staying Informed During a Crisis
In today’s digital age, staying informed during a crisis has never been easier. Monitor local news stations and weather channels for updates on current conditions. Follow official government accounts on social media platforms like Twitter or Facebook for real-time alerts and advisories. And don’t forget to charge your electronic devices regularly so you can stay connected even without electricity.
Conclusion
Preparing for disasters takes time and effort but can ultimately save lives. By following these tips and creating a comprehensive plan, you can rest easy knowing that you and your loved ones are ready for whatever comes your way. Remember, being proactive and taking action now can make all the difference later.
Emergency preparedness is an essential aspect of ensuring your family’s safety and well-being in times of crisis. A disaster can strike at any time, leaving you without power, water or access to medical care. Being prepared for these situations can mean the difference between life and death. In this blog post, we will discuss what emergency preparedness entails, why it’s important, how to create an emergency kit, first aid supplies, water and food storage, shelter and warmth, communication and contacts, practicing your plan, and taking action today.
Introduction: What is Emergency Preparedness?
Emergency preparedness refers to the steps taken by individuals, families, and communities to ensure they are ready for unexpected events such as natural disasters, pandemics, terrorist attacks, and other crises. It involves having a plan in place that includes preparation, response, and recovery strategies. The goal of emergency preparedness is to minimize harm and damage caused by unforeseen events.
The Importance of Being Prepared
Being prepared for emergencies can save lives. During a crisis, chaos and confusion often reign supreme, making it difficult to make informed decisions. Having a plan in place beforehand helps reduce stress and anxiety, allowing you to act quickly and efficiently when disaster strikes. Additionally, being prepared can help prevent injuries and illnesses that could result from exposure to hazardous materials or lack of access to basic necessities like food, water, and medicine.
Creating an Emergency Kit
An emergency kit should be one of the cornerstones of your emergency preparedness plan. Your kit should include items that will help keep you alive and comfortable during the first 72 hours after a crisis. Here are some essentials to consider including in your kit:
Water (at least three gallons per person)
Non-perishable food items (such as granola bars, trail mix, and canned goods)
Flashlight with extra batteries
Portable phone charger
First aid supplies (bandages, antiseptic wipes, pain relievers, etc.)
Multi-tool or knife
Whistle
Map of the area
First Aid and Medical Supplies
In addition to having a well-stocked first aid kit, it’s also essential to have knowledge about basic first aid techniques. Consider taking a CPR/first aid course to learn how to respond to common medical emergencies. Some additional items to add to your first aid kit include:
Sterile gauze pads
Adhesive tape
Antibacterial ointment
Tweezers
Eye drops
Water and Food Storage
Access to clean drinking water is crucial during a crisis. Store at least three gallons of water per person in your home, and consider investing in a portable water filtration system if necessary. When it comes to food, focus on non-perishable items that are easy to prepare and require minimal cooking. Examples include canned soups, energy bars, and dried fruits.
Shelter and Warmth
If you find yourself in a situation where you need to evacuate your home, it’s essential to have a safe and secure location to go to. This could be a hotel, relative’s house, or even a public shelter. Make sure to research potential shelters ahead of time so you know what options are available in your area. If you must stay in your home during a crisis, make sure to stock up on blankets, sleeping bags, and other warm clothing to keep you and your loved ones warm and cozy.
Communication and Contacts
During a crisis, communication can be challenging, but it’s essential to try to stay connected with friends, family, and emergency services. Keep a list of important contact numbers in your wallet or purse, including local police and fire departments, hospitals, and utility companies. You may also want to sign up for alert systems through your community’s website or social media pages to receive updates on the situation.
Practicing Your Plan
It’s not enough to simply have an emergency plan; you need to practice it regularly to ensure everyone knows what to do in case of an emergency. Conduct regular drills with your family members, focusing on different scenarios such as earthquakes, fires, or floods. Discuss possible escape routes, meeting places, and communication protocols to ensure everyone stays safe and informed.
Conclusion: Take Action Today
Don’t wait until it’s too late to start planning for emergencies. Start building your emergency kit, creating a plan, and learning basic first aid skills today. By taking proactive measures, you can increase your chances of survival and help protect those around you. Remember, emergency preparedness isn’t just about surviving; it’s about thriving in the face of adversity.
When starting your disaster prep journey, the first thing I did was assess my family’s specific needs. You gotta think about everyone’s daily routine and any special requirements. If someone in your family has medical issues, you’ll need to factor those in. Even pets need consideration—don’t forget about their food and care needs in an emergency!
Next, sit down with your family for a chat. Make it a fun event, maybe over a casual dinner or coffee. Talk about what emergencies could affect your area, and discuss each person’s role in an emergency. This way, everyone knows what to do when things go south.
Finally, write down your plan. Get everyone’s input, and keep it somewhere handy. I like to stick mine on the fridge. Seeing it daily keeps it fresh in everyone’s mind, and encourages conversation about it.
Choosing an Emergency Meeting Spot
An essential part of your plan is choosing a safe meeting place. In the chaos of an emergency, things can get wild, so having a predetermined place to rally helps. My family chose a nearby park. It’s spacious and easy to get to for everyone.
Discuss two locations: one close to home for minor emergencies, and a second one farther away for more serious situations. If you haven’t already, make sure everyone knows how to get there. Consider transportation options, especially if you might be on foot.
Have a little fun with it! Maybe plan a family outing to that spot, so it becomes more familiar and less intimidating when you truly need it.
Documenting Important Information
Don’t forget to document critical information. I can’t emphasize this enough. Create an emergency contact list that includes family members, friends, and any local services you might need post-disaster. Also, collect important documents—think insurance papers, medical records, and IDs.
I’ve found keeping this info both digitally and physically helps. You can easily share the digital version through a family group chat, while keeping paper copies in a safe spot you can access quickly.
Lastly, be sure to update this info regularly. Great plans grow and evolve with your family!
Gathering Essential Supplies
Making a Supplies List
Gathering essential supplies is an exciting part of preparing. At first, it can feel overwhelming, but breaking it down into categories makes it manageable. Start with food—think non-perishables like canned goods, dry snacks, and ready-to-eat meals. I love adding a few comfort items like chocolate or my favorite energy bars to the mix!
Next on the list? Water. You’ll want enough for each person in your household to have at least one gallon a day for a minimum of three days. It sounds like a lot, but I found some great stackable containers that make storage simple.
And don’t forget first aid kits and personal hygiene items! These are essential for keeping everyone safe and clean during a disaster. You can buy pre-made kits, but I prefer to customize mine to fit our specific needs.
Organizing Your Supplies
Once you’ve gathered your supplies, organization is key. I like to use plastic bins for everything—labeling is crucial, not just for you but for anyone helping during an emergency.
Separate supplies into different bins: food, water, first aid, and communication tools. Keeping everything organized saves time and stress when the pressure is on.
Consider having an “easy access” box with the most essential items, like flashlights, batteries, and basic first aid supplies. It sounds simple, but when disaster strikes, you really don’t want to be rummaging through everything.
Regularly Reviewing and Updating Your Supplies
Having supplies is great, but maintaining them is just as important. I check my emergency stash every few months—replacing expired items and rotating stock.
This can also be a family fun day: have everyone help out! It turns into a reminder for everybody about the plan and gets everyone involved in the process.
Develop a calendar reminder for yourself so it doesn’t slip through the cracks. It’s easy to forget, but keeping your supplies fresh is crucial. Trust me, your future self will thank you!
Staying Informed About Local Risks
Identifying Local Hazards
Now that you’ve got a plan and supplies, it’s time to educate yourself on local hazards. Different regions have different risks, and knowing these can save you and your family.
I started by researching the most common disasters in my area—floods, earthquakes, and hurricanes, oh my! Find local resources, like community websites or your town’s emergency services page, to stay updated.
Also, check in with neighbors or local community groups. Sometimes, local knowledge can shed light on risks that official channels may overlook.
Utilizing Technology for Updates
There’s no escaping technology in today’s world—so why not use it to stay informed? I highly recommend downloading emergency apps on your phone. Many are free and provide alerts, emergency tips, and maps that can guide you during a crisis.
Set up alerts for local weather and emergency alerts to keep you informed in real-time. This way, you won’t be caught off guard when disaster strikes.
And hey, don’t just rely on tech! Cultivating relationships with your community can often be your first line of defense.
Participating in Local Preparedness Training
Lastly, step outside your comfort zone and join local preparedness programs. I attended a community workshop, and it opened my eyes to things I wouldn’t have learned on my own. They often teach valuable skills like basic first aid, how to shut off utilities, and even CPR.
Encourage your family to join so you all learn together. Plus, you meet folks in your community who can lend support in emergencies.
Practicing Your Preparedness Strategy
Conducting Drills
Alright, practice time! Just like athletes need practice, we need to drill our emergency plans. Get the family together and run through your plan at least twice a year.
You can make it a fun day outdoors—set up scenarios like a fire drill or lockdown situation, teaching kids how to react properly. I always add elements of fun to it, so they stay engaged!
Afterward, gather as a family to discuss what went well and what didn’t. This is all about growth, learning from mistakes, and tightening your plan over time.
Assessing Supplies During Drills
During your practice drills, take time to assess your supplies too. Make sure your emergency kit is where it should be and stocked up. You’d be surprised what gets used up or misplaced over time.
I’ve found that doing this during drills creates a sense of urgency without the stress—it’s a balancing act. Plus, it becomes second nature when real emergencies inevitably occur.
Updating Your Plan With Feedback
Remember that preparedness isn’t a one-and-done deal. After practicing your emergency drills, gather feedback from all family members. What did they find confusing? Was anything missing?
With this info, you can make changes to your plan and supplies. I’m continually tweaking my approach based on feedback, and it’s made our family a lot more confident in our emergency readiness.
FAQs
What should I do first when starting my disaster prep plan?
Start with assessing your family’s specific needs and creating a personalized emergency plan. Consider everyone’s routines and any special requirements, then document your plan clearly.
How often should I update my emergency supplies?
I recommend reviewing and updating your emergency supplies at least every few months. This ensures that things like food and medications are fresh and ready to go.
Where can I find information about local risks?
Check community websites, local emergency services pages, and connect with neighbors. Official sources often provide the most accurate information regarding local hazards.
How can I make practicing my plan fun for my family?
Implement games or challenges while running your drills! Make it a family day out where everyone participates, and celebrate afterward to keep spirits high while doing something serious.