by Preparation | May 8, 2025 | Preparedness
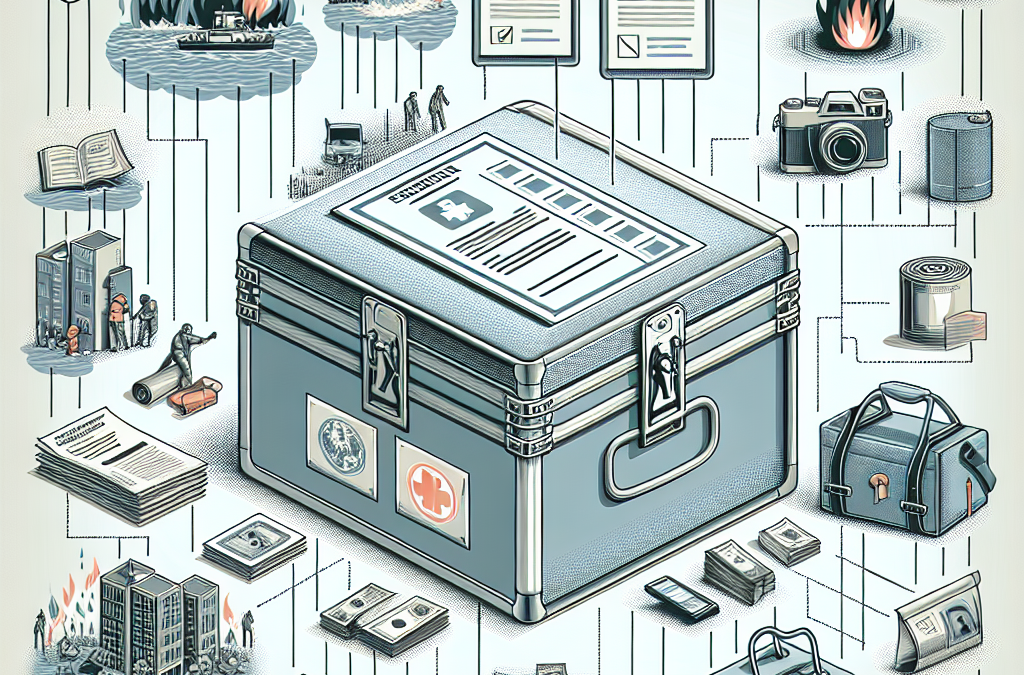
Identify Your Essential Documents
Personal Identification
When I’m in a crunch, the first thing I focus on is my personal identification. This includes things like passports, driver’s licenses, and social security cards. These documents are often irreplaceable, and losing them can really complicate an already stressful situation. Without them, it’s tough to prove who you are, so I take special care to know where they are.
If I ever find myself needing to gather documents quickly, I have a mental checklist: Do I have my ID? My passport? These help not just in emergencies but also when traveling. Keeping these items safe and organized can save you a lot of hassle in the long run.
To make it easier on myself, I recommend keeping your IDs in a dedicated folder or envelope, so they’re all in one place. That way, when a crisis hits, the last thing I want to do is scramble and dig through piles of paperwork!
Financial Records
Next up on my list are my financial records. These cover everything from bank statements to investment paperwork. Personally, I find it super important to have this information on hand in case of theft, natural disasters, or anything else that might require me to prove my financial status.
In today’s world, it’s not just enough to keep a physical copy. I also use secure online storage options for digital copies. Having everything accessible yet protected gives me peace of mind knowing that if something happens, I won’t be starting from scratch.
Plus, being organized with your finances lets you manage your money smartly and makes tax time a whole lot easier! Seriously, nobody wants to be digging for their tax documents at the last minute.
Important Legal Documents
Legal documents can be a huge pain point when you’re in a bind. These include things like your will, property deeds, and any contracts. Keeping them safe is something I didn’t take seriously until I faced a situation where I needed them in a hurry.
Having these documents in a safe but accessible place is key. I suggest using a fireproof safe or a safety deposit box for the really important stuff. That way, I’m not left scrambling when I need to prove ownership or settle legal matters.
When I keep these documents close, it not only helps during a crisis but also makes me feel more in control of my life. It’s worth the effort to get them sorted and safely tucked away.
Organize Your Documents Effectively
Create a Document Inventory
When it comes to organization, I’ve learned that creating a document inventory is a game-changer. I list everything I have and categorize it: identification, finances, legal files, etc. This inventory acts as a roadmap when I need to find something quickly.
Every time I add or remove a document, I update the inventory. This way, I always have an accurate account of what I possess, which is helpful during emergencies or if I suspect something has gone missing.
Having this organized allows me to stay proactive. If something happens, I can whip out my list and know exactly what I need to grab. Super simple yet so effective!
Use a Secure Storage Solution
Finding the right storage solution made a world of difference for me. I recommend having both a physical storage option, like a fireproof safe at home, and a secure digital option, like a password-protected cloud service. Balancing both gives me the flexibility I need.
For the documents I keep digitally, I make sure to encrypt them, ensuring that they’re safe from prying eyes. It’s just another layer of protection, and honestly, it’s become second nature to me now.
Being a little extra cautious pays off, especially if I ever need access to my documents in a hurry. I feel like having a foolproof storage method really ups my preparedness game.
Regularly Review Document Status
Another thing that’s crucial in my document-safeguarding process is the regular review. I set reminders to go through my documents, check for updates or renewals, and ensure everything is where it needs to be. Sometimes things can slip through the cracks!
This practice not only keeps my documents current but also helps prevent any unpleasant surprises later on. It’s kind of like spring cleaning for my paperwork—it feels good to tidy everything up!
I also use this time to dispose of any unnecessary documents. Reducing clutter is like reducing stress; it helps me stay focused on what truly matters.
Utilize Technology Wisely
Cloud Storage Services
Let’s talk tech! Cloud storage has been a lifesaver for me. I use services like Google Drive and Dropbox to keep digital copies of all my important papers. This way, I can access them from anywhere, which is a huge perk if I’m ever out and about and need a digital version.
Of course, security is key here, so I make sure to use strong passwords and two-factor authentication. It might seem tedious, but trust me, it helps me sleep better at night knowing my documents are safe.
Plus, having everything in the cloud makes it easier to share files with trusted family members if needed. Coordination can be tricky in emergencies, so knowing they can access documents without hassle makes it all a bit easier!
Document Scanning Apps
File organization took a leap forward with document scanning apps on my phone. It’s super easy to scan documents directly from my phone. Apps like CamScanner or Adobe Scan let me create PDFs on the go, which is amazing for quickly digitizing important records.
When I’m at home, I can easily scan, upload, and organize everything right after I receive or create a new document. This not only reduces physical clutter but also ensures I have digital backups handy.
These apps really make the process efficient, allowing me to keep my documents neat without the worry of paper piling up around me. It’s a win-win situation!
Reminders and Alerts
When it comes to technology, I’m also a big fan of setting reminders and alerts. Whether it’s renewing my driver’s license or reviewing my files, tech can help me stay on top of it all. I use calendar apps to build alerts that give me a heads-up before deadlines.
In a crisis, time can fly, so these reminders keep me anchored. It minimizes stress when I know a renewal is around the corner, and I can plan accordingly.
It’s all about making technology work for me. By utilizing reminders, I seamlessly blend my organizational needs with digital help and stay one step ahead.
Share Critical Information with Trusted Individuals
Selectting Trusted Contacts
It’s important for me to choose my trusted contacts wisely. These are people who will help me in an emergency, whether it’s family members or close friends. I usually sit down and think about who I trust the most with my personal information.
Having these contacts in place provides me with a safety net. If something happens, I know that they will step in, whether that means accessing shared documents or helping me get through a difficult time.
Trusting someone with your document safety isn’t easy, but opening that door can truly be a lifesaver. Just be sure to pick folks who have your back no matter what!
Communicate Your Plans
Once I’ve decided on my trusted contacts, I make it a point to communicate my safety plans with them. This includes discussing where I keep my documents, how they can access them, and what to do in case of emergencies.
A clear communication channel makes it much easier to coordinate and reduces panic during stressful moments. I love the peace of mind that comes with knowing my closest allies are on the same page.
Also, I often have these conversations over dinner or casual catch-ups—keeping it light helps integrate these important discussions into our lives without feeling forced.
Establish Access Protocols
Lastly, I don’t just hand over access freely. Establishing access protocols is necessary to keep my documents secure while still allowing trusted contacts to help if needed. This could be a shared password for digital documents or a plan to go to a specific location to access physical files.
By laying down these protocols, I offer a level of control while ensuring my information doesn’t fall into the wrong hands. Honestly, it’s a balance, but I love feeling like I’m not in this alone.
Setting these guidelines brings accountability, and ultimately, it builds a safety net around my essential documents that I can rely on in tough situations.
Stay Informed About Document Protection
Understand Legal Requirements
One of the critical lessons I’ve learned in documenting protection is being aware of the legal requirements surrounding important documents. Different documents have different regulations, and knowing the basics helps a ton when it comes to safeguarding them.
I frequently check in with local laws and regulations regarding document security and storage. Make it a point to familiarize yourself with what you should be doing to keep your items secure and compliant.
Whether it’s updates on wills or legal changes in property ownership, staying informed can prevent a lot of unnecessary headaches later on. Knowledge is power!
Keep Up with Technology Changes
Just like any other area of life, technology is always evolving. I make it a priority to keep up with changes that might affect my document security. Whether it’s new encryption methods or better storage services, I’m always on the lookout for improvements.
There are plenty of resources out there, from tech blogs to webinars, and they offer valuable information on protecting your documents. By staying up-to-date, I can make sure that I’m taking advantage of the best practices available.
This way, I can incorporate any new tools that make the safeguarding process easier while still ensuring my information is safe.
Continual Education on Risks
Lastly, I focus on understanding potential risks that come with not safeguarding documents properly. Criminal activities and natural disasters can happen anytime, so being informed about the types of threats helps me proactively protect myself.
I often read articles or attend workshops about safeguarding personal information. Staying aware of what scams or real-world risks to look out for makes it easier for me to prepare.
This continual education gives me the upper hand and helps prevent any unfortunate surprises from shaking the foundations I built for protecting my important documents.
Frequently Asked Questions
1. What are the essential documents I should safeguard?
The essential documents include personal identification like passports and driver’s licenses, financial records, and important legal documents like wills and property deeds. It’s wise to have both physical and digital copies of these documents.
2. How can I create backups of my important documents?
You can create backups by scanning physical documents and storing them securely in the cloud. Apps like CamScanner can help convert hardcopies to digital formats, and always remember to use encrypted storage for security.
3. Why is it important to have trusted contacts for document access?
Having trusted contacts ensures you have help during emergencies. They can assist you in accessing essential documents or making informed decisions when needed.
4. How often should I review my document inventory?
I recommend reviewing your document inventory at least once a year, or whenever you have significant updates, like new documents or changes to existing ones.
5. What are the best methods for keeping documents secure?
Utilizing a mix of physical and digital storage solutions is key. Invest in a fireproof safe for physical documents, and use secure cloud storage with strong passwords for digital copies. Regularly update this information to keep it secure.

by Preparation | May 8, 2025 | Preparedness
Hey there! Let’s dive into an important topic that many people might not think about until it’s too late: where to hide during a home invasion. Having a plan can make a world of difference. Based on my experiences and discussions, I’ve pinpointed some essential spots that can really help you stay safe if things ever go sideways. So, let’s break this down into five main areas where you can hide. Trust me, it’s about being as prepared as possible!
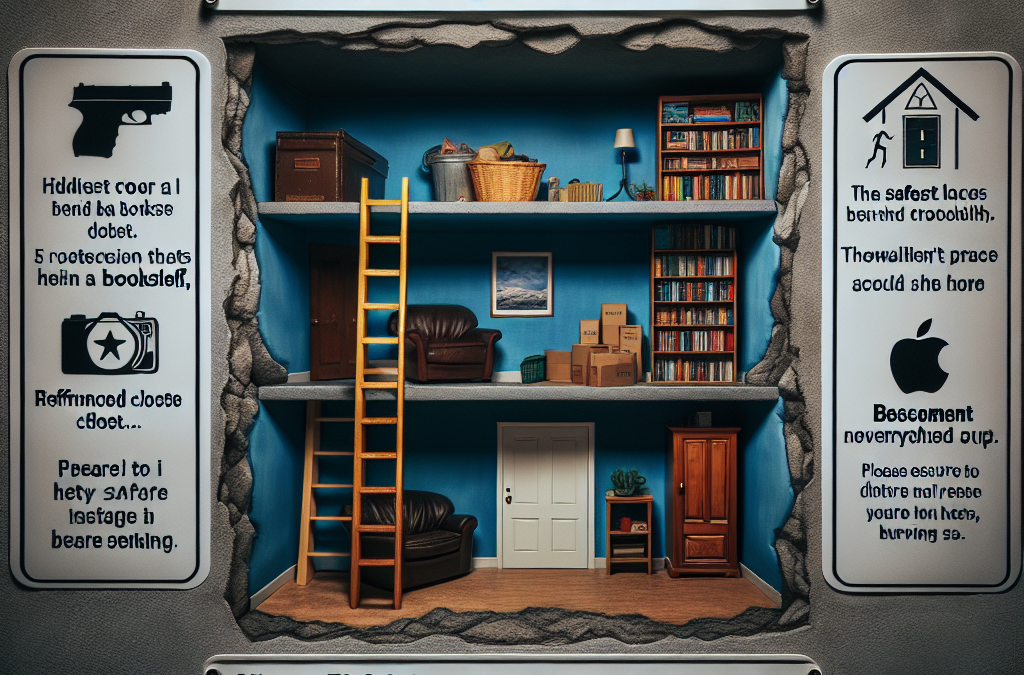
1. Under the Bed
Assessing Space and Accessibility
First things first, not all beds are created equal! If you haven’t checked how much space is under your bed lately, do it now. Some beds have a fair bit of clearance, while others may be too low for comfort. You want to make sure you can squeeze in without feeling like you’re getting stuck in a tight spot.
Also, consider how quickly you can get under there. If you’re in a room and things go wrong, you need to get under fast. Take a moment to test it out! Practice crawling under and see if it feels manageable. Being able to move smoothly is vital when every second counts.
Finally, keep in mind what’s under there. It’s best to clear out any junk that might trip you up. A bit of space can help you breathe easier and not feel cluttered when you suddenly find yourself in the need to hide!
Camouflage Your Presence
Now that you’re under the bed, let’s talk about blending in. If you have bedding that drapes down low enough, it can hide you pretty well! It’s always good to have a cozy blanket or even an extra cushion that you can use to cover yourself up and not attract attention.
Don’t forget about sound! Keeping quiet is key. So, I recommend practicing not making noise while under there – maybe turning on some music and seeing how still you can stay. You want to be a ghost, not a drummer!
And remember, the calmer you are, the better you can think. Focus on your breathing and stay collected. This mental state can really help you as you await any resolution.
Exit Routes
Another key aspect to consider is what your exit routes look like when you’re under the bed. If you’ve got a window nearby, know if it can be an escape route if needed. Sometimes being aware of your surroundings under pressure can be a real game-changer.
Have a plan for when you might come out, and think ahead about which direction to go — whether it’s running to another room or bolting outside. Being under this cover should also help you observe the situation without being seen, so use that knowledge wisely!
Last but not least, always have your phone with you or a way to communicate if the situation allows it. You never know when you might need to call for help – every detail counts!
2. Inside a Closet
Choosing the Right Closet
When it comes to closets, it’s all about the size and the contents. If you’ve got a walk-in closet, that’s usually a sweet spot. You can close the door, and with the right positioning, you can remain hidden quite effectively!
If it’s a smaller closet, look for a corner where you can tuck yourself behind coats or shoes. In this scenario, the more clothes the better! It adds a layer of protection and camouflage. Remember that you don’t want to be in a spot where your presence might stand out.
Also, consider the accessibility of the closet. If there’s clutter or boxes in your way, get that sorted out beforehand. Being able to slip in without a fuss during a scary moment is stinking important!
Noise Management
Just as with being under the bed, noise management is key here. Keep your breathing quiet, and resist the urge to fidget with things – it’s so easy to knock something over and give away your hiding spot! Find a comfy position and stay super still.
Additionally, try to find something soft to sit on if the floor is hard. Think about bringing in a cushion or a rolled-up towel to make it more comfortable. The longer you can stay calm, the better your chances are!
It’s a good idea to mentally prepare what you would say if confronted. If you can keep your cool under pressure, it may help you handle any verbal confrontation far better than if you were freaking out.
Creating a Hiding Barrier
To effectively conceal your presence, think about how you can create barriers in the closet. Hanging clothes can act as a good shield – placing several on hooks can really help obscure you from view.
You can also think about throwing things like bags or shoes around to further disguise your spot. The more natural it looks, the less likely someone will notice anything amiss!
Finally, don’t forget about your phone. If you have a discreet hiding place for it within the closet, that’s your lifeline. Just remember, only try to use it if you feel absolutely safe doing so!
3. Behind a Door
Strategic Placement
Hiding behind a door might seem straightforward, but it’s actually a clever choice if done correctly! When facing an intruder, positioning yourself behind a door can offer a surprising level of protection and concealment.
The key is to choose the right door — preferably one that opens away from you. Trying to hide behind a door that opens in your direction only gives you away! Plus, don’t forget about ensuring the door is sturdy. You want to secure yourself in a safe spot.
When the door opens, staying close to the edge can also help obscure you. Think about how you can make your silhouette less defined; standing or crouching in a way that keeps you hidden is all part of the plan!
Minimizing Movement
Most importantly, stay super still! It’s all instinctive, but moving around unnecessarily can draw attention to yourself. In this spot, silence is truly golden. So, get comfortable in your stance and maintain a strong focus.
Focus on your breathing again. Slow, deep breaths can keep you calmer and help you think clearly. This is the moment to be silent and aware of everything going on around you.
And if by chance you have anything in your hands, get rid of it beforehand. Trust me, having free hands can make a huge difference at a moment like this when your focus needs to stay strong.
Smart Exit Options
Again, having an exit strategy is crucial. If you’re behind the door, think about how you’ll slip out if things go wrong. Visibility on the other side plays a big role. Maybe there’s a window you can access or another room that leads to safety. Mapping this out mentally is key.
Make sure to have an idea of what’s outside and how you can get to safety without being seen. Timing is everything. Watch for distractions or sounds that could help you make a break for it.
Finally, be aware of your surroundings when you’re exiting. Quick glances can help you decide whether to stay put a little longer or make your move!
4. In the Attic
Accessing the Attic
If you’ve got an attic, that could be a game-changer. It’s often not the first place someone would check. First, evaluate how easily you can access it — is there a pull-down ladder, or do you have to climb up through a hatch? Make sure you’re comfortable using it quickly.
Once you’re up there, check the layout. Some attics can be awkward and cramped, full of old boxes and gear. Know how you can navigate in the dark — falling over something can do you way more harm than good during a scary moment!
Creating a safe zone in your attic can also make a big difference. If there’s room, consider keeping a small pile of supplies with a flashlight and your phone. That way, you’re a bit more prepared for anything that comes your way.
Disguising Your Hiding Spot
Attics can be dark, but it’s crucial to disguise yourself well! If there are old boxes, old furniture, or anything that can help conceal your presence, use them to your advantage. Pile items around you, but make sure you still have room to breathe!
Ensure you can remain as unseen as possible. Something as simple as a dusty sheet covering your silhouette can provide the cover you need. Just be careful to not batch yourself in too tightly, as you still want to be able to escape if need be.
Being hidden in a less-than-clean space can make keeping calm harder, so try to find something comfy if you can. The more relaxed you are, the easier it’ll be to maintain your focus!
Exit Strategies from the Attic
When hiding in the attic, always keep a mental checklist of possible escape routes. Often, there’s that hatch where you came from or a rooftop you might be able to access. Know where those options lie, and how quickly you can get to them.
Checking what’s directly below you can also be pivotal. If your exit through the attic hatch leads into a room where someone is lurking, you’ll want to rethink your plan quickly!
Getting out without making noise is key! You don’t want to draw attention to your escape, so practice what that would look like. Planning for a quiet getaway sets you up much better than leaving it all to chance.
5. Behind Large Furniture
Choosing the Right Pieces
Sometimes, the best hiding spots can be right in plain sight! Large pieces of furniture, like a couch or a wardrobe, can be your secret weapon. Look around your home — it could be as simple as pulling a big chair away from the wall and slipping behind.
When you’re scouting for these spots, test how much space you have. A creaky chair can give you away, so moving a little can be a no-go. Ensure your hiding place can support your weight comfortably without noise!
Being behind larger pieces can give you that unexpected cover. Just ensure that it’s sturdy and won’t topple over if you lean against it. Protecting yourself is the main goal!
Staying Calm and Concealed
Once you’re behind the furniture, deep breaths again! Silence rules — staying still is key. If you feel tension rising, focus on outside noises or movement; it’s all about keeping your composure in such heightened moments.
You may not have much room, but make sure you’re comfortable enough to stay still for a while. If needed, find a small cushion to put behind your head to help keep your thoughts clear and your body relaxed.
Always listen carefully to what’s happening around you. If things start getting rowdy, staying concentrated on the sounds can help you gauge the situation without exposing yourself.
Planning Your Next Move
Finally, while hiding behind furniture, always be prepared with a plan. What’s your next step if things go wrong? A hasty retreat from behind the couch could be best to think about, but knowing where you’ll head to is just as important.
Having a clear exit route — even if it means making a run for it once you know you can get away unseen — is vital. If there’s a back door, window, or even an escape route into a neighboring area, make sure it’s fresh in your mind.
And above all, trust your instincts! Sometimes, your gut feeling will lead you to safety better than any strategy drawn up on paper. This readiness will give you the edge you need!
FAQ
- 1. What is the safest place to hide during a home invasion?
- The safest place really depends on your home’s layout and where you feel most secure. Under the bed, in a closet, or behind large furniture are all viable options that can help conceal your presence.
- 2. How can I prepare my home for a potential invasion?
- Preparation involves having a plan, knowing your escape routes, and keeping areas clear of clutter. Creating hiding spots and practicing your responses can make a big difference in high-stress situations.
- 3. Should I try to confront an intruder?
- Generally, it’s best not to confront an intruder. Prioritizing your safety should come first, so hiding and waiting for them to leave or for help to arrive is usually the safest route.
- 4. What should I keep in my hiding spots?
- Having essential items like your phone, a flashlight, or anything you need to stay quiet can be extremely helpful. It’s always good to have a little stash of supplies to make your hiding experience more manageable!
- 5. How can I stay calm during a home invasion?
- Staying calm involves finding ways to center yourself, like focusing on your breathing, staying still, and listening intently to your surroundings. Practicing mindfulness can help maintain your composure during high-pressure situations.
by Preparation | May 8, 2025 | Preparedness
Assessing Your Pet’s Needs
Understanding Common Health Issues
As you embark on the journey of creating a first aid kit for your furry friend, it’s crucial to understand what kinds of health issues you might encounter. Every pet is unique, and knowing their specific needs can make a huge difference in an emergency. When I first started thinking about my pets’ health, I made a list of common problems like cuts, bites, and allergic reactions. It gave me clarity on what to include in my kit.
For instance, my dog, Max, is prone to ear infections, while my cat, Bella, occasionally gets into tussles with other animals. By identifying these issues, I ensured I was prepared for any situation that might arise. Consider chatting with your vet about potential concerns—they can offer customized advice based on your pet’s age, breed, and health history.
Being proactive is key! Think about your pet’s lifestyle, whether they are active and adventurous or more relaxed. This can help you predict potential emergencies and prepare accordingly. It’s all about being one step ahead.
Talking to Your Veterinarian
One of the best resources I found while preparing my pet’s first aid kit was actually my veterinarian. They have a wealth of knowledge and could suggest essential items for my kit based on my pets’ unique needs. Just asking simple questions during our regular check-ups gave me valuable insights.
Don’t be shy about asking specific questions! For example, “What should I have on hand for a bee sting?” or “How can I handle a sudden illness?” These conversations can help you build a tailored kit that’s efficient and effective.
Make it a practice to update your kit according to your vet’s advice, as recommendations might change with seasons or health developments. Keeping an open line of communication with your vet can ensure that you’re always prepared for anything life throws your way with your pet.
Regularly Updating Your Kit
Over time, I realized that just building the kit wasn’t enough. Regularly updating it is super important! Just like you check the pantry for expired food, keep an eye on the contents of your first aid kit, too. If your pet’s health changes or they age, you may need to add new supplies.
Also, I’ve learned that I should check items like gauze and antiseptics to ensure they remain sealed and effective. Rotating supplies can also help ensure anything that needs attention is taken care of promptly. Make it a habit to do this every few months. You never know when you’ll need it!
Additionally, every few seasons, let’s say every six months, it helps to re-evaluate what’s in there. Some items might get used up or become obsolete. If you’ve had a change in your pet’s activities or health, adapt the kit to suit those new circumstances!
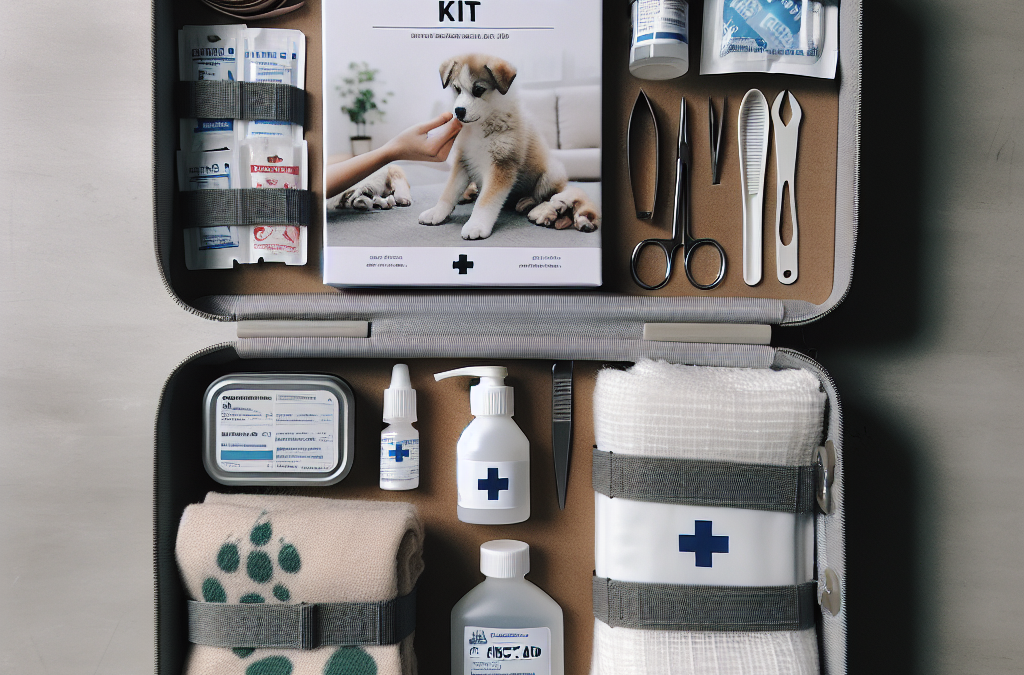
Essential Items for Your Kit
Bands and Wraps
When I think of first aid, one of the first things that comes to mind is bandages. The world of bandages is vast, and I’ve learned that having a variety is key. From adhesive bandages for small cuts to elastic wraps that can secure gauze on a more serious injury, each plays an essential role in pets’ first aid.
Having a set of stretchy bandages is great for wrapping injuries on a leg or paw, while smaller adhesive bandages work perfect for those tiny scrapes. Just keep in mind, don’t use human bandages, as they can contain materials that might be unsafe for pets if swallowed!
Stocking a few different types ensures you’re ready for small everyday boo-boos to bigger accidents. Trust me; after a couple of mishaps with Max and Bella, I learned this the hard way. The right bandage can really speed up healing and help minimize infections!
Cleaning Supplies
Next, we have cleaning supplies, an absolutely necessary component of any pet first aid kit. Keeping wounds clean is essential, and I often use sterile saline solution and antiseptics to help with that. It’s something I learned after witnessing a minor cut turn serious due to lack of proper cleaning!
Even knowing you can use natural options like witch hazel can help soothe your pet’s skin after cleaning. However, I always consult with my vet before trying new products, just to be on the safe side. You just never know what works best, especially if they have allergies.
Keep some cotton balls and swabs handy, too. They can really help with applying cleaning solutions, making things easier and more controlled. And let’s face it; the last thing you want is a messy clean-up job!
Medication and Treatment Essentials
I’ve faced the tough decision of having to give Max medication for unexpected allergies, and that’s when I realized having the right medications is crucial. Over-the-counter choices like Benadryl and activated charcoal can come in handy for treating mild allergies or poisoning.
However, it’s vital to consult your vet about dosages and what medications are safe for your specific pet. I always keep a little guide with standard dosages for my pets and maintain a line of communication about any changes to their health or medication needs.
Having a thermometer specific for pets is another essential tool that has saved me from guessing too much. If ever in doubt, taking a quick temperature gives definitive information. Those little pieces of knowledge make you feel more in control in an emergency.
Storing Your Kit
Choosing the Right Container
When I first built my first aid kit, I didn’t put much thought into the container. Boy, was I wrong! I later realized that having a good sturdy container makes a huge difference. You need something that’s durable, waterproof, and easy to carry around, please! I recommend a plastic box with labels for each section inside, so you know exactly where everything is in a moment’s notice.
Also, think about where you plan to keep this kit. Evaluate the environment; if it’s in a humid area, you might need to think about sealing everything inside properly. Keeping medications and supplies in their original packaging can also help prevent any mix-ups.
Once, I had everything scattered in a drawer, and it took me ages to find what I needed in an emergency. Trust me; it’s worth investing some time into organizing it properly to make things smoother later!
Labeling and Organizing Items
Another crucial aspect is labeling. I figured out that simply throwing things together isn’t enough; organizing by type helps a lot. Using labels for different sections like ‘bandages,’ ‘medications,’ or ‘cleaning’ copies not only saves time but ensures that others who might need to use the kit can find what they need in a hurry.
Consider creating a quick reference guide to put inside the kit. It could include emergency numbers for vets, poison control, or even your regular vet’s info. On one stressful occasion, I was frantically looking for numbers, only to realize I could’ve had that on hand!
Also, regularly checking and re-labeling supplies as needed keeps everything up to date. It’s a simple practice that can prevent any mishaps where you think you have the right item only to find out it expired or was used last week.
Location Accessibility
Finally, where you store your kit can make a world of difference. It’s an easy mistake to hide it away in the back of a closet; I did that once, and you can imagine how fun that was trying to dig it out during an emergency! Instead, I’ve learned to keep my first aid kit in a place that’s easily accessible yet safe from small hands and paws.
Keep a small kit in your car too, just in case emergencies happen while you’re out and about. This has been a lifesaver during long walks or hikes. Trust me, having it on hand prevents panic when unexpected problems arise.
Finally, maybe consider having a separate smaller kit specifically for travel, just to keep it all ready to tackle whatever comes your way during adventures. You’ll thank yourself later for being prepared and confident in handling situations when they pop up!
Training and Practice
Learning Basic First Aid Techniques
Honestly, having a first aid kit is just one part of the equation—knowing how to use it is another. I took a weekend class on basic pet first aid, and it was a game-changer! They walked us through techniques like how to bandage a leg and when to apply pressure to stop bleeding.
Hands-on techniques taught me to perform CPR on pets, which I certainly hope I never have to use, but it gives peace of mind to know what to do in a scary situation. I’d recommend checking for local classes, as many community programs offer these invaluable skills.
Alternatively, there are several online resources and videos to guide you. Just make sure they come from reputable sources or certified professionals. Knowing these skills can make that crucial difference if an emergency arises, and being prepared is so empowering.
Practicing with Your Pet
Another thing I found super helpful was practicing how I would handle my pets in an emergency. I set aside time to get used to the equipment and practice where all the items in my kit are located. It felt a bit silly at first, but it actually built confidence for me—and my pets were great sports about it!
Since my pets are pretty calm, practicing nudging their paws or holding them still for a bandage helped me prepare for the real thing. It was reassuring to know how they reacted and how I could best calm them if they were stressed.
Having my pets accustomed to being handled during these training sessions really paid off when things got tense. Your pets might surprise you by being more cooperative if they’ve had a little practice in advance!
Creating a Family Plan
Finally, involving the family in the process can create a sense of teamwork about your pets’ health and safety. I often include my kids in discussions about the first aid kit and what supplies we have. They’ve learned where to find everything and how to assist if needed in an emergency.
This also lays a foundation for valuable life lessons about responsibility and care of pets. My kids take pride in knowing they can help care for our animals and are more attentive during our walks and outings. It’s all about creating that bond between them and our pets!
Every few months, we have a family refresh on knowledge about the first aid kit, discussing what’s in it and why. What could be a mundane chore becomes a bonding session over our beloved pets. Teamwork makes the dream work, right?
FAQs
1. What should be included in my pet’s first aid kit?
Your kit should contain bandages, antiseptics, gauze, medications, and a thermometer, along with a few basic first aid tools like scissors and tweezers. Tailor it to your pet’s specific needs.
2. How often should I check and update my first aid kit?
I recommend checking your kit every few months, replacing expired items, and ensuring everything is in good condition. This keeps you prepared for any emergencies!
3. Is it necessary to take a pet first aid class?
While not mandatory, it’s incredibly beneficial. Learning basic first aid techniques increases your confidence and equips you with the skills you may need during a pet emergency.
4. Can I use human medications on my pets?
Some human medications are safe for pets, but you must consult your veterinarian before giving anything. Dosages vary widely, and some medications can be harmful to pets!
5. Where should I store my first aid kit?
Keep your first aid kit in an easily accessible, safe place that your pet can’t reach. Consider having smaller kits for your car and travel to ensure preparedness wherever you go!
by Preparation | May 8, 2025 | Preparedness
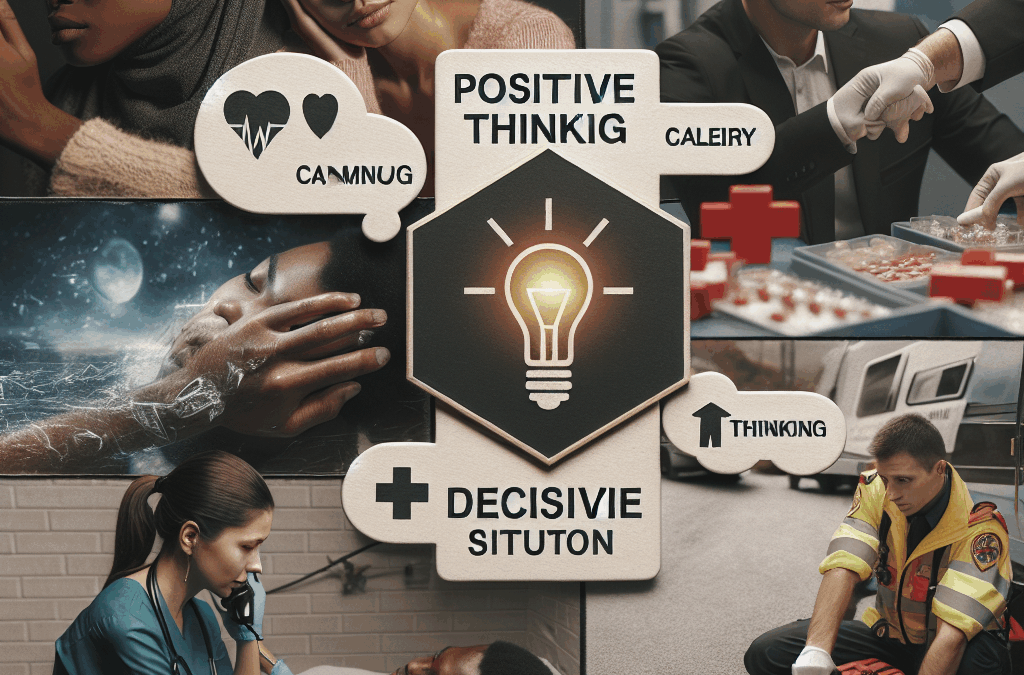
Stay Calm and Breathe
Understanding the Power of Breath
When an emergency strikes, our natural reaction might be panic. Trust me, I’ve been there. The first thing you’ve got to do is to hit the pause button. Breathing techniques can help clear the fog of panic. I remember a time when I was in a tense situation; focusing on my breath turned everything around for me.
Calming breaths essentially signal to your brain that it’s all going to be okay. When you exhale slowly, your body recognizes that it’s not in immediate danger anymore. It’s like telling yourself, “I got this!” I often find that inhaling deeply through my nose and exhaling through my mouth does wonders.
Try to implement deep breathing exercises every day, so you’re trained and ready when emergencies happen. Even simply counting your breaths can anchor you back in the present moment. Let this become your go-to strategy!
Reframe Your Thoughts
Identifying Negative Triggers
When trouble looms, our mind can go to dark places. I’ve learned the hard way that recognizing these negative thoughts is crucial. Grab a notebook, jot down your feelings during an emergency. Trust me, it’s validates what you’re feeling.
Reframing isn’t about lying to yourself; it’s about flipping the script. Instead of thinking, “I can’t handle this,” shift to, “I’m learning how to handle this.” This minor change in dialogue can really empower you to tackle the situation. It’s refreshing!
Next, consider the positive aspects of your predicament. For every emergency, there’s an opportunity for growth. Maybe it’s improving your crisis management skills or learning more about your support system. Keep reminding yourself: every cloud has a silver lining.
Visualize Success
Imagining Positive Outcomes
This might sound a bit cheesy, but visualization has been a game changer for me. When faced with an uncertain situation, I take a moment to vividly imagine a successful resolution. Picture it! What does that look like for you? The clarity really helps.
When you see yourself conquering the issue, you’re setting a positive tone for your actions. It’s like a mental rehearsal that boosts your confidence when faced with obstacles. Plus, I’ve noticed that imagining success reduces anxiety—how cool is that?
Can you envision your ideal outcome? Maybe it’s acing an important presentation or calmly managing a family emergency. Take that picture and hold on to it as a goal. Visualization can often lead to those goals manifesting in reality.
Seek Support
Don’t Hesitate to Reach Out
There’s a common misconception that we have to handle everything on our own. Let me tell you, that’s often not the case. When I face emergencies, reaching out to friends, family, or even professionals helps lighten the load. They can offer perspectives and support you might not even have considered.
Support networks are crucial during crises. I remember a time when I was unsure how to maneuver through a tough situation; talking it through with a friend not only eased my mind but also provided solutions I hadn’t thought of.
Encourage yourself to express your feelings openly. Engaging in constructive conversations can help you realize you’re not alone in your struggles. A listening ear may be exactly what you need to see things in a new light. Keep that connection alive!
Practice Gratitude
The Bright Side in Dark Times
It’s easy to get bogged down by negativity during emergencies, but I’ve found that practicing gratitude helps shift my focus. No matter how bad things seem, there’s always something to be thankful for! Even if it’s just having a place to rest your head that night, acknowledging those wins matters.
Gratitude can alter your perspective. I learned to list three things I’m grateful for every day, even amid chaos. This ritual constantly reminds me that life has its ups and downs, and recognizing what’s good helps create a more balanced outlook.
Consider keeping a gratitude journal. It’s a fantastic tool I’ve used to document positive aspects of my life, especially during tough times. Revisiting those moments fosters resilience and positivity, turning emergencies into opportunities for growth.
FAQs
What is the first step to take during an emergency?
First and foremost, stay calm and breathe. This helps clear your mind and allows you to think more clearly.
How can I reframe my negative thoughts effectively?
Identify your negative triggers and consciously shift your thoughts to a more positive perspective, focusing on your ability to handle the situation.
Does visualization really help in stressful situations?
Absolutely! Visualizing a successful outcome boosts your confidence and reduces anxiety, making it easier to face challenges.
Why is seeking support important during emergencies?
Support from friends and family provides comfort and additional perspectives, helping you navigate through difficulties better.
How can gratitude change my perspective during tough times?
Practicing gratitude helps shift focus from negativity to positivity, enhancing your resilience and outlook on situations.
by Preparation | May 8, 2025 | Preparedness
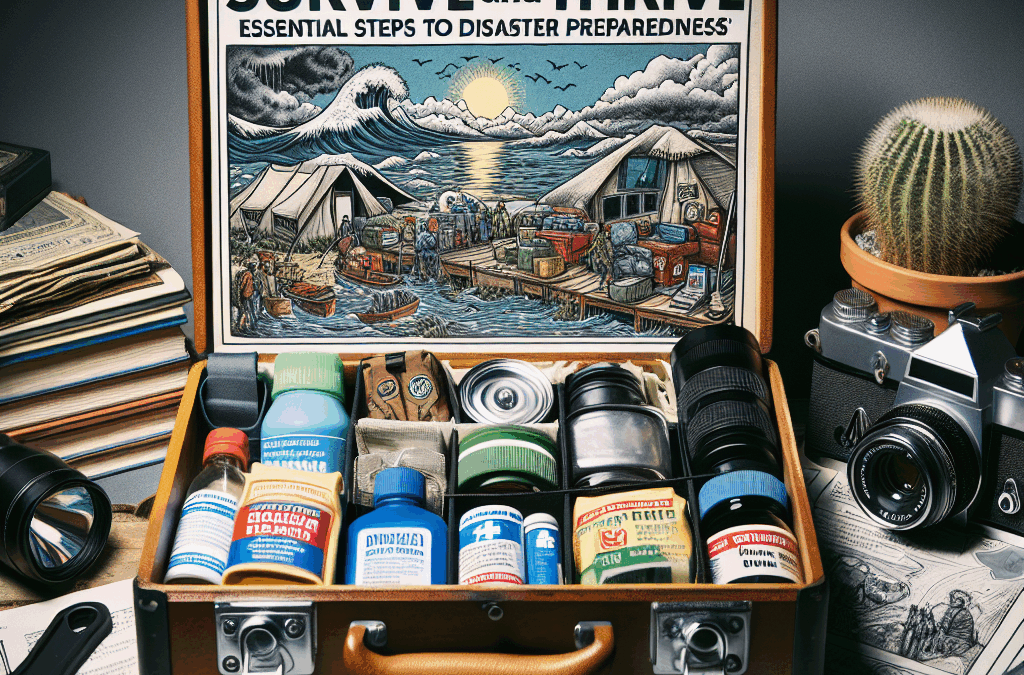
In an unpredictable world, the adage “hope for the best but prepare for the worst” rings especially true. Disasters can strike at any moment—be they natural calamities like hurricanes, earthquakes, or floods, or man-made crises such as industrial accidents or civil unrest. The key to navigating these challenges lies in preparedness. Here’s how you can ensure both survival and resilience in the face of adversity.
*Understanding Risks: Identify Potential Disasters in Your Area**
The first step toward effective disaster preparedness is understanding what risks lurk in your environment. Each region faces unique threats based on geography and climate. For instance, coastal areas may be prone to hurricanes and flooding, while regions near fault lines might experience earthquakes. To pinpoint potential disasters specific to your locality, consult resources like local government websites or emergency management agencies. They often provide comprehensive assessments of risks prevalent in your area.
Once you’ve identified these hazards, take note of their historical frequency and severity. This valuable information will guide you in prioritizing which preparations are most critical for your household.
*Building Your Emergency Plan: A Blueprint for Survival**
With a clear understanding of potential threats, it’s time to draft an emergency plan tailored to your family’s needs. Start by outlining escape routes from your home and identifying safe meeting points outside if evacuation becomes necessary. Remember that communication is vital; establish a system for keeping in touch with loved ones should traditional channels become compromised.
Moreover, include specific roles for each family member within your plan—designate who will grab essential items during an evacuation or who will check on elderly relatives nearby. Regularly practice these scenarios through drills so that everyone knows exactly what to do when the moment arrives.
*Stocking Up: The Ultimate Emergency Supply Checklist**
A well-stocked emergency supply kit can mean the difference between mere survival and thriving through a crisis. Begin with the basics: water (one gallon per person per day), non-perishable food items (think canned goods and energy bars), a flashlight with extra batteries, and basic first-aid supplies.
Don’t forget important documents! Store copies of identification papers, insurance policies, medical records, and any other crucial paperwork in a waterproof container within your kit. Additionally, consider including tools like a multi-tool knife or duct tape—these can prove invaluable during emergencies.
Lastly, tailor your supplies based on individual needs; if you have pets or young children, ensure their requirements are met too!
*Staying Informed: The Importance of Communication and Training**
Disaster preparedness doesn’t end once you’ve created a plan and assembled supplies; staying informed is equally crucial. Sign up for local alerts regarding weather updates or emergency notifications through text messages or apps provided by governmental organizations.
Furthermore, invest time into training opportunities available within your community. Programs like CPR certification courses or FEMA training workshops equip individuals with skills that could save lives during emergencies.
In conclusion, disaster preparedness is not just about surviving but also about fostering resilience within our communities. By understanding risks unique to our area, crafting detailed plans tailored to our families’ needs, stocking vital supplies thoughtfully, and remaining informed through education and communication channels—we set ourselves up not just to survive but truly thrive amidst chaos when it inevitably arises.

by Preparation | May 8, 2025 | Preparedness
Understanding the Crisis and Its Impact
Identifying What Constitutes a Crisis
When we think about crises, it’s easy to jump to dramatic events—a natural disaster, a financial emergency, or a health pandemic. But what I’ve realized over the years is that crises can also be personal. They can be anything that disrupts our daily lives and challenges our mental resilience. Recognizing the scope of a crisis is the first step towards tackling it.
The beauty here lies in the acknowledgment. By understanding the type of crisis we are dealing with, we can better prepare ourselves mentally and emotionally. It’s not only about the event itself but also how it shapes our perceptions and actions moving forward.
So, in my experience, sitting down and listing out what bothers me most during these times has been therapeutic. It makes those big, scary “crisis” feelings feel a bit more manageable, even familiar!
Recognizing the Emotional Toll
Crises take an emotional toll; that’s a fact. I’ve been through my fair share of ups and downs, and one thing stands out: the constant sense of uncertainty can lead to anxiety and sadness. It’s vital to recognize these feelings as legitimate. Ignoring them doesn’t make them disappear.
When you feel that emotional weight, don’t hesitate to reach out. Sharing feelings not only lightens the load but also opens doors to new perspectives and solutions. I’ve had countless meaningful conversations during crisis moments that changed the game for me—each one made me feel less alone.
Moreover, processing those feelings through journaling or talking to a close friend has helped me find clarity. Even a simple “Hey, I’m having a rough day” can be the start of significant healing.
Finding Support Systems
Support systems are like lifelines in turbulent waters. In my journey, I can’t stress enough the importance of having a crew to lean on during crises. Friends, family, or even support groups can be incredibly beneficial. We all grapple with our own battles, but having others rally around you makes a difference.
What I’ve found over time is that creating or joining a community where open discussion is encouraged can help foster resilience. It’s comforting to know you’re not going through it alone, and sometimes just hearing “me too” can be a source of strength.
I also believe in the power of professionals—therapists or counselors can provide guidance and tools that we might not think of ourselves. They’re often able to highlight areas of your life needing attention, and that insight can be really illuminating!
Navigating Through the Crisis
Staying Positive Amidst Adversity
Keeping a positive mindset can be tough, especially when the world feels chaotic. But I’ve found that focusing on what I can control—my reaction and outlook—has made a remarkable difference. Even trying to embrace small, joyful moments can create a more encouraging atmosphere.
Creating a daily gratitude list has been a game-changer for me. It sounds cliché, but recognizing things to be thankful for—even the little ones—helps shift my perspective during dark times. It’s all about retraining the brain to look for silver linings.
And let’s face it, practicing kindness—whether to myself or to others—has turned those dark days into more bearable experiences. After all, a little love can go a long way!
Establishing Actionable Steps
Once I’ve recognized the crisis and the emotional waves that come with it, the next step is taking action. It’s about forming actionable steps to navigate through the noise. I often start by breaking down tasks into small, manageable pieces. For example, simple to-do lists can be powerful in giving direction.
This not only provides a sense of purpose but also allows me to tick off accomplishments, boosting my mood. And honestly, who doesn’t love that feeling of knocking things off a list? It’s like tiny victories that build up!
Additionally, setting realistic goals that are achievable has been crucial. Trying to tackle everything at once can leave you feeling defeated, whereas small wins create a positive feedback loop that keeps you motivated.
Reflecting and Learning Post-Crisis
After navigating through a tough time, I always take a moment to reflect. What worked? What didn’t? This reflective practice teaches valuable lessons, helping me build a stronger foundation for the future. I’ve learned that crisis can often lead to unforeseen growth.
I also make it a habit to discuss my experiences with trusted friends or loved ones, not just to vent but to analyze. Sharing is growth, and maybe even helping others who may face similar challenges down the line!
Finally, I ensure to celebrate the resilience I’ve built through these tough times. Whether it’s journaling about my growth or simply treating myself to something special, I honor the journey. It’s all about how far I’ve come and not just that moment of struggle.
Frequently Asked Questions
What is ‘Positive Preparedness’?
Positive Preparedness is a mindset and practice that encourages individuals to develop resilience and hope during crisis situations. It involves understanding crises, recognizing emotional impacts, and finding proactive ways to navigate through tough times.
Why is it important to identify the type of crisis?
Identifying the type of crisis helps to set the course for your response. Different situations require different coping strategies, so understanding the specifics can make your approach more effective.
How can I find support during a crisis?
Finding support can be as simple as reaching out to friends or family. You may also consider joining groups or seeking professional help. Remember, you don’t have to face tough times alone!
What steps should I take to maintain positivity?
Focus on what you can control, practice gratitude, and embrace kindness, both towards yourself and others. These small acts can help create a more positive environment even during challenging situations.
How can I reflect on my experiences after a crisis?
Take time to write about your experience, discuss it with trusted friends, and look for lessons learned. Celebrating your resilience and growth is crucial in moving forward with newfound strength.


