by Preparation | Mar 9, 2025 | Preparedness
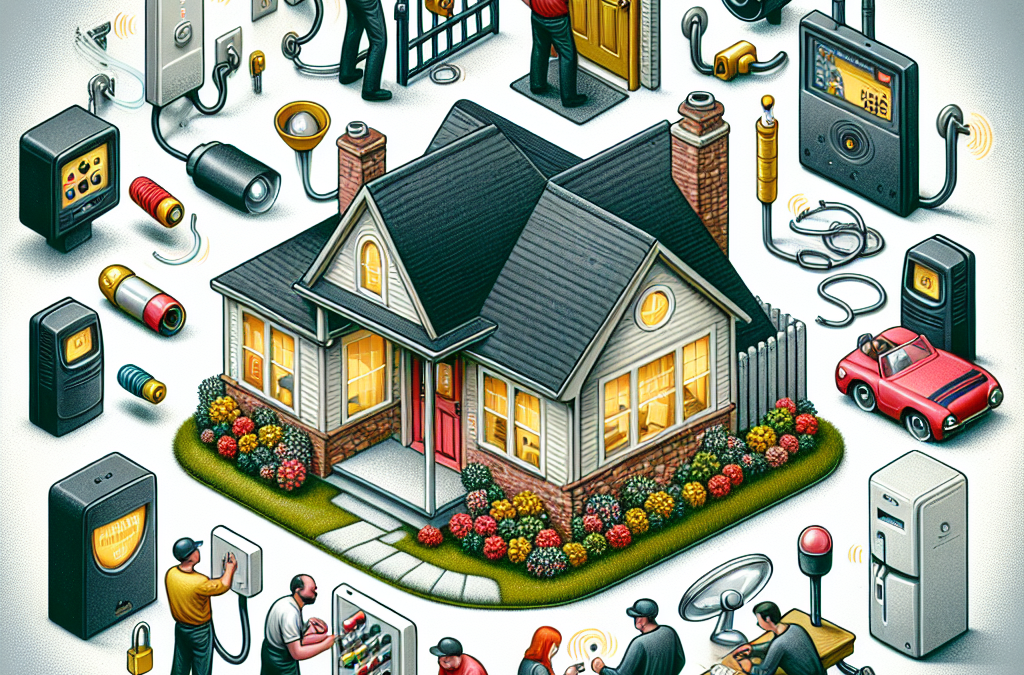
Hey there! Today, I’m diving into a topic that’s super important for all of us—how to secure our homes from intruders. Whether you live in a bustling city or a quiet neighborhood, the safety of your home should always be a priority. From personal experience, I can tell you that taking a few proactive steps can make a world of difference. So, let’s break this down into five major areas that can help fortify your fortress. Ready? Let’s go!
Enhance Your Physical Security
Invest in Quality Locks
First things first, let’s talk about locks. You’d be amazed at how many homes still have basic locks that can be easily picked. When I moved into my house, I swapped out all the standard locks for deadbolts. Trust me, it’s worth investing in high-quality locks that are hard to tamper with. Look for options that come with a grade rating from the American National Standards Institute (ANSI) for added peace of mind.
Also, consider installing smart locks. These babies let you control access to your home with your phone. No more fumbling for keys! You can remotely lock or unlock your door and even see who comes and goes.
Lastly, don’t forget about secondary entrances. That garage door or back door should have just as secure a lock as your front door. Time to lock it down, folks!
Upgrade Your Outdoor Lighting
Next up, let’s shed some light on the situation—literally! Criminals love the cover of darkness, so brightening up your property can deter unwanted visitors. Motion sensor lights are a fantastic option because they only turn on when someone approaches.
I’ve installed them around my yard and let me tell you, it’s made a huge difference. Just the other night, a raccoon set them off, and I can only imagine how a potential intruder would feel seeing those lights blaze to life.
Dusk-to-dawn lights are also a great addition. They keep your property lit from nightfall to sunrise, making it look lived-in and less appealing to anyone looking to cause trouble.
Fortify Windows and Doors
Don’t forget about your windows and doors! These can be vulnerable entry points if they’re not adequately secured. A simple upgrade is to add window locks and secure latches on all your ground-level windows.
For an extra layer of protection, consider window security film. This stuff strengthens your glass, making it harder to break. When I put this film on my windows, it really gave me peace of mind knowing that the glass wouldn’t shatter as easily.
Additions like door jammers or security bars can also add a friendly barrier to your doors and windows. Every little bit helps, and knowing my windows and patio doors are secure lets me sleep easier at night!
Utilize Security Systems
Invest in a Home Security System
If there’s one thing I can tell you, it’s that having a security system is worth it. Many companies offer affordable plans with comprehensive coverage. Whether you go for a traditional system with cameras and alarms or a modern smart home setup, it’s crucial to have that layer of security that alerts you and the authorities.
When I installed mine, I felt like I’d set up an invisible fortress around my home. Plus, you can keep tabs on everything through your phone. I love being able to check in when I’m away.
Installation can be a breeze, too! Some systems even offer DIY setups, so you can do it at your own pace. Just remember to put those yard signs up—let everyone know you’re serious about security!
Install Security Cameras
Your home security system won’t be complete without security cameras. They act as your eyes and can deter intruders right off the bat. I installed a few around my home, and I can’t tell you how comforting it is to have that extra surveillance.
With modern technology, you can find cameras that offer motion detection, night vision, and cloud storage. Some even allow you to talk through the camera. Imagine scaring off a would-be intruder by saying, “Hey! I see you!”
Be smart about where you place them—entry points are key. Cameras positioned to capture both the front and back of your home are especially important. And don’t forget about the sides of your home!
Set Up an Alarm System
An effective way to add security is through alarm systems. They not only alert you to movement but can also notify local law enforcement. I opted for a system that alerts me on my phone for real-time notifications.
Many of these alarms now come with features like glass break sensors, door/window sensors, and even smoke detection. It’s so reassuring to know that my system can alert me of more than just a break-in.
Make sure to test your alarms regularly. Nothing would be worse than feeling secure only to find out your alarm doesn’t work when it’s needed most!
Create a Secure Outdoor Environment
Lush Landscaping Isn’t Just Pretty
While it’s great to have a beautiful yard, overgrown bushes can create hiding spots for intruders. Keeping your landscaping neat and trim can help eliminate places for someone to lurk. I started doing regular maintenance, and cutting back my bushes near windows made a noticeable difference.
Instead of high shrubs, consider low plants that add some charm while keeping everything visible. Clear sightlines offer better security and can deter intruders who prefer to stay hidden.
If you’re looking for extra deterrence, planting thorny bushes near windows or under windows can also help. It’ll make anyone second guess their entry plans, that’s for sure!
Neighborhood Watch Programs
Buddying up with your neighbors to form a neighborhood watch program can enhance your security even further. It’s amazing what a little community spirit can do! I personally love how it fosters relationships, plus having a watchful eye can deter crime.
Regularly communicating with neighbors about any concerning activities keeps everyone informed and alert. You’d be surprised how sharing little details can lead to a safer neighborhood.
Host block parties or meetings to build camaraderie. A friendly neighborhood is a strong neighborhood, and you all look out for each other. Together, you can keep your community safe!
Secure Your Garage and Shed
Your garage and shed can actually serve as unwelcome entry points for intruders. Many folks overlook them, but making sure these areas are secure is vital. I used to leave my garage door unlocked often, but not anymore!
Invest in good quality locks for your garage door and shed. Furthermore, keep ladders stored away, as they can provide access to upper levels of your home. My trick is to always keep tools and outdoor furniture secured away—no need to give thieves an invitation.
Lastly, installing motion-activated lights around your garage and shed can alert you to any unwanted attention. I’ve had my motion lights save me from a couple of suspicious situations.
Stay Informed and Proactive
Regular Property Assessments
Staying proactive and regularly assessing your property for potential vulnerabilities is key. I set aside some time each season to walk around my home and check for weak spots or anything that could be improved.
Take a look at your locks, lights, and overall security. Ask yourself what could be done better. Making these tiny tweaks can go a long way in keeping your home secure.
Documenting these assessments also helps in tracking progress. Over time, you’ll identify areas that need addressing and make the necessary shifts to bolster your home’s defenses.
Education and Awareness
Education is another fantastic tool for keeping your home safe. Stay updated on crime trends or alerts in your neighborhood. Websites and social media are perfect for learning about recent reports of burglaries or suspicious activity.
Also, consider taking security workshops or self-defense classes. Understanding how to respond in a crisis can give you confidence and the tools to stay safe. I’ve found that even simple awareness techniques can make a difference!
And don’t hesitate to share your knowledge with neighbors—keeping everyone informed creates a culture of safety.
Follow Up on Security Measures
Lastly, always follow up on your security measures with regular reviews. It’s not just about installing systems but also maintaining them. If you’ve got smart technology, ensure your apps are updated and devices are functioning properly—nothing worse than a faulty security system!
You should also revisit your plans every so often. Circumstances change, and a simple reevaluation can propel you to upgrade your systems or strengthen areas that have become lax.
For me, it’s about cultivating a habit of vigilance. A few routine checks make all the difference, and it’s something I take pride in as a homeowner.
FAQs
1. What are the best types of locks to use for home security?
High-quality deadbolts and smart locks are among the best options. Make sure they are rated by ANSI and fit well into your door for maximum security.
2. How can I improve outdoor security without spending a lot?
You can improve outdoor security with strategic lighting, trimming your shrubs, and keeping an eye out in your neighborhood. These tasks can be done affordably and can greatly enhance your home’s safety.
3. Is it worth investing in a home security system?
Absolutely! A home security system not only deters intrusions but also offers peace of mind. It’s an investment that can protect your home and your loved ones.
4. How often should I assess my home for security vulnerabilities?
It’s a good practice to reassess your home at least once a season. Changes in the environment or your lifestyle may reveal new vulnerabilities that need addressing.
5. What should I do if I notice suspicious activity in my neighborhood?
If you notice suspicious activity, it’s crucial to alert your neighbors and, if necessary, contact local law enforcement. Staying informed as a community helps keep everyone safe!

by Preparation | Mar 9, 2025 | Preparedness
Assess the Situation
Understand the Type of Disaster
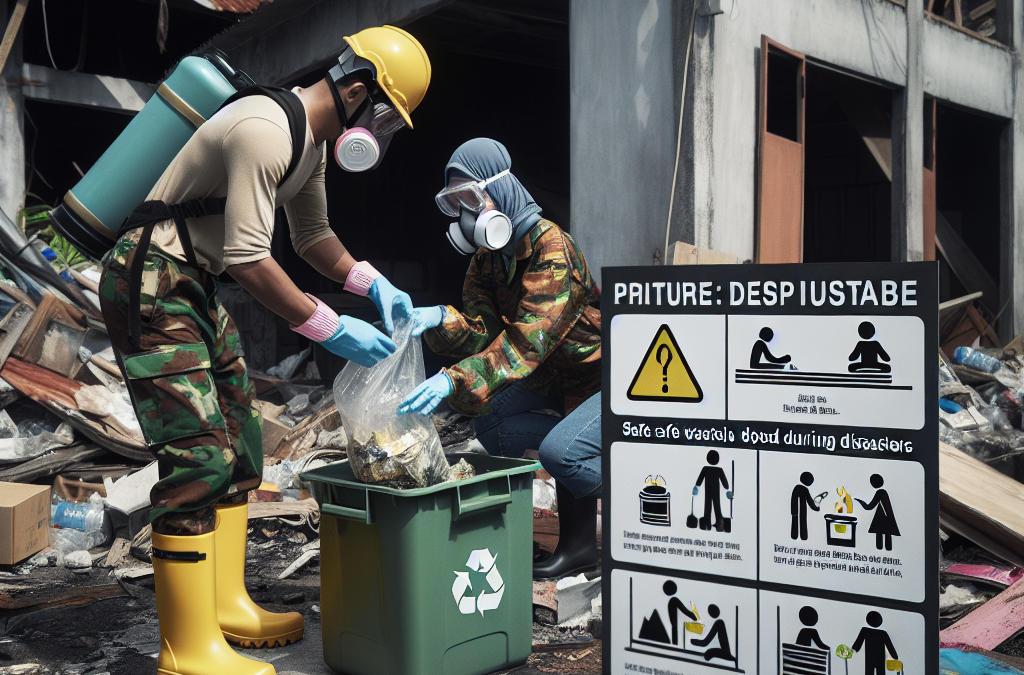
When a disaster hits, whether it’s a natural calamity like a flood or a man-made situation such as an industrial accident, the first step is to understand what kind of waste you’re dealing with. Is it hazardous, recyclable, or general trash? This helps you prioritize your disposal methods. In my experience, this initial assessment is crucial, and it sets the tone for everything that follows.
Take a quick mental inventory of the situation. For instance, in the aftermath of Hurricane Katrina, many faced types of debris ranging from household items to hazardous materials. Knowing what you’re dealing with can save time and keep you and your loved ones safe. Be sure to wear protective gear like gloves and masks to protect yourself from exposure.
Also, ensure you have a solid grasp on the classification of the waste based on local regulations. Each municipality might have different rules, and I can tell you from experience that ignoring these can lead to complications. Trust me, no one wants added trouble when they’re just trying to pick up the pieces.
Evaluate Available Resources
After assessing the waste, the next step is to evaluate what resources are at your disposal. This includes local disposal services, community programs, or even volunteers who can help. Sometimes, there are organizations that quickly mobilize to offer assistance, and knowing how to tap into these resources can be a lifesaver.
I once found myself in a pinch during a localized flooding event where the normal waste collection services were down. I had to get creative and work with a community group that was organizing a clean-up drive. They had all the right contacts, and this made disposal a lot smoother than I could have managed alone. When in doubt, the power of community is something not to be underestimated.
Don’t forget to consider personal resources like your own tools or vehicles for transporting waste. In a disaster, having a truck or even a sturdy wheelbarrow can make a significant difference. The more prepared you are, the easier the process becomes, and you end up achieving more, faster.
Prepare for Safe Disposal
Now that you know what you’re dealing with and what you can use, it’s time to get ready for safe disposal. This involves gathering the right materials such as bags, bins, and possibly some cleaning supplies. A well-stocked clean-up kit can be your best friend in these times.
I’ve learned the hard way that having everything ready to go speeds things up considerably. For example, using biodegradable trash bags can be great for organic waste, especially if you’re doing composting. Just remember, however, not to mix different types of waste; this creates more problems down the line.
If hazardous waste is part of the equation, ensure you have containers that are specifically designed for that purpose. You don’t want any nasty surprises while you’re trying to do the right thing. Safety first, folks. It’s all about protecting ourselves and our environment during these challenging times.
Implement Waste Segregation
Sorting Waste on-site
Implementing waste segregation is one of the best practices I’ve adopted during disaster clean-ups. It’s about sorting your waste into categories right there where the disaster recovery is happening. There are some items you just can’t throw together – like hazardous materials and everyday trash.
Creating designated areas for each type of waste can minimize risk and make the entire process much more manageable. For instance, I usually set up separate bins for recyclables, compostables, and general waste. This not only eases my own stress but also helps everyone involved understand what goes where.
I’ve found that marking the bins clearly can really help others pitch in. If you’re leading a group, having visuals can streamline participation and make sure no one mistakenly contaminates a non-hazardous area. Trust me; it helps keep tempers calm during what could easily become a chaotic situation!
Involve the Community
Community involvement can be instrumental when managing waste during a disaster. Not only does it create a sense of teamwork, but it can also sacrifice the grueling work of waste disposal into something much more manageable and, dare I say, enjoyable?
In my own experience, reaching out to neighbors and local organizations has fostered a great teamwork spirit. We even set up a schedule for shifts so that no one was overwhelmed. It felt good knowing that we were all in it together, and this camaraderie really eased some of the stress involved.
Of course, safety training sessions can also be very helpful. Organizing a quick talk on how to handle waste appropriately can ensure everyone knows what they’re doing, which, in turn, minimizes risk. Community engagement is powerful, and it’s been inspiring to see how many hands can transform a challenging situation.
Educate on Proper Disposal Techniques
One of the biggest challenges after a disaster is ensuring people know the proper disposal techniques. You’d be surprised how many come into a clean-up without a clue about the right way to handle waste. It’s something I make it a point to educate about during any clean-up efforts.
This can range from how to safely collect and store hazardous materials to knowing what can and cannot be recycled. Most folks genuinely want to do the right thing, so sharing knowledge goes a long way in helping the environment and the community. I often hand out flyers or even hold impromptu workshops when I can!
By sharing experiences and educating others, we collectively empower ourselves. Proper disposal methods contribute to a more effective recovery process, allowing communities to bounce back faster from disasters. I believe education is key – and it’s never too late to learn something new!
Monitor and Follow Up
Track Waste Disposal Progress
Once you’ve got the ball rolling, it’s important to keep tabs on how things are going. Having a tracking system can make you aware of what’s working and what’s not. It’s easy to get lost in the chaos of disaster recovery, but a little oversight can make all the difference.
I like to keep a checklist of what type of waste has been collected, how much has been disposed of, and what still needs attention. This provides transparency to everyone involved and helps strategize for the future, particularly if other challenges arise. Keeping detailed records has saved me a lot of headaches.
Plus, monitoring helps ensure that waste is being disposed of responsibly and not just left to pile up somewhere. Waste management isn’t complete until you know everything is taken care of, so keep that in mind when managing your efforts!
Follow Local Protocols
Every community usually has specific protocols for post-disaster waste disposal. It’s essential to stay informed about local rules and adhere to these guidelines. I remember participating in a community clean-up where protocols were crucial in ensuring no one got into legal trouble over improper waste disposal.
Sometimes these rules can change based on the situation on the ground, and staying updated is vital. Participating in community meetings can also be really helpful because that’s where decisions are made, and you can raise any issues you see. I often found that people appreciate being informed about these regulations.
Your local waste management department can provide invaluable insights into proper practices, so don’t hesitate to reach out. This way, you’ll not only protect yourself legally but also contribute to a more efficient recovery process.
Evaluate Overall Effectiveness
After you’ve wrapped up the disposal efforts, it’s worthwhile to sit down and evaluate the overall effectiveness of your approach. What worked well? What could have gone better? Reflecting on this can help you improve future waste management strategies.
In my clean-up experiences, I often engage with volunteers during evaluation sessions, allowing everyone to provide feedback. This can uncover insights that can be easy to overlook during the chaos. Plus, it’s great for building camaraderie and support among all involved.
Ultimately, these evaluations can also impact policy if shared with local officials. What you learned can provide vital information for future disaster preparedness efforts. It’s all about learning and evolving to create a culture of safety and efficiency in our communities!
Frequently Asked Questions
1. What type of waste should I be concerned about during a disaster?
Generally, waste can be categorized into hazardous, recyclable, and general waste. It’s critical to identify each type so you can manage them appropriately and ensure safety during disposal.
2. How can I encourage my community to participate in waste management?
Create a sense of community by organizing clean-up events and sharing knowledge about how to dispose of waste correctly. Engaging activities and clear communication can improve participation rates significantly!
3. What should I do with hazardous waste after a disaster?
Hazardous waste needs careful handling. Always use designated containers and follow local guidelines for disposal. Contact local waste management for specific instructions to ensure safety.
4. How can I keep track of our disposal efforts?
Maintain a checklist or a log of what waste has been collected, sorted, and disposed of. This will help you keep tabs on progress and identify any areas that might need additional attention.
5. Why is it important to follow local guidelines for waste disposal?
Local guidelines are designed to protect public health and the environment. Following them reduces the risk of contamination and legal problems while ensuring that waste is disposed of properly.
by Preparation | Mar 9, 2025 | Preparedness
amzn_assoc_placement = “adunit0”;
amzn_assoc_search_bar = “true”;
amzn_assoc_tracking_id = “trailfun-20”;
amzn_assoc_ad_mode = “manual”;
amzn_assoc_ad_type = “smart”;
amzn_assoc_marketplace = “amazon”;
amzn_assoc_region = “US”;
amzn_assoc_title = “My Amazon Picks”;
amzn_assoc_linkid = “b8a282f77bef9515b8ea47755a2b1681”;
amzn_assoc_asins = “B089ZWXZHQ,B01GOGIIQQ,B08776JNCM,B086D6DN5V”;
Safe Drinking Water in an Emergency Situation or Disaster
Nothing makes clearer the relevance of water than a big disaster; tidy, fresh water comes to be better than gold. It’s very easy to forget that without water, we just can not make it through. 60 percent of our bodies are water, in fact for babies, water composes concerning 80 percent of their body, so it is a lot more vital they have access to tidy drinking water.
Unfortunately, after massive catastrophes, it’s not uncommon that water sources might be removed briefly or be made unsuitable for consumption. Every person should understand the following suggestions concerning risk-free drinking water in emergency situations.
Being prepared is everything! The recommendations from experts come regularly, but many people still do not follow advice are not ready when catastrophe hits. You should keep a supply of clean drinking water someplace safe in your house. You can make it through a week without food, if necessary, but also a couple of days without water can cause your body functions to shut-down and even be deadly.
In terms of just how much water is required to be stored, you require to drink a minimum of 2 quarts a day of water. Sufficient water for all the members of your family for a minimum of a couple of days is a good suggestion. You can save water on your own in your own containers; anything glass, and also tidy, extensively washed plastic containers with caps work well. Seal water tightly in their containers as well as save them in someplace cool and also dark in your house. Make sure to change new water routinely; when every 6 months.
Finding Safe Drinking Water: If you do lack water during an emergency, or are caught somewhere without all set access to tidy drinking water, you’ll need to recognize what’s risk-free to consume alcohol, and what isn’t.
After a calamity, feasible sources of safe alcohol consumption water in your home consist of the water from your hot water container, the water from your toilet storage tank (not the bowl, but the water from your container, but if it is chemical-free), and water entrapped in your water pipes. Thaw any type of ice cubes that you might have saved.
As weird as it sounds (especially since waterbeds are no longer very popular)… Avoid making use of water from waterbeds as consumable water, since they are treated with chemicals harmful for drinking. You can make use of waterbed water for washing, however. Outside your house attempt to situate streams, rivers, lakes, or various other resources of fresh water. Never consume floodwater, because it is usually polluted with germs and chemicals. Of course, DO conserve and collect rain water that you can use for drinking.
Making water Pure in an Emergency situation: If you can not locating secure drinking water throughout an emergency situation, then any kind of water you locate that does not look clear, or which you think might be contaminated, must be cleansed before drinking.
The best and also most convenient way to purify water is by boiling. Disease-bearing microbes can not survive in high temperatures. Boil the water for about one minute. For boosted taste, pour the water back and forth from one tidy container to another.
If you’re not able to boil your water, treat it chemically prior to drinking. House chlorine bleach can be made use of to treat your water. Use an eyedropper, to drop eight declines of bleach right into each gallon of water to be treated. Ensure the chlorine you make use of lists hypochlorite as its only active ingredient; any kind of additional chemicals or fragrances will just further pollute the water. Stir the water and also permit it to stand a minimum of thirty minutes. When the water appears clear, it is most likely risk-free to drink. If it is still dirty or clouded, put in 8 even more drops and allow stand an additional half an hour.
by Preparation | Mar 9, 2025 | Preparedness
Introduction to Emergency Preparedness:
Being prepared for an emergency can help you and your family stay safe, calm, and informed during a crisis. It’s essential to have a plan in place before disaster strikes so that everyone knows what to do and how to keep each other safe. Start by identifying potential risks in your area such as natural disasters like hurricanes or earthquakes, terrorist attacks, pandemics, power outages, etc., and make sure you are ready to face them head-on.
Building an Emergency Kit:
An emergency kit is a collection of supplies that will help you survive during the first 72 hours after a disaster hits. Your kit should include items such as non-perishable food, water, flashlights, batteries, first aid supplies, medication, personal hygiene products, extra clothes, blankets, and important documents. Make sure to store everything in a portable container that you can easily grab on your way out the door if necessary.
Creating a Family Communication Plan:
Communication is critical during an emergency, especially when family members may be separated. Establish a communication plan with your loved ones ahead of time so that everyone knows who to call, text, or email in case of an emergency. Consider setting up a group chat or using social media platforms to share updates and check-ins. Also, designate a meeting spot where everyone can gather safely in case evacuation is required.
Importance of First Aid Training:
First aid training is crucial because it prepares you to handle medical emergencies until professional help arrives. Take a course through your local Red Cross chapter or online to learn basic skills such as CPR, wound care, and how to use an automated external defibrillator (AED). You could also invest in a comprehensive first aid kit that includes essentials like bandages, antiseptic wipes, and pain relievers.
Evacuation Planning and Practice:
Knowing what to do and where to go during an evacuation can save lives. Identify safe routes and shelter locations in advance, and practice evacuating regularly with your family. Keep track of traffic patterns, road closures, and alternative transportation options in case you need to leave quickly. Remember to take your emergency kit with you and let someone outside of your immediate circle know where you’re going.
Staying Informed During an Emergency:
During an emergency, it’s essential to stay informed about what’s happening around you. Listen to local news stations, follow government agencies on social media, and sign up for alert systems offered by your community. These resources will provide real-time information on weather conditions, evacuation orders, and other vital details that could affect your safety.
Conclusion:
Preparing for an emergency doesn’t have to be overwhelming. By taking small steps like building an emergency kit, creating a communication plan, and practicing evacuations, you can increase your chances of staying safe and protected during times of crisis. Don’t wait until disaster strikes; start planning today!
by Preparation | Mar 9, 2025 | Preparedness
Welcome to my ultimate guide on how to build a 72-hour emergency kit. Emergencies can strike at any time, and it’s essential to be prepared for them. In this post, I will walk you through everything you need to know about building an emergency kit that will keep your family safe and protected during times of crisis.
What is an Emergency Kit?
An emergency kit is a collection of supplies and tools that are designed to help you survive in the event of an emergency. These kits typically contain items such as food, water, first aid supplies, communication devices, and other essentials that may be needed in a crisis situation. Why Build a 72-Hour Emergency Kit?
Building a 72-hour emergency kit is important because it ensures that you have enough supplies to last for three days in case of an emergency. This is the recommended amount of time that you should plan for when preparing for disasters or unexpected events. During these types of situations, basic services like electricity, gas, and water may not be available, which means having access to essential resources becomes crucial. Basic Essentials for Your Kit
There are several essential items that should be included in every emergency kit. Here are some examples:
1. Water – You should aim to have one gallon of water per person per day stored in your emergency kit.
2. Food – Non-perishable food items like granola bars, trail mix, and canned goods are ideal for emergency kits.
3. First Aid Supplies – Bandages, antiseptic wipes, pain relievers, and other medical supplies should be included in your kit.
4. Shelter, Warmth & Lighting – Items like blankets, flashlights, and matches can provide warmth and light in emergency situations.
5. Communication and Navigation Tools – Radios, cell phones, maps, and compasses can help you stay connected with others and navigate unfamiliar terrain.
6. Important Documents – Copies of identification cards, insurance policies, and other critical documents should also be included in your emergency kit.Putting it All Together: Step by Step Guide
Now that we’ve covered what should be included in your emergency kit, let’s talk about how to put it all together. Here are the steps you need to follow:
1. Determine the size of your emergency kit based on the number of people who will rely on it.
2. Purchase or gather the necessary supplies listed above.
3. Organize your supplies into categories (e.g., food, water, first aid) and place them in a durable container like a backpack or plastic bin.
4. Label each item clearly so that everyone knows what they are using.
5. Test your kit regularly to ensure that nothing has expired or gone bad.
Remember, being prepared is key to keeping yourself and your loved ones safe during emergencies. By following these tips and creating a well-stocked emergency kit, you can rest easy knowing that you’re ready for whatever life throws your way.
by Preparation | Mar 9, 2025 | Preparedness
As the world becomes more unpredictable, it’s essential to be prepared for any natural disaster that may strike. A step-by-step guide on how to prepare for a natural disaster can help you and your family stay safe and protected during these difficult times. Here are some crucial steps you need to take:
1. What to Do Before a Natural Disaster Strikes
The first thing you should do is create an emergency plan with your family members or housemates. This includes identifying potential risks in your area, such as earthquakes, hurricanes, floods, wildfires, etc., and creating a communication strategy so everyone knows what to do if they get separated. You also need to establish a meeting place where everyone can gather after the disaster strikes.
2. Creating an Emergency Kit: The Essentials You Need
Another critical step is to create an emergency kit that contains all the essentials you will need during and after the disaster. Your kit should include non-perishable food items, water, flashlights, extra batteries, first aid supplies, medications, personal hygiene products, and copies of important documents like passports, IDs, and insurance policies. Make sure to store this kit in a convenient location that everyone can access easily.
3. How to Prepare Your Home for a Natural Disaster
To protect your home from damage caused by natural disasters, you need to reinforce its structure and make necessary repairs beforehand. Secure loose roof shingles, repair cracks in walls and foundations, and trim trees and shrubs around your property. You can also install storm shutters or impact-resistant windows to prevent breakage.
4. Making an Evacuation Plan and Practicing It Regularly
If you live in an area prone to natural disasters, making an evacuation plan is crucial. Identify safe routes and shelter locations, and practice evacuating regularly with your family members. Remember to always follow the instructions of local authorities and never ignore evacuation orders.
In conclusion, being prepared for a natural disaster requires proactive measures and planning ahead. By following these four steps, you can increase your chances of survival and minimize the risk of injury or loss of property. Don’t wait until it’s too late; start preparing today!


