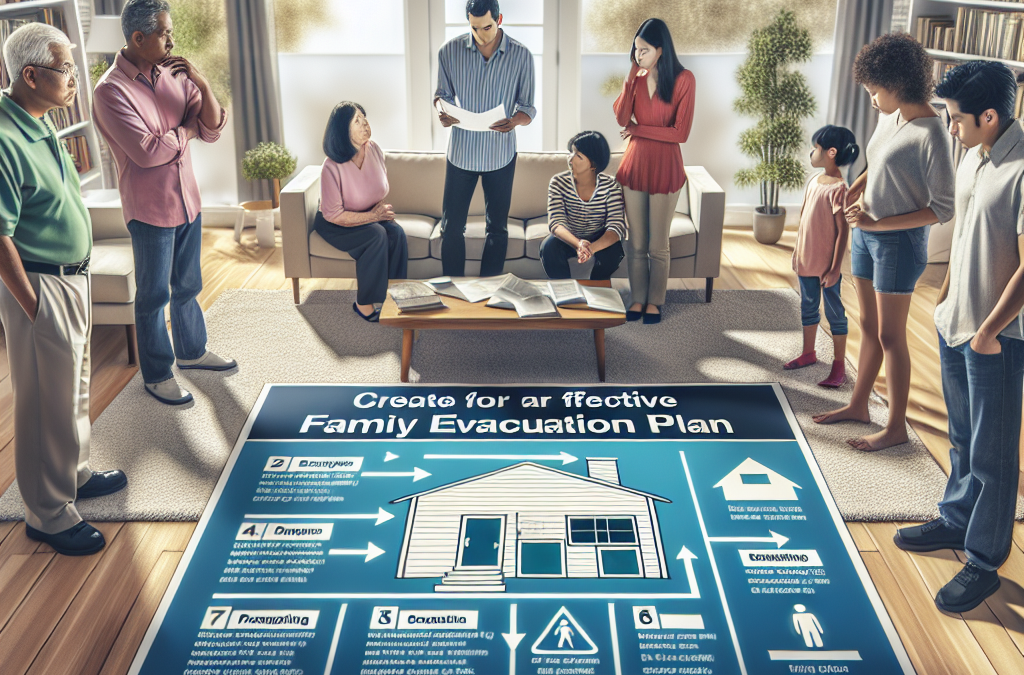
First off, let’s talk about the importance of understanding your surroundings. You’ve got to know what kind of emergencies are relevant to where you live. For instance, if you’re in a hurricane zone, that’s something to prioritize. For other folks, maybe it’s wildfires or earthquakes. Listing these risks gives you a clear picture of what you’re up against.
Once you’ve got a good grasp on your local risks, consider how they would impact your family. Think about things like whether you have pets, children, or elderly family members in the house. Each demographic will require different considerations. Personally, I find that bringing the whole family into the conversation makes everyone feel more secure and involved.
In my experience, staying informed is key too. Subscribe to local emergency management alerts or follow local news channels. It’s essential to stay in the loop, especially in times of crisis. This way, you’re not only informed but ahead of the game when planning your evacuation.
Establish a Meeting Point
Choosing the Right Location
Alright, next up is establishing a meeting point. This is like your family’s headquarters in case the chips are down. You want it to be somewhere safe, easily accessible, and known to all family members. My go-to spot is a nearby park or a friend’s house across town. Just someplace that makes sense!
Make sure every family member knows how to get to the location. I’ve learned from experience that during a stressful situation, people tend to forget directions, so practicing is key. We used to do mock evacuations just so everyone felt more confident! Seriously, it worked wonders for our peace of mind.
Also, consider establishing alternative meeting points, especially if your primary spot becomes compromised. It’s like having a backup plan for your backup plan. Life’s unpredictable; be prepared for anything!
Develop a Communication Strategy
Setting Up Channels
Next, communication is everything! You want a solid game plan for how your family will stay in touch. In our digital age, using tech tools can be a real lifesaver. I’d suggest setting up a group chat or using a family locator app. Whatever gets the job done and keeps everyone connected!
The tricky part is ensuring everyone knows how to use these tools. With kids, make it a fun learning experience. We often sit down together and have tech evenings where we go through our communication tools. It’s a great excuse to bond and build knowledge at the same time.
Don’t forget to plan for situations where cell service might be down. You can create a list of important numbers on a physical piece of paper to stash in wallets or backpacks. Trust me; your future selfwill thank you for this. I’ve learned the hard way how vital this small step can be!
Pack an Emergency Kit
What to Include
Now, let’s dive into the nitty-gritty of packing an emergency kit. I think of it as your survival toolbox. Some essential items to include are water, non-perishable food, first aid supplies, and flashlights. But go beyond the basics! Think about what your family specifically might need during a crisis. For example, allergy medications or favorite snacks for the kids are great additions.
I’ve also learned that it’s handy to have important documents readily available—things like insurance policies, identification, and medical records. I like to keep everything in a waterproof bag just in case water damage becomes a concern.
Make it a point to review and replenish your kit periodically. Food and medications can spoil or expire, so don’t let your kit become a relic of the past. I try to set up a routine check every six months. It’s straightforward, and I find it keeps our family thinking about preparedness all the time.
Practice Your Plan
Regular Drills
Finally, don’t just stick your plan in a drawer; you gotta practice! Organizing regular drill sessions helps everyone understand what they need to do in an emergency. We’ve made it into a family tradition, almost like a game. This way, the kids especially can get the hang of what needs to happen, and it eases their anxiety.
During these drills, encourage feedback. Ask your family what went well and what could improve. This not only enhances the process, but it also fosters open communication. I can’t stress enough how valuable this conversation is—it opens up channels for everyone to express concerns or suggestions.
Finally, celebrate your preparedness! After a practice session, we usually treat ourselves to something fun, like ordering pizza or watching a movie. It makes the whole preparation idea seem less daunting and reinforces our teamwork.
Frequently Asked Questions
1. What should I include in my emergency kit?
Your emergency kit should include essentials like water, non-perishable food, first aid supplies, flashlights, batteries, and essential medications. Think about your family’s specific needs when curating your kit.
2. How often should I review my evacuation plan?
It’s a good idea to review your plan at least twice a year, or whenever major life changes occur (like moving, adding new family members, etc.). Regular reviews ensure everyone is still on the same page and prepared.
3. What if my family can’t communicate during an emergency?
Creating a communication strategy that includes alternate forms of contact is vital. Consider meeting points, and using tools like group chats or family locator apps, and make sure to have important phone numbers documented physically.
4. Why is practicing the evacuation plan so important?
Practicing helps everyone know their specific roles and reduces panic during an actual emergency. It also encourages dialogue about the plan, ensuring everyone’s concerns and suggestions are heard.
5. How do I choose a meeting point?
Choose a location that is safe, familiar, easily accessible, and known to all family members. Having a backup meeting point is also safe in case your primary spot becomes compromised.
When I started prepping, the first thing on my mind was water. It’s literally the most crucial element for survival. I recommend at least one gallon per person per day for a minimum of three days. You can store this in 5-gallon jugs or use water bricks that come in stacks to save space.
Additionally, I found it useful to include purification tablets and filters to make sure that if I ran out, I could still get clean water from natural sources. Always remember, you might be okay without food for a few days, but without water? Not so much!
And don’t forget about pets! They need water too, so make sure you factor them into your calculations. An excited dog can go through water a lot quicker than you think!
Non-Perishable Food
Next up is food. You want to stock up on a variety of non-perishable items. I started with canned goods because they last a long time and provide a good amount of nutrition. Things like beans, vegetables, and meat can keep you fed when fresh supplies run low.
Don’t overlook dry goods like rice, pasta, and oats. They’re not only affordable but also versatile. I sometimes make a big batch of rice and mix in whatever canned veggies I have lying around for a quick meal.
And let’s not forget about those “comfort foods.” You know, snacks like granola bars or chocolate. When times get tough, having something sweet can lift your spirits, and I think we all deserve that little comfort during crises!
First Aid Kits
Your first aid kit can be a lifesaver—literally! When I compiled mine, I focused not just on band-aids and antiseptics but included a variety of items like tweezers, scissors, and even over-the-counter medications.
I read a lot about common injuries and health situations, so I stocked up on supplies like gauze, athletic tape, and antibiotic ointments. The best part is that you can often find ready-made kits online or in stores, but I’d recommend customizing it to your own needs.
Don’t forget to check expiring items regularly, and refresh your supplies as they get used. A first aid kit won’t do you much good if your ointment has expired and your bandages are covered in dust!
Safety and Security
Home Security Measures
When I began prepping, the safety of my home was a top priority. I started out by reinforcing doors and windows. A good deadbolt can make a huge difference, and I even invested in a security camera system to keep an eye on things from afar.
Taking an honest look at my property also helped me identify weak spots—places that could easily be compromised. Sometimes simple measures such as outdoor lighting or motion sensors can deter unwanted visitors.
And don’t forget to create a safe room or a designated area in your home that’s stocked and secured. This could be a basement or a closet that’s easily defensible if things go south. It’s all about being prepared, right?
Self-Defense Basics
Let’s talk self-defense—an essential skill in any prepper’s toolkit. I’ve taken a few classes to understand the basics of self-defense, from body language to more physical techniques. You don’t have to be a black belt—just knowing how to protect yourself can be enough in many situations.
Consider investing in some self-defense tools too, whether it’s pepper spray or a good tactical pen. I carry mine everywhere, and it’s better to be ready than caught off guard!
Above all, stay situationally aware. Trust your instincts; if something feels off, it probably is. It’s all about creating a mindset of awareness when you’re out and about.
Communication Plans
In case of emergencies, having a reliable communication plan can keep families connected. I made a point to write down important contacts and put them in my emergency kit—old-school, right? But it’s valuable when your phone battery is dead.
Setting up a meeting point where loved ones can regroup is also essential. You might come back to a home that’s not safe, so having a backup plan can ease anxiety and keep everyone on the same page.
And don’t forget about ham radios! They’re a great way to communicate if the grid goes down. I’ve spent some time learning about connecting with others this way, and it can really be a lifesaver.
Planning and Organization
Creating a Food Storage Plan
So, everyone knows food is important, but planning how you’re going to store it is just as vital. I started by measuring a dedicated space in my home—like a closet or a garage—to effectively arrange my supplies. It helps to visualize what you have and what you might need.
Next, I organized my stock by expiration dates and type of food. I wrote labels and used bins to categorize them, so when I need something, I can find it instantly. This helps me avoid any chaos down the line!
It’s also important to rotate your stock regularly. I try to eat the older stuff to clear my pantry, which helps keep everything fresh and reduces waste. Remember: food prep can be efficient and organized. No one likes a cluttered space!
Building a Bug-Out Bag
All right, let’s chat about bug-out bags. These are your go-to packs when life throws a curveball, and you have to get out fast. I started with a sturdy backpack and packed the essentials: food, water, clothing, first-aid supplies, and a flashlight. You really want to think about what you’ll need on the go!
I made sure to tailor mine to my personal needs and to include things like a fire starter or survival blankets. Preparing a bug-out bag is not just about the items, but also making sure you’re ready to use them efficiently.
It’s also a good idea to regularly check and update your bagments and practice using the items. Knowledge and familiarity can be a game-changer in critical moments!
Establishing a Family Emergency Plan
A family emergency plan is super important. I sat down with my family and discussed what types of emergencies we might face—natural disasters, local unrest, you name it. We all have different skills, so it’s great to know who’s doing what in a chaotic scenario.
We also established communication methods—just texting, for example, in case phones were down. Practicing what we came up with through drills can boost everybody’s confidence when it matters most, and honestly, it can be fun too!
When making plans, flexibility is key. Life is unpredictable, so knowing we can adapt is as crucial as having a plan in the first place. It should evolve as our circumstances change!
Community Engagement
Finding Local Events and Classes
Connecting with your community can really boost your prepping knowledge. I found local events and classes on emergency preparedness, survival skills, and first-aid—meeting people who share similar interests is a great way to learn and grow.
There’s something cool about gathering in groups and sharing experiences or knowledge! I often meet folks who are willing to share their stories and offer unique insights that I would have never considered.
Also, don’t be shy about asking questions; most preppers are more than happy to lend a hand. You’ll be surprised by how generous and friendly the prepper community is—it’s like a giant family!
Networking with Other Preppers
Networking can take your prepping game to the next level. I joined local prepper groups which meet regularly. Having a support system where we can swap ideas and resources really encourages me to stay on top of my prepping efforts.
Some members even organize skill-sharing workshops—perfect for expanding the skill set! I’ve learned wilderness survival skills and prepping hacks that I’d have never thought of alone.
The bonus? You get to make friends with some awesome, like-minded people. It motivates you to keep going and pushing your limits. It’s great to know you’re not alone in your prepping journey!
Volunteering and Helping Others
I realized that helping others in my community can be rewarding and actually prepare me too. Volunteering during local disasters or emergency drills has offered me hands-on experience on how to keep calm in chaos.
Plus, lending a hand helps build friendships within your community. The more connections you have, the better your support network will be if you ever need it! It’s a win-win!
Ultimately, it fosters a spirit of community resilience. We all come together to support each other when crises strike and strengthen the bonds that keep our neighborhoods safe.
Conclusion
Prepping starts as an individual effort, but it really flourishes when we think about our families and communities. By focusing on these comprehensive checklist areas, we can ensure that we’re ready for whatever life throws our way. I mean, who wouldn’t want that peace of mind?
FAQs
1. What are the essential items I should include in my emergency supplies?
It’s essential to have water, non-perishable food, a first-aid kit, and safety tools. Also, consider adding important medications and personal hygiene products.
2. How can I improve my home security for prepping?
Start with reinforcing doors and windows, install outdoor lighting, and consider a security camera system. Regularly check your locks and be alert to potential vulnerabilities.
3. What should I put in my bug-out bag?
Your bug-out bag should include food, water, clothing, first-aid supplies, a multi-tool, and items for fire starting and shelter. Tailor it to meet your specific needs.
4. How can I engage with the prepping community?
Look for local events, classes, or groups in your area to meet other preppers. Networking can enhance your knowledge and create a solid support system.
5. Why is it important to have a family emergency plan?
A family emergency plan ensures that everyone knows their role during a crisis, helping to minimize confusion and stress. It also promotes communication and preparedness.
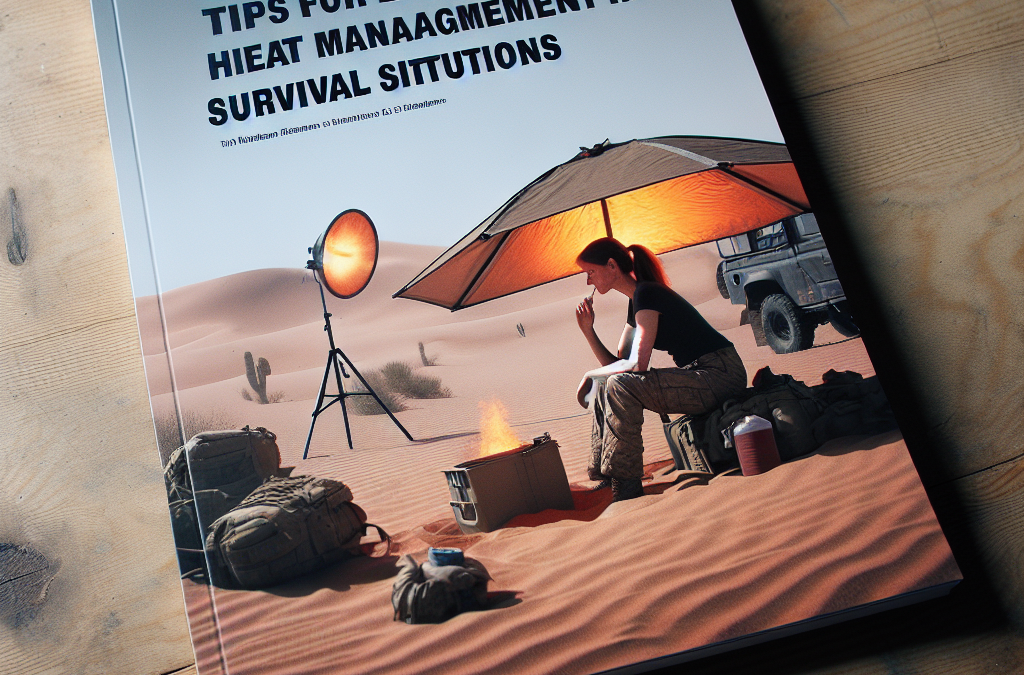
When I’m out in the wild, facing the elements, one of the most critical skills I’ve learned is how to manage heat effectively. Whether you’re in a harsh cold or battling the scorching sun, heat management can truly make or break the experience. Having gone through various situations, here are my five key areas of focus that help me outsmart the weather.
Understanding Your Environment
Assessing Temperature Levels
First off, you’ve got to get a handle on the temperature around you. It may sound basic, but trust me, actually stopping to assess the conditions can save your neck. I usually check for the highs and lows during the day, understanding when I might be able to cool off or need extra warmth.
Keep an eye on sunrise and sunset. The sun heats things up, so knowing when it’s at its peak can inform when to take breaks. It’s all about being strategic; if I know the sun’s blazing, I might aim for shelter to stay cool or find a stream to chill by.
Also, look around for natural indicators like wind direction and cloud coverage. These can provide hints about incoming weather changes, giving you a better understanding of how to manage heat effectively.
Recognizing Heat Sources
Next, it’s super important to recognize natural heat sources. Believe me, the sun is not the only player here. Things like campfires or even your own body can create excess heat in an already tough environment.
I once got caught in a situation where I was near a fire, thinking I’d just cozy up. But it turned into a heat management nightmare! I learned to position myself with care regarding any heat sources and to use them wisely.
Understanding how different surfaces retain heat is key too. For example, rocks can absorb heat during the day, only to release it at night, so being aware of where you sit or sleep can help you regulate your body temperature quite a bit.
Adapting to Changes
Adapting to sudden temperature changes is a skill I’ve honed over the years. Weather can be unpredictable, and you’ve got to have a plan B ready to roll. Dressing in layers has been a game-changer for me; it allows me to adjust my attire as conditions shift.
When it gets warm, I might peel off a layer, but if I’m caught in a chill later, I’m prepared to bundle back up. It’s all about flexibility and having that foresight to think ahead.
Lastly, I always carry items like a lightweight emergency blanket. You never know when you might need to wrap up and stay warm, especially if darkness creeps in unexpectedly!
Clothing Choices Matter
Choosing Appropriate Fabrics
My experience has taught me the true value of fabric choice. Wear lightweight, breathable fabrics when it’s warm, and opt for thick, insulating layers when it gets chilly. Cotton is usually a no-go; it traps moisture and stays wet, which can lead to hypothermia.
Instead, I lean toward quick-drying materials that wick moisture away. Fabrics like merino wool or synthetic blends can keep me comfortable no matter the situation. It really does make a difference!
Don’t forget about UV protection too. I always grab a hat with a wide brim and long sleeves when the sun’s high. Not only does it shield me from UV rays, but it also helps regulate my body temperature.
Layering Strategies
Just like a cake, layering your clothing helps when the temperature dips or soars. I usually start with a moisture-wicking base layer, which acts like a shield against sweat. Over this, I add an insulating mid-layer, often a fleece or down jacket, and finally a waterproof outer layer to battle the wind and rain.
I once went hiking with inadequate layers, and it was a lesson learned the hard way. I transformed into an ice cube at the top of a mountain, shivering and regretting my choices. Now, I always ensure I have options!
This layering system gives me the ultimate control over my body heat, which is vital in survival situations. I can add or remove layers to navigate through varying conditions effectively.
Footwear Considerations
Don’t overlook your feet! Trust me, poor footwear can lead to discomfort, affecting your overall survival strategy. I learned this on a trek where my shoes weren’t up to par; I limped my way back home!
Invest in durable and breathable shoes suited for rough terrain. Good grip is essential too. You’ll want your footwear to keep you grounded in both wet and dry conditions, ensuring that heat management isn’t thrown off.
Also, remember to pack extra pairs of socks. It may seem trivial, but switching out wet socks for dry ones can elevate your comfort level dramatically, helping you avoid blisters and maintaining warmth!
Staying Hydrated
The Importance of Water Intake
Now, hydration is key! Let’s face it; you can’t manage heat if you’re not drinking enough water. At times, I’ve been careless, and it led to fatigue and heat exhaustion. When you’re out there, staying hydrated keeps your body in check.
I always set reminders to drink water regularly. It’s easy to go hours without realizing you need it. Aim for at least half a liter every couple of hours, especially in extreme conditions.
In hot conditions, adding electrolyte tablets to my water has worked wonders. It helps replace lost salts and keeps me feeling energized, ready to tackle whatever comes next.
Recognizing Signs of Dehydration
Learning to recognize the signs of dehydration has been essential. Things like dizziness, dry mouth, or fatigue are red flags that I never ignore. When I notice them, I implement my hydration plan immediately.
It’s vital to listen to your body because getting behind on hydration can spiral fast. Just a couple of hours of neglect could have me battling a headache that ruins my experience.
If you’re sweating buckets, make sure to replenish those fluids and keep a lookout for darker urine. Ideally, I shoot for a light yellow shade, which indicates my hydration level is just right!
Creative Water Sources
When water gets scarce, being resourceful pays off big time. I’ve learned to look for dew in the mornings or even rainwater. Depending on where you’re at, you might find a stream or pond, just keep safety in mind and filter whenever necessary.
A portable water filter can be a lifesaver! On my last hiking trip, I used mine to drink straight from a stream. Nothing feels better than fresh, clean hydration when you really need it!
Yeah, there are times when you’ve got to get a little creative. For instance, I once made a makeshift solar still from a plastic bag and some plants. It was a fun challenge that paid off when I was in a pinch!
Utilizing Natural Shelter
Finding Shade When Necessary
Embracing nature means using what’s around you. I’m a huge fan of finding shade during those blistering hot afternoons. That could mean hiding under trees or even using large boulders to block the sun.
Staying still in the shade allows my body to cool down dramatically. I’ve, unfortunately, underestimated the sun before and wound up sunburned and irritable throughout my trip. Now, I prioritize cool spots regularly.
Using natural structures to shield from the elements adds an extra layer to managing heat. Even positioning my gear to minimize sun exposure can help maintain a cooler environment while I take my breaks.
Windbreaks and Insulation
In colder situations, I’ve had to get creative with windbreaks to retain body heat. Using fallen branches, natural mounds, or even packing my gear around creates a protective barrier against cold breezes. It’s a game-changer!
Building a small shelter can enhance protection from both heat and cold. I learned the basics of building a simple lean-to and, let me tell you, the warmth I kept at night made all the difference.
Emphasizing insulation also plays a vital role. I always keep insulated sleeping pads or emergency blankets in my gear. They reflect the warmth back to me, ensuring that even if it’s cold outside, I’ll stay comfy inside!
Emergency Shelters
Lastly, having an emergency shelter plan is crucial. When stuck in extreme weather, a tarp or bivy sack can save your life. I keep a compact emergency poncho that doubles as a shelter. It’s light, versatile, and comes in clutch when you need it most!
Building a quick shelter can also mitigate heat exposure. It doesn’t have to be fancy; just a fast structure can offer relief. I’ve crafted makeshift shelters from leaves and sturdy branches, and even those come in handy.
Always have a contingency plan. Knowing where to find materials or how to construct a simple structure can make all the difference. The peace of mind that comes with preparation cannot be overstated!
Conclusion
Managing heat in survival situations is all about preparation, knowledge, and a bit of creativity. I hope my personal experiences and tips help guide you on your next outdoor adventure. Whether it’s choosing the right clothing, staying hydrated, or utilizing natural shelter, always remember: your comfort can greatly enhance your survival chances. Stay safe out there!
FAQs
1. What is the most important factor in heat management during survival situations?
The most critical factor is understanding your environment. Knowing the temperature ranges and recognizing heat sources can help you make informed decisions about how to stay comfortable and safe.
2. How can I assess the heat level in my surroundings?
Look for natural indicators like cloud coverage, wind direction, and the position of the sun. Also, be aware of your own body’s reactions to temperature changes as they can provide insight into the conditions around you.
3. Why is hydration crucial in heat management?
Staying hydrated helps regulate your body temperature and prevents fatigue and heat-related illnesses. It’s essential to drink regularly, especially in extreme conditions.
4. What fun materials can I use to create a makeshift shelter?
Fallen branches, leaves, tarps, and even large rocks can all be used to build a simple shelter. Just let your creativity flow while thinking about how to shield yourself effectively!
5. Are there any tips for choosing the right clothing for varying temperatures?
Absolutely! Always choose moisture-wicking and insulating layers. Lightweight and breathable for heat, coupled with warm, thick layers for the cold, will give you the flexibility needed for any situation.
Think about the last time you were in a pinch—the kind where you needed help ASAP. Having a solid emergency contact list can be a lifesaver. Seriously! Whether it’s a medical emergency or a car breakdown, knowing who to call can make a world of difference.
When we’re caught in the chaos of an emergency, our minds can go blank, and panic sets in. Don’t let this happen to you! With a prepared list, you’ll have instant access to trusted people who can step in and help when you need it most.
Plus, a good emergency contact list brings peace of mind. Just knowing that there are folks ready and willing to help can help keep your anxiety in check when things get stressful. It’s like having a safety net at your fingertips.
Peace of Mind for Family
I can’t stress enough how comforting it is for family members to know there’s a plan in place. If something happens to you, having their names and numbers readily available can help save precious time when it matters the most.
Your loved ones will feel more secure knowing they can quickly connect with the right people. It alleviates so much worry—and trust me, I’ve seen this firsthand with my relatives who are always fretting over each other.
Imagine your family being able to call your doctor or your best friend instantly. This can be a crucial difference in the heat of the moment. Preparing that list is a simple yet effective way to ease their minds in uncertain situations.
Easier Coordination with Services
Let’s face it—emergencies often require coordination with multiple services. Whether it’s contacting a neighbor to check on your pets or calling roadside assistance, a contact list keeps everything tidy.
In my experience, trying to remember who to call while I’m panicking isn’t the best approach. If you have important numbers stored in one handy spot, you can keep your focus on resolving the emergency rather than scrambling for phone numbers. This way, you can think clearly and take charge!
And hey, it’s not just about you! Your contacts will appreciate being made aware that they’re on your emergency list. Being organized shows you care and understand the gravity of situations.
Organizing Your Contacts
Identifying Key People
The first step to taking your emergency contact list from concept to reality is determining who should be on it. Start with close family members and friends, then think about important professionals like your doctor, pediatrician, or a trusted neighbor.
Having a variety of contacts, from family to professionals, ensures you have the right help for different situations, and doesn’t just limit you to one type of emergency. You never know when an accident or unexpected event may happen, so better safe than sorry!
As you identify key people, consider what role they might play. Maybe it’s your sibling for family emergencies or a colleague for work-related issues. This will save you time in the moment and give everyone clarity on who to reach out to.
Updating Regularly
I learned the hard way that contact information can change faster than you think. You can’t just jot down phone numbers once and forget about them! It’s crucial to revisit your emergency contact list every few months to make sure everything’s current.
Sometimes friends move, family changes their numbers, or health professionals retire. Keeping your list updated means it will be useful when it really counts. So, set a reminder on your phone or calendar—whatever works for you.
It takes just a few minutes, and you’ll feel so much better knowing that your list is accurate. Trust me, future you will be grateful!
Storing Your List Safely
Next up, how and where to store your emergency contact list is just as important as creating it. You might think putting it on the fridge is enough, but I’d suggest more secure options. Consider keeping a digital version on your phone or in a cloud app where you can access it from anywhere.
Printable versions are also handy. If you’re like me, and often forget your phone when heading out, a hard copy stashed away in your wallet or glove compartment can save you a headache on the road.
And don’t forget to share it! Make sure key people in your life know where to find it. Sharing means they can also help maintain it—teaming up for safety never hurts!
Legal and Medical Considerations
Health Care Proxy
If you’ve ever been in a medical emergency, you probably understand how vital it is to have a health care proxy listed on your contact sheet. This ensures that your wishes are known and respected during critical times.
It’s someone you trust to make medical decisions on your behalf if you cannot. It can seem a bit daunting to think about, but seriously, having this planned out is a huge relief. I’ve even discussed this with my family to clarify our preferences over dinner!
Make sure the person you choose understands your values and preferences. It’s a conversation that may feel uncomfortable, but it’s worthwhile for everyone involved.
Emergency Medical Information
Alongside your contacts, don’t forget to include important medical information! This could be allergies, medications you’re taking, or key health conditions. If you ever need to go to the hospital, having this info can help healthcare providers give you the best care.
Including this information on your emergency list means that there won’t be any delays in treating you. There’s nothing worse than being in a bind and having to rely on others to piece together your medical history.
This section can save lives, honestly. You don’t want to be in a situation where someone’s scrambling to figure out what meds you’re on while you’re in distress.
Legal Contacts
Finally, don’t overlook the importance of including legal contacts. Whether it’s your attorney or someone from your insurance company, knowing who to talk to can be super beneficial in legal emergencies.
Things like accidents, property issues, or even disputes can crop up at any moment, and having legal support readily available can relieve a ton of stress. I once found myself in a sticky situation and having an attorney’s number was a lifesaver!
Reach out beforehand to your legal contacts, let them know they’re on your list, and ensure they are willing to assist when necessary. Setting these expectations upfront smooths out potential bumps in an already stressful situation.
Creating a Communication Plan
Designating a Point of Contact
As I work on my emergency contact list, I also ensure I designate a single point of contact among my family and friends. This person becomes the go-to for relaying information during a crisis, keeping it streamlined and preventing confusion.
Having a designated person can help coordinate updates and ensure that information gets passed on without everyone trying to contact each other simultaneously. Trust me—it can get chaotic otherwise!
It’s great to involve this person in your discussions about emergency protocols, so they know what to expect and can effectively manage the flow of information. It’s also helpful for them to feel empowered in that role.
Utilizing Technology
In today’s age, we’ve got tech at our fingertips, so let’s use it to our advantage! There are some fantastic apps available specifically designed to manage emergency contacts and information. You can program your list into your phone or even set up alerts for your loved ones.
I’ve found that tech can be unreliable sometimes, so having backups is key. Just remember to ensure your devices are charged and functioning properly. In an emergency, you don’t want to scramble to get your phone working!
By blending traditional methods with modern tech, you can create a comprehensive system that serves you well, regardless of the circumstance.
Practicing Your Plan
All the planning in the world won’t help if you don’t practice your communication plan! It may sound silly, but rehearsing what to do and who to contact can make a world of difference when things go south.
Share your plan with everyone on your emergency contact list so they also know what to expect and how to react. It’s a way to ensure everyone is on the same page, which can lighten the mood when the unexpected happens.
Run through scenarios—what happens if there’s a fire? What if someone gets injured? Practicing helps turn nervous energy into confidence, which is critical during genuine emergencies!
FAQs
1. Why is it important to have an emergency contact list?
Having an emergency contact list ensures that you have quick access to people who can help you or provide important information during urgent situations.
2. How often should I update my emergency contact list?
It’s best to revisit your list every few months or whenever there’s a significant life change, like moving or changing your doctor. Keeping it updated is key!
3. What kind of information should I include in my emergency contact list?
Your list should include names and numbers of family, friends, healthcare providers, and any other professional contacts. Don’t forget to add critical medical info like allergies and medications!
4. How do I store my emergency contact list?
You can keep a hard copy in your wallet, stored in your phone, or use a cloud app so you can access it easily. Just make sure key people know where to find it!
5. What’s the best way to create a communication plan for emergencies?
Designate a point of contact, utilize technology for quick access to information, and practice the plan with everyone involved. Rehearsing can greatly reduce panic during emergencies!
When I first started thinking about evacuation plans, I realized the importance of knowing what kind of hazards can affect my environment. For instance, if you live in an area prone to floods, wildfires, or earthquakes, then these factors are critical. Each hazard poses unique challenges and risks that we must be prepared for.
Understanding these dangers allows you to create a tailored plan that addresses specific scenarios. Take some time to research past incidents in your area. Reflect on how those events unfolded and what lessons were learned. This knowledge sets the stage for a more effective and relevant evacuation strategy.
Finally, I recommend checking in with local emergency services for their insights. Often, they can provide valuable information on identifying risks that might not be apparent at first glance. Knowledge is power, especially when it comes to safety!
Identify Escape Routes
Once you recognize potential hazards, the next step is figuring out how to get out. Identifying escape routes might feel pretty straightforward—just follow the signs, right? Well, not necessarily! It’s important to map out various escape routes. You never know when one route might be blocked or unsafe.
During my personal experience creating an evacuation plan, I found it useful to walk the routes beforehand. I practiced how to navigate each route, checking for potential obstacles like traffic or construction. This little exercise can ease anxiety and prepares you mentally and physically when the time comes.
Also, consider alternative modes of transportation. If you live in a city, public transport may be vital, while a rural area might rely on personal vehicles. Whichever applies, make sure you have a Plan B ready just in case things don’t go as planned!
Designate Meeting Points
After figuring out how to escape, take a moment to plan where everyone should meet. Designating meeting points is crucial for ensuring everyone is accounted for post-evacuation. Trust me, when chaos strikes, it’s easy to lose track of everyone.
Choose spots that are easily accessible and can accommodate your entire group, whether it’s a family or a larger organization. It’s best to select places that are far from the hazard zone, such as a local school or community center. Ensure every family member knows the chosen meeting points and the reasons behind it—you want everyone on the same page when it hits the fan!
And just like other parts of the plan, it’s wise to practice the meeting point strategy. Regularly schedule a family drill or even a community walk-through. The more familiar everyone is with the plan, the smoother the process will go in an actual emergency.
Gather Essential Supplies
Create an Emergency Kit
In my opinion, one of the easiest ways to prepare for an evacuation is by having an emergency kit ready to go. Load it up with essentials like water, non-perishable food, first aid supplies, and any necessary medications. Having this stuff in a single, easy-to-grab kit can save precious time when you’re on the clock.
When I was gathering my own supplies, I made it a habit to take inventory every few months. I found expired items and missing essentials that I hadn’t realized were out of date. It’s easy to overlook the supply stockpile until you really need it, but proactively checking can prevent chaotic last-minute runs to the store during an emergency.
Don’t forget about important documents, like IDs, insurance info, and any medical records. Storing these in a waterproof pouch ensures they’re safe from the elements if you need to evacuate in a hurry!
Plan for Pets and Special Needs
For pet owners like me, planning for your furry family members is a must. I learned early on that not every evacuation site accommodates pets. Keep this in mind when gathering supplies—make sure you have food, water, and identification for your pets. It’s important to have that ready, just in case.
Additionally, if you have family members with special needs, ensure their requirements are accounted for in your emergency kit. This could range from extra medication to mobility aids, and even just comforting items like a favorite blanket. Trust me, everyone will feel more at ease if they have their must-haves sorted out ahead of time.
Having training or reassurance methods for pets—such as leashes, carriers, or even training to respond to commands during an emergency—is also really helpful. Every little bit of preparation contributes immensely to a smoother evacuation!
Store Important Documents Securely
A lesson I learned the hard way was the importance of securing essential documents. When planning your evacuation, store documents like birth certificates, insurance policies, and medical records safely in your kit or a reliable cloud service. This way, you don’t have to scramble for paperwork in a time of urgency.
Consider having both physical and digital copies of these documents so you’re covered no matter the situation. Also, create a contact list of important phone numbers and addresses—this might include family, friends, and emergency contacts. Having someone to reach out to can provide both information and peace of mind if you’re in a bind.
Lastly, take some time to go over these documents periodically. Keep them updated and easy to locate! Learning from my experience, investing this small time regularly beforehand pays off big during urgent situations.
Practice Your Plan Regularly
Conduct Drills
I can’t stress enough how valuable it is to practice your evacuation plan regularly. It’s like a fire drill you had back in school. Rehearsing keeps everyone sharp and ensures that when the real thing happens, you’re prepared, not panicked.
Set aside time to conduct full drills with family, friends, or colleagues. Swap roles or test everyone’s knowledge of the meeting points and routes. Make it fun, like an adventure! You’ll be surprised how much easier it is to navigate the situation when you’ve already “been there, done that.”
After each drill, gather feedback. What was too complicated? What worked well? Use this information to tweak and improve your evacuation plan. Flexibility and continuity are key to developing plans that will actually work in times of need!
Simulate Different Scenarios
One of the best parts of planning is the creativity in simulating different scenarios. Whether it’s a fire, flood, or any other emergency, consider how each situation would play out. This helps you discover unique challenges or adjustments needed within your plan.
For example, what if members of your household are at different locations when an emergency occurs? Discussing and practicing these hypotheticals can spark discussions on logistics that might otherwise be overlooked—things like how to communicate or where to go without directions. It can be eye-opening!
Simulations can be fun and engaging, especially if you make it competitive or include themed scenarios. This way, everyone gets involved and takes the process seriously without feeling overwhelmed by the gravity of the situation. You might even uncover strengths and weaknesses in your plan you didn’t expect!
Review and Revise Your Plan
Once you’ve established a solid plan and practiced it a bit, the work isn’t done yet! Regularly review and revise your evacuation plan. I try to sit down with my family at least once a year to go over the details together. Doing this ensures that the plan stays current, relevant, and efficient.
Changes can happen—new children, pets, or shifts in your living situation all impact your evacuation readiness. Check for updates in local response plans or community resources too. Staying informed can help you make necessary tweaks to ensure your family stays safe and informed.
Feedback is also the name of the game here. When doing your drills and simulated scenarios, listen closely to everyone’s feelings and thoughts about the plan. They might uncover issues that you hadn’t even considered. By including everyone, you foster a sense of teamwork that is crucial during stressful times.
FAQ
1. What should be in my emergency kit?
Your emergency kit should include basics like water, non-perishable food, a flashlight, first aid supplies, and any necessary medications. Don’t forget personal documents and contact numbers!
2. How often should I review my evacuation plan?
It’s a good idea to review your plan at least once a year or when there are significant changes in your household or local circumstances. Regular practice makes perfect!
3. How can I ensure my pets are included in the evacuation process?
Have a plan ready for your pets, including carriers, food, and identification. Familiarize them with carriers and practice loading them ahead of time to minimize stress.
4. What is the best way to conduct a drill effectively?
Make it realistic! Assign roles, walk through routes, and simulate different scenarios. Afterward, gather feedback to improve the plan. Keep it less stressful and more like an adventure!
5. Are there community resources I can rely on during an emergency?
Absolutely! Connect with local emergency services, community centers, or neighborhood groups. They often provide valuable information and resources regarding evacuation protocols.
If you have ever seen the movie “The Road Warrior” starring Mel Gibson, then you know that there are some things that we just cannot live without. We would be lost without our cell phones, and we would certainly be lost without our cars. If you don’t have a car or your car is no longer running, then you may want to consider a car kit as part of your emergency plan.
The car kit will provide you with the basic necessities such as food, water, first aid, and a flashlight. This kit will also include a manual on how to use the tools in the kit. The manual will teach you how to use the tools to fix any problems you may encounter with your car.
One of the best ways to learn about what to do when you are stranded is to study the manual that comes with your car kit. It will show you how to get your car started, how to change tires, how to change oil, how to check your air pressure, how to check your radiator, how to check your battery, and how to change a flat tire.
You can also find books on how to maintain your car at home. There are many books that you can find on the Internet that will give you information on how to keep your car running for a long time. These books will show you how to change your oil, how to change your brake pads, how to replace spark plugs, and how to clean your headlights.
There are many different types of car kits available on the market today. You will find car kits that are designed for your specific make and model of car. They will also have kits that are designed for specific types of cars such as convertibles, SUVs, trucks, and sports cars.
When you are looking for a car kit, you will need to consider how much space you have available. You will also need to decide if you want to buy a kit that has everything that you will need to fix your car, or if you will only need a few items from the kit.
Most car kits come with a manual that will help you to understand how to use the tools that you will find in the kit. You will also find many videos on YouTube that will show you how to use the tools in your kit.
A car kit will be a great addition to your emergency plan because it will provide you with the basic needs