by Preparation | Mar 12, 2025 | Preparedness
Emergency preparedness is an essential aspect of ensuring your family’s safety and well-being in times of crisis. The first 72 hours after a disaster strikes are crucial, as emergency services may not be available or fully functional during this time. Being prepared can help you stay calm and focused, allowing you to respond quickly and effectively to any situation that arises. In this blog post, we will discuss what it takes to survive the first 72 hours of a crisis, including creating an emergency kit, stockpiling water and food, finding shelter and warmth, communicating with loved ones, practicing evacuation plans, and taking action today.
Introduction: What is Emergency Preparedness?
Emergency preparedness refers to the steps taken by individuals, families, and communities to ensure they have the necessary resources and knowledge to cope with unexpected events such as natural disasters, power outages, pandemics, and other crises. These measures include developing contingency plans, building emergency kits, and training for potential scenarios. By being proactive and preparing ahead of time, you can reduce the impact of these events on yourself and those around you.
The Importance of Being Prepared
Disasters can strike at any moment without warning, leaving people feeling helpless and vulnerable. However, by taking simple steps to prepare beforehand, you can increase your chances of survival and minimize the risk of injury or loss. Having an emergency plan in place can also provide peace of mind, knowing that you and your family are ready to face whatever challenges come your way.
Creating an Emergency Kit
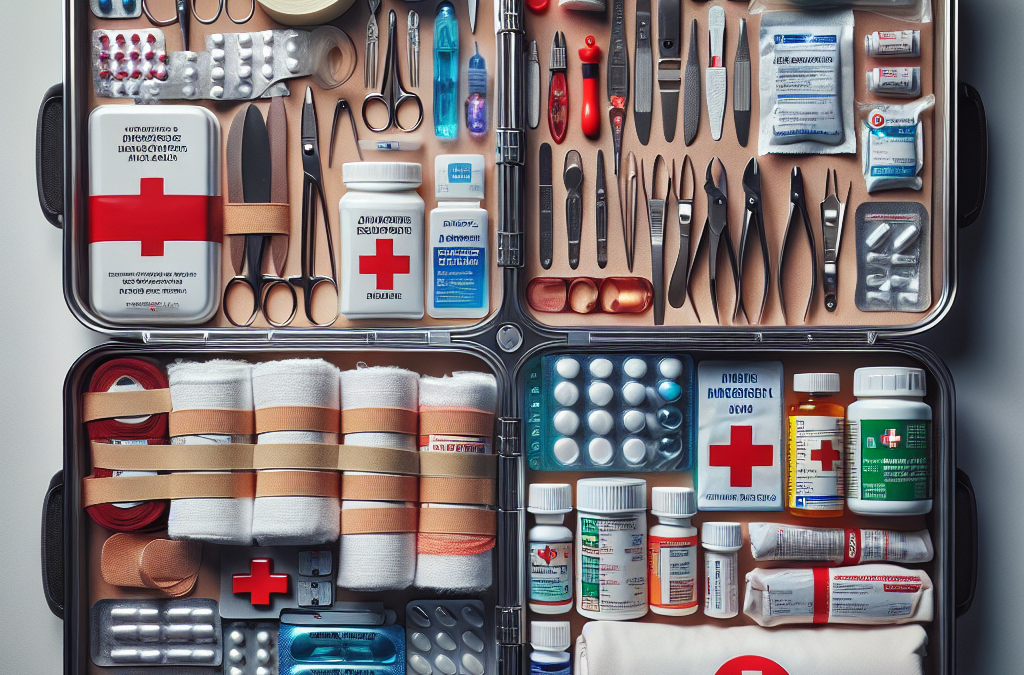
An emergency kit should contain all the supplies needed to sustain life for up to three days. This includes items like non-perishable food, bottled water, flashlights, batteries, first aid equipment, and personal hygiene products. It’s also important to consider special needs such as medications, baby formula, and pet food if applicable. Make sure to store these items in a convenient location where they can easily be accessed when needed.
First Aid and Medical Supplies
In addition to basic first aid supplies like bandages and antiseptic wipes, it’s essential to have any prescription medications on hand. If someone in your household has specific medical needs, make sure to have appropriate supplies and equipment readily available. Additionally, having a first aid manual or guidebook can be helpful in treating injuries until professional assistance arrives.
Water and Food Storage
Access to clean drinking water is critical during emergencies, so it’s essential to have enough stored for everyone in your household. Plan for one gallon per person per day, and remember to rotate your supply every six months to prevent spoilage. Non-perishable food items like canned goods, energy bars, and dried fruits are also important to have on hand. Remember to check expiration dates regularly and replace anything that has passed its prime.
Shelter and Warmth
Depending on the type of crisis, you may need to seek alternative shelter or ways to keep warm. Have a backup plan in case your home becomes unsafe or uninhabitable, such as a nearby hotel or relative’s house. Also, consider investing in emergency blankets or sleeping bags to keep warm in cold temperatures.
Communication and Evacuation Plans
Having a communication plan in place is vital to keeping everyone informed and safe during a crisis. Designate a meeting spot for family members to gather in case you get separated, and establish a contact person who lives outside the affected area to serve as a point of contact. Practice evacuation routes frequently, and make sure everyone knows how to operate any necessary safety equipment like fire extinguishers or generators.
Practicing Your Plan
Regularly reviewing and practicing your emergency plan is key to ensuring its effectiveness. Conduct drills periodically to test your response time and identify areas for improvement. Discuss any changes or updates with your family members, and make adjustments as needed.
Conclusion: Taking Action Today
By following these guidelines, you can take control of your family’s safety and well-being during times of crisis. Don’t wait until it’s too late – start preparing now by building your emergency kit, practicing your plan, and staying informed about potential risks in your area. Remember, being proactive and prepared can save lives.

by Preparation | Mar 12, 2025 | Preparedness
Disaster preparedness is an essential aspect of ensuring the safety and well-being of you and your loved ones. A disaster can strike at any time, leaving devastation in its wake. Being ready for a disaster can make all the difference between life and death. In this blog post, we will discuss five essential steps to disaster preparedness that will help ensure you are ready when disaster strikes.
Step 1: Create an Emergency Plan
The first step to disaster preparedness is creating an emergency plan. This includes identifying potential risks in your area, such as hurricanes, earthquakes, or wildfires, and developing a plan for how to respond to each one. Your emergency plan should include evacuation routes, safe meeting places, and contact information for family members and friends. It’s also important to have a plan for pets and other animals.
Step 2: Build a Disaster Kit
Building a disaster kit is another crucial component of disaster preparedness. Your disaster kit should contain supplies that will last for at least three days, including food, water, flashlights, batteries, first aid supplies, and extra clothing. It’s also a good idea to include items like cash, identification documents, and copies of important papers in case you need to evacuate quickly.
Step 3: Stay Informed
Staying informed about potential disasters is critical to being prepared. Make sure you stay up-to-date on weather reports and news updates related to natural disasters. Sign up for local alert systems, such as text message notifications or email alerts, so you know what’s happening in real-time.
Step 4: Protect Your Property
Protecting your property from damage during a disaster is also essential. Take measures to secure loose outdoor furniture, trim trees and shrubs, and install storm shutters or impact-resistant windows. Consider investing in flood insurance if you live in a high-risk area.
Step 5: Practice and Review Your Plan
Finally, practicing and reviewing your disaster plan regularly is key to ensuring everyone knows what to do in the event of a disaster. Conduct regular drills with your family, practice evacuating different routes, and review your emergency contacts to ensure they are still accurate.
In conclusion, disaster preparedness is not something to take lightly. By following these five essential steps, you can increase your chances of surviving a disaster and protect yourself and your loved ones from harm. Remember, being prepared is the best way to ensure your safety and well-being in times of crisis.
by Preparation | Mar 12, 2025 | Preparedness
What’s in a Proper Emergency Medical Kit? Find Out
What’s in a Proper Emergency Medical Kit? Find Out
- Essential Items for a Basic Emergency Medical Kit
- Advanced Supplies for Serious Medical Needs
- Organizing Your Emergency Medical Kit Efficiently
- Customizing Your Emergency Medical Kit for Specific Situations
Essential Items for a Basic Emergency Medical Kit
So, when it comes to creating an emergency kit, the essentials are truly where we start. I remember when I first ventured into this territory—I totally underestimated what I actually needed. First things first, here are your must-haves!
First Aid Basics
You can’t go wrong with the traditional first aid supplies. Pack sterile bandages, gauze, and adhesive tape. I always make sure to have supplies that cater to any little scrapes and cuts that might happen. When my kid slipped off his bike, having these goodies on hand was a lifesaver!
Don’t forget Antiseptic wipes! Those little packets can really save the day by preventing infections. Trust me, the last thing you want is a tiny scratch turning into something major. And while you’re at it, throw in some tweezers for splinters—you never know!
Honestly, just having these basic items gives me peace of mind. They’re straightforward and can get you through most small accidents without a hitch.
Medication Must-Haves
Now let’s chat about medications. Having a few basic over-the-counter medicines is a game-changer. I keep pain relievers like ibuprofen and acetaminophen in my kit; they’re helpful for headaches or bumps and bruises that might happen.
It’s also handy to have allergy medication, especially during the pollen-filled months. There’s nothing worse than being stuck somewhere when allergies hit hard! And a little antihistamine can really save the day in those moments.
If you or anyone in your family has specific prescriptions, consider keeping a small supply in your kit, too. It can be as simple as a couple of extra doses—just in case of emergencies.
Basic Tools and Equipment
Don’t overlook the tools! A pair of scissors is something I never knew I needed until I had to strap up an injury. I also recommend having a thermometer and a flashlight—being able to check a temperature in the dark? Priceless.
Another handy tool is a CPR face shield or mask. I won’t lie; it’s not something I thought about until I took a basic first aid course. Having that little piece of equipment has made me feel way more prepared for any unexpected scenarios.
Last but not least, make sure you have a first-aid manual. It’s easy to forget the steps when panic sets in, and having that guidance can really help in a pinch!
Advanced Supplies for Serious Medical Needs
As I got deeper into emergency preparedness, I realized that sometimes the basics just won’t cut it. Depending on your situation, you might need some more advanced items in your kit. Here’s what I swear by!
Advanced Trauma Kits
If you’re in an area where serious injuries could occur—like hiking in the mountains or even driving long distances—consider upgrading to a trauma kit. These may include tourniquets, hemostatic agents (fancy word for stopping bleeding), and larger, more specialized dressings for big wounds.
Tourniquets have been life-savers for me. I once witnessed a gnarly bike accident, and having one ready was super beneficial. It gives you time to get proper help without exacerbating any injuries.
Also, my trauma kit has those hemostatic dressing pads, which are magic for bleeding wounds. I always felt confident having these on hand, knowing they would work wonders when needed.
Oxygen and Airway Management
If your CPR knowledge extends that far, consider packing supplemental oxygen equipment. This is more for those trained for high-risk situations but could really come in handy in emergencies where someone is not breathing properly.
Plus, you should think about carrying some airway adjuncts, like oropharyngeal airways, if you’re familiar with them. I took a course, and knowing how to use these could really make a difference in a serious respiratory emergency.
Trust me, it’s not just about bandages. Being prepared for various scenarios means thinking about how your kit could cater to more critical needs.
Specialty Supplies for Specific Risks
Don’t forget that specialty supplies might be key based on your environment. If you’re a road-tripper like me, consider including auto-specific first aid items for car accidents—things like spine boards or more extensive back injury gear. It’s all about being aware!
If you go hiking or camping often, maybe include items for snake bites like a snake bite kit. Research the area you’re going to, and adapt your kit to be as effective as possible for your adventures.
Remember, the more tailored your kit is to your needs, the more it’ll serve its purpose. Knowledge of your surroundings is your best ally!
Organizing Your Emergency Medical Kit Efficiently
Okay, by now you should have a lot of great supplies in mind! But even if you have all the right stuff, if your kit’s all jumbled, it might as well be useless. Here’s how I keep mine organized to navigate quickly in an emergency.
Use Clear Containers
I swear by using transparent containers. Having everything in clear bags means I can see what’s there at a glance. I’ve tried the whole “let’s shove everything in one bag” approach, but that was a headache waiting to happen!
For certain sections of my kit, I use labeled bags: First Aid, Medications, Advanced Gear. It saves loads of time when you’re frantic and searching!
Not to mention, clear containers can also help keep everything dry in case it rains. Trust me on this one; I’ve learned the hard way!
Regularly Check and Update Supply Levels
It’s super important to review your kit regularly. I put reminders in my calendar every couple of months to check the supply levels and expiration dates of medications or supplies. Nothing worse than trying to rely on expired stuff!
I tend to reorder or restock immediately after I’ve used anything. This way, I know I’m always prepared for the next outing or emergency! Think of it as keeping your kit alive, making sure it’s ready to go at a moment’s notice.
Your peace of mind is worth every effort in this regard. It ensures that if or when disaster strikes, you’re never scrambling.
Make a Quick Reference Guide
I can’t stress enough how helpful it is to create a quick reference guide! This can be a small booklet or an easily accessible digital file on your phone, detailing the contents of your kit along with first aid procedures. It’s an absolute lifesaver in a moment of panic!
When I had to deal with an unexpected injury while out camping, my quick reference guide was the first thing I turned to. Not only did it save me time, but it also calmed my nerves since I had a plan!
A well-organized kit paired with a quick reference guide means you can provide help faster. It’s preparation meeting potential emergencies, and it pays off every time!
Customizing Your Emergency Medical Kit for Specific Situations
Lastly, let’s talk about customization because one kit doesn’t fit all! It’s essential to tailor your medical kit to fit your lifestyle, travel situation, and family needs, and I’m here to tell you how!
Family and Personal Medical History
Consider every family member’s medical history. If you’ve got someone with allergies or chronic conditions, make sure you cater your kit to them specifically. This isn’t just about the general scenario; it’s about your individual needs!
I keep a mini kit for my son’s allergies and another for my chronic health issues. It sounds a bit overboard, but knowing I have what I need on hand calms my nerves! Trust me; it’s all worth it when you’re faced with a flare-up.
Every family has unique needs, so don’t overlook this step. Adjusting your kit makes it truly comprehensive.
Myth-Busting Specialized Kits
If you’re into specific activities—like hiking, biking, or even if you just live in an area prone to natural disasters—consider specialized kits. I’ve encountered myths about what you *need*, and believe me, you don’t have to go over the top.
For example, a wilderness medical kit is crucial if you’re often in remote areas and far from help. It’s easy to add specialized tools without going crazy—really think about what you genuinely need!
I even keep a separate kit for when I travel overseas! It’s got local medications and gear that’s specific to where I’m headed. It saves me hassle and keeps me safe!
Involve Your Family
Lastly, involve your family in creating the kit! This makes it a collective effort. When my kid joined me in packing and learning about the items in the kit, he felt empowered and confident. It wasn’t just a bunch of stuff; he understood its importance!
Make it fun! Use the chance to educate your kids on basic first aid. The more they learn, the better prepared they’ll be in emergencies—seriously, it’s teamwork at its finest!
Plus, you won’t be the lone ranger during an emergency. Everyone will know what’s in there and how to use them if something happens.
FAQ
What are the essential items for a basic emergency medical kit?
The essentials include bandages, antiseptic wipes, scissors, adhesive tape, and over-the-counter pain relief. Don’t forget to throw in a first-aid manual for guidance!
How can I organize my emergency medical kit effectively?
Organize using clear containers or labeled bags for categories. Regularly check and update the supplies, and consider creating a quick reference guide to help you find items quickly in an emergency.
What should I consider when customizing my emergency medical kit?
Look at your family’s medical history and the specific risks related to the activities you participate in. Cater your kit to include medications needed for allergies or chronic conditions and any specialized items for your hobbies, like hiking gear.
Why is it necessary to regularly update my emergency medical kit?
Supplies can expire, and items can go missing. Regularly updating guarantees that all supplies are fresh and that you have everything you need on hand. It’s all about being ready for whatever life throws your way!
by Preparation | Mar 12, 2025 | Preparedness
Understanding the Risks
Identifying Potential Causes
Alright, let’s get real for a second: understanding why we might find ourselves in the dark is the first step to planning. Risks can range from severe weather—think hurricanes and snowstorms—to human-made outages, like accidents or maintenance work. Knowing what’s at stake helps you prepare for the worst.
One experience I had was during a massive storm where the power went out for days. It was an eye-opener. I realized that understanding the risks meant I needed to stay updated from reliable sources on weather forecasts, so I could be proactive rather than reactive.
Adding to that, it’s not just natural disasters. Sometimes, it can be local failures that affect just your neighborhood. Always have a clear idea of your local infrastructure and how vulnerable it is.
Assessing Your Needs
Now that you’ve got a grip on the risks, we need to look at what you personally require during a power outage. This can be food, medical devices, or even just comfort items like candles and board games.
I’ve got young kids, and trust me, keeping them entertained during a blackout is a priority! A well-thought-out list of essentials tailored to your family’s needs makes a world of difference when planning ahead.
Don’t forget to evaluate specific needs based on seasons. In the summer, staying cool can be a challenge, while in winter, warmth becomes your number one concern.
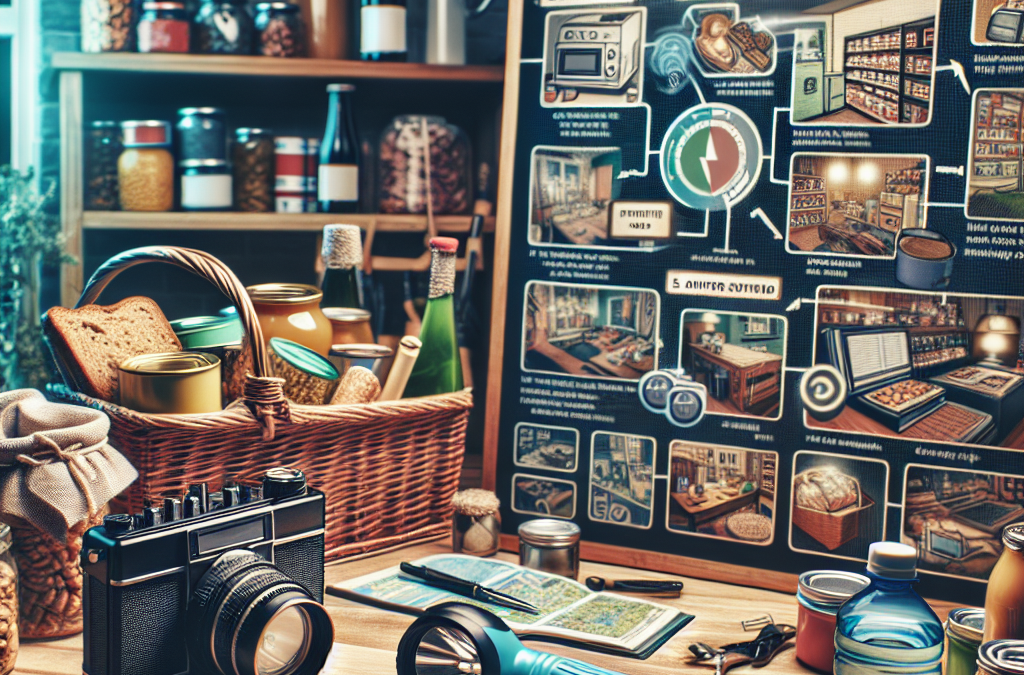
Your Emergency Kit
Creating an emergency kit is possibly one of the fun parts of preparing. I always think of it like I’m crafting a survival kit. You want to be equipped. Think torches, batteries, first aid supplies, and bottled water. A comprehensive kit has saved me more than once.
Make sure you include non-perishable foods, a manual can opener, and items specific to your family’s needs—like baby supplies or pet food. I packed some of our favorite snacks that keep our spirits high when the lights are low!
Lastly, don’t forget a battery-powered or hand-crank radio. It’s essential for staying informed when the local news stops broadcasting. I learned that the hard way during my last power outage.
Creating a Communication Plan
Establishing Contact Points
In today’s world, having a solid communication plan is like having a GPS when you’re lost. You don’t want to go dark both literally and figuratively! Make sure to establish clear contact points with family and friends.
I always set up a group text that everyone can access, which makes it easy to share updates or check in on each other during an outage. It’s comforting to know that even when the lights are out, you’re not alone.
Try to have one out-of-area contact. If things get really hairy, having someone outside of your immediate zone can give you an extra layer of security to rely on.
Sharing Family Plan
Next, bring your family into the discussion. Everyone should know how to handle things when the power goes out. This helps avoid panic. I usually gather the family and we outline our go-to tasks and checklists together.
We assign roles, whether it’s who heads to the basement to grab supplies or who checks on neighbors. Making it a family affair reduces anxiety and makes the process smoother. Plus, it’s nice to bond over planning!
Keep a printed version of your communication plan visible in your home, just in case phones go dead. It’s a great backup plan that I’ve started implementing in our household.
Regular Updates
Having a communication plan is just the start; updating it regularly is vital. I schedule reminders to review our emergency plan every six months. This way, we adjust for new family members or changing needs.
Keep it flexible. What works this summer might not make the cut next winter, especially as your kids grow and their needs change. We’ve had our fair share of evolving plans!
And don’t forget to educate new family members or friends who might be staying over. This ensures everyone’s on the same page during emergencies.
Staying Informed
Utilizing Technology
In this day and age, staying connected shouldn’t be too hard! I like using apps and alerts on my phone for weather updates. These tools can be lifesavers when you’re preparing for a possible outage.
Set your notifications to have an early warning on severe weather. You’d be surprised how much a timely alert can impact your readiness. I once received an alert an hour before an outage, and it allowed me to prepare.
Also, subscribe to your local utility providers for outage updates. They often have resources and tips specific to your city or region that can prove invaluable.
Community Resources
Don’t forget about your community! Often, local governments and organizations have resources and recovery plans in place. This is something I learned by attending town hall meetings.
You can find out where shelters are located or which community centers have backup power sources. I always encourage friendships with neighbors; we can all rely on each other in tough times.
Check out community bulletin boards and local websites for any additional tips or resources. You might discover cool local events focused on preparedness!
Regular Preparedness Training
Last but not least, reflecting on your knowledge is crucial. Try to engage in regular preparedness training; it can be through workshops, online resources, or even local demonstrations.
I’ve taken a few classes on first aid and emergency preparedness, and let me tell you—it adds a sense of confidence. Knowing how to react when it all goes south is empowering.
Plus, who wouldn’t want to impress family and friends with your newfound life-saving skills? It’s a win-win situation!
Practicing Your Plan
Creating Mock Scenarios
This is the part where you get to test your knowledge! I like to create mock scenarios, like simulating a power outage at a random time. It’s a little game for my family that has turned serious in a fun way!
Practicing how to respond will help everyone know exactly what to do in real situations. It makes a world of difference when the stakes are real. Plus, it can lead to some lighthearted moments!
Adjust your plans based on what you learn during these practice drills. It’s a dynamic process.
Reviewing Your Resources
I always end up reviewing our supplies after practice runs. Sometimes we find staples that are outdated or expired. This keeps things fresh and ensures that when we need our kits, they’re ready to rock.
Rotate through your food supplies, and keep your batteries fresh. Get the kids involved! It’s a fun way to teach them responsibility while ensuring your preparedness gear is in top shape.
Plus, it gives you peace of mind to know that you’ve got everything sorted out. You can sleep soundly knowing you’re ready for whatever comes your way!
Making Adjustments
Finally, be prepared to make adjustments in your approach. Maybe the last practice taught you that your radio needs an upgrade, or perhaps you realized you could streamline your communication chores.
The first plan might not always work perfectly, and that’s totally okay! Learning to adapt is part of the process. I always think of it as refining what you’ve learned over time.
After each drill, I sit down with the family to discuss what worked and what didn’t. This open dialogue helps build a stronger sense of community and security within our household.
FAQs
1. Why is planning for a power outage important?
Planning prepares you for unexpected situations, ensuring you have the necessary supplies and information to stay safe and comfortable.
2. What items should be included in an emergency kit?
Your emergency kit should include water, non-perishable food, a flashlight, batteries, first-aid supplies, a manual can opener, and items specific to your family’s needs.
3. How can I stay informed during a power outage?
Utilize technology like weather alerts and local utility notifications. Having a battery-powered radio can also help you stay updated.
4. What should I include in a communication plan?
Your communication plan should establish contact points, outline family responsibilities, and include information for an out-of-area contact.
5. How often should I review my emergency plan?
It’s a good idea to review and update your emergency plan every six months or whenever there are significant changes in your family dynamics or local risks.
by Preparation | Mar 12, 2025 | Preparedness
Evaluate Your Space
Understanding Your Needs
First things first, take a good look at your living space. Whether it’s a cozy apartment or a spacious house, assessing your area makes all the difference. I remember when I first started organizing my emergency medical supplies. I didn’t consider how much space I actually had until I laid everything out. It’s essential to know where you’ll keep these supplies accessible yet safe.
Assess how many supplies you have. Are you equipped for just yourself, or do you have a family to look after? Depending on your needs, the amount of space required may vary. If you’re just starting, you might only need a small kit, but it’s wise to consider potential expansions.
Also, think about where you tend to spend most of your time. It makes sense to store supplies somewhere that’s easy to access in emergencies. A little forethought about accessibility can save you a lot of hassle later on.
Choosing the Right Location
Finding the right spot to store supplies can’t be overlooked. In my experience, I’ve found that a dedicated area, like a cabinet or a drawer, works wonders. You want something that won’t get buried under a pile of junk. A specific location that is tidy and out of high traffic can be just what you need.
Don’t forget about temperature and humidity! You’d be surprised how harmful these factors can be for medical supplies. Avoid storing items in damp basements or humid areas; it’s a recipe for disaster. Choose a cool, dry place to prolong the shelf life of your supplies.
Also, think about visibility. I like to use clear bins or labels so I can quickly grab what I need. You’d be amazed at how much easier it is to find stuff when it’s organized and visible. Trust me, fumbling around in a panic is not where you want to be!
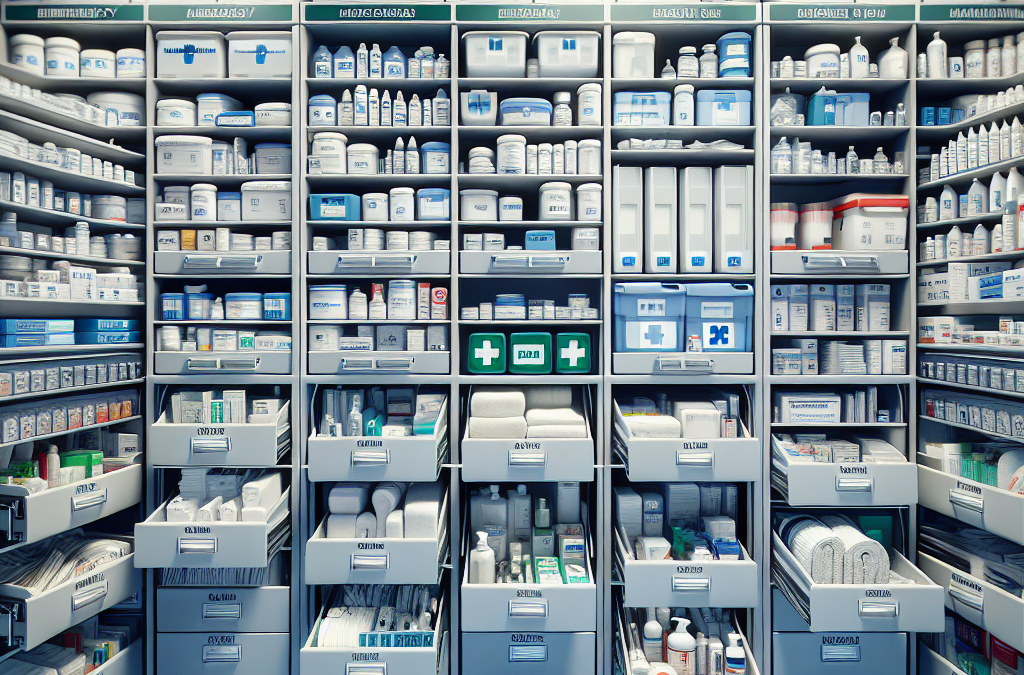
Maximizing Space Efficiency
Once you have your location sorted, it’s time to maximize that space. Using shelving and stacking bins allows me to utilize vertical space, and it keeps things organized without clutter. By categorizing items—think first aid kits, medications, and tools—you’ll find it becomes second nature to reach for the right thing when needed.
Consider the use of clear containers for easy visibility and quick access. Many of my friends favor clear bins over opaque ones because it’s a time-saver. You can see at a glance what you have, which is especially handy in high-stress situations.
Rotating your supplies can also save precious time. Make a habit of putting newer items at the back and using older ones first. I’ve learned to check my supplies every few months, making sure everything’s stocked and up-to-date. This way, you avoid any nasty surprises!
Organize by Categories
Group Similar Items
Now that you’ve got your space all prepped, let’s get organizing! Group similar items together—it’s all about creating a system that makes sense. Personally, I like to divide my supplies into categories like first aid, medications, and tools. This method makes it easier to locate what you need, without wasting precious time.
Think about the frequency of use. Everyday items should be easy to grab. In contrast, you could tuck away less essential supplies a bit further back. When I reorganized my kit, moving the most-used items to the front changed the game for me!
You can use small containers or even zip bags for grouping smaller items together. Think of it as creating mini-stations within your main storage area. It’s sort of like having a separate toolbox for various tasks—it brings order to chaos!
Labeling Everything
You’ve got your items grouped, so now let’s talk about labels! A simple label can save a ton of headaches during an emergency. I can’t stress enough how this small step significantly reduces panic and confusion. You can use a label maker or just good old sticky notes—whatever works for you!
When labeled well, you can immediately identify where things are and what needs replenishing. This became particularly important during a recent family camping trip when someone needed a bandage quickly. Being able to reach for the right container without hesitation was such a relief.
Don’t forget to update labels as you refresh supplies! If you’ve changed the contents or organization, tweak those labels to reflect what’s inside—keeping everything up-to-date ensures smooth sailing when it counts.
Creating a Quick Reference Guide
Finally, it’s essential to have a reference guide to accompany your supplies. This guide can outline what you have, where you’ve stored it, and any specific usage instructions for medications or equipment. I made a simple document that I keep taped to the inside of my supply cabinet—it’s handy for anyone who might need to step in during an emergency.
Another tip I learned is to include emergency contact numbers and instructions for potential first aid scenarios. It’s like having a mini-roadmap when things get intense! When the unexpected happens, clarity can be your best friend.
And don’t forget to share this guide with family members. Keeping everyone informed means that a friend or a partner could grab what I’d need in a pinch, avoiding any confusion. Teamwork makes the dream work, right?
Routine Checks and Updates
Regular Inventory Assessments
Alright, it’s time to talk maintenance. Just because your supplies are organized doesn’t mean they can be forgotten! I’ve learned the hard way that doing regular inventory checks is vital. I recommend setting a calendar reminder to check supplies every few months—it keeps everything fresh and stocked.
During these checks, look for expiration dates on medications and other time-sensitive items. Disposing of expired goods ensures you won’t be scrambling in an emergency, only to discover that a necessary item just doesn’t work anymore.
Part of this inventory should also include reassessing your needs over time. As life changes, so might the supplies you require. If you’ve moved or had a baby, updating your kit is a smart move. Stay proactive!
Restocking Supplies
Restocking once you’ve used items or when they expire is crucial. I keep a running list when I’m low on something so I don’t forget. You’d be surprised how many times I’ve forgotten a crucial item because I didn’t note it down!
Taking advantage of sales or bulk buying is also a strategy I use. When I run low on gloves or gauze, it’s often worth stockpiling a bit to save money in the long run. Just make sure to keep track of those expiration dates!
Setting up alerts for supplies is also a nifty idea. Some apps remind you when it’s time to check or replenish supplies based on your inventory list. Automating this process can save you some serious stress!
Educating Everyone
One cannot overstate the importance of educating everyone in your household about the medical supplies. I make it a point to involve my family in discussions around safety and what we have available. Knowledge is power, especially in emergencies!
Holding mini-training sessions on managing certain supplies is also something I’d recommend. It’s been eye-opening for my kids to learn where things are and what to do with them. Every session usually comes with a “cool” factor, which encourages them to pay more attention!
Remember, practice makes perfect. The more familiar everyone is with the supplies and their locations, the smoother your operations will run in a pinch. Together as a family, we empower each other to stay prepared.
Stay Prepared and Ready
Mindset Matters
Having a good mindset about emergency preparedness is so essential. I’ve realized that the more I prepare, the more confident I feel. Taking those steps to gather and organize supplies truly puts my mind at ease! It’s much better than panicking and feeling lost if something unexpected happens.
Remember, preparation is about more than just physical supplies; it’s also mental resilience. Keeping calm is crucial in emergencies, and knowing I have what I need boosts my confidence in those situations.
When I know my family is prepared, I have this great sense of relief. It creates a bond as well; everyone can contribute and feel part of the process! I like to think of it as building our little fortress of health and safety.
Continuous Learning
Life doesn’t stand still, and neither should we! I actively seek out new information regarding safety and first aid. Whether it’s attending workshops or reading up on health guidelines, keeping updated on the best practices is key.
Online courses or community classes can be a lifesaver—not to mention a fun way to learn something new. Not only does this add to our preparedness, but it can also be a terrific bonding experience for families. Plus, who doesn’t want to be a bit of a local hero?
Remaining open to learning means you can adapt to new knowledge and tools at your disposal, making you even more effective when an emergency strikes. Always be a student of preparation!
Celebrating Preparedness
Finally, I think it’s important to celebrate the little victories after organizing your supplies. Take a moment to feel good about what you’ve accomplished. You’ve set yourself up for success, and that deserves recognition!
Sharing your preparedness journey with friends and family can inspire others to do the same. What better way to spread knowledge than through excitement and community? It can create a ripple effect of awareness that benefits everyone.
Ultimately, preparedness is an ongoing journey. It’s a lifestyle choice that equips you and your loved ones for life’s unpredictable moments. Celebrate those victories, and keep moving forward!
Frequently Asked Questions
1. How often should I check my emergency medical supplies?
It’s a good idea to check your supplies every few months, keeping an eye on expiration dates and ensuring everything is stocked and up to date.
2. What items are essential for an emergency medical kit?
Your kit should generally include first aid supplies like bandages, antiseptic wipes, pain relievers, and any prescription medications needed by your family.
3. How can I extend the shelf life of my medical supplies?
Store supplies in a cool, dry place, avoid high humidity, and adhere to expiration dates. Regularly check and rotate supplies to keep them fresh.
4. Should I involve my kids in the emergency preparedness process?
Absolutely! Involving children promotes awareness and understanding, making them feel empowered and prepared for emergencies.
5. What should I do with expired medical supplies?
Always dispose of expired supplies safely. Many pharmacies offer medication take-back programs, and you can check with local waste disposal services for guidelines on other items.
by Preparation | Mar 12, 2025 | Preparedness
Understanding Different Types of Emergencies
Defining Emergencies
Alright, let’s start with the basics: what exactly qualifies as an emergency? We’ve all seen those crazy disaster movies where chaos ensues, but in real life, emergencies can range from natural disasters like hurricanes and earthquakes to personal crises like medical emergencies.
Each type of emergency has its own characteristics, and understanding these can help you prepare effectively. For example, a natural disaster might require you to think about physical supplies, while a personal emergency might need medical knowledge or contacts ready to go.
Recognizing the different types of emergencies out there is crucial if you want to get ahead of the game. It’s like doing your homework before a test—knowledge really is power!
The Impact of Emergencies
You know, the impact of not being prepared can be staggering. Imagine waking up in the middle of a storm without a flashlight or food! The feeling of panic can be overwhelming. From my personal experience, a buddy of mine was caught in a flash flood because he didn’t think to check weather alerts. Trust me, you don’t want to be that person.
Emergencies can disrupt everyday life, leading to losses—of property, health, and even lives. This is why understanding emergencies is so crucial; when you know what could hit, you can strategize and mitigate those risks.
So, take it from me, taking the time to assess your specific region, lifestyle, and possible emergencies is a smart move that can save not just your sanity, but possibly your life.
How Preparedness Influences Outcomes
Here’s the scoop: preparedness can literally change the game. When I was super prepared for a hurricane last year, I felt an inexplicable sense of control. I had supplies stocked up, a plan in place, and even a fancy little evacuation route laid out!
The most interesting part? The people who weren’t prepared were running around, panicking. They were scrambling for last-minute supplies—grabbing whatever they could find at stores with empty shelves. It was sheer madness! On the other hand, my friends and I were comfortably watching movies while the storm raged outside because we had our act together.
So yeah, being prepared not only makes YOU feel better but can positively influence those around you. When you’re calm, that calmness can spread to your family or neighbors, creating a more organized environment during chaotic times.
Creating a Preparedness Plan
Identifying Your Needs
So, let’s chat about putting together a preparedness plan. First things first—know your needs! This varies from family to family and even person to person. For me, I’ve got kids, pets, and a couple of family members who have special needs. Each of those factors means my plan will look different than a single friend’s.
Think about your lifestyle. Do you live in an area prone to certain natural disasters, or are you more likely to face medical emergencies? Tailor your strategies based on these risks to best fit your situation.
Once you figure out your needs, everything else starts to fall into place. It’s like building a house; you wouldn’t try to put up walls without first laying a solid foundation!
Building an Emergency Kit
Next on the list is crafting that all-important emergency kit. Trust me, having one will save a ton of headaches down the line. Start by gathering essentials like water, non-perishable food, first aid supplies, and flashlights. I like to throw in some comforting snacks too—like chocolate—it’s all about mental peace, right?
Also, don’t forget those crucial documents! Keep copies of your ID, insurance information, and anything else vital stored somewhere water-proof and easily accessible. Those will be game changers if you have to evacuate.
Just a little tip from my own experience: every few months, check your kit. I found out the hard way that my canned goods had expired (oops). Staying on top of this prevents any nasty surprises when it’s crunch time!
Practicing Your Plan
Now that you’ve got a plan and a kit, it’s time to practice. Drills might sound a bit over the top, but trust me, they are super beneficial. They help everyone know what’s expected during real emergencies. I like to involve my family in these drills. It’s not just about seriousness; we try to make it a fun routine so that everyone’s on board and knows their roles.
During our last fire drill, I made everyone race to the “safe spot”. Gotta say, seeing my kids take it seriously while still having a blast was pretty awesome! Plus, knowing that they can react calmly in a real emergency makes my heart feel just a bit lighter.
Remember, practicing makes perfect, and it comes in handy when adrenaline is pumping during a real incident. You’ll be the household hero when everyone else is freaking out!
Staying Informed
Regular Updates from Reliable Sources
Staying informed is key in any emergency situation. I’m a big fan of technology, and you bet I have notifications from weather channels, local news, and emergency management agencies. It just makes sense. Knowledge is kinda like a shield; it protects you when things go sideways.
Make it a habit to check in regularly. For instance, during hurricane season, I always stay posted on updates. Even if nothing seems to be brewing on the radar, you never know what’s coming! Having a solid grasp on what’s happening around you can save your hide.
Plus, sharing this info with your neighbors or family adds an extra layer of community preparedness. The more connected we are, the stronger we become!
Utilizing Technology and Apps
One of my favorite parts about staying informed is using technology. There are tons of apps designed just for emergencies, from weather apps to local alert systems. They’re super intuitive and quite handy! Personally, I find them invaluable when I’m out and about.
Using tech can make it easier to communicate with loved ones during an emergency. A simple text can save panic and misunderstandings while keeping everyone in the loop.
And let’s be honest, who doesn’t love a little gadget action? I’ve got my emergency kit set up with a portable phone charger, so I’ll always have a way to get information, even if the power goes out. It’s like being a superhero in your own right!
Building a Community Emergency Network
Finally, building a community network is so important. Knowing your neighbors and figuring out a plan together can be a lifesaver. When I moved into my neighborhood, I reached out to some of the folks nearby to get on the same page. We even organized a little community meeting to discuss emergency plans!
By pooling resources and information, we learned about specific risks in our area and how to address them. It turned our short, “hello” exchanges into solid relationships built on collaboration and support.
Having that bond can make the toughest situations feel just a tad easier to manage. Plus, it’s nice to know you’ve got people looking out for each other when chaos strikes.
Conclusion
So, is it important to prepare for different types of emergencies? 100% yes! The preparedness journey is all about understanding risks, planning, staying informed, and creating that vital network around us. Honestly, it’s worth the time and effort.
Take it from me, when I implemented these steps, I could feel the weight lift off my shoulders. You’ll sleep much better knowing you’re ready for whatever life throws at you!
FAQ
1. What should I include in my emergency kit?
Your emergency kit should include water, non-perishable food, a flashlight, batteries, a first aid kit, important documents, and any medications you need. Don’t forget snacks for mental peace!
2. Why is it crucial to understand different types of emergencies?
Understanding different types of emergencies helps tailor your preparations to your specific situation. Each emergency requires a unique approach, so knowledge is key!
3. How often should I practice my emergency plan?
I recommend practicing your emergency plan at least twice a year. That way, everyone stays sharp and knows what to do when the time comes.
4. What are some resources for staying informed about emergencies?
Check local news stations, emergency management websites, and download apps focused on weather alerts or emergency notifications. Stay connected!
5. How can I involve my community in emergency planning?
Start by reaching out to your neighbors or organizing community meetings. Share resources and create a shared emergency plan to strengthen your network.


