by Preparation | Mar 12, 2025 | Preparedness
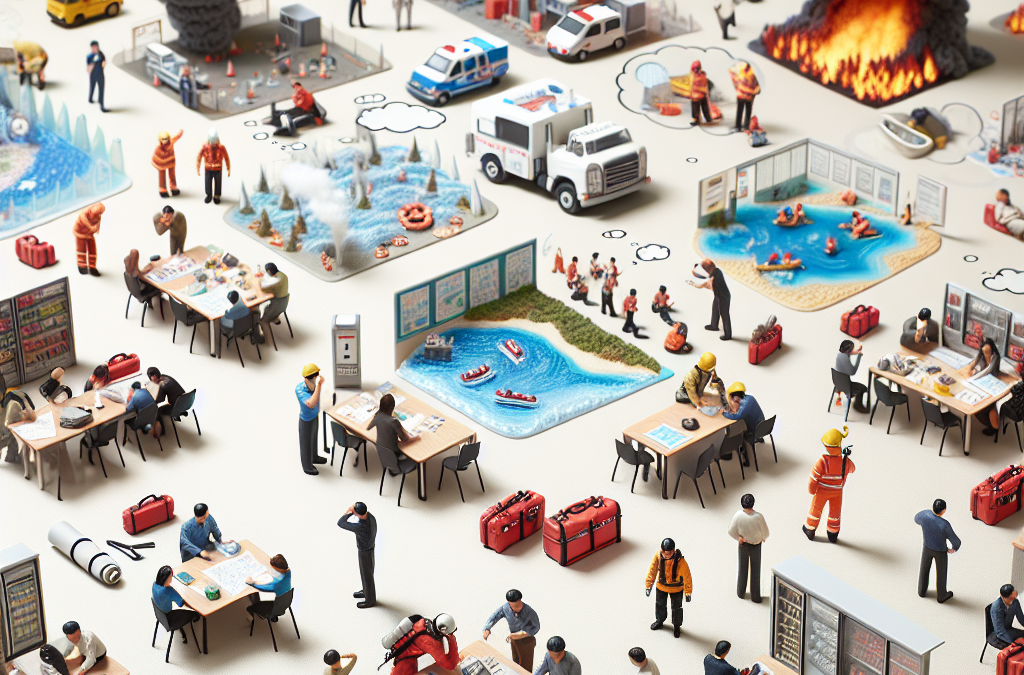
Understanding Different Types of Emergencies
Defining Emergencies
Alright, let’s start with the basics: what exactly qualifies as an emergency? We’ve all seen those crazy disaster movies where chaos ensues, but in real life, emergencies can range from natural disasters like hurricanes and earthquakes to personal crises like medical emergencies.
Each type of emergency has its own characteristics, and understanding these can help you prepare effectively. For example, a natural disaster might require you to think about physical supplies, while a personal emergency might need medical knowledge or contacts ready to go.
Recognizing the different types of emergencies out there is crucial if you want to get ahead of the game. It’s like doing your homework before a test—knowledge really is power!
The Impact of Emergencies
You know, the impact of not being prepared can be staggering. Imagine waking up in the middle of a storm without a flashlight or food! The feeling of panic can be overwhelming. From my personal experience, a buddy of mine was caught in a flash flood because he didn’t think to check weather alerts. Trust me, you don’t want to be that person.
Emergencies can disrupt everyday life, leading to losses—of property, health, and even lives. This is why understanding emergencies is so crucial; when you know what could hit, you can strategize and mitigate those risks.
So, take it from me, taking the time to assess your specific region, lifestyle, and possible emergencies is a smart move that can save not just your sanity, but possibly your life.
How Preparedness Influences Outcomes
Here’s the scoop: preparedness can literally change the game. When I was super prepared for a hurricane last year, I felt an inexplicable sense of control. I had supplies stocked up, a plan in place, and even a fancy little evacuation route laid out!
The most interesting part? The people who weren’t prepared were running around, panicking. They were scrambling for last-minute supplies—grabbing whatever they could find at stores with empty shelves. It was sheer madness! On the other hand, my friends and I were comfortably watching movies while the storm raged outside because we had our act together.
So yeah, being prepared not only makes YOU feel better but can positively influence those around you. When you’re calm, that calmness can spread to your family or neighbors, creating a more organized environment during chaotic times.
Creating a Preparedness Plan
Identifying Your Needs
So, let’s chat about putting together a preparedness plan. First things first—know your needs! This varies from family to family and even person to person. For me, I’ve got kids, pets, and a couple of family members who have special needs. Each of those factors means my plan will look different than a single friend’s.
Think about your lifestyle. Do you live in an area prone to certain natural disasters, or are you more likely to face medical emergencies? Tailor your strategies based on these risks to best fit your situation.
Once you figure out your needs, everything else starts to fall into place. It’s like building a house; you wouldn’t try to put up walls without first laying a solid foundation!
Building an Emergency Kit
Next on the list is crafting that all-important emergency kit. Trust me, having one will save a ton of headaches down the line. Start by gathering essentials like water, non-perishable food, first aid supplies, and flashlights. I like to throw in some comforting snacks too—like chocolate—it’s all about mental peace, right?
Also, don’t forget those crucial documents! Keep copies of your ID, insurance information, and anything else vital stored somewhere water-proof and easily accessible. Those will be game changers if you have to evacuate.
Just a little tip from my own experience: every few months, check your kit. I found out the hard way that my canned goods had expired (oops). Staying on top of this prevents any nasty surprises when it’s crunch time!
Practicing Your Plan
Now that you’ve got a plan and a kit, it’s time to practice. Drills might sound a bit over the top, but trust me, they are super beneficial. They help everyone know what’s expected during real emergencies. I like to involve my family in these drills. It’s not just about seriousness; we try to make it a fun routine so that everyone’s on board and knows their roles.
During our last fire drill, I made everyone race to the “safe spot”. Gotta say, seeing my kids take it seriously while still having a blast was pretty awesome! Plus, knowing that they can react calmly in a real emergency makes my heart feel just a bit lighter.
Remember, practicing makes perfect, and it comes in handy when adrenaline is pumping during a real incident. You’ll be the household hero when everyone else is freaking out!
Staying Informed
Regular Updates from Reliable Sources
Staying informed is key in any emergency situation. I’m a big fan of technology, and you bet I have notifications from weather channels, local news, and emergency management agencies. It just makes sense. Knowledge is kinda like a shield; it protects you when things go sideways.
Make it a habit to check in regularly. For instance, during hurricane season, I always stay posted on updates. Even if nothing seems to be brewing on the radar, you never know what’s coming! Having a solid grasp on what’s happening around you can save your hide.
Plus, sharing this info with your neighbors or family adds an extra layer of community preparedness. The more connected we are, the stronger we become!
Utilizing Technology and Apps
One of my favorite parts about staying informed is using technology. There are tons of apps designed just for emergencies, from weather apps to local alert systems. They’re super intuitive and quite handy! Personally, I find them invaluable when I’m out and about.
Using tech can make it easier to communicate with loved ones during an emergency. A simple text can save panic and misunderstandings while keeping everyone in the loop.
And let’s be honest, who doesn’t love a little gadget action? I’ve got my emergency kit set up with a portable phone charger, so I’ll always have a way to get information, even if the power goes out. It’s like being a superhero in your own right!
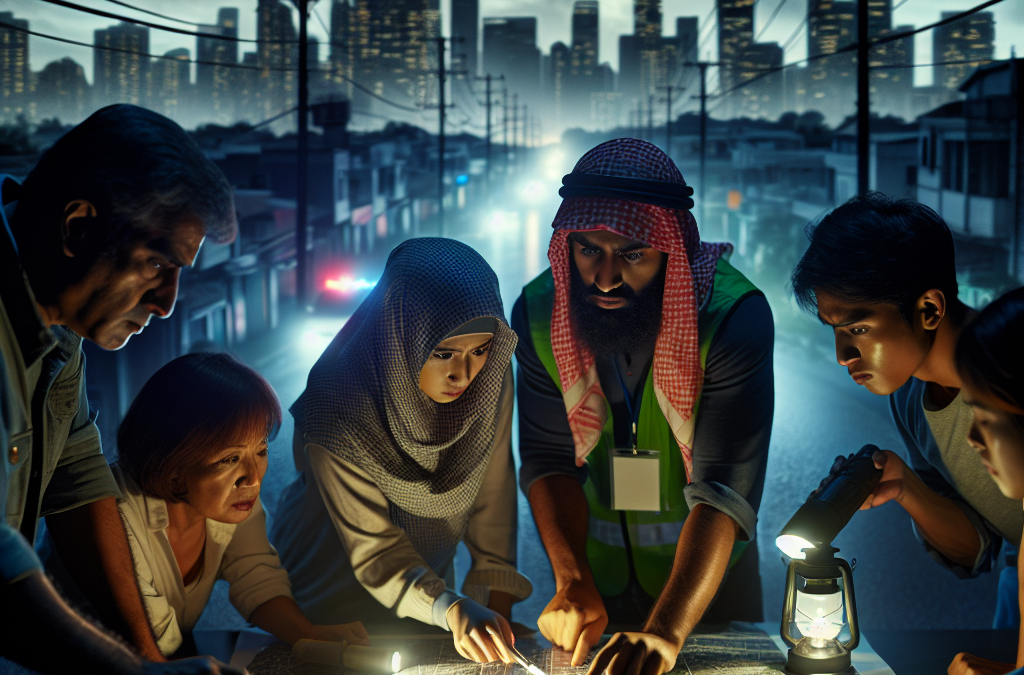
Building a Community Emergency Network
Finally, building a community network is so important. Knowing your neighbors and figuring out a plan together can be a lifesaver. When I moved into my neighborhood, I reached out to some of the folks nearby to get on the same page. We even organized a little community meeting to discuss emergency plans!
By pooling resources and information, we learned about specific risks in our area and how to address them. It turned our short, “hello” exchanges into solid relationships built on collaboration and support.
Having that bond can make the toughest situations feel just a tad easier to manage. Plus, it’s nice to know you’ve got people looking out for each other when chaos strikes.
Conclusion
So, is it important to prepare for different types of emergencies? 100% yes! The preparedness journey is all about understanding risks, planning, staying informed, and creating that vital network around us. Honestly, it’s worth the time and effort.
Take it from me, when I implemented these steps, I could feel the weight lift off my shoulders. You’ll sleep much better knowing you’re ready for whatever life throws at you!
FAQ
1. What should I include in my emergency kit?
Your emergency kit should include water, non-perishable food, a flashlight, batteries, a first aid kit, important documents, and any medications you need. Don’t forget snacks for mental peace!
2. Why is it crucial to understand different types of emergencies?
Understanding different types of emergencies helps tailor your preparations to your specific situation. Each emergency requires a unique approach, so knowledge is key!
3. How often should I practice my emergency plan?
I recommend practicing your emergency plan at least twice a year. That way, everyone stays sharp and knows what to do when the time comes.
4. What are some resources for staying informed about emergencies?
Check local news stations, emergency management websites, and download apps focused on weather alerts or emergency notifications. Stay connected!
5. How can I involve my community in emergency planning?
Start by reaching out to your neighbors or organizing community meetings. Share resources and create a shared emergency plan to strengthen your network.
by Preparation | Mar 12, 2025 | Preparedness
1. Sustainability in Crisis
Reliability and Consistency
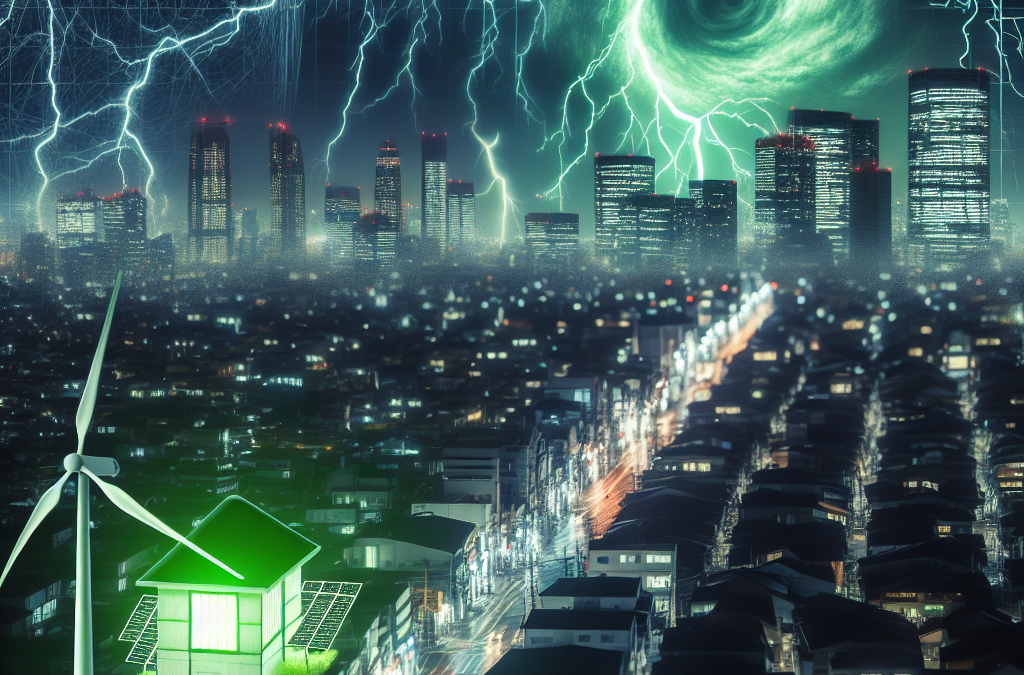
From my experiences, one of the first things I’ve noticed during emergencies is the unpredictability of our existing energy systems. Whether it’s a natural disaster like a hurricane or human-made glitches, traditional energy sources falter. Renewable energy, on the other hand, is often more reliable. It relies on natural elements like sun and wind, which are pretty consistent, even when the grid is down. During my time volunteering post-disaster, we found that solar energy systems can be set up relatively quickly and provide immediate help.
This consistency means that when the weather gets rough, those with renewable energy sources can maintain some level of normalcy. In the chaos that ensues during emergencies, having dependable energy isn’t just a luxury; it’s essential for survival. In one scenario I remember, a community set up portable solar chargers, allowing people to keep their cell phones powered, making communication possible.
Taking this approach not only keeps essential services running but also boosts the morale of affected communities, especially when they see a little normalcy during tough times. You really can’t put a price tag on reliable energy when everything else around you feels uncertain.
Reducing Dependence on Fossil Fuels
In my journey, I’ve made it a personal mission to reduce reliance on fossil fuels. This choice becomes even more pronounced in emergency situations. Fossil fuel disruptions during crises can lead to shortages, and the last thing we need is to be fighting for limited resources when chaos reigns. When we can harness renewables, this worry dissipates slightly.
Empowering communities to leverage solar panels or wind turbines during emergencies eliminates that dependence entirely. It’s liberating! Seeing neighborhoods come together to create their energy solutions is one of the most inspiring sights. It fosters a sense of unity and resilience that helps everyone get through challenging circumstances.
Plus, thinking long-term, this shift fosters a culture of sustainability. If communities adopt renewables during tough times, they might stick with those practices afterward, creating an invigorated focus on energy independence. It’s like planting a seed during a storm; that seed grows stronger in sunnier days.
Community Empowerment
Another takeaway I’ve had is the empowerment of communities through renewable energy. During emergencies, it’s not just about having energy; it’s about ensuring that communities can look after themselves. I’ve seen how installing local renewable energy systems can provide not just power but also a sense of control over one’s situation.
When a community can tap into wind or solar power, they build resilience. I remember during a recent disaster response, a group of volunteers worked with locals to set up small wind turbines. Watching their faces light up with pride when they successfully generated their first kilowatt of energy was priceless. It’s those moments that I cherish.
The knowledge and experience gained by these communities—from setting up systems to maintaining them—fosters a sense of ownership. Such experiences build confidence, and during challenging times, having that can make a world of difference.
2. Flexibility and Adaptability
Modularity of Renewable Systems
One of the coolest things I’ve realized is how versatile renewable energy systems can be. They can be scaled up or down depending on the immediate needs. Whether it’s a small solar panel on a home or a larger community setup, there’s flexibility in design that can adapt to various circumstances. I’ve seen neighborhoods rally together to install community solar frameworks that let them generate and share power.
This modularity becomes crucial in emergencies. For instance, when I helped set up energy stations in a disaster-hit area, we used portable solar generators, which could provide power to several homes or a community center seamlessly. It was efficient, and more importantly, it was tailored to the needs on the ground.
Taking that flexibility a step further allows communities to recover quicker and more effectively. Instead of relying on one massive energy plant, you have dozens of small solutions spread throughout, minimizing risk and maximally doodling collaborative efforts. I cherish these experiences of innovation and problem-solving.
Rapid Deployment and Setup
When an emergency hits, time is of the essence. From my experience in emergency management, every moment counts, and waiting for traditional energy restoration can be tedious. Renewable energy systems, particularly solar technologies, can be deployed rather quickly. In my various endeavors, I’ve witnessed how quickly solar panels can pop up and begin generating power.
During one particular endeavor, we saw rooftops outfitted with solar panels within a week of a disaster striking. People were back in business quicker than they expected. That rapid response isn’t just about convenience; it’s about survival. Having power means you have communications, security, and the ability to offer medical services, all crucial during emergencies.
Being able to mobilize these resources immediately gives communities the tactical edge they need to regroup and respond effectively. In an age where every second can make a difference, that rapid deployment can save lives.
Educational Opportunities
Last but certainly not least, the situations surrounding emergencies offer an incredible educational platform. When I’ve been involved in renewable energy projects, we not only provided power but also educated communities. These learnings aren’t just theoretical; they’re practical skills that can be applied immediately.
I’ve found that hands-on training—like setting up solar panels or basic maintenance—teaches individuals invaluable skills. Once this knowledge is shared, it empowers them for the future. In times of crisis, these lessons can also breed innovation. It’s incredible to see people’s creativity when they need to solve energy issues with limited resources.
Moreover, the educational component fosters community togetherness. Sharing knowledge about renewable energy creates a collective understanding that promotes planning for future emergencies and an ongoing commitment to sustainability. It’s like giving a fish and teaching how to fish. The latter is far more powerful in ensuring long-term recovery.
3. Environmental Benefits
Reduction of Carbon Footprint
One of the best things about renewable energy that I’ve come to love is its minimal environmental impact. In emergencies, the last thing we want to do is add to the problem by relying on fossil-fuel-based energy. I’ve seen firsthand how communities that embrace clean energy can significantly reduce their collective carbon footprint.
When people understand that they can generate power in an eco-friendly manner, it makes a tangible difference. During instances where coal or gas plants couldn’t operate, communities that had implemented wind or solar systems carried on with negligible emissions. Their contributions to reducing greenhouse gas emissions during critical moments showcased how necessary these technologies are, not just in emergencies but also in everyday life.
In the long run, mitigating climate change through renewable energy will improve our resilience against future disasters. That bigger picture is what keeps me excited when discussing renewable solutions during crises. It’s not a one-time fix; it’s a lifestyle adjustment toward a more sustainable future.
Preservation of Natural Resources
Using renewable energy in emergency situations plays a vital role in preserving our planet’s resources. I’ve seen neighbors come together to utilize solar energy instead of running diesel generators. This not only relieved stress on local supplies but also helped conserve vital resources for future use.
The experiences I’ve had taught me that protecting our water supply and natural ecosystems is just as critical during disasters. By depending on renewable technologies, we minimize our reliance on resource-draining methods and allow nature to replenish itself. The positive ripple effects can be felt long after the crisis ends, and communities foster a connection with the environment.
This preservation pays dividends in resiliency, as it means we’re not just building back; we’re building smarter and more sustainably. It inspires future generations to care for the planet and provides a framework for tackling upcoming challenges together.
Long-term Community Health
Lastly, in all my observations, shifting to renewable energy sources positively impacts community health. The air quality improves significantly when we step away from fossil fuels—something that clearly benefits individuals’ health over time. During one community recovery event where solar power was a prominent energy source, healthcare workers reported fewer respiratory issues among residents.
Energy solutions play a huge role in mental health, too. When the lights come back on and homes are filled with energy again, it brings a sense of normalcy. That’s crucial for stability during time of distress. In the emergencies I’ve seen, communities that used clean energy often showed a greater level of healing and adaptation.
Promoting renewable energy in emergencies not only safeguards the environment but also breeds health-conscious communities ready to tackle any challenges ahead. Establishing this culture of renewable practices helps ensure that energy isn’t merely an item on a checklist but a crucial part of our lifestyle and well-being.
FAQ
1. Why is renewable energy important in emergencies?
Renewable energy is crucial during emergencies because it provides reliable power when traditional energy sources fail. It enables communities to bounce back quicker and maintain essential services.
2. How does using renewable energy reduce dependence on fossil fuels?
By deploying solar, wind, and other renewable sources, communities can generate their power rather than relying on limited fossil fuel supplies, especially during crises.
3. What role does community education play in renewable energy efforts?
Education empowers individuals to take control of their energy solutions. Skills learned during emergencies can lead to long-term sustainable practices in the community.
4. How do renewable energy sources benefit the environment during emergencies?
Using renewable energy reduces emissions and helps preserve natural resources, which is essential for community health and ecological stability during crises.
5. Can renewable energy solutions be deployed quickly during disasters?
Yes! Renewable energy systems can often be set up rapidly, helping communities regain power and services immediately after an emergency hits.
by Preparation | Mar 12, 2025 | Preparedness
Understanding the Risks of Weather-related Disasters
Types of Weather Disasters
First off, let’s talk about what we’re dealing with here. Weather-related disasters can come in many forms. From hurricanes and tornadoes to floods and blizzards, each carries its own risks. Living in a place prone to one or more of these can be quite an eye-opener. Rusty old me used to think, “It won’t happen to me,” until it did!
Understanding the types of weather disasters that can affect your area is crucial. This knowledge shapes not just your preparations but also your mindset. For example, if you live in a hurricane zone, you need to stock up differently than if you were in a place known for heavy snow. Beach towels don’t help when you’re trying to dig your car out of three feet of snow!
Equipping ourselves with this info prepares us better. I remember scanning through government websites and local news—sometimes, it’s about what you can find within your community. Forecasts and alerts can become your best friends if you know how to interpret them!
Creating an Emergency Kit
What to Include in Your Kit
Now, let’s get practical and discuss an emergency kit. You want this puppy ready to go in case of a disaster. So what do you toss in there? I like to think about the essentials—water, non-perishable snacks, a flashlight, and a first-aid kit. These little things can make a massive difference when the chips are down.
Don’t forget personal documents—insurance info, IDs, etc. I learned the hard way about keeping copies of important papers. You just never know when you might need them, and trust me, scrambling around to find them post-disaster isn’t the time to be searching!
And for those of you with pets, don’t leave them out of the mix! Fido needs food and a cozy blanket to curl up with too. Preparing for the whole family helps ease anxiety, and let’s face it, pets can get anxious just like us when the winds start howling!
Staying Informed
Weather Alerts and Updates
This part might sound boring, but staying informed is KEY. I can’t stress this enough! You need to sign up for local weather alerts. Honestly, I have my phone buzzing whenever there’s severe weather in my area, and it’s saved my skin more than once—literally!
Watching local news or following your area’s meteorologist on social media can also be a game-changer. They provide real-time updates that national platforms might miss. Make it a routine to check the forecasts for the week ahead—you’ll be the friend who knows what’s up!
And don’t shy away from using apps! Weather apps are super handy for tracking storms and alerts on the go. I make it a point to keep mine updated and check them regularly. A little vigilance goes a long way when nature has other plans!
Planning Your Evacuation Routes
Knowing When to Evacuate
If things go south, knowing when to evacuate can be a lifesaver. The thing is, sometimes it can be a race against time! Keeping an ear to the ground (or, you know, your weather app) when storms are brewing helps you make that decision. I often ask myself, “Is it worth it?”
When disaster strikes, confusion reigns! Planning your escape strategy beforehand relieves some of that panic. Map out the routes, check local guidelines, and have a plan B in mind. You’d be surprised by how many people just assume they’ll figure it out on the fly. Trust me; that extra prep will save you from some serious headaches later!
Also, coordinate with your family. We have a little group chat where everyone knows the exit routes and meeting points in case we’re separated. Communication is key in these scenarios, and it’s better to be safe than sorry!
Recovering After a Disaster
Assessing Damage and Resources
Okay, so the storm’s passed. Now what? Recovery can be a hell of a process. First things first: make sure you and your family are safe. Check for any immediate hazards before you go poking around. I always take my time and gather my thoughts before diving back in—the last thing you want is to get injured when you’re already stressed!
After ensuring safety, assessing the damage comes next. It’s crucial to document everything—photos, videos, lists of what was lost. This will help your insurance claims later. I’ve been through the wringer with claims, and trust me, keeping organized makes a world of difference!
Lastly, don’t hesitate to tap into community resources! Local organizations often step up to provide aid, whether it’s food, shelter, or emotional support. I remember attending a local community meeting post-disaster; seeing everyone rally together is what healed not just our homes, but our spirits too!
FAQ
1. How often should I check my emergency kit?
It’s best to check your emergency kit every six months. Make sure items like food, water, and batteries are fresh or replace them as needed. Keeping it up-to-date is crucial!
2. What items are often overlooked in emergency kits?
People often forget personal documents, prescription medications, and pet supplies. Don’t let these slip through the cracks—make a comprehensive list!
3. How can I stay informed about severe weather?
Sign up for local weather alerts on your phone, watch local news, and use weather apps. Staying proactive will keep you informed of any changes in your area.
4. What should I do immediately after a disaster?
Take immediate stock of your surroundings for safety, document any damages, and check in with family. Always prioritize safety before assessing the wreckage.
5. Is it better to evacuate or stay during a storm?
It depends on the severity of the storm and the advice of local authorities. If they issue an evacuation order, it’s generally best to heed that warning and leave!
by Preparation | Mar 12, 2025 | Preparedness
Improvised First Aid Supplies
Bandaging Cuts and Scrapes
We’ve all been there, right? A little kitchen accident can quickly turn a fun cooking session into a mini-crisis. That’s when I discovered that clean kitchen towels make excellent makeshift bandages. Just remember to fold them to make them thicker and tie them off after applying pressure to the wound. If you’ve got a little duct tape lying around, it can work wonders to hold your makeshift bandage in place!
Another great item you might overlook is that old T-shirt you’ve been meaning to toss out. Cut it into strips, and voilà – you’ve got yourself a fashionably practical bandage! Not only is it absorbent, but it’s also soft against the skin, which is a win-win in my book. Just be sure to clean the wound first with whatever clean water you have on hand.
If the cut is a bit deeper and you need to create a more secure dressing, you can use plastic wrap to cover the area before wrapping it with the T-shirt strips. The plastic acts as a barrier against bacteria, and that’s key in keeping infections at bay until you can access proper medical attention.
Using Ice and Heat Packs
A sprain or strain during a hike can really put a damper on things. For quick relief, I’ve learned to fill a Ziploc bag with ice cubes or frozen veggies from the freezer. Honestly, next time I’m in a pinch, I might just grab that bag of peas! It’s not just cool; it’ll really help with reducing the swelling. Just wrap the bag in a towel before applying it to the affected area. We don’t want frostbite on top of the injury!
Now, if your pesky pain needs some warmth instead, a rice sock does the trick beautifully. Fill a clean sock with uncooked rice, tie it off, and pop it in the microwave for about 30 seconds. Bingo, you have an instant heat pack for those achy muscles. The rice holds heat really well and contours to whatever body part you’re soothing.
Keep in mind that both ice and heat should be used thoughtfully. Always take breaks in-between applications, maybe 20 minutes on, followed by a similar break, to give your body a chance to heal without too much shock or irritation.
Cleaning Wounds with Household Products
In case of minor cuts and scrapes, I’ve discovered that most of us have hydrogen peroxide hiding in our medicine cabinets. This is great for cleaning wounds, as it helps kill off bacteria. Just remember not to use it too often, as it can damage new skin cells. But in an emergency, it’s certainly better than leaving it uncleaned.
Now, if you run out of hydrogen peroxide, white vinegar can be a lifesaver. It’s a natural antiseptic! Just dab a little on a clean cloth and gently clean around the wound. I tend to follow this up with aloe vera from my houseplant, which can help soothe and promote healing. It’s an old trick I learned from my grandma.
Always remember to keep the area clean and dry while healing. Cover it with a clean bandage and change it regularly. Trust me, staying on top of this makes a world of difference in recovery time.
Homemade Fire Starters
Using Cardboard and Egg Cartons
If there’s one thing that has gotten me out of a tough spot while camping, it’s these homemade fire starters. Cut up cardboard and use it with empty egg cartons to create your own firestarter kits. Just pack the cardboard into each cup of the carton, then soak everything in a bit of melted wax or candle stubs. Trust me, this brilliant method will have a fire roaring in no time!
Once they’ve set, simply break off one of the compartments, place it under your kindling, and light it up. The egg carton holds everything together nicely, and the wax makes it burn longer, giving your kindling time to catch. It’s such a simple way to recycle and ensure you have a reliable fire starter ready at hand.
Plus, not to forget, this is a fantastic project to engage the kids in! They can have a blast decorating and filling up those egg cartons, prepping for future camping adventures or even chilly nights in the backyard.
Using Dryer Lint
You know when you’re cleaning out the dryer and thinking about all that lint going to waste? Don’t throw it out! Line a little container or baggie with dryer lint, and you’ve got another excellent fire starter. It lights quickly and burns hot, making it perfect when you’re in a bind.
To amp it up a notch, I’ve been known to soak that lint in used cooking oil for added longevity. Just stuff the oily lint into some old toilet paper rolls and seal one end with a piece of tape. When you need warmth, you just light the open end, and let it work its magic.
Remember, it’s not just for camping! These fire starters can come in handy for those chilly nights you want to have a fire in the backyard or even just to light up the fireplace indoors. Keep a few handy in your camping gear or emergency kit for quick access!
Using Pine Cones
Pine cones are my happy little fire-making friends. You can toss them right into the fire pit for extra flair, as they ignite splendidly. But wait, there’s more! You can enhance them by dipping them in wax for a slow-burning fire starter. Just like with the cardboard, make sure they’re thoroughly coated but not dripping wet.
For the best result, allow the wax-covered pine cones to harden in a cool spot before tossing them in your emergency gear. When you need a quick fire starter, just toss a few of these babies on the pile, and they’ll put on a show while everything else catches. Plus, they smell so good while they burn!
If you’re camping, collecting pine cones can double as a fun little nature scavenger hunt for kiddos while gathering supplies. Talk about making memories and being prepared at the same time!
Water Filtration Options
Use Coffee Filters for Clarity
Did you know that coffee filters can do more than just help you brew a good cup of joe? When in a pinch for clean drinking water, you can easily use a coffee filter to get rid of visible particles. Simply pour your water through the filter into a container, and voilà! You’ve got yourself clearer water.
Now, this won’t purify the water entirely, but it’s a great first step if you’re in a bind. Just be careful to always follow this up with boiling the water if you have the means to, or use purification tablets if you have them on hand. Safety first, right?
Another great tip? Layer multiple coffee filters for more effective filtration. The more, the merrier when it comes to debris! This simple idea can make your water much more palatable, especially when you’ve been out in the elements for a while.
DIY Sand Filter
If you’ve got a little time and access to some sand, gravel, and a clean container, you can make a simple sand filter! Start with a layer of clean gravel at the bottom of your container, then add a fine layer of sand on top. Lastly, put a coffee filter on top of the sand to catch the larger impurities.
When you pour unfiltered water in, gravity will do its thing, and the sand will catch smaller particles while letting you collect cleaner water below. It’s not quite as fun as making desserts, but it’s a substantial survival skill to have learned!
And remember, just like with the coffee filters, always boil or chemically treat the water afterward. This method is about getting the gunk out; we want to ensure we’re drinking safe water!
Using Activated Charcoal
If you have activated charcoal on hand, you’re in luck! This stuff can be used to purify water due to its porous nature, which traps impurities. If you’ve got a breathable fabric like cheesecloth, you can create a filter by placing activated charcoal in it and letting water drip through.
When setting this up, make sure to layer it well. The more charcoal, the better the filtration! Just remember, once again, this doesn’t guarantee safe drinking water unless you boil or chemically treat it afterward. It’s a great step toward making unfit water safer.
Don’t forget to store your activated charcoal properly; moisture can diminish its effectiveness. Consider stashing this stuff in your emergency kit along with those coffee filters – they’re the perfect team when it comes to ensuring safe hydration!
Home Cleaning Solutions
Vinegar for Disinfecting
When it comes to cleaning, vinegar has been my go-to for ages! In emergencies, whether it’s dealing with minor smells or surfaces that need disinfecting, vinegar is super effective and non-toxic. I often mix equal parts vinegar and water in a spray bottle and use it as an all-purpose cleaner.
This combo can do wonders on countertops, bathroom surfaces, and even fabrics (but be careful with colors, folks!). It’s a stellar natural disinfectant that keeps things clean without harsh chemicals. Plus, it’s affordable and typically already in most households!
And here’s a pro tip: If you’re dealing with mold, mixing vinegar with baking soda can create a powerful cleaning solution that not only cleans but helps to eliminate that pesky odor as well. Just be sure to rinse thoroughly afterward!
Baking Soda for Odor Control
Baking soda isn’t just for baking; it’s an absolute lifesaver when it comes to neutralizing odors! Whether it’s the fridge or your dog’s favorite spot in the house, I’ve sprinkled baking soda in those places to absorb unpleasant smells.
For carpets, I often mix it with a few drops of essential oil to make a gentle carpet powder. Just sprinkle it on, let it sit for a bit, and vacuum. Fresh-smelling rooms on a dime!
And let’s not forget its versatility when it comes to emergencies. It can also be a gentle abrasive for scrubbing surfaces, so I sometimes combine it with a splash of water to make a paste for cleaning tougher stains around the house.
Casting Out Bad Smells with Citrus
If you’ve got citrus fruits lying around, they can work wonders for freshening up your home in a heartbeat. What I love to do is take any leftover citrus peels and toss them in a pot of water on the stove. It becomes a lovely natural air freshener that fills the house with a pleasant aroma.
Beyond that, citrus cleaners can be made by combining peels with vinegar for a scrubbing solution. Just let the peels soak in vinegar for a couple of weeks and use it as you would with regular vinegar. It’s both delightful and effective!
So next time you’re slicing up an orange or a lemon, don’t toss those peels! Keep them aside for some nifty cleaning tricks that make your home smell oh-so-good.
Frequently Asked Questions
1. Can these household items actually work in emergencies?
Absolutely! Many household items can be repurposed effectively for emergency scenarios, and often they are more useful than we give them credit for. It’s all about knowing how to utilize them appropriately!
2. Are there any safety considerations to keep in mind?
Definitely! Always ensure that any items you use for first aid or cleaning are clean and suitable for the task. When dealing with food or body substances, hygiene is key. And for water purification, always boil or chemically treat any water that you aren’t 100% sure is safe!
3. How can I prepare my household for emergencies?
Start by creating an emergency kit stocked with basic household items, first aid supplies, and instructions on how to use them. This way, when emergencies arise, you’ll have your bases covered.
4. Can I use essential oils for cleaning during emergencies?
Yes! Essential oils can enhance cleaning solutions and provide pleasant scents. Just ensure they are safe for the surfaces you’re cleaning, and remember that some oils may not mix well with certain materials.
5. Is it suitable to use items like vinegar and baking soda around children?
Yes, both vinegar and baking soda are generally safe around children but should still be used with caution and supervision. Always store any cleaning products, even natural ones, out of reach of little ones!
by Preparation | Mar 12, 2025 | Preparedness
Preparation and Planning
Understanding Your Environment
When I first moved to the city, I quickly learned that power failures could strike at any moment, especially during storms. The first thing I did was to familiarize myself with my neighborhood’s infrastructure. Knowing whether you’re in a high-risk area for outages can save you a lot of headaches later on.
It’s super helpful to check out local news or community boards to see if there’s a pattern to power issues in your area. You’d be surprised how much information you can gather just from chatting with your neighbors who have been around longer!
This understanding will help you anticipate potential outages and prepare for them effectively. I’ve found that being proactive is much better than being reactive when the lights go out.
Creating a Smart Emergency Kit
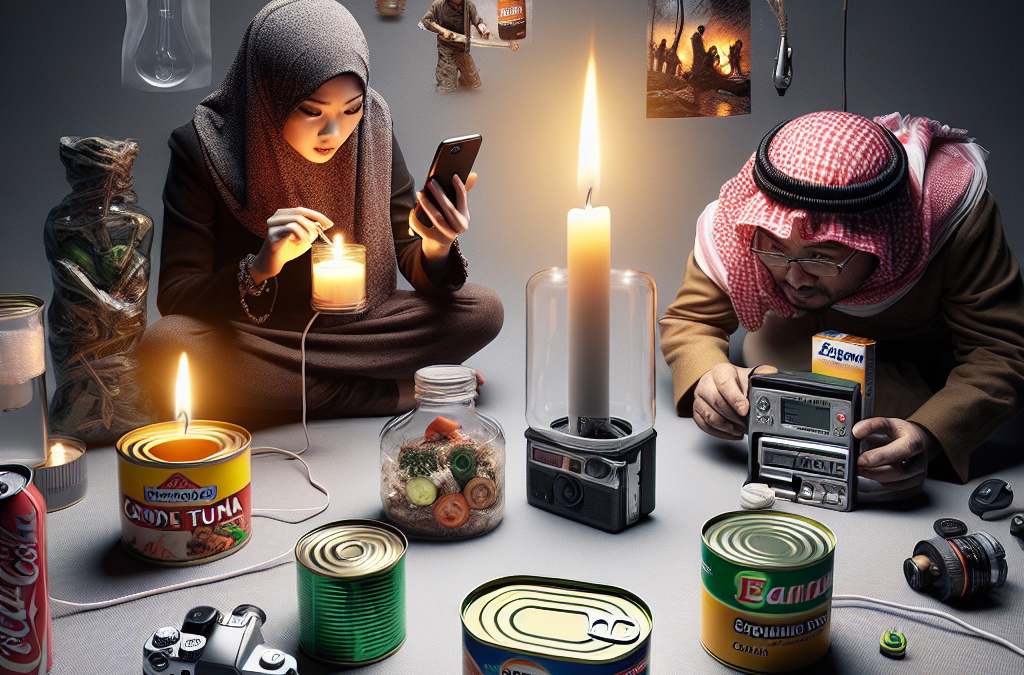
No one plans for a power failure, but having an emergency kit ready can make all the difference. I recommend starting with the basics: non-perishable food, bottled water, and a flashlight are must-haves. I keep an old backpack filled with supplies just in case.
Don’t forget your phone charger! Power banks are a lifesaver when the grid goes down. Also, think about including items like a first-aid kit and necessary medications—stuff you don’t want to be without if you’re stuck waiting for the power to come back on.
Make sure to check your kit regularly to replace expired items. It’s one of those things I often forget until it’s too late, but now I keep it on my seasonal checklist to stay ahead.
Communication Plans
Staying connected during an outage is crucial. I always make sure to have a list of important contacts saved in my phone and written down somewhere in my house too. Depending on your location, cell towers might be affected by outages, so having alternative methods of communication can be handy.
It’s also good to set a communication plan with your family or roommates. Decide on a meeting spot in case you get separated, and check in with each other often to make sure everyone’s alright.
Trust me, after experiencing my first power failure, I learned just how vital staying connected is when the lights go out. A little planning goes a long way!
Staying Calm During Outages
Emotional Management
Let’s face it: losing power can be incredibly frustrating, but panic doesn’t help anyone. In my personal experience, I’ve found that taking deep breaths and staying present can help alleviate some of that anxiety. Remember, it’s just temporary!
Try to distract yourself. Whether it’s reading a book (by candlelight if necessary), playing cards with friends, or just taking a stroll outside, staying busy can help ease the tension and pass the time.
Look for the silver lining! Sometimes an unexpected power failure can lead to an evening of laughter and stories with loved ones. Find joy in the moment, and everything will feel a bit lighter.
Resource Management
One of the biggest mistakes I’ve seen people make is to use all their resources too quickly. Conserving food and water should be a priority when you realize you’re in for the long haul. Remember, rationing is your best friend during these times.
I always keep a close eye on my battery levels for devices that matter. Limiting usage can mean the difference between staying connected or being completely cut off.
Sometimes, it may also be worth connecting with neighbors to share resources. I’ve had a great time trading snacks or lending a phone charger to neighbors—it creates a sense of community in tough times!
Safety First
When the lights go out, safety is paramount. I’ve learned the hard way that you should never light candles near flammable items or leave them unattended. Safety standards are key, especially during an emergency.
Keep flashlights handy and, if you have kids or pets, teach them about safety during power failures. Create a plan together that everyone understands, so no one panics.
Finally, make sure to invest in a good surge protector for when the power does come back on. I lost a few gadgets during a storm once, and now I always double-check my safety measures!
Post-Outage Recovery
Inspecting Your Equipment
Once the power is restored, checking all your electrical appliances is super important. You don’t want to trip a circuit with an overloaded system after a blackout. Trust me—I’ve had my struggles with that!
Reset any electronic devices that may go haywire during the outage. Things like microwaves and smart devices might need to be reset manually to get them back to functioning order.
Also, remember to keep an eye on any food that might have spoiled. A little inspection goes a long way in ensuring your household stays safe and healthy.
Reconnecting with Your Community
After a power failure, I always take the opportunity to reconnect with neighbors. Whether it’s sharing experiences or offering help, there’s something comforting about being part of a community that looks out for one another.
Organizing a neighborhood gathering to discuss how you all managed can create a support network for future outages. It’s nice to swap tips or just bond over some shared experiences.
Sometimes these connections can even lead to emergency preparedness groups that make future outages less stressful for everyone involved!
Reflecting and Learning
Every power failure comes with lessons learned. After each incident, I like to sit down and jot down what worked and what didn’t. This helps me strategize for next time.
Consider talking about what you learned with family and friends. Sharing knowledge not only helps you reinforce what you know, but you also might gain valuable insights from others’ experiences.
Above all, keep a positive attitude. Outages may be inconvenient, but with the right mindset, they can be opportunities for growth and connection!
FAQ
1. What should I include in my emergency kit for power failures?
Your emergency kit should have non-perishable food items, bottled water, a flashlight with extra batteries, a first-aid kit, necessary medications, a portable phone charger, and any other items specific to your household needs.
2. How can I stay updated during a power failure?
Communication can be tricky during outages, but it’s good to have a battery-operated radio or a charged power bank for your cell phone. Additionally, keeping emergency contact lists handy is vital.
3. What are some safety tips during a power outage?
Always be cautious with candles; never leave them unattended. Use flashlights instead for visibility, and ensure that food safety standards are adhered to, especially with perishables in the fridge.
4. How can I best accommodate my family during a power failure?
While it might be challenging, try establishing a communication plan with your family. Plan activities to keep everyone occupied and check in regularly to ease everyone’s minds.
5. What steps should I take once power is restored?
After power is restored, inspect your appliances for any damage, reset devices if needed, and check perishable food for spoilage. It’s also a good time to reflect on what you learned during the outage!
by Preparation | Mar 12, 2025 | Preparedness
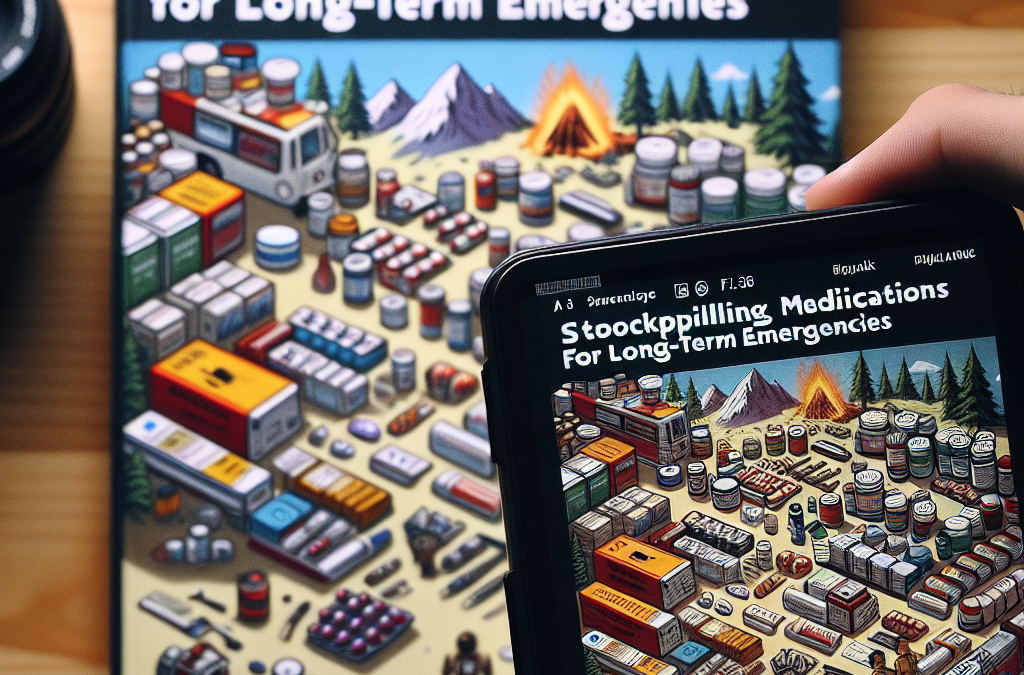
Understanding Your Medication Needs
Assess Your Current Medications
First things first, I’ve learned that it’s crucial to sit down and list all the medications currently being used in your household. This includes everything from prescription meds to over-the-counter staples like ibuprofen and allergy pills. Having a comprehensive list can save you from the dreaded panic when an emergency strikes.
Once you have your list, dive a little deeper and note down why each medication is needed. For instance, if someone in your family is managing chronic conditions like diabetes or asthma, you’ll want to ensure those essentials are prioritized when you start your stockpiling endeavors.
Also, remind yourself to check the expiration dates on your existing supply. It happens to all of us; medications can sit in cabinets and become outdated without us even realizing it. Keeping track can prevent wastage and ensure you’re always covered during unforeseen circumstances.
Consult with Healthcare Professionals
Next, do yourself a favor and chat with your healthcare providers. This tactic has proven invaluable for me. By discussing your stockpiling plans with your doctor, you can get their insights on which medications are truly essential for your health needs.
Additionally, don’t hesitate to ask about alternatives or generics. There are many effective medications available that may not drain your pocket as much. Finding reliable substitutes could provide you some peace of mind while accumulating your supplies.
And if your doctor thinks it’s necessary, they may be willing to prescribe a larger supply of critical medications. This is especially true for people with chronic health issues. Just explain your situation, and you might find them understanding and accommodating.
Recognizing Emergency Scenarios
It’s super important to understand the various scenarios that may lead to a shortage of medications. Natural disasters, pandemics, or even economic disruptions can all disrupt the ease of accessing prescriptions. Trust me, I’ve seen it happen, and it’s wise to be prepared.
Aside from just the obvious natural disasters, smaller-scale emergencies like a family member becoming unexpectedly sick can put a strain on your supply. Keeping this in mind, developing a broader understanding of potential scenarios can help you be better prepared.
Having an awareness of these emergencies can guide you in how much medication you choose to stockpile and how diverse your supplies should be. It’s not just about gathering what you think you need, but about prepping for the unexpected.
Building Your Stockpile Step by Step
Inventory and Organization
When setting out to create a stockpile, my first move is always to organize everything. I like to create a dedicated space at home where I can keep all my medications. Whether it’s an old cabinet or a designated shelf, having a specific spot makes retrieval and management way easier.
Alongside organization, I also create a rotating system to avoid expiration. This means arranging medications based on their expiry date, with the oldest upfront so that I can use those first. It’s a simple hack, but it genuinely helps keep everything fresh!
I’ll even label everything—it sounds super extra, but it really helps when you’re in a hurry. A quick glance can direct you to what you need and prevent any mix-ups in times of stress.
Where to Purchase Additional Supplies
Finding the right place to stock up on medications can be a game-changer. Personally, I prefer checking local pharmacies first. They often have memberships or discounts on bulk purchases that can really help save a few bucks in the long run. Plus, supporting local businesses always feels good!
Online pharmacies are another great option. I’ve found that you can often get prescriptions delivered right to your door, and many times they offer discounts for first-time customers. Just be sure to use a reputable site to avoid counterfeit medications—safety first!
Don’t overlook community health organizations either. They sometimes provide free or discounted medications, especially for those in need. Connecting with these organizations can not only help you build your supplies but also reinforce a sense of community, which is critical during trying times.
Monitoring and Rotation for Safe Storage
As I dive deeper into stockpiling, I’ve realized that simply gathering medications isn’t enough; proper storage is key. Make sure the area you’ve chosen is cool and dry. Storing medicines in heat or humidity can majorly decrease their effectiveness, and let’s be real, that’s not what we want!
Additionally, I keep a eye on expiration dates and rotate my stock regularly. It’s a good habit to check in every couple of months to make sure everything is still valid and to reorder what’s running low. I usually set a reminder on my phone—it’s really helpful!
Finally, always keep a log of what medications you have, their expiration dates, and when you purchased them. Creating a simple spreadsheet might seem tedious, but I promise it pays off when you’re in a pinch and can’t remember what you have on hand!
Know the Legalities of Stockpiling Medications
Understand Prescription Laws
One of the most crucial aspects of stockpiling is being aware of the legalities in your area regarding medication prescriptions. As someone who’s dabbled in this quite a bit, I can tell you that every state has its own set of laws. It’s essential to familiarize yourself with these regulations to avoid running into any trouble.
For instance, certain states limit the quantity of medication you can obtain at one time. Knowing if your state allows for 90-day prescriptions or if there are restrictions can make a big difference in how you plan your stockpiling.
And let’s not forget about controlled substances, too. Strict regulations often apply, so being knowledgeable about what medications fall under this category is vital. This way, you can prepare accordingly and advocate for yourself where needed.
Communicate with Your Pharmacist
Now, here’s a little insider tip: your pharmacist can be your best buddy in this stockpiling mission. They have the insight and knowledge regarding local laws and can help you navigate the tricky waters of obtaining your medications. Seriously, don’t underestimate the power of a good conversation!
Don’t shy away from asking questions about bulk ordering, generic alternatives, or their policy on refills. Building a relationship with your pharmacist can also result in them looking out for you when it comes to potential savings or available discounts.
Having an open dialogue can make your stockpiling efforts not only smoother but also more effective. You never know, they might even provide you with valuable tips regarding medications or stockpiling based on what they see in their daily practice!
Document Your Supplies and Prescriptions
As I mentioned before, keeping a proper log is crucial. Treat it like a checklist where you record each medication, the quantity, expiration dates, and any refill information. By doing this, you make your stockpile legible and manageable at a glance.
In addition to that, store all important prescriptions and paperwork in a safe place. God forbid you lose access to a critical medication; having documentation could make all the difference in getting a swift refill when you need it.
In times of crisis, you want to be well-informed and prepared. By putting your stockpiling plan on paper—and storing it safely—you’re likely to feel much calmer knowing that you have things organized and legible when it counts the most.
Simplifying Long-Term Stockpiling Storage
Choose the Right Containers
Not all containers are created equal! Trust me, after experimenting with various options, I’ve learned how crucial it is to pick the right storage for my stockpiled medications. Opt for opaque containers that protect medicines from light, and always ensure they are labeled clearly to avoid any confusion.
Air-tight containers also help protect your meds from moisture. I’ve found that just repurposing old tupperware isn’t the best option. Instead, find containers specifically designed for storing pharmaceuticals, which provide better protection.
Investing a small amount in quality storage can save you a lot of heartache down the road! Plus, it keeps everything looking neat and professional, making it easier for you—or anyone else—who might need to access the meds in a hurry.
Regular Maintenance Checks
Let’s be real; just because you set up your stockpile doesn’t mean you can forget about it! Regular maintenance checks are essential to ensure everything is still in good condition and within its expiration dates. Personally, I schedule a bi-monthly check where I go through my entire stockpile.
During these checks, I’ll look for anything that looks suspect or damaged. Medications stored improperly may become ineffective, so it’s crucial to assess everything periodically. Catching expired meds can help you rotate what you have, so you’re using the freshest options first.
Moreover, this routine helps reinforce the importance of being prepared. The more you engage with your stockpile, the more comfortable you’ll feel using it when that inevitable rainy day comes.
Creating a Strategic Use Plan
Having a plan set in place detailing how to utilize your stockpile is as important as gathering it in the first place. I’ve drafted a strategic use plan that outlines what medications I’ll tap into for specific scenarios. For example, chronic conditions, minor illnesses, and even injuries should have specific meds prioritized!
This plan not only saves time in emergencies but also helps to ensure that the right medications are taken at the right moments. A little planning goes a long way in a pinch, right?
And as always, make sure to keep each family member in the loop. Having everyone informed takes the burden off of any one person during an emergency and ensures that everyone knows where to find what they need when they need it.
FAQs
1. How often should I check my stockpile of medications?
It’s a good idea to do a thorough check of your stockpile every couple of months. This way, you can assess expiration dates and quantities to see if you need to reorder anything. Regular checks keep your stockpile fresh and ready for emergencies!
2. Can I stockpile medications without a prescription?
While you can stockpile over-the-counter medications without a prescription, prescription medications must be obtained through a healthcare provider. Consult your doctor about the possibility of larger prescriptions for chronic conditions to help build your stockpile.
3. What types of medications should I prioritize when stockpiling?
Focus on medications that you or your family members frequently use. Essential prescriptions for chronic illness should be at the top of your list. Additionally, consider pain relievers, allergy meds, and first-aid supplies as part of your broader stockpile.
4. How do I ensure my medications stay effective over time?
Storing your medications in a cool, dry place away from direct sunlight is crucial. Use air-tight, opaque containers to help keep moisture and light out, which can degrade the effectiveness of your medications over time.
5. What should I do with expired medications?
Do not just toss expired medications in the trash! Instead, take them to a pharmacy that offers medication take-back programs or follow local regulations for safe disposal. It helps keep the environment clean and safe.


