Select Page
Can I focus on preparedness without giving up comfort?

Can I focus on preparedness without giving up comfort?

When I first started thinking about preparedness, I wrestled with the idea of how to do it without completely sacrificing my comfort. I mean, let’s be real, who wants to trade in their cozy evenings for a life of dread and anxiety? After some trial and error and a fair bit of reflection, I distilled my thoughts into five key areas that help maintain that sweet balance. So, let’s dive in!

Mindset Shift

Understanding the Importance of Preparedness

First off, it’s crucial to realize that preparedness isn’t just about stockpiling supplies and building a bunker. It’s a mindset. For me, it was about shifting how I viewed potential emergencies or disruptions as opportunities to enhance my life quality. Embracing a proactive mindset really changed the game for me.

I began to see preparedness as an act of self-care rather than a burden. This perspective made it less daunting. Instead of thinking, “Oh no, I have to do this!” I switched to “Wow, this is going to make my life easier!” That simple change sparked my interest and made it enjoyable.

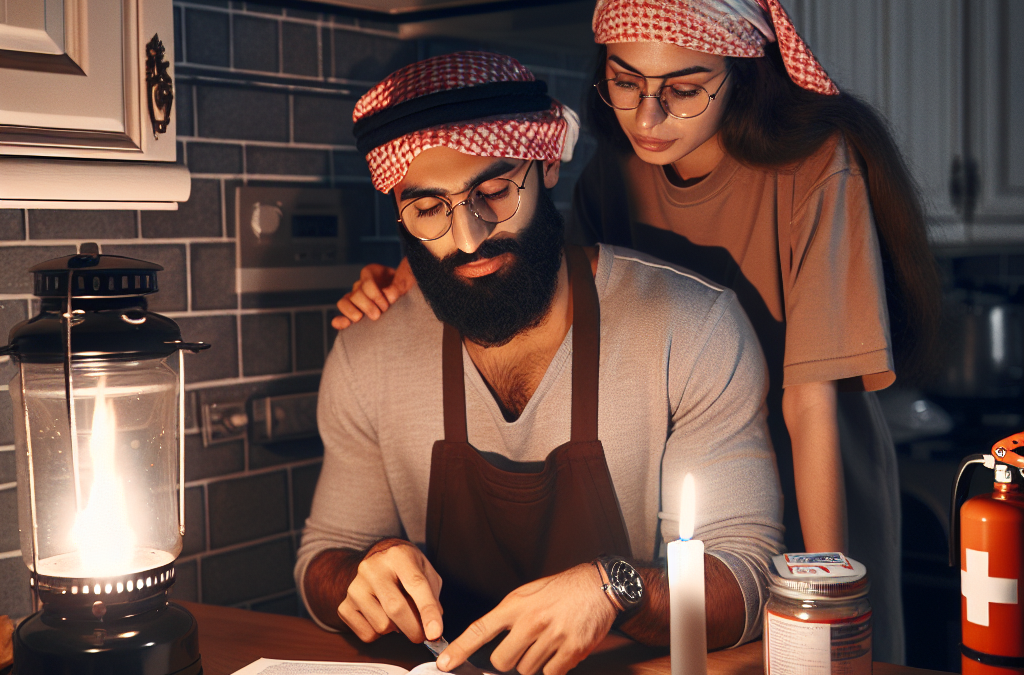
Moreover, with this mindset, I started incorporating small preparedness steps into my daily routine. For example, I began keeping extra batteries in my kitchen drawer. It’s a small step that promotes comfort since it saved me from frantic searches. Trust me, these little wins make all the difference.

Creating a Comfort-first Approach

What really helped me was figuring out how to blend preparedness with the things I love. Instead of treating it like a chore, I made it fun. Think about it: preparing for emergencies or tough times doesn’t have to suck the joy out of life.

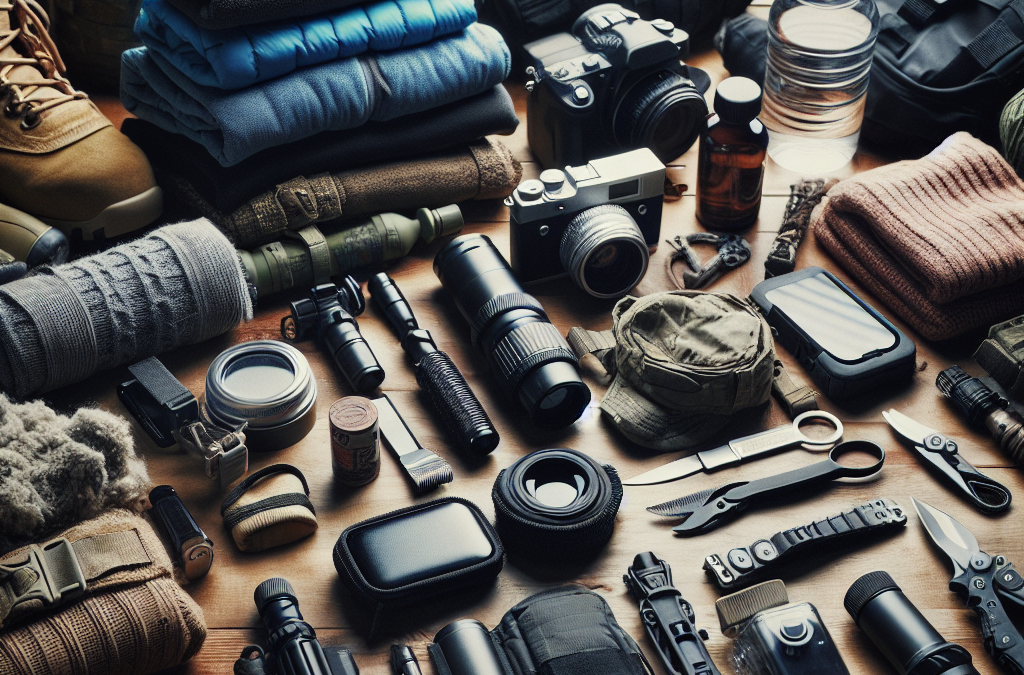
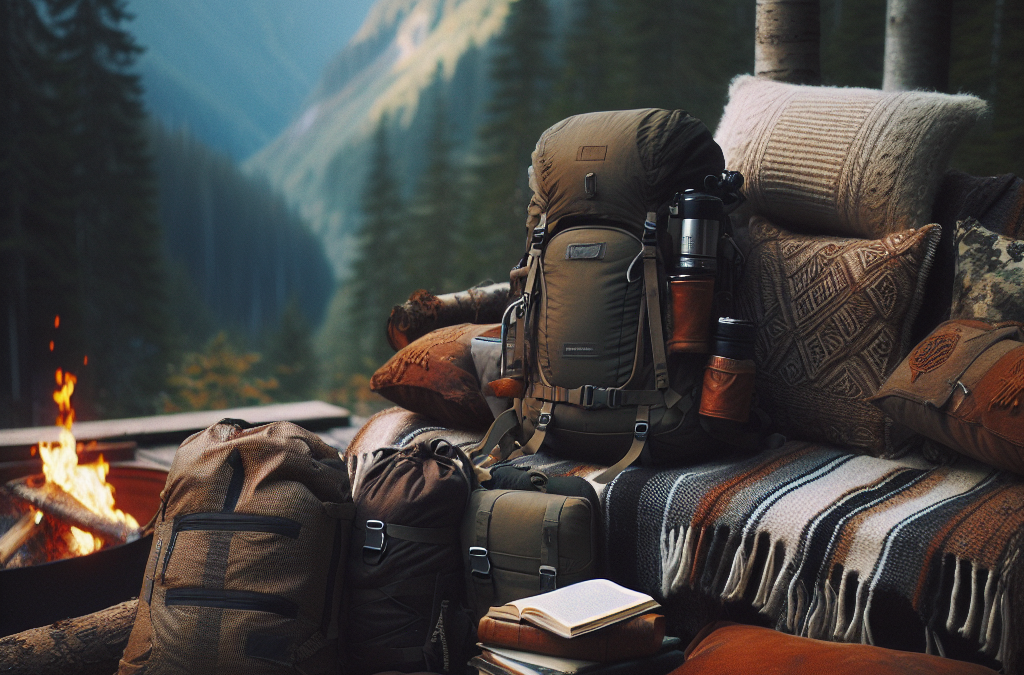
For instance, I started to buy multipurpose tools that could help with daily tasks while also being useful in emergencies. A good Swiss Army knife became my best friend! It’s handy for everything from camping trips to mundane kitchen tasks, showing me that preparedness can be integrated seamlessly into my lifestyle.

Additionally, I began involving family and friends in the process. We turned emergency drills into game nights. The laughter and fun we shared made the necessity of emergency preparedness feel less like a burden and more like an enriching experience.

Setting Realistic Goals

In my journey, setting realistic, attainable preparedness goals was key. I realized that I didn’t have to do everything at once. Instead of trying to take on the world, I started with one small goal at a time, like ensuring that I had a three-day emergency kit somewhere handy.

Once I tackled one goal, I would celebrate that success, which kept my motivation high. I found it empowering to see progress without feeling like I was sacrificing too much of my comfort or time. Ten minutes each week felt doable and transformed into an effective strategy for preparedness.

By keeping my goals realistic, I could maintain my comfort while steadily preparing for anything that might come my way. It’s an ongoing journey, but it’s one that keeps evolving without sacrificing the cozy things in life.

Smart Shopping Strategies

Quality over Quantity

One of my biggest revelations was focusing on quality rather than just buying everything bulking up my supplies. I learned this the hard way after investing in cheap supplies that broke down when I actually needed them. It was a lesson learned!

I started putting my money towards high-quality, reliable items that would last longer and serve multiple purposes. For example, I swapped out my flimsy canned foods for nutrient-dense, versatile options. That way, I felt good about my choice and knew I’d actually be eating well if the time ever came.

It’s become something of a hobby for me, researching and investing in quality products. Not only are these items built to last, but they also often come in stylish packaging, making them look great on a shelf – no more hiding everything under the bed!

Utilizing Discounts and Sales

Trust me, I love a good deal as much as anyone. I started keeping an eye on seasonal sales and discounts. For food storage, I’ve learned to buy in bulk when items are on sale—grain, canned goods, even first aid supplies are much cheaper when you catch a deal!

Also, subscribing to newsletters from my favorite outdoor and preparedness stores keeps me in the loop about sales. I’ve scored some excellent items at steep discounts by staying informed. It makes prepping for the unexpected a bit easier on the wallet.

Utilizing these smart shopping strategies has allowed me to build my emergency supplies without busting the bank, ultimately preserving my overall comfort in my day-to-day spending.

Prioritizing Sustainability

Lastly, embracing sustainability has been a game-changer. Environmental consciousness melded perfectly with my preparedness journey. I began investing in reusable products and sustainable options, which not only help in emergencies but also promote a healthier lifestyle.

For instance, I swapped out single-use plastics for glass containers for food storage. It’s comforting to know that I’m making a choice that’s good for the planet while also preparing myself for any situation. Plus, it feels great to draw from my stash knowing I’m also contributing to sustainability!

This commitment to sustainability in my prepping has brought an added layer of comfort, knowing every choice I make is beneficial for both myself and the environment, making my prepping journey much more fulfilling.

Planning Engaging Activities

Practice Makes Perfect

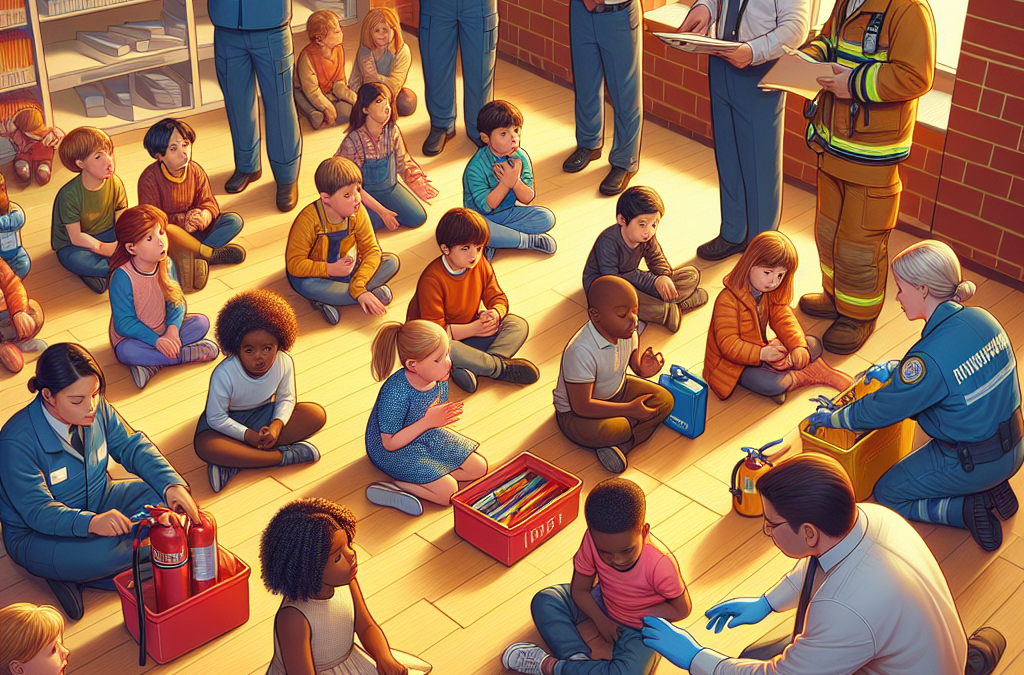
To keep things engaging, I regularly incorporate preparedness drills into my routine. It initially felt a bit awkward, but over time, it became a fun bonding experience with my loved ones. We even set times for fire drills and evacuation plans!

Making it fun by turning it into a competition with friends or family keeps spirits high. For example, we time ourselves getting through our emergency plans—who knew practicing could be this adrenaline-inducing? These little challenges made a once-dreaded task into something we all looked forward to.

Even my kids get involved. They’ve learned valuable skills while having fun, and we all feel more secure knowing we’re prepared. Plus, it can act as a catalyst for meaningful conversations about safety and responsibility!

Exploring Nature Together

I also started outdoor adventures as part of my preparedness efforts. You can’t beat hiking trips for testing gear, practicing navigation, and honing survival skills in a fun setting.

These nature outings became integral to our family traditions. We bond over campfires, teach each other new skills, and even practice emergency scenarios. Who knew getting outside could tick both boxes of preparedness and comfort?

Taking my preparation into nature not only helps me become better equipped but also keeps me grounded while enjoying life’s simple pleasures. It’s a win-win for everyone involved!

Local Community Engagement

Building relationships in my local community around preparedness has been a great source of comfort. This is such a key area I can’t stress enough! Involvement in community preparedness programs or local groups creates a sense of belonging and support.

I’ve made great connections through such groups, and I’ve learned valuable tips and tricks about preparedness. Plus, sharing experiences creates a supportive environment that increases community resilience and helps everyone feel more secure.

Knowing I’m surrounded by like-minded individuals not only makes me feel more comfortable about my preparedness efforts, but it also makes our community as a whole stronger and more resilient.

Frequently Asked Questions (FAQ)

1. Is it possible to be prepared without sacrificing comfort?

Absolutely! With a good mindset and the right strategies, you can integrate preparedness into your life while still enjoying your comforts. It’s all about balancing priorities.

2. What are some practical tips for blending preparedness into everyday life?

Start with small, realistic goals that fit into your daily routine. Choose quality supplies, involve family in fun preparedness activities, and always look for smart shopping alternatives!

3. How can I involve my family in the preparedness process?

Make it fun and interactive! Turn drills into games, go on nature outings, or have discussions about safety and emergency plans over dinner. Kids love engaging activities!

4. What role does sustainability play in preparedness?

Sustainability encourages a healthier lifestyle and helps you make choices that benefit both yourself and the environment. It often leads to long-term savings and comfort in lifestyle decisions.

5. How can community involvement help with preparedness?

Engaging with local groups creates a support network that makes you feel more secure. Shared knowledge and experiences can improve resilience and foster a sense of belonging.

What to Look For in a Reliable Emergency Radio

What to Look For in a Reliable Emergency Radio

Durability

Weather Resistance

When it comes to emergency radios, durability is a top priority for me. I’ve learned the hard way that weather resistance is a game-changer. If you’re out in a storm or an unexpected downpour, having a radio that can withstand the elements is crucial. Look for radios that are rated IPX4 or higher, as these can handle splashes and moisture without giving up on you.

One memorable camping trip I had turned into a wild weather adventure. We were caught in an unexpected rainstorm, and my trusty radio kept us up-to-date on the latest weather alerts. It survived without any damage, thanks to its weatherproof design!

Think about where you might use your emergency radio. Whether you’re hiking, camping, or sheltering at home during a storm, make sure it can resist moisture, dust, and even the occasional drop. Trust me, you don’t want to be that person who can’t get important updates because their gear wasn’t built to last.

Build Quality

Next up is build quality. You want a solid radio that feels substantial in your hands. When I say “build quality,” I mean the materials and craftsmanship. Plastic might be lightweight, but it can break easily if you drop it. Go for something robust that feels like it can take a hit.

During a power outage in my neighborhood, I reached for my emergency radio and was relieved to find it intact and ready to go. Its sturdy design meant it had survived multiple stumbles and still worked like a charm. This isn’t just about aesthetics; this impacts its longevity and performance when you need it.

A great way to assess build quality is to read customer reviews or even try the product out in-store if you can. The heftier the radio feels, generally the better the materials used. I always opt for a radio that I believe can withstand whatever life throws at it.

Compact Design

Another crucial aspect is the compact design. Look, I get it; when emergencies hit, space becomes a luxury. I always appreciate a radio that’s easy to stash away in a backpack or glove compartment. A compact design doesn’t just save space; it also makes the radio more transportable when you’re on the go.

For instance, I love taking my emergency radio when I go on road trips. It fits neatly in my car’s console without taking up too much room. Plus, its lightweight design means I can easily take it hiking or camping without it weighing me down.

Some radios even come with built-in features like hand crank chargers that don’t add unnecessary bulk. Remember: while you want a powerful radio, a compact design means you’re more likely to have it with you when those unexpected situations arise.

Power Options

Battery Life

Let’s talk about battery life. If your emergency radio runs out of juice when you need it most, then what’s the point, right? I always look for radios that allow for extended use, especially in times of crisis. A radio with a long battery life or replaceable batteries can be a lifesaver.

One time, my family was without power for a week due to a storm, and my radio turned out to be invaluable. I had a model that could run for days on a single charge, so I was able to catch essential updates without constantly worrying about plugging it in.

Look for radios that also allow you to change batteries easily if you’re using disposable options. Some models will even have rechargeable batteries with solar charging capabilities, which can be a real asset for extended outages.

Alternative Charging Methods

Speaking of battery life, alternative charging methods are a must-check option. I’ve found that radios equipped with hand cranks or solar panels become truly versatile. If your batteries die and you can’t get to a power source, you’ll still have options!

During a lengthy camping trip, our power bank ran dry, but my solar-powered radio saved the day. A few hours of sunlight had my radio back in working order, which kept us informed and entertained.

It’s worth investing in a radio that offers multiple charging methods, just in case the usual way becomes impractical. Having this flexibility means you’ll be ready for anything – come rain or shine!

Ease of Use

Finally, ease of use is something that can’t be overlooked. When an emergency hits, the last thing you want to do is struggle with complicated buttons or confusing dials. I personally prefer radios that have simple, intuitive controls.

On one occasion, I gave my friend a tour of my emergency kit, and we began messing around with the radio. The simplicity of the design made it easy for her to tune in to local news reports without any hassle. The clearer and more responsive the design, the better, especially when your adrenaline is pumping!

Before deciding on a radio, I always recommend trying it out; if a radio feels complicated to use in a calm setting, think how that will affect you when you’re stressed. Look for clear labeling, big buttons, and straightforward functionality to ensure you can operate smoothly in any situation.

Features and Functions

Tuning Capability

Alright, let’s dive into the fun part – features! Tuning capability is an important item to have on your radar. You want a radio that can pick up multiple frequencies. In a jam, being able to listen to AM, FM, and NOAA channels is essential.

During a local emergency last year, being able to tune into NOAA weather alerts really helped my community and me stay informed. I felt more secure knowing I was in the loop, thanks to the variety of frequencies my radio provided.

Before purchasing your radio, confirm what frequencies it can access. The last thing you want is to miss critical updates because of limited tuning options. I always feel safer with a grab-and-go radio capable of accessing diverse signals.

Additional Alerts and Alarms

One feature I absolutely love is additional alerts and alarms. It’s comforting to know that my radio can do more than just play music or the news. My current radio even has a built-in alert system that can notify me about severe weather warnings. This feature adds an extra layer of safety.

I had a situation where I was working outside, and the radio sent out a weather alert about an approaching storm. Thanks to that alarm, I was able to make a quick decision to head indoors before getting caught in the downpour.

Look for radios with customizable alert features so you know you won’t miss anything vital. You never know when you might need that kind of heads-up.

Portability and Accessories

Last but certainly not least, think about portability and any additional accessories. I love radios that come with a sturdy carrying strap, making it easy to grab and go when the situation calls for it. Having portability gives me peace of mind because I know I can always take it with me.

Some models even come with useful attachments like lights or phone charging capabilities. I can’t tell you how handy having a built-in flashlight was during a camping trip when we found ourselves around an unexpected power outage. My radio doubled as both an information source and a portable light!

Finally, make sure the radio itself is lightweight but durable enough to handle wearing it on your body or tossing it into a bag. Portability makes a world of difference, especially in emergencies where you need to move quickly.

FAQ

1. What is the most important feature to look for in an emergency radio?

The most important feature is durability, especially regarding weather resistance. In emergency situations, you want a radio that can withstand various environmental challenges.

2. Are hand-crank radios better than battery-operated ones?

Both have their advantages! Hand-crank radios offer the convenience of power generation without needing batteries, while battery-operated ones offer ease of use and often longer playtime between charges.

3. How can I ensure my emergency radio is easy to use during a crisis?

Look for radios with intuitive controls and clear labeling. Testing the radio beforehand can also help ensure you can operate it quickly when needed.

4. Is it necessary for an emergency radio to have multiple tuning options?

Yes! Access to a variety of frequencies, including AM, FM, and NOAA, is essential for staying informed during emergencies. It ensures you won’t miss critical updates from different sources.

5. Can I use an emergency radio for everyday activities?

Absolutely! Many emergency radios also function as entertainment sources. They can be used for listening to music, news, or even podcasts, making them versatile for everyday use!

Safe Cooking Practices During Power Outages

Safe Cooking Practices During Power Outages

Understanding the Risks of Cooking During Outages

The Dangers of Carbon Monoxide

So, let’s be real, when the lights go out, it can feel like a scene out of a survival movie. I’ve been there, rummaging through the pantry and itching to get something cooked. But here’s the catch—using generators or charcoal indoors is just reckless. Carbon monoxide is a real silent killer, and you don’t want to be the star of a horror story.

It’s essential to stay informed about this risk. Even if it feels like a safe haven, cooking indoors with any sort of fuel that emits fumes could lead to serious health issues, or worse. I learned this the hard way—after a minor incident during a storm, I’ve since become a stickler about outdoor cooking.

Keep in mind that if you can’t be outside, it’s worth considering no cooking at all. Sometimes a simple meal that doesn’t require heat is your best bet. Trust me, your lungs will thank you!

Planning Your Food Supplies

Keep a Well-Stocked Pantry

One of the biggest mistakes I’ve made during outages is not having my food game plan sorted. I swear by keeping a collection of non-perishable foods on hand. Canned goods, dried fruits, and nut butters have saved me more than once!

Make sure to check the expiration dates regularly. You don’t want to find yourself hoarding a can of something that’s been sitting around too long. I’ve got a checklist and every month I check what needs to be rotated out—think of it as a mini inventory.

Also, don’t underestimate the power of snacks! It’s easy to overlook, but when the power’s out, having something quick to grab can keep the morale up. Whether it’s granola bars or trail mix, stocking up can make all the difference.

Utilizing Alternative Cooking Methods

Grilling and Outdoor Cooking

Ah, the grill! It’s not just for backyard barbecues. For me, it’s my go-to during power outages. Grilling outdoors can be a lifesaver. It’s easy, quick, and gives everything a magical smoky flavor.

However, it’s not just about tossing some burgers on there. You can whip up veggies, seafood, and even fruits! Yes, that’s right—grilled peaches anyone? Just remember, always use your grill outside and never in a garage or enclosed space.

And don’t forget to prep! The last thing you want is to be fumbling around in the dark trying to get everything ready. Cook and cut things before the outage hits if you can. It’s just a smoother process when you have everything set up.

Keeping Food Safe

Understanding Food Temperatures

Now, let’s chat about food safety. It’s all good and fun until you get sick from spoiling food. I’ll keep it simple: your refrigerator will keep food safe for about four hours if it remains closed. Keep an eye on that clock!

When it comes to leftovers, after a power outage, if in doubt, throw it out. I’d rather toss out a bit of food than deal with a stomach bug that could last for days. Better safe than sorry, right?

Another handy tip? Use ice packs and coolers for any perishable items if you’re braving the outage for a while. It’s amazing how a little preparation can extend the life of your food supplies.

Engaging the Community

Sharing Resources and Support

Sometimes, the best thing you can do during a power outage is to reach out to neighbors. I’ve found that communities come together, and if you have extra supplies or skills, share them! You’ll never know who might need a helping hand.

Organizing potlucks can also be a fun way to utilize food before it spoils. I’ve attended gatherings where everyone contributed what they could, and together we whipped up a feast. It’s not only practical but creates a sense of camaraderie.

Don’t forget to stay connected! Social media or community apps can help coordinate food sharing or resources. Sometimes, someone nearby might have a generator or a camp stove they are willing to share. Just put the call out there!

Frequently Asked Questions

1. What should I do if the power goes out?

First, stay calm! Keep your refrigerator and freezer closed. Use your alternative cooking methods if you can, and make a plan for your food supply.

2. How long can food last without power?

Typically, food in your fridge will stay safe for about four hours if you keep the door closed. Your freezer can maintain its temperature for about 48 hours if full.

3. Is it safe to cook indoors during a power outage?

No! Cooking indoors using grills or generators can lead to carbon monoxide poisoning. Always cook outside to ensure safety.

4. What types of food should I keep on hand for emergencies?

Focus on non-perishables like canned goods, dried fruits, snacks, and any easy-to-cook items. Make sure to rotate your supplies regularly!

5. How can I engage my neighbors during a power outage?

Reach out to those around you! Organize a community gathering to share resources or food. It’s a great way to bond and ensure everyone is safe and fed!

How to Stay Safe When Returning Home After a Disaster

How to Stay Safe When Returning Home After a Disaster

Evaluate the Situation First

Assess the Damage

Before I ever set foot back in my home after a disaster, I always take a moment to stand back and really look at the property. It’s crucial to recognize potential hazards like downed power lines, damaged structures, or broken glass. Going in without checking might seem tempting, but trust me, you don’t want to get caught off guard.

I’ve learned to have a little checklist in my head: look up for anything that might fall, check the ground before I step, and most importantly, listen for anything unusual. If it feels unsafe, I’ll wait for professionals to give the all-clear.

Remember that sometimes the biggest danger isn’t always visible. Mold can set in almost instantly in a water-damaged home, and inhaling those spores isn’t something anyone wants to deal with. If there’s flooding, better to err on the side of caution!

Check for Utility Safety

Once I’m certain it’s somewhat safe outside, I pay close attention to my utilities. I walk to the main gas line and look for any leaks – a whiff of gas is a red flag. If I smell anything weird or I’m unsure, I don’t take any chances; I turn off the main valve and leave the area.

Next, I check the electricity. If I see any sparking or damaged wires, I know it’s best to keep a distance until an expert comes over. Sometimes, I’ll try to look at my circuit breaker too, but I always keep my safety gear handy just in case.

Water supply is another thing I check. If the water system is compromised, I make sure to rely on bottled water until I know it’s safe to use again. I’ve made the mistake of thinking tap water was okay before, and let’s just say it didn’t end well!

Listen to Local Authorities

After assessing my own property, I tune in to what local authorities are saying. This is a biggie! I always monitor news reports and social media updates to get the latest news about evacuation areas or safety notices. Sometimes, the information they provide can save me a lot of headaches.

It’s also good practice to keep my phone charged – it’s amazing how often I need it for alerts. If disaster strikes, things can change on a dime, and having the latest info is key. It’s best to follow the guidelines they provide, even if it throws a wrench in my plans.

Community meetings can be really helpful too. If they’re held in my area, I take time to attend. They often give out useful advice about recovery services, shelters, and cleanup efforts. Connecting with neighbors also brings a sense of community that can be so comforting during tough times.

Document Everything

Take Photos for Insurance

One of the first things I do when I think it’s somewhat safe is to grab my phone and start snapping pics. It’s wild how much damage can be inflicted, and having a visual record for my insurance company is a lifesaver. I make sure to photograph everything – the exterior, interior, damage up close, you name it.

If my home insurance process has taught me anything, it’s that proof is everything. The more detailed my documentation, the better chance I get a fair settlement when the dust settles. I also make sure to take pictures of what I’m salvaging, like furniture or other items, just to keep track.

Loyal to my organizational habits, I sometimes even jot down notes on each item – when it was purchased, estimated value, and condition. Yes, I know it sounds tedious, but trust me, it pays off!

Keep Records of All Communications

I’ve learned the hard way that keeping a record of conversations with my insurance agent, contractors, and even city officials is really important. I always use a notebook or my computer to log who I talked to, what they said, and when we spoke. Seriously, details can get fuzzy when stress is high.

When I reach out to my insurance company, I document every interaction. I note down claim numbers and the names of the people helping me. Having that information organized and accessible can make follow-ups way less daunting. I’m basically creating a mini-history of my recovery!

This documentation helps in case disputes arise later about coverage or payment. I never want to be in a situation where someone says they didn’t say something – it’s like he-said-she-said, but with a lot more at stake.

File a Claim as Soon as Possible

Timing is everything when it comes to filing insurance claims post-disaster. I learned to jump on it as soon as I feel safe enough to start the process. My mindset is: the quicker I file, the quicker I can start the recovery process!

Every insurance policy has time limits. I keep a close eye on those dates to ensure nothing slips through the cracks. If I miss a deadline, I might as well be throwing my money out the window.

Getting all my documented details together for the claim is super important. I organize photographs, bills, and repair estimates to present a solid case. When I make the effort to compile everything ahead of time, it makes the submission process a lot smoother.

Stay Connected and Informed

Establish a Communication Plan

Finding a way to check in with loved ones is crucial for my peace of mind. I usually make a plan beforehand or at least write down a method for reaching my family and friends. It can be challenging, especially if cell services are down, but I’ve found that social media or messaging apps can do wonders.

Regular status updates can help keep everyone calm and ensure no one is worrying unnecessarily. Plus, when things settle down, I always have a game plan for deciding where to meet up if we can’t get home.

Establishing a communication plan is also a good way to connect with neighbors. I’ve found that fostering relationships can lead to all sorts of support during tough times, whether it’s sharing resources or emotional support.

Utilize Community Resources

Once I return home and things seem in order, I don’t shy away from reaching out to local community resources. I always check in with local governments and organizations for any available assistance programs aimed at disaster recovery. They often have a wealth of information that can help!

In my experience, it’s been great to tap into local resources for food, clothing, or housing assistance. There’s often a community spirit that blossoms after a disaster, so getting involved can help a lot – I’ve met some incredible people through these programs!

So, don’t hesitate to ask for help! Sometimes, just knowing there’s a network out there can make a massive difference in my recovery process. Plus, you never know – you might end up forging lasting relationships while you’re at it.

Keep Updated on Recovery Efforts

Staying informed about ongoing recovery efforts is essential. I usually follow local news channels and government websites fr updates related to rebuilding phases, road closures, and safety warnings. Being in the loop keeps me aware of potential dangers.

I also appreciate any information on local help centers and recovery-oriented community meetings. They usually provide updates on resources and aid being offered, which assists during my cleanup efforts.

Joining local online groups can be a real game changer, too. They often share firsthand experiences about dealing with insurance or recovery, and offer comforting advice during times when I might feel alone in my struggle.

Rest and Recover

Take Care of Your Mental Health

Returning home can take a toll on anyone’s mental well-being. I always remind myself that it’s okay to feel overwhelmed during this process. I make a conscious effort to give myself permission to take breaks and just breathe. Sometimes, just stepping outside for some fresh air can do wonders!

Talking about my feelings with friends or a therapist can help me process all that’s happened. It’s important to vent, even if it involves crying over coffee with a friend while reminiscing about happier times.

If I notice lingering stress or anxiety that won’t go away, I don’t hesitate to reach out for professional help. Mental health is just as crucial as physical health, and taking care of myself sets the stage for a successful recovery.

Find Support Systems

I’ve come to learn that leaning on friends, family, or support groups during this period is vital. Surrounding myself with supportive people not only helps me feel balanced but also keeps my spirits lifted.

Finding local support groups can be an excellent way to connect with others who are going through similar experiences. I’ve found group settings transform sharing struggles into learning moments; hearing how others cope can offer fresh perspectives!

Also, sometimes just knowing that I’m not alone in this journey can be comforting. Check-ins from loved ones, even in simple forms like a text or call, remind me that my world is still filled with caring connections.

Establish a Routine

Finally, creating a routine helps me regain a sense of normalcy after a disaster. I’ve been amazed at how having a daily schedule—even if it’s simple—helps shift my mindset. It’s about getting back to doing things that bring me joy, whether cooking a meal or taking a walk.

Additionally, checking items off my to-do list can provide little victories throughout the day. Slowly but surely tackling cleanup or recovery tasks brings a sense of accomplishment, which is so motivated during recovery.

Even if my routine isn’t perfect, it serves as a mental anchor, allowing me to feel a bit more in control. I’ve realized that recovery is a journey, and taking small steps is totally okay!

FAQ

Q1: What should I do first when I return home after a disaster?

A1: The first step is to evaluate the situation to assess any damage and ensure it’s safe to enter your home. Look for hazards like broken glass, downed power lines, or any smells that could indicate gas leaks.

Q2: Why is documenting damage important?

A2: Documenting damage with photos helps provide evidence for insurance claims and ensures you’re assessing the true extent of the damage. The more detail you have, the better your chances of getting a fair settlement.

Q3: How do I choose the right community resources for recovery?

A3: Check with local government sites, disaster relief organizations, or community centers. They often have a list of resources tailored to those affected by the disaster.

Q4: What should I prioritize during the mental recovery phase?

A4: Take care of your mental health by seeking support from friends, family, or professional help. Make space for your feelings and don’t hesitate to lean on your support system.

Q5: How can I establish a routine during recovery?

A5: Start small by setting up a daily schedule that incorporates tasks that bring you joy or a sense of accomplishment. Creating little victories in your day can help restore a sense of normalcy.

Choosing the Right Survival Gear for Different Climates

Choosing the Right Survival Gear for Different Climates

Understanding the Environment

Assessing Climate Types

When I first started preparing for different environments, I quickly realized not every climate is the same. There are tropical climates which can be hot and humid, polar climates that are frigid and unforgiving, and temperate climates that have a mix of both. Each of these settings demands its own unique set of survival gear. It’s all about understanding where you’re going and what conditions you’ll face.

With this in mind, you’ll want to know about seasonal variations too. For instance, a temperate zone can experience frigid winters and scorching summers. Pack accordingly! It’s not just about the current season; a good survivalist thinks ahead to what they might face next.

Finally, consider specific regional features. If you’re heading into a mountainous region, you need to gear up for altitude changes and harsh weather. Meanwhile, coastal areas may have their own challenges, like salty air and humidity. The more you know, the better prepared you will be

How to Train Children on Emergency Response Actions

How to Train Children on Emergency Response Actions

Understanding Emergency Situations

What constitutes an emergency?

So, first off, we’ve gotta talk about what an emergency even is. Sometimes, it’s not just those massive situations like fires or earthquakes. It could even be something simpler like getting lost in a store! Recognizing the difference helps kids grasp the gravity of various situations.

I like to keep it engaging, so I often share stories or examples from my own life. It makes it relatable and, honestly, a lot more fun! Plus, when they can visualize their own experiences, it sticks better.

Getting kids to identify what an emergency looks like helps them understand when it’s time to react. Whether it’s feeling unsafe or needing help, it’s crucial they feel empowered to recognize those moments.

The importance of staying calm

If there’s anything I’ve learned, it’s that staying calm in a crisis can be a game-changer. Kids often take cues from adults in stressful situations. If they see panic, they might freak out too! I work on ways to model calmness through breathing exercises or grounding techniques, which they can use when things get tense.

When I practice this with children, I act it out. I pretend to be in a stressful situation—maybe I’m pretending to lose my keys—and I show them how to breathe and pause before reacting. It’s all about fostering a reaction they can remember when the heat is on.

Praise always helps when they show calmness in a practice drill. I make it a point to highlight how relaxing and focusing helped them navigate through the scenario. Positive reinforcement goes miles with kiddos!

Encouraging questions

Creating an open environment for questions is super important too. Kids are naturally curious, and I find that they often have brilliant questions that lead to deeper discussions about safety and emergency response. I always encourage them to ask anything, stressing that no question is too silly.

When they ask, I make sure to give thorough answers—using language that they’d understand, of course! I might share real-life examples where appropriate, linking back to discussions we’ve had previously. This way, it feels like a dialogue rather than a lecture.

Through this exchange, it nurtures their critical thinking. They learn not just to know facts, but to connect those facts to real-world scenarios. It’s all about stimulating their minds, and it certainly makes the experience more meaningful!

Developing a Safety Plan

Creating a family action plan

Alright, let’s dive into the nitty-gritty of making a solid family safety plan. First off, it’s about collaboration! I love getting everyone’s input, even if it sounds a little silly. Children have a way of thinking outside the box that adults sometimes forget.

We sit down together and brainstorm what we’d do in varied emergencies. I have them suggest things, and we build a really clear, step-by-step plan. Making it visual, like on a poster board, helps them remember the key points!

Then, I’ll have practice drills based on our action plan. We treat it like a fun game, and the kids get to be the heroes of the story, responding and executing our emergency plan. This practice is key, as it builds muscle memory for when they need to act!

Identify safe spots and escape routes

Next up, we map out safe spots in our home and community. It’s like our own little treasure map to safety! Honestly, kids think it’s cool to know where to go in case things go awry.

When we go over our escape routes, I like to make it interactive. For instance, we practice “what if” scenarios, and I ask questions on how we would get to safety. It sparks their imagination and keeps them engaged.

Giving them ownership on knowing these routes makes a difference! They begin to feel responsible for their own safety, and that’s empowering for them. It builds confidence, which is super important in high-stress situations.

Regular family drills

You know what’s next? Having regular drills! But let’s be real, we can turn these into something fun and not super serious. I suggest planning them out on the family calendar like a special event—it’s a great way to remind everyone to take it seriously but also enjoy themselves.

I like to mix things up so it doesn’t get boring. One time, we went outside and did a “fire drill” with a twist—we pretended we had to run with our favorite stuffed animals! It ended up being a hilarious bonding moment.

Afterwards, I always check-in to see how they felt about the drill. What worked, what didn’t, and what they’d like to do differently next time. This feedback loop is so crucial for their learning and for fine-tuning our plan!

Teaching Basic First Aid

Essential first aid skills

When talking about emergencies, knowing some basic first aid can really empower kids. I like to start with simple stuff—like cleaning a cut or putting on a bandage. Hands-on practice is key, so I often use fake injuries for them to work on!

Throughout these activities, I ensure that kids are actively engaged. We make it a team effort—everyone gets involved, and I encourage them to ask questions, helping them learn better as they practice.

Also, I keep it light-hearted! Sometimes it’s worth a laugh to stumble through a task together. They learn and bond at the same time, which adds to their confidence in these skills. Plus, they get to leave the session feeling like little medics!

Recognizing when to seek help

Sometimes, knowing when to step back from first aid and get professional help is just as important as the skills themselves. I like to discuss situations that might require a call to a trusted adult or 911. Understanding this distinction is crucial to ensure they don’t try to tackle things beyond their capabilities.

To make this relatable, we often role-play different situations. I’d act out being hurt while kids identify responses, such as when to call an adult. They feel like mini-heroes being decisive in these scenarios, which is a huge confidence booster!

Reinforcing that asking for help is strong rather than a weakness helps too. I want them to know that seeking advice from trusted adults is always a smart move in sticky situations!

Practice makes perfect

Lastly, it’s all about practice! I emphasize that just like sports or music, the more they practice first aid skills, the better they become. We set aside time each week, where we revisit and refresh their first aid knowledge.

Not only does this continue their learning, but it builds their confidence and helps them become more comfortable in real-life scenarios. It’s like turning them into mini-experts without them even realizing it!

And hey, who knows? One day, these skills could genuinely come in handy. They might save a friend, and that’s a fantastic feeling! It’s all about instilling both knowledge and courage in these young minds.

Practicing Communication Skills

Effective verbal communication

So, let’s talk about one of the most important aspects of emergency response—communication! It’s not just about knowing what to do; it’s also about being able to tell others about it. I start with simple games about expressing ideas or emergencies using just words, practicing calm and clear dialogue.

I find that when kids practice articulating their thoughts aloud, it helps them in high-stress situations to communicate what’s going on, and to share their needs with trusted adults. It’s that whole concept of making sure their voice is heard, especially in a crisis.

Having storytelling sessions can be fun for this too! They can create stories about emergency scenarios, making them verbalize their thoughts in an entertaining way. They’re learning while having a blast!

Non-verbal cues

But let’s not forget about non-verbal communication! Sometimes, it’s the stuff we don’t say that speaks the loudest. Whether it’s body language or facial expressions, I stress how essential it is to recognize these cues.

I set up activities where kids have to guess emotions based solely on facial expressions. It’s a great way to enhance their observational skills! We discuss how someone might feel during an emergency and how they can communicate compassion, support or alertness through these cues.

Emphasizing that they can also use their body language to show that they’re serious, calm, or trying to communicate can be super effective in an emergency. They could use their body to direct others for help, too.

Role-playing emergencies

One of my favorite methods to teach communication is through role-playing! I find that immersing kids in a scenario often allows them to verbalize responses naturally. We set up different emergency scenarios where they take turns being the one in need of help, then the helper.

This back-and-forth fosters empathy while showcasing how effective communication can change outcomes in an emergency. They can practice using clear language to both explain the situation and seek assistance.

Honestly, kids have a blast with it, and it doesn’t feel like a lesson! I always end the role-plays with a little debrief—what went well and what could be improved. It ties everything together while reinforcing their learning!

Conclusion

Training children on emergency response is an ongoing journey. It’s about making it fun, engaging, and empowering! As someone who’s walked this path, I’ve seen the positive impact it has on kids’ confidence. They bloom when they know they can handle what life throws at them.

It’s all about empowering them with knowledge and skills that could make a difference. They become more aware, more communicative, and capable of taking action when needed.

So if you’re like me, thinking about how to best prepare the next generation for any bumps in the road, keep it open, light-hearted, and fun. You’ll create lasting memories while ensuring they’re ready to handle emergencies with confidence!

FAQ

What types of emergencies should children be trained for?

Children can be trained to recognize various emergencies, including fires, medical situations, getting lost, severe weather, and other unexpected events. It’s crucial to cover a range of scenarios to prepare them adequately.

How can I make emergency drills engaging for kids?

To keep emergency drills engaging, incorporate fun elements like games, role-playing, or themed scenarios. Keeping things light-hearted while simulating real-life situations helps children feel less overwhelmed and more prepared.

At what age should children start learning about emergency response?

There’s no one-size-fits-all answer, but around ages 4-5, children can start learning about emergencies in simple terms. As they grow older, you can introduce more complex concepts and skills tailored to their maturity level.

What resources are helpful for teaching children about emergencies?

There are various resources available! Picture books, interactive apps, videos, and local community workshops can all help teach kids about emergency response. Hands-on practice and engaging discussions are also invaluable tools.

How do I ensure my child remembers what they’ve learned?

Repetition is key! Regularly reviewing what they’ve learned through fun discussions or practice drills helps reinforce their knowledge. Celebrate their progress and encourage questions to keep them engaged and confident in their skills.

Copy of PREPARE Mag ad 970 x 250