So, first off, we’ve gotta talk about what an emergency even is. Sometimes, it’s not just those massive situations like fires or earthquakes. It could even be something simpler like getting lost in a store! Recognizing the difference helps kids grasp the gravity of various situations.
I like to keep it engaging, so I often share stories or examples from my own life. It makes it relatable and, honestly, a lot more fun! Plus, when they can visualize their own experiences, it sticks better.
Getting kids to identify what an emergency looks like helps them understand when it’s time to react. Whether it’s feeling unsafe or needing help, it’s crucial they feel empowered to recognize those moments.
The importance of staying calm
If there’s anything I’ve learned, it’s that staying calm in a crisis can be a game-changer. Kids often take cues from adults in stressful situations. If they see panic, they might freak out too! I work on ways to model calmness through breathing exercises or grounding techniques, which they can use when things get tense.
When I practice this with children, I act it out. I pretend to be in a stressful situation—maybe I’m pretending to lose my keys—and I show them how to breathe and pause before reacting. It’s all about fostering a reaction they can remember when the heat is on.
Praise always helps when they show calmness in a practice drill. I make it a point to highlight how relaxing and focusing helped them navigate through the scenario. Positive reinforcement goes miles with kiddos!
Encouraging questions
Creating an open environment for questions is super important too. Kids are naturally curious, and I find that they often have brilliant questions that lead to deeper discussions about safety and emergency response. I always encourage them to ask anything, stressing that no question is too silly.
When they ask, I make sure to give thorough answers—using language that they’d understand, of course! I might share real-life examples where appropriate, linking back to discussions we’ve had previously. This way, it feels like a dialogue rather than a lecture.
Through this exchange, it nurtures their critical thinking. They learn not just to know facts, but to connect those facts to real-world scenarios. It’s all about stimulating their minds, and it certainly makes the experience more meaningful!
Developing a Safety Plan
Creating a family action plan
Alright, let’s dive into the nitty-gritty of making a solid family safety plan. First off, it’s about collaboration! I love getting everyone’s input, even if it sounds a little silly. Children have a way of thinking outside the box that adults sometimes forget.
We sit down together and brainstorm what we’d do in varied emergencies. I have them suggest things, and we build a really clear, step-by-step plan. Making it visual, like on a poster board, helps them remember the key points!
Then, I’ll have practice drills based on our action plan. We treat it like a fun game, and the kids get to be the heroes of the story, responding and executing our emergency plan. This practice is key, as it builds muscle memory for when they need to act!
Identify safe spots and escape routes
Next up, we map out safe spots in our home and community. It’s like our own little treasure map to safety! Honestly, kids think it’s cool to know where to go in case things go awry.
When we go over our escape routes, I like to make it interactive. For instance, we practice “what if” scenarios, and I ask questions on how we would get to safety. It sparks their imagination and keeps them engaged.
Giving them ownership on knowing these routes makes a difference! They begin to feel responsible for their own safety, and that’s empowering for them. It builds confidence, which is super important in high-stress situations.
Regular family drills
You know what’s next? Having regular drills! But let’s be real, we can turn these into something fun and not super serious. I suggest planning them out on the family calendar like a special event—it’s a great way to remind everyone to take it seriously but also enjoy themselves.
I like to mix things up so it doesn’t get boring. One time, we went outside and did a “fire drill” with a twist—we pretended we had to run with our favorite stuffed animals! It ended up being a hilarious bonding moment.
Afterwards, I always check-in to see how they felt about the drill. What worked, what didn’t, and what they’d like to do differently next time. This feedback loop is so crucial for their learning and for fine-tuning our plan!
Teaching Basic First Aid
Essential first aid skills
When talking about emergencies, knowing some basic first aid can really empower kids. I like to start with simple stuff—like cleaning a cut or putting on a bandage. Hands-on practice is key, so I often use fake injuries for them to work on!
Throughout these activities, I ensure that kids are actively engaged. We make it a team effort—everyone gets involved, and I encourage them to ask questions, helping them learn better as they practice.
Also, I keep it light-hearted! Sometimes it’s worth a laugh to stumble through a task together. They learn and bond at the same time, which adds to their confidence in these skills. Plus, they get to leave the session feeling like little medics!
Recognizing when to seek help
Sometimes, knowing when to step back from first aid and get professional help is just as important as the skills themselves. I like to discuss situations that might require a call to a trusted adult or 911. Understanding this distinction is crucial to ensure they don’t try to tackle things beyond their capabilities.
To make this relatable, we often role-play different situations. I’d act out being hurt while kids identify responses, such as when to call an adult. They feel like mini-heroes being decisive in these scenarios, which is a huge confidence booster!
Reinforcing that asking for help is strong rather than a weakness helps too. I want them to know that seeking advice from trusted adults is always a smart move in sticky situations!
Practice makes perfect
Lastly, it’s all about practice! I emphasize that just like sports or music, the more they practice first aid skills, the better they become. We set aside time each week, where we revisit and refresh their first aid knowledge.
Not only does this continue their learning, but it builds their confidence and helps them become more comfortable in real-life scenarios. It’s like turning them into mini-experts without them even realizing it!
And hey, who knows? One day, these skills could genuinely come in handy. They might save a friend, and that’s a fantastic feeling! It’s all about instilling both knowledge and courage in these young minds.
Practicing Communication Skills
Effective verbal communication
So, let’s talk about one of the most important aspects of emergency response—communication! It’s not just about knowing what to do; it’s also about being able to tell others about it. I start with simple games about expressing ideas or emergencies using just words, practicing calm and clear dialogue.
I find that when kids practice articulating their thoughts aloud, it helps them in high-stress situations to communicate what’s going on, and to share their needs with trusted adults. It’s that whole concept of making sure their voice is heard, especially in a crisis.
Having storytelling sessions can be fun for this too! They can create stories about emergency scenarios, making them verbalize their thoughts in an entertaining way. They’re learning while having a blast!
Non-verbal cues
But let’s not forget about non-verbal communication! Sometimes, it’s the stuff we don’t say that speaks the loudest. Whether it’s body language or facial expressions, I stress how essential it is to recognize these cues.
I set up activities where kids have to guess emotions based solely on facial expressions. It’s a great way to enhance their observational skills! We discuss how someone might feel during an emergency and how they can communicate compassion, support or alertness through these cues.
Emphasizing that they can also use their body language to show that they’re serious, calm, or trying to communicate can be super effective in an emergency. They could use their body to direct others for help, too.
Role-playing emergencies
One of my favorite methods to teach communication is through role-playing! I find that immersing kids in a scenario often allows them to verbalize responses naturally. We set up different emergency scenarios where they take turns being the one in need of help, then the helper.
This back-and-forth fosters empathy while showcasing how effective communication can change outcomes in an emergency. They can practice using clear language to both explain the situation and seek assistance.
Honestly, kids have a blast with it, and it doesn’t feel like a lesson! I always end the role-plays with a little debrief—what went well and what could be improved. It ties everything together while reinforcing their learning!
Conclusion
Training children on emergency response is an ongoing journey. It’s about making it fun, engaging, and empowering! As someone who’s walked this path, I’ve seen the positive impact it has on kids’ confidence. They bloom when they know they can handle what life throws at them.
It’s all about empowering them with knowledge and skills that could make a difference. They become more aware, more communicative, and capable of taking action when needed.
So if you’re like me, thinking about how to best prepare the next generation for any bumps in the road, keep it open, light-hearted, and fun. You’ll create lasting memories while ensuring they’re ready to handle emergencies with confidence!
FAQ
What types of emergencies should children be trained for?
Children can be trained to recognize various emergencies, including fires, medical situations, getting lost, severe weather, and other unexpected events. It’s crucial to cover a range of scenarios to prepare them adequately.
How can I make emergency drills engaging for kids?
To keep emergency drills engaging, incorporate fun elements like games, role-playing, or themed scenarios. Keeping things light-hearted while simulating real-life situations helps children feel less overwhelmed and more prepared.
At what age should children start learning about emergency response?
There’s no one-size-fits-all answer, but around ages 4-5, children can start learning about emergencies in simple terms. As they grow older, you can introduce more complex concepts and skills tailored to their maturity level.
What resources are helpful for teaching children about emergencies?
There are various resources available! Picture books, interactive apps, videos, and local community workshops can all help teach kids about emergency response. Hands-on practice and engaging discussions are also invaluable tools.
How do I ensure my child remembers what they’ve learned?
Repetition is key! Regularly reviewing what they’ve learned through fun discussions or practice drills helps reinforce their knowledge. Celebrate their progress and encourage questions to keep them engaged and confident in their skills.
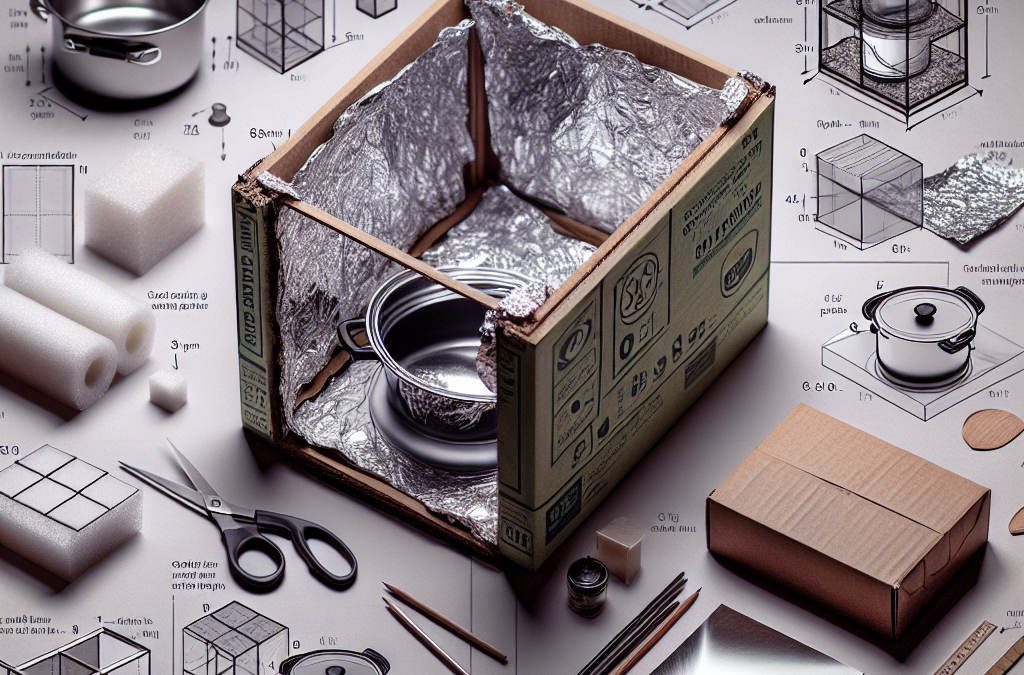
So, you want to make a solar oven? Great choice! Before diving into the construction, I found it’s crucial to gather all the materials you’ll need. Trust me, nothing’s worse than getting halfway through and realizing you’re missing something key. You’ll need a pizza box (this is my go-to!), aluminum foil, plastic wrap, and black construction paper.
Don’t worry, you can usually find these materials around the house or at a local store. Even check out thrift stores or online marketplaces for second-hand goods. I’ve scored some amazing stuff that way! And remember, the more reflective your foil, the more heat you can generate—this little detail can make a huge difference.
Getting all your supplies in one swoop not only saves time but also keeps the momentum going, which is so important during any DIY project. Plus, it gives you a chance to visualize how everything will come together!
Understanding Functionality
It’s super important to understand what each of these materials brings to the table. For instance, the pizza box is not just for pizza; it serves as the chamber to trap heat. The aluminum foil reflects sunlight into the box, while the black paper absorbs the heat—the science can feel a bit like magic!
When I first started, I spent some time just thinking about how the sun’s rays would travel through the plastic and heat what was inside. It’s fascinating! The clearer your understanding of your materials’ roles, the better your solar oven’s performance will be.
And let’s not forget: this is also a fun way to talk about sustainability and energy. It’s a conversation starter, especially if you have kids or friends who are curious about renewable energy. Share what you learn as you build—I promise it will draw more people into your DIY adventures!
Preparation is Key
Now that you’ve got your materials, it’s smart to prepare your workspace. I mean, nobody enjoys a chaotic environment when they’re trying to create something cool, right? Clean off that table or workspace and lay everything out so you can see what you’ve got. Trust me, it makes a world of difference.
Also, I like to have a plan. Sketch it out! It doesn’t have to be fancy, just a rough idea of how you’re going to assemble your solar oven. This visual map helps me stay focused and makes it easier to catch any steps I might have otherwise overlooked.
Remember, even when things don’t go perfectly, they can still turn out awesome. Preparing means you can respond to any hiccups with grace and make them part of the fun rather than frustration!
Building the Solar Oven
Constructing the Box
Alright, let’s get building! I love this part—there’s something satisfying about seeing your creation take shape. Start by cutting a flap in the lid of your pizza box. This is what you’ll use to direct sunlight into the oven. First cut along three sides, leaving an inch or so attached to create your flap.
Next, you want to cover the inside of that flap with aluminum foil. This is what reflects the sunlight into your solar oven. I like to make sure it’s shiny and smooth, as that helps with maximum reflectivity. The shinier, the better!
Once that’s done, grab your black paper and line the bottom of the pizza box with it. The black color will trap the heat much more effectively. It’s intriguing how color theory plays into this; it makes you think about the world from a different angle.
Sealing for Efficiency
Next up: sealing it all in! Take plastic wrap and cover the opening of the pizza box. This creates an insulating layer which locks in the heat. I usually add a couple of layers to ensure it holds up against the sun’s rays. It’s like making a cozy blanket for your solar oven!
A little pro tip: make sure there are no gaps in the plastic wrap; any holes can let that precious sunlight escape. You want this baby to be as airtight as possible while still allowing the heat to enter. This is where you can get creative—tape or glue down the edges securely!
It’s exhilarating to see a simple pizza box transform into something new and functional. Plus, sealing it well will make your solar oven more efficient, so you’ll be one step closer to cooking with it!
Setting Up for Success
Your solar oven is really coming together now! The last part of building is about positioning it correctly. Place it outside in a sunny spot where it can catch direct sunlight. I typically keep it facing south if I can. The orientation can really make a difference in how effective your oven is.
Adjusting the flap to catch the maximum sunlight is essential. Play around with different angles until you find the sweet spot. The more sunlight you capture, the hotter your oven will get!
And remember, patience is key here. You won’t be cooking things in a matter of minutes like a microwave. But isn’t that part of the charm? Taking your time with the cooking process can bring a sense of calm and mindfulness that’s hard to find in our fast-paced lives.
Cooking with Your Solar Oven
Choosing What to Cook
Okay, now for the fun part—cooking! The options are endless, but I recommend starting with simpler things. S’mores, mini pizzas, or baked cookies are perfect beginner projects. They’re easy, fun, and who doesn’t love a good s’more, right?
Make sure whatever you choose is quick to cook. You want to give your solar oven a good test run without feeling overwhelmed. Plus, the kids love being involved, and there’s nothing like a fun cooking session under the sun to make memories!
And if you feel adventurous, try roasting veggies! It’s an eye-opening experience to taste something you’ve cooked with the sun’s energy. Bonus points for flavor and nutrition!
Monitoring the Temperature
Once your food is inside, it’s important to keep an eye on the temperature. It can be tricky, as you won’t have a conventional oven gauge to rely on. I like to use a simple regular thermometer placed in the oven—it gives me peace of mind that I’m cooking things at the right temperature.
When I first used my solar oven, I set a timer to check on everything regularly. There’s something rewarding about peeking into the box and seeing deliciousness develop from pure sunlight!
Estimating cooking times can take practice, but it’s part of the whole DIY experience. And hey, if it doesn’t turn out perfect the first time—that’s totally cool! Learn, adapt, and enjoy the process!
Enjoying Your Creation
Finally, after the waiting game, it’s time to savor what you’ve created. Remove your food carefully—it can be hot! There’s something special about realizing you cooked with nothing but the sun’s rays; it’s like harnessing a superpower.
Set the table (or a picnic blanket) outside and share the moment with friends or family. I love hearing everyone’s reactions when they taste something made with the sun. It’s pure joy and often leads to conversations about sustainability and the environment!
Don’t forget to take some pictures—after all, you’ll want to remember your solar cooking triumph and inspire others to try it out for themselves!
Conclusion and FAQs
FAQs
1. How long does it take to cook food in a solar oven?
Cooking times can vary quite a bit depending on the food and the sun’s intensity. Generally, expect to wait anywhere from 30 minutes to several hours. Just be patient and enjoy the process!
2. Can I use a solar oven on cloudy days?
While sunny days yield the best results, you can still cook on cloudy days. It just takes longer since the rays are less direct. It’s a bit like camping out—embrace the change!
3. What type of food works best in a solar oven?
Start with easy recipes! S’mores, nachos, or vegetables are excellent beginnings. They’re fun and satisfying, and you can build your confidence for more elaborate dishes as you go!
4. Is it safe to leave the solar oven unattended?
It’s best not to leave it completely unattended. If you’re cooking for a longer period, check on it every now and then—it keeps the experience fun and lets you monitor how things are cooking!
5. How can I improve the heat efficiency of my solar oven?
Make sure you have no gaps in your insulating layers, and adjust your solar oven to catch the sunlight at the right angle. Keeping the inside clean and shiny will also help maximize heat absorption!
You might not give much thought to the power supply in your daily life until it suddenly goes out. I’ve been there—sitting in the dark, staring at my dead screens, wondering what just happened. When the power goes out, all sorts of systems shut down: lights, heat, cooling, and all those fancy gadgets we rely on daily. It can be a real shock to the system.
The first thing to know is that outages can be short or long. Short outages might only last minutes, but a longer failure could mean hours—or even days—without power. Each type can impact your daily routine differently, from keeping your food fresh in the fridge to maintaining a comfortable temperature at home.
Understanding how a power failure affects your life is crucial for planning. When you generate awareness about these impacts, you can start strategizing ways to minimize disruptions in your life. Trust me, preparation is key to reducing the stress that comes with unexpected outages.
Why Do Power Failures Occur?
Power failures can happen for various reasons. Most commonly, weather plays a huge role; think about those stormy days when high winds and rain cause branches to fall on power lines. I’ve had instances when a thunderstorm knocked out my power just as I was about to binge-watch the latest series.
Other causes include technical failures, maintenance issues, and even human errors. It’s interesting how something so invisible, like electricity, can be affected by so many tangible factors. A blown transformer or an overloaded circuit can lead to outages. So, understanding these causes helps you prepare better.
Staying informed about the regional infrastructure and potential weather conditions can also help output the likelihood of an outage in your area. There’s no way to control nature or technical failures, but knowledge gives you the ability to foresee potential problems.
How Long Can Power Failures Last?
I’ve been caught in power failures that seemed to stretch on forever. The duration of a power failure can truly vary. Some might last less than an hour, while others could drag on for days, especially in severe weather conditions. Ugh! The anxiety of waiting for the lights to flicker back on can feel unbearable!
Electric companies usually give estimates for repairs, but those can change. That’s why it’s wise to prepare for the worst-case scenario. Accepting that a long outage might happen helps you focus on solutions rather than getting stressed about ‘when’ the lights will come back.
Having a plan in place can alleviate that anxiety. I always recommend preparing a backup plan that considers varying durations of power outages—knowing you can weather the storm gives you peace of mind.
Creating a Power Failure Emergency Kit
What to Include in Your Kit
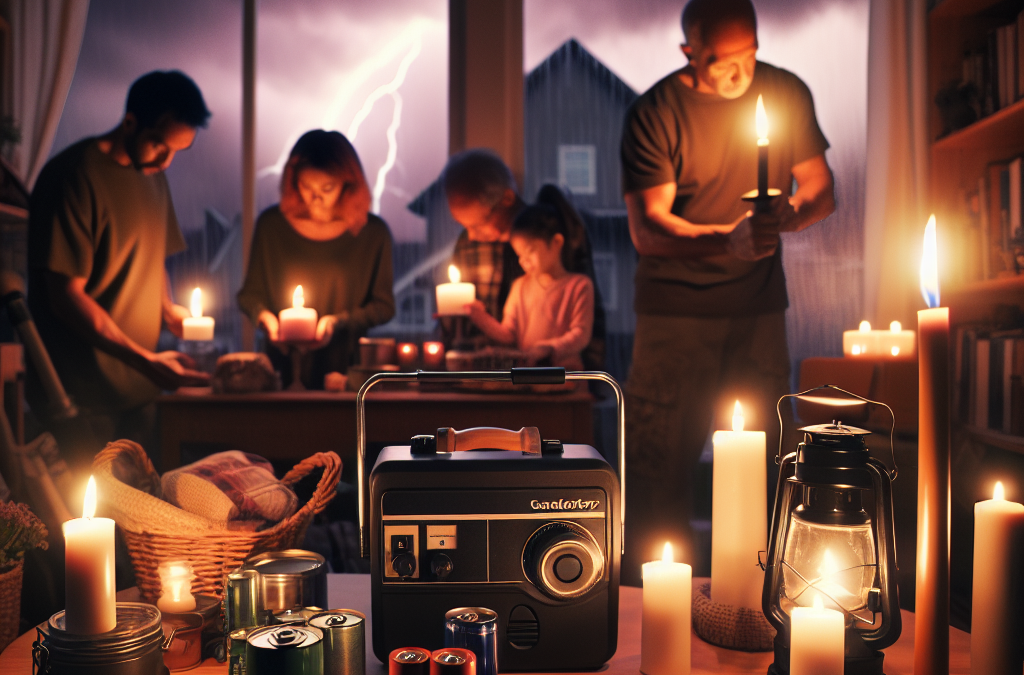
When I first had a power outage, I was scrambling around looking for candles, flashlights, and all the essentials. Now, I keep a well-stocked emergency kit. So, what should you put in yours? Start with the basics like flashlights and batteries. It might sound simple, but trust me—having a reliable light source makes all the difference when your home is pitch black.
Next, include non-perishable food and water. Stuff like canned goods, dried fruits, and nuts are great because they don’t require cooking. And who wants to eat cold beans directly from a can, right? But in a pinch, you might have to!
Don’t forget a first-aid kit. Accidents can happen in the dark, and it’s always better to be prepared. A little foresight can save you a lot of trouble. The simple act of compiling these items can help ease anxiety, knowing you’re equipped if the power goes out.
How to Secure Your Devices
Backups are crucial! I can’t stress this enough. In our modern lives, losing access to devices can feel like losing a lifeline. For me, ensuring my phone and laptop are fully charged is a top priority whenever I hear about potential outages. Whenever strong winds or storms loom on the horizon, I make it a point to charge my devices beforehand.
Considering investing in a portable charger or power bank, too. That way, even if the power is out for an extended period, you can still keep your phone alive for emergencies.
And don’t forget about your internet router! If you have a mobile hotspot, using it during an outage can help you stay connected. Internet isn’t just for browsing; it’s essential for communication during emergencies.
Local Resources and Contact Information
Keep a list of important contacts readily available. Jot down the numbers of local electric companies, emergency services, and community resources. If anything goes awry, having immediate access to this information can save you time and hassle. I’ve found that when the power is out, it feels like everything is in slow motion, which makes the downtime even more frustrating.
Additionally, familiarize yourself with local emergency management websites. Many communities have social media pages or apps that provide real-time updates during outages.
Staying connected and informed has helped me tremendously in the past. And even if the power is out, knowing the local resources can truly help in navigating an unexpected situation.
Planning Ahead: Assessing Your Home’s Vulnerabilities
Identifying Problem Areas
Your home may have specific areas that are more vulnerable during a power failure, and it’s key to identify them ahead of time. Have you ever woken up freezing because your heating system went down? Yeah, it’s no fun! Check if your heating or cooling systems rely solely on electricity.
Evaluate your home’s insulation too. If your insulation isn’t up to par, you might find that your home turns into an icebox during a power failure in winter, or a sauna in summer. I made this mistake once, and trust me; it’s a surreal experience that you never want to go through again.
Understanding the layout of your home can guide your preparations. For instance, if your basement is prone to flooding when it rains hard, planning will be vital to ensure your possessions remain safe during an outage.
Making Necessary Adjustments
Once you’ve assessed your home’s vulnerabilities, it’s time to make adjustments. Simple fixes can make all the difference. If you rely heavily on electrical systems for heating, consider investing in a propane heater or a wood stove. This can become an alternative heat source should the power fail.
Additional backup measures might include solar chargers for your gadgets or a generator for essential appliances. Not to be dramatic, but trust me, these can be lifesavers. Just think—your fridge can keep working, and you won’t return to a stinky mess after a long outage.
Making these adjustments might require upfront costs, but they’re investments in your peace of mind. Assess what’s necessary for you and act accordingly; the effort will pay off down the line.
Communicating with Your Family
One of the most important elements of any power failure plan is communication. Talking to your family about emergency plans can prevent panic in the event of an outage. I always sit down with my family and discuss what they need to know—where the emergency kit is, how to manage without power, and who their emergency contacts are.
Getting everyone involved ensures that information is easily transferable. In the chaos of an unexpected outage, clear communication can help manage stress levels and ensure everyone feels secure.
Establishing a system for checking in during an outage is also good—perhaps a group chat or a designated meeting spot nearby in case the phones go down. Making these plans shows that you’re all in this together, which can be comforting.
Staying Informed and Updated
Utilizing Technology
Believe it or not, technology can be your best buddy when it comes to staying informed during an outage. Download apps from your local power company that provide real-time updates. A few minutes spent setting these up now can save major headaches later.
I love using weather apps as well. These not only warn about potential storms and resulting outages but also guide you on necessary precautions to take ahead of time. Knowledge is power—pun intended!
Moreover, setting up alerts for emergency notifications is crucial. This keeps you informed even when the power is out, as long as your devices are charged or you have a backup plan for communication.
Listening to Local News and Alerts
Staying connected to local news can provide you with useful updates and information. During outages, I often turn to the radio or battery-operated devices to stay in the loop. Local news stations often have updates on recovery efforts, road conditions, and safety advisories.
Being aware of what’s going on in your area can also guide your decisions—whether it’s safe to stay home or if you need to evacuate if storms are severe enough. Staying informed can give you vital information that helps keep you safe.
Don’t forget social media forums as they also share real-time information and community experiences. Connecting with neighbors and sharing updates can help everyone feel a sense of community—especially during challenging times.
Preparing for Future Emergencies
Lastly, I can’t stress enough the importance of ongoing preparation. Just because you’ve made it through one power failure, doesn’t mean you’re off the hook for another one. Regularly assess your kits, update emergency contacts, and refresh emergency plans with your family. Life changes, and so do our needs. Staying proactive is key!
I also recommend practicing emergency drills as a family. It might sound silly, but running through the motions can make a huge difference when anxiety kicks in during an actual outage. The more familiar everyone is with the plan, the smoother things will go.
Remember, being prepared is about feeling secure when the unexpected happens. Taking these steps can give you peace of mind, knowing you’re ready for whatever comes your way.
FAQs
1. What should I include in an emergency kit for power failures?
Your emergency kit should include flashlights, batteries, non-perishable food, water, a first-aid kit, and any necessary medications. Don’t forget a battery-operated radio for updates!
2. How can I securely charge my devices during an outage?
Invest in portable chargers or power banks to keep your devices charged. Also, consider solar chargers for a sustainable option during longer outages.
3. Why is it essential to communicate with my family about power failures?
Clear communication helps manage anxiety during outages. Discussing plans and emergency contacts ensures everyone knows what to do, reducing panic.
4. How do weather conditions affect power outages?
Severe weather, like storms, can lead to power failures through downed lines or equipment damage. Staying informed about impending weather can help you prepare accordingly.
5. What adjustments can I make to my home for better power failure preparedness?
Consider investing in alternative heating sources, reviewing insulation, and creating an emergency kit specific to your home’s vulnerabilities. Making these changes enhances your preparedness for unexpected outages.
First up, I can’t stress enough how crucial it is to know what you’re up against. Take a good look at the geographical location of your business. Are you in a flood zone or an area prone to hurricanes? You’ll want to jot these vulnerabilities down and categorize them based on the likelihood of occurrence. Trust me, nothing beats being prepared based on solid knowledge.
Beyond just your location, consider the specific type of business model you have. Are there particular materials or equipment that could pose risks during a disaster? Knowing what’s on the line can help you make more informed decisions as you create your disaster preparedness plan.
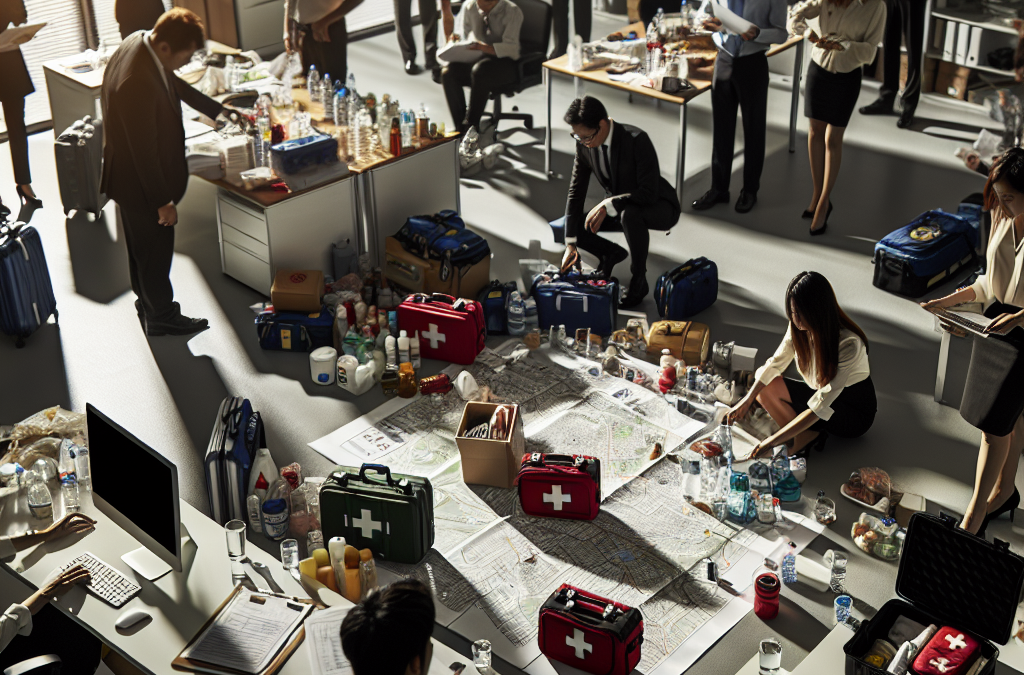
Don’t forget to involve your team in this assessment. It’s always better to have multiple perspectives. Organize a brainstorming session where everyone shares what they think could be a risk, this not only creates a sense of involvement but also may surface some overlooked areas.
Utilize Resources
Another critical part of assessing risks is making full use of available resources. There are tons of online tools and local government resources that can help you gather data about potential disasters in your region. I often recommend checking out FEMA’s website for their comprehensive data on various natural disasters.
If you have the budget, consider hiring an expert or consultant who specializes in risk assessment. They can provide insights that you might miss as a business owner. Plus, it’s often worth the investment when you think about the potential losses you could avoid.
Lastly, don’t overlook community resources. Network with other local businesses to learn about what strategies they’re employing to mitigate risks. Collaboration can lead to innovative solutions that can keep everyone safer.
Regular Training and Drills
Once you’ve nailed down your risks, the next step is getting your team ready. Regular training sessions can make a world of difference. I recommend scheduling quarterly trainings that focus specifically on emergency preparedness. Go over what procedures to follow in different scenarios, whether it’s a fire, flood, or earthquake.
In addition to training, conducting drills is super important. Just like fire drills in schools, it’s essential for your team to get comfortable with the procedures. These drills help everyone know their roles and can significantly decrease panic during an actual event.
Make it fun! You can turn a serious training session into a team-building experience. Maybe have some friendly competitions about who remembers the most about safety procedures. This encourages participation and reinforces the importance of being prepared.
Create an Emergency Preparedness Plan
Outline Essential Procedures
Alright, so now that we’ve assessed our risks, it’s time to create a solid emergency preparedness plan. This ain’t just any ol’ document; it needs to clearly outline procedures for any disaster scenario. Get down to the nitty-gritty like evacuation routes, communication channels, and roles for team members during an emergency.
Having a structured plan helps eliminate confusion. I can’t tell you how many times I’ve seen chaos ensuing in the absence of one. Try to keep it simple enough that anyone can understand it, even under stress. Use clear language and visual aids like maps or diagrams to illustrate key points.
Lastly, remember that a plan is a living document. Make sure to regularly revise and update it as your business grows or as new potential threats emerge. Keeping it fresh ensures everyone’s on the same page.
Communicate Effectively
Alright, so here’s where the rubber meets the road: communication. Your plan is fantastic, but if nobody knows it, it’s pretty useless. Establish effective communication channels before a disaster strikes. This could be through group texts, email chains, or even a dedicated app based on your team’s needs.
Involve your employees in this aspect as well. Ask for their preferences on communication methods and ensure everyone knows how to reach each other in an emergency. It’s all about creating a dependable network within your business.
And don’t forget about external communication with customers and stakeholders. Being transparent can help maintain trust during troubled times. Have a communication plan ready for how you’ll disseminate information about closures or reopening plans.
Regular Plan Review and Updates
Creating a plan is just the start; you’ve got to keep it alive by regularly reviewing and updating it. I’d recommend setting a schedule—maybe bi-annually—to revisit all components of the preparedness plan. This keeps things relevant and allows your team to adapt to any changes or new circumstances.
Encourage feedback from your employees on what works and what doesn’t with the current plan. Getting fresh perspectives can lead to improvements that you might not initially see. This fosters a culture of continuous improvement in safety measures.
Finally, documenting updates is key. Keep an updated version of your plan accessible to all employees, so they can refer to it whenever needed. This shows your commitment to safety and helps your team feel more secure.
Build Strong Connections with Local Agencies
Networking with Local Authorities
Building relationships is crucial, folks. One way to amp up your preparedness is by connecting with local emergency management agencies. By doing so, you gain access to crucial information and resources. Many local agencies offer workshops or meetings that can keep you informed about potential threats and best practices in emergency management.
Not only should you connect, but try to attend community meetings where these topics are discussed. It’s a great way to stay in the loop and show your business’s commitment to readiness. Plus, knowing who to contact in an emergency is vital for peace of mind.
These relationships can even lead to partnerships during community emergencies, where businesses can collaborate to provide mutual aid. It strengthens the resilience of your business and the community as a whole.
Collaborate with Other Businesses
Don’t be an island; it’s all about teamwork and collaboration! Partner up with other local businesses to develop a cohesive disaster response strategy. Sharing resources or ideas can have a massive impact when a natural disaster hits. You might even find that pooling resources can save everyone money and effort.
Think about creating a business alliance focused on disaster preparedness. This group can work together on training and resources, and even conduct joint drills together. It can vastly widen your safety net!
Another cool avenue can be sharing insights from your experiences. I’ve learned tons from other business owners who’ve been through the storm (literally and figuratively) and took the time to share their insights. Offer to share your own lessons learned; it’s a great way to build camaraderie and reinforce community resilience.
Stay Informed About Upcoming Events
Lastly, make it a habit to stay informed about upcoming weather events or natural disasters that might impact your area. This includes subscribing to alerts from local news, weather channels, or emergency management services. Being proactive about information can make a huge difference in your level of preparedness.
Moreover, encourage your employees to stay informed too. An informed team is a prepared team. You might consider a regular newsletter or chat group where people can share updates or news relevant to your industry and location.
Remember, staying informed means not just reacting but being ready before an emergency hits. The more steps you take to foster awareness, the better your business can respond when it counts.
Conclusion
Preparing for natural disasters is no small feat, but it’s essential for the longevity and safety of your business. Start with assessing your risks, creating an actionable emergency preparedness plan, establishing solid communication channels, and building meaningful connections in your community.
Staying proactive and involved will not only help protect your assets but also ensure the safety and well-being of your employees and customers. So, roll your sleeves up and start preparing today—it’s a task well worth the effort!
Frequently Asked Questions
1. What should I do first when considering disaster preparedness?
The first step is to assess your risks. Identify the potential natural disasters relevant to your geographical area and consider how they could impact your business operations.
2. How often should I review my emergency preparedness plan?
It’s recommended to review your plan at least bi-annually. Keeping it updated ensures everyone is aware of the current procedures and any significant changes in your setup or location.
3. Why is training important for my team?
Training prepares your team for real-life situations. Regular drills and training sessions help employees feel more confident, reducing panic and confusion during actual emergencies.
4. How can collaboration with local businesses benefit my disaster preparedness efforts?
Collaborating helps pool resources, share insights, and potentially develop joint strategies for emergency response, making the entire community more resilient.
5. What resources are available for disaster preparedness?
There are plenty of resources ranging from FEMA’s website to local emergency management services. Many offer workshops, online tools, and guidelines that can assist businesses in preparing effectively.
In this article we will be discussing the topic of emergency preparedness and survival. With all that is going on in the world right now, it is prudent that we consider a preparedness and survival plan.
When you think of survival, what comes to mind?
Most people think of the movie “The Road Warrior” where they imagine themselves surviving in the wild with nothing but their wits and whatever they can find. In reality, survival is not about being able to fend off wild animals or being able to outrun a hungry grizzly bear. Survival is actually about being able to cope with anything life throws at you. Whether you encounter a natural disaster, global pandemic, or financial collapse – you need to be able to survive.
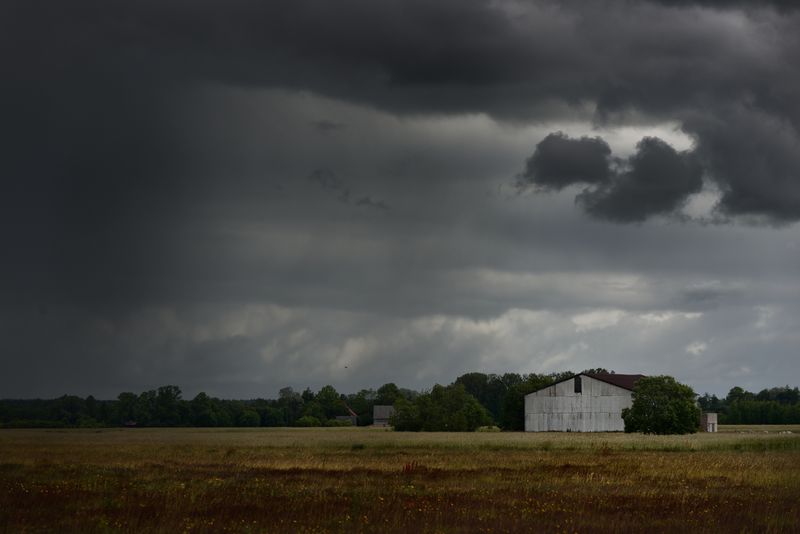
There are many different types of disasters that can occur, including floods, hurricanes, tornadoes, earthquakes, volcanoes, and even nuclear meltdowns. The list is endless which makes planning and preparedness very important. Don’t let a disaster situation catch you without a plan.
Many people have a very poor understanding of how long they would be able to survive in the event of an emergency. There are many factors that come into play when determining how long you can survive in an emergency situation. For example, if you live in a hurricane zone, you may have to prepare for a minimum of three days before you can expect help to arrive. However, if you live in a tornado zone, you may only have to prepare for a day or two.
If you have a family, it is very important that you determine what type of disaster your family will be able to survive. If you have children, you will want to make sure that you know how long it will take to get help. You will also want to consider how far away your family members are from each other. If you live in a large city, you may be able to walk there in a short amount of time. However, if you live outside of town, you may have to wait hours or even days for help to arrive.
You will also need to determine what supplies you need to have on hand. This will depend on the type of disaster you will be facing. Some people think that they will just have to pack up their bags and go. However, you may need to make sure that you have enough food, water, and clothing to last you until help arrives.
In addition, you will want to consider what type of shelter you will need. If you live in an area that has frequent earthquakes, you may want to consider building a shelter on top of your home. If you live in a tornado zone and are not in a basement, you may want to consider a tent. If you live in a flood zone, you may want to consider buying a boat or renting a cabin on a lake.
If you are not sure what type of disaster you will be faced with, you may want to consider taking a class on survival skills. You will learn the basics of what you will need to survive and you will be able to determine how long you can survive without help.
Emergencies can strike at any time, and it’s essential that you are prepared. A disaster could leave your family without power or running water for days, so it’s crucial to have a plan in place. In this blog post, we will discuss the five essential steps to prepare for an emergency.
Step 1: Create an Emergency Kit
The first step is to create an emergency kit that includes all the essentials your family may need during a crisis. Your kit should include non-perishable food items, bottled water, flashlights, extra batteries, first aid supplies, and any necessary medications. It’s also important to have a portable charger for your phone and other electronic devices. You may want to consider adding additional items like matches, a whistle, and a multi-tool. Make sure to store everything in a convenient location where it can easily be accessed.
Step 2: Develop a Communication Plan
Communication is critical during an emergency, which is why it’s essential to develop a communication plan with loved ones. Identify someone out of state who can serve as a central point of contact and make sure everyone has their number saved in their phones. Also, establish a meeting spot if you get separated from your family. Remember to charge your phone regularly and keep it on silent mode to conserve battery life.
Step 3: Keep Important Documents On Hand
It’s vital to keep important documents such as birth certificates, social security cards, insurance policies, and passports in a safe and accessible location. Consider using a fireproof lockbox or storing them electronically in a cloud storage service. This way, you can quickly access these documents if needed.
Step 4: Preparing Your Home For An Emergency
Preparing your home for an emergency involves taking several proactive measures. Firstly, ensure that your smoke detectors are working correctly and replace the batteries every six months. Secondly, install a carbon monoxide detector near sleeping areas and check its batteries regularly. Thirdly, secure loose furniture and objects that could fall during an earthquake or severe weather event. Finally, trim trees and shrubs around your house to reduce the risk of damage from falling branches.
Step 5: Practice Your Emergency Plan
Practicing your emergency plan is essential to ensuring that everyone knows what to do in case of an emergency. Conduct regular drills with your family to test your communication plan and evacuation procedures. Review your emergency kits periodically to ensure they are up to date and replenish anything that has expired. By practicing your emergency plan, you will feel more confident and prepared in the event of an actual emergency.
In conclusion, being prepared for an emergency is crucial. Taking these five essential steps will help ensure that you and your family stay safe and informed during difficult times. Remember to stay calm, communicate effectively, and take action before an emergency strikes.