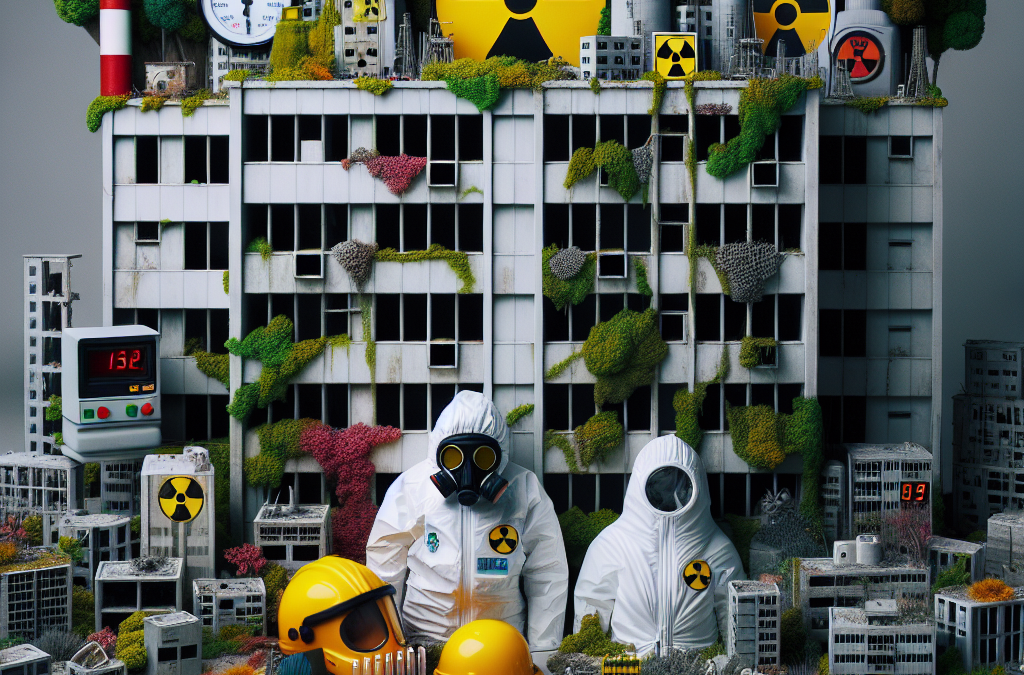
by Preparation | Apr 26, 2025 | Preparedness
Human Health Impacts
Immediate Effects of Radiation Exposure
Let’s be real—radiation is no joke. When someone gets exposed to high levels of radiation, the immediate effects could be brutal. Things like nausea, vomiting, and fatigue can hit hard and fast. Honestly, you wouldn’t want to find yourself in that situation. It isn’t just about bad vibes; it’s about feeling physically awful.
These symptoms can onset very quickly after an acute exposure, often within hours. What’s scary is that some folks might not realize what’s happening to them at first. It can throw a wrench in your plans, making it essential to recognize the signs and seek help immediately.
In addition, the psychological aftermath can also be daunting. People often feel a sense of fear and anxiety about their health after these disasters, which can linger long after the physical symptoms fade away. That emotional toll is just as significant as the physical damage done.
Long-Term Health Risks
The long-term risks of radiation exposure can be even creepier. Cancer is the big bad wolf here. Those who’ve been exposed to significant radiation may have an increased risk of various cancers years down the line. It’s a grim truth that many don’t like to think about but ignoring it won’t help.
Other potential long-term effects include cardiovascular diseases and damage to your thyroid. Studies have shown that radiation can impact organs that we might not even immediately think about. Keeping an eye on your health post-exposure is crucial.
Your mental well-being plays a role too. Survivors often deal with anxiety and depression stemming from the event. It’s vital for folks to have access to mental health support to process what they’ve gone through and rebuild their lives.
Vulnerable Populations
And, of course, we can’t forget about vulnerable populations. Kids, pregnant women, and even the elderly are at greater risk during radiological events. Why? Their bodies are more susceptible, and the long-term effects can hit harder for them. It honestly breaks my heart when I think about how these disasters can impact those who are already vulnerable.
This vulnerability is a reminder for all of us to stay informed and prepared. When we know that certain groups are at a higher risk, it motivates us to create safer environments and advocate for better disaster preparedness.
The community plays an essential role here. Helping one another during crises—especially those most at risk—fosters resilience and supports recovery efforts across the board.
Environmental Impacts
Contamination of Land and Water
Now, let’s dive into the environment. One of the major issues following a radiological disaster is the contamination of land and water. The impact can last for decades, or even longer in some cases. Sites can become uninhabitable for a long stretch of time, and that’s a big deal!
Water sources can also be compromised, making them unsafe for drinking or irrigation. This can result in food shortages and health crises, creating a vicious cycle of issues. People need clean water, and when that gets messed up, it’s a problem shared by everyone.
As someone who has seen the effects of environmental disasters firsthand, I can say that the scars they leave can take generations to heal. It’s vital for society to develop robust cleaning and containment responses to deal with the fallout.
Impact on Flora and Fauna
Let’s talk about our furry and green friends. Radiological disasters don’t just affect people; they also have devastating effects on wildlife and vegetation. You can imagine that once an area is contaminated, the native species suffer, often leading to drastic declines in their populations.
This decline can disrupt entire ecosystems, creating imbalances that have long-lasting effects. It changes the landscape—both literally and figuratively—transforming vibrant areas into ghostly reminders of their former selves.
It’s sad to think about, but recovery for affected wildlife can take years. We really need to think about how we can mitigate these impacts ahead of time and preserve what we can.
Economic Consequences
Lastly, let’s touch on the economic fallout. After a radiological disaster, local economies can crumble. Property values can plummet, and businesses may close down for good. People are often hesitant to return—and who can blame them? The fear of radiation lingers long after the physical cleanup is done.
Tourism can take a massive hit as well, which can starve a community of much-needed revenue. With fewer visitors, local services suffer, creating a ripple effect of economic hardship. Recovery isn’t just about cleaning up; it’s about revitalizing a community.
As someone interested in marketing and community resilience, I believe we need to foster proactive approaches to recovery, so that when disaster strikes, communities aren’t left in the dust, financially or emotionally.
Preparedness and Response
Emergency Plans
So, how do we get ourselves set up for success? Well, emergency planning is a biggie. Communities need to create and communicate clear emergency plans for radiological disasters. This means everything from evacuation routes to communication methods for keeping everyone informed.
I remember a community drill I participated in; we learned about these plans firsthand, and it was honestly eye-opening. Preparedness isn’t just a bunch of jargon—it’s what can save lives when the crunch comes.
Having these plans in place also helps to mitigate panic and confusion when an actual disaster occurs. Clear communication can guide people and keep emotions at bay during a tense time.
Education and Training
Education is key! Folks need to know what they’re up against and how they can protect themselves. Community workshops could provide training on recognizing signs of exposure and how to decontaminate yourself if you find yourself in a disaster zone.
Kinda wild to consider how much power knowledge can give us. It can help individuals and communities band together and respond effectively, transforming a potentially chaotic situation into one where everyone knows what’s going on.
Having trained personnel ready to step in is vital too. First responders who have dealt with radiological threats can make all the difference in those early hours of a crisis. It’s refreshing to see communities prioritizing this level of preparation.
Community Engagement
Last but not least, community engagement is an essential piece of the puzzle. When people come together to prepare for potential disasters, it builds a sense of unity and resilience within the community. Sharing resources, planning, and participating in drills allows everyone to feel more secure and informed.
One thing I’ve noticed is that engaged communities handle crises better. There’s a certain trust that builds when people collaborate on preparation efforts. It’s reassuring to know that we can rely on each other when push comes to shove.
Plus, it’s pretty empowering to take action. People love being part of solutions, and when we rally together, we create stronger, safer environments for everyone.
Regulatory and Safety Measures
Government Regulations
Government regulations play a pivotal role in managing the risks associated with radiological disasters. There are strict rules dictated by organizations meant to keep us safe. These guidelines often revolve around proper containment measures, emergency response protocols, and worker safety measures.
Having those regulations in place is crucial—not just for preventing disasters but also for effectively responding when they do happen. I’ve seen communities that are proactive about implementing these standards set an example for others.
It can create a culture of safety where everyone knows their responsibilities and can act accordingly. In times of crisis, that culture can be life-saving!
Safety Training for Workers
Safety isn’t just about regulations; it’s personal, especially for those working in industries where exposure risks are higher. Regular training about safety procedures can empower workers to keep themselves and their colleagues safe. This kind of training can be lifesaving.
For example, learning to identify radiation hazards and how to mitigate those risks can create a safer workplace. Remember, those frontline workers become our first line of defense during a disaster.
So, when I think about safety training, it’s all about building a culture of vigilance. Workers should feel confident and equipped to face hazardous situations, and that starts with comprehensive training.
Community Involvement in Regulation
Lastly, community involvement in regulations is super important. It’s one thing to have regulations on paper, but when folks are involved in the process, it adds a layer of insight that’s invaluable. Communities can bring their experiences and knowledge to the table to create better regulations.
Public forums, discussions, and participation in licensing processes can result in regulations that truly reflect the community’s needs and concerns. This isn’t just top-down governance; it’s a collaborative approach that can foster trust.
From my experience, when local voices are heard, the regulations are often more effective and embraced by the community since people feel like they have a stake in their safety protocols.
Conclusion
In conclusion, understanding the risks of radiological disasters requires a multi-faceted approach. From grasping the health implications and environmental impacts to ensuring preparedness, response, and safety measures, it’s a lot to digest. But facing these challenges head-on can ultimately foster resilience and community strength.
My takeaway? It’s essential for all of us to stay informed, engaged, and prepared to tackle these very real risks together. When we band together and take knowledge to heart, we create safer worlds for our families and communities.
FAQ
1. What are the immediate health effects of radiation exposure?
Immediate effects of radiation exposure can include symptoms like nausea, vomiting, and fatigue. These symptoms can present themselves within hours of exposure, highlighting the need for prompt medical attention.
2. How does radiation affect the environment?
Radiation can contaminate land and water sources, making them unsafe for living organisms. It can disrupt ecosystems and lead to declines in plant and animal populations, impacting biological diversity.
3. Why is community engagement important in disaster preparedness?
Community engagement fosters collaboration and trust among residents. When people work together to prepare for disasters, they create a network of support that can make a significant difference in recovery efforts.
4. What role do government regulations play in preventing radiological disasters?
Government regulations set safety standards for industries and establish protocols that help prevent disasters from occurring. These regulations ensure that organizations are equipped to handle potential radiological risks effectively.
5. How can individuals prepare for a radiological disaster?
Individuals can prepare by creating emergency plans, participating in community drills, and staying informed about safety protocols. Being knowledgeable and ready can help mitigate the impacts of a radiological event.
This HTML article provides insight into the understanding of radiological disasters, structured to be informative and approachable. The tone is friendly and personal, aiming to both educate and engage the reader.
by Preparation | Apr 26, 2025 | Preparedness
Diverse Skill Sets Enhance Flexibility
Understanding Cross-Training
Cross-training in survival skills is all about diversifying the abilities you can call upon. It’s like not putting all your eggs in one basket! When you’re out in the wild, relying on a single skill can be limiting. For instance, if you’re a pro at building fires but can’t navigate back home, you might find yourself in a sticky situation. That’s why mixing it up is key.
From my own experience, I’ve found that learning to forage for food complements my navigational skills beautifully. When I can recognize edible plants while knowing how to read the terrain, my chances of survival soar. The more skills you have under your belt, the quicker you can adapt to any curveball nature throws at you.
Plus, diversifying your skill set keeps things interesting. Instead of getting bored with the same routine, you’re constantly challenging yourself, which helps to solidify what you learn. After all, who wants to be stuck in a rut when learning about survival can be so much fun?
Building Confidence Through Mastery
Practice Makes Perfect
One of the coolest things about cross-training is the confidence it builds. I remember the first time I successfully started a fire using only my surroundings—it was a euphoric moment! By learning various techniques, from friction-based methods to modern fire starters, I felt capable and ready for anything.
When you’ve invested the time to master different skills, it boosts your survival mindset. Suddenly, situations don’t seem so overwhelming. For instance, if you’re lost in the woods, having multiple navigation techniques under your belt reduces panic and increases problem-solving abilities.
Confidence isn’t just about knowing what to do; it’s also about trusting yourself to pull it off. I’ve found that the more I practice, the more I trust my instincts, which is vital when you’re out there facing the great unknown.
Adapting to Different Environments
The Value of Versatility
Let’s face it: nature doesn’t always play nice, and environments can vary wildly. Cross-training allows me to adapt my skills to whatever situation I find myself in. Whether I’m hiking in the mountains or camping by a lake, having a range of survival skills ensures I’m prepared for any scenario.
For example, in a forested area, my skills in shelter building and food foraging come in handy. But if I find myself near a body of water, knowing how to fish or purify water moves to the forefront. It’s like having my own toolkit of awesomeness, and I get to choose the right tool for the job!
Being adaptable doesn’t just help in survival situations; it enhances my enjoyment of nature, too. I mean, who wouldn’t want to be the person who can whip up a meal on a camping trip or navigate back to camp when the sun sets?
Collaborative Learning Opportunities
Learning with Others
One of the best parts of cross-training in survival skills is how much you can learn from others. During group adventures, I’ve picked up countless tips and tricks from fellow enthusiasts. It’s an amazing way to not only enhance your own skills but also build camaraderie.
Take a wilderness survival course, for example; you’re bound to meet people with diverse backgrounds. Whether it’s a military veteran or a nature guide, everyone has something unique to offer. These collaborative experiences are invaluable, and they often lead to lifelong friendships.
Additionally, sharing skills with friends can reinforce what you’ve learned. Teaching someone else is a great way to deepen your understanding. When you explain how to build a shelter or start a fire, it solidifies your knowledge, while also fostering a sense of community around essential skills.
Preparing for the Unexpected
The Reality of Survival Situations
Finally, life is unpredictable. Cross-training helps prepare you for unexpected circumstances by arming you with a stash of survival skills. Trust me when I say it’s not just about ‘if’ something goes wrong, but ‘when.’ Being prepared can make all the difference in critical moments.
I remember a backpacking trip where a sudden storm hit. Having cross-trained in both navigation and emergency shelter building meant that instead of freaking out, I could act swiftly. Understanding how to identify shelter materials and create a safe space proved invaluable at that moment.
Each experience adds to your arsenal, making you better equipped to handle surprise situations. The more flexible and knowledgeable you are, the more effectively you can respond. This level of preparedness can turn anxiety into action—a huge win for any survivalist!
FAQs about Cross-Training in Survival Skills
1. What is cross-training in survival skills?
Cross-training in survival skills refers to the practice of diversifying your knowledge and abilities to enhance your survival capabilities in various situations. Instead of focusing on just one area, it encourages learning multiple skills to adapt to different environments.
2. How does cross-training improve confidence?
Confidence in survival situations often stems from practice. When you master a variety of skills, you feel more capable of handling unexpected challenges. This trust in your abilities can reduce panic and improve your decision-making in critical moments.
3. What are some examples of survival skills to cross-train?
Some examples include navigation techniques, fire-starting methods, shelter building, foraging for food, and water purification. Learning a mix of these skills ensures that you’re prepared for whatever nature throws your way.
4. Can cross-training be done solo or in a group?
Absolutely! While you can certainly learn on your own through books and practice, joining a group can enhance your learning experience through shared knowledge and skills. It’s also a great way to build a community of fellow survival enthusiasts!
5. Why is adaptability important in survival skills?
Adaptability is crucial because survival situations can change rapidly. By having a range of skills, you can adjust your approach based on the specific environment and challenges you encounter, increasing your chances of survival and success.
by Preparation | Apr 26, 2025 | Preparedness
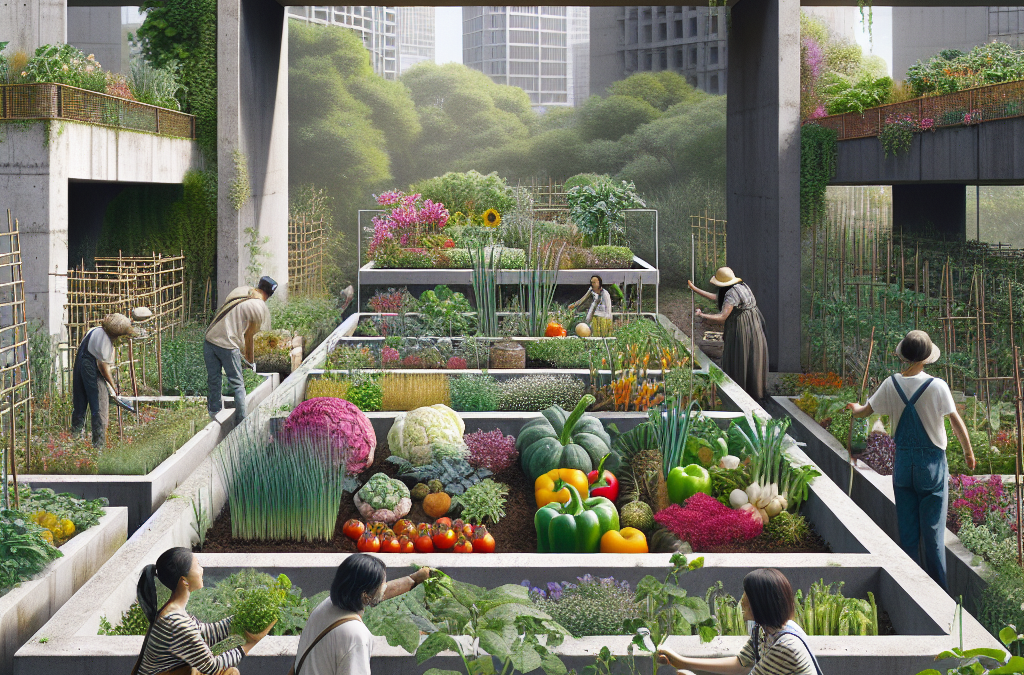
1. Finding Space to Garden in the City
Utilizing Small Balconies
When I first started my urban gardening journey, I was working with a small balcony that didn’t seem like it could fit much. But let me tell you, with a little creativity, it’s amazing what you can squeeze in! I began with vertical gardening. A couple of tiered plant stands allowed me to grow herbs and small veggies without taking up valuable floor space.
Choosing the right containers is also key. I found that using a mix of different-sized pots not only looked appealing but also helped me maximize my growing options. You don’t need a lot of room to grow food – sometimes a few pots can yield a surprising amount.
And don’t forget about the importance of sun exposure. I quickly learned that my balcony faced northeast, which meant I had to strategically position my plants throughout the day to soak up as much sunlight as possible. Even in small spaces, a little bit of planning goes a long way!
Community Gardens
One of the best discoveries in my urban horticulture experience was finding local community gardens. They’re often projects run by civic organizations or neighborhood groups and can be a great resource. Not only do these spaces provide a little plot of land for you to cultivate, but they also come with a built-in support system.
Getting involved in a community garden opened up a world of networking opportunities. I met fellow gardeners who shared tips, seeds, and even some veggies from their overflowing harvests. Plus, the camaraderie makes it more fun to dig in the dirt together!
Don’t be shy about asking around in your neighborhood or checking local Facebook groups. You might find an amazing community ripe for planting – literally!
Window Sills and Indoor Options
If you’re really strapped for outdoor space, don’t stress! You can grow a surprising amount of food right on your windowsill. Herbs like basil, parsley, and even green onions can thrive indoors with just a little sunlight. I started growing herbs in mason jars, which not only looked cute but were also super handy for adding fresh flavor to my cooking.
Another top tip? Consider using hydroponic systems that can fit on a counter. They’re a bit of an investment, but they really maximize your possibility for growing. And hey, being able to grow fresh lettuce in the middle of winter is totally worth it!
Remember, every little space counts! Get creative and see what you can make work in your home. You can turn even the tiniest nook into a flourishing mini-garden.
2. Selecting the Right Plants
Choosing Hardy Vegetables
Not all plants are created equal when it comes to urban gardening. I learned quickly that I needed to choose varieties that would thrive in confined spaces and sometimes less-than-ideal soil conditions. Start with hardy vegetables like radishes, greens, and carrots – they’re forgiving and grow well in smaller pots.
My first year, I tried to grow tomatoes and ended up with more struggles than success. But radishes? They were a breeze! With a little love and attention, they grew fast and were ready to eat in weeks.
Make sure you also consider the climate of your city. Research which plants thrive during your growing season and opt for varieties that do best in your specific zone.
Herbs and Companion Planting
Herbs are fantastic for urban gardens. They don’t take up much room, and you’ll be surprised at how many you can keep in just a few pots. I recommend starting with staples like rosemary, cilantro, and mint. These not only give flavor to your meals but also add a lovely fragrance to your space.
Another fun aspect is companion planting. I’ve found that certain plants actually help each other grow better when planted near each other. For instance, basil is wonderful when paired with tomatoes. Their synergistic relationship helps ward off pests and enhances growth. Plus, they both make for great homemade sauces!
Experimenting with different combinations has made my little garden not only more productive but also more interesting to tend. Every combination is like a mini science experiment!
Native Plants
Don’t overlook the importance of native plants! They’re typically more resilient and adaptable to local conditions, which makes them easier to maintain. I’ve planted a few native flowering plants alongside veggies, and they attract beneficial insects and pollinators, giving my garden a healthy ecosystem.
Plus, there’s something really meaningful about growing plants that are historically rooted in the area you’re living in. It connects you further to the land, and it feels extra special!
Always do a little research on what grows natively in your area and consider incorporating them into your garden space for a more diverse and caring garden.
3. Soil and Fertilizers
Building Quality Soil
The foundation of any garden is its soil. When I first started gardening, I just grabbed some basic potting mix, but the results were, let’s just say, less than stellar. Investing in quality soil has made a huge difference in my gardening experience.
Creating a blend that combines potting soil with compost not only enriches the nutrients available to your plants but also improves drainage and moisture retention. I’ve had the best luck using a mix of organic compost and worm castings to create a nutrient-rich base.
Also, consider the pH level of your soil, as it can affect nutrient absorption. Simple soil test kits can help you figure out what you’re working with, so don’t skip that step!
Organic Fertilizers
In my quest for healthy gardening, I quickly turned to organic fertilizers. Chemical fertilizers might give a quick boost, but they can also be harmful to the environment. I prefer to use organic options like fish emulsion or bone meal, which enrich the soil naturally and provide long-lasting benefits to my plants.
Composting is another fantastic way to feed your garden. Last year, I started composting kitchen scraps and yard waste. It took some time to get the hang of it, but now I have nutrient-rich compost that I use to amend my soil every season.
Trust me, feeding your plants naturally not only helps them grow but also makes for healthier food down the line. Plus, it makes me feel good knowing I’m doing my part for the planet!
Mulching for Success
As I delved deeper into my gardening journey, I learned about the incredible benefits of mulching. Applying a layer of mulch on the soil surface not only helps retain moisture but also prevents weeds, which has been a game-changer for me.
I use straw or wood chips as mulch, depending on what I can get my hands on. It’s been super helpful in keeping my little veggie patch thriving without constant watering. It makes my gardening life just a tad easier, you know?
Plus, as the mulch breaks down, it adds nutrients back to the soil, creating a lovely cycle of support for my plants. It’s truly a win-win!
4. Pest Management Strategies
Identifying Common Pests
Pest control can be one of the biggest challenges in urban gardening. I’ve encountered all sorts of little critters that just love munching on my plants. Learning to identify pests early on has been an important part of maintaining a healthy garden.
For example, aphids and spider mites are notorious for ruining plants. I found that a simple soapy water spray can help take care of them without resorting to harmful chemicals. Just take a gentle spray bottle and mix a bit of dish soap with water and watch those pests disappear!
Getting familiar with beneficial insects like ladybugs and lacewings has been equally important. I learned that attracting these helpful critters can help keep the bad ones in check. I’ve even started planting flowers that attract them – it’s all about balance!
Natural Remedies
There’s no need to reach for harsh pesticides when there are natural remedies available! I’ve used things like neem oil and diatomaceous earth with great success. For instance, neem oil acts as a natural repellent for many insect pests and is safe for humans and pets, which is a big plus in my book.
Garlic spray is another easy DIY remedy I learned about that deters a lot of unwanted visitors. Just blend garlic cloves with water, strain it, and spray it on infested plants. It smells a bit funky, but my plants don’t seem to mind!
With patience and persistence, it’s possible to keep pests at bay without negatively impacting the environment. I love sharing natural pest control tips with fellow gardeners!
Companion Planting for a Healthy Garden
As I mentioned earlier, companion planting is not just great for the plants but also for pest control. I discovered that planting marigolds near my veggies can deter aphids and nematodes. Plus, they add a pop of color to my garden!
Planting certain herbs alongside your vegetables can also help. For example, basil is a natural repellent for flies and mosquitoes, so it benefits everyone when planted nearby!
Finding out which plants grow well together has really taken my gardening to the next level. Not only do my plants seem healthier, but I’ve also created a more biodiverse environment that supports all kinds of critters.
5. Harvesting and Enjoying Your Urban Bounty
Knowing When to Harvest
Ah, the moment of truth – when it’s time to reap what you’ve sown! One of the most exhilarating parts of gardening is harvesting, but knowing when to do it can be tricky. I’ve had my fair share of too-early or too-late harvests, so I’ve learned to pay attention.
For example, leafy greens are best picked before they get too tall or bitter. I typically try to harvest in the morning when they’re crisp and full of moisture. Similarly, tomatoes should be harvested when they’re just turning that lovely shade of red, not waiting until they’re completely soft.
Always look up specific harvesting info for each type of plant. It makes a difference – trust me!
Storing and Preserving Your Harvest
Once you’ve harvested that gorgeous produce, the next step is figuring out how to store it properly. I learned that different veggies require different storage tactics. For instance, leafy greens can benefit from being wrapped in a damp cloth before putting them in the fridge.
Another great way to extend the life of your harvest is through preservation methods. I started canning my excess tomatoes and pickling cucumbers. It’s a little work, but there’s nothing quite like enjoying your garden’s bounty all year long!
Plus, if you’re someone who loves gifting, homemade preserves make wonderful presents. Friends and family will be amazed that you grew the ingredients yourself!
Sharing the Bounty
One of the best parts about urban gardening is the community aspect. Once you start harvesting, you might find yourself with more produce than you can eat. This is the perfect opportunity to share your fresh food with neighbors or friends!
I often find joy in sharing my herbs or a big basket of veggies with neighbors. Not only does it strengthen community ties, but it also spreads the joy of gardening! Plus, my friends return the favor with their own garden goodies, and it turns into a delightful cycle.
In the end, urban gardening is not only about sustaining yourself but also about fostering relationships and sharing the fruits of your labor. It’s about creating a community and enjoying the experience together!
FAQ
1. What are the best vegetables to grow in an urban space?
Some of the best vegetables for urban gardening include radishes, leafy greens, and carrots, as they thrive in small spaces and can be grown in containers.
2. How can I attract beneficial insects to my urban garden?
Planting flowers like daisies and marigolds, alongside herbs, will help attract beneficial insects like ladybugs and lacewings, which control pests naturally.
3. What should I do if I have limited sunlight?
If you have limited sunlight, focus on shade-tolerant plants like spinach or certain herbs. You can also rotate pots to ensure they get as much sun as possible throughout the day.
4. Can I grow vegetables indoors without natural sunlight?
Absolutely! You can set up an indoor garden using grow lights, which mimic natural sunlight. Many herbs and greens can thrive in such conditions.
5. How often should I water my urban garden?
Watering frequency can vary depending on the plant and weather, but generally, aim for once every few days, and water deeply. Always check the soil moisture before watering to avoid overwatering.

by Preparation | Apr 26, 2025 | Preparedness
Food and Water Supplies
Types of Food to Stockpile
When it comes to post-disaster survival, food is a must-have. I’ve learned that non-perishable food items like canned goods, rice, beans, and dehydrated meals are invaluable. They not only last a long time but are also compact and easy to carry around if you need to relocate.
In my personal stash, I like to include some comfort foods, too. Things like chocolate bars or powdered drink mixes can really uplift spirits in tough times. Remember, having a morale booster is just as vital as having nutritional food!
Don’t forget to think about dietary restrictions. If you or those you may barter with have allergies or special diets, it’s important to stock up on foods that cater to those needs.
Water Filtration and Purification
You can’t survive long without water, and that’s why I recommend investing in good water filtration systems. During my research, I discovered that portable filters can provide clean drinking water without relying on electricity, which is super important in a disaster scenario.
Also, purification tablets are a game-changer. They’re small, lightweight, and can be used to make sure any water source is safe to drink. Storing a supply of these can easily become a bartering item.
Lastly, never underestimate the value of water containers. Whether it’s jugs, bottles, or storage tanks, having a way to collect and store water can make a significant difference in your survival strategy.
Cooking Equipment
If you’re trying to make the best out of scarce resources post-disaster, having cooking gear is essential. A small camping stove or portable grill can seriously elevate your food game. I mean, who wouldn’t want a hot meal instead of cold beans from a can?
Alongside that, I find utensils and cookware like pots, pans, and cutlery are neat to have. In a barter situation, these could attract a good trade for the right people, especially if they are planning to cook their own food.
Moreover, I believe a backup power source, like solar chargers or even batteries, is handy. Heating meals could literally mean the difference between survivors’ morale or despair.
Medical Supplies
First Aid Kits
First aid kits are an obvious essential. I’ve always made sure to have a well-stocked kit with bandages, antiseptics, and pain relievers. It’s amazing how quickly one can get hurt when chaos unfolds, so having this in place could save a life.
Don’t forget about prescription medications here, either! I’ve seen firsthand how crucial it is to have any necessary medications on hand for chronic conditions. These can be a hot ticket item for bartering, especially if someone has been cut off from their regular supply.
Lastly, some basic knowledge about how to use these supplies effectively can be crucial. Being able to treat injuries to not only yourself but others can position you as an essential person in a disaster scenario.
Hygiene Products
Let’s be real, hygiene might fly out the window during a disaster, but it shouldn’t. It dubs as a much-needed bartering item. I always keep things like soap, toothpaste, and sanitary products locked away in my emergency stash because trust me, they’re hard to come by when supplies are limited!
Wipes and hand sanitizers are lifesavers too. You never know when you might be stuck without water, so having alternatives handy can keep you feeling somewhat fresh and healthy.
Finally, make sure to have a supply of trash bags to keep your living area clean. This is not just for hygiene but also prevents the spread of disease, making it crucial for survival.
Knowledge and Skills
Skills can be the most valuable currency during a crisis. I placed a huge focus on learning skills like basic medical assistance, gardening, and even self-defense. The more skills you have, the better you’ll be prepared for bartering!
Sharing knowledge can also be a worthwhile barter. If you can teach someone how to grow food or start a fire, you can exchange that for goods you wouldn’t otherwise have. Skills are versatile and can transcend the need for physical items!
So, take some time to invest in your own skills. Whether it’s online classes or hands-on practice, being skilled means you’re in a stronger position to survive and barter in a post-disaster scenario.
Tools and Equipment
Basic Tools
Having a toolkit with basic hand tools can be incredibly handy. I strongly suggest gear like pliers, screwdrivers, hammers, and wrenches. You never know when you might need to fix something or construct a shelter!
I once traded a small toolkit with a neighbor for some water. Tools can often be overlooked, but they’re essential for maintaining your environment and improving your situation.
Plus, if you become the go-to person for repairs or building projects, you’ll find that others will approach you when they need something fixed, allowing you to barter for goods or services.
Self-defense Items
In uncertain times, having something for self-defense is non-negotiable. I’ve personally researched options like pepper spray or personal alarms which are great for keeping intruders at bay without needing a firearm.
Additionally, something as simple as a sturdy walking stick may serve a dual purpose for defense and mobility. I appreciate tools that work for multiple situations!
In a barter scenario, self-defense items can be immensely valued. Many people dread the idea of being unprotected, so having extra items might put you in a position to make favorable trades.
Communication Devices
Being able to communicate is key in a disaster, so think about investing in walkie-talkies or ham radios. I once had to rely on these gadgets during an emergency, and they were a lifesaver!
My recommendation is to keep spare batteries as well since a dead device isn’t going to help anyone. These items make for great bartering tools when others realize how essential they are when the communication lines are down.
Furthermore, understanding how to use these devices is vital for effective communication. In a crisis where information is scarce, knowledge of survival communication can make you invaluable.
Community and Relationships
Building Connections
Lastly, I want to stress how important connections are. Building relationships within your community can be the strongest form of bartering. Trust me, the stronger your network, the better your survival chances.
People share resources and skills within a community; for instance, I’ve seen neighbors exchange food for medical advice. This gives everyone a sense of support and hope in tough times.
Don’t forget to work on your interpersonal skills too. Sometimes your biggest resource in dire situations can be the friendships you’ve cultivated.
Sharing Resources
Don’t hoard everything for yourself! Learning to share resources with others in your community can turn the tide during a disaster. I found it rewarding to share supplies and skills, as this helped build trust among us.
Pooling resources can create a more resilient group. If there are assorted supplies, it makes it easier for everyone to survive and increases the chances of successful bartering.
Remember, sharing can earn you goodwill, and in a barter situation, that can translate to significantly favorable conditions for you!
Group Strategies
Being part of a group can be beneficial when it comes to survival. In my personal experience, I’ve found that groups help strategize the best way to gather supplies and defense. There’s strength in numbers!
Plus, you can divide tasks based on skills. If one person is a fantastic cook and another knows how to collect water, everyone contributes their strengths for mutual benefit.
Ultimately, working together can improve your chances in bartering as the collective knowledge and resources create more opportunities for advantageous exchanges.
FAQ
What are considered essential bartering items for post-disaster survival?
The essential items include food and water supplies, medical supplies, hygiene products, tools and equipment, and community relationships.
How do I effectively barter in a post-disaster situation?
To effectively barter, be prepared with a variety of items and skills. Know the needs of those around you and use your network of relationships to trade items or services.
What foods should I stock up on for emergencies?
Ideal foods are non-perishable items like canned goods, rice, beans, and dehydrated meals. Don’t forget comfort foods to keep spirits high!
Are medical supplies important for bartering?
Absolutely! First aid kits, prescription medications, and hygiene supplies are highly valuable when others are in need, making them top bartering items.
How can I prepare my community for a potential disaster?
Engage in open communication with your community, share resources, focus on building trust, and work together for emergency preparedness plans to ensure everyone’s survival.

by Preparation | Apr 26, 2025 | Preparedness
Recognize the Importance of Preparedness
Understanding Natural Disasters
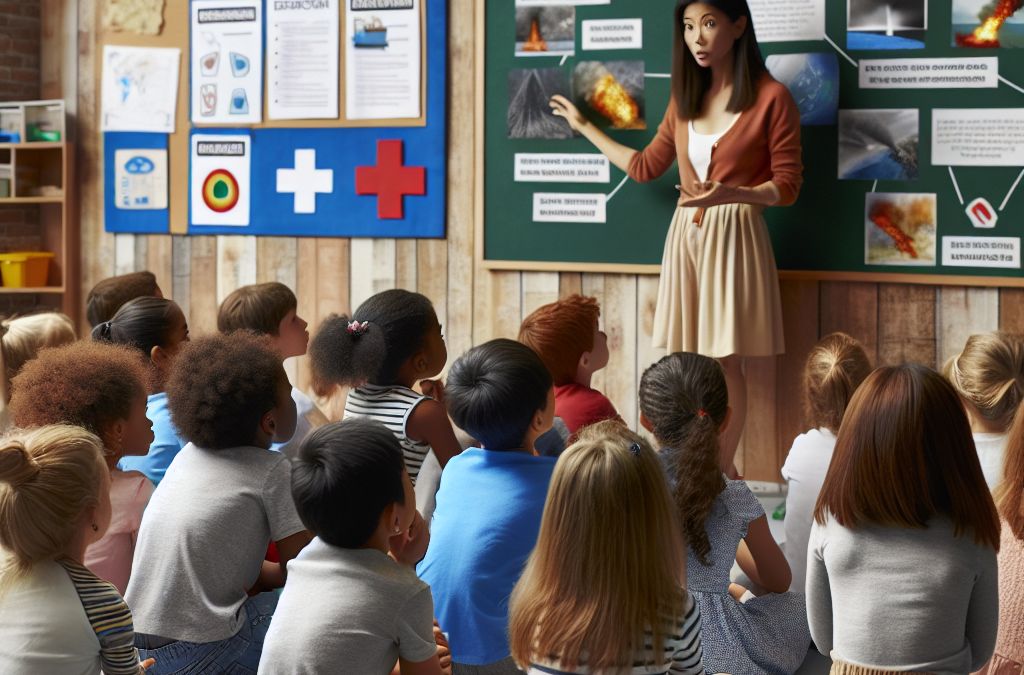
Let’s face it, the subject of natural disasters can be pretty heavy. From hurricanes to wildfires, it’s easy to feel overwhelmed. But I’ve found that having a grasp on what these disasters really are is key to preparing your kids. I often sit my children down and explain in simple terms what natural disasters are and how they can affect our lives. This understanding helps them process the information better.
When kids know what to expect, they feel less anxious. For instance, I tell my kids that not all storms are catastrophic; some may be just a little windy and rainy. We’ve had many discussions about types of disasters, and I always try to include some visuals to make it more engaging.
It’s also important to instill a sense of resilience. I remind my kids that while disasters can be scary, they’re part of life. Knowing that we can face challenges together tends to ease their minds and fosters a greater sense of security.
Importance of Family Discussions
Having regular family talks about emergencies can make a world of difference. In our house, we set up a dedicated time to discuss our family’s emergency plan. We talk about what everyone’s roles would be if a natural disaster happens. Making it a family effort makes it feel less intimidating and more of a team activity.
Each discussion gives my kids the space to express their feelings and ask questions. They often have great insights that I hadn’t thought of! This way, they feel included in the conversation, and it allows them to take ownership of their preparedness.
Sometimes, we even role-play different situations. While it may feel silly, it helps solidify their understanding of what to do—and it guarantees a few laughs, too!
Resources for Learning
There are a ton of resources available that can help make learning about natural disasters fun for kids. I always recommend books geared toward their age group that cover the topic in a friendly and approachable way. For example, there are great picture books that can help littles understand complex ideas without overwhelming them.
Interactive websites and apps can also be awesome. We often explore educational games that teach kids how to respond during various disasters. It’s a lively way to reinforce what we’ve discussed and keeps them engaged learning about preparedness!
Don’t forget about local community resources! Many communities offer workshops for families on disaster preparedness. We recently attended one where my kids got to meet local firefighters; it was an absolute hit!
Create an Emergency Plan Together
Involve Children in Planning
Crafting our emergency plan together has been one of the most rewarding experiences. My kids love the idea of being able to contribute their thoughts and ideas about what we should include. We sit down with snacks and brainstorm what our family needs to do during emergencies, and you wouldn’t believe the creative ideas they come up with!
Involving them in the planning process not only empowers them but also makes them more likely to remember the plan. We make a poster with our plan and hang it in a spot they’ll see regularly, a little reminder that we’ve got this covered as a family.
We also make it a point to discuss who we can reach out to in case of an emergency and create contact cards for them, which is a fun little project. It feels like they’re gearing up for an adventure rather than just solving a serious issue.
Setting Up Communication
Communication is crucial when disaster strikes. My kids and I often talk about different ways to stay connected if something happens. We’ve established a meet-up spot that’s safe and easy for everyone to reach, so they know where to go if they get separated.
We’ve also created a list of emergency contacts that they can memorize. I joke with them about how ‘cool’ it is to have a secret code for safety. They love the idea of having a ‘code word’ that they can share with trusted adults if there’s ever a situation where they need help.
Having these conversations has made my kids feel a lot more at ease about the potential chaos of an emergency situation. They feel equipped with tools to handle the unexpected, which is inspiring to see as a parent.
Practice Makes Perfect
Just like anything else in life, practicing the plan reinforces learning. I like to schedule regular drills throughout the year. It’s not only practical but also fun! We might take a Saturday morning to go over different scenarios, and hey, a little practice never hurt anyone!
During drills, we switch up what we do to keep things unpredictable because life is anything but predictable, right? Sometimes we’ll simulate a power outage to encourage them to rely on whatever resources we’ve prepared. It’s incredible how calm they can be when they’ve had the chance to practice a few times.
And let’s not forget the flair! We turn our drills into themed events—sometimes it’s “Earthquake Awareness Day” with themed snacks and games that emphasize safety during an earthquake. It’s a great way to keep their spirits high while learning serious skills.
Build an Emergency Kit
Essential Items for the Kit
Building an emergency kit together has turned out to be one of my favorite family projects. We gather essential items such as water, food, first aid supplies, and flashlights. I let my kids pick out some items themselves, which adds a personal touch to our kit and makes them more invested in it.
It’s important to explain to them why each item is in the kit. For example, we talk about the necessity of having non-perishable food and how life may not look the same after a natural disaster. They start to see the importance of those boring canned beans—trust me!
When the kit is all set up, we have a small celebration. I find that if you make something feel rewarding, your kids will be more vested in keeping it updated and looking after it!
Regularly Update Your Kit
One of the best lessons I learned when building our emergency kit is that we have to check on it regularly. As a family, we schedule a “kit inspection day”—this is when we switch out expired items, add fresh supplies, and give the kit a refresh. It’s a great way to get the kids involved and reminds them of its importance.
We also use this day to discuss other possible items that may be relevant to the upcoming seasons, like extra blankets in wintertime or sunscreen in the summer. It keeps the discussion ongoing and ensures that our kit is always ready to go.
During our checking sessions, I love asking them what else they think might make our kit even better. Their creative suggestions always keep the spirit alive. It’s exciting because they don’t realize they’re learning, and it’s also bonding time for us.
Educating through Hands-on Experience
Education through hands-on experience has been a real game-changer for us. When we build our emergency kit, I encourage my kids to help assemble it. Walking them through the reasons behind each item makes it more memorable.
I often pull up videos or real-life stories of communities responding to emergencies to give them context for our efforts. I try to convey that being prepared isn’t just about our family; it’s about looking out for our friends and neighbors, too.
We sometimes create a mini-kit for their favorite toys or dolls. They enjoy imagining what their furry friends would need in a disaster, and it keeps the conversation light and fun while still educational. It’s fantastic to see them utilize creativity in such important discussions!
Stay Informed After a Disaster
Keeping the Lines of Communication Open
When a disaster does strike, staying informed is key. I make sure my kids know we’ll come together as a family to process what happened. We chat about different sources of information—news, social media, even what our neighbors are saying, and we prioritize credible sources.
I let them express their feelings about what’s happening. Sometimes they’re scared, and other times they just want information. This open line of communication has helped them cope better with the aftermath of any situation. I want them to feel comfortable sharing their worries with me!
Understanding that it’s perfectly okay to feel anxious after a disaster is crucial. I remind them that I’m here to support them, and we talk through their emotions, creating a safe space where they can voice their concerns freely.
Making Sense of the Situation
After a disaster, I focus on helping my kids understand what happened, breaking down the event into digestible pieces. Sometimes I use drawings or maps to explain how certain events occur, like floods or earthquakes, which helps demystify it all.
Once we’ve talked about the event, I encourage my kids to express their thoughts and feelings through art. We’ve had discussions about how to process emotions and how that can look different for everyone. Their drawings become activities for us to share and reflect upon together.
It’s so rewarding to see how they interpret their feelings through creative outlets. It reinforces their understanding of that particular disaster while also giving them a healthy way to express how they feel.
Finding Support Resources
It’s essential to remind my kids that help is available, whether through school counselors or community support services. We explore these resources together if they ever feel overwhelmed after a disaster.
Some organizations offer counseling and workshops specifically for children affected by disasters, and I’ve found sharing this information helps my kids feel more connected to their community. It lets them know they’re not alone and that there are people who care.
Together, we create a list of contacts they can pull data from if they ever need extra support. This proactive approach makes my kids feel empowered and reassured that they’ve got a solid support network in place.
FAQ
- 1. How do I explain natural disasters to my children?
- Use simple language, provide visuals, and incorporate discussions about resilience. Frame it as an opportunity to learn rather than instill fear.
- 2. What should I include in our emergency plan?
- Your plan should include communication methods, meet-up locations, and roles for each family member during emergencies. It’s essential to keep it accessible and visible.
- 3. How can I make preparing for disasters fun for my kids?
- Involve them in planning, use role-playing activities, and celebrate milestones in preparedness. Gamifying the experience makes it less daunting!
- 4. How often should we update our emergency kit?
- Regularly check your kit, at least twice a year or before a season change, to ensure supplies are fresh, and add items relevant to any upcoming weather conditions.
- 5. What resources are available for ongoing disaster education?
- Look into community workshops, educational apps, and books specifically targeting children. Engaging resources keep kids informed while they learn important skills.
by Preparation | Apr 26, 2025 | Preparedness
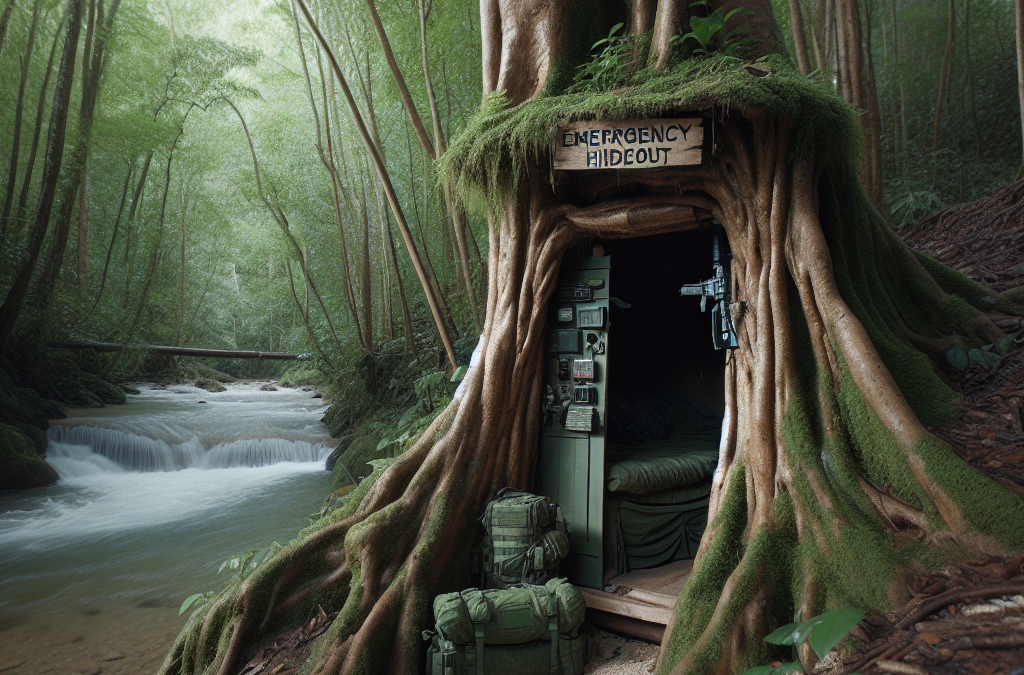
Choosing the Right Location
Scout Out Potential Areas
Finding the perfect spot for a hideout is super important. I always start by scouting out various locations around me. Parks, wooded areas, and even abandoned buildings can all be great options, depending on your situation. I recommend making a list of spots that seem discreet but accessible enough for a quick getaway.
Once you find a few potential areas, visit them at different times of day, and take note of foot traffic. Are there busy times when someone might wander by? If so, you might want to steer clear of those times or go for a spot that’s tougher to spot during rush hours.
Lastly, think about how easy it is to blend in or remain unnoticed in these spots. Remember, the key is to remain hidden, so your chosen location should offer some natural cover or be well out of sight.
Evaluate Accessibility
Making sure you can easily access your hideout is crucial. After all, what good is a hideout if you can’t get to it in a hurry? I usually identify multiple routes to my chosen place. Being able to approach from different angles can really help evade anyone looking for you, whether it’s a prank gone awry or something more serious.
Consider the weather conditions as well. You don’t want to choose an area that becomes a muddy mess in the rain or one that’s a sweltering oven in the summer heat. A good hideout is not just a place to stay; it’s a place that allows you to stay comfortable while waiting it out.
Lastly, think about your gear. If you plan on bringing supplies, you’ll want to ensure these routes can support your load—think about how you can get your essentials, whether it be a backpack or more complex gear.
Consider the Surrounding Environment
When evaluating your location, considering the environment is super important. How does the local wildlife impact your stealth? I’ve found that some areas are teeming with critters that can draw attention to your hideout. Keep your eyes peeled for animal trails or nests. Even in a stealthy location, the little things can betray you.
There’s also the aspect of human activity in the area. Are there nearby homes? It’s beneficial to stay out of earshot of prying ears. I’ve been in places where I thought I was safe, but then I heard kids playing or dogs barking, and it really stressed me out.
Finally, know how to use terrain to your advantage. Hills, trees, and backs of buildings can help conceal your hideout. I love a good natural windbreak that can obscure sound as well as sight. The goal is to learn how to leverage your environment effectively.
Gathering Essential Supplies
Compile a Survival Kit
Whenever I think of a hideout, I can’t stress enough how important a well-equipped survival kit is. The basics usually include a first aid kit, non-perishable food, water, and a flashlight. I like to make sure I have items that can sustain me for several days on my own. After all, I might not have the luxury of an immediate escape.
Another thing to consider for your kit is how discreetly you can store everything. Lightweight options that fit in a small backpack work best. I like using packing cubes to keep everything organized. You never want to be fumbling around if you need to grab something in a pinch!
Also, consider including personal items, such as a notebook, pen, or even a favorite book for downtime. It’s amazing how comforting familiar things can be when you’re in a tense situation.
Incorporate Self-Defense Tools
You never know what might happen when you’re hiding out, so having some self-defense tools is a must. I always carry something like pepper spray or a personal alarm. They’re lightweight and can literally make the difference between a safe escape or facing an unwanted situation.
Of course, it’s crucial to check local laws on self-defense items. I remember a time when I didn’t realize a tool I thought was harmless might raise eyebrows. Better safe than sorry, am I right?
Most importantly, just having these tools adds a layer of psychological safety. Knowing that I’m prepared helps me feel calmer, even in stressful situations!
Plan for Communication
In this age of technology, never underestimate the need for communication. I like to have a basic burner phone or walkie-talkies stashed in my hideout. It’s a fail-safe for contacting friends or family in case of an emergency. Imagine trying to explain your situation without a way to reach out!
Consider putting together a communication plan with trusted individuals. Establish set times when routine check-ins happen. That way, if something feels off, they know to alert the appropriate people.
Finally, think about signal techniques. If you’re not able to verbally communicate, a simple sign can alert someone to your situation without drawing unwanted attention. Chalk marks on a nearby tree or even a series of stones can help convey important messages discreetly.
Creating Concealment
Utilizing Natural Cover
I’ve had a bunch of experience with camouflaging my hideout using natural materials. Branches, leaves, and other debris can be your best friends when it comes to creating a concealment structure. I often collect what’s readily available nearby to blend my hideout seamlessly into the environment.
Take some time to assess how visible your spot is from various angles. From this perspective, I can learn how to better conceal my area while waiting out the storm. Knowing how to utilize natural camouflage not only protects you but can also add a personal touch to your hideout.
Don’t forget to use low-growing shrubs or thick brush to your advantage. These not only obscure sightlines but can help muffle sound as well. The quieter, the better!
Building a Stealthy Shelter
If you’re planning on staying a while, you might need a bit more structure. Constructing a temporary shelter is not only practical but can also be fun. I love using tarps, branches, and even some old fabric to create a makeshift cover. It’s like playing outdoors again but with a serious twist!
Always remember the balance between sturdy and stealthy. Make sure your shelter is eco-friendly and blends into the surrounding environment. I’ve found that simple lean-tos work great, but it’s crucial to maintain a low profile.
Also, keep in mind how to dismantle or hide the shelter afterwards. You don’t want your hideout to be detected just because of signs of previous activity.
Layering Invisible Barriers
Add an extra level of stealth by layering invisible barriers. You can use things like tripwires or low-cost traps that can alert you to unwanted visitors. I’ve had experiences where a small signal system gave me peace of mind while I was holed up.
Additionally, ensure the sounds created by these barriers remain unnoticed. I’ve been working on sound-dampening techniques using natural materials; it’s effective and doesn’t draw the eyes of passersby.
Always test your barriers beforehand to ensure they work as intended, but remain discreet. It’s all about making your hideout as elusive as possible while you’re hunkering down.
Maintaining Situational Awareness
Stay Updated on Surroundings
When I’m in a hideout, I make it a priority to keep an active awareness of what’s happening around me. I enjoy spending some time just listening, observing, and taking mental notes. I look for changes in the environment—whether it’s wildlife behavior or the presence of people.
I also recommend minimizing distractions like screens. Being in your hideout shouldn’t be about scrolling through social media, it should be about tuning into your senses!
Writing down what you observe helps, especially if you realize patterns exist in how people interact with the area. It can totally inform your next steps or decisions on when to leave your hideout.
Develop a Routine
Staying too idle can lead to impatience or poor decisions. Having a daily routine gives structure even in the most unexpected of situations. Include practical tasks, such as collecting water or gathering more natural cover.
I also find personal time valuable, like practicing mindfulness or even basic workouts. It helps to keep my mind and body sharp, making sure I’m ready to act if needed.
Of course, don’t forget to mix in periods of complete stillness. Being quiet and observant for an extended period can yield surprising insights about your surroundings.
Building a Contingency Plan
You must always have an exit strategy when creating a hidden space. The last thing you want is to be caught off guard. I typically visualize several scenarios: one that goes smoothly, and others that don’t.
This preparation includes routes to escape, alternative hideouts, and having an emergency contact plan in place. The flexibility to adapt your plan based on situational awareness is key.
I recommend practicing your escape routes beforehand, ideally during routine outings in the area. Being prepared can make all the difference when you need to act quickly.
FAQ
1. What materials do I need to make my hideout?
You’ll want basic survival supplies like food, water, first aid items, and tools for setting up the shelter. Don’t forget to include self-defense tools and a means of communication!
2. How often should I check my surroundings?
Staying aware is a continuous task. I recommend checking your surroundings at least every half hour and being quiet to listen for changes.
3. How do I ensure my hideout remains hidden?
Using natural materials to camouflage your space is key. Keep it low to the ground and avoid bright colors or unnatural shapes.
4. Can I have company in my hideout?
While it’s possible, be cautious! The more people, the more noise and potential to draw attention. If you must have someone over, make sure they’re trustworthy and share the same goals.
5. What if I need to leave my hideout quickly?
Always have escape routes mapped out, and keep your gear organized for a quick departure. I recommend practicing your exit strategy regularly to be fully prepared!


