
by Preparation | Mar 17, 2025 | Preparedness
Unlock the secrets to natural health with our Apple Cider Vinegar Tonic, a powerful blend of lemon, ginger, and raw honey, designed to fight inflammation and boost your immune system. This easy-to-make tonic harnesses the anti-inflammatory properties and antioxidants of its all-natural ingredients to offer a holistic approach to wellness. Ideal for daily consumption, it provides a simple yet effective way to enhance your digestive health, reduce joint pain, and revitalize your energy levels, making it an essential addition to your health regimen.
Of course, it is important that you consult those you trust for advisement on your health and wellness. This tonic is for information purposes and should not be considered a health claim.
Healing Harmony Tonic: A Natural Anti-Inflammatory Remedy
Description: Discover the soothing benefits of our Healing Harmony Tonic, a natural remedy crafted from the earth’s purest ingredients. This tonic combines the powerful anti-inflammatory properties of apple cider vinegar, fresh lemon juice, ginger, and raw honey to create a refreshing drink that not only alleviates inflammation but also boosts overall health.
Ingredients:
- 1 cup of organic apple cider vinegar
- Juice of 2 fresh lemons
- 1-inch piece of fresh ginger, grated
- 2 tablespoons of raw honey
Properties and Benefits of Each Ingredient:
- Apple Cider Vinegar: Rich in acetic acid, it helps reduce inflammation and can lower blood sugar levels.
- Fresh Lemon Juice: Contains vitamin C and antioxidants, promoting immune defense and skin health.
- Ginger: Known for its potent anti-inflammatory and antioxidant effects, ginger can relieve nausea and pain.
- Raw Honey: Offers antibacterial and anti-inflammatory properties, and provides a natural energy boost.
Preparation Process:
- In a clean glass jar, combine the apple cider vinegar and fresh lemon juice.
- Add the grated ginger to the mixture.
- Stir in the raw honey until fully dissolved.
- Seal the jar and shake well to ensure all ingredients are thoroughly mixed.
- Store the tonic in the refrigerator for up to one week.
Suggested Daily Dosage: For best results, take 1 tablespoon of the Healing Harmony Tonic each morning on an empty stomach. If the taste is too strong, dilute it with a glass of water.
Best Uses and Timing: This tonic is ideal for those experiencing joint pain, digestive issues, or anyone looking to enhance their overall health naturally. Consuming it in the morning kickstarts your metabolism and leverages the tonic’s benefits throughout the day.
by Preparation | Mar 17, 2025 | Preparedness
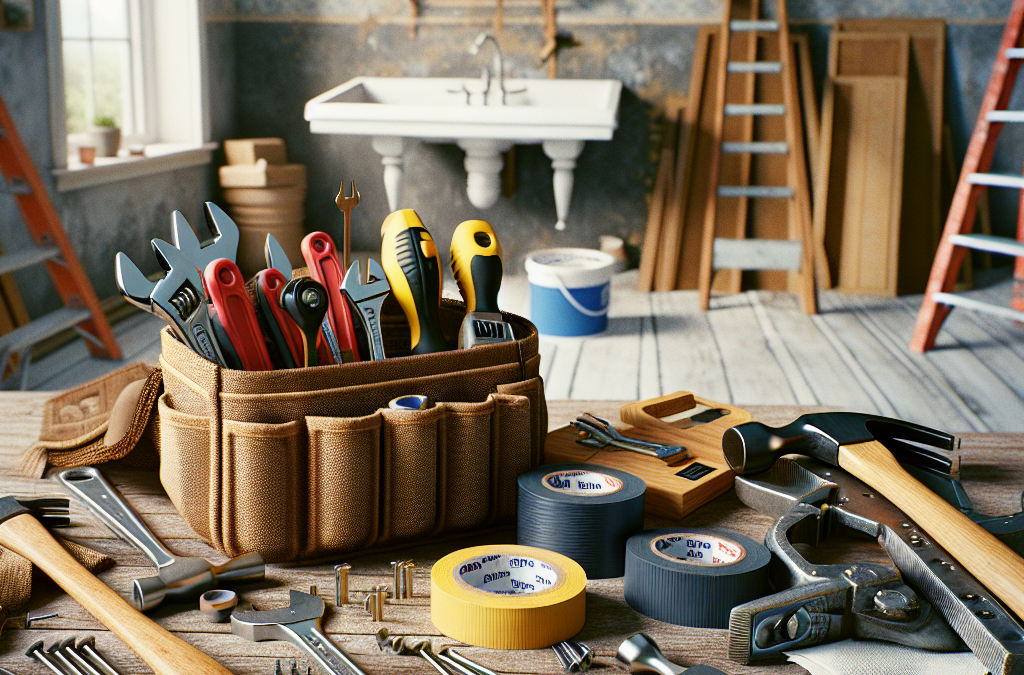
Dealing with Leaky Faucets
Understanding the Basics
Let me tell you, nothing’s worse than a dripping faucet keeping you up at night. I’ve learned that understanding the anatomy of your faucet is the first step in diagnosing the problem. Depending on whether you have a cartridge, compression, ball, or ceramic disc faucet, the repair steps will vary slightly.
On top of that, it’s crucial to know how to turn off your water supply. I once made the mistake of diving into a repair without shutting the water off first, and boy, did I regret it! Always locate your main shut-off valve.
Finally, gather your tools—wrenches, screwdrivers, and replacement parts. Being equipped ahead of time can save you tons of headaches during an emergency!
Common Causes of Leaks
As I’ve gotten my hands dirty over the years, I’ve realized there are a few typical culprits behind leaky faucets. Most often, it’s just a worn-out washer or O-ring. These little pieces can wear down over time due to constant use. It’s pretty easy to switch them out once you’ve got the right parts!
Another thing you might find is mineral buildup. Especially if you live in an area with hard water, those pesky deposits can cause your faucet to act up. Regular cleaning and maintenance can really help keep this under control.
Not to forget, if the leak persists, there might be a more severe issue lurking under the surface, potentially requiring a plumber’s expertise. Don’t hesitate to call in the pros if you’re in over your head!
Step-by-Step Repair Process
Fixing a leaky faucet is often easier than you might think! Start by taking off the handle, which usually involves unscrewing a few screws. Once it’s off, you’ll be able to access the cartridge or the assembly inside. Make sure to take a picture of how it looked for reference.
Next, replace any worn washers or O-rings. This step might be as simple as unscrewing and putting new ones in place, but hey, easy mistakes can lead to bigger headaches. Pay attention to what you’re doing!
Once everything is back together, slowly turn your water supply back on and check for leaks. You’ll be surprised at how a tiny change can make a huge difference.
Fixing a Running Toilet
Identifying the Problem
Oh boy, a running toilet is probably one of the most common—and ignored—issues I come across. First things first, let’s identify the problem. Usually, it’s caused by a faulty flapper or an issue with the float mechanism. I had my fair share of “technical difficulties” before I learned to troubleshoot properly.
Check inside the tank and see if the flapper is seating correctly. If it’s old or warped, it’s time to swap it out. A little investment here can really keep your water bill in check!
Next, observe the float ball or float arm. If it’s stuck, the water will keep running. You can usually fix this by adjusting the height or replacing the entire assembly if needed.
Tools and Materials You’ll Need
Before you jump into the repair, gather your supplies. Flush these items through your checklist: a new flapper, adjustable wrench, and perhaps a screwdriver or two. I’ve tried it before without the right tools, and trust me, it’s not a good time!
While you’re at it, keep some cleaning gloves handy. Getting into the tank can be a bit messy, and it’s best to protect your hands. Plus, cleaning while you’re in there never hurts!
Also, don’t forget a towel or two for cleanup. Let’s face it, accidents happen—even to the pros!
A Simple Repair Guide
Once you have everything prepped, let’s get down to business! Start by turning off the water supply to the toilet, then flush to empty the tank. This step makes it far less messy.
Now, replace the flapper if it looks worn. Installing a new one is usually as simple as hooking it over the pegs on the flush valve. If everything looks good there, check the float mechanism. Make sure it moves up and down freely.
After that’s all set, just turn the water back on and check to see if everything functions properly. I can’t tell you how satisfying it feels to stop a running toilet!
Unclogging Drains
Recognizing Clogs
So, let’s talk about one of life’s biggest annoyances—clogged drains. I can’t tell you how many times I’ve faced this issue, especially in the kitchen after cooking up a storm. Understanding the signs of a clog is key; slow drainage or strange noises are usually the first indicators.
If you’ve noticed a gurgling sound when you run water, it often suggests that there’s a blockage somewhere. Also, if multiple sinks are backing up at once, it’s likely an issue with the main drain instead of just one sink.
Recognizing these signs early can save you a lot of fuss later on. Give your pipes a good visual check now and then—trust me, future you will thank you!
Tools for Unclogging
I’ve learned through trial and error that having the right tools for this job makes all the difference. A plunger is a must-have; it’s like the Swiss army knife for drain issues. A snake is also fantastic for deeper clogs. Having both at your disposal makes your DIY arsenal much stronger!
Additionally, you might want to stock up on some natural drain cleaners. I prefer using baking soda and vinegar because they’re effective and less harsh than chemical options. But, I’ll admit, there have been times I’ve had to pull out the big guns!
Lastly, have some old towels or rags on standby to clean up any spills or mess that may occur during the process. It’s better to be over-prepared than to get caught in an unexpected situation!
Clearing the Clog
Alright, let’s get to work clearing that clog! Start with the plunger—press down firmly to create a seal, and give it a good few pumps. You’d be surprised at how often this works, even on stubborn clogs!
If that doesn’t do the trick, it’s time to break out the snake. Insert it into the drain and twist while pushing forward. It’ll catch any hairs or gunk along the way. At this point, I’ve always found patience to be key—a few twists and pushes often yield the best results.
After you feel like you’ve done all the work, run some hot water down the drain to help wash everything free. In my experience, flushing the drain afterwards is often the best part of the whole process!
Sealing Drafty Windows
Identifying Drafts
Let’s not forget about those pesky drafts during winter. I can’t tell you how many times I’ve cranked up the heat only to feel cold air creeping in through the windows. The first step is to check where the drafts are coming from, and believe me, it can save you a ton on your heating bill!
Feel around the edges of your windows with your hands or use a lit candle to spot any errant drafts. If the flame flickers, you’ve got a culprit! Once you pinpoint the sources, you can focus your efforts on sealing them up.
Be thorough; even the tiniest gaps can cause a significant chill. I’ve had great success by doing a full inspection of all the windows, especially those that seem to be the oldest or most exposed to the elements.
Materials for Sealing
When it comes to sealing drafts, you’ve got options! Weather stripping is a great place to start. I usually opt for adhesive-backed foam tape as it’s super easy to use and surprisingly effective.
Then there’s caulk—my go-to for sealing gaps around the window frame. It’s like magic for keeping cold air out and warm air in. Keep in mind to get the right type of caulk for indoor or outdoor use!
Another idea is to use window film. This is a great temporary solution for when you need extra insulation. I’ve had plenty of success using it during the winter months.
Executing the Seal
The sealing process is relatively straightforward! Start with cleaning the window surfaces to remove any dust or old residue. You want the adhesive to stick well, right?
Next, apply your weather stripping around the edges, making sure to cut it to the right lengths. Don’t worry too much about being precise; it’s more about insulating that space!
For caulk, cut the tip of the tube, and apply it along the seams where the window meets the frame. Smooth it with your finger to ensure a solid seal. Once you’re finished, test for drafts again. You’ll be amazed by the difference!
Understanding Electrical Issues
Common Electrical Problems
Now, let’s dive into something a lot of folks dread—electrical issues. I get it; the thought of dealing with wires can be intimidating. But trust me, most common problems are pretty manageable! Flickering lights, tripped breakers, or dead outlets are signs that you might need to fix something.
Flickering lights can mean a loose bulb or a faulty fixture. If it’s a circuit breaker tripping, you might have an overload or a short circuit. Keeping an eye on these signs will help you avoid bigger, more dangerous problems in the long run.
Always remember: if you’re feeling uneasy, or if the issue requires more than your comfort level, don’t hesitate to bring in a good electrician!
Tools to Have on Hand
What I’ve learned over time is that having the right tools can make a potentially scary situation much easier. A multimeter is a must—I can’t tell you how many times that little device has saved me from guessing. It helps you measure voltage, current, and resistance.
I also recommend getting a good insulation tester and some safety glasses. A lot of electrical work can be messy, and the last thing you want is debris getting in your eyes.
Let’s not forget gloves, either. Ensuring you have proper personal protective equipment can’t be overemphasized!
Simple Repairs to Consider
When tackling minor electrical repairs, always start by turning off the power to the area you’re working on. Safety first, right? Once that’s done, unscrewing light fixtures or replacing outlets is usually as simple as matching colors to reconnect. Just be cautious and go slowly!
If you’re dealing with circuit breakers, resetting them is usually just a matter of flicking the switch back. If they keep tripping, it might be time to consult a professional to check for shorts or overloaded circuits.
In my experience, taking an afternoon to familiarize yourself with your electrical system and practicing some of these repairs can be incredibly empowering. You’ll gain confidence and maybe even a few new parties stories!
Conclusion
In conclusion, knowing how to handle these common home repairs can save you a lot of money and stress in emergencies. From leaky faucets to drafty windows, having some basic skills under your belt makes you much better equipped to tackle household issues. I hope that by sharing my experiences and knowledge, you’ll feel inspired to take on your own DIY challenges!
FAQs
1. Can I fix a leaky faucet myself?
Absolutely! Most leaky faucets can be repaired with some basic tools and a bit of knowledge on the type of faucet you have.
2. How do I know if my toilet is running due to a faulty flapper?
If you hear your toilet refilling frequently without you flushing it, or if you notice water trickling into the bowl, it’s likely the flapper needs replacing.
3. What should I do if I cannot unclog my drain?
If plunging and snaking don’t work, it may be time to call a plumber. They have specialized tools to handle tougher clogs.
4. Is window film effective for sealing drafts?
Yes! Window film can add an extra layer of insulation during colder months and is easy to apply.
5. When should I call a professional for electrical issues?
If you’re feeling uncertain or if the repairs involve complex wiring, it’s always best to call an electrician for safety reasons.

by Preparation | Mar 17, 2025 | Preparedness
1. Creating a Defensible Space
Understanding Defensible Space
Creating a defensible space around your property might sound a bit daunting, but it’s one of the most crucial steps you can take to protect your home from wildfires. Think of it as a buffer zone—this space provides a clear area where fire could be stopped before it reaches your home. This not only helps reduce the risk to your property but also makes it easier for firefighters to tackle the flames if they approach.
When I first learned about defensible spaces, I was surprised by how much detail went into it. It’s not just about clearing brush; it involves managing vegetation, maintaining landscape, and ensuring your property’s immediate surroundings are fire-resistant. That being said, it can be done in manageable steps!
Start by studying your property. Take a good look at the trees, shrubs, and grasses, and see if there are areas that could potentially act as fuel for a fire. Creating a defensible space means strategically trimming back branches, keeping grass trimmed, and removing dead plants—all the stuff that might catch fire easily.
Zones of Defensible Space
So, how do you actually build this defensible space? It’s based on three primary zones, each with specific tasks. The first zone is immediate around your home – usually within 30 feet. Here, keep the grass trimmed short and prune trees to avoid overhanging branches. I remember my first year here, and I got a little carried away, thinking a super green lawn would look nice—until I realized it was a fire hazard!
The second zone extends outwards from 30 to 100 feet, and in this area, you want to create a mix of vegetation that can slow down any fire. Use fire-resistant plants and create gaps between bushes. My personal trick here is to plant flowers that love a bit of heat! They can be beautiful and help fend off the flames.
Finally, the third zone, beyond 100 feet, should ideally be a natural area that remains undisturbed. You don’t want to completely strip the land, just maintain balance. Maintaining this natural area benefits wildlife, too, which I find rewarding.
Maintenance is Key
Once you’ve created your defensible space, don’t just forget about it! Regular maintenance is needed to keep this area effective. This can mean annual clean-ups, especially in the fall when leaves start to gather. Trust me, you don’t want to let that debris accumulate—it’s an open invitation for fire.
Try to schedule a time, perhaps monthly, to walk around your property and check in on your defensible space. It can be a bit of hard work but don’t forget to throw on your favorite playlist and make it fun! I often liven up my maintenance days with some good music.
Remember, a well-maintained defensible space is your first line of defense against wildfires. It’s one of those things you’ll be glad you prepared for if a wildfire does come your way.
2. Fire-Resistant Building Materials
Choosing the Right Materials
When it comes to building or renovating your property in a wildfire zone, paying attention to the materials you use can make a world of difference. Fire-resistant materials can significantly reduce the likelihood of your home catching fire from embers or direct flames. Trust me, I learned this the hard way while renovating my place!
Some of the best options for roofing include metal, tile, or concrete. Your walls can also be enhanced with materials like stucco or stone. I remember agonizing over which materials to use and finally realized that it’s an investment in peace of mind. I upgraded to a metal roof, and I can say, it really does look classy! Plus, I know it can stand up to wildfires much better than typical shingles.
Windows are another critical area to think about. Consider tempered glass windows, which are designed to resist heat and flames better than standard glass. I know they come with a higher price tag, but trust me, in the long run, it’s worth every penny knowing they offer extra protection.
Fencing and Decking
What about the exterior features of your home, like fences and decks? It can be easy to overlook these areas, but wooden structures can serve as a bridge for fire. I swapped out my wooden fence for a composite material that’s fire-resistant—it looks fantastic and I don’t have to worry as much.
Decks, too, need to be treated with care. Choose building materials labeled as fire-resistant or composite decking. I often host backyard get-togethers, and knowing my deck has that layer of safety gives me a whole lot of comfort while having fun with friends.
Regularly maintaining these structures is just as important. After heavy storms or winds, I check for any wear and tear that might have occurred. Staying proactive helps ensure your fire-resistant features stay effective!
Fire-Safe Landscaping
When planning your landscaping, this is another opportunity to think fire-safe! The plants you choose can either help or hinder your fire safety strategy. Fire-resistant landscaping denotes selecting plants that have a low oil content and won’t ignite easily—think succulents, perennials, and those beautiful flowering plants I just adore!
Also, layout is critical. Keeping plants spaced out can help to keep flames from jumping. I put a lot of thought into how I arranged my flower beds, and you can mix creativity with safety. Use decorative gravel around plants—it looks great and creates another barrier against fire.
Believe me, you can have a lovely yard and still be fire-smart. I find that embracing fire-safe landscaping can be both enjoyable and rewarding. Plus, it’s a conversation starter for folks passing by!
3. Emergency Preparedness Plans
Creating an Evacuation Plan
Alright, moving on, we need to talk about emergency preparedness. Living in wildfire-prone areas means being ready ahead of time. One of the first steps in my planning was creating an evacuation plan. I sat down, looked over the exits, and made sure my family knew exactly what to do if the sirens started blaring!
Don’t just make the plan—practice it! I encourage you to conduct regular drills. In my case, we made a fun family evening out of it, and it helped us all feel more comfortable with the process. It kind of turned into a game, and everyone gets to learn roles and responsibilities.
Ensure everyone knows where to meet after an evacuation too. Having a designated meeting point gives us all peace of mind, knowing we can connect with each other afterward. What might seem like a tedious task is invaluable when an emergency occurs.
Emergency Kits
Every good evacuation plan needs a solid emergency kit. I can’t stress enough how important it is to have one ready to go. I always keep one in the house and another in the car just in case life throws a curveball!
In my kits, I have essentials like water, non-perishable food, first aid supplies, and any medication we might need. I also added a copy of important documents and maps of the area. When I made my emergency kits, it felt good to know I was taking a step to look out for my family—and it was honestly quite easy to put together while also being proactive!
And, of course, don’t forget about your pets! Make sure you have supplies for them as well. I can’t imagine leaving behind my furry companions. They are, after all, part of the family!
Staying Informed
Staying informed about wildfire risks in your area is super vital. I recommend signing up for local alerts or using smartphone apps that notify you about emergency situations. Seriously, this is your lifeline when it comes to timely information.
As a habit, I monitor weather reports during high-risk seasons. It’s amazing how much detailed information is out there, and staying informed makes it easier to remain calm and collected. It helps me feel more in control of the situation, and I can make better decisions too.
Involving friends and neighbors in your emergency preparedness discussions can also create a strong support network. Share tips, ideas, or even avenues for sharing resources—together, we can be better prepared!
4. Community Engagement and Support
Building a Neighbourhood Network
One of the best pieces of advice I can share is to get to know your neighbors. Building relationships can create a safety net where everyone looks out for each other. I started hosting small get-togethers during the summer, which was an awesome way to bond!
During these gatherings, we exchanged contact information, which allows us to check in with each other during wildfire alert seasons. It doesn’t need to be anything fancy—a good old-fashioned potluck works wonders to help strengthen community ties.
In times of crisis, it’s often those closest to you, your neighbors, who can provide immediate assistance. You’d be surprised at how many people in my neighborhood jumped in to help when one of us had to evacuate unexpectedly!
Volunteer Programs
Don’t underestimate the power of getting involved in volunteer programs focused on wildfire prevention and awareness. Engaging with these programs not only helps build community but also spreads vital knowledge. I’ve volunteered with local fire departments, and it’s been a rewarding experience.
Participating in clean-up days or educational workshops about fire safety can create lasting change. Plus, you meet similarly-minded folks who care about the same issues, which builds camaraderie!
It’s incredible how much knowledge you’ll gain and how many resources you’ll have access to. It’s like having a hidden network of wildfire wisdom right at your fingertips.
Support Local Fire Departments
Support your local fire department however you can. They’re often the first responders when disasters occur. I like to donate or participate in fundraising events. Getting to know your local firefighters not only helps support their efforts; it fosters relationships that can be valuable in times of crisis. Plus, they’re often a wealth of knowledge when it comes to fire safety!
Engaging in community support also means advocating for funding and resources for your local fire department. When communities come together, we can create environments where our first responders have everything they need to keep us safe.
Also, consider attending community safety meetings or training sessions. It’s a bonus if you’re already buddies with the firefighters; learning their tips and tricks can make a real difference in how prepared you feel as the summer gets hotter.
5. Insurance and Recovery Plans
Choosing the Right Insurance
Let’s talk about something that might not be the most thrilling topic but is nonetheless super important—insurance! If you live in a wildfire zone, your insurance policy should reflect that reality. I initially overlooked this until I learned that I had to be very specific about wildfire coverage!
While shopping for insurance, it’s important to ask the right questions. Be sure to discuss the intricacies of your policy with your agent so you know what’s covered in the event of fire damage. Getting this clear understanding can provide peace of mind knowing your hard work won’t go down in flames without support.
.I highly suggest documenting the valuable items in your home as well—photos, receipts, whatever it takes. It may seem tedious, but if something happens, you’ll be thankful you took the time to gather this info!
Having a Recovery Plan
Insurance isn’t everything; having a recovery plan is essential too. Beyond just how to handle the aftermath, it’s about knowing how you’ll rebuild and restore your life once a wildfire passes through. I never thought I’d need to consider this until I started gathering resources!
Create a list of contacts—contractors, suppliers, and local resources to help you bounce back if needed. Research who can meet your needs if a crisis occurs. It may feel a bit overwhelming, but again, take it one step at a time. And don’t forget to add in emotional support resources; rebuilding isn’t just physical.
Taking into account the emotional toll after a wildfire is equally important. It’s a significant life change, and having access to support systems will help tremendously in recovery. I found solace in community support groups aiming to rebuild safely and sustainably.
Tips for Financial Recovery
Once you’ve sorted through the chaos, getting your financial recovery plan on track is crucial. Familiarize yourself with local relief programs that can assist with rebuilding expenses. Knowledge is power, after all!
Also, it’s helpful to speak to a financial advisor who understands the journey specific to disaster recovery, particularly for wildfires. They can steer you in the right direction and help establish financial strategies to recover effectively.
Finally, remember to take it slow. Recovery takes time—both physically and mentally. Celebrate small victories along the way because they add up in the long run, turning the dream of recovery into a reality.
FAQs
1. What is a Defensible Space?
A defensible space is a buffer zone created around your property to reduce fire risk. This zone helps slow down potential flames and allows firefighters better access to defend your home during a wildfire.
2. How can I prepare my home for wildfires?
You can prepare by using fire-resistant building materials, creating a defensible space, and regularly maintaining your property. It’s essential to stay informed and create a solid evacuation plan as well.
3. What should I include in my emergency kit?
Your emergency kit should contain essentials like water, food, first aid supplies, important documents, and any necessary medication. Don’t forget supplies for pets if you have them!
4. How can I support my community’s fire prevention efforts?
You can support community efforts by engaging in volunteer programs, attending local meetings, and working closely with your local fire department. Advocate for resources and funding to boost local firefighting capabilities.
5. What should I do if I’ve lost everything in a wildfire?
First, take a deep breath and allow yourself time to process the loss. Reach out to local relief efforts, connect with insurance representatives, and consider support groups that can aid both emotional and physical recovery. Remember, it’s okay to seek help!
by Preparation | Mar 17, 2025 | Preparedness
Identification Documents
Why They Matter
Alright, let’s chat about identification documents. Honestly, when stuff hits the fan, having these ready can be a game changer. They basically prove who you are, and without them, things can get really tricky. Imagine trying to prove your identity without an ID during an evacuation or a natural disaster, it’s a nightmare!
From government-issued IDs to social security cards, having a photo ID like your driver’s license or passport helps in so many situations. You’ll need this for anything from getting emergency services to even registering in a shelter. Seriously, don’t underestimate their importance.
So, get a folder or a fireproof box, and stash all your important IDs together. It’ll save you a lot of stress when you need them most. Trust me, you don’t want to be rifling through paperwork while the world is going nuts around you!
Where to Store Them
Now, when it comes to storing your ID documents, think about accessibility and safety. A drawer might feel secure, but if it’s in the back of a packed closet, you might regret it later. It’s all about striking the right balance!
I personally prefer using a dedicated safe that’s both fireproof and waterproof. It’s a bit of an investment, but it’s totally worth it for that extra peace of mind. Plus, I know exactly where everything is when I need to grab it. No rummaging through bags for me!
And don’t forget, keep a digital copy too! Snap a pic of your important documents and save them in the cloud. That way, even if the physical copies are lost, you’ve got backups. Just make sure your cloud is secure, alright?
Updating Your Documents
Life happens, and our documents can become outdated fairly quickly, right? I’ve learned the hard way that keeping track of expiration dates can slip your mind. Passports, licenses, and even certain registrations have to be updated regularly.
Set reminders in your phone or calendar a month before any of your important documents are due to expire. It’s a pain, I know, but if you stay ahead of the game, you won’t be caught off-guard when you need them in an emergency.
Plus, after a major life event—like marriage, divorce, or change of address—make it a habit to check if you need to update anything. Keeping everything current can save you some serious hassle later!
Medical Records
What to Include
Next on the list? Medical records. Trust me, these are super crucial. I always make sure to have my and my family’s medical history documented—like vaccination records, allergies, prescriptions, and any ongoing treatments.
Now, you might think, “Why do I need this?” Picture this: you or a family member gets hurt or sick in an emergency, and the first responders need to know your medical history. It makes a huge difference in the care you receive and can even save lives.
So, gather everything in one file or folder. Include emergency contact information of your doctors and any special arrangements for ongoing treatments. It’s like your personal health cheat sheet!
Digital vs. Physical Copies
I’m a big fan of having both physical and digital copies of my medical records. Digital copies are so easy to access on my phone or tablet. But there’s something about having a physical copy in that safe I mentioned earlier—it just feels more secure.
Make sure that your digital copies are encrypted or stored in a secure place. You wouldn’t want your private health information exposed, right? Just check regularly to ensure the files are updated and accurate.
And a little tip: if you’re traveling, always keep a copy of your medical records in your travel documents. You never know when you might need to show them during a trip.
Regular Check-Ins
Over time, medical needs change, and it’s helpful to revisit your records periodically. I usually set a quarterly reminder to review and update my medical documentation. Trust me, it’s easier to do a little bit regularly than to overhaul everything in panic mode.
This is also a great time to check in with family members about their health information. Do they have chronic conditions you might need to consider in an emergency? Keeping communication open about health isn’t just smart; it can be lifesaving.
Plus, if anything major changes—like you start a new medication or have a significant health update—be sure to note it down immediately. You’ll thank yourself later when it’s all organized and ready to go in case of an emergency.
Financial Information
Key Documents to Secure
Let’s face it, financial information is vital, especially when you’re trying to get back on your feet after an emergency. Keep your bank statements, insurance policies, and tax documents together. If you have any outstanding loans or credit information, that goes in the pile too.
Your insurance details are particularly important. Whether it’s your home, health, or car insurance, knowing what’s covered can be a game-changer when you have to file claims quickly. I always ensure those documents stay updated!
I recommend organizing these papers by category. It saves so much precious time when you know exactly where your liability information lies or what your policy numbers are when you’re in a tight spot.
Where to Keep Financial Records
Much like your other sensitive documents, the safe route is to keep these records in a secure place. I prefer a fireproof and waterproof safe, but sometimes a locked drawer works just fine—especially if you need easy access.
A great idea is to use a password manager for all your digital financial information. This way, you’re not scrambling to remember what account goes where during a crisis. You’ll have everything at your fingertips, and it’s somewhat safer!
Don’t forget to share access with someone you trust, like a family member. This ensures that they can access important financial information if something happens to you and it becomes necessary.
Tracking Changes and Updates
Just like everything else on this list, your financial documents need regular check-ups. Every six months or so, sit down and go through your financial situation. Are there any changes? New accounts? Updated policies? It’s all worth addressing!
Seems tedious, I know, but having everything in order makes you feel so much better. This way, you’re less stressed when you have to access these documents later. Plus, it helps you stay on top of your financial health.
You don’t want to find out something important is missing at the worst possible time. So take the time, go through your documents, and keep them neat and clear!
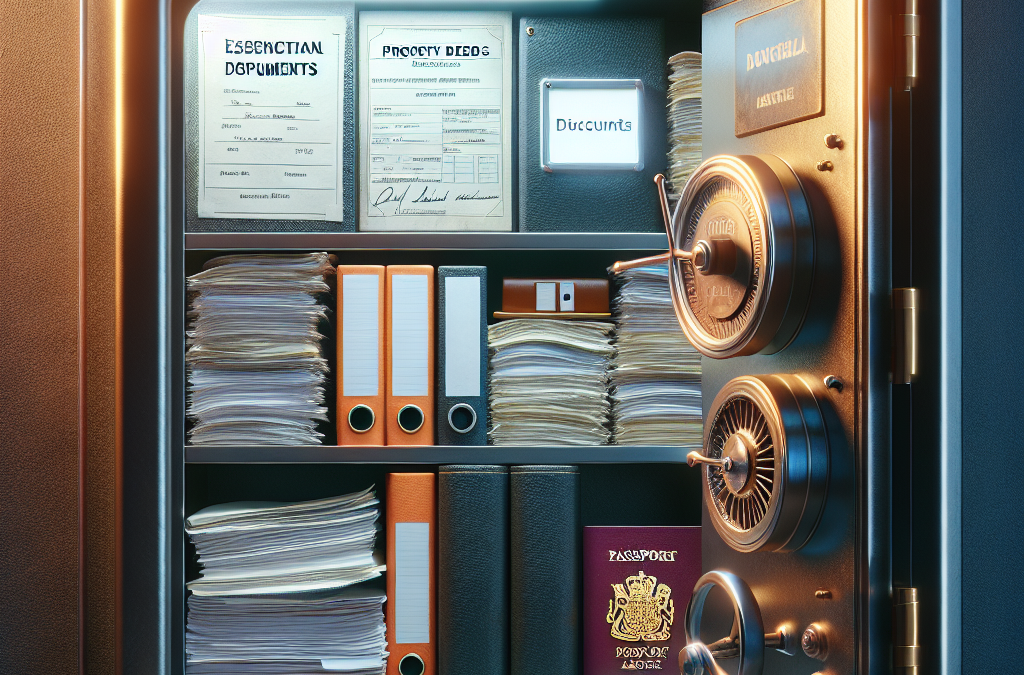
Property Documents
What You Need
Property documents are another huge thing you want to keep under wraps. Deeds, titles, and lease agreements—these are critical when you need to claim ownership or address insurance matters. You never know when you might need to pull these out!
If you’ve got a mortgage, keep that document handy too. It’s especially important for insurance claims if your property gets damaged in an emergency. Plus, it can help you with refinancing later if need be.
Again, organizing these documents by property type is a smart approach. Whether it’s real estate, vehicles, or any rental agreements, ensure you know where they all are when you’re in a bind!
Safe Storage Options
When it comes to storing property documents, I’m all about creating a designated folder for each property. Whether it’s a physical folder or a digital one, having a separate space keeps it simple. Just make sure it’s secure—in a safe, of course!
Consider digitizing these documents as well. Use a scanner or a scanning app on your phone. Just like I mentioned previously, digital copies act as an awesome backup and are easy to access anytime—and you won’t have to worry about losing physical documents.
Also, don’t forget about copies. Keep duplicates in different locations, if possible. In an emergency where you have to evacuate quickly, it’s humbling to be able to grab important papers and not leave everything behind!
Regular Audits
Definitely don’t let your property documents collect dust! At least once a year, go through everything and check if there are updates or changes. Whether you’ve sold a vehicle or moved houses, keep your documents in sync with your life.
This also gives you a chance to review what you have and what you might need in the future. It keeps you prepared and organized. As they say, an ounce of prevention is worth a pound of cure!
Plus, it’s a good habit to check if there are any new property laws in your area. Being informed can save you from unexpected surprises down the line.
Important Contacts
Compile a List
Last but definitely not least, maintaining a list of important contacts is absolutely key. You want to have a written down or saved in your phone contacts anyone you might need to reach out to in an emergency—medical professionals, family, friends, and insurance agents. You don’t want to be scrambling for numbers when you really need them.
In my experience, I’ve made it a point to keep this list visible in my home, ideally near my phone or in my wallet. This way, I know it’s readily accessible should things go sideways. You can also categorize contacts by type for easier retrieval.
Also think about including emergency contacts who are out-of-state. In situations where local communication gets tricky, having someone in a different area who can coordinate information is really useful! Trust me on that one!
How to Update Regularly
As your life changes, so should your contact list. I try to review mine after significant changes, like moving or even when I just meet new people. It’s a good opportunity to reassess who’s my support system and who I might need to contact in a bind.
It’s also a good idea to ask your close contacts if they want to be included. Sometimes you think someone will want to be your go-to contact, but they might not be comfortable with that. Better to check than be caught off guard!
Another thing? Whenever there’s a change in someone’s information, make a habit of updating it right away. Digital tools can help too—there are apps designed to store emergency contacts securely!
Technology Aids
These days, there are tons of apps dedicated to emergency preparedness, which can help with maintaining and sharing your contact list. Some even send alerts for emergencies or provide quick ways to access critical information. I’ve found that super handy!
Just remember that if you’re using a tech-based solution, keep it secure. Regularly updating passwords and using two-factor authentication can protect your information from prying eyes.
Don’t depend only on technology, though. As someone who believes in a good mix, I still keep a physical list saved somewhere. Sometimes, in the heat of things, it’s easier to grab paper than your device!
Frequently Asked Questions
What are essential documents to keep safe in emergencies?
Essential documents include identification, medical records, financial information, property documents, and important contacts. Keeping these in a secure and accessible location can help in emergencies.
How can I best store my essential documents?
The best way to store essential documents is to use a fireproof and waterproof safe. Additionally, keeping digital copies stored securely in the cloud is a smart backup strategy.
How often should I update my documents?
It’s advisable to review your essential documents at least once every six months. Changes in personal situations or expiring documents should be addressed promptly.
Should I keep physical and digital copies?
Yes! Having both physical and digital copies can provide more security. Digital copies are easy to access, while physical copies can sometimes be your best bet during emergencies.
What can I do if I lose my essential documents?
If you lose your essential documents, the first step is to report it, especially for identification documents like your driver’s license or passport. Next, work on getting replacements as soon as possible, and don’t forget to check your digital backups if you have them!

by Preparation | Mar 17, 2025 | Preparedness
Disasters can shake us to our core in ways we never thought possible. Whether it’s natural disasters like hurricanes and earthquakes or man-made tragedies, the psychological toll is real. Having navigated my own fair share of emotional upheavals, I can tell you, it’s crucial to categorize our feelings and reactions. Let’s dive into how disasters can affect our mental state and more importantly, how we can learn to cope.
Understanding the Emotional Reactions to Disasters
Common Emotional Responses
Right after a disaster hits, it’s normal to feel a whirlwind of emotions. You might feel fear, sadness, anger, or even numbness. Every person reacts differently to trauma, and acknowledging your feelings is the first step. Once, after a significant event, I found myself oscillating between extreme sadness and a feeling of complete detachment from reality. I realized that these reactions, though unsettling, are part of the healing process.
Understanding that these feelings are common can be liberating. Whether it’s grief from loss or anxiety about future uncertainties, naming these emotions can help in processing them. I often recommend journaling to my friends post-disaster. Writing what you feel, even if it seems jumbled, creates a pathway to healing.
Also, don’t be surprised if these emotions linger longer than you’d expect. Many times, the psychological impact of disasters doesn’t vanish quickly; it morphs over time. Giving yourself permission to feel is key, and it’s perfectly okay to seek out support when needed.
Adjustment Difficulties
After experiencing a disaster, adjusting back to ‘normal’ life can be one of the toughest challenges. You might find reminders of the event trigger anxiety or distress. When I was attempting to resume my routine after a natural disaster, I faced difficulties concentrating on mundane tasks. Everything seemed tinged with worry.
Finding healthy coping mechanisms is vital. For me, joining a support group was a game-changer. Talking to others who had gone through similar experiences helped me realize that I wasn’t alone. Sometimes sharing your story helps weave a narrative that makes life seem less chaotic.
Routine is your ally too. Gradually re-establishing a sense of normalcy can offer comfort. In the aftermath of my own experiences, I focused on small daily tasks—like walking my dog or cooking dinner—as a way to anchor myself amid the chaos.
Physical Symptoms Related to Stress
It’s essential to realize that emotional turmoil can manifest physically. Stress from disasters can lead to symptoms like headaches, stomach issues, or fatigue. I learned this lesson during a particularly stressful time. My body literally started sending me red flags, and I knew I needed to listen.
When your mind is in distress, the body often reflects that turmoil. Acknowledging physical symptoms and treating them gently is so important. Techniques like deep breathing, meditation, or light exercise helped me. I even took up yoga, finding that it not only calmed my mind but also eased physical tension.
Remember, your body is battling too! Make sure to prioritize self-care. Whether that’s indulging in a hobby you love, or simply taking a warm bath, nurturing yourself can go a long way in helping you recover holistically.
Identifying and Addressing Trauma Symptoms
Recognizing Trauma Signs
Trauma can be sneaky. Sometimes, the signs don’t show up until weeks or even months later. For me, I noticed I was becoming easily agitated, and certain sounds or images from the disaster would send me spiraling. Recognizing these signs is crucial; it’s the first step toward finding help.
Symptoms can range from intrusive thoughts about the event, hypervigilance, or even avoiding places or reminders that trigger distress. I once avoided a park where I had experienced a traumatic event. Understanding that avoidance often stems from fear made it easier for me to confront my feelings.
It’s key to approach trauma with patience. Each person’s healing timeline is unique. Acceptance of where you are is essential for moving forward without fear or shame about your recovery journey.
Seeking Professional Help
Let’s face it—often we need a little extra help, and that’s totally okay! Talking to a professional can provide tailored guidance and coping strategies. I remember feeling apprehensive about seeking therapy after my experiences, but it turned out to be a blessing in disguise.
Finding someone you trust is essential. Whether through personal recommendations or online directories, look for someone who specializes in trauma care. Therapy gave me tools to manage my anxiety and helped me explore my feelings constructively.
Don’t hesitate to reach out! Seeking help is a sign of strength, not weakness. It’s okay to lean on experts who can provide a safe space for you to explore your feelings—trust me, it can transform your healing journey.
Building a Support Network
Connecting with family, friends, or community members can shore you up during tough times. After experiencing disaster, isolation can sneak in, but I’ve found that sharing the weight of that burden makes a world of difference. Organizing meet-ups or joining community support groups can strengthen your network.
Never underestimate the power of a listening ear. I often invite friends over just to hang out, allowing a casual environment to talk about life, feelings, or just to enjoy a good movie together. It’s comforting to know you’re not alone in the aftermath.
Remember that it isn’t just about talking; giving support to others can be equally healing. Sometimes, being there for someone else helps us process our own experiences. Strength breeds strength, and community can be a powerful part of our healing process.
Developing Coping Strategies and Skills
Healthy Coping Mechanisms
Creating a toolkit of coping strategies can help you navigate post-disaster life. I’ve learned to combat my anxiety through various methods—some are physical, while others are creative or contemplative. For instance, simple things like going for a run or engaging in art have proven therapeutic for me.
It’s all about discovering what works for you. Experiment with tools like mindfulness, journaling, or even gardening. When I tend to my plants, I find peace in the rhythm of watering and caring for them. That connection to nature brings grounding to the chaos within.
Your toolkit should be unique to you! Whether you enjoy cooking, running, painting, or meditating, prioritize activities that bring you joy and calmness. Having these coping strategies in place can arm you when stress strikes.
Building Resilience
Resilience isn’t about being tough but rather about adapting, learning, and bouncing back from adversity. I’ve found that every disaster has taught me something valuable about myself. It’s about reframing your mindset and embracing the idea that you can overcome challenges.
Start by setting small goals for yourself. After a disaster, I focused on tiny achievements—like getting out of bed on time or having a healthy meal. Celebrating those little wins can build confidence and encourage you to tackle bigger challenges ahead.
Building resilience often includes fostering optimism. Surrounding myself with positive and supportive people has helped craft an uplifting environment that encourages recovery. Remember, it’s okay to lean on others. Together, we can be stronger.
Practicing Self-Care
Finally, never underestimate the power of self-care. In times of crisis, self-care can often be neglected. I’ve realized that prioritizing my own needs is crucial in being able to show up for others. It’s not selfish; it’s essential.
Establishing routines that include self-care practices can provide stability. Whether that means reading a book, treating yourself to a spa night, or simply taking time to breathe deeply, it’s vital. After all, if your tank is empty, you can’t help others fill theirs!
Make self-care a non-negotiable part of your day. When I began checking in on myself regularly, I noticed that my overall wellbeing improved. You deserve love and care just as much as anyone else. Prioritize yourself because it’s a pivotal part of healing.
Frequently Asked Questions
1. What are the common emotional reactions to disasters?
Common emotional reactions to disasters include fear, anxiety, sadness, anger, and confusion. It’s perfectly normal to experience these feelings, as everyone copes in their own unique way.
2. How do I know if I’m experiencing trauma symptoms?
Signs of trauma can include intrusive thoughts related to the disaster, heightened anxiety, mood swings, and physical symptoms like headaches or fatigue. If these symptoms persist, it might be beneficial to consult with a professional.
3. What should I do if I feel isolated after a disaster?
If you feel isolated, reaching out for support is essential. Join local groups, connect with loved ones, or consider talking to a therapist who can help you rebuild your social connections.
4. How can I practice self-care during difficult times?
Practice self-care by incorporating activities that nourish your mind and body. This can include exercise, meditation, hobbies, and simply making time for relaxation. Prioritize your well-being like it’s your lifeline—because it truly is.
5. When should I seek professional help after a disaster?
If your symptoms are significantly impacting your daily life, or if they persist for several weeks, it’s a good idea to seek professional help. A therapist can provide valuable support and coping strategies tailored to your situation.

by Preparation | Mar 17, 2025 | Preparedness
Stay Connected with Others
Utilize Technology
One of the best things about living in the digital age is how easy it is to stay connected with friends and family, even when you’re stuck at home. I remember during the last significant emergency, I relied heavily on video calls. Apps like Zoom and FaceTime allowed me to have ‘face-to-face’ chats, making me feel less isolated. I suggest scheduling regular catch-ups with your loved ones to keep up the good vibes.
Don’t forget about social media! While it can sometimes get a bad rap, platforms like Facebook and Twitter can help you stay in touch and keep up with what everyone’s doing. Share memes, funny stories, or even just check in on each other. It really helps to laugh together, even if it’s through a screen.
If you’re feeling extra creative, consider starting a virtual book club or a game night. I’ve enjoyed countless evenings of playing online games with friends, and it felt almost like we were in the same room. Finding ways to connect, even while you’re apart, can really bridge the gap and keep your spirits up.
Reach Out for Support
If things get tough, don’t hesitate to reach out for support. I learned the hard way that bottling up feelings makes everything feel worse. Whether it’s a chat with a good friend or a session with a professional, talking things through can work wonders. It’s okay to be vulnerable; we all need that support sometimes.
A lot of communities have created support groups (both online and offline) to help those feeling isolated. Take a look around; you might be surprised at what’s available. For me, discovering a community of people experiencing the same feelings made a huge difference. We could encourage each other and share tips and good practices.
Don’t forget about your local resources—many organizations offer helplines and online support groups. They’re there to help you navigate through tough times. I always keep a list of helplines and support services handy just in case I need them or someone else does.
Express Yourself
When I was feeling isolated, I found writing to be incredibly therapeutic. Journaling has helped me process my thoughts and feelings, and sometimes, I just dump everything onto the page without holding back. It’s a great way to understand what I’m going through. You might be surprised at how cathartic it can be.
Art can also be a powerful outlet. Whether you draw, paint, or craft, finding a creative hobby can give you a sense of accomplishment and joy. I took up painting a few months ago, and it was like a switch flipped for me. I forgot about the stress of isolation and immersed myself in the world of color and creativity.
You can even try expressing yourself through music. Whether you’re playing an instrument, singing, or just dancing around your living room, music has a magical way of lifting our spirits. I’ve had some of the best moments during isolation just blasting my favorite tunes and having a mini-concert at home!
Establish a Routine
Create a Daily Schedule
Crafting a daily schedule can be super helpful when you’re holed up at home. When everything feels chaotic, having a structured day helps ground me. I usually start by setting fixed wake-up and bedtime routines; it gives my day some much-needed rhythm. You’ll find it easier to manage stress and anxiety if you have a clear plan.
I recommend including a mix of work, relaxation, and fun activities in your schedule. Maybe set aside some time each day to read, go for a walk, or try that new recipe you’ve been eyeing. Balancing productivity with leisure is key in preventing burnout, especially when the days seem to blend into one another.
Don’t forget to include breaks in your schedule. Short breaks to stretch or do something you enjoy can recharge your batteries and make you feel more productive. You bet I’ve taken many coffee breaks where I just step outside for a minute and soak in the fresh air!
Set Small Goals
Along with my daily schedule, I like to set small, achievable goals for myself. These can be simple things like finishing a book, organizing a room, or starting a workout routine. By breaking things down into bite-sized tasks, I find that I get a real sense of accomplishment, which is especially important when I’m feeling isolated.
Every time I check a goal off my list, it keeps the positive vibes flowing. I recommend writing down your goals where you can see them daily—maybe put them on your fridge or as a wallpaper on your phone. This small visual cue can serve as a reminder and motivation when you need it.
Also, don’t be afraid to celebrate those wins! Even small victories deserve recognition. Go ahead and treat yourself when you accomplish your goals—it might be as simple as enjoying a relaxing bath or indulging in your favorite snack. These celebrations can make a world of difference in lifting your mood.
Practice Self-Care
Self-care became a big focus for me during isolation. I made it a priority to spend time on myself and my mental health. Whether it’s practicing mindfulness, doing yoga, or simply taking a hot bath, finding those moments for yourself can be a game-changer. I can’t stress enough how important it is to be kind to yourself during tough times.
Additionally, physical activity plays a huge role in my self-care routine. Whether it’s a home workout, going for a run, or even dancing around the living room, getting those endorphins going always lifts my spirits. Find a workout you enjoy, and it won’t feel like a chore at all.
Also, don’t underestimate the power of nutrition. Fueling your body with healthy meals makes a difference in how you feel. While it’s tempting to snack on junk food more when I’m stuck at home, I’ve found that cooking nourishing meals keeps my energy levels up and my mood stable.
Engage in Hobbies
Rediscover Old Interests
Isolation is a perfect time to revisit hobbies that you might have put on the back burner. I picked up painting and gardening again, and honestly, it felt like finding an old friend. Reconnecting with these pastimes fuels creativity and gives you something to look forward to each day.
Get curious! Explore the things that genuinely excite you. Maybe it’s knitting, photography, or learning a new language. Dedicating time each week to explore a hobby can significantly enhance your well-being, and who knows—you might just discover a new passion!
Sharing these hobbies with others can also add a layer of connection. I found online groups and classes for my interests, and it felt great to connect with people who shared the same passions. It’s fulfilling to learn together and share our progress!
Learn Something New
Why not use this time to learn something new? I enrolled in a few online classes during my isolation. There’s an abundance of resources out there, from cooking to coding, and it felt refreshing to challenge myself and soak in new information. It’s amazing how engaging your brain like this can shift your perspective.
Self-paced learning also means you can go at your own speed, which was perfect for me. I loved having the flexibility to dive deep into topics that intrigued me without the pressure of a rigid timeline. Plus, it’s a great way to keep my mind sharp while having fun!
Don’t be afraid to get hands-on. Many hobbies involve skill-building, so trying your hand at DIY projects or cooking new recipes can feel rewarding. The better you get, the more fun it becomes. It’s a win-win situation!
Volunteer Virtually
Giving back can be an incredibly fulfilling way to combat feelings of isolation. I discovered various virtual volunteer opportunities that allowed me to contribute while connecting with others. Whether it’s helping with online tutoring or supporting local organizations through social media, it’s a great way to feel part of a community.
Volunteering can also lead to new friendships! I met like-minded individuals through different initiatives. Building relationships through shared efforts always brightened my days and shifted my focus away from my feelings of isolation.
Make it a fun family or friend activity! You could organize online fundraisers or get together to help your community from a distance. It feels energizing to be part of something bigger than yourself, and you might be amazed at how much of a difference you can make!
Conclusion
In summary, coping with isolation during emergencies can be challenging, but it’s entirely possible with some creativity and effort. By staying connected with others, establishing a routine, embracing hobbies, and practicing self-care, I’ve learned to thrive, even when times get tough. Remember, it’s okay to feel overwhelmed sometimes, but you’re never truly alone.
FAQs
1. How can I stay connected with friends and family during isolation?
You can utilize technology like video calls and social media to stay in touch. Schedule regular catch-ups or start virtual activities such as game nights or book clubs to maintain connections.
2. What are some self-care practices I can adopt?
Consider creating a morning routine that includes mindfulness exercises, physical activity, and healthy meals. Also, take time for your hobbies and ensure regular check-ins with your emotional health.
3. How do I establish a productive routine?
Create a daily schedule that includes a mix of work, relaxation, and fun activities. Setting small, achievable goals can help keep you motivated and provide a sense of accomplishment.
4. What should I do if I feel overwhelmed?
Reach out for support, whether from friends, family, or mental health professionals. Expressing your feelings and seeking help can reduce the emotional burden and provide clarity.
5. How can volunteering help during isolation?
Volunteering can provide a sense of purpose and connection with others. Engaging in virtual volunteer opportunities allows you to help your community while forming new friendships along the way.


