Emergencies can strike at any time, and being prepared is essential. In this blog post, we will discuss the five essential steps you need to take to prepare for an emergency. Follow these steps to ensure that you and your family are ready for whatever life throws your way.
Step 1: Introduction to Emergency Preparedness
The first step in preparing for an emergency is understanding what it means to be prepared. This involves having a plan in place, building an emergency kit, staying informed during an emergency, practicing your plan, and maintaining your supplies. By taking these steps, you can help ensure that you and your loved ones are safe and protected in the event of an emergency.
Step 2: The Importance of Having a Plan
Having a plan in place is crucial when it comes to emergency preparedness. You should create a detailed plan that outlines what you will do in different types of emergencies. This includes identifying evacuation routes, determining where you will go if you need to evacuate, and establishing a communication plan with your loved ones. Make sure everyone in your household knows what the plan is and practices it regularly.
Step 3: Building an Emergency Kit
Building an emergency kit is another important aspect of emergency preparedness. Your kit should include items such as non-perishable food, water, flashlights, batteries, first aid supplies, and extra clothing. You may also want to include additional items like cash or a portable charger for your phone. Make sure your kit is easily accessible and keep it up to date by checking expiration dates on perishables and replacing anything that has been used.
Step 4: Staying Informed During an Emergency
During an emergency, it’s essential to stay informed about what’s happening around you. Keep a weather radio handy so that you can receive updates on severe weather events. You can also sign up for local alerts through your community’s emergency management agency. Be sure to follow instructions from authorities and avoid going outside unless absolutely necessary.
Step 5: Practicing and Maintaining Your Plan
Practice makes perfect, especially when it comes to emergency preparedness. Regularly practice your emergency plan with your family members so that everyone knows what to do in different situations. Additionally, make sure to maintain your supplies by checking expiration dates and replacing anything that needs to be replaced. It’s better to be overprepared than underprepared when it comes to emergency situations.
In conclusion, following these five essential steps can help you prepare for an emergency. Remember to have a plan, build an emergency kit, stay informed during an emergency, practice your plan, and maintain your supplies. Being proactive and prepared can help give you peace of mind and protect yourself and your loved ones in times of crisis.
Welcome to my blog post about emergency preparedness. In this article, we will discuss how to build a 72-hour emergency kit and what you need to know to be fully prepared for any unforeseen circumstances that may arise.
Emergencies can happen at any time, and it’s essential to have a plan in place to keep yourself and your loved ones safe. One of the most important steps you can take is to create an emergency kit with enough supplies to last for three days or more. This kit should include everything you might need during a crisis, from food and water to first aid supplies and communication tools.
Here are some tips on what to include in your 72-hour emergency kit:
1. Food and Water: You should aim to store at least one gallon of water per person per day, as well as non-perishable food items such as granola bars, trail mix, and canned goods. Make sure to rotate these items regularly to ensure they haven’t expired.
2. First Aid Supplies: Your kit should contain bandages, antiseptic wipes, pain relievers, and other basic medical supplies. It’s also a good idea to include a first aid manual or guide.
3. Communication Tools: In case of an emergency, you may not be able to rely on cell phones or internet connections. Consider including a portable radio, flashlight, and extra batteries in your kit.
4. Shelter and Warmth: If you find yourself stranded without shelter, having a tent or emergency blankets could make all the difference. These items are lightweight and easy to pack away.
5. Additional Considerations for Special Needs Populations: If anyone in your family has special needs, such as medication or mobility issues, make sure to account for those needs when building your emergency kit.
Remember, being prepared isn’t just about having the right gear – it’s also about knowing what to do in different situations. Take the time to educate yourself on disaster response procedures and practice drills so that you feel confident in your abilities to handle whatever comes your way.
In conclusion, building a 72-hour emergency kit is an essential step towards ensuring your safety and security during times of crisis. By following these guidelines and taking the necessary precautions, you can rest assured that you and your loved ones will be ready for anything.
Emergencies can strike at any time, and it’s essential that you are prepared. In this blog post, we will discuss the five essential steps you need to take to prepare for an emergency. These steps include creating an emergency kit, developing a communication plan with loved ones, keeping important documents on hand, preparing your home for an emergency, and practicing and testing your emergency plan.
Step 1: Create an Emergency Kit
The first step in preparing for an emergency is to create an emergency kit. Your emergency kit should contain all of the supplies you may need during an emergency situation. Some items to consider including in your emergency kit are non-perishable food, water, flashlights, batteries, first aid supplies, and extra clothing. It’s also a good idea to have a portable charger or solar charger for your phone so you can stay connected during an emergency.
Step 2: Develop a Communication Plan with Loved Ones
Developing a communication plan with loved ones is crucial in case you get separated during an emergency. Make sure everyone knows how to reach each other and has access to important contact information. Consider using an app like Zello or Facebook Messenger to communicate if cell service is limited.
Step 3: Keep Important Documents On Hand
Keeping important documents on hand is vital in case you need to evacuate quickly. You should make copies of your passport, driver’s license, insurance policies, and any other critical papers and keep them in a safe place. If possible, scan these documents and save them electronically as well.
Step 4: Preparing Your Home for an Emergency
Preparing your home for an emergency involves taking some proactive measures to protect yourself and your property. This includes having a backup generator, securing loose outdoor furniture, trimming trees and shrubs around your house, and installing storm shutters or impact windows. You should also ensure that your smoke detectors and carbon monoxide alarms are working properly.
Step 5: Practice and Test Your Emergency Plan
Practicing and testing your emergency plan is essential to ensuring that everyone knows what to do in case of an emergency. Conduct regular drills with your family members, and practice different scenarios such as evacuating your home or sheltering in place. By doing so, you will be better equipped to handle whatever emergency situations arise.
In conclusion, being prepared for an emergency is critical to keeping yourself and your loved ones safe. By following these five essential steps, you can rest easy knowing that you are ready for anything.
Let’s be real here—when’s the last time you genuinely thought about what would happen if the lights went out? I’d bet my last flashlight it wasn’t recently! It’s easy to brush off, but having a solid plan in place for a power outage can save your family a lot of stress. I’ve learned the hard way that waiting until it’s already happening is not the best strategy.
So, gather your tribe and get down to business. Start by having a family discussion about what a power outage would mean for all of you. What medical devices require electricity? How long can everyone survive without things like refrigeration or internet? The more you talk about it, the better prepared you’ll be.
Another smart move is to identify your go-to resources. Know which local authorities to rely on for updates, and have emergency contacts saved on everyone’s phone. Trust me, when the power’s gone, a little pre-planning can be a total lifesaver.
Creating a Power Outage Plan
Once you know why it’s essential to plan, it’s time to create an action plan. I suggest writing it down and making sure everyone has a copy. We don’t have to rely on our memories, especially in stressful situations!
Your plan should include steps for what everyone will do when the lights go out. Designate a meeting place in case of evacuation. This is crucial, especially if you have kids. You’ll want to be sure everyone knows where to go if they’re separated.
Lastly, review and update this plan regularly. It sounds simple, but how many of us actually sit down and go over important stuff like this? By making it a family activity, you can keep everyone engaged, and it’s a good bonding experience, too!
Assessing Your Home’s Risk
It’s a great idea to check out the specific risks you face in your area. For instance, if you live in a storm-prone area, you might want to take extra precautions during hurricane season. Knowing what natural disasters are common around you can help you tailor your emergency plan.
Take some time to consider your home’s structure, too. Is your roof sturdy? Do you have good insulation? Some places might experience more frequent outages due to being in a bad grid area or just poor infrastructure. Understanding these risks will help you prepare more effectively.
Remember to factor in communication options as well. Cell service can be spotty during power outages, so look into battery-operated radios or walkie-talkies for emergencies—believe me, being without communication is a real stressor!
Essential supplies for blackout
The Basics You Need
Now, onto my favorite part: supplies! When it comes to a power outage, having the right stuff at hand can make all the difference. First off, stock up on flashlights. I know it sounds simple, but I can’t tell you how many times I’ve scrambled to find one at the last minute!
Don’t forget batteries! Keeping a stash of both rechargeables and disposables is critical. And let’s not neglect candles and matches or lighters, although be careful with those—they can be a fire hazard if you’re not careful.
Next up, you should have a good amount of water stored. We often forget that no power means no running water too! Aim for at least a gallon of water per person, per day, for three days. Believe me, you’ll regret it if you don’t plan for that!
Food Storage Solutions
When you’re thinking about supplies, food is just as important. You don’t want to be stuck watching your fresh groceries go bad, right? Consider canned, non-perishable items. Think beans, soups, and vegetables that can last for ages on your shelf.
Don’t forget that can opener! I once had a whole can of chili and no way to get into it. Learn from my mistakes, folks! Also, think about snacks; you don’t always want to eat a full meal during a power outage. Granola bars or trail mix can be a quick fix.
If you have kids, include their favorites. Keeping the atmosphere light during a blackout can really help to ease the anxiety, and a simple treat can make a world of difference.
Staying Powered Up
Now let’s talk about keeping some of your tech running. Consider investing in a portable power station or generator. This is especially handy for medical devices or even just keeping your fridge running for a little while longer.
If you’re worried about fuel shortages during outages, solar chargers can be a great backup. They might not power everything, but they can do wonders for charging phones or small devices.
To stretch your resources even further, consider asking friends or family if they have spare chargers or backup batteries you can borrow. Everyone wants to lend a hand during tough times!
Family safety during outages
Creating a Safe Environment
Safety first, my friends! I can’t stress this enough. When the lights go out, it’s super important to make sure your home is a safe place. Start by securing any items that could become a hazard. Trip hazards are no joke!
Have you thought about your emergency exit routes? In the dark, it can be easy to forget the plan. Walk through your house during the day and tell everyone where to go if you need to leave in a hurry.
For those with young ones or pets, you’ll want to ensure they know where to find each other in case everyone gets separated. I’ve found it’s super helpful to practice these things occasionally. Make it a game—kids love challenges!
Keeps Kids Calm
Let’s be honest, kids can freak out during an outage, especially if they don’t understand what’s going on. I’ve been there! So, talking calmly about the situation will help alleviate some of those nerves. Explain what’s happening and assure them that it’s just temporary.
If you can, plan fun activities that don’t require power. Board games, storytelling, or arts and crafts can keep spirits high and create some of the best memories despite the dark.
If your kids are scared of the dark, it’s a good idea to have some soft toys or blankets nearby for comfort. It’s amazing how little things like these can help calm their fears.
Communication is Key
The ability to communicate during outages is vital. Make sure everyone in your family knows how to reach out for help in case of an emergency. Teach them the basics of using landlines or emergency contact lists.
In this tech age, it’s easy for us to forget about the good old ways of staying connected. So, practicing using things like a battery-operated radio can be a fun family activity. Plus, you’ll get some reliable info on what’s going on around you.
If you’re close enough to neighbors, maybe it’s good to have a buddy system set up. Knowing you have someone nearby you can count on is comforting and practical.
How to cope with a power cut
Staying Positive
Let’s face it: a power outage can be a major drag. I’ve found that keeping a positive attitude can make all the difference. Take a moment to breathe and remember it’s just a temporary thing.
Engage your family in little fun challenges. Whether it’s flashlight tag for the kids or storytelling sessions, turning this into a mini-adventure can help lighten the mood.
Also, don’t hesitate to laugh off the uncomfortable moments. Embracing the whole “roughing it” experience can make you all closer. I swear, those are the stories that your family will reminisce about long after the lights are back on!
Utilizing Non-Electric Activities
Be sure to utilize those non-electric activities to your heart’s content. This is your golden opportunity to reconnect. Reading books, playing games, and just talking are great ways to bond without screens.
I’d recommend setting up a “no tech” rule just to cut off all distractions. You’d be amazed at how much fun you can have without devices demanding your attention!
Some of my best family memories were made during outages, just by embracing the moment. Be creative, and watch how inspiring a little chaos can be!
Finding Comfort
When dealing with the stress of a power outage, finding comfort is key. Make sure everyone has their favorite snacks, cozy blankets, or beloved things close by. Honestly, a little comfort food goes a long way!
If chilly weather’s the concern, grab an extra layer and cuddle up together. Getting cozy and huddling up really does help everyone feel better during an outage. Show that tender love, and it’ll strengthen the family bond.
Lastly, even when the lights are out, it’s a great time to reflect on all those ‘little things’—your family, your home, and so on. Appreciate the moment, and focus on the love that shines brighter than any light!
FAQs
What should I do first during a power outage?
The first step is to stay calm and assess the situation. Check if the power is out in your vicinity or just your home, and then ensure that everyone in the family is safe. Gather emergency supplies if you need to, and start implementing your outage plan.
How can I keep my food from spoiling during an outage?
Keep your refrigerator and freezer doors closed as much as possible. This helps keep the cold air inside. If you have a generator, use it to power your fridge, but be sure to follow safety guidelines!
How long can a power outage last?
Power outages can last anywhere from a few minutes to several days, depending on the cause (like storms or equipment failure). It’s essential to be prepared for an extended outage to ensure your family is taken care of.
What if I have medical needs during a power outage?
If you have medical needs, it’s crucial to have a backup plan. Talk to your healthcare provider about what to do if the power goes out, and consider having backup supplies or a generator for medical equipment that requires electricity.
9 Critical Water Storage Mistakes You’re Probably Making
9 Critical Water Storage Mistakes You’re Probably Making
Water Storage Practices
Common Water Storage Errors
Improper Water Container Choices
Unmanaged Water Quality
Water Storage Practices
Understanding Proper Water Storage
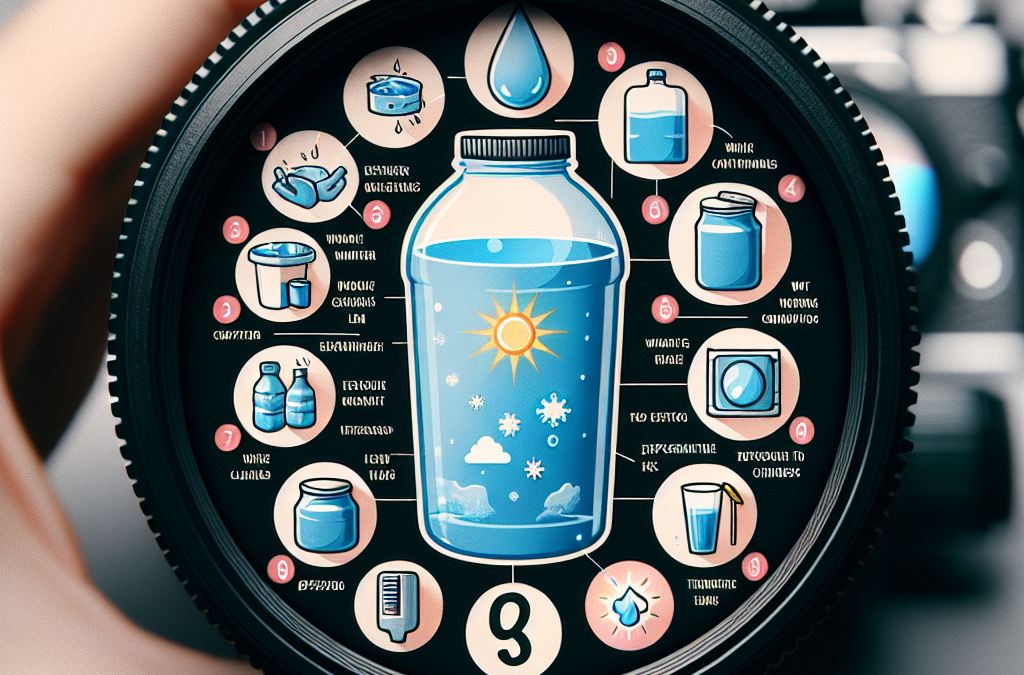
When I first got into water storage, I thought it was just about filling up some containers and calling it a day. However, it’s way more nuanced than that. Each type of water has specific requirements, and understanding these basics can showcase how essential it is to get it right.
Water storage isn’t just about making sure you have enough; it’s about being prepared for the long haul. This means selecting the right storage solutions, maintaining good hygiene, and rotating your supply regularly so it doesn’t go to waste.
Besides, it can be a bit overwhelming with all the options out there. From barrels to bottles, there’s a learning curve that’s essential to navigate if you want to keep things safe and effective.
Choosing the Right Storage Containers
Alright, let’s talk containers! When I started, I made mistakes with my choices that could’ve been easily avoided. Not all containers are safe for storing water. Trust me, learning about BPA-free plastic and food-grade materials was crucial.
You’ve got to make sure that your containers are not just any old plastic but specifically designed for water storage. If not, you could end up with leached chemicals in your drinking water. Nobody wants that!
So always opt for reputable brands and check online reviews. Find containers that come highly recommended by others. That little bit of research can save you a heap of trouble in the long run.
Setting up a Storage System
Once I’ve got my containers sorted, the next step is organizing them in a way that makes access super easy. I can’t stress enough how important this is! A chaotic storage area is a recipe for disaster and waste.
I like to categorize my water based on use—drinking, cooking, and emergency supplies. This way, I always know what I have on hand and how to reach it in a pinch.
An effective labeling system also saves you time and stress, ensuring that you’re not tearing through everything just to find what you need. A little organization upfront can go a long way.
Common Water Storage Errors
Failing to Check for Leaks
One of my biggest blunders in water storage was neglecting to regularly check for leaks. It’s easy to overlook, but trust me—this can lead to a significant waste of water and serious damage to your storage area.
I recommend making it a routine to inspect your containers. Cracks, holes, or general wear-and-tear can develop quietly over time. And you know what? It only takes one slip-up to ruin everything, so vigilance is key.
Having a checklist or setting reminders on your phone can help you stay on top of your storage inspections. It sounds simple, but trust me, you don’t want to find out the hard way!
Ignoring Water Quality
Man, I learned this the hard way. One day, I went to grab some water from my storage, and let’s just say it had a funky taste. I had ignored whether I was maintaining the quality of my water!
You should be testing stored water periodically for clarity, odor, and taste. Not every change you notice is worrisome, but sometimes, it can indicate potential contamination. Make sure you know what signs to watch for!
It also helps to understand some basic water treatment steps that can keep your water fresh, like adding a bit of chlorine or using filtration systems. This way, you’ll always be prepared!
Neglecting Regular Rotation
Okay, this one is a biggie! I used to think that as long as I had water stored away, I didn’t need to worry about it. Wrong! Rotating your water supply is a critical part of maintaining quality.
Water should generally be rotated at least every six months. This doesn’t mean you have to waste water, either; you can always use the older water in your daily cooking or for washing.
Plus, it helps to keep track of what you have and when you added it. I like to use a simple notebook or even an app on my phone to track dates and usage. This makes it way easier to remember without causing stress.
Improper Water Container Choices
Understanding Container Materials
You would think all containers are equal, but oh boy, was I wrong! Different materials impact the taste, safety, and longevity of your water. Plastic isn’t just plastic—some leach harmful chemicals, especially when exposed to heat.
There are glass containers, metal options, and food-grade plastics. It’s vital to know the pros and cons of each material. Personally, I love using glass for its durability and non-reactive qualities.
Research each type of container you’re considering. Look for reviews and recommendations, and always choose safety over saving a few bucks!
Size and Shape Considerations
Have you ever tried to maneuver a large water barrel in a tight space? Let me tell you, sometimes the frustration isn’t worth it! Size matters when it comes to choosing water containers.
Think about where you’ll store your water and how frequently you’ll need to access it. Remember to balance convenience and capacity. I often find that smaller, stackable containers work well for me.
Also, the shape of your containers can make a difference in how easily they fit in your dedicated storage space. It can be a game-changer for an organized and efficient setup.
Overlooking Cleaning Procedures
Another thing I didn’t focus on as much when I started was cleaning my containers properly. Even the best containers need a good scrub once in a while to prevent bacteria growth.
I’ve learned to have a cleaning routine that includes a mix of vinegar and baking soda or a mild bleach solution to disinfect. Just make sure to rinse thoroughly afterward, so no chemicals hang around.
Taking the time to keep your storage clean will pay off big time. You’ll not only have safer water, but it’ll also taste better— and who wants to drink gross water, am I right?
Unmanaged Water Quality
Understanding Water Treatment Options
Let’s dive into the nitty-gritty of treating your water! I always thought my water was perfectly fine right from the tap or after storage, but I learned it’s essential to treat it properly.
There are many methods like boiling, chemical treatments, and filtration systems. Each has its pros and cons, and understanding which to use in specific scenarios will empower you as a water manager.
I usually recommend active charcoal filters for day-to-day use, but in emergencies, I might go for chemical treatments. It’s all about knowing your options so you can take action when you need it.
Identifying Contamination Risks
Contamination can strike from so many angles—it’s mind-boggling! From dirty hands touching the spout to external pollutants, I’ve learned to be proactive about keeping my water sources clean.
It’s crucial to identify potential contamination risks in your home and outdoor water sources. Regularly assessing what might compromise the integrity of your water storage should become second nature.
Implementing preventive measures, like covering containers and using clean siphons when pouring, can help keep your supply safe from contaminants. Prevention is definitely the name of the game.
Testing Water Regularly
I’ve got to emphasize this: Testing your water shouldn’t be a one-time thing. Just because it was good last month doesn’t mean it’ll be the same next week!
Investing in a water testing kit was one of the best decisions I made. These kits are easy to use and give me peace of mind. They can help identify any changes in pH, chlorine levels, or presence of harmful bacteria— all things we want to avoid.
Make monitoring a habit, and it will pay off in dividends in the long run. Good water management isn’t just about storing; it’s about sustaining!
Frequently Asked Questions
What type of containers are best for water storage?
The best containers for storing water are made from food-grade plastics, stainless steel, or glass. Make sure they are BPA-free to avoid leaching harmful chemicals.
How often should I check my water storage for leaks?
I recommend checking your water storage containers at least once a month for leaks and other signs of wear and tear to prevent waste and damage.
What are the signs that water quality has been compromised?
Signs include a change in color, bad odor, or an unusual taste. If you notice any of these, consider treating or replacing the water.
How can I ensure my stored water remains safe and clean?
Regular inspection of your containers, maintaining proper cleaning techniques, and rotating your water supply at least twice a year are key to keeping your stored water safe.
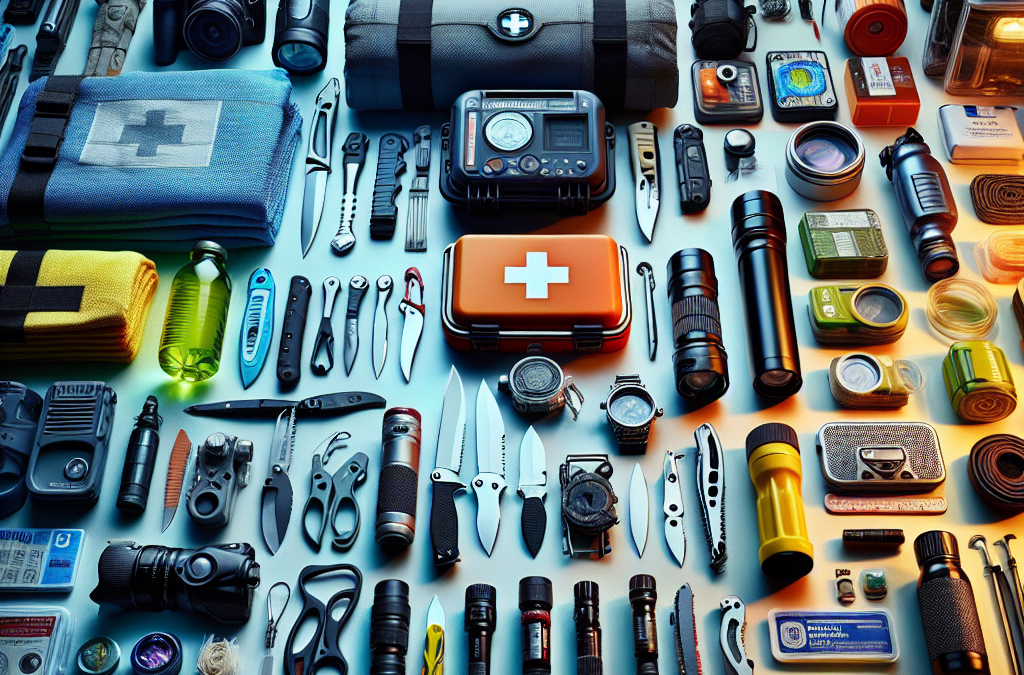
When I think about emergency preparedness, the first thing that comes to mind is an emergency kit. This is your lifeline in a crisis. I usually include items like first aid supplies, non-perishable food, and water. It’s surprising how many people overlook these basics and then scramble at the last minute. Trust me, having these essentials ready can make all the difference.
As for the quantity, I suggest stocking up on enough supplies to last at least 72 hours. This gives you time to recover from the initial shock and find more resources if necessary. Don’t forget about any personal items specific to your needs, like medications or pet supplies. I’ve made the mistake before of thinking about my needs but forgetting about my furry friend!
Remember, your kit isn’t a one-size-fits-all. Personalize yours based on your unique situation. Think about the climate you live in, your family members, and even your hobbies. For example, if hiking is your jam, pack some gear along with the basic food and water. That way, you’re not only prepared but also comfortable.
Communication Plan
Establishing Your Network
During any disaster, clear communication is crucial. After reflecting on previous experiences, I can’t stress enough how vital this is. Gather your family and friends to discuss who will be in charge of what, should an emergency arise. I can remember a time when we rushed to evacuate but didn’t establish who would contact whom. It added unnecessary stress!
I also recommend using text messaging over traditional calls since text messages can often go through when calls can’t. Create a family group chat specifically for emergencies. Make sure everyone knows how to access this information and practice it so there’s no hesitation when it really matters.
Think about other communication channels too, like social media, local bulletin boards, or community centers that can serve as meeting points. I’ve found that having multiple layers of communication gives everyone peace of mind, especially the little ones who might not understand the gravity of the situation.
First Aid Supplies
Building the Perfect First Aid Kit
A solid first aid kit is a non-negotiable. Trust me on this one; I’ve had my share of scrapes and bruises that needed more than a Band-Aid! Start with the basics: antiseptic wipes, gauze pads, adhesive tape, and a good pair of scissors. You’d be amazed at how often you’ll need these during even minor emergencies.
Don’t forget to add a manual or reference guide, especially if you’re like me and sometimes forget where the aspirin is when you need it most! You can find really handy booklets that talk you through common injuries and their treatments. I also include personal medications, like antihistamines, because allergies don’t take a break during a crisis!
As your skills grow, consider attending a first aid or CPR class. I did this a few years back, and it was enlightening. It’s like being a superhero – you don’t just have a kit; you’ve got the know-how to use it. Plus, it’s fun to learn something new and potentially save a life.
Water Supply
Understanding Your Needs
Water is essential, and I can’t stress this enough. In emergencies, clean drinking water becomes a precious commodity. I always make a plan to store at least one gallon of water per person per day. You might think that’s a lot, but trust me, you’d rather have more than not enough!
Remember to also consider pets and the extra water they might need. I once had a friend who forgot about her dog during a storm, and let’s just say we learned a valuable lesson that day! Consider storage options for water – there are many kinds of containers that can keep your water supply safe and free from contaminants.
And hey, think about purification methods too! Water filters, iodine tablets, and even a good old-fashioned boil could be necessary if local sources are questionable. I’ve used filters during hikes, and they’ve saved me a few times. Just don’t be like me and forget to check the replacement filters!
Emergency Power Supplies
Choosing the Right Power Options
With all the tech we have today, keeping the lights on during a disaster is super important. I always recommend investing in a portable power bank; it’s a lifesaver! It’s no fun when your phone dies while trying to get updates or making emergency calls.
Batteries play a vital role here too. I make sure to stock up on various sizes because you never know what might be in need of a change. I hate being caught off guard by a flashlight with dead batteries. C’mon, no one wants to stumble around in the dark!
If you’re feeling adventurous, consider solar-powered gadgets. I’ve been using a solar charger for my devices, and it’s great. Not only does it help the planet, but it also means less reliance on conventional power sources – which is key when emergencies hit!
FAQ
1. What items should I include in my emergency kit?
Your emergency kit should include essentials like non-perishable food, water, first aid supplies, batteries, and a flashlight. Personalize it by considering your family’s specific needs.
2. How often should I update my emergency kit?
It’s a good idea to review and update your emergency kit at least once a year. Check expiration dates on food and medications, and refresh items that have been used.
3. How do I create a communication plan?
Gather your family to discuss who will contact whom during an emergency. Set up a group chat, specify meeting points, and practice emergency procedures to ensure everyone is on the same page.
4. What is the best way to store water?
Store water in food-grade containers, avoiding anything that previously contained chemicals. A general rule is to have at least one gallon of water per person per day, along with extra for pets.
5. Are there eco-friendly power options for emergencies?
Yes, consider solar-powered chargers and equipment that minimize dependence on traditional power. They are great for sustainability and can provide energy during outages.