by Preparation | Apr 10, 2025 | Preparedness
Stay Calm and Assess the Situation
Take a Deep Breath
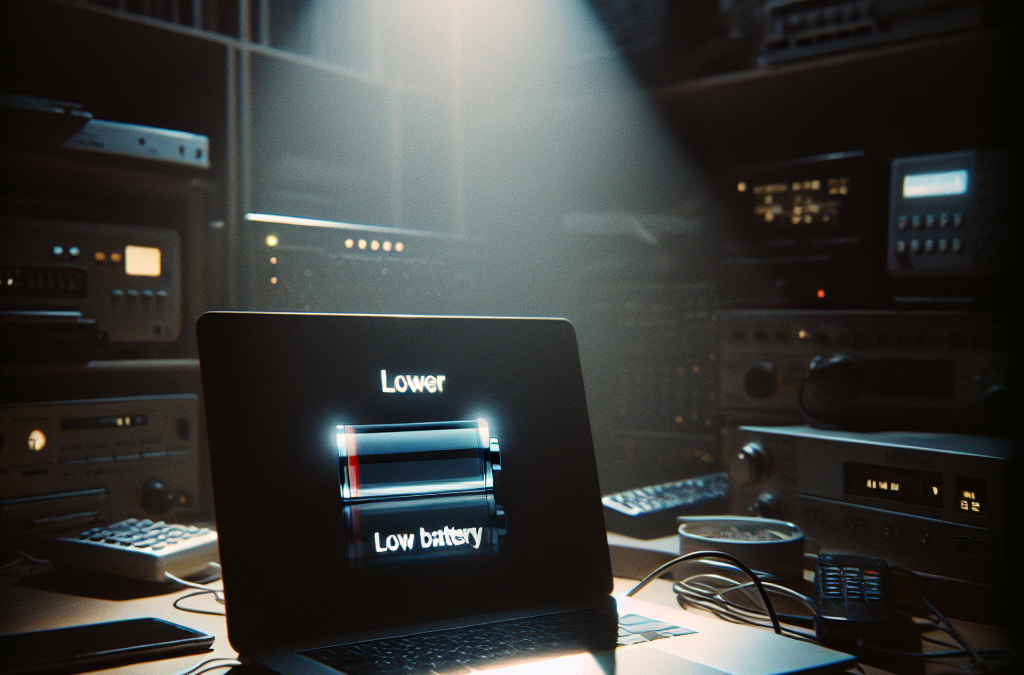
I’ve been there before, standing in the dark, looking at my dead phone, and panicking a little. The first rule? Just breathe. It sounds simple, but that deep breath helps clear the fog of frustration. When you stay calm, you can think rationally about your next steps.
Frustration can lead to poor decisions—like wandering off to find a charger when you’ve forgotten where you put it. In my experience, a moment of calm is all it takes to focus your thoughts. Make sure to remind yourself that power outages are temporary.
Instead of spiraling into panic mode, try to assess your immediate need for power. Is it your phone that’s dead, or is it something more necessary like your fridge? Knowing what’s most important can help you prioritize what to do next.
Check Your Devices
Next up, check your devices. You might be surprised by how many electronic gadgets can still hold a charge. Sometimes my laptop has a little juice left that I can use to get by for a while. Knowing the status of your devices helps shape your plan.
Don’t forget to check wall chargers, power banks, or even if you’ve got a spare battery lying around. I once found an old battery pack while looking for my hairdryer! It saved me a lot of hassle that day.
If all else fails, remember things like handheld gaming devices, e-readers, or any gadget that might have some battery life you forgot about. Those little things can turn into lifesavers in a pinch!
Know Your Options
After assessing the situation, it’s time to explore your options. I’ll admit, there were times when I was genuinely clueless about what to do next. Turns out, understanding your power needs and resources can steer you in the right direction.
Consider who in your circle has power. A friend down the road may have extra battery packs or even a generator. Also, think about public places. Coffee shops and libraries often have outlets available for desperate folks like us!
And don’t overlook your car! If you have a vehicle, there’s a good chance it can charge your electronics. I’ve plugged in my phone in the car so many times, and it’s usually a quick solution when I’m in a jam!
Find a Backup Power Source
Utilize Portable Power Banks
A portable power bank is a game-changer. I can’t stress enough how having one charged and handy makes life easier. These small devices can keep your phone and other gadgets alive long enough to get you through a power outage.
My first power bank was a lifesaver while traveling. Having that little gadget meant I wasn’t tied to finding outlets every five minutes. Make sure to keep it charged and ready to go, just in case your regular power supply fizzles out.
Power banks come in all shapes and sizes, so invest in one that meets your needs. You don’t need anything fancy; just ensure it’s reliable and powerful enough to do the job!
Explore Solar Chargers
Solar chargers have come a long way, and they’re quite handy during a power outage. When the sun is shining, my solar charger can keep my devices alive all day. I’ve even used these while outdoors, camping, or hiking.
What’s great is that they don’t need a traditional power source. Your outdoor adventures or even a lazy day in the backyard can turn into convenient charging sessions, saving your gadgets and sanity!
Just ensure you have enough sunlight during the day. And make sure your solar charger is compatible with the devices you’ll need to juice up!
Consider Generators
If you’re facing a lengthy outage, generators might be worth the investment. They can be a bit pricey, but I’ve learned they can pay off when you’re in a bind. Whether it’s for keeping food from spoiling or for your essential devices, they really work wonders.
Before buying one, assess your power needs. I took some time figuring out how much power my home requires during a blackout, and it made all the difference when choosing the right generator.
Remember, safety first! Operating a generator requires proper ventilation and following all safety guidelines. It’s essential for your peace of mind and well-being while you navigate through the power crisis.
Stay Connected
Leverage Social Media
Social media is a great tool to stay in touch with what’s happening around you during a power outage. I would often turn to Twitter for real-time updates on power restoration in my area. Just a quick hashtag search can connect you to neighbors and updates from the local utilities!
Sometimes, you can also find nearby locations with available power or community resources that can help. Keeping track of local news can be a lifesaver during an outage.
Don’t underestimate the power of online communities! Sharing your outage experience could lead to discovering helpful tips or offers for power sharing among friends and neighbors.
Communicate with Neighbors
A friendly chat with your neighbors can sometimes lead to unexpected resources. I’ve found myself combining efforts with neighbors during outages—sharing devices, planning meals, or even setting up a mini BBQ for everyone to enjoy while we wait for the lights to flicker back on!
Communication can also mean looking out for one another, especially if someone needs help or is in a more challenging situation. When we unite, we can create a better plan for getting through the tough times together.
Don’t hesitate to reach out, a friendly face or a helping hand can make a world of difference when we’re all facing the same issue. Plus, you’ll build stronger relationships with those living around you!
Use Alternative Communication Methods
When the power is out, my phone isn’t the only thing that goes dead. It’s always a good idea to have alternative forms of communication lined up. Investing in walkie-talkies or having some good old-fashioned landlines can work wonders.
Even if power is down, you could still connect with nearby family or friends without relying solely on cell towers. I love playing with gadgets, especially in times of need, and you’d be surprised how tactical a small handheld device can be!
So, if you’re picking up some gear, add a couple of alternative communication tools to your shopping list. You might find them surprisingly handy beyond just a power outage!
Reevaluate Your Habits
Improving Device Usage
Running out of power often calls for a reassessment of how we use our devices. I’m guilty of having too many unnecessary apps running in the background. Taking a moment to streamline your device can save significant battery life!
Consider an app audit. Delete those that you hardly use; you’ll be amazed at how much performance improves when you cut the clutter. The fewer the apps, the more battery you get!
Also, adjust settings to prioritize battery life. Lowering screen brightness or turning off auto-updates can stretch your battery’s life and keep you connected for just a little longer during an outage.
Consider Backup Plans
Life’s unpredictable, and so are power outages. It’s a good idea to map out backup plans in advance. I’ve learned the hard way to have a strategy; stocking up on essential items before disaster strikes is a must!
Things like bottled water, canned goods, batteries, and emergency lighting should be part of your regular grocery runs. Having these handy can save you from running around like a headless chicken when you lose power.
And, yes, let’s not forget a good old-fashioned flashlight! Planning ahead and being proactive will make any outage a lot less troublesome to handle.
Be Aware of Future Solutions
Finally, keeping an eye on innovative solutions for power management is crucial in today’s tech-savvy world. I love discovering new technology that can make my life easier, especially when it revolves around power.
For instance, options like smart home devices can help monitor your power consumption so you can better manage your usage. They also often come with alerts to let you know when power runs low—super handy, right?
Plus, always consider new developments in the renewable energy sector. More homes are incorporating solar power solutions every day, and they’re becoming more accessible than ever. Staying informed means you might be able to avoid future outages!
FAQs
1. What should I do first when the power goes out?
First, take a deep breath and stay calm. Assess which devices you need to keep functional and check the remaining battery levels of those devices.
2. Are portable power banks really worth it?
Absolutely! They can be lifesavers during outages. Just make sure to keep them charged and ready to go. A little investment can save you a lot of headaches!
3. How can I stay connected during an outage?
Leverage social media and communicate with your neighbors. Alternative communication methods like walkie-talkies also come in handy when phones are down.
4. What essential items should I have for a power outage?
Stock up on bottled water, non-perishable food, batteries, flashlight, and a portable charger. Planning ahead makes a big difference when the lights go out!
5. How do I prepare for unexpected power outages?
Map out a backup plan. Regularly audit your device usage, and stay informed about new technologies that can help with power management in the future.
by Preparation | Apr 10, 2025 | Preparedness
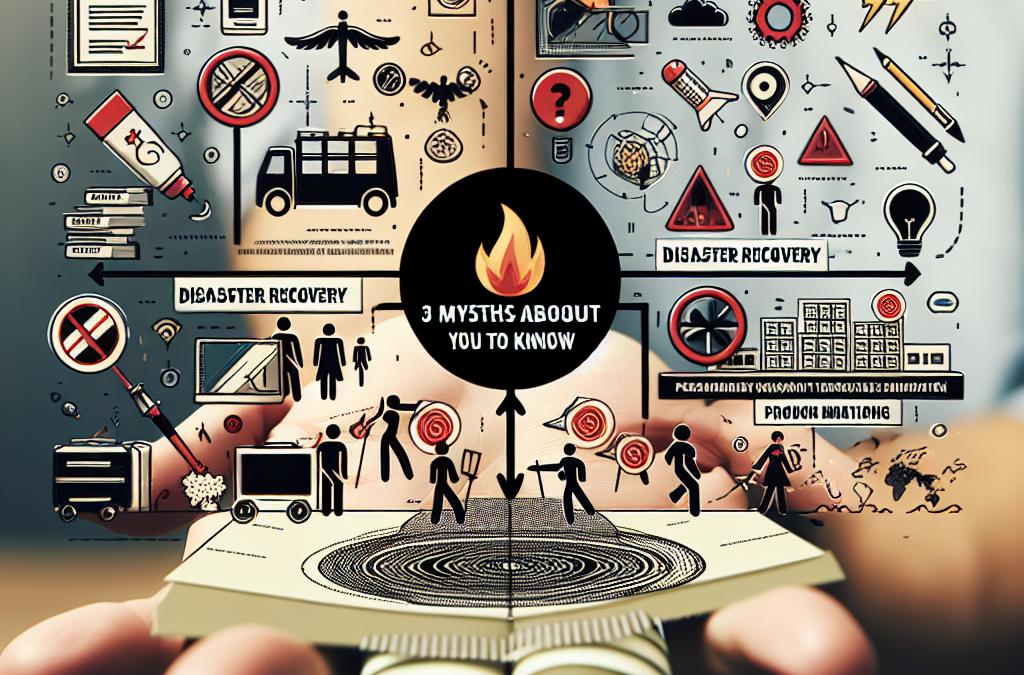
Myth 1: Disaster Recovery is Just About Backups
Understanding the Scope
When I first dipped my toes into the world of disaster recovery, I thought it was all about having a backup system in place. Sure, backups are absolutely essential, but they’re just one piece of the puzzle. It’s like thinking a single slice of pizza can satisfy your hunger when you really need the whole pie.
Disaster recovery encompasses everything from data protection to ensuring business continuity. It’s not just about data loss; it’s about how quickly you can get back on your feet after a disaster strikes. Trust me, if you focus only on backups, you’ll miss out on critical components like the people involved and the processes needed to get things up and running again.
I’ve seen businesses struggle because they relied solely on backups without having a comprehensive recovery plan. So, don’t fall into that trap! Think of disaster recovery as a full strategy that includes infrastructure, software, processes, and most importantly, people.
The Importance of Planning
Believing that backups are the only requirement can lead to a false sense of security. My first disaster recovery plan revolved around a neat backup solution, and it was only when I faced a crisis that I realized I was missing crucial elements. The plan should also address communication, resource allocation, and prioritization of business functions, among other things.
My biggest lesson came when I learned that planning means looking at the ‘what ifs.’ What if a fire breaks out? What if a natural disaster strikes? Planning not only prepares you for these scenarios but also helps your team understand their roles and responsibilities during those times. It’s about creating a culture of readiness.
With a solid plan, you can move from panic mode to a well-orchestrated effort, ensuring that your recovery process is efficient and effective. Trust me, a little planning goes a long way in minimizing chaos and confusion when a crisis hits.
Testing Your Recovery Strategy
So, you’ve got a plan in place, but how do you know if it works? This is where testing comes in. I can’t stress this enough: test your recovery strategy regularly! Running through simulations gives you invaluable insights into what works and what doesn’t.
During one of our tests, we discovered that some of our communication channels were outdated. If we had skipped that step, we would have struggled to communicate effectively during a real disaster. Testing is your opportunity to tweak and refine your approach.
Make it a routine. Just like you would maintain your car, you need to keep your disaster recovery plan in shape. Regularly update your team, review and adjust roles, and conduct drills to ensure that everyone knows what to do. It could very well save your business when it counts most!
Myth 2: Disaster Recovery is Too Expensive
Assessing the Costs
One of the most common myths is that implementing a disaster recovery plan is just too pricey for most businesses. I get it—budgets are tight! However, what I’ve learned is that considering the potential losses during a disaster can drastically change your outlook.
Imagine the costs associated with data loss, downtime, and damage to your reputation. When I started comparing these costs against the expense of a disaster recovery plan, the figures were startling. Investing a fraction to protect against potentially devastating losses is an easy decision when viewed through the right lens.
Moreover, there are now many scalable options available, even for small businesses. Whether it’s leveraging cloud solutions or opting for managed services, there’s something that will fit your budget. Don’t let the fear of expense keep you from safeguarding your business.
Long-term Savings
Not only can a disaster recovery plan save you from major losses, but it can also contribute to long-term savings by improving operational efficiency. Investing in the right tools and technologies can streamline processes and reduce waste, making your business run smoother overall.
When I revamped our disaster recovery procedures, I noticed improved workflow and communication, which in turn led to increased productivity. You can think of it as an investment—putting down a little now can yield big returns later.
Additionally, a solid disaster recovery strategy can bolster your business’s trustworthiness. Clients and stakeholders are more likely to work with a business that takes its disaster preparedness seriously, leading to potential new partnerships and opportunities.
Finding Cost-Effective Solutions
If you think all disaster recovery solutions are prohibitively expensive, think again! There are an array of cost-effective solutions out there that can cater to different needs without breaking the bank. I can’t tell you how many free or low-cost online resources and tools I’ve come across that proved invaluable.
Cloud services, for example, offer scalable disaster recovery solutions that fit a variety of budgets. Plus, utilizing the cloud can decrease the need for on-site hardware, cutting down on costs.
Work with your team to come up with solutions that fit your situation. I found that pooling resources with other small businesses for shared disaster recovery services can also be a win-win scenario. Collaborate and share knowledge—it just makes sense!
Myth 3: Disaster Recovery is Only for Big Businesses
Your Business is Not Too Small
Another myth I hear often is that disaster recovery isn’t necessary unless you’re a large corporation. I mean, come on! No matter your size, you run the risk of a disaster impacting your business. I’ve worked with small businesses who learned this lesson the hard way.
Every business, regardless of size, relies heavily on data and processes. It’s imperative to recognize that small businesses can be just as vulnerable, if not more so, than larger enterprises. What happened to a small friend’s boutique who lost data and had no recovery plan? Total chaos!
Don’t let size be a factor in your level of preparedness! I’ve seen smaller businesses bounce back faster than some larger counterparts simply because they had a robust disaster recovery plan in place. It’s about mindset; every organization deserves a safety net.
Making Adjustments for Size
While small and big businesses should both have disaster recovery plans, the scale and complexity of those plans might differ. Trust me; it’s all about tailoring the approach. I make it a point to adjust our plan’s intricacy based on our size and resources.
For small businesses, a straightforward, cost-effective plan can often suffice when spearheaded by someone dedicated to managing it. I’ve found success by delegating disaster recovery responsibilities among our team, ensuring that every member understands their role without overwhelming one person.
Remember, just because your organization is small doesn’t mean your recovery efforts should be minimal. Tailor your approach, but don’t skimp on the essential elements. It’s all about balance!
The Plus Side of Being Small
Believe it or not, being a small business can have its perks when it comes to disaster recovery. You may have more flexibility in implementing changes and adapting quickly to new processes. I’ve learned that in times of crisis, smaller teams often collaborate more effectively due to close relationships and clear lines of communication.
Moreover, smaller businesses might find it easier to foster a culture of preparedness. Create an atmosphere where the team understands the importance of disaster recovery, making it part of your company’s ethos. When your crew believes in the plan, they’re more likely to stay engaged.
So, embrace your size! Use it to your advantage, building genuine teamwork and collaboration around disaster recovery initiatives. Trust me; it can lead to stronger bonds and a resilient company culture.
Conclusion
In conclusion, understanding these myths surrounding disaster recovery can empower you to build a more resilient and secure organization. Whether you’re a small startup or a large corporation, it’s crucial to adopt a holistic approach to disaster recovery beyond just backups. Remember, proper planning, assessing costs in terms of losses, and recognizing that preparation is vital for all businesses will set you on the right path.
FAQs
1. Why is disaster recovery important for my business?
Disaster recovery helps you prepare for unforeseen events that could potentially disrupt your business operations. It ensures that you can continue to serve your customers and recover from incidents promptly.
2. What are some key components of a disaster recovery plan?
A comprehensive plan should include data backups, communication strategies, resource management, roles and responsibilities, and testing procedures to ensure everything works smoothly when a disaster occurs.
3. How often should I test my disaster recovery plan?
It’s best practice to test your disaster recovery plan at least once or twice a year. Frequent testing helps identify areas for improvement and keeps your team prepared for any emergencies.
4. Can disaster recovery be cost-effective for small businesses?
Absolutely! Many affordable disaster recovery options, such as cloud services and shared resources, can help small businesses implement effective recovery strategies without breaking the bank.
5. Is my small business really at risk for disasters?
Yes! Disasters can affect businesses of any size, including small businesses. It’s essential to acknowledge this risk and put appropriate measures in place to ensure your business can recover effectively.
by Preparation | Apr 10, 2025 | Preparedness
1. Understanding the Basics of Disaster Preparedness
What is Disaster Preparedness?
First off, let me tell you, disaster preparedness isn’t just about having a bunch of supplies stacked up in your basement. It’s about having a plan, knowing what to do, and being ready for anything that comes your way. When I first started looking into this, I realized it’s like creating a roadmap for safety; you need to know the routes you’d take during an emergency.
Different disasters require different plans. Whether it’s a natural disaster like a hurricane or a human-made one, like a power outage, understanding what’s at stake will guide your preparations. For me, having that understanding was like flipping a switch; it made everything else fall into place.
A thorough understanding of potential risks ensures you’re not caught off guard. So grab a pen and jot down what disasters might affect your area. You’ll thank yourself later when you’ve got your bases covered!
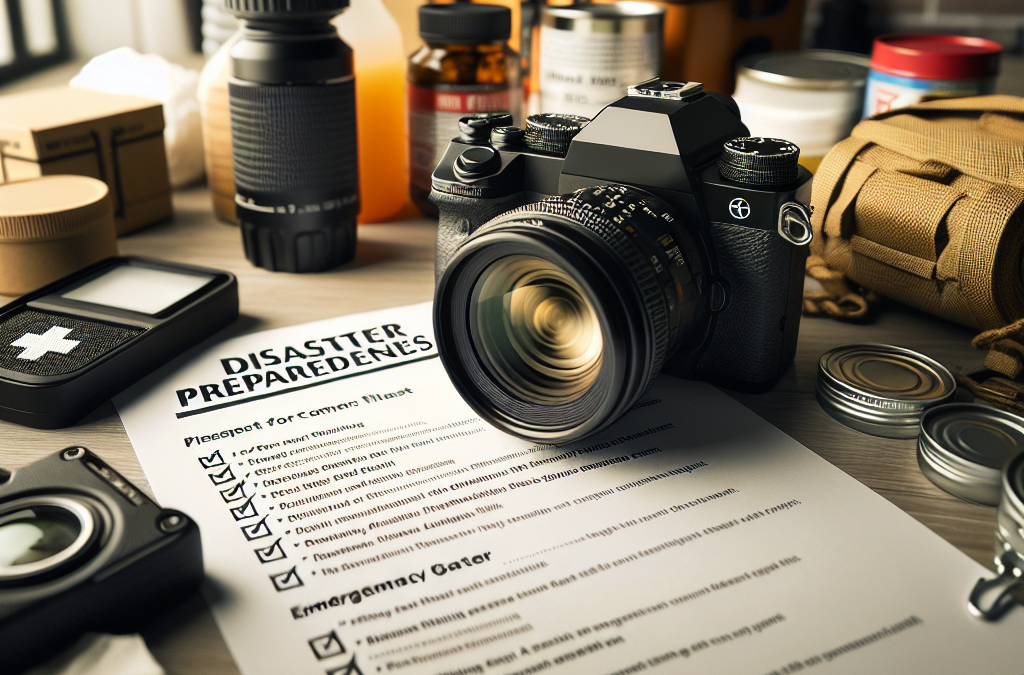
Why Create a Disaster Checklist?
Creating a disaster checklist is like packing your bag before a big trip. You want to make sure you’ve got everything to keep you safe and comfortable. In my opinion, having a checklist gives you peace of mind—it can be pretty nerve-wracking not knowing if you have everything in place.
Moreover, a checklist helps you stay organized. When chaos strikes, your brain might just go to mush. It’s easy to forget critical things! By having a prepared list, you make sure you don’t miss anything essential. Trust me, nothing is worse than realizing you left the flashlight behind in the dark!
Lastly, a checklist is a living document. It should evolve with you; update it regularly as your life changes—new kids, new pets, or even a move. Keeping it fresh ensures you’ll be ready no matter what gets thrown your way!
Components of a Good Preparedness Checklist
Now, let’s break down what goes into these checklists. First, you’ll need basic supplies—think non-perishable foods, water, a first aid kit, and emergency tools. I remember when I built my first kit, and I was amazed at how much stuff I had to consider; I felt like a survivalist!
Then there’s the important aspect of communication. Who do you contact after a disaster? Having a list of family and friends, complete with phone numbers and addresses, is crucial. You don’t want to be searching through your phone in a crisis!
Finally, don’t overlook your insurance and important documents. I learned the hard way that keeping digital copies of essential documents in a cloud storage or a safe place makes everything easier in a pinch.
2. Sources for Reliable Checklists
Government Websites
One of the best places to start looking for reliable disaster preparedness checklists is through government websites. Agencies like FEMA (Federal Emergency Management Agency) have extensive resources that are detailed and regularly updated. These checklists are tailored to various types of disasters, and they really know their stuff!
When I first explored FEMA’s site, I was impressed at how straightforward their materials were. They break down everything you need depending on the disaster you might face. Plus, it’s nice to know you’re getting this info straight from the source!
Sometimes, local government websites can have more specific advice tailored to your area. If you live somewhere with unique risks, they’ll have the goods to keep you prepared!
Non-Profit Organizations
Another great resource is non-profit organizations focused on disaster relief. Groups like the Red Cross not only aid after disasters, but they also publish incredible preparedness materials. I often find their checklists comprehensive and to the point, perfect for someone who wants information without the fluff.
These organizations frequently update their materials and have volunteer programs that can educate you further on preparedness. Participating in their programs has been eye-opening, giving me a greater understanding of what to include in my own plans.
Don’t forget to check their websites for community events or workshops focused on disaster preparedness; you might meet some like-minded folks while getting the intel you need!
Community Resources and Local Workshops
Sometimes, the best resources are right in your community! Local fire departments or community centers often hold workshops or informational sessions on disaster preparedness. I attended one not too long ago—it was surprisingly informative and I met some cool neighbors!
Community discussions are also a fantastic way to learn about what types of disasters are most common in your area. Just listen to others’ experiences, and you’ll pick up helpful tips you might not have thought of.
Don’t miss out on the local library either. They often have books and pamphlets specifically geared towards disaster preparedness that can be a goldmine of information!
3. Tailoring Your Checklist to Personal Needs
Assessing Your Unique Risks
When you create your disaster checklists, you really need to think about your unique situation. What risks do you face? Is it flooding? Earthquakes? Or maybe tornadoes? The first step in tailoring your checklist is acknowledging those risks because what’s relevant for me might not hold true for you.
I’ve found that when I took a close look at what I might face in my region, I could tailor my supplies and preparations accordingly. You’ll be amazed how much peace of mind you get just by knowing you aren’t over- or under-prepared for your circumstances!
Don’t hesitate to consult with friends, family, or local experts to really nail down what you should prioritize based on real-world conditions.
Including Family Preferences and Needs
Now let’s talk about your family. If you have kids, pets, or elderly relatives, you need to consider their specific needs in your checklist. For instance, I learned the hard way that packing some comfort items for my kids made a huge difference in their stress levels during an emergency!
Additionally, any family members with medical conditions may need specialized supplies. Make sure you have extra medications, mobility aids, or anything else critical for their comfort and safety. Tailoring your checklist isn’t just practical; it shows your loved ones you care.
This attention to individual needs creates not only a more effective plan but fosters a sense of teamwork among family members—no one wants to be left out in tough times!
Review and Revise Regularly
One thing I learned through this whole planning process is that a checklist isn’t static. Needs change, and new threats emerge. Make it a habit to sit down once or twice a year and review your checklist, updating as necessary. This way, nothing will slip through the cracks!
It might sound boring, but I often make it a family event. We all gather around and discuss what worked, what didn’t, and what we could do better. It turns into a really good bonding experience, and we often come up with great ideas while chatting!
Plus, regular review keeps everyone on the same page and ready for action if disaster strikes. It’s all about staying informed and being flexible!
4. Online Tools for Disaster Preparedness
Mobile Applications
In this tech-savvy world, there are tons of mobile apps designed specifically for disaster preparedness. Apps like FEMA’s own can send you emergency alerts and reminders about your preparedness tasks. It’s like having a little preparedness buddy in your pocket!
When I downloaded one of these apps, it made my life way easier. I could track what supplies I had at home and even set reminders to review my checklist every few months. This tech could make all the difference when you’re running on adrenaline or just plain busy.
Don’t forget to check the reviews—some apps are more user-friendly than others, so find the one that vibes with your needs!
Online Forums and Communities
The internet is a treasure trove of forums and communities focused on survival and preparedness. Engaging in these spaces not only gives you access to a wealth of knowledge but also connects you with enthusiastic folks who share your interests!
I’ve learned a ton just from reading about other people’s experiences and recommendations. People are always happy to share tips on improving checklists or adding to your disaster preparedness repertoire.
Plus, there’s a certain comfort in knowing you’re part of a community that takes this stuff seriously. It makes the process feel less daunting.
Interactive Educational Resources
Lastly, look out for interactive courses or webinars offered by organizations dedicated to disaster preparedness. I took one a while back, and it changed my perspective completely! Learning from experts kept me engaged, and I picked up some valuable skills along the way.
Many of these courses provide downloadable templates for building your own checklist, which I found incredibly helpful. They guide you through the nitty-gritty details without overwhelming you.
Don’t underestimate the power of hands-on learning—being involved in discussions or simulations really solidified concepts and gave me more confidence in my planning.
5. Sharing Your Preparedness Knowledge
Teaching Family and Friends
It’s great to be prepared yourself, but sharing that knowledge with family or friends amplifies the impact. Have a little family night where everyone discusses the checklist. You can even role-play some emergency scenarios together!
Seeing those around you educated and prepared can ease your own worries. Trust me; I feel way less anxious about emergencies when I know my family has done their homework. Plus, it encourages a culture of responsibility!
Sharing your checklist and experiences can empower those around you to prepare; birdies of a feather flock together, right?
Engaging with Your Community
Consider organizing community preparedness fairs or workshops! You’d be surprised how many folks are willing to join in. Just a little gathering can start discussions and raise awareness about disaster preparedness.
Sharing resources can help ensure that everyone in your area has access to vital information. I’ve seen communities come together after disasters, and laying the groundwork beforehand makes a huge difference.
Encouraging informed conversations about preparedness helps foster resilience in the community, allowing you all to bounce back together in times of crisis!
Using Social Media for Outreach
In today’s world, social media can be a powerful tool for sharing knowledge. Posting tips, resources, or inspiring stories can ignite interest among your followers. I often share little snippets of what I’ve learned because it’s a conversation starter!
Plus, platforms like Facebook or Instagram can help you create groups focused on disaster preparedness. This way, everyone can share their knowledge and support each other in being proactive.
Letting people know you care about their safety not only enhances your preparedness but enriches your connections with others.
Frequently Asked Questions
1. Where can I find the most reliable disaster preparedness checklists?
Government websites like FEMA and non-profit organizations such as the Red Cross are excellent places to find reliable and updated disaster preparedness checklists.
2. How often should I update my disaster preparedness checklist?
It’s a good idea to review and potentially update your checklist at least once or twice a year. Changes in living situations, health, and available resources should be reflected in your plans.
3. What should I include in my disaster supplies kit?
Your disaster supplies kit should include basic supplies like non-perishable food, water, a first aid kit, communication tools, necessary medications, and important documents.
4. How can I engage my community in disaster preparedness?
You can engage your community by organizing workshops, sharing resources on social media, or even hosting community gatherings focused on preparedness. Collaboration increases overall safety!
5. Are there any apps to help with disaster preparedness?
Yes! There are several mobile applications designed for disaster preparedness, such as FEMA’s app, which can send alerts and provide you reminders for your checklist tasks.

by Preparation | Apr 10, 2025 | Preparedness
Lifestyle Adjustments
Downsizing Your Space
So, you want to become more self-reliant but think you need a sprawling estate to make it happen? Trust me, you don’t! Downsizing your living space can have a super-positive impact on your self-reliance. When you manage with less, you simplify your life, making you more adaptable, approachable, and ready for those self-sufficient adventures.
I started relocating to a smaller apartment in the city, which pushed me to be creative. I focused on multi-functional furniture and efficient storage solutions. Suddenly, life felt lighter. It’s amazing how tweaking your lifestyle to fit into a smaller space can also push you to think outside the box.
You don’t have to give up comfort. With the right mindset and resourcefulness, a small space can lead you to a self-sufficient lifestyle that’s rich in experiences rather than possessions!
Minimalist Living
Minimalism is more than just a trend; it’s a lifestyle choice that can help you break free from the chains of consumerism. By embracing minimalist living, you reallocate your time and focus on what truly matters. Instead of filling your home with stuff, I shifted my perspective to focus on skills and hobbies that enrich my life.
For example, I started growing my own veggies on my small balcony. That tiny garden became my pride and joy, giving me fresh produce while saving money! This isn’t just about lack of stuff; it’s about craving experience over possession.
Trust me, when you learn to appreciate the essentials, your path to self-reliance becomes illuminated. Less really is more!
Community Connections
Another way to embrace a self-reliant lifestyle is by connecting with your community. You’ll be surprised at how much you can learn from your neighbors or local networks. While many think ‘self-reliance’ is a solitary endeavor, collaboration often strengthens our ability to thrive.
When I moved to my neighborhood, I joined a community garden. It was a fantastic way to meet people and share practices. We exchanged tips on planting as well as tools and resources. This connection not only expanded my skill set but it helped to foster a sense of belonging too.
Don’t hesitate to reach out! Building relationships can be an awesome resource and a safety net as you navigate this journey. Finding others with similar goals makes the whole experience richer and more enjoyable.
Sustainable Practices
Gardening and Urban Farming
No large property? No problem! Starting a small garden or an urban farming space can yield amazing results. I initially thought I needed a massive backyard to grow my own food, but I quickly discovered small containers and vertical gardening techniques can work wonders, even in tight spaces.
Growing your own herbs or vegetables encourages self-sufficiency, cutting down grocery bills while giving you the joy of nurturing something from seed to plate. The best part? There’s pure satisfaction in gathering your homegrown salad!
Even if you’re only using a few pots, you’ll start to appreciate fresh produce in a totally new way. So, whether you’re trying basil in your window sill or carrots in your backyard, every little bit helps!
DIY Projects
Getting hands-on with DIY projects is another way to embrace self-reliance. It could be anything from crafting homemade cleaners to creating your own furniture from reclaimed wood. Embracing this philosophy has allowed me to save a ton of cash, and I found a newfound appreciation for what I can create with my own two hands.
The process can feel a little daunting at first. I remember fumbling through my first attempt at woodworking, but hey, practice makes perfect! And you know what? My creative mishaps turned into great learning lessons.
DIY projects not only save you money, but they also provide a sense of accomplishment that’s hard to beat. Plus, you never know when you’ll need to fix something or create a solution on-the-fly!
Energy and Resource Efficiency
Being mindful of energy consumption is crucial in developing a self-reliant lifestyle. I began making small changes like switching to LED bulbs and unplugging devices when not in use. I’ve noticed a significant dip in my electricity expenses since taking these steps!
Additionally, consider investing in energy-efficient appliances or even looking into renewable options like solar panels if it’s feasible for your situation. There’s a great sense of peace in knowing that you’re consuming resources more responsibly and sustainably.
Tracking energy use encourages mindfulness. When I started paying attention, I discovered so many simple tweaks to drastically reduce my carbon footprint without sacrificing comfort. Sometimes it’s all about the little things!
Resource Networking
Shared Resources with Neighbors
When it comes to living self-sufficiently, sharing is caring—especially when it comes to resources! I’ve realized that my neighbors are often my best asset. Whether it’s tools, knowledge, or even pooling together for larger projects, there’s a treasure trove of possibilities.
For instance, if you need a ladder for a project, why not ask a neighbor instead of purchasing one? Building these relationships fosters a spirit of collaboration that makes everyone’s life a bit easier, while also promoting the self-reliant lifestyle.
Remember that sharing doesn’t only lessen your burden; it cultivates community spirit and deepens bonds. Who knew cooperation could be so fulfilling?
Trade and Skill Sharing
A cool way to enhance self-reliance is through barter systems. If you have a skill—like sewing, cooking, or even digital marketing—why not trade it with someone for something you need? It’s a win-win! I’ve participated in various skill-sharing sessions, and they not only allowed me to learn immensely but also let me contribute my knowledge with others.
Let’s say you can fix a bicycle; maybe a neighbor who bakes delicious bread could use your skills! Creating this cycle of bartering can reduce the need for money and foster a vibrant neighborhood.
Sharing skills also makes you a part of something bigger. It revitalizes the importance of community while continuing to build a self-reliant lifestyle together.
Online Community Engagement
In today’s digital world, online platforms can be game-changers for self-sufficient living. From forums to social media groups, I stay engaged with like-minded folks who share tips and tricks for living off the land or becoming more sustainable.
Think about it; you can access a wealth of knowledge from anyone around the globe! It’s exhilarating to see what others are experimenting with in their self-reliance journeys, and it gives you fresh ideas and perspectives.
Sharing your progress and insights can also establish connections that’d surprise you. I have met so many wonderful individuals virtually who share the same goals, and some even convert into real-world friendships. It’s pretty amazing!
Final Thoughts
You might’ve come in thinking that a self-reliant lifestyle is only achievable with acres of land, but I hope I’ve shown you that that’s just not true! By focusing on lifestyle adjustments, sustainable practices, resource networking, and establishing community connections, you can absolutely make it work—regardless of property size.
Every step you take, no matter how small, brings you closer to a life where you feel empowered, knowledgeable, and independent. So why wait? Dive into this rewarding lifestyle, and relish in the strides you’ll make toward self-reliance!
FAQ
1. Can I really be self-reliant in a small apartment?
Absolutely! You can grow herbs, make homemade products, and build community connections, all of which contribute to self-reliance without needing a large space.
2. What if I don’t have any gardening experience?
No worries! Start small with easy-to-grow plants like herbs or lettuce. There are loads of tutorials to help you along the way!
3. How can I connect with my neighbors?
Start with small gestures, like introducing yourself or inviting them for coffee. Getting involved in community events or sharing resources is also a great way!
4. What are some DIY projects I can start with?
You can start with simple projects like making cleaning products, repairing small items, or even crafting. Just pick one that excites you!
5. How can online communities help with self-reliance?
Online communities offer support, shared resources, and tips from people with similar goals. They can be a great source of motivation and inspiration!
by Preparation | Apr 10, 2025 | Preparedness
Community Organizations and Local Groups
Finding Your Local Preparedness Groups
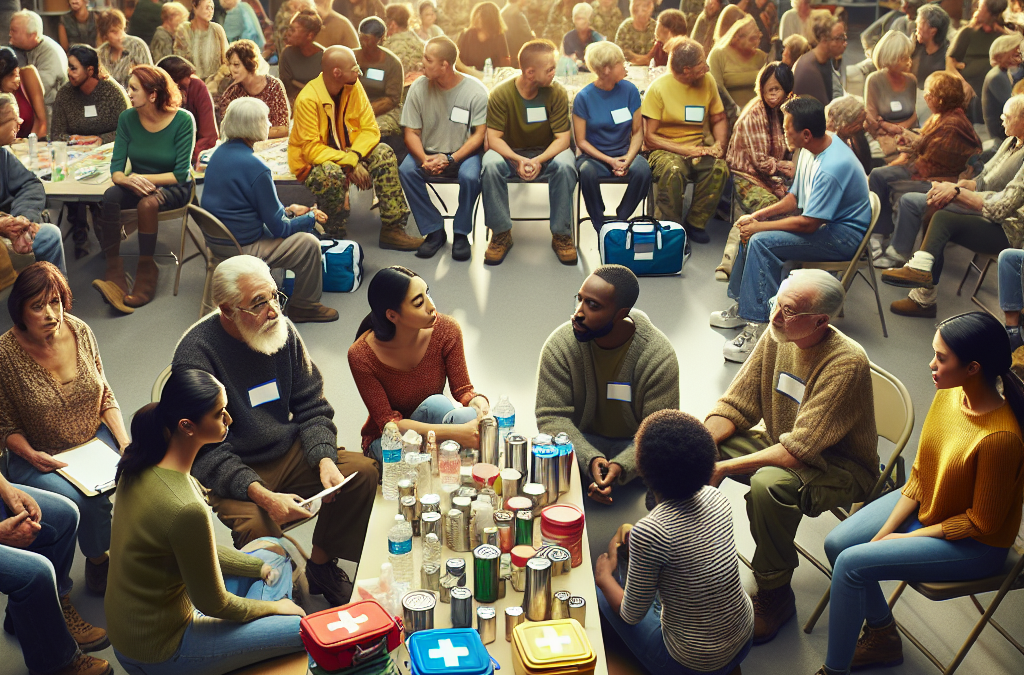
One of the best places to start is by checking out community organizations focused on disaster preparedness. I remember when I first got into this, I stumbled upon a local group that meets monthly. They’re passionate about educating the community on risks and planning ahead. These groups often post their events on community boards, social media, or even websites dedicated to local activities. Getting involved can make a real difference!
Be sure to reach out to local nonprofits. Some are specifically dedicated to disaster preparedness. They often offer training sessions and workshops that not only inform you but allow you to meet like-minded individuals. It’s a perfect way to share experiences and resources. Plus, you get to learn from folks who have dealt with emergencies firsthand.
Sometimes, you can even find volunteer opportunities within these organizations. Taking action not only boosts your skills but also helps you forge stronger connections with others who care about disaster preparation. Trust me, it’s rewarding to be part of something bigger than yourself.
Online Forums and Social Media Groups
Utilizing Social Media for Connections
In this digital age, online forums and social media are gold mines for connecting with others interested in disaster preparedness. Platforms like Facebook and Reddit have numerous groups dedicated to this cause. I’ve made some great connections just by joining a few of these communities and engaging in discussions about best practices and experiences.
Don’t shy away from participating in these conversations! Ask questions, share your own tips, and learn from others. I once posted about an emergency kit I was assembling, and the feedback and suggestions I received were incredible. People love to help, and you’ll find loads of generous folks offering their insights.
Moreover, attending virtual events or webinars hosted by these online communities is another fantastic way to connect. You’ll often find experts sharing their knowledge, and it’s a fantastic opportunity to network with attendees as well. It’s all about being proactive and putting yourself out there.
Workshops and Training Sessions
Enrolling in Local Workshops
Another hands-on way to connect with others is through workshops. Many organizations hold training sessions on various aspects of disaster preparedness, from first aid to emergency planning. When I attended a local workshop that involved creating an emergency plan, I realized how beneficial it was to interact with others in a learning environment.
These workshops not only equip you with valuable skills but also create a sense of camaraderie among participants. You’re all there for the same reason: to be better prepared for the unforeseen. I met several people who have since become friends, and we often exchange ideas on how to improve our preparedness efforts.
Keep an eye out for certifications, too! Some places offer official training that could enhance your personal resume while connecting with others on the same path. It’s both fulfilling and instrumental in building a network of preparedness-minded individuals.
Neighborhood Associations and Community Plans
Engaging with Your Neighbors
Don’t underestimate the power of your immediate surroundings! Neighborhood associations are often key players in disaster preparedness efforts. I started attending my local meetings, which led to discussions on safety and emergency plans tailored specifically to our area. Engaging with your neighbors builds a foundation of trust and mutual support.
It’s a great way to get a pulse on what resources are available in your community. Some neighborhoods even set up brigades for emergencies, which means you’ll know exactly who can help in a crisis. The feeling of knowing that you’re all on the same team is comforting.
Plus, you can collaborate on community-wide drills and create a neighborhood emergency response plan. It’s empowering to feel like you’re not just preparing personally, but building a resilient community. It turns something daunting into a group effort – and that’s pretty special.
Emergency Services and Government Programs
Building Relationships with Local Services
Lastly, connecting with emergency services can be a huge asset. Fire departments, police, and local emergency management offices often offer workshops and resources for the public. I attended a session hosted by our fire department that not only provided valuable information but also allowed me to meet local responders.
These services are not just there when disaster strikes; they want to promote preparedness in the community too! Establishing a connection with them can provide you with additional support and resources that you might not find elsewhere.
Furthermore, local governments often have programs aimed at improving community resilience. Stay updated on what they offer; they might share your interest in having a well-prepared community and provide tools and initiatives that can further enhance your preparation efforts.
FAQs
1. Why is connecting with others important for disaster preparedness?
Connecting with others allows you to share resources, experiences, and tips, making your preparedness efforts more effective. It also creates a support system that can be crucial during emergencies.
2. Where can I find local preparedness groups?
Check community bulletin boards, social media platforms, and local nonprofit organizations. Often, these groups will hold regular meetings and events that anyone can join.
3. How do online forums and social media help in preparing for disasters?
They provide a space for discussion and sharing of best practices. You can connect with experts and peers who can offer insights and advice tailored to your situation.
4. Are workshops really beneficial for disaster preparedness?
Absolutely! Workshops provide you with practical skills and knowledge while also giving you a chance to meet others who are equally invested in being prepared.
5. How can I involve my neighbors in disaster preparedness?
Start by discussing the importance of preparedness in your neighborhood associations or simply through casual conversations. You can organize meetings, share resources, or even practice drills together!
by Preparation | Apr 10, 2025 | Preparedness
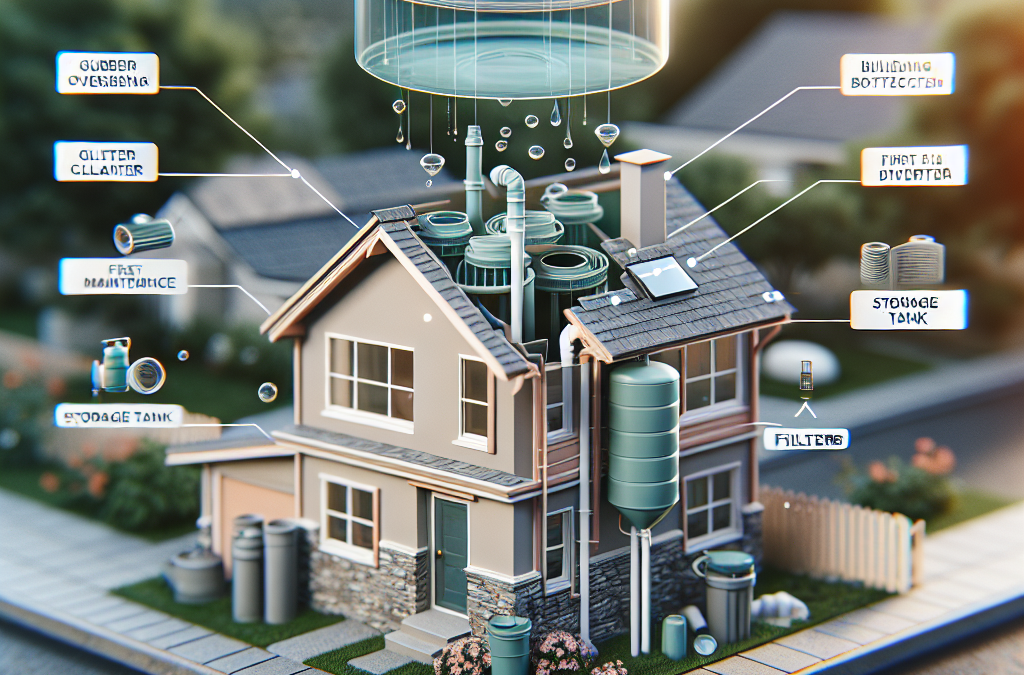
Understanding the Basics of Rainwater Harvesting
The Importance of Rainwater Collection
Let me tell you, collecting rainwater isn’t just some trendy thing to do; it’s downright essential. First off, we all know water is life, right? So having a backup source can be a lifesaver. Plus, it’s a sustainable way to cut down on your utility bills. Imagine using collected rainwater for your garden or washing your car!
Besides the practicality, think about the environmental impact. By harvesting rainwater, we reduce stormwater runoff, which helps keep our local waterways cleaner. Trust me, this system can make a real difference.
When I first started, I was amazed by how easy it is to harness nature’s water gifts, and it had me feeling like an eco-warrior. It’s fascinating to think that this simple practice can help combat the water crisis we sometimes hear about.
Components of a Rainwater Collection System
Alright, let’s dive into the nuts and bolts. A rainwater harvesting system generally includes a catchment area (like your roof), guttering, a downspout, and a storage tank. It might sound simple, but each piece plays a crucial role. Trust me, getting the right components makes all the difference.
There’s also the filtration system, which is super important to keep your stored water clean and safe for uses like irrigation. Without it, you might end up with all sorts of gunk in your tank, which is definitely not what you want.
Don’t skimp on the quality of materials either. A sturdy tank and reliable filters can save you headaches down the line. I made some mistakes with cheaper materials in my early days, and let me just say, I learned my lesson!
Legal Things to Consider
Before you get all gung-ho and start building your system, check your local regulations. In some places, rainwater harvesting is encouraged, while in others, there might be limits or specific guidelines to follow.
Every municipality is different, and it’s important to comply with any guidelines to avoid fines or complications. I remember when I jumped in without doing my homework and faced a bunch of red tape afterward. Definitely not fun!
Once you know the legal landscape, you can feel good about your project. It’s empowering to contribute positively to the environment while sticking to the rules.
Setting Up Your Rainwater Collection System
Choosing the Right Location
Location, location, location! You’ve gotta pick the right spot for your collection system. Ideally, you want an area that receives ample rainfall and is easy to access. Trust me; you don’t want to be lugging buckets across a muddy yard!
I like to set my tanks close to the house so I can connect them easily to my downspouts. This not only makes things efficient, but it also helps ensure I’m utilizing every drop of rain that falls.
If you have trees or other structures nearby, consider how they affect rainwater flow. I learned the hard way that certain branches can block rain, so keep those in mind when deciding where to place your system.
Installing the System
Now comes the fun part—installation! If you’re a DIY enthusiast like me, you’ll find it pretty satisfying to get your hands dirty. Follow the manufacturer’s guidelines for the specific components you buy, but I can give you a general idea of how it goes. You’ll start by installing your gutters and downspouts to ensure water flows into your collection tank.
Connecting the tank is usually a straightforward process. I remember the first time I hooked mine up; it was exhilarating to see the water start filling up the tank after a rain.
As you’re setting everything up, don’t forget to install a first flush diverter if you can. It helps ensure that the initial dirty water from the roof doesn’t contaminate your storage tank. Trust me; you’ll thank yourself later for it!
Testing Your System
Once everything’s in place, it’s time to test things out! After the next rain, keep an eye on your system and see how it performs. You’re looking for any leaks, blockages, or issues with water flow. The last thing you want is a nasty surprise after all your hard work.
Don’t worry if you find a hiccup here or there. I had my share of troubleshooting too. Use this time to tweak and improve your setup. Sometimes a simple adjustment can make a world of difference.
If all goes well and your system fills up, you’ll want to test the water quality as well. Just to be safe! It can be a bit of work, but it’s a rewarding experience that reassures you your system is running smoothly.
Maintaining Your Rainwater Collection System
Regular Inspections
Maintenance is key to keeping your system functional. Get into the habit of inspecting your gutters and tank regularly. You’d be surprised at how quickly debris can pile up. I usually check mine after significant storms to clear any leaves or dirt that may have accumulated.
Watch for any signs of wear and tear, too. If you spot something that doesn’t look right, nip it in the bud before it escalates. Trust me, catching issues early saves time and money!
Also, keep your filtration system in top shape. This is what keeps your water clean, and it’s easy to forget. Regular cleaning should become part of your routine maintenance.
Cleaning the System
It’s not the most glamorous task, but cleaning your rainwater system is essential. I recommend doing a thorough clean at least once a year. Empty your tank, scrub it down, and make sure there’s no algae build-up.
While you’re at it, I find it helpful to give the gutters a good clean too. Removing any dirt, leaves, and debris helps facilitate better water flow when it rains.
After everything’s cleaned up, refill your tank, and you’ll be surprised at how fresh and invigorating it feels to have clean water stored up and ready to use!
Using Your Collected Rainwater Wisely
Finally, it’s all about how you use that collected water. Just because you’ve got it doesn’t mean you can use it for everything! Be mindful of where your rainwater goes. I typically use mine for watering my indoor and outdoor plants, and it works wonders.
Many people also use collected rainwater for flushing toilets or washing their cars—great for saving on the water bill. Just make sure you’re aware of what can and can’t be done with it, depending on local guidelines.
After all this work, it’s quite gratifying to see the positive impact you’re making, both for your home and the environment. You might find yourself falling in love with this eco-friendly practice just as I did!
Frequently Asked Questions
What are the primary components needed for a rainwater collection system?
The basic components include a catchment area like a rooftop, guttering to collect water, downspouts to channel it into a storage tank, and filtration to keep the water clean. It’s crucial that each component is chosen carefully to ensure optimal performance.
How do I know if rainwater harvesting is legal in my area?
Before starting your project, it’s important to check local regulations regarding rainwater harvesting. Laws can vary greatly by location, and some areas encourage it, while others may have restrictions. A quick call or visit to your local government’s water department can save you from potential headaches later on.
How can I maintain my rainwater collection system effectively?
Regular inspections and cleaning are key to maintaining your system. Make it a habit to check your gutters and tank frequently for debris or any signs of damage. Cleaning out your filtration system at least once a year helps ensure you’re collecting clean water.
Can I use collected rainwater for drinking purposes?
Using rainwater for drinking can be done, but it requires proper treatment and filtration to be safe. If you’re considering this, it’s essential to research and implement the necessary purification systems to meet health regulations in your area.
What are some practical uses for collected rainwater in the home?
Collected rainwater can be used for various purposes, such as watering plants, washing vehicles, and flushing toilets. It’s a great resource for irrigation in your garden, helping you save on your overall water bill while giving back to the environment.


