by Preparation | Apr 18, 2025 | Preparedness
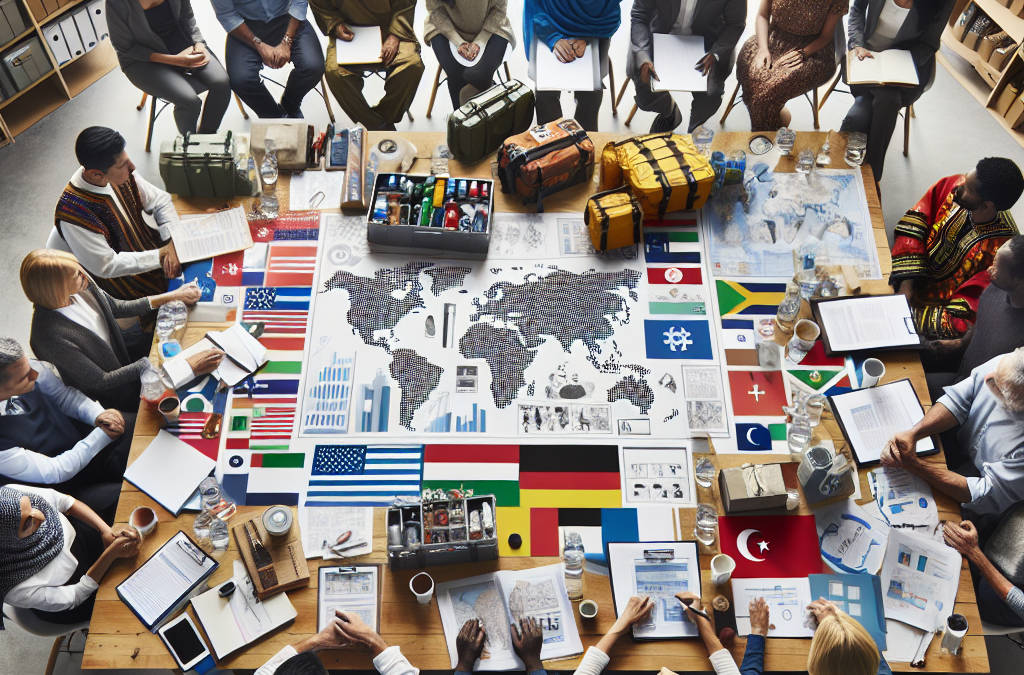
Understanding Cultural Diversity
Recognizing Different Cultural Norms
When I started working on community preparedness, I quickly realized just how diverse the communities I was dealing with were. Each group had its unique set of cultural norms that influenced how they interpreted risks and responded to emergencies. Understanding these differences became crucial. For instance, some cultures might prioritize family gatherings as a first response, while others rely heavily on institutional instructions.
It was a real eye-opener for me to see how different beliefs and values shaped people’s perspectives on safety and security. Engaging with various community leaders helped me gather insights into what those norms were. By spending time with them, I developed a better understanding of how to create a more inclusive and effective preparedness plan.
Without recognizing these cultural nuances, any preparedness plan could fall flat. It’s vital for us as planners to immerse ourselves in the community’s cultural outlook. A little effort goes a long way in enhancing trust, leading to a more resilient community when faced with crises.
Language Barriers
Language plays a huge role in how communities prepare for emergencies. In my experience, failing to accommodate language differences can leave entire communities in the dark about vital information. When I put together preparedness materials, I always made it a point to translate them into the predominant languages of those communities.
One time, working in a multilingual neighborhood, I collaborated with local schools to create bilingual pamphlets. The feedback was incredibly positive! It turned out that families were more likely to engage in preparedness activities when they understood the information in their own language.
Going beyond just translation, I learned that incorporating visual aids also helped overcome language barriers. Infographics, pictures, and easy-to-read bullet points could convey critical information even for those with limited reading skills. It’s all about making sure that everyone feels informed and involved in their own safety.
Community Engagement Techniques
Getting the community involved is another key aspect. I found that organizing workshops in different neighborhoods allowed for open conversations about preparedness. People were more receptive when they could discuss their concerns actively. This co-creation not only empowered the community but also ensured the plans resonated with their experiences.
We also discovered that using local events, like festivals or farmer’s markets, as platforms to share preparedness information was super effective! It created a laid-back atmosphere where people were willing to stop, chat, and learn without feeling overwhelmed by the seriousness of the subject.
Building relationships with community members is about trust. When they saw us genuinely interested in their needs, it became a partnership rather than just a top-down approach. Effective engagement leads to better preparedness and boosts morale, making everyone feel like they’re in it together.
Incorporating Community Values
Identifying Core Values
When the time came to incorporate community values into our preparedness plan, I was amazed at how much joy and pride people took in their customs. Each community I worked with had core values that defined them. For some, it was about coming together as a family during crises; for others, it was about maintaining traditions through challenging times. Understanding these values helped me design a plan that was truly reflective of each community’s spirit.
Aside from the values, I also learned the importance of honor in certain cultures. Many groups place a high value on respect and honor, with some even having rituals that involve ancestors during emergencies. By respecting and incorporating these traditions into our plans, we found deeper connection points with the community.
Ultimately, the takeaway was clear. If we wanted to build a community preparedness plan that truly resonated, we had to align it with their core values. This understanding fosters a natural sense of ownership among community members, leading to better engagement overall.
Utilizing Cultural Competence
Cultural competence is a skill I’ve invested a lot in mastering over the years. It enabled me to engage more effectively with diverse community groups. It’s not just about knowing a few facts; it’s about understanding and appreciating those differences. I always remind myself to be approachable and open-minded when interacting with different cultures.
One practical skill I honed was active listening. I truly took the time to listen and seek clarity on how people felt about various issues related to preparedness. This approach not only improved my knowledge but also made residents more comfortable in expressing their thoughts and concerns.
Ultimately, practicing cultural competence means that you’re committed to ongoing learning. Each interaction serves as a learning opportunity to understand how best to engage with communities, thus enriching both professional and personal experiences.
Building Trust Through Transparency
In my journey towards building community preparedness, I learned that transparency is vital in establishing trust. I made it a priority to communicate openly about what our preparedness plan entailed, how decisions were made, and who was involved. Residents appreciate honesty, especially when it comes from someone who genuinely cares about their well-being.
Creating an open-door policy where community members could approach us with their thoughts and suggestions was important. This not only built trust but also fostered a stronger partnership between us and the community. I realized early that people were more likely to engage in preparedness activities when they felt they were included in the process.
Finally, I found that consistently providing updates, particularly during emergencies, goes a long way in reinforcing that trust. By sharing real-time information and being upfront about challenges, we built a resilient community that remained proactive even in tough times.
Educational Outreach
Creating Targeted Educational Programs
When it came to educational outreach, I quickly identified the need for targeted programs. Not every community will respond the same way to general preparedness education, and that’s something I learned the hard way. By focusing on specific needs and challenges faced by distinct groups, we could create effective educational sessions.
I started partnering with local organizations and schools to help reach diverse audiences. We emphasized hands-on learning experiences, which resonated well with participants. This kind of engagement made them feel like they weren’t just students but active participants in their preparedness education.
Topic-wise, we tailored our programs to cover culturally relevant information that aligned with their values. For instance, incorporating examples from their everyday lives made the lesson plans more relatable. This approach allowed community members to see preparedness as not just a task, but a lifestyle.
Empowering Community Leaders
Empowerment is a big theme I’ve witnessed over the years. One of the most effective ways to enhance educational outreach is by empowering local leaders to take charge. I’ve found that training community leaders enables them to share knowledge with their own networks effectively. They often have established trust, which makes them credible messengers of preparedness.
I remember a particular instance where we conducted workshops specifically for community leaders. Instead of just handing them information, we encouraged them to share their perspectives and techniques for engagement. The outcome? A ripple effect where leaders could multiply the impact of the training by sharing it with their communities.
Empowering leaders not only educates but also fosters a sense of ownership over the preparedness process. They become champions of change and advocates within their communities, creating a more robust preparedness culture overall.
Leveraging Technology for Outreach
Technology has played a huge role in how I approach educational outreach. Digital platforms allow us to reach even the most remote communities. Utilizing social media, apps, and websites helped share information quickly and effectively. I started collaborating with tech-savvy individuals within the community to enhance our outreach capabilities.
Webinars and virtual workshops became a mainstay, especially during the pandemic, bridging the gap when in-person gatherings weren’t possible. We utilized storytelling and local examples, making our virtual interactions just as engaging as face-to-face meetings.
As we continued to innovate our outreach strategies through technology, we realized that using interactive platforms led to more engagement. Polls, Q&As, and “Ask Me Anything” sessions facilitated a dynamic two-way conversation that made residents feel included and heard.
Feedback and Continuous Improvement
Encouraging Community Feedback
One of the best lessons I’ve learned is the importance of gathering community feedback. After implementing our preparedness plan, I started creating simple channels for community members to share their thoughts and suggestions. Whether through surveys or community gatherings, the aim was to create a continuous cycle of feedback.
In my experience, community members often have insights that surprise you! Their unique perspectives helped me better understand what worked and what didn’t. For instance, a community member once mentioned that the information sessions were too formal, leading us to revise our approach and make it more inviting and relaxed.
Encouraging this feedback fosters a sense of collaboration and makes the community feel valued. People appreciate being able to voice their opinions and witness their feedback lead to tangible changes in the plan.
Implementing Changes Based on Feedback
Taking feedback seriously is crucial. I learned that when community members see their suggestions result in changes, it builds trust and engagement. Each time we adjusted our plan, based on their input, we showcased our commitment to doing what’s best for the community.
For instance, after receiving feedback on the accessibility of our meeting locations, we adjusted our venues to better accommodate everyone. Enabling all members of the community to participate enhances our preparedness efforts.
This iterative process of implementing feedback ensures that the preparedness plan adapts over time, staying relevant to the community’s evolving needs. Ultimately, it’s about creating a living document that grows alongside the community.
Establishing a Review Process
Lastly, establishing a regular review process ensures that everything stays on track. I made it a point to set quarterly meetings where we would assess the effectiveness of our preparedness efforts. During these meetings, we celebrated successes and identified areas needing attention or adjustment.
In our reviews, I’ve found that involving community partners brought additional value. They provided insights into how our plans were impacting the community positively or negatively. It was an excellent platform for collaborative problem-solving, enhancing both our plan and our relationships.
This commitment to review fosters accountability and transparency in the preparedness process, allowing for a smoother transition through challenges. It reminded all of us that preparedness is not just a one-time task but a continuous journey.
FAQ
1. What are some key cultural considerations in building a community preparedness plan?
It’s essential to understand cultural diversity, address language barriers, engage effectively with the community, incorporate their values, and always promote educational outreach.
2. How can language barriers affect community preparedness?
Language barriers can lead to miscommunication and misinformation about important safety measures, making it critical to create translated materials and use visuals to ensure everyone understands the information.
3. Why is community engagement important in preparedness planning?
Engaging the community fosters trust, ownership, and empowerment. It allows for the creation of a plan that reflects the needs and experiences of local residents, ultimately resulting in a more resilient community.
4. How do I empower community leaders to effectively communicate preparedness?
Providing training and resources for community leaders helps them share knowledge within their networks. This approach leverages their established trust and credibility, enhancing the overall outreach.
5. What role does feedback play in improving preparedness plans?
Feedback is crucial for making necessary changes to preparedness plans. It allows communities to feel heard, ensures that plans remain relevant, and fosters a culture of collaboration and continuous improvement.
by Preparation | Apr 18, 2025 | Preparedness
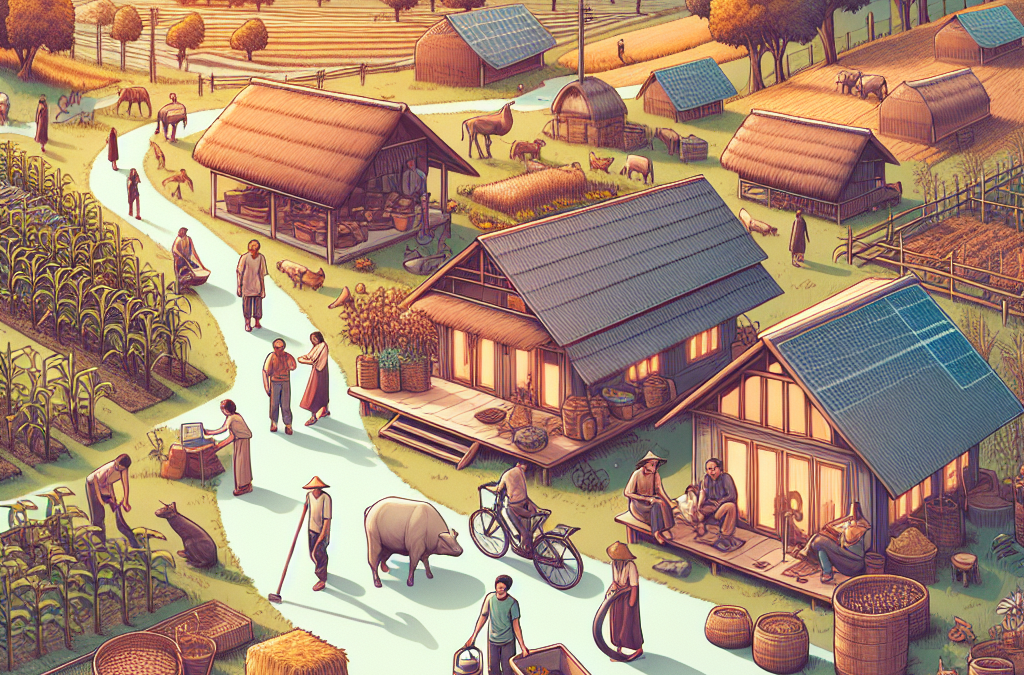
Choosing Your Homestead Location
Assess Your Needs
When I first thought about moving to the countryside, I had all these dreams of having a little patch of paradise. It was essential for me to figure out what I needed in terms of space, resources, and proximity to the necessities—like grocery stores and medical services. Take some time to jot down what’s important for you. Are you looking for a quiet retreat or a more communal setting?
Also, be aware that some locations are more conducive to self-sufficiency than others. Do your homework on the climate, soil quality, and local resources. You don’t wanna end up somewhere that makes it a hassle to grow your own food or access clean water!
And, of course, think about the kind of lifestyle you want. Rural living can vary wildly, from turnover rates of land to community vibes. Make sure the area has the cultural flavor and community feel you’re looking for.
Understanding Zoning Regulations
Okay, so here’s a reality check: zoning laws can be a total thorn in your side if you’re not aware of them. Each area has its own set of rules about land use, so make sure you dive into this boring but necessary paperwork. It’ll save you a world of headache later.
For example, some places have restrictions on what kind of livestock you can keep, while others might limit your ability to build structures. Knowing what’s allowed can help you avoid legal issues and make more informed decisions about your homestead.
Trust me, nothing sucks the joy out of your dream homestead faster than being served with a cease and desist because you didn’t check the zoning laws. Get in touch with your local planning office; they’re usually pretty eager to help.
Accessing Resources and Utilities
When I first made the leap to rural living, I didn’t realize how important access to water, electricity, and other utilities would be. Make sure to evaluate what’s available in your chosen area. If you like the idea of being off-grid, research how to set up your own systems.
With water, it’s crucial to know whether you can drill a well or if the area has reliable water access. Prices can skyrocket if you need to truck water in, so plan accordingly!
As for electricity, consider whether you want to connect to the grid or go solar. The initial investment can be steep, but it pays off in the long run—literally! Look into local companies that specialize in solar setups; they often have incentives that can lower your costs.
Growing Your Own Food
Starting a Vegetable Garden
So, you wanna grow your own food? Awesome! The first steps in starting a vegetable garden are getting your hands dirty—and I mean that literally. Prepare your soil by tilling it and adding compost or organic matter. Healthy soil is your best friend!
Next, consider what veggies you love to eat. I’ve found that planting perennials like asparagus and rhubarb can be a great move since they’ll come back year after year. But don’t be shy! Experiment with herbs and seasonal veggies—there’s nothing quite like plucking fresh basil for your pasta sauce.
Remember, start small and grow from there. The more you experiment, the better you’ll understand your needs and your soil. It’s all about trial and error, and hey, even the pros have their off days!
Fruit Trees and Berry Bushes
On my quest for self-sufficiency, I quickly realized fruit trees and berry bushes are the gifts that keep on giving. After they’ve established themselves, they require far less effort than replanting every season! Plus, let’s be real: nothing beats fruit fresh off the branch.
I highly recommend choosing varieties that grow well in your region. Apple trees, blueberry bushes, and blackberry brambles are fantastic options. Just keep in mind that they need the right conditions to flourish, so check local advice on what might thrive in your area.
Don’t forget about maintenance! Pruning and occasional pest control are a must, but it’s relatively low-key, especially compared to the needs of a full veggie garden. Just sit back and watch them grow while you sip your morning coffee!
Storing Excess Produce
Once your garden bursts forth with delicious goodies, you’ll need a plan for how to store all that extra produce. Trust me, you don’t wanna find out the hard way that cucumbers go bad fast! I recommend canning or freezing, which can keep your harvest fresh all year long.
If you’re new to preserving, start simple. Canning tomatoes is a great gateway project. As you get comfortable, you can branch out into pickles, jams, or whatever floats your boat. There are so many online resources that guide you through each step—it’s just like a cooking show without the camera!
And don’t forget about sharing with your neighbors! Building community is a big part of rural living, and sharing your bounty can lead to friendships and alliances that make living in a rural area even more fulfilling.
Raising Animals for Food
Chickens for Eggs
Ah, chickens! If you like eggs and have a bit of space, raising chickens is pretty much a no-brainer. They’re relatively easy to care for and they provide a steady supply of fresh eggs. Not to mention, they’re quite entertaining to have around!
Start with a small flock to gauge what works for you. Keep in mind that different breeds lay different amounts of eggs. I started with Rhode Island Reds because they produce well and adapt easily. Make sure to give them a cozy place to roost, and they’ll be happy chickens!
Just remember, chickens are social creatures. The more, the merrier, as they say! However, don’t go overboard right off the bat; manage your expectations and resources. Soon enough, you’ll have a feathered squad that’ll be the talk of the homestead.
Goats for Milk
If you’re looking to up your self-sufficiency game, let’s talk goats! Not only are they adorable, but they provide a fantastic source of milk. Plus, they’re great at clearing brush if you have some unruly landscaping.
There’s a learning curve, of course, but once you get the hang of it, they’re worth the commitment. Plan on starting with a couple of dairy breeds, like Nubians or Saanens. They’ll require shelter, some fencing, and regular milking, but they’re super rewarding.
Milk from your goats can be turned into cheese, yogurt, ice cream—you name it. It’s like having a mini dairy right at home! Just remember to check local ordinances regarding livestock to keep everything above board.
Bees for Honey
Now, let’s not forget about bees! If you’ve got a garden thriving, adding bees is a fantastic way to boost pollination and get sweet, delicious honey. Plus, they play a crucial role in the ecosystem, and who doesn’t want to support our buzzing buddies?
I’ll be honest: beekeeping isn’t for the faint of heart. There’s a learning curve, and it’s important to go into it with the right mindset. I started off with a local beekeeping course, which was super helpful and allowed me to connect with experienced keepers.
Once you get the hang of it, the rewards are plentiful. Fresh honey is an amazing treat, whether it’s drizzled on toast or mixed in tea. And trust me, your plants will thank you for the vibrant bee population flying around!
Building Community Connections
Finding Local Support Groups
Living in a rural area can sometimes feel isolating, especially when you’re just starting out. That’s why I can’t stress enough the importance of finding local support groups. These folks are usually loaded with knowledge and ready to help you navigate aspects of self-sufficient living.
I joined a local community group focused on sustainable living, and it really was a game-changer. From gardening tips to animal care advice, the camaraderie of like-minded individuals can make the learning curve less steep—and much more fun!
Many areas also offer workshops and events, so keep your eyes peeled for bulletin boards or social media pages where these are posted. Don’t be shy; they want you to get involved!
Trading and Bartering
Once you’ve settled in a bit, consider looking into trading or bartering with your neighbors. It’s a time-honored tradition that can build community ties. Whether it’s swapping a dozen eggs for a basket of tomatoes or trading fresh herbs for a freshly baked loaf of bread, it fosters great relationships.
Plus, when you get to know your neighbors, you’ll find opportunities to collaborate on projects—be it sharing tools, skills, or even labor. It’s a win-win situation, and it’s all built on trust.
And let’s be honest, trading makes life just a bit sweeter. You’d be surprised how many goods and services can be exchanged without cash. Get creative; you’ll soon find your community bursting with talent!
Participating in Local Events
Finally, don’t underestimate the power of local events. Farmers’ markets, harvest festivals, and craft fairs are not just fun; they’re also great opportunities to showcase your own skills and products. Engaging in these activities will help you meet others who share your interests while supporting local agriculture!
Add to the vibe by volunteering at these events. You’ll gain valuable social capital, meet local farmers, and start forming a network. Plus, who doesn’t want to try amazing homemade pies or fresh jams?
And those relationships can help you navigate the often tricky waters of rural homesteading. Establishing your footprint in the community will make your journey toward self-sufficiency that much more enjoyable.
FAQs
1. What is self-sufficient living?
Self-sufficient living involves becoming less reliant on external systems by growing your own food, raising animals, and creating a sustainable lifestyle that meets your basic needs.
2. Is it expensive to start a homestead?
While initial investments can be high, particularly in land and infrastructure, many aspects of homesteading can become more affordable over time as you cultivate your own resources.
3. Can I really grow enough food for my family?
Many people successfully grow most of their food by strategically planning their garden and expanding it over time. Starting small and assessing what works best for your family is key.
4. Do I need a lot of land to be successful?
Nope! You can practice self-sufficiency on smaller plots of land. Urban gardening and container gardening can also yield lot of produce with limited space.
5. How can I build a supportive community?
Joining local groups, participating in community events, and networking with neighbors can help you establish connections. Staying involved in local initiatives fosters relationships that promote support and collaboration.
by Preparation | Apr 18, 2025 | Preparedness
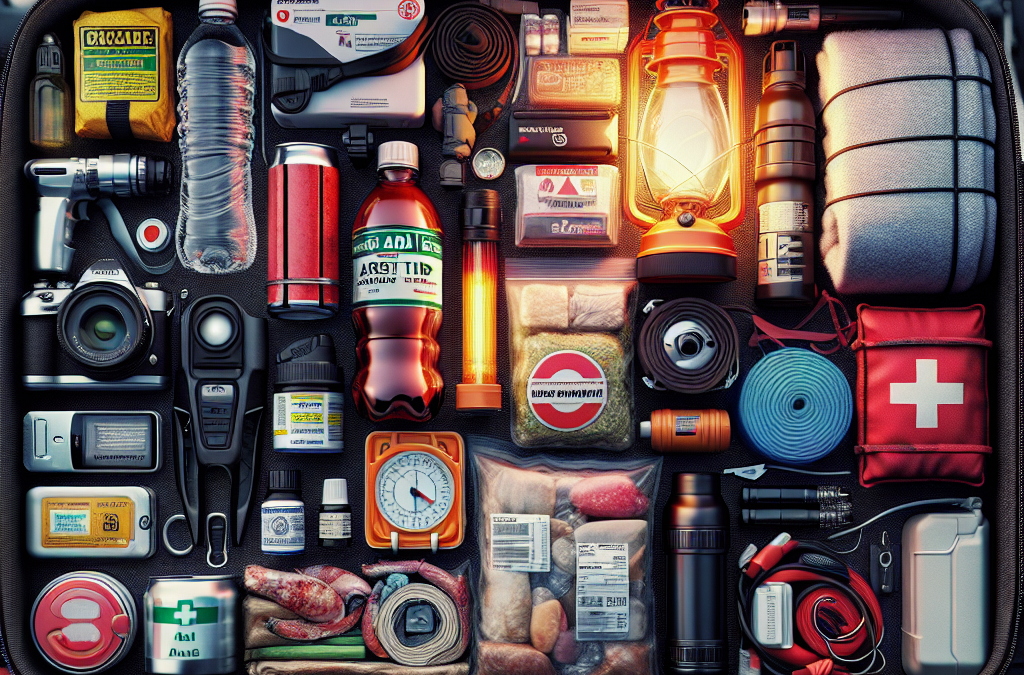
Essential Tools for Roadside Assistance
Jumper Cables
One of the most crucial items I’ve found in my car emergency kit is a good set of jumper cables. There’s nothing like the sinking feeling of getting into your car and realizing the battery is dead. Trust me, your day can go from bad to okay with just a quick jump start. Make sure you get cables that are long enough to reach across cars—nothing is worse than realizing they’re too short when you need them the most.
When picking out jumper cables, aim for a gauge of 6 or lower, which indicates they can handle a stronger current. The last thing you want in an emergency is a weak set of cables that can’t get the job done. I personally prefer cables that come with detailed instructions, just in case you need a refresher on how to jump a car.
Also, don’t forget to check them regularly for wear and tear. Just because they’re in your kit doesn’t mean they’ll work perfectly! If they look frayed or damaged, it might be time for an upgrade.
First Aid Kit
You’d be surprised how many people overlook packing a first aid kit for their car. I mean, you never know when a small accident could happen—a paper cut, a bug bite, or a blister from a long road trip. Having a basic first aid kit can really ease those little annoyances. Look for a kit that includes adhesive bandages, antiseptic wipes, and gauze.
If you’re like me and enjoy outdoor adventures, consider adding some extras like tweezers for splinters and even a cold pack for unexpected bumps and bruises. It’s super handy when you’re miles away from the nearest pharmacy.
And remember, just packing the kit isn’t enough! Make it a habit to check the contents regularly and replace any items that get used or expire. You don’t want to be in a bind, only to find your antiseptic is outdated.
Flashlight and Extra Batteries
A flashlight is another must-have in any car emergency kit. Picture this: it’s dark, you’re on the side of the road, and you need to see what’s going on. A flashlight can not only light your way but also signal for help if needed. I like to have a sturdy, rechargeable flashlight—those little mini ones just won’t cut it for serious situations.
Don’t just throw the flashlight in there though; make sure you also have extra batteries. It’s always a good idea to pack them in a waterproof bag, just in case. Check the flashlight every few months to ensure it still works and that your batteries aren’t leaking.
Plus, a simple headlamp can work wonders too—hands-free light while you dig through your trunk or attempt to change a tire? Yes, please! It’s one of those small gadgets that might just save the day.
Emergency Supplies You Can’t Ignore
Water and Non-Perishable Snacks
When I hit the road, I always make sure to pack extra water and some non-perishable snacks in my emergency kit. You’d be amazed at how dehydrated and hungry you can get if something goes awry and you’re stuck waiting for help. A couple of bottles of water should suffice, along with snacks like granola bars or nuts that can keep for a while without spoiling.
Pro tip: Look for snacks that are energy-dense but light, so you’re not lugging around a ton of heavy items. I love having a mix of protein and carbs to really keep my energy up if needed. A small stash can really make a difference.
Make sure to check the expiration dates on your food items regularly! You may think it’ll last forever, but you might be surprised by what can go stale or bad. Rotate your supplies just like you’d do in your pantry.
Blankets and Warm Clothing
Weather can be unpredictable, and trust me, getting stuck in the cold can be beyond uncomfortable. I always pack a couple of warm blankets in my trunk along with an extra set of warm clothing. Even in summer, it can sometimes turn chilly at night, especially if you’re in a remote area.
Make sure those blankets are not just lightweight fleece, but also something that can keep the heat in. My go-to is a thicker emergency survival blanket that’s compact and reflective—it’s cheap and incredibly effective.
And don’t forget a beanie and gloves! It’s often easy to overlook these small items until the moment you genuinely need them. Being prepared for temperature drops is one of those simple things that can really keep your spirits high in a frustrating situation.
Road Flares or Reflective Triangles
If you’ve ever seen an accident scene, you’ll know how important visibility is in emergency situations. A set of road flares or reflective triangles is vital for alerting other drivers of your presence if you’re stuck. I make sure to have a couple of flares on hand; they’re effective and straightforward to use.
Reflective triangles are a nice touch too, especially if you prefer something reusable. Just set them up behind your car, and they’ll help prevent any further accidents by letting drivers know you’re in distress. You could even make it a habit to practice setting these up in your driveway; it’s just one of those things that can feel a bit challenging when you’re nervous.
And let’s be real, we all appreciate anything that can make a tough situation a little less daunting. Both of these items will give you and any onlookers peace of mind while waiting for help to arrive.
Staying Informed: Emergency Contacts and Resources
List of Important Contacts
This might sound basic, but having a list of important contacts saved in your car can be a lifesaver. I keep a little laminated card with numbers for family, friends, and even my roadside assistance service. In an emergency, you might forget phone numbers, even those of your closest relatives!
Along with personal contacts, consider jotting down local emergency services numbers, too. You never know when you may need them. And if you have kids, pack a special list that includes a trusted neighbor’s number as well—it’s just good thinking.
Stash that list somewhere safe and easily accessible, like in your glove compartment, so you’re not fumbling around when stress hits. Sometimes it’s perfect to cover your bases, and this is one of those times.
Emergency Roadside Assistance
Having a roadside assistance plan is like having a good friend you can call when things go sideways! I highly recommend signing up for one if you haven’t already. There’s always peace of mind knowing you can call for help if your car breaks down, or you’re dealing with a flat tire.
Before hitting the road, be sure to have your membership information on hand, either in your phone or in your emergency kit. That way, you’re ready to make that call without scrambling through your paperwork. Trust me, organization counts when the nerves kick in!
Plus, in most cases, these services offer more than just towing. They often provide help with lockouts and running out of fuel as well, so having that membership can cover multiple bases. You never know what might happen, and it’s better to be prepared.
Emergency Apps for Your Phone
In this tech-savvy world we live in, utilizing your smartphone to stay informed during emergencies is on the table. I downloaded a few emergency apps that provide everything from car trouble assistance to navigation for the quickest routes when you’re stranded. It takes some of the stress away, knowing I can track my family’s location or get quick access to help.
Look for apps that provide real-time updates on things like weather conditions, traffic alerts, and emergency contact options. Some apps even allow you to store all your important information securely so you won’t lose it if your phone dies.
Just remember to keep your phone charged! That little battery icon becomes all too real when you’re in a tough spot, so occasionally check up on your charging habits before heading out on any adventures.
Frequently Asked Questions
What should I prioritize in my car emergency kit?
The top priorities should include jumper cables, a first aid kit, water, snacks, and a flashlight. Beyond these essentials, think about your personal needs and habits to customize your kit even further.
How often should I check my emergency kit?
I recommend checking your emergency kit at least twice a year. Make sure everything is in order, and replace any items that are expired or used. It’s a good habit to get into!
What snacks are best for an emergency kit?
Energy-dense non-perishable snacks are ideal! Look for items like granola bars, trail mix, or jerky. They provide quick energy and can last quite a while without spoiling.
Can I include personal medications in my emergency kit?
Absolutely! If you have medications that you need on hand, consider adding a supply to your car kit. Just remember to keep them in a safe, temperature-regulated spot to avoid any degradation or damage.
Is it necessary to have roadside assistance, or can I rely on my emergency kit?
While having a well-stocked emergency kit is super important, roadside assistance helps when the situation is too challenging to handle alone, like a major breakdown or if you lock your keys inside your vehicle.
by Preparation | Apr 18, 2025 | Preparedness
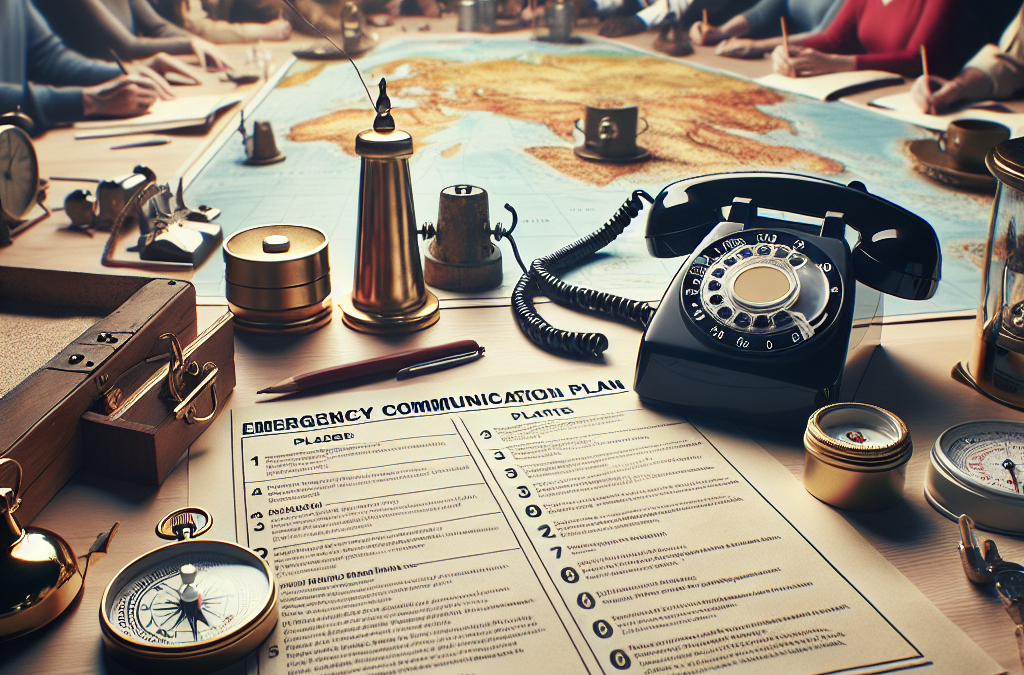
Assess Your Communication Needs
Understanding Your Audience
One of the key aspects of creating an effective emergency communication plan is to really understand who you’re communicating with. Whether it’s your family, staff at work, or even your community, knowing your audience will guide how you convey your message. For instance, different age groups or backgrounds might require tailored communication methods to ensure everyone gets the message.
Think about the different modes of communication people might respond to. For instance, younger folks may prefer texts or social media, while older adults might appreciate a quick call or even a face-to-face meetup. Identifying these preferences early on can help in crafting a plan that resonates with all parties involved.
Another critical part is knowing where to reach your audience. Sometimes it’s about being in the right place at the right time to get that message across. So, take some time to gather this information on your audience; it’s going to save you headaches down the line.
Identifying Key Messages
Next, you’ll want to think about what key messages you need to get across. In an emergency, it’s vital to have clear, concise, and actionable messages. Avoid jargon and make sure that anyone hearing your message knows exactly what’s happening and what they need to do. Write down a few key messages that can be readily shared across various platforms.
You might also want to run these messages by a few people to see if they understand them as intended. It’s super helpful to have fresh eyes on your material. Out in the field, you may encounter unexpected questions, so it’s a good idea to anticipate these and have answers at the ready.
Keep your language simple, direct, and to the point. During emergencies, people tend to be stressed, and clear communication can make a world of difference in ensuring everyone stays safe and informed.
Choosing Communication Tools
Now, let’s dive into the nitty-gritty of what tools you’ll use to communicate. Depending on your audience, you could use anything from social media platforms like Twitter or Facebook to SMS text alerts, emails, or even printed flyers. Every tool offers different advantages, so think about what will work best in your situation.
Don’t forget to consider the diversity of your audience. Some might not have access to tech, or they may be in areas with poor reception. In those cases, having face-to-face methods or emergency radio communications might be best. It’s all about ensuring that your message reaches everyone.
Also, test your chosen tools ahead of time. Send practice messages, monitor responses, and refine your methods. The last thing you want is to find out in a crisis that a tool you planned to use is not reliable or effective.
Establish Roles and Responsibilities
Define Who Does What
One of the best things I learned while creating my emergency communication plan was to define roles early on. Everyone involved should be crystal clear about what they’re responsible for during a crisis. This not only ensures smooth communication but also eliminates any confusion when the heat is on.
Assigning roles can range from spokespersons to logistical support. For instance, who will communicate with the media? Who will handle internal communication within the organization? Make a list of roles and make sure everyone understands their responsibilities. Seriously, having this laid out makes life so much easier during emergencies!
Prioritize and delegate tasks based on people’s strengths. For instance, someone with clear communication skills may be better suited as a spokesperson, while those with organizational skills could manage logistics. Trust me, efficiency is key during critical times.
Training and Drills
Training is a huge part of ensuring everyone is prepared. Schedule regular drills so that everyone knows exactly what to do when an emergency occurs. Just like fire drills in school, these moments help familiarize everyone with the plan and reduce panic during real situations.
Training should also involve reviewing the communication tools you’ve chosen. Make sure everyone knows how to operate them properly. Hold mock scenarios where you test out messaging and roles, and see what works and what doesn’t.
After each drill, gather feedback and refine your plan accordingly. It’s a learning experience, and each step forward gets you closer to achieving your communication goals during a crisis.
Encourage Feedback and Adaptation
Once your plan is in place, creating a culture of open communication and feedback is essential. After drill sessions or actual incidents, take the time to gather everyone’s thoughts on how things went. Was something unclear? Did certain tools not work as expected?
Being adaptable is crucial. Don’t be set in your ways; tweak your plan based on actual feedback. The world is always changing, and having an adaptable plan may very well be the difference between chaos and effective communication down the line.
It’s a tough pill to swallow sometimes, but realize that your initial plan is not the be-all and end-all. It’s a work in progress, and improvement should be continuous.
Test and Review Your Plan Regularly
Schedule Regular Reviews
Get into the habit of regularly reviewing your communication plan. I like to set reminders every six months or so. This is a great opportunity to assess your tools and messages, ensuring they’re still effective and relevant. Something that worked a year ago might not cut it now!
During your reviews, consider asking the team if any new technology or platforms could improve communication. Stay up to date with the latest trends so that your plan remains fresh and effective.
Don’t underestimate the value of these reviews. They can prevent someone from being left out in case something changes last minute. Plus, it keeps everyone on their toes and engaged in the process!
Run Simulations
Once or twice a year, I recommend running a full simulation of your communication plan in action. This is a great way to see if everything operates smoothly under pressure. Will everyone know their roles? Are the established messages still clear and actionable?
It’s kind of like a sports team practicing before the big game. The more you practice, the better you perform. During these simulations, address any issues that arise and make a note for future trainings.
Trust me; running simulations will boost everyone’s confidence, being prepared for real emergencies. Plus, it’s a bit of a team-building activity!
Incorporate New Communication Channels
As new communication tools come onto the scene, it’s essential to incorporate them into your plan. Social media and messaging apps are always evolving, and being aware of these changes can make a significant difference. Maybe a new app would work better for the whole group or allow for quicker updates!
Keep an ear to the ground so you can swiftly adapt. The faster you can integrate these tools into your existing plan, the more effective your overall communication will be.
Being proactive rather than reactive will save you a ton of stress when an actual emergency occurs. Just remember: embrace change!
FAQs
What is an emergency communication plan?
An emergency communication plan outlines how to communicate effectively during a crisis. This includes assessing needs, defining messages, choosing tools, assigning roles, and reviewing regularly.
Why is it important to assess communication needs?
Assessing communication needs helps tailor your messages and methods to ensure everyone affected understands the situation and knows what actions to take.
How often should I review my emergency communication plan?
I recommend reviewing your plan at least twice a year. It helps ensure it’s relevant and effective in case of an emergency.
What if my audience doesn’t have access to the latest technology?
That’s a great concern! Always consider a mix of communication methods, including traditional approaches like face-to-face interactions or printed materials, to reach everyone.
How can I involve my team in building the plan?
Involving your team is key! Encourage open discussions about roles, conduct drills together, and gather feedback. Their insights can help create a more robust communication plan.

by Preparation | Apr 18, 2025 | Preparedness
Preparation Before a Flood
Creating an Emergency Plan
When I think about facing a flood, the first thing that jumps to mind is preparation. Having an emergency plan is like your blueprint for survival. You’ve got to map out where you’ll go, how to get there, and what you’ll do if things get tricky. Make sure everyone in your household knows the plan. A little coordination goes a long way!
Everyone should have a role in the plan; it makes the whole situation less chaotic. If you’ve got kids, involve them! Let them help put together a “go-bag” with essentials. Kids often feel more empowered when they actively participate in the planning process.
Lastly, review and rehearse the plan. This isn’t something you just write down and forget about! Go through the steps together, and if possible, do a mock evacuation. It can be a great bonding experience and ensures everyone is on the same page.
Stocking Up on Supplies
You never know when a flood will hit, so having an emergency supply kit is a must. In my experience, I like to keep enough non-perishable food and water for at least three days for everyone in the household. It’s not just about food; think about medications, personal hygiene items, and other essentials too. You want to be completely stocked!
Don’t forget about your furry friends! If you have pets, make sure to include food, water, and any medications they might need in your emergency supplies. I can’t imagine being in a situation where I had to choose between my pet’s needs and mine. It’s all about planning for the whole family, right?
Also, keep important documents in waterproof containers. I learned the hard way that losing irreplaceable papers can complicate things when you’re trying to get assistance post-flood. So, having everything safely stored away saves a ton of headaches later!
Understanding Flood Alerts
It’s crucial to stay tuned into weather reports and alerts. These days, there are plenty of apps and services that provide real-time updates. When I’m alert for possible flooding, I ensure that I check reports multiple times a day. It’s better to be safe than sorry, after all!
Familiarize yourself with the different types of flood alerts: watches, warnings, and emergencies. They signal how serious the situation is. For example, if a flash flood watch is issued, it means conditions are favorable for flooding. Actively monitoring these alerts can save your life.
Additionally, local emergency management offices often share invaluable information about your specific area. It’s worth following them on social media or signing up for their newsletters. You’d be surprised how much peace of mind it brings knowing you’re being kept in the loop!
During the Flood
Evacuate If Necessary
If things take a turn and you need to evacuate, don’t hesitate! I’ve learned that staying put just because you think you’re safe is a risky move. Follow the planned routes in your emergency plan and avoid walking or driving through floodwaters. You never know how deep or fast the water is moving!
Don’t forget to take your emergency kit. Trust me, I’ve been in situations where I thought I’d be fine without it, and it’s a bad feeling! Pack some of your most important belongings if time allows—documents, medication, and loved items that can’t be replaced.
While evacuating, keep your family together. The chaos can make it easy to lose sight of one another. I always stress the importance of sticking together. It’s not just for safety; it’s comforting to know you’re all facing this challenge as a team!
Staying Informed
During a flood, it’s super important to stay updated. This is where battery-powered radios or phone alerts come into play. I always keep a radio handy for emergencies. Sometimes, power lines can go down, and cell service may get iffy, so having a backup is key.
Follow local authorities and emergency services on social media and listen to their reports. They often share critical updates about evacuation routes and safety notices. The more informed you are, the better decisions you can make for everyone’s safety.
If you’re at home and water starts to rise, don’t ignore it. It can escalate quickly. I’ve learned to have that mental switch ready to go just in case. Don’t wait for someone else to tell you to leave; trust your instinct!
Keeping Your Family Safe
In a flooding situation, ensuring everyone’s safety has to be your top priority. Avoid flooded areas, stay away from downed power lines, and steer clear of electrical appliances and outlets. Staying safe means keeping a level head and thinking about what’s truly essential.
Communicate with each family member about what to do in an emergency. It helps everyone know what’s happening, and it can reduce anxiety. If you have kids, it’s comforting for them to see that there’s a plan in place, even when things seem scary.
Lastly, don’t forget to have a buddy system. If you’ve got neighbors who are also trying to navigate the flood, check in on each other. Sometimes those connections can make all the difference when you’re feeling isolated or overwhelmed.
After the Flood
Returning Home Safely
When the floodwaters recede, and it’s time to go home, you need to approach it with caution. It’s easy to want to rush back, but checking for any hazards should be your first step. Look out for structural damages, downed electrical lines, and any signs that the area is still unsafe.
Always listen to local authorities regarding when it’s safe to return. They often provide the best information on whether areas have been cleared or are still in danger, which can protect you from accidental harm.
Once you’re back, take photos of any damage for insurance purposes before starting to clean up. This will save you a lot of hassle later when you’re dealing with claims. I’ve learned that it’s always better to have documentation just in case!
Cleaning Up
Cleansing your home after a flood can seem overwhelming, but tackling it step by step makes it manageable. Wear protective gear, including gloves, masks, and sturdy boots. You never know what could be lurking in the floodwaters, and being cautious is always wise.
Focus on removing water-damaged items first—carpets, appliances, and furniture. I’ve found that documenting each item is super helpful for later discussions with your insurance company. Make a list, take photos, and keep track of what needs to go!
After the bulk is removed, thoroughly clean and disinfect all surfaces. You don’t want mold lurking around, trust me! Mold can be hazardous, so a bit of elbow grease during the cleanup phase does wonders for your home’s longevity.
Seeking Support
After a flood, it’s not just about physical repairs; the emotional impact can be just as significant. Don’t hesitate to reach out. Whether it’s family, friends, or a support group, talking things through can be incredibly helpful during the recovery phase.
You can also check for local resources and organizations offering assistance. Many communities rally together in times of need, and you’d be surprised at the kindness of strangers. It’s something that has always amazed me in tough situations.
Lastly, give yourself time to heal, both mentally and physically. Engaging in community programs that focus on recovery can offer camaraderie and support as you navigate the aftermath of flooding. Lean on your community; there’s strength in numbers!
FAQs
1. What should I do before a flood hits?
Preparation is key! Create an emergency plan, stock up on supplies including food and water, and stay informed about potential flooding in your area.
2. How can I ensure my family stays safe during a flood?
Stay together, stick to your emergency plan, and ensure everyone knows the safest routes to evacuate. Avoid flooded areas and listen to local authorities for updates.
3. What supplies are crucial for my emergency kit?
Your kit should include non-perishable food, water, medications, personal hygiene items, important documents, and items for your pets if you have them.
4. How can I clean up my home effectively after a flood?
Start by wearing protective gear, removing water-damaged items, cleaning and disinfecting surfaces, and documenting everything for insurance purposes.
5. Where can I find support after experiencing a flood?
Reach out to family and friends, local organizations, and community support groups to help with recovery, both emotionally and physically.
by Preparation | Apr 18, 2025 | Preparedness
Dress in Layers
Understanding Layering
When it comes to staying warm in freezing temperatures, layering is my go-to strategy. It’s not just about throwing on a ton of clothes; it’s about knowing how to create a barrier against the cold. The idea is to trap heat while wicking moisture away from my body. I usually start off with a moisture-wicking base layer that hugs my skin, keeping it warm and dry.
The second layer, which I often choose to be fleece or down, helps to insulate. This is crucial because it traps body heat effectively but remains lightweight. It’s important to avoid cotton for this layer, as it absorbs moisture and loses its insulating properties. Trust me, getting wet in the cold is no fun at all!
Finally, I always top my outfit with a waterproof and windproof outer layer. This protects against wind chill and any wet conditions, ensuring that my inner layers stay dry and effective. Adopting the right layering technique has been an absolute game changer for me during cold weather outings.
Choosing the Right Materials
Not all fabrics are created equal when you’re battling the cold. In my experience, wool, polyester, and nylon are winners, while cotton is a big no-no. Wool is fantastic for retaining warmth even when wet, and believe me, I’ve had my share of snowy adventures where that’s come in handy!
Polyester, on the other hand, is excellent for moisture-wicking, keeping me dry during high-energy activities. When I’m out there skiing or hiking, staying dry is essential. As for nylon, it’s tough and offers wind resistance, which can be a lifesaver during blustery winter days.
One tip I’ve picked up over the years is to be mindful of my socks and gloves. I always go for thermal materials that not only keep my extremities warm but also wick moisture away. Cold feet and hands? Yeah, let’s avoid that at all costs!
Monitoring Your Body Temperature
Throughout my freezing adventures, I’ve learned to listen to my body. It’s super important to monitor how I’m feeling temperature-wise. If I start to feel too warm, I know it’s time to shed a layer or two. Conversely, if I begin to feel chilled, I need to add another layer back on.
Dressing appropriately can help me avoid both overheating and hypothermia. I often keep an eye on the signs of frostbite as well, particularly on my fingers and toes. Redness, tingling, or numbness are all indicators that I need to warm up quickly.
Being proactive about my comfort and warmth has really increased my enjoyment of winter activities. If I understand how my body reacts to cold, I can adjust my layers to keep myself cozy without overdoing it.
Building a Shelter
Finding the Right Location
Whether I’m stuck overnight in a snowstorm or camping out, knowing how to properly set up a shelter can be a lifesaver. I always prioritize finding a spot that’s away from the wind and provides some natural cover. Ideal locations might be near trees or boulders; those spots break the wind and reduce chill.
It’s also important to choose a spot that’s dry; the last thing I want is snow or moisture seeping into my shelter. If I can find a natural depression in the ground, even better! It naturally provides some insulation. I’ve learned that a good view might be nice, but protecting myself from the elements is way more important.
Orientation matters, too! Positioning the entrance away from the wind can make a world of difference. I’ve made the mistake before of not paying attention to this, and it left me cold and uncomfortable!
Constructing the Shelter
When I get the location figured out, it’s time to build the shelter itself. For a quick and effective structure, I often lean towards a simple snow cave or a debris hut. Both methods are pretty straightforward, and I love how easy it is to find materials in my surroundings.
A snow cave, for instance, uses the insulating properties of snow to keep the temperature regulated inside. I usually dig into the snow and design it in a way that it’s spacious enough for me to sit or even lie down comfortably.
If it’s not snowy, I tend to gather branches, leaves, and other debris to create a hut structure. Layering branches on a frame gives me a strong foundation, while more foliage offers insulation and wind protection. It’s amazing how resourceful you can be when you put your mind to it!
Insulating the Shelter
Insulation is key for ensuring my shelter remains warm. I like to gather leaves, pine needles, or even more snow (if available) to stuff in the nooks and crannies. This helps trap the heat and keeps the cold at bay. It’s surprising how much of a difference a few extra layers can make!
I also make sure to create a comfy place to sit or lie down. Finding or creating a bed of leaves or branches elevates me off the cold ground and gives added insulation. It’s so worth the time and effort for a better night’s sleep!
The whole insulating process makes my shelter not just a temporary fix but a real haven against the chilly temperatures outside. In my experience, putting in the effort to properly insulate pays off when I’m hunkered down in the cold.
Finding Food and Water
Locating Fresh Water
In cold climates, finding water can be as challenging as finding food. I always need to observe my surroundings for sources, like streams, rivers, or melting snow. Drinking snow is often a last resort, and I typically avoid it unless I’m desperate since it can lower my body temperature.
When it comes to melting snow, I generally prefer to use a stove if I’ve got one, but if not, I’ll collect it in a vessel and let it sit until the sun does the work. Every drop counts when you’re out in the cold.
I make it a habit to check for clear, running water, as it’s usually the safest choice. Staying hydrated is crucial; dehydration can sneak up on me during cold weather just as easily as in the heat!
Identifying Edible Plants
Foraging for food in the winter can seem daunting, but trust me, it’s doable. I’ve had luck by keeping an eye out for certain hardy plants; dandelions, for example, have leaves that can be eaten, and their roots are edible too. In fact, I’ve even made a tasty tea from dandelion roots when I’m in a pinch!
I also pay attention to berry bushes, as many species retain some fruit in colder months. Ripe berries are not only a source of food but can also provide a much-needed dose of energy. Just a quick word of caution, though—always double-check what you’re consuming.
Getting familiar with edible plants takes practice, but I’ve found that keeping a simple guide with me can be helpful. You never know when you might spot something edible on your chilly adventures!
Hunting and Trapping
If I’m in a situation where I need a more substantial meal, knowing how to hunt or trap small game can be perfect. Depending on the area I’m in, I look for tracks or signs of animals. I’ve often used snares or simple traps to secure food when essentials run low.
Setting up traps can be tricky, but it’s rewarding when done right. I usually look for spots where animals are likely to travel, like game trails. The more I observe their behavior, the better my chances become.
Remember, patience is key here. Waiting quietly is essential to let the animals do their thing. Eventually, I’ve managed to catch my own meals which adds a real sense of accomplishment to my winter survival skills!
Staying Warm with Fire
Gathering Firewood
Fire can be a lifesaver in freezing temps, so I always begin by collecting dry wood. I like to search for dead branches that are still off the ground; these tend to be much drier. When I’m getting wood, I also gather smaller twigs to use as kindling to help the fire get going.
It’s crucial to make sure everything is dry for an effective fire. I’ve learned the hard way that trying to burn wet wood can be a total bummer, so I do my best to find the best materials.
I also collect tinder from things like dry grass, pine needles, or birch bark. These can spark up quickly and help get the larger pieces of wood to ignite. Having these materials on hand often turns out to be a real game-changer!
Building the Fire
Building the fire itself is where the fun starts. I usually set up a small base using logs in a teepee or log cabin style, ensuring that my kindling is in the middle. The idea is to allow airflow, which helps ignite the fire more easily.
Once I’ve struck a spark onto my tinder and got it going, I gradually add larger pieces of wood to the fire. It’s all about patience; I’ve seen too many folks try to rush it, only to end up with a smoldering mess! If I take my time, I’ve found fires are much easier to maintain.
Finally, once the fire is going strong, I keep an eye on the flames and regulate the size by adding wood as needed. A well-maintained fire not only keeps me warm but also serves as a beacon in case I need to signal for help!
Using Fire Wisely
Fire is a powerful tool, but it demands respect. I’ve made it a point to never leave my fire unattended, as this can lead to dangerous situations. Safety is key, especially in remote areas. If it’s dry, I make sure to create a fire ring if I can to prevent any chance of it spreading.
Also, when the fire’s not in use, I’ll cover it up using some damp soil or leave it to go out naturally instead of dousing it with water. I’ve learned fires can leave a lasting imprint on the environment if not put out properly.
Lastly, I use my fire smartly, positioning it not just for warmth but for cooking or melting snow too. Balancing all functionalities has really enhanced my overall survival experience in freezing temps!
Using Survival Tools and First Aid
Essential Survival Gear
Having the right tools can be the difference between comfort and chaos. I always carry a well-stocked survival kit, including a knife, fire-starting tools, and a first-aid kit. A good knife is invaluable when it comes to making shelters or preparing food!
I also make sure I’ve included a multi-tool; this little gem can serve various purposes, from cutting to screwing or opening cans, you name it! It’s one of those tools that always comes in clutch.
Don’t forget a good map and compass, or a GPS if I have the battery life. Getting lost in the wilderness can be not only scary but dangerous, especially in freezing temps. I’ve learned to orient myself with the terrain around me and take the right tools along to always find my way home.
Basic First Aid Skills
Accidents can happen, and dealing with injuries in freezing weather can be tough. I find it crucial to know how to treat common ailments, such as frostbite or hypothermia. Recognizing signs early can make a big difference—like understanding when tingling starts in my extremities!
If someone is showing signs of hypothermia, I focus on warming them up with layers and getting them sheltered quickly. When it comes to frostbite, I’ve learned to never rub the affected area; instead, I should gently warm it up using body heat or warm water if possible.
Having a first-aid kit handy with bandages, antiseptics, and pain relievers keeps me prepared for any unexpected scrapes or bruises during cold adventures. I always take note of any allergies as well and plan the contents of my kit accordingly!
Emergency Signals
When all else fails, knowing how to signal for help is crucial. I usually pack a whistle—trust me, it’s way more effective than yelling! It carries farther, and I can conserve my energy this way.
I also don’t forget mirrors or bright colors that can be used to attract attention. Flashing sunlight off a mirror or wearing neon can work wonders. It’s all about being visible in the best way possible.
And finally, I always keep a flashlight handy. Not only does it help me to navigate in the dark, but it’s also a great signaling device if the need arises. Preparation is everything when I plan to face the elements!
Frequently Asked Questions
1. What’s the best way to stay warm in freezing temperatures?
The best way to stay warm is by dressing in layers. Start with a moisture-wicking base layer, add insulation, and top it off with a weather-resistant outer layer. It’s all about trapping heat and staying dry!
2. How do I make a shelter in the snow?
To build a shelter in the snow, look for a windbreak area, dig a snow cave, or construct a debris hut using branches and leaves. Be sure to insulate it well to keep warm!
3. Can I drink snow for hydration?
Drinking snow is not the best option as it can lower your body temperature. If you must, melt it first, but always try to find fresh water sources instead.
4. What materials are best for starting a fire?
When starting a fire, look for dry twigs, small branches, leaves, and other tinder materials. Using dry wood will help the fire ignite more easily.
5. What should be included in a survival kit for freezing temperatures?
A solid survival kit should include a knife, fire-starting tools, a first-aid kit, food rations, and water purification tablets. A map and compass are also vital for navigation!


