by Preparation | Apr 18, 2025 | Preparedness
Assess Your Communication Needs
Understanding Your Audience
One of the key aspects of creating an effective emergency communication plan is to really understand who you’re communicating with. Whether it’s your family, staff at work, or even your community, knowing your audience will guide how you convey your message. For instance, different age groups or backgrounds might require tailored communication methods to ensure everyone gets the message.
Think about the different modes of communication people might respond to. For instance, younger folks may prefer texts or social media, while older adults might appreciate a quick call or even a face-to-face meetup. Identifying these preferences early on can help in crafting a plan that resonates with all parties involved.
Another critical part is knowing where to reach your audience. Sometimes it’s about being in the right place at the right time to get that message across. So, take some time to gather this information on your audience; it’s going to save you headaches down the line.
Identifying Key Messages
Next, you’ll want to think about what key messages you need to get across. In an emergency, it’s vital to have clear, concise, and actionable messages. Avoid jargon and make sure that anyone hearing your message knows exactly what’s happening and what they need to do. Write down a few key messages that can be readily shared across various platforms.
You might also want to run these messages by a few people to see if they understand them as intended. It’s super helpful to have fresh eyes on your material. Out in the field, you may encounter unexpected questions, so it’s a good idea to anticipate these and have answers at the ready.
Keep your language simple, direct, and to the point. During emergencies, people tend to be stressed, and clear communication can make a world of difference in ensuring everyone stays safe and informed.
Choosing Communication Tools
Now, let’s dive into the nitty-gritty of what tools you’ll use to communicate. Depending on your audience, you could use anything from social media platforms like Twitter or Facebook to SMS text alerts, emails, or even printed flyers. Every tool offers different advantages, so think about what will work best in your situation.
Don’t forget to consider the diversity of your audience. Some might not have access to tech, or they may be in areas with poor reception. In those cases, having face-to-face methods or emergency radio communications might be best. It’s all about ensuring that your message reaches everyone.
Also, test your chosen tools ahead of time. Send practice messages, monitor responses, and refine your methods. The last thing you want is to find out in a crisis that a tool you planned to use is not reliable or effective.
Establish Roles and Responsibilities
Define Who Does What
One of the best things I learned while creating my emergency communication plan was to define roles early on. Everyone involved should be crystal clear about what they’re responsible for during a crisis. This not only ensures smooth communication but also eliminates any confusion when the heat is on.
Assigning roles can range from spokespersons to logistical support. For instance, who will communicate with the media? Who will handle internal communication within the organization? Make a list of roles and make sure everyone understands their responsibilities. Seriously, having this laid out makes life so much easier during emergencies!
Prioritize and delegate tasks based on people’s strengths. For instance, someone with clear communication skills may be better suited as a spokesperson, while those with organizational skills could manage logistics. Trust me, efficiency is key during critical times.
Training and Drills
Training is a huge part of ensuring everyone is prepared. Schedule regular drills so that everyone knows exactly what to do when an emergency occurs. Just like fire drills in school, these moments help familiarize everyone with the plan and reduce panic during real situations.
Training should also involve reviewing the communication tools you’ve chosen. Make sure everyone knows how to operate them properly. Hold mock scenarios where you test out messaging and roles, and see what works and what doesn’t.
After each drill, gather feedback and refine your plan accordingly. It’s a learning experience, and each step forward gets you closer to achieving your communication goals during a crisis.
Encourage Feedback and Adaptation
Once your plan is in place, creating a culture of open communication and feedback is essential. After drill sessions or actual incidents, take the time to gather everyone’s thoughts on how things went. Was something unclear? Did certain tools not work as expected?
Being adaptable is crucial. Don’t be set in your ways; tweak your plan based on actual feedback. The world is always changing, and having an adaptable plan may very well be the difference between chaos and effective communication down the line.
It’s a tough pill to swallow sometimes, but realize that your initial plan is not the be-all and end-all. It’s a work in progress, and improvement should be continuous.
Test and Review Your Plan Regularly
Schedule Regular Reviews
Get into the habit of regularly reviewing your communication plan. I like to set reminders every six months or so. This is a great opportunity to assess your tools and messages, ensuring they’re still effective and relevant. Something that worked a year ago might not cut it now!
During your reviews, consider asking the team if any new technology or platforms could improve communication. Stay up to date with the latest trends so that your plan remains fresh and effective.
Don’t underestimate the value of these reviews. They can prevent someone from being left out in case something changes last minute. Plus, it keeps everyone on their toes and engaged in the process!
Run Simulations
Once or twice a year, I recommend running a full simulation of your communication plan in action. This is a great way to see if everything operates smoothly under pressure. Will everyone know their roles? Are the established messages still clear and actionable?
It’s kind of like a sports team practicing before the big game. The more you practice, the better you perform. During these simulations, address any issues that arise and make a note for future trainings.
Trust me; running simulations will boost everyone’s confidence, being prepared for real emergencies. Plus, it’s a bit of a team-building activity!
Incorporate New Communication Channels
As new communication tools come onto the scene, it’s essential to incorporate them into your plan. Social media and messaging apps are always evolving, and being aware of these changes can make a significant difference. Maybe a new app would work better for the whole group or allow for quicker updates!
Keep an ear to the ground so you can swiftly adapt. The faster you can integrate these tools into your existing plan, the more effective your overall communication will be.
Being proactive rather than reactive will save you a ton of stress when an actual emergency occurs. Just remember: embrace change!
FAQs
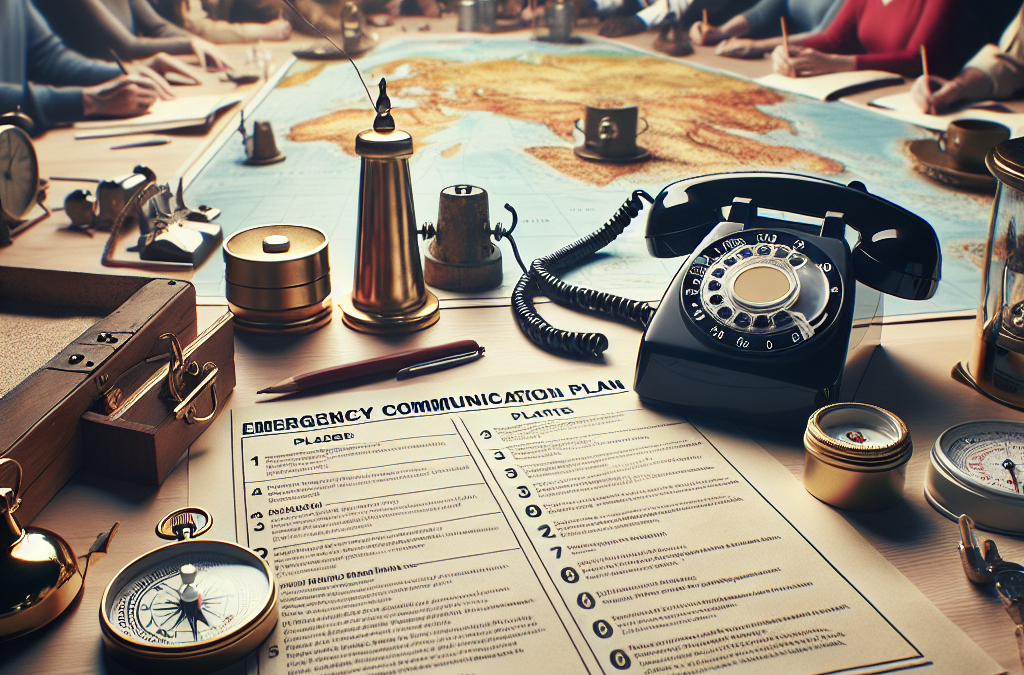
What is an emergency communication plan?
An emergency communication plan outlines how to communicate effectively during a crisis. This includes assessing needs, defining messages, choosing tools, assigning roles, and reviewing regularly.
Why is it important to assess communication needs?
Assessing communication needs helps tailor your messages and methods to ensure everyone affected understands the situation and knows what actions to take.
How often should I review my emergency communication plan?
I recommend reviewing your plan at least twice a year. It helps ensure it’s relevant and effective in case of an emergency.
What if my audience doesn’t have access to the latest technology?
That’s a great concern! Always consider a mix of communication methods, including traditional approaches like face-to-face interactions or printed materials, to reach everyone.
How can I involve my team in building the plan?
Involving your team is key! Encourage open discussions about roles, conduct drills together, and gather feedback. Their insights can help create a more robust communication plan.

by Preparation | Apr 18, 2025 | Preparedness
Preparation Before a Flood
Creating an Emergency Plan
When I think about facing a flood, the first thing that jumps to mind is preparation. Having an emergency plan is like your blueprint for survival. You’ve got to map out where you’ll go, how to get there, and what you’ll do if things get tricky. Make sure everyone in your household knows the plan. A little coordination goes a long way!
Everyone should have a role in the plan; it makes the whole situation less chaotic. If you’ve got kids, involve them! Let them help put together a “go-bag” with essentials. Kids often feel more empowered when they actively participate in the planning process.
Lastly, review and rehearse the plan. This isn’t something you just write down and forget about! Go through the steps together, and if possible, do a mock evacuation. It can be a great bonding experience and ensures everyone is on the same page.
Stocking Up on Supplies
You never know when a flood will hit, so having an emergency supply kit is a must. In my experience, I like to keep enough non-perishable food and water for at least three days for everyone in the household. It’s not just about food; think about medications, personal hygiene items, and other essentials too. You want to be completely stocked!
Don’t forget about your furry friends! If you have pets, make sure to include food, water, and any medications they might need in your emergency supplies. I can’t imagine being in a situation where I had to choose between my pet’s needs and mine. It’s all about planning for the whole family, right?
Also, keep important documents in waterproof containers. I learned the hard way that losing irreplaceable papers can complicate things when you’re trying to get assistance post-flood. So, having everything safely stored away saves a ton of headaches later!
Understanding Flood Alerts
It’s crucial to stay tuned into weather reports and alerts. These days, there are plenty of apps and services that provide real-time updates. When I’m alert for possible flooding, I ensure that I check reports multiple times a day. It’s better to be safe than sorry, after all!
Familiarize yourself with the different types of flood alerts: watches, warnings, and emergencies. They signal how serious the situation is. For example, if a flash flood watch is issued, it means conditions are favorable for flooding. Actively monitoring these alerts can save your life.
Additionally, local emergency management offices often share invaluable information about your specific area. It’s worth following them on social media or signing up for their newsletters. You’d be surprised how much peace of mind it brings knowing you’re being kept in the loop!
During the Flood
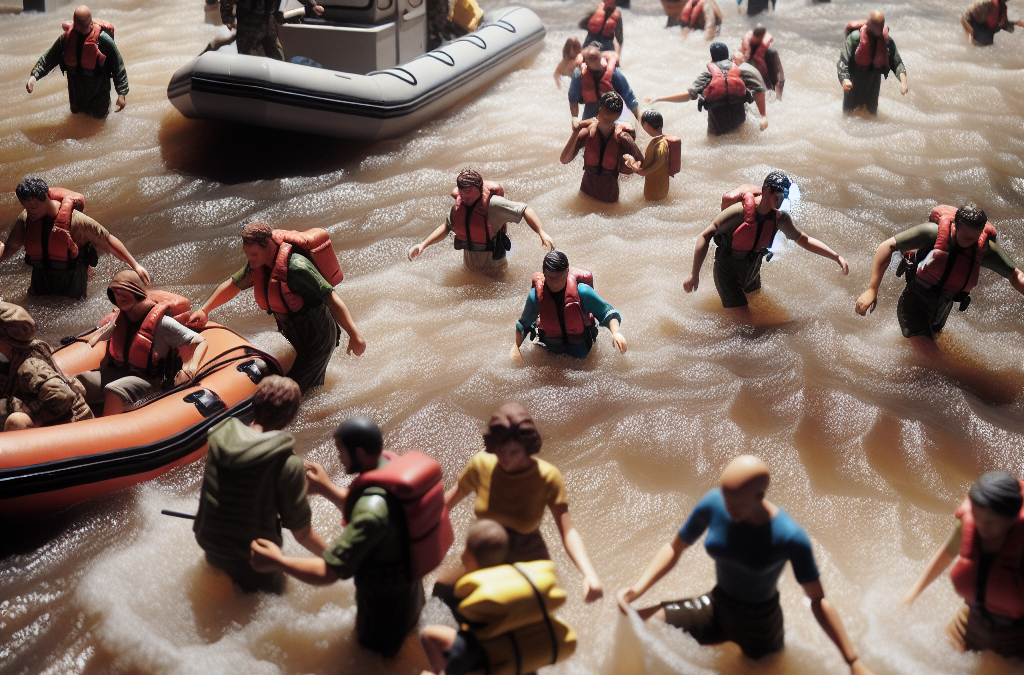
Evacuate If Necessary
If things take a turn and you need to evacuate, don’t hesitate! I’ve learned that staying put just because you think you’re safe is a risky move. Follow the planned routes in your emergency plan and avoid walking or driving through floodwaters. You never know how deep or fast the water is moving!
Don’t forget to take your emergency kit. Trust me, I’ve been in situations where I thought I’d be fine without it, and it’s a bad feeling! Pack some of your most important belongings if time allows—documents, medication, and loved items that can’t be replaced.
While evacuating, keep your family together. The chaos can make it easy to lose sight of one another. I always stress the importance of sticking together. It’s not just for safety; it’s comforting to know you’re all facing this challenge as a team!
Staying Informed
During a flood, it’s super important to stay updated. This is where battery-powered radios or phone alerts come into play. I always keep a radio handy for emergencies. Sometimes, power lines can go down, and cell service may get iffy, so having a backup is key.
Follow local authorities and emergency services on social media and listen to their reports. They often share critical updates about evacuation routes and safety notices. The more informed you are, the better decisions you can make for everyone’s safety.
If you’re at home and water starts to rise, don’t ignore it. It can escalate quickly. I’ve learned to have that mental switch ready to go just in case. Don’t wait for someone else to tell you to leave; trust your instinct!
Keeping Your Family Safe
In a flooding situation, ensuring everyone’s safety has to be your top priority. Avoid flooded areas, stay away from downed power lines, and steer clear of electrical appliances and outlets. Staying safe means keeping a level head and thinking about what’s truly essential.
Communicate with each family member about what to do in an emergency. It helps everyone know what’s happening, and it can reduce anxiety. If you have kids, it’s comforting for them to see that there’s a plan in place, even when things seem scary.
Lastly, don’t forget to have a buddy system. If you’ve got neighbors who are also trying to navigate the flood, check in on each other. Sometimes those connections can make all the difference when you’re feeling isolated or overwhelmed.
After the Flood
Returning Home Safely
When the floodwaters recede, and it’s time to go home, you need to approach it with caution. It’s easy to want to rush back, but checking for any hazards should be your first step. Look out for structural damages, downed electrical lines, and any signs that the area is still unsafe.
Always listen to local authorities regarding when it’s safe to return. They often provide the best information on whether areas have been cleared or are still in danger, which can protect you from accidental harm.
Once you’re back, take photos of any damage for insurance purposes before starting to clean up. This will save you a lot of hassle later when you’re dealing with claims. I’ve learned that it’s always better to have documentation just in case!
Cleaning Up
Cleansing your home after a flood can seem overwhelming, but tackling it step by step makes it manageable. Wear protective gear, including gloves, masks, and sturdy boots. You never know what could be lurking in the floodwaters, and being cautious is always wise.
Focus on removing water-damaged items first—carpets, appliances, and furniture. I’ve found that documenting each item is super helpful for later discussions with your insurance company. Make a list, take photos, and keep track of what needs to go!
After the bulk is removed, thoroughly clean and disinfect all surfaces. You don’t want mold lurking around, trust me! Mold can be hazardous, so a bit of elbow grease during the cleanup phase does wonders for your home’s longevity.
Seeking Support
After a flood, it’s not just about physical repairs; the emotional impact can be just as significant. Don’t hesitate to reach out. Whether it’s family, friends, or a support group, talking things through can be incredibly helpful during the recovery phase.
You can also check for local resources and organizations offering assistance. Many communities rally together in times of need, and you’d be surprised at the kindness of strangers. It’s something that has always amazed me in tough situations.
Lastly, give yourself time to heal, both mentally and physically. Engaging in community programs that focus on recovery can offer camaraderie and support as you navigate the aftermath of flooding. Lean on your community; there’s strength in numbers!
FAQs
1. What should I do before a flood hits?
Preparation is key! Create an emergency plan, stock up on supplies including food and water, and stay informed about potential flooding in your area.
2. How can I ensure my family stays safe during a flood?
Stay together, stick to your emergency plan, and ensure everyone knows the safest routes to evacuate. Avoid flooded areas and listen to local authorities for updates.
3. What supplies are crucial for my emergency kit?
Your kit should include non-perishable food, water, medications, personal hygiene items, important documents, and items for your pets if you have them.
4. How can I clean up my home effectively after a flood?
Start by wearing protective gear, removing water-damaged items, cleaning and disinfecting surfaces, and documenting everything for insurance purposes.
5. Where can I find support after experiencing a flood?
Reach out to family and friends, local organizations, and community support groups to help with recovery, both emotionally and physically.
by Preparation | Apr 18, 2025 | Preparedness
Dress in Layers
Understanding Layering
When it comes to staying warm in freezing temperatures, layering is my go-to strategy. It’s not just about throwing on a ton of clothes; it’s about knowing how to create a barrier against the cold. The idea is to trap heat while wicking moisture away from my body. I usually start off with a moisture-wicking base layer that hugs my skin, keeping it warm and dry.
The second layer, which I often choose to be fleece or down, helps to insulate. This is crucial because it traps body heat effectively but remains lightweight. It’s important to avoid cotton for this layer, as it absorbs moisture and loses its insulating properties. Trust me, getting wet in the cold is no fun at all!
Finally, I always top my outfit with a waterproof and windproof outer layer. This protects against wind chill and any wet conditions, ensuring that my inner layers stay dry and effective. Adopting the right layering technique has been an absolute game changer for me during cold weather outings.
Choosing the Right Materials
Not all fabrics are created equal when you’re battling the cold. In my experience, wool, polyester, and nylon are winners, while cotton is a big no-no. Wool is fantastic for retaining warmth even when wet, and believe me, I’ve had my share of snowy adventures where that’s come in handy!
Polyester, on the other hand, is excellent for moisture-wicking, keeping me dry during high-energy activities. When I’m out there skiing or hiking, staying dry is essential. As for nylon, it’s tough and offers wind resistance, which can be a lifesaver during blustery winter days.
One tip I’ve picked up over the years is to be mindful of my socks and gloves. I always go for thermal materials that not only keep my extremities warm but also wick moisture away. Cold feet and hands? Yeah, let’s avoid that at all costs!
Monitoring Your Body Temperature
Throughout my freezing adventures, I’ve learned to listen to my body. It’s super important to monitor how I’m feeling temperature-wise. If I start to feel too warm, I know it’s time to shed a layer or two. Conversely, if I begin to feel chilled, I need to add another layer back on.
Dressing appropriately can help me avoid both overheating and hypothermia. I often keep an eye on the signs of frostbite as well, particularly on my fingers and toes. Redness, tingling, or numbness are all indicators that I need to warm up quickly.
Being proactive about my comfort and warmth has really increased my enjoyment of winter activities. If I understand how my body reacts to cold, I can adjust my layers to keep myself cozy without overdoing it.
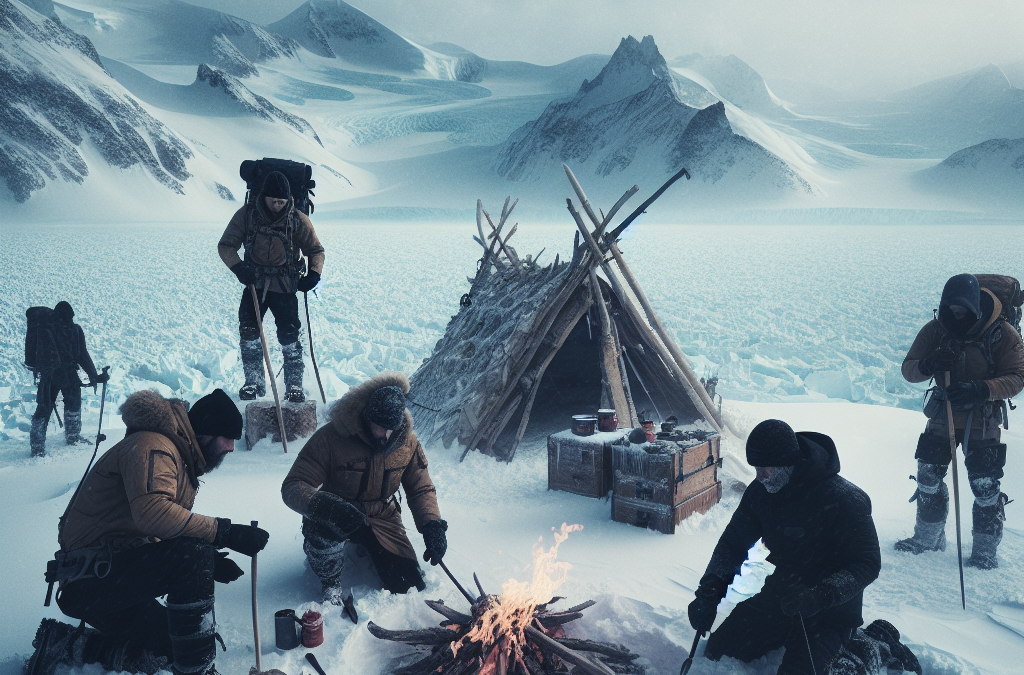
Building a Shelter
Finding the Right Location
Whether I’m stuck overnight in a snowstorm or camping out, knowing how to properly set up a shelter can be a lifesaver. I always prioritize finding a spot that’s away from the wind and provides some natural cover. Ideal locations might be near trees or boulders; those spots break the wind and reduce chill.
It’s also important to choose a spot that’s dry; the last thing I want is snow or moisture seeping into my shelter. If I can find a natural depression in the ground, even better! It naturally provides some insulation. I’ve learned that a good view might be nice, but protecting myself from the elements is way more important.
Orientation matters, too! Positioning the entrance away from the wind can make a world of difference. I’ve made the mistake before of not paying attention to this, and it left me cold and uncomfortable!
Constructing the Shelter
When I get the location figured out, it’s time to build the shelter itself. For a quick and effective structure, I often lean towards a simple snow cave or a debris hut. Both methods are pretty straightforward, and I love how easy it is to find materials in my surroundings.
A snow cave, for instance, uses the insulating properties of snow to keep the temperature regulated inside. I usually dig into the snow and design it in a way that it’s spacious enough for me to sit or even lie down comfortably.
If it’s not snowy, I tend to gather branches, leaves, and other debris to create a hut structure. Layering branches on a frame gives me a strong foundation, while more foliage offers insulation and wind protection. It’s amazing how resourceful you can be when you put your mind to it!
Insulating the Shelter
Insulation is key for ensuring my shelter remains warm. I like to gather leaves, pine needles, or even more snow (if available) to stuff in the nooks and crannies. This helps trap the heat and keeps the cold at bay. It’s surprising how much of a difference a few extra layers can make!
I also make sure to create a comfy place to sit or lie down. Finding or creating a bed of leaves or branches elevates me off the cold ground and gives added insulation. It’s so worth the time and effort for a better night’s sleep!
The whole insulating process makes my shelter not just a temporary fix but a real haven against the chilly temperatures outside. In my experience, putting in the effort to properly insulate pays off when I’m hunkered down in the cold.
Finding Food and Water
Locating Fresh Water
In cold climates, finding water can be as challenging as finding food. I always need to observe my surroundings for sources, like streams, rivers, or melting snow. Drinking snow is often a last resort, and I typically avoid it unless I’m desperate since it can lower my body temperature.
When it comes to melting snow, I generally prefer to use a stove if I’ve got one, but if not, I’ll collect it in a vessel and let it sit until the sun does the work. Every drop counts when you’re out in the cold.
I make it a habit to check for clear, running water, as it’s usually the safest choice. Staying hydrated is crucial; dehydration can sneak up on me during cold weather just as easily as in the heat!
Identifying Edible Plants
Foraging for food in the winter can seem daunting, but trust me, it’s doable. I’ve had luck by keeping an eye out for certain hardy plants; dandelions, for example, have leaves that can be eaten, and their roots are edible too. In fact, I’ve even made a tasty tea from dandelion roots when I’m in a pinch!
I also pay attention to berry bushes, as many species retain some fruit in colder months. Ripe berries are not only a source of food but can also provide a much-needed dose of energy. Just a quick word of caution, though—always double-check what you’re consuming.
Getting familiar with edible plants takes practice, but I’ve found that keeping a simple guide with me can be helpful. You never know when you might spot something edible on your chilly adventures!
Hunting and Trapping
If I’m in a situation where I need a more substantial meal, knowing how to hunt or trap small game can be perfect. Depending on the area I’m in, I look for tracks or signs of animals. I’ve often used snares or simple traps to secure food when essentials run low.
Setting up traps can be tricky, but it’s rewarding when done right. I usually look for spots where animals are likely to travel, like game trails. The more I observe their behavior, the better my chances become.
Remember, patience is key here. Waiting quietly is essential to let the animals do their thing. Eventually, I’ve managed to catch my own meals which adds a real sense of accomplishment to my winter survival skills!
Staying Warm with Fire
Gathering Firewood
Fire can be a lifesaver in freezing temps, so I always begin by collecting dry wood. I like to search for dead branches that are still off the ground; these tend to be much drier. When I’m getting wood, I also gather smaller twigs to use as kindling to help the fire get going.
It’s crucial to make sure everything is dry for an effective fire. I’ve learned the hard way that trying to burn wet wood can be a total bummer, so I do my best to find the best materials.
I also collect tinder from things like dry grass, pine needles, or birch bark. These can spark up quickly and help get the larger pieces of wood to ignite. Having these materials on hand often turns out to be a real game-changer!
Building the Fire
Building the fire itself is where the fun starts. I usually set up a small base using logs in a teepee or log cabin style, ensuring that my kindling is in the middle. The idea is to allow airflow, which helps ignite the fire more easily.
Once I’ve struck a spark onto my tinder and got it going, I gradually add larger pieces of wood to the fire. It’s all about patience; I’ve seen too many folks try to rush it, only to end up with a smoldering mess! If I take my time, I’ve found fires are much easier to maintain.
Finally, once the fire is going strong, I keep an eye on the flames and regulate the size by adding wood as needed. A well-maintained fire not only keeps me warm but also serves as a beacon in case I need to signal for help!
Using Fire Wisely
Fire is a powerful tool, but it demands respect. I’ve made it a point to never leave my fire unattended, as this can lead to dangerous situations. Safety is key, especially in remote areas. If it’s dry, I make sure to create a fire ring if I can to prevent any chance of it spreading.
Also, when the fire’s not in use, I’ll cover it up using some damp soil or leave it to go out naturally instead of dousing it with water. I’ve learned fires can leave a lasting imprint on the environment if not put out properly.
Lastly, I use my fire smartly, positioning it not just for warmth but for cooking or melting snow too. Balancing all functionalities has really enhanced my overall survival experience in freezing temps!
Using Survival Tools and First Aid
Essential Survival Gear
Having the right tools can be the difference between comfort and chaos. I always carry a well-stocked survival kit, including a knife, fire-starting tools, and a first-aid kit. A good knife is invaluable when it comes to making shelters or preparing food!
I also make sure I’ve included a multi-tool; this little gem can serve various purposes, from cutting to screwing or opening cans, you name it! It’s one of those tools that always comes in clutch.
Don’t forget a good map and compass, or a GPS if I have the battery life. Getting lost in the wilderness can be not only scary but dangerous, especially in freezing temps. I’ve learned to orient myself with the terrain around me and take the right tools along to always find my way home.
Basic First Aid Skills
Accidents can happen, and dealing with injuries in freezing weather can be tough. I find it crucial to know how to treat common ailments, such as frostbite or hypothermia. Recognizing signs early can make a big difference—like understanding when tingling starts in my extremities!
If someone is showing signs of hypothermia, I focus on warming them up with layers and getting them sheltered quickly. When it comes to frostbite, I’ve learned to never rub the affected area; instead, I should gently warm it up using body heat or warm water if possible.
Having a first-aid kit handy with bandages, antiseptics, and pain relievers keeps me prepared for any unexpected scrapes or bruises during cold adventures. I always take note of any allergies as well and plan the contents of my kit accordingly!
Emergency Signals
When all else fails, knowing how to signal for help is crucial. I usually pack a whistle—trust me, it’s way more effective than yelling! It carries farther, and I can conserve my energy this way.
I also don’t forget mirrors or bright colors that can be used to attract attention. Flashing sunlight off a mirror or wearing neon can work wonders. It’s all about being visible in the best way possible.
And finally, I always keep a flashlight handy. Not only does it help me to navigate in the dark, but it’s also a great signaling device if the need arises. Preparation is everything when I plan to face the elements!
Frequently Asked Questions
1. What’s the best way to stay warm in freezing temperatures?
The best way to stay warm is by dressing in layers. Start with a moisture-wicking base layer, add insulation, and top it off with a weather-resistant outer layer. It’s all about trapping heat and staying dry!
2. How do I make a shelter in the snow?
To build a shelter in the snow, look for a windbreak area, dig a snow cave, or construct a debris hut using branches and leaves. Be sure to insulate it well to keep warm!
3. Can I drink snow for hydration?
Drinking snow is not the best option as it can lower your body temperature. If you must, melt it first, but always try to find fresh water sources instead.
4. What materials are best for starting a fire?
When starting a fire, look for dry twigs, small branches, leaves, and other tinder materials. Using dry wood will help the fire ignite more easily.
5. What should be included in a survival kit for freezing temperatures?
A solid survival kit should include a knife, fire-starting tools, a first-aid kit, food rations, and water purification tablets. A map and compass are also vital for navigation!
by Preparation | Apr 18, 2025 | Preparedness
Prepare Your Home and Surroundings
Recognizing Vulnerabilities
One of the first things I did was check out my home for weak spots. It’s crazy how many things can become dangerous during an earthquake—think heavy shelves, mirrors, and those cute but precariously stacked decorative items. I recommend getting down on your hands and knees and looking for anything that might topple over. This little exercise will give you a fresh perspective on your space!
Also, take a peek outside. If you live near large trees or buildings that are leaning a bit, consider how they could impact your safety. It’s all about understanding your environment and making smart adjustments. Plus, it’ll ease your mind knowing you’ve minimized risks!
Lastly, don’t forget to check your emergency supplies. Make sure you have essentials like food, water, and first-aid kits handy. I like to keep mine in a designated spot so I don’t have to search at crunch time. It’s all about being proactive!
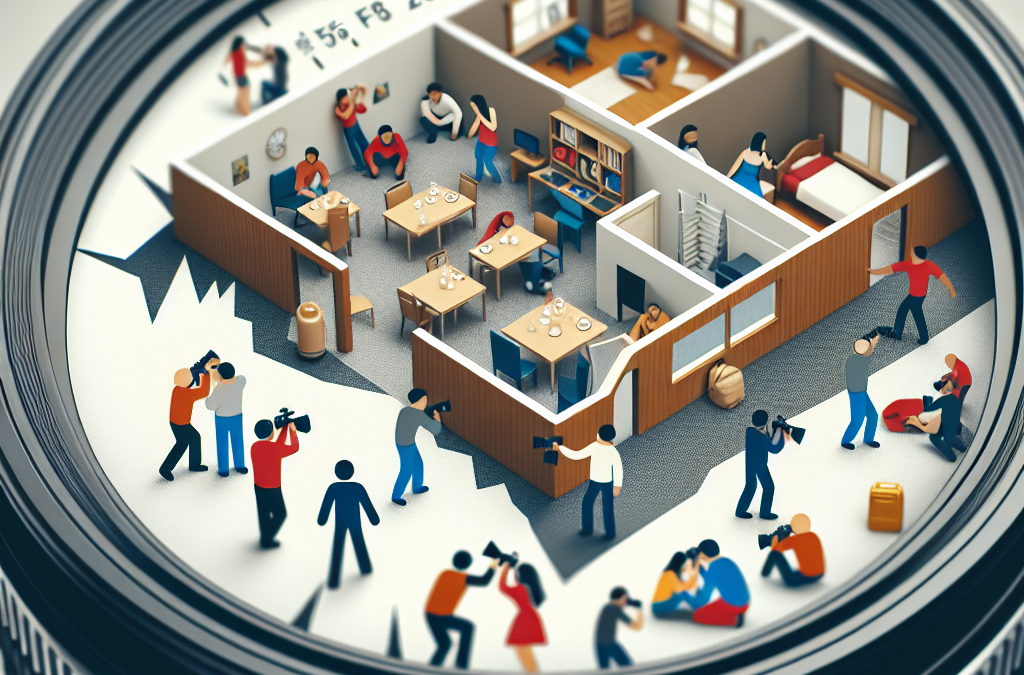
Practice the “Drop, Cover, and Hold On” Technique
The Importance of Immediate Response
When an earthquake strikes, it can be hard to think straight. That’s why practicing the “Drop, Cover, and Hold On” technique is crucial. I personally practiced this with my family a few times, and trust me, it helps embed that immediate response in your brain.
Dropping to the ground is all about protecting yourself from falling debris. Covering your head and neck with your arms is next—imagine there’s heavy furniture above you; you want to shield yourself! Finally, holding on until the shaking stops ensures you’re prepared to move if needed.
Even practicing this method in different locations can be beneficial. Whether you’re at home, in a restaurant, or at a friend’s place, try running through in your head where you’ll drop and cover. You’ll feel less panicked knowing you have a solid plan.
Communication Plans
Setting Up a Contact List
Another essential skill is having a solid communication plan. I remember chatting with my family about our go-to contacts in case we get separated during an earthquake. It sounds simple, but knowing who to reach out to can relieve a lot of stress!
Create a contact list, and consider using text messages instead of calls during emergencies since they can get jammed. I also recommend designating a meeting spot where everyone can go if the chaos unfolds. That way, you know you’ll find each other without racing through the streets!
Make sure you have your phones charged and even consider getting a portable charger. When things get tight, a working phone can be your lifeline to loved ones and emergency services. I never go anywhere without mine fully charged anymore!
Evaluate Your Emergency Kits
What to Include
This is where things get practical. I’ve spent some time ensuring that my emergency kit has everything we’d need—food, water, and first aid are just the basics. Make sure to include enough non-perishable food to last at least three days. I prefer items that don’t need cooking, like energy bars and canned goods, because you never know what might happen!
Don’t forget about personal items like medications and glasses. Those little things can make a big difference in your comfort! I keep a small checklist in my kit so I can quickly see if anything needs replenishing.
Lastly, add any important documents or valuables in a waterproof container. It’s heartbreaking to think about losing family photos or important papers. Keeping these handy makes sure you’re prepared for whatever life throws your way!
Stay Informed About Earthquake Activity
Use Technology to Your Advantage
Staying informed is easier than ever, thanks to apps and local news. I’ve downloaded an earthquake app that notifies me of any seismic activity in my area. It’s a game changer! Knowing about tremors before they happen allows me to prepare and keep calm.
Connect with local emergency management agencies, too. They provide up-to-date information and resources, and they can be a reliable source during emergencies. Following their social media accounts or subscribing to newsletters can keep you in the loop.
Lastly, engage with your community. Joining local emergency preparedness meetings can offer more insights, plus it’s a great way to connect with neighbors and develop strategies together. You’re not alone in this; it’s always better when we tackle it as a team!
Frequently Asked Questions
What should I do immediately during an earthquake?
Drop, Cover, and Hold On! Get low to the ground, cover your head and neck, and hold on until the shaking stops.
How can I prepare my home for earthquakes?
Identify and secure heavy items, and make sure you have emergency supplies readily available in a designated spot.
Why is communication planning important during earthquakes?
During an earthquake, things can get chaotic. Having a contact list and designated meeting spot ensures you can find your loved ones safely.
What should I include in my emergency kit?
Include non-perishable food, water, first-aid supplies, medications, important documents, and personal items in your kit.
How do I stay informed about earthquakes?
Utilize earthquake apps, follow local emergency management agencies, and engage with your community for updates and resources.

by Preparation | Apr 18, 2025 | Preparedness
Stay Informed
Follow Reliable News Sources
One of the first things I do when I hear there’s unrest is to turn on the news. It’s super important to know what’s going on, right? I always stick to reliable sources. We’ve got to sift through the noise and be sure we’re getting accurate updates about what’s happening around us. Sometimes it feels like the news can be sensational, so I focus on channels that maintain credibility.
Also, don’t forget about social media. While it can be a double-edged sword, platforms like Twitter can give real-time updates. Just be cautious though; not everything you see online is true. Cross-checking info from multiple sources has saved me from panicking over false alarms more than once!
Setting up alerts on my phone for breaking news allows me to stay in the loop wherever I am. I’d rather be overwhelmed with info than caught off guard. In moments of uncertainty, being informed is your best weapon.
Understand Your Surroundings
Before heading out, I always take a moment to survey my environment. Is there a crowd nearby? Are people congregating for a specific reason? Knowing my surroundings helps me gauge potential risks. I’ve learned the hard way that sometimes trouble can brew out of nowhere, and recognizing early signs can be vital.
Also, I make it a habit to know the locations of safe spots nearby. Whether it’s a police station, a government building, or just a good ol’ café, having a plan is key. If things get dicey, I want to have places in mind where I can seek refuge.
And let’s be honest, it’s not just about staying safe from conflict. Sometimes you just want to escape the noise and grab a cup of coffee until it’s safe to venture out again. Knowing the lay of the land can be a game changer.
Disengage When Necessary
This one’s a biggie for me. I’ve learned the hard way that it’s okay to walk away from a situation if it’s escalating. There’s no shame in choosing safety over bravado. If you find yourself in the midst of a protest or a crowd that’s turning volatile, my best advice is to exit the scene as discreetly and calmly as possible.
Resisting the urge to document everything on my phone has also been a crucial lesson. Sometimes, wanting to capture the moment can put you in harm’s way. Instead, I focus on getting to a safe zone and then assessing the situation if necessary. Trust me; there’s a time for releasing the shutter and a time for self-preservation.
Finally, don’t hesitate to seek help if things get out of hand. Whether it’s from law enforcement or fellow community members, reaching out for assistance can make a real difference.
Keep Your Communications Open
Stay Connected with Loved Ones
During unrest, I like to keep my friends and family in the loop. It gives everyone peace of mind knowing that I’m okay, and I also want to know they’re safe too. Group chats can be a lifesaver; it’s a quick way to pass on updates without having to individually reach out every time.
Before heading out, I usually let a friend or family member know my plans and intended routes. That way, if anything goes sideways, they’ll have an idea of my last known whereabouts. This simple step offers both me and them some extra reassurance.
Moreover, I make sure my phone is charged and I have backup power sources handy. Losing communication can lead to panic, so keeping my devices operational through this type of chaos is crucial.
Utilize Technology Wisely
Apps can be awesome tools during civic turmoil. I like to have a few downloaded that help with navigation, like Google Maps, but also ones that can keep me informed. Some apps send alerts about local disturbances or provide updates on safe areas in real-time.
Social media can be both an advantage and a disadvantage, so I use it wisely. Following local organizations that provide real-time updates can help ensure that I have access to factual information as situations evolve.
And if you have someone who can help from a distance, communicate with them. Having someone keeping an eye on the news can help guide your decisions. In essence, leverage those digital connections for your safety.
Prepare Your Emergency Kit
When unrest is on the horizon, I always make sure I have an emergency kit ready. I keep things simple: water, non-perishable snacks, and a first-aid kit. It’s surprising how calming it is to know that I have some essentials within reach if things take a turn.
I also include medications I might need, along with important documents. While it seems basic, having everything in one place ensures that I grab it quickly if I need to leave. I can’t tell you how many frantic searches I’ve avoided by being prepared.
Additionally, I pack a flashlight and spare batteries. Sometimes, disruptions lead to power outages or blocked roads and having a light source can keep me oriented. A little preparation goes a long way when the unexpected happens.
Be Aware of Legal Rights
Understand Your Rights to Assemble
As a citizen, I think it’s important to know my rights when it comes to demonstrations and civic engagement. It can be daunting to step out during unrest, but knowing that I have the right to voice my opinion can be empowering. I make a point to educate myself on local laws and regulations regarding gatherings.
However, I also remind myself that this isn’t a free pass to act recklessly. Understanding the framework can help me navigate situations much better and make informed decisions about participation or withdrawal from a protest.
Being prepared with this knowledge not only reassures me but also empowers me to stand by fellow citizens if something untoward happens. Community awareness of legal rights fosters a culture of support and protection.
Know How to Document Events
If I find myself in a situation where things turn chaotic, it’s essential to know how to document events conscientiously. This can include capturing video or photos, but here’s the catch: I prioritize my safety first. If documenting puts me in danger, I choose to step back.
When safely recording, I always make sure to be respectful of others’ privacy. The intent should never be to exploit someone else’s situation, and I believe it’s crucial to have empathy in such tense times. Remember, we’re all humans in distress, right?
Ultimately, I think documenting can play a significant role in providing accountability, but I emphasize staying aware of my environment. Balancing awareness and documentation can be tricky, but with practice, we can all share experiences while staying safe.
Have a Plan for Evacuation
Know Your Escape Routes
Planning an escape route can really save my skin during civil unrest. It’s like chess – you need to think a few steps ahead. I prefer to familiarize myself with multiple pathways out of crowded areas, as sometimes the most direct route might be blocked.
Mapping out escape routes might feel a bit paranoid, but trust me, a little forethought can go a long way. I find it useful to choose routes that take me away from potential conflicts rather than directly toward them. Keeping eyes peeled for alternate exits can provide that extra layer of assurance.
Also, when I’m at events, taking mental notes of where security personnel are positioned can guide my decisions should I need assistance or a faster exit. Better safe than sorry, right?
Practice Situational Awareness
I always stay tuned to what’s going on around me, even if I’m just grabbing lunch. It’s about cultivating that sixth sense for danger. This isn’t just being hyper-vigilant; it’s about being aware of body language, sounds, and any changes in the crowd’s behavior.
If things suddenly feel off, I pay attention and don’t hesitate to depart from the area. Trusting instincts has saved me on more than one occasion, and I believe it’s a skill anyone can cultivate with time.
Besides, I think it’s about being engaged with your community, too. The more familiar I am with the people around me and their usual behavior, the easier it becomes to detect when something’s not quite right.
Rehearse Your Exit Plan
Run through scenarios in your head; it may sound goofy, but I often visualize what I’d do if I needed to evacuate. Think of it as a fire drill for civil unrest. Preparing for potential situations mentally can bolster my confidence during an actual event.
Sometimes I even practice with friends and have discussions about what we would do together. This not only solidifies plans but helps keep everyone on the same page. A safer community starts with collective awareness and preparedness.
And if I’ve ever doubted the value of practicing, I look back on times when my gut instincts kicked in because I had prepared. Every little bit of readiness can make a significant difference when it counts the most.
Frequently Asked Questions
1. What should I do if I find myself in a Civil Unrest situation?
It’s crucial to remain calm. Assess your surroundings and decide whether it’s better to stay put or leave the area. Stay informed through reliable news sources and communicate with loved ones about your status.
2. How can I prepare my emergency kit for civil unrest?
Your emergency kit should include essentials like water, snacks, a first-aid kit, medications, important documents, and a flashlight with batteries. Keep everything in one place for quick access.
3. Are there legal considerations to be aware of during protests?
Yes, it’s essential to understand your rights to assemble and voice your opinion. However, ensure you’re aware of local laws to navigate situations responsibly.
4. How can I ensure my safety while documenting events?
Prioritize your safety first. If you can document events safely without putting yourself at risk, do so. Always avoid exploiting situations; approach documentation with empathy and respect.
5. What steps can I take if I feel unsafe in a crowd?
If you feel unsafe, trust your instincts to leave the area calmly and discreetly. Familiarizing yourself with escape routes and maintaining communication with friends can help elevate your safety during unrest.
by Preparation | Apr 18, 2025 | Preparedness
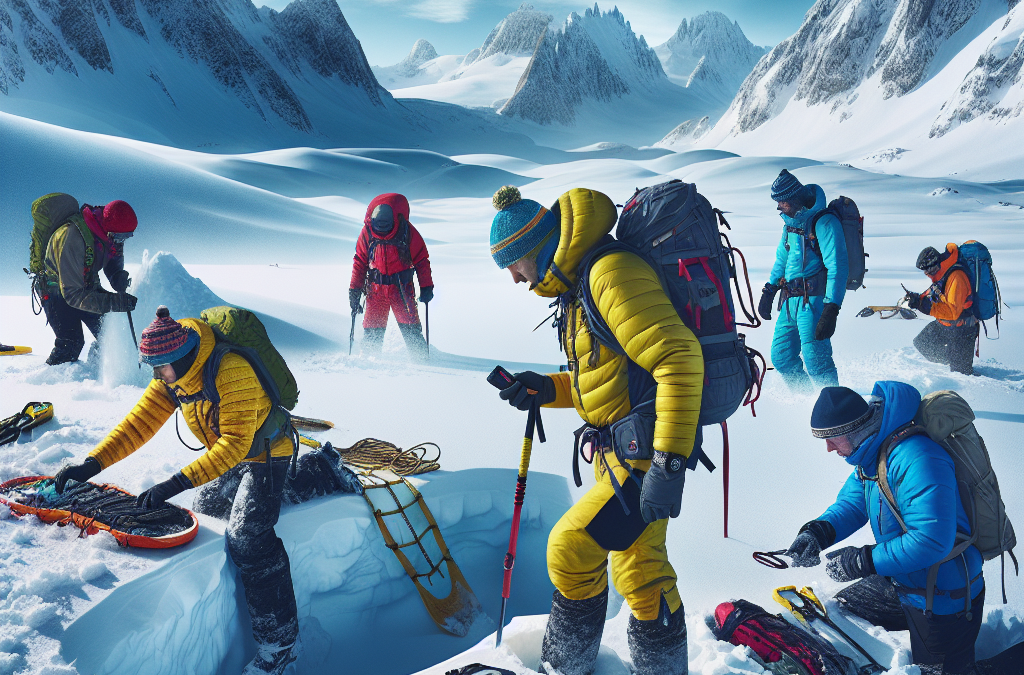
Understanding Avalanche Dangers
Recognizing Snowpack Instabilities
Before heading out into the backcountry during winter, it’s crucial to understand how snowpack operates. Over the years, I’ve spent many hours studying snow layers. Each one behaves differently based on temperature, moisture, and wind. For instance, when new snow falls on a weak layer, it could lead to instability. Recognizing these signs is key to avoiding danger.
I often rely on local reports and guides who provide insights on conditions. Checking resources like the Avalanche Forecast Center can save you from potentially fatal trips. I learned the hard way that even slight changes in weather can make a big difference; for example, a beautiful sunny day can turn a solid snowpack into a risky situation.
Ultimately, understanding the dangers of avalanche terrain isn’t just about knowledge; it’s about being observant. Whenever I’m on the slopes, I make it a point to look for any signs of instability, like cracking or collapsing snow. It pays off to be vigilant.
Planning Your Route
Choosing Safer Terrain
Planning your route is a big deal in the snow. I can’t stress enough how important it is to choose the right terrain. I’ve quickly learned to respect the mountains and dodge steep, open slopes after hearing too many horror stories from fellow adventurers. Ideally, I stick to well-trodden paths or areas known to be safer in winter conditions.
When mapping out my route, I make sure to factor in the current snow stability reports and weather forecasts. Using modern navigation tools like GPS can be a lifesaver; just make sure you fully understand how to use them before you need them. I can’t tell you how many times I’ve had to rely on my device when visibility hit rock bottom!
An important part of route planning is also checking for potential escape routes. When traversing snowy landscapes, keeping your options open can mean the difference between safety and disaster. I have found that mentally navigating the area multiple times can be immensely helpful when you’re focused on getting back safely.
Essential Gear for Survival
Required Avalanche Safety Equipment
Now let’s chat about gear. There’s a bunch of crucial equipment I never hit the slopes without. A beacon, probe, and shovel are the holy trinity for avalanche safety equipment. I can’t stress enough how wearing a personal avalanche transceiver (beacon) can help rescue teams find you in the event of a tragedy.
Choosing a reliable probe is also essential; it can make the process of locating a buried person faster and more efficient. When I first got equipped, I spent time practicing with it before heading out. Learning how to deploy and use my gear in a controlled environment gives me confidence in real emergencies.
Lastly, my shovel – it might seem basic, but I can tell you that having a lightweight, durable shovel can make digging someone out an achievable task. I recommend going for one that’s easy to handle, especially with gloves on. Trust me, you don’t want to deal with a flimsy shovel in a panic!
Rescue Techniques and Practices
Understanding Search Methods
In the scary event that someone is caught in an avalanche, knowing how to conduct a search is crucial. I remember the first time I went through a search and rescue training. It was eye-opening! You’ve got to utilize your avalanche beacon because it dramatically reduces search time, but if the beacon fails, a systematic search is key.
The foundational technique I practice is the “parallel search.” This means moving back and forth across the likely burial area while listening for beeping signals. It’s like something out of a spy movie at times, but I assure you, it works effectively when you keep your focus. Knowing how to fine-tune your listening and watching for the slightest clue can be what saves a life.
And let’s not forget about teamwork. When I’m out there, everyone needs to play their part, keeping constant communication. We’ve got each other’s backs, so knowing who’s looking where and what techniques each person is using can make a big difference in how smooth the rescue goes.
First Aid in the Wilderness
Addressing Cold Injuries
Cold injuries can sneak up on you faster than you think. I recall a chilly day out on the slopes when I began feeling numb in my fingers. I had to immediately educate myself about frostbite and hypothermia symptoms; sometimes it’s just a little tingle that can lead to serious issues. Always be prepared!
Having basic first aid skills can prove invaluable. I’ve made it a rule to carry a first-aid kit whenever I’m out exploring. Basic supplies, including gauze, adhesive tape, and a good antiseptic, can address minor injuries and keep things from escalating. Nothing’s worse than having a long trek back with an injury you didn’t take care of!
Lastly, if you see someone else showing signs of cold injury, don’t hesitate to step in. I’ve learned that sometimes, a simple hot drink or warm pack of hand warmers can make a gradual difference. Keeping an eye on your friends is crucial because, in the snow, we can all get a little too focused on having fun—and safety often gets overlooked.
Frequently Asked Questions
What should I do before heading into avalanche terrain?
Always check avalanche forecasts, understand snowpack conditions, and learn to recognize signs of instability in the snow. It’s essential to plan your route around safer terrains and stay updated.
What gear do I need for avalanche safety?
Key gear includes an avalanche beacon, probe, and shovel. It’s also a good idea to carry a first aid kit and emergency supplies just in case.
How can I effectively search for someone buried in an avalanche?
Utilize your avalanche beacon first. If the beacon isn’t available, perform a systematic parallel search across the last known location of the victim, looking for clues and listening for signals.
What are the signs of cold injury in the wilderness?
Common signs of frostbite include numbness, discoloration of the skin, and pain. Hypothermia symptoms consist of shivering, slurred speech, and confusion. Be aware of these and act quickly!
How can I best prepare for first aid in snow emergencies?
Take a first aid course focused on outdoor scenarios. Always carry a well-stocked first-aid kit on your trips and familiarize yourself with the contents and their uses before you head out.


