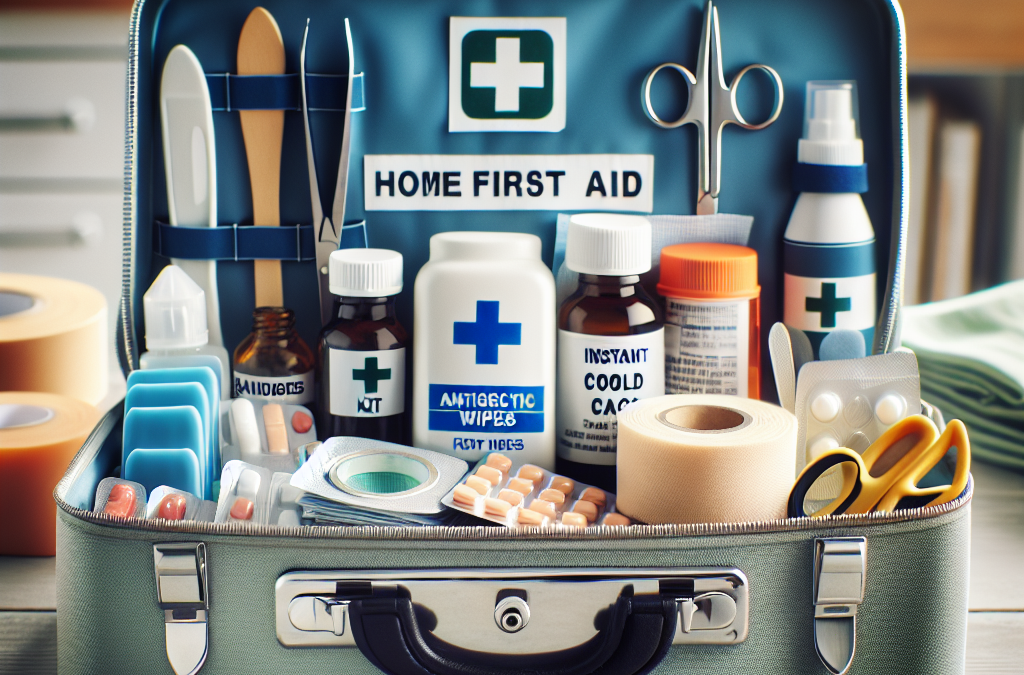
When I first started thinking about putting together a first aid kit, I realized how important it is to have the right supplies on hand. Basic supplies like adhesive bandages, gauze pads, and antiseptic wipes are the fundamental building blocks. Trust me, these items are lifesavers in small accidents, and it’s best to have them close by.
For me, the excitement of creating my own kit made me think of all the “just in case” moments we encounter—tiny cuts, scrapes, and even blister problems. Anyone who’s ever taken a hike knows those shoe blisters can sneak up on you, and having the right band-aid can make all the difference.
Moreover, stocking up on these basics doesn’t need to cost a fortune. You can find most essentials at your local pharmacy or even dollar store. Just remember, you want to ensure everything is easily accessible so you’re not scrambling around when you need it the most.
Choosing the Right Materials
So there’s more to first aid supplies than just what looks nice on the shelf. You really need to think about the materials you’re choosing. For instance, breathable bandages are a must because they help wick moisture away, reducing infection risk.
I like to choose products that come with clear instructions right on the packaging; if I’m in a panic, I don’t want to be deciphering tricky directions. That clarity can save lots of time and keep stress levels down.
Let’s not forget the importance of expiration dates. It’s easy to forget about items hiding at the back of the drawer! I set a reminder to check my kit every six months, so things like antiseptic wipes and ointments don’t go bad.
Special Considerations
Depending on your lifestyle, you might need to include some unique items. For example, if you or someone in your household suffers from allergies, having antihistamines on hand is crucial. Or if you have kids, those adorable cartoon band-aids can encourage them to keep their spirits up after a tumble!
Keep in mind any specific medical needs too. If someone has a prescribed medication or special equipment, that should definitely be included. I’ve learned from experience that incorporating those needs into your first aid plan prevents panic later on.
Last but not least, consider environmental factors. If you enjoy outdoor adventures, some insect bite relief or sunburn cooling gel could come in handy. It’s all about tailoring your kit to fit your personal needs and preferences.
2. Medications You Should Have
Basic Over-the-Counter Medications
I’ve discovered that having a few basic over-the-counter meds in my kit can be a game changer. Pain relievers like ibuprofen or acetaminophen help ease headaches or body aches that can pop up unexpectedly, especially after an active day.
Don’t forget about antacids, either. Those pesky moments when spicy food backfires can be uncomfortable, and having a little something to ease the burn can turn a rough evening into a more bearable one.
And let’s not skip over good ol’ allergy remedies—hay fever can hit hard when the seasons change. Keeping some antihistamines on hand will help you breathe a lot easier during those troublesome months.
Cold and Flu Essentials
No one wants to be caught off guard by a scratchy throat or runny nose, right? I always keep some cold and flu medications in my first aid kit. Syrups, throat lozenges, and nasal decongestants are must-haves for any unexpected illness.
I’ve learned by experience that a little preparation can prevent a lot of discomfort. When those symptoms hit, having the comfort of familiar remedies makes staying cozy on the couch a whole lot better.
Plus, I’ve got to say, it beats making a late-night pharmacy run when you just want to rest up. So stock your kit with what works for you!
Prescription Medications
Now let’s chat about prescription meds. This can get a little tricky because it’s not just about stocking up—it’s about staying organized. I dedicate a little space in my kit for personal prescriptions to ensure I’m always prepared.
One tip I’ve found helpful: keep a list of emergency contacts, including doctors. That way, if something happens and you need a refill or medical advice, you know right where to look.
Make sure to follow the guidelines for storage. Some medications should be kept in specific conditions—like out of sunlight or in a cooler environment. It’s all about keeping everything safe and effective.
3. Tools and Accessories That Matter
Basic First Aid Tools
Definitely don’t overlook the significance of good tools! Scissors, for instance, can help you cut through stubborn bandages quickly when you need to get to an injury.
Also, tweezers are excellent for removing splinters or pulling out ticks, which are way too common in warmer months. Trust me, these tools can make all the difference in an emergency.
Adding a digital thermometer to my kit has truly been a lifesaver. Checking temperatures can guide my responses, especially with the kiddos. A good thermometer means I know when it’s time for a cold compress or a doctor’s visit!
Personal Protection Equipment
When I think about first aid, I always consider personal protection. Disposable gloves have become a staple in my kits ever since I realized how handy they are when dealing with injuries.
Alongside gloves, a basic face mask could come in handy during specific situations, especially if you’re around someone who’s ill. It just adds a layer of safety that goes a long way.
And, don’t forget about a face shield or goggles if there’s a chance for blood sprays, especially in situations where safety is paramount. It might seem like overkill, but being prepared can be a lifesaver!
Storage and Organization
Having all the right tools and supplies is all well and good, but if they aren’t organized properly, it can feel like chaos. I recommend utilizing clear containers or pouches to help keep things sorted and easy to find.
Labeling each section or container makes things super simple. In a moment of panic, you want to grab what you need without hunting through layers of clutter.
Lastly, think about where you’re storing your kit. I’ve created a designated spot in my home that’s both easily accessible but also out of reach from little hands. Finding that balance means I’m ready for anything that comes my way.
4. Tailoring Your Kit to Your Family
Assessing Your Family’s Needs
Taking the time to evaluate my family’s unique needs has made tailoring our first aid kit much more effective. Think about the age of everyone in your household—do you have toddlers or teenagers? Each group brings different challenges.
For parents, adding items like teething gel or pediatric pain relievers can be crucial. And for teens, maybe some acne treatment should be thrown in the mix. It’s all about anticipating what might come up!
Consider any ongoing medical conditions too. Stocking your kit with necessary extras ensures you feel prepared for anything, whether it’s managing a fever for a child or preparing for a fainting spell in a grandparent.
Special Considerations for Pets
And let’s not forget about our furry companions! I’ve found it essential to have pet-specific items in my first aid kit. A basic supply of tweezers or special pet first aid guides can really help in emergencies.
If your pet has allergies, try to keep their antihistamines handy—because trust me; they can suffer too. Canine first aid can sometimes feel like a whole other ballgame, so having resources can ease some worries.
Don’t forget important items, like a muzzle or leash for a scared or injured pet. They can help you manage the situation safely while you access care!
Involving Family Members
One thing I’ve truly enjoyed is involving my family in building and maintaining our kit. It’s a great way to educate everyone about the supplies while also preparing them for possible emergencies.
Each person can take the time to learn what to do in certain situations, from basic CPR to identifying what to grab in a hurry. Plus, having everyone involved sparks interesting conversations about health and fitness!
Make it a family event to restock the kit together—checking expiration dates brings everyone together while also teaching responsibility. It becomes a communal activity, strengthening your family’s preparedness and confidence.
5. Training and Preparedness
Understanding Basic First Aid
If there’s one lesson I’ve learned, it’s that having a well-stocked first aid kit is only part of the equation. Gaining knowledge about how to use those supplies is equally essential. I took a basic first aid course, and it opened my eyes to what I can do in emergency situations.
Learning techniques like CPR, bandaging wounds, or how to treat burns encourages confidence when handling accidents. Plus, it’s empowering to know that I can care for myself and my family when needed.
Many organizations, like the Red Cross, offer great resources and even certifications in first aid and CPR. I highly recommend checking those out—they’ve been game changers for me!
Regular Refresher Courses
Knowledge isn’t enough if it gets rusty over time! I regularly sign up for refresher courses and online webinars, because staying informed is super important. Plus, it’s fun to meet others interested in emergency preparedness!
Even just reviewing materials or reading first aid manuals every now and then can keep life-saving techniques fresh in my memory. Journals and guides often have updated information that may improve my approach to home health emergencies.
Sharing that knowledge with my family can be a good bonding experience too. Together, we work through different scenarios, keeping those important conversations open and ensuring everyone knows what to do when a challenge arises.
Creating a Plan
Beyond gathering supplies, creating a comprehensive emergency plan is essential. I made sure to sit down with my family to discuss what we would do in different situations, like natural disasters or severe injuries. Everyone has a role to play, and knowing that is comforting.
We also set communication plans—deciding who to contact for help or how to find each other in public spaces if separation occurs. It’s all about feeling prepared and knowing we have each other’s backs.
Finally, I have a designated spot to keep our plan accessible, so in the heat of the moment, we can refer to it for guidance. It’s all about remaining calm and collected, and knowing what our next steps should be can help with that tremendously.
Frequently Asked Questions
What is the best place to store a first aid kit?
The best place to store a first aid kit is in a location that is accessible to all family members but out of reach of young children. A kitchen cupboard, a hall closet, or under a bathroom sink usually works well.
How often should I check my first aid kit supplies?
It’s a good idea to check your first aid kit every six months. This helps ensure that all items are in good condition and have not passed their expiration dates.
Can I use expired first aid supplies?
While some items might retain their effectiveness past expiration dates, it’s generally best to replace expired supplies to ensure optimal safety and effectiveness.
Should I include specific medications for family members in my first aid kit?
Yes, you should include any specific prescription medications or necessary items for family members who have ongoing medical needs. Just make sure they’re stored properly!
Is it worth it to take a first aid class?
Absolutely! Taking a first aid class prepares you to handle emergencies effectively and gives you confidence in your skills. Plus, it can be quite empowering!
Disasters can shake us to our core in ways we never thought possible. Whether it’s natural disasters like hurricanes and earthquakes or man-made tragedies, the psychological toll is real. Having navigated my own fair share of emotional upheavals, I can tell you, it’s crucial to categorize our feelings and reactions. Let’s dive into how disasters can affect our mental state and more importantly, how we can learn to cope.
Understanding the Emotional Reactions to Disasters
Common Emotional Responses
Right after a disaster hits, it’s normal to feel a whirlwind of emotions. You might feel fear, sadness, anger, or even numbness. Every person reacts differently to trauma, and acknowledging your feelings is the first step. Once, after a significant event, I found myself oscillating between extreme sadness and a feeling of complete detachment from reality. I realized that these reactions, though unsettling, are part of the healing process.
Understanding that these feelings are common can be liberating. Whether it’s grief from loss or anxiety about future uncertainties, naming these emotions can help in processing them. I often recommend journaling to my friends post-disaster. Writing what you feel, even if it seems jumbled, creates a pathway to healing.
Also, don’t be surprised if these emotions linger longer than you’d expect. Many times, the psychological impact of disasters doesn’t vanish quickly; it morphs over time. Giving yourself permission to feel is key, and it’s perfectly okay to seek out support when needed.
Adjustment Difficulties
After experiencing a disaster, adjusting back to ‘normal’ life can be one of the toughest challenges. You might find reminders of the event trigger anxiety or distress. When I was attempting to resume my routine after a natural disaster, I faced difficulties concentrating on mundane tasks. Everything seemed tinged with worry.
Finding healthy coping mechanisms is vital. For me, joining a support group was a game-changer. Talking to others who had gone through similar experiences helped me realize that I wasn’t alone. Sometimes sharing your story helps weave a narrative that makes life seem less chaotic.
Routine is your ally too. Gradually re-establishing a sense of normalcy can offer comfort. In the aftermath of my own experiences, I focused on small daily tasks—like walking my dog or cooking dinner—as a way to anchor myself amid the chaos.
Physical Symptoms Related to Stress
It’s essential to realize that emotional turmoil can manifest physically. Stress from disasters can lead to symptoms like headaches, stomach issues, or fatigue. I learned this lesson during a particularly stressful time. My body literally started sending me red flags, and I knew I needed to listen.
When your mind is in distress, the body often reflects that turmoil. Acknowledging physical symptoms and treating them gently is so important. Techniques like deep breathing, meditation, or light exercise helped me. I even took up yoga, finding that it not only calmed my mind but also eased physical tension.
Remember, your body is battling too! Make sure to prioritize self-care. Whether that’s indulging in a hobby you love, or simply taking a warm bath, nurturing yourself can go a long way in helping you recover holistically.
Identifying and Addressing Trauma Symptoms
Recognizing Trauma Signs
Trauma can be sneaky. Sometimes, the signs don’t show up until weeks or even months later. For me, I noticed I was becoming easily agitated, and certain sounds or images from the disaster would send me spiraling. Recognizing these signs is crucial; it’s the first step toward finding help.
Symptoms can range from intrusive thoughts about the event, hypervigilance, or even avoiding places or reminders that trigger distress. I once avoided a park where I had experienced a traumatic event. Understanding that avoidance often stems from fear made it easier for me to confront my feelings.
It’s key to approach trauma with patience. Each person’s healing timeline is unique. Acceptance of where you are is essential for moving forward without fear or shame about your recovery journey.
Seeking Professional Help
Let’s face it—often we need a little extra help, and that’s totally okay! Talking to a professional can provide tailored guidance and coping strategies. I remember feeling apprehensive about seeking therapy after my experiences, but it turned out to be a blessing in disguise.
Finding someone you trust is essential. Whether through personal recommendations or online directories, look for someone who specializes in trauma care. Therapy gave me tools to manage my anxiety and helped me explore my feelings constructively.
Don’t hesitate to reach out! Seeking help is a sign of strength, not weakness. It’s okay to lean on experts who can provide a safe space for you to explore your feelings—trust me, it can transform your healing journey.
Building a Support Network
Connecting with family, friends, or community members can shore you up during tough times. After experiencing disaster, isolation can sneak in, but I’ve found that sharing the weight of that burden makes a world of difference. Organizing meet-ups or joining community support groups can strengthen your network.
Never underestimate the power of a listening ear. I often invite friends over just to hang out, allowing a casual environment to talk about life, feelings, or just to enjoy a good movie together. It’s comforting to know you’re not alone in the aftermath.
Remember that it isn’t just about talking; giving support to others can be equally healing. Sometimes, being there for someone else helps us process our own experiences. Strength breeds strength, and community can be a powerful part of our healing process.
Developing Coping Strategies and Skills
Healthy Coping Mechanisms
Creating a toolkit of coping strategies can help you navigate post-disaster life. I’ve learned to combat my anxiety through various methods—some are physical, while others are creative or contemplative. For instance, simple things like going for a run or engaging in art have proven therapeutic for me.
It’s all about discovering what works for you. Experiment with tools like mindfulness, journaling, or even gardening. When I tend to my plants, I find peace in the rhythm of watering and caring for them. That connection to nature brings grounding to the chaos within.
Your toolkit should be unique to you! Whether you enjoy cooking, running, painting, or meditating, prioritize activities that bring you joy and calmness. Having these coping strategies in place can arm you when stress strikes.
Building Resilience
Resilience isn’t about being tough but rather about adapting, learning, and bouncing back from adversity. I’ve found that every disaster has taught me something valuable about myself. It’s about reframing your mindset and embracing the idea that you can overcome challenges.
Start by setting small goals for yourself. After a disaster, I focused on tiny achievements—like getting out of bed on time or having a healthy meal. Celebrating those little wins can build confidence and encourage you to tackle bigger challenges ahead.
Building resilience often includes fostering optimism. Surrounding myself with positive and supportive people has helped craft an uplifting environment that encourages recovery. Remember, it’s okay to lean on others. Together, we can be stronger.
Practicing Self-Care
Finally, never underestimate the power of self-care. In times of crisis, self-care can often be neglected. I’ve realized that prioritizing my own needs is crucial in being able to show up for others. It’s not selfish; it’s essential.
Establishing routines that include self-care practices can provide stability. Whether that means reading a book, treating yourself to a spa night, or simply taking time to breathe deeply, it’s vital. After all, if your tank is empty, you can’t help others fill theirs!
Make self-care a non-negotiable part of your day. When I began checking in on myself regularly, I noticed that my overall wellbeing improved. You deserve love and care just as much as anyone else. Prioritize yourself because it’s a pivotal part of healing.
Frequently Asked Questions
1. What are the common emotional reactions to disasters?
Common emotional reactions to disasters include fear, anxiety, sadness, anger, and confusion. It’s perfectly normal to experience these feelings, as everyone copes in their own unique way.
2. How do I know if I’m experiencing trauma symptoms?
Signs of trauma can include intrusive thoughts related to the disaster, heightened anxiety, mood swings, and physical symptoms like headaches or fatigue. If these symptoms persist, it might be beneficial to consult with a professional.
3. What should I do if I feel isolated after a disaster?
If you feel isolated, reaching out for support is essential. Join local groups, connect with loved ones, or consider talking to a therapist who can help you rebuild your social connections.
4. How can I practice self-care during difficult times?
Practice self-care by incorporating activities that nourish your mind and body. This can include exercise, meditation, hobbies, and simply making time for relaxation. Prioritize your well-being like it’s your lifeline—because it truly is.
5. When should I seek professional help after a disaster?
If your symptoms are significantly impacting your daily life, or if they persist for several weeks, it’s a good idea to seek professional help. A therapist can provide valuable support and coping strategies tailored to your situation.
Let me tell you, being prepared as a renter is absolutely crucial. From my experience, you never really know when something is going to go wrong—floods, fires, or even unexpected maintenance issues can pop up out of nowhere. It’s like life throwing a curveball when you least expect it. Being prepared gives you peace of mind and ensures that you’re not left scrambling when things go awry.
Plus, let’s be honest, being a renter means that you’re navigating a different ballpark compared to homeowners. Your landlord has certain responsibilities, but you can’t always rely solely on them. If there’s an emergency, you need to have a game plan ready to go. That’s why I’m all about keeping things organized and knowing what to do.
And speaking of knowing what to do, staying aware of local emergency procedures is a biggie. Trust me, knowing your building’s evacuation routes and emergency contacts can be a lifesaver—literally! It puts you one step ahead in stressful situations when everyone else might be panicking.
Creating an Emergency Plan
Developing Your Plan
Alright, let’s get real. The first step in creating an emergency plan is just sitting down and making a list. I know it sounds boring, but hear me out! Identify potential emergencies specific to your area. For instance, if you live near a fault line, earthquakes should be on your radar. Or if you’re in a hurricane zone, that’s another thing to consider.
Once you’ve pinpointed those emergencies, take it a step further. Think about how you’d respond. Who would you contact? Where would you go? Write this all down. I can’t stress enough how helpful it is to have a printed copy tucked away somewhere handy in your apartment.
Lastly, don’t forget to involve your roommates or family members in this process. Everyone should be on the same page about the emergency plan. A quick meeting over snacks can help everyone understand their roles, and it makes the whole thing feel less daunting!
Building an Emergency Kit
What to Include
Your emergency kit is basically your survival bag! You want to pack it with all sorts of essentials to get you through unexpected situations. Start with the basics: food, water, and first aid supplies. It’s crucial to have enough non-perishable food to last a few days, just in case you can’t get to a store.
Don’t forget important documents, like rental agreements and IDs. Store these in a waterproof bag. In case of emergencies, the last thing you want is to be fumbling around for your lease in the middle of disaster. I’ve been there, and it’s so frustrating!
And hey, add some personal touches to your kit! Maybe it’s a flashlight with extra batteries or a blanket to stay warm. Think about what would keep you comfortable or safe during a tough time. Having items that make you feel a bit more at ease can make a world of difference when things get crazy.
Staying Informed and Connected
Use Technology to Your Advantage
In today’s world, staying informed has never been easier, and you should totally take advantage of that! I use apps that send warnings about severe weather or emergencies in my area. Set these up on your phone and keep notifications turned on—you never know when something important will pop up!
Beyond apps, consider connecting with your neighbors. Having a solid community can be incredibly helpful. I’ve found that simply introducing yourself to neighbors can lead to exchanging contact info. You never know when someone will be able to lend a helping hand!
Also, don’t shy away from local resources! Many communities host preparedness workshops or provide valuable resources. Getting involved not only helps you learn but also connects you with others who are in the same boat.
Review and Practice Your Plan
Testing Your Plan
Okay, so you’ve got your plan and your kit—now what? Reviewing and practicing your emergency plan is super key! I recommend going over your plan at least once or twice a year. Things change, and so do your needs, so keeping your plan fresh is important.
And practice makes perfect, right? Doing a mock drill with your roommates or family can help everyone feel more confident. Plan out what you’d do in different scenarios. You’ll even pick up on any gaps in your plan when you run through it together.
Finally, give your emergency kit a good once-over. Check expiration dates on food and batteries, and refresh any supplies that are low. Doing this will keep you prepared and ensure you’re ready for anything life throws your way!
FAQs
1. What should I include in my emergency kit?
You should include non-perishable food, water, a first aid kit, personal documents in a waterproof bag, flashlights, batteries, and any comfort items you might need.
2. How often should I review my emergency plan?
It’s a good idea to review your emergency plan at least once or twice every year, especially after any major life changes or if you move to a new place.
3. How can I stay informed about emergencies in my area?
Utilize apps that send alerts about severe weather or local emergencies. Also, consider joining local neighborhood groups or community boards to stay updated.
4. Should I involve my roommates in the preparedness process?
Absolutely! Involving your roommates (or family members) ensures that everyone is on the same page and knows their role during an emergency, which makes everything smoother.
5. What’s the first step I should take to prepare for an emergency?
The first step is to sit down and identify potential emergencies that are relevant to your area, then create a comprehensive emergency plan tailored to those risks.
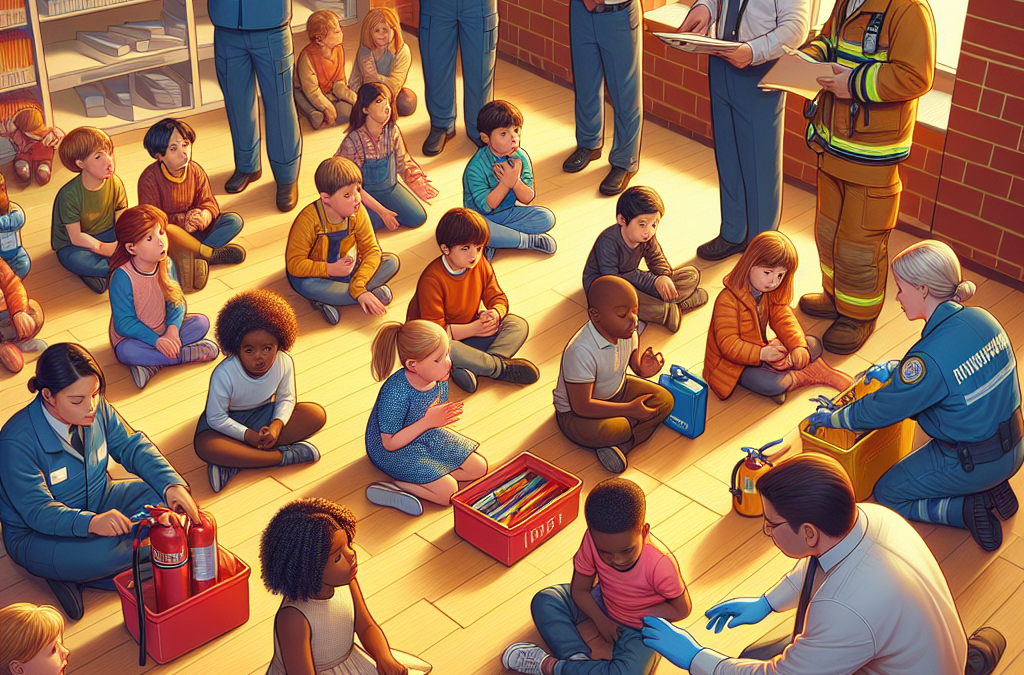
So, first off, we’ve gotta talk about what an emergency even is. Sometimes, it’s not just those massive situations like fires or earthquakes. It could even be something simpler like getting lost in a store! Recognizing the difference helps kids grasp the gravity of various situations.
I like to keep it engaging, so I often share stories or examples from my own life. It makes it relatable and, honestly, a lot more fun! Plus, when they can visualize their own experiences, it sticks better.
Getting kids to identify what an emergency looks like helps them understand when it’s time to react. Whether it’s feeling unsafe or needing help, it’s crucial they feel empowered to recognize those moments.
The importance of staying calm
If there’s anything I’ve learned, it’s that staying calm in a crisis can be a game-changer. Kids often take cues from adults in stressful situations. If they see panic, they might freak out too! I work on ways to model calmness through breathing exercises or grounding techniques, which they can use when things get tense.
When I practice this with children, I act it out. I pretend to be in a stressful situation—maybe I’m pretending to lose my keys—and I show them how to breathe and pause before reacting. It’s all about fostering a reaction they can remember when the heat is on.
Praise always helps when they show calmness in a practice drill. I make it a point to highlight how relaxing and focusing helped them navigate through the scenario. Positive reinforcement goes miles with kiddos!
Encouraging questions
Creating an open environment for questions is super important too. Kids are naturally curious, and I find that they often have brilliant questions that lead to deeper discussions about safety and emergency response. I always encourage them to ask anything, stressing that no question is too silly.
When they ask, I make sure to give thorough answers—using language that they’d understand, of course! I might share real-life examples where appropriate, linking back to discussions we’ve had previously. This way, it feels like a dialogue rather than a lecture.
Through this exchange, it nurtures their critical thinking. They learn not just to know facts, but to connect those facts to real-world scenarios. It’s all about stimulating their minds, and it certainly makes the experience more meaningful!
Developing a Safety Plan
Creating a family action plan
Alright, let’s dive into the nitty-gritty of making a solid family safety plan. First off, it’s about collaboration! I love getting everyone’s input, even if it sounds a little silly. Children have a way of thinking outside the box that adults sometimes forget.
We sit down together and brainstorm what we’d do in varied emergencies. I have them suggest things, and we build a really clear, step-by-step plan. Making it visual, like on a poster board, helps them remember the key points!
Then, I’ll have practice drills based on our action plan. We treat it like a fun game, and the kids get to be the heroes of the story, responding and executing our emergency plan. This practice is key, as it builds muscle memory for when they need to act!
Identify safe spots and escape routes
Next up, we map out safe spots in our home and community. It’s like our own little treasure map to safety! Honestly, kids think it’s cool to know where to go in case things go awry.
When we go over our escape routes, I like to make it interactive. For instance, we practice “what if” scenarios, and I ask questions on how we would get to safety. It sparks their imagination and keeps them engaged.
Giving them ownership on knowing these routes makes a difference! They begin to feel responsible for their own safety, and that’s empowering for them. It builds confidence, which is super important in high-stress situations.
Regular family drills
You know what’s next? Having regular drills! But let’s be real, we can turn these into something fun and not super serious. I suggest planning them out on the family calendar like a special event—it’s a great way to remind everyone to take it seriously but also enjoy themselves.
I like to mix things up so it doesn’t get boring. One time, we went outside and did a “fire drill” with a twist—we pretended we had to run with our favorite stuffed animals! It ended up being a hilarious bonding moment.
Afterwards, I always check-in to see how they felt about the drill. What worked, what didn’t, and what they’d like to do differently next time. This feedback loop is so crucial for their learning and for fine-tuning our plan!
Teaching Basic First Aid
Essential first aid skills
When talking about emergencies, knowing some basic first aid can really empower kids. I like to start with simple stuff—like cleaning a cut or putting on a bandage. Hands-on practice is key, so I often use fake injuries for them to work on!
Throughout these activities, I ensure that kids are actively engaged. We make it a team effort—everyone gets involved, and I encourage them to ask questions, helping them learn better as they practice.
Also, I keep it light-hearted! Sometimes it’s worth a laugh to stumble through a task together. They learn and bond at the same time, which adds to their confidence in these skills. Plus, they get to leave the session feeling like little medics!
Recognizing when to seek help
Sometimes, knowing when to step back from first aid and get professional help is just as important as the skills themselves. I like to discuss situations that might require a call to a trusted adult or 911. Understanding this distinction is crucial to ensure they don’t try to tackle things beyond their capabilities.
To make this relatable, we often role-play different situations. I’d act out being hurt while kids identify responses, such as when to call an adult. They feel like mini-heroes being decisive in these scenarios, which is a huge confidence booster!
Reinforcing that asking for help is strong rather than a weakness helps too. I want them to know that seeking advice from trusted adults is always a smart move in sticky situations!
Practice makes perfect
Lastly, it’s all about practice! I emphasize that just like sports or music, the more they practice first aid skills, the better they become. We set aside time each week, where we revisit and refresh their first aid knowledge.
Not only does this continue their learning, but it builds their confidence and helps them become more comfortable in real-life scenarios. It’s like turning them into mini-experts without them even realizing it!
And hey, who knows? One day, these skills could genuinely come in handy. They might save a friend, and that’s a fantastic feeling! It’s all about instilling both knowledge and courage in these young minds.
Practicing Communication Skills
Effective verbal communication
So, let’s talk about one of the most important aspects of emergency response—communication! It’s not just about knowing what to do; it’s also about being able to tell others about it. I start with simple games about expressing ideas or emergencies using just words, practicing calm and clear dialogue.
I find that when kids practice articulating their thoughts aloud, it helps them in high-stress situations to communicate what’s going on, and to share their needs with trusted adults. It’s that whole concept of making sure their voice is heard, especially in a crisis.
Having storytelling sessions can be fun for this too! They can create stories about emergency scenarios, making them verbalize their thoughts in an entertaining way. They’re learning while having a blast!
Non-verbal cues
But let’s not forget about non-verbal communication! Sometimes, it’s the stuff we don’t say that speaks the loudest. Whether it’s body language or facial expressions, I stress how essential it is to recognize these cues.
I set up activities where kids have to guess emotions based solely on facial expressions. It’s a great way to enhance their observational skills! We discuss how someone might feel during an emergency and how they can communicate compassion, support or alertness through these cues.
Emphasizing that they can also use their body language to show that they’re serious, calm, or trying to communicate can be super effective in an emergency. They could use their body to direct others for help, too.
Role-playing emergencies
One of my favorite methods to teach communication is through role-playing! I find that immersing kids in a scenario often allows them to verbalize responses naturally. We set up different emergency scenarios where they take turns being the one in need of help, then the helper.
This back-and-forth fosters empathy while showcasing how effective communication can change outcomes in an emergency. They can practice using clear language to both explain the situation and seek assistance.
Honestly, kids have a blast with it, and it doesn’t feel like a lesson! I always end the role-plays with a little debrief—what went well and what could be improved. It ties everything together while reinforcing their learning!
Conclusion
Training children on emergency response is an ongoing journey. It’s about making it fun, engaging, and empowering! As someone who’s walked this path, I’ve seen the positive impact it has on kids’ confidence. They bloom when they know they can handle what life throws at them.
It’s all about empowering them with knowledge and skills that could make a difference. They become more aware, more communicative, and capable of taking action when needed.
So if you’re like me, thinking about how to best prepare the next generation for any bumps in the road, keep it open, light-hearted, and fun. You’ll create lasting memories while ensuring they’re ready to handle emergencies with confidence!
FAQ
What types of emergencies should children be trained for?
Children can be trained to recognize various emergencies, including fires, medical situations, getting lost, severe weather, and other unexpected events. It’s crucial to cover a range of scenarios to prepare them adequately.
How can I make emergency drills engaging for kids?
To keep emergency drills engaging, incorporate fun elements like games, role-playing, or themed scenarios. Keeping things light-hearted while simulating real-life situations helps children feel less overwhelmed and more prepared.
At what age should children start learning about emergency response?
There’s no one-size-fits-all answer, but around ages 4-5, children can start learning about emergencies in simple terms. As they grow older, you can introduce more complex concepts and skills tailored to their maturity level.
What resources are helpful for teaching children about emergencies?
There are various resources available! Picture books, interactive apps, videos, and local community workshops can all help teach kids about emergency response. Hands-on practice and engaging discussions are also invaluable tools.
How do I ensure my child remembers what they’ve learned?
Repetition is key! Regularly reviewing what they’ve learned through fun discussions or practice drills helps reinforce their knowledge. Celebrate their progress and encourage questions to keep them engaged and confident in their skills.
Hey there! Let’s chat about the sustainable practices I’ve embraced for long-term food storage. It’s kind of a passion of mine, you know? It’s all about being smart with what we have and ensuring that good food doesn’t go to waste. So, here are the five key areas I focus on, and I can’t wait to share my experiences with you!
Choosing the Right Storage Containers
Materials Matter
First things first, the materials you choose for food storage can really make or break the whole operation. I’ve experimented with glass, metal, and plastic containers. Personally, I love glass because it’s non-toxic and doesn’t leach chemicals into my food. Plus, it’s super easy to clean!
That said, I do have a few sturdy plastic containers for things like grains and beans. It’s all about balance! Just make sure any plastic you use is BPA-free to keep things safe and healthy.
Don’t forget about vacuum seal bags! They’re fantastic for stashing away the goodness while eliminating extra air. It’s like wrapping your food in a protective hug, helping it last longer.
Size and Shape
Let’s talk about size and shape! I’ve got various sizes of containers – small for snacks and large for bulk items. It’s super practical to have a variety on hand. I can’t tell you how many times I’ve regretted using too big of a container for just a bit of food.
Also, consider the shape of your containers. I mean, stackable containers can save a ton of space in the pantry or freezer. Plus, you get that satisfying look of organization that makes me feel all warm and fuzzy inside!
Remember, it’s not just about storage; it’s also about making your kitchen look good. You know, eye-catching containers make a difference, and we all love a bit of aesthetic appeal.
Sealing and Labeling
Sealing is like the cherry on top of good storage practices! Make sure your lids are airtight to keep moisture and pests at bay. I love doing the double-check, making sure I hear that satisfying ‘pop’ when I seal a jar.
And can we talk about labeling? I can’t stress how much easier meal prep becomes when I know exactly what’s in each container. I started using a simple label maker and it’s a total game-changer. No more mystery jars lurking in the back!
And hey, don’t forget about dates! It’s important to keep track of when things were stored, especially if you’re using the “first in, first out” method. It saves you from the stress of trying to remember what’s in there!
Utilizing Preservation Techniques
Canning
Canning has been an absolute lifesaver for me! I remember the first time I tried it; I was so nervous but now it feels like second nature. The thrill of watching those jars seal is just exhilarating. I like to can tomatoes, fruits, and even some pickles.
The best part? It preserves the taste of summer all year long! Just be sure to follow safe canning guidelines. We don’t want any botulism creeping into our goodies.
I always set aside a weekend for canning, turn up some tunes, and have fun with it. It’s like a mini-party in the kitchen, and I get to share the fruits of my labor with friends!
Freezing
Freezing is another awesome technique I swear by! Seriously, it’s amazing how much food you can save by freezing. Fresh fruits, veggies, and even some cooked meals can easily be frozen for later use. I often spend a few hours prepping food for freezing whenever I have a surplus from the garden.
One tip I’ve learned is to slice or chop food before freezing. It makes it easier to portion and use later. Plus, foods like berries freeze perfectly on a baking sheet before they get stored in bags, preventing those clumps.
Don’t overlook the power of meal prep on your freezing days! I like packing entire meals in freezer-safe containers, so all I need to do is pop one out and heat it up. Believe me, it’s a lifesaver on those busy weeknights!
Dehydrating
Dehydrating food has become somewhat of a hobby for me! I love turning fruits into tasty chips or creating my own vegetable powders. It’s pretty cool knowing I can stretch out the life of food in a fun and creative way.
If you’re thinking about trying dehydrating, get a good dehydrator! It makes the process so much easier. I often whip up a batch of apple chips or dried herbs, and they last forever.
Plus, dehydrated foods make awesome snacks for road trips or hikes. They’re lightweight and packed with nutrients, which is a win-win. I even toss some in my granola, and it takes breakfast to a whole new level!
Buying and Storing in Bulk
Finding Local Sources
Buying in bulk from local farmers and markets is one of my favorite ways to save money and minimize packaging waste. I love talking to the vendors about their practices and knowing where my food comes from. It’s like connecting with my food on a deeper level!
Also, many local co-ops offer bulk buying options for grains, beans, and spices. Plus, you can bring your own containers, which feels great and helps cut back on single-use plastics.
Support your local economy! It’s so rewarding to build relationships with farmers and see my money going directly to them instead of big corporations.
Proper Storage Techniques
When it comes to storing bulk items, organization is key! I use clear bins labeled for grains, beans, and other staples. It makes it easy to grab what I need without rummaging around, saving me time and potential mess.
Also, keep a close eye on the temperature and humidity in your storage area. A cool, dark place is ideal for most items. Trust me, it’s worth investing in good storage solutions to protect your bulk buys.
Don’t be afraid to portion bulk items into smaller containers for easier use. I often do this with items like rice or flour, just to keep things fresh and manageable.
Using the Right Oxygen Absorbers
Finally, I use oxygen absorbers when I’m storing large quantities of dried foods. They help keep them fresher for longer! Just make sure to follow the instructions for how many to use based on the size of your storage container.
I like to buy them in bulk online, and they’re a total game changer! Knowing that I’m preserving my food efficiently gives me peace of mind and reduces waste. It’s like having a secret weapon in my food storage arsenal.
And don’t forget: Always check the expiration dates and replace the absorbers as needed. Keeping things fresh means you’ll always have delicious food at the ready!
Creating a Meal Planning Routine
Plan Ahead
Meal planning has been a total lifesaver for maintaining my food storage. I try to dedicate a bit of time each week to plan out meals based on what I have stored. It not only reduces waste but also saves time during busy weeks!
I love creating a simple template to keep track of what I’ll be using from my pantry and freezer. It’s nice to know that I can whip something up without scrambling for ingredients at the last minute.
Plus, it’s a fun opportunity to try new recipes! I regularly browse through cookbooks or blogs for inspiration, especially to make use of whatever’s in season. Cooking becomes an adventure!
Incorporating Seasonal Foods
When meal planning, I always keep the seasons in mind. Incorporating seasonal produce not only supports sustainable practices but also enhances flavor. Being aware of what’s in season often leads me to new ideas for dishes!
Using seasonal ingredients can also save you money when shopping at local markets. It helps me stay connected with nature’s cycles and keeps my diet varied and exciting.
Don’t hesitate to explore farmers’ markets for unique seasonal finds. You might discover some delightful fruits or veggies that you’d never thought about using before!
Keeping Track of Inventory
Finally, keeping an inventory of what I have on hand is essential. I simply use an app on my phone or even a good old-fashioned notepad. It helps me stay organized and avoid overbuying.
Plus, it’s satisfying to check things off as I use them up. I often feel like I’m on a mission to use everything in my pantry before it goes bad!
Don’t forget to regularly reassess your stock, especially when buying in bulk. This way, you can prioritize meals and ensure that what you have is being used rather than stored indefinitely.
Incorporating Sustainable Practices
Minimizing Waste
Sustainability isn’t just a trend; it’s a lifestyle. I focus on minimizing waste by using food scraps creatively. Those veggie peels? Yes, they can become broth! And stale bread? Croutons, here I come!
I’ve made it a point to share these tips with friends and family. It’s honestly heartwarming to see others embracing less waste in their lives. Plus, sharing ideas can spark fresh inspiration!
By keeping our waste minimal, we contribute to a healthier planet. It’s a small change that can lead to significant impacts. We can all make a difference, one food scrap at a time!
Educating Others
I believe that sharing knowledge can lead to broader changes in our communities. Conversations about food storage, sustainability, and minimizing waste can lead to real action. I love hosting little workshops with friends where we dive into storage techniques and canning.
Social media is another great platform for spreading the word. I often share my food storage successes (and sometimes failures!) on social channels to encourage others to give it a go. It feels like a supportive community effort!
Everyone can benefit from learning about food storage practices. The more we know, the more empowered we feel to make sustainable choices!
Supporting Sustainable Brands
One more way to practice sustainability is by supporting brands that focus on eco-friendly practices. I’m mindful of where I buy my storage containers, food, and other supplies. It feels good to invest in companies that prioritize our planet.
There are awesome brands out there that make biodegradable or reusable storage solutions. I often do a little research before making purchases to ensure my money goes to the right places!
By supporting sustainable brands, we send a message that we care about the environment. It feels good to know that I’m playing a part in fostering change, and I hope it inspires others to do the same!