
by Preparation | Oct 22, 2024 | Preparedness
Understand Your Environment
Know Your Land
One of the first things I learned when I decided to go off-grid was the importance of really understanding the land I was living on. Every piece of land has its own unique features, whether it’s the types of plants that grow there or the flow of water. I spent a lot of time just wandering around, taking notes on where the sun hit during the day, and which areas stayed wet. This helped me figure out the best spots for gardening and setting up my living area.
Besides the plants and water sources, you have to pay attention to wildlife too. Some critters can turn your dreams of self-sufficiency into a nightmare if you’re not careful. By familiarizing myself with the local animals, I learned to identify which ones were likely to cause trouble, allowing me to take preventive measures like building better fencing or creating barriers.
Last but not least, understanding the weather patterns in my area helped to prepare me for storms, droughts, or extremes in temperature. I remember my first winter off-grid, when I was woefully unprepared for the amount of snow that fell. Now, I always invest time in learning about seasonal changes and climate trends, which makes a world of difference in surviving off the grid.
Master the Art of Food Production
Grow Your Own Food
When I made the leap into off-grid living, I quickly realized that relying on stores for food just wouldn’t cut it. Growing my own food was not only necessary but surprisingly rewarding. I started with the basics: veggies like tomatoes, beans, and lettuce. Learning which plants work well in my climate was a game changer, and I often reference books and online forums for tips from other experienced growers.
About a year in, I discovered companion planting and how it can maximize the efficiency of my garden. For example, growing basil near tomatoes not only helps repel pests but can also boost the flavor of my fruits. It’s a fun experiment and one that adds depth to my gardening skills.
Plus, I learned to forage for wild edibles in my area. This added enormous value to my diet. I couldn’t believe the variety of food available right outside my door! With a good field guide and some practice, foraging turned into a fantastic supplement to my home-grown meals.
Become Handy with Tools
Familiarize with Basic Repairs
One of my biggest lessons about living off-grid was to get comfortable with tools and repairs. I can’t tell you how many times a sudden plumbing issue or broken appliance caught me by surprise. Initially, I felt overwhelmed. But every hiccup presented an opportunity to learn. I began with some basic tools and a lot of YouTube tutorials.
Over time, I developed a knack for simple home repairs, and it saved me a ton of money. Instead of hiring someone to fix leaky pipes or replace fixtures, I now tackle these issues myself. It’s so satisfying when you can fix a problem with your own two hands!
I also learned that preventive maintenance is key. By regularly checking on my systems—like the roof or water supply—I could catch problems early before they spiraled into bigger issues. It’s all part of the off-grid experience, and I genuinely enjoy the sense of accomplishment it brings.
Harness the Power of Renewable Energy
Setting Up Solar or Wind Energy
Energy is a huge part of off-grid living, and I quickly realized that harnessing renewable energy was essential. After a lot of research, I opted for solar panels since I live in a sunny area. Setting them up was easier than I expected, but I took my time to install them correctly.
Learning how to monitor my energy usage was also vital. I became more conscious of how much power my appliances consumed and adjusted my habits accordingly. For instance, doing laundry during peak sunlight hours helped maximize the solar energy I produced.
Wind energy is another avenue I explored. While I eventually decided to focus more on solar, wind turbines are great in windy areas. Understanding how these renewable sources work not only helps keep my energy bills nonexistent but also reduces my footprint on the planet.
Build a Support Network
Connect with Fellow Off-Grid Dwellers
No one does it completely alone, and building a support network has been crucial in my off-grid journey. I first connected with folks in local farmer’s markets and workshops. It’s beneficial to meet people who are on the same path, exchanging tips and experiences is incredibly enriching.
Social media groups and online forums have also become invaluable resources. Sharing experiences and problems with others who understand the lifestyle has saved me countless headaches. There’s nothing quite like hearing someone else’s story and realizing, “Hey, I’ve dealt with that too!”
Moreover, sometimes it’s just about having a friendly face around for moral support or a little help on a big project. From barn-raising to community gardening, finding those who share your passion for self-sufficiency offers the encouragement that makes this lifestyle livable.
FAQs
1. What is the first step to living off-grid?
The first step is to understand your environment. Knowing the land you’re living on is crucial for survival, so spend time learning about local resources and nature.
2. How can I grow food if I’m new to gardening?
Start with easy-to-grow veggies, and consider using companion planting techniques to maximize your yield. There’s a ton of resources available to help you get started!
3. What tools should I invest in for off-grid living?
Basic hand tools and power tools like a drill or saw can be incredibly useful. It’s also good to have plumbing and electrical repair tools, depending on your setup.
4. How do I ensure I have enough energy living off-grid?
Explore solar power and wind energy options. Monitor your consumption to manage your usage effectively and make adjustments based on your energy production.
5. Why is building a support network important?
Having a support network of fellow off-grid dwellers provides encouragement, shared knowledge, and assistance when tackling challenges that come up in this lifestyle.
by Preparation | Oct 21, 2024 | Preparedness
Assess Your Environment and Risks
Understanding Your Surroundings
First things first, take a good look around your home or office. What potential hazards do you see? Whether it’s a nearby river that could flood, a busy street you’re close to, or even just the layout of the building, knowing what risks are present is crucial.
Make sure you’re aware of the various exits available. Some buildings have hidden emergency exits that might not be obvious at first glance. Familiarizing yourself with those exits can save precious seconds during an emergency.
I also recommend keeping a mental or written note of nearby landmarks. These can serve as important reference points, especially if the lights go out or panic sets in. You want to know where you’re headed when the urgency kicks in!
Identifying Potential Evacuation Routes
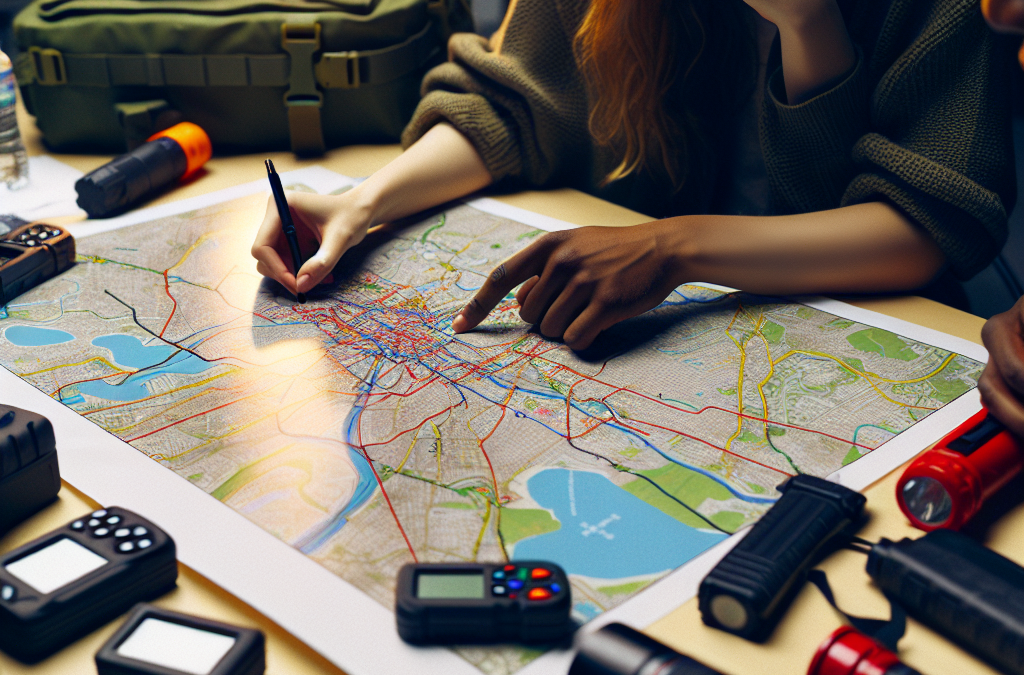
Now that you know your surroundings, it’s time to figure out which routes you could take. Walking, driving, or even biking—there’s often more than one way out. I like to say, “Don’t put all your eggs in one basket,” so explore various ways to exit safely, depending on your location.
Create a map, even if it’s just a rough sketch! I remember drawing a map of my apartment complex once, charting out the quickest routes to the exits. That way, if something ever happens, I feel much more prepared and confident.
Don’t forget to consider different scenarios. For instance, if there’s a fire and smoke is pouring out of one exit, what’s your backup? Plan A may quickly turn into Plan B, so be ready for anything!
Check Accessibility and Obstacles
Next, think about accessibility for everyone in your household or workplace. If you have elderly folks or individuals with mobility challenges, make sure those routes cater to their needs. The last thing you want in an emergency is for someone to struggle to get out.
Also, while doing this, consider any obstacles that might block your chosen routes. Is there furniture, gates, or maybe even landscaping that could make getting out tricky? Assessing these obstacles early can save a lot of hassle later.
And don’t forget about pets! If you have furry family members, include them in your evacuation plan. A sudden dash for the door might need an extra step to grab them, so keep that in mind when plotting your escape routes!
Plan Your Evacuation Procedure
Create a Step-by-Step Plan
It’s all well and good to have identified the routes, but now we need a solid plan in place. I suggest writing it down; there’s just something about seeing it on paper that makes the plan feel more real. Each person should know where to go and what steps to take.
Break it down into basic steps. For example, “Once I hear the alarm, grab my phone and keys, then head to the nearest exit.” Simple and clear instructions can truly make a difference.
Simplifying your steps is key. I often practice them myself, just to ensure those instructions stick. It becomes second nature, and that sense of preparedness can really calm nerves during a real emergency.
Communicate Your Plan
Now, here’s where it gets interactive! Share your plan with everyone involved—the kids, roommates, coworkers, whoever it may concern. Keeping folks in the loop about where to meet and how to get there can prevent chaos when it really counts.
I like to hold a little family meeting or team huddle, whatever fits the situation! Brainstorm potential hitches and solutions together. This not only gives them a voice but also fosters a sense of responsibility and teamwork.
Repetition is your friend! Discuss the plan often so it sticks. Whether it’s casual check-ins or periodic drills, keeping the lines of communication open is essential to ensure everyone is on the same page.
Incorporate Checkpoints and Safety Measures
One way of making your evacuation plan even more effective is to incorporate checkpoints. Decide ahead of time where everyone should go once they exit the building, whether it’s a tree in the park across the street or a neighbor’s driveway.
I set these checkpoints because they help in ensuring no one gets left behind. If you’re doing group evacuations, having a roll call at a designated spot helps ensure everybody’s safe and accounted for.
Don’t hesitate to evaluate and adjust safety measures along the way. Learn from others’ experiences. I once heard a harrowing story of someone who evacuated without a good plan; their tale became part of my evaluation of my own process.
Practice Your Evacuation Plan
Conduct Regular Drills
Okay, so you’ve got your plan down—now it’s time to practice like you mean it! Running drills helps everyone familiarize themselves with the process. It’s all about muscle memory. I highly recommend doing this a few times a year.
Don’t make it too serious either; keeping it light-hearted can ease any tension associated with drills. I usually involve the family pets too, just to make sure everyone knows how to handle a situation and it becomes a fun family bonding time.
Take your time, and keep a log of how long it takes to evacuate. Timing will show you where you might need to speed things up or adjust your routes or processes.
Evaluate and Adjust Your Plan
After each drill, sit down and talk about what worked and what didn’t. I find that reflecting on these practices can unveil areas for improvement. Maybe the route was blocked or someone didn’t know which way to go—this is your chance to pivot!
Staying flexible is key! Your environment may change over time—new routes might open or close; even family dynamics might shift. Regular evals guarantee that your plan evolves with you.
Remember, just because it worked last time doesn’t mean it’ll be perfect this time around. Adaptation keeps your plan relevant and effective.
Keep Everyone Informed
Finally, continued education about your plan is essential. It’s not just about practicing; I find it helpful to have reminders about the procedures around the house or workplace. Something as simple as a printed checklist near the exits can significantly enhance remembrance during a crisis.
Also, I use resources like family group chats or regular safety meetings to keep everyone updated. In a world that changes rapidly, staying current is vital.
If someone new joins your household or workplace, educate them about the evacuation protocol right away. It creates a culture of safety that extends beyond just your circle.
Frequently Asked Questions
1. Why is it important to plan an evacuation route?
Having a plan means you’re prepared for an emergency, significantly reducing panic and confusion when time is of the essence. Knowing where to go ahead of time can save lives!
2. How often should I practice my evacuation plan?
Regular drills are ideal—aim for at least twice a year, but more if possible! Changes in your circumstances may warrant more frequent practice.
3. Should I involve my pets in the plan?
Absolutely! If you have pets, ensure they are included in the evacuation plan, and be prepared to grab them quickly if an emergency arises.
4. What if someone in my household has mobility issues?
This is where careful planning comes into play. Design evacuation routes that are accessible and practice different strategies to ensure everyone can exit safely.
5. How can I communicate the plan effectively?
Hold family meetings, use visual aids, and keep the conversation ongoing. Repetition and inclusion help embed the plan into everyone’s minds.
by Preparation | Oct 20, 2024 | Preparedness
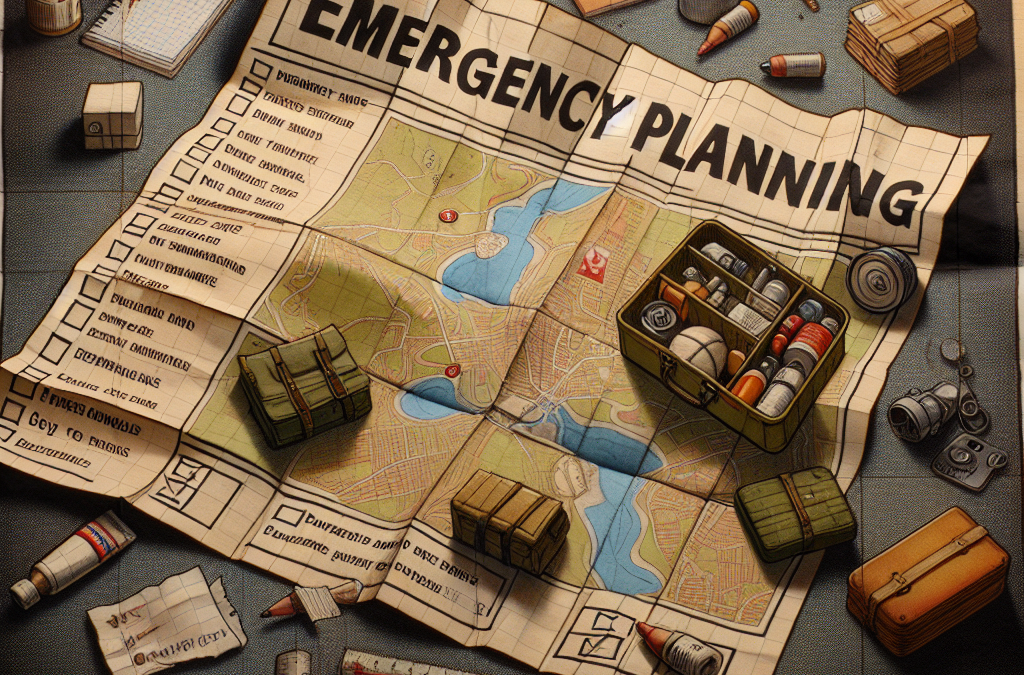
Hello there! Today, I want to share some insights from my own experiences about emergency planning. Let’s dive deep into some common missteps that many folks, including myself in the past, tend to make when prepping for emergencies. It’s all about learning and improving, right?
Not Having a Clear Communication Plan
One of the biggest blunders I’ve seen – and made – is not having a solid communication plan. Believe me, when chaos strikes, having a clear line of communication can make all the difference.
Identify Contact Points
First things first, you need to decide who your key contacts are. This should include family members, friends, and even your neighbors. Make sure everyone knows who to reach out to in the event of an emergency.
Next, it’s essential that these contacts are diverse. Maybe it’s a relative in another state or a friend in a different neighborhood. Having a network that spans out can be lifesaving. Trust me; you don’t want to put all your eggs in one basket.
Finally, communicate this plan to everyone involved. Don’t assume they’ll remember all the details. Write it down and have everyone acknowledge their roles. The clearer the plan, the less confusion there will be when it’s needed most.
Establish Alternative Methods of Communication
If the primary method fails – say, cellular networks are down – what then? Having alternatives is crucial. I’ve learned the hard way that relying solely on one form of contact can lead to frustrations.
Consider apps like WhatsApp or Signal, which can run on Wi-Fi. Make sure your family knows how to use them. Maybe share some practice scenarios for fun! It’s an excellent way to ensure everyone is comfortable with the tools available.
Another thing to think about? Old-school methods like walkie-talkies or designated meeting points. Sometimes, technology can fail, and fallbacks are critical.
Regularly Update Your Plan
Lastly, don’t make the mistake of letting your communication plan gather dust. Regular updates are necessary as your situations change – new jobs, new moves, or shifts in relationships.
I set reminders every six months to discuss and tweak our plans. This ensures everyone is still on the same page and familiar with the latest resources and protocols.
It’s a simple step, but it helps maintain the integrity of your plan. When statuses change, you don’t want your network to become impractical.
Ignoring Local Hazards
Alright, let’s talk about something crucial: overlooking local hazards. Depending on where you live, your emergency plan should reflect the unique risks your area faces.
Research Local Risks
The first step involves doing a bit of homework. What natural disasters are common in your area? Earthquakes, floods, wildfires…having this intel is key. I learned this after a colleague experienced flooding because they didn’t realize their city was prone to it.
Check out local government websites or community boards; they often have valuable guides on local hazards. This intel will help tailor your emergency bags and response strategies significantly.
In my town, I’ve integrated storm preparedness after realizing our weather patterns shifted. Control what you can by understanding your surroundings and adjusting your plans accordingly.
Prepare Specific Supplies
Once you know the hazards, create a list of emergency supplies tailored to those risks. For flooding, you might want waterproof bags and sandbags; for wildfires, have fire-resistant gear ready.
I remember during a wildfire scare, I was woefully unprepared. I quickly adjusted my kits to include smoke masks and fire blankets. It was a lightbulb moment! You don’t want to wait until the event occurs to put these supplies together.
Cross-check these supplies occasionally, especially if you haven’t touched them in a while. Something that was operational a year ago might have expired or become outdated.
Engage With Your Community
And let’s not forget about community engagement. It’s such an underrated aspect! Local groups often have insights and resources, so consider connecting with them. I’ve made some fantastic friends who helped me understand what to expect if a disaster were to strike.
Participate in community drills or informational meetings—it’s an excellent way to stay prepared and learn from others facing similar challenges. Having that camaraderie can make emergencies less daunting.
Plus, sharing experiences helps foster an environment where everyone is more prepared. We’re all in this together, after all!
Failing to Practice Your Plan
This one’s a biggie: failing to practice the plan! You might have the most finely crafted emergency plan, but if you’ve never rehearsed it, what’s the point?
Regular Drills
Scheduling regular drills is something I can’t stress enough. Just like fire drills in school, your family should practice your emergency response. This creates familiarity and can uncover any holes in your plan.
I try to hold drills every few months, varying the scenario slightly each time to keep everyone on their toes. It’s kind of fun and helps reinforce that preparedness mindset. You never know when practice will pay off!
Reassuring your family that practicing is just as vital as the plan itself can help reduce anxiety during real emergencies. The more prepared you are, the more confident you’ll feel.
Involve Everyone
Involving everyone, from kids to grandparents, is crucial. Each person’ll usually retain different pieces of the plan. Encouraging an open dialogue allows everyone to feel included and invested in the plan.
I’ve seen that older family members might even contribute valuable insights from their experiences. Plus, involving everyone helps ease worries—especially for kids who might feel overwhelmed with emergency talk.
So whether it’s a scavenger hunt for supplies or a pretend emergency at home, make it fun! Keeping the experiences positive is key.
Feedback Sessions
And after drills, it’s superhero moment feedback time! Discuss what worked and what didn’t. You’d be amazed at the potential improvements that can arise during these sessions.
It encourages accountability and helps us tweak our plans based on actual experiences. Take note of any surprises during drills, and communicate openly about concerns. Adjustments can always be made!
Feedback also serves as a motivator. It boosts morale when everyone knows they’re working towards staying safe and prepared.
Neglecting to Include Pets in Planning
Look, I love my pets, and I can’t imagine leaving them behind in an emergency. Another mistake I’ve made was assuming they wouldn’t need a plan. Spoiler alert: they do!
Create a Pet Emergency Kit
Making a pet emergency kit is an essential step. I’ll never forget the first time I packed my dog’s essentials: food, water, medication—the works. It might seem obvious, but having that kit ready is a lifesaver.
Along with the basics, don’t forget to include any comfort items. Something familiar can help soothe their anxiety during tough situations. Plus, that stuffed toy might work wonders if they get scared.
How often should you check this kit? You guessed it—regularly! Treat it like your human emergency kit. Things can change, and so do your pet’s needs.
Plan for Transportation
When an emergency strikes, how do you safely transport your pets? This is a critical yet overlooked aspect of planning. If you can’t get to your car or evacuate on foot, do you have a plan in place?
In our house, we’ve designated carriers and harnesses for our pets to ensure we can get them in a safe way. Then, practice getting them into the carriers to make the process smoother when it counts.
And don’t forget microchipping or keeping a collar with ID tags. It’s a safety net that gives you peace of mind in case you get separated during a chaotic event.
Include Emergency Contacts for Vets
Finally, keep a list of emergency contacts, including your vet’s number, in your emergency kit. This is sometimes overlooked in the hustle. Keep it handy—along with your pet’s medical records, just in case.
Also, consider having a secondary vet listed in case your primary vet is unreachable. Making that network will streamline care in stressful moments.
Your furry friends are family too, and their needs are just as important as everyone else’s. Including them in your emergency plan ensures you won’t leave anyone behind!
Overcomplicating Your Plan
Let’s wrap this up with a common pitfall: overcomplicating the plan. Simplicity is key! When a disaster strikes, the last thing you want is to scramble through pages of instructions.
Be Clear and Concise
Keep your plan straightforward. Clarity will help in those high-stress moments. I’ve seen complicated diagrams that leave folks confused rather than informed.
Sometimes, sticking to a few key points makes for quick reference during emergencies. It’s about getting to the good stuff when every second counts.
It’s also a great idea to have everyone involved sign off on the plan. If they know what’s up, they can confidently act quickly when it really matters!
Use Visual Aids
Visuals can be immensely helpful! From simple charts to maps of your local area, having that visual is really beneficial, especially for visual learners.
I have these charts in places where everyone can easily see them—like the fridge or by the front door. They serve as awesome reminders, too!
Think of a child’s drawing that gets the point across better than paragraphs of text. Sometimes less truly is more.
Regular Simplification Review
Lastly, regularly review and simplify your plan. Just like any good strategy, efficiencies can always be made as life goes on. What seemed necessary a year ago might not be today.
Ask everyone how comfortable they feel with the plan and if there’s anything they think is overly complicated. Being open to feedback can streamline the whole process and minimize confusion.
In summary, keeping it simple is the best way forward. Emergencies are chaotic enough without us adding hurdles to them!
FAQ
- What is the first step in creating an effective emergency plan?
Start by identifying key contacts and establishing a clear communication plan for your family and friends.
- Why should I research local hazards?
Understanding your area’s specific risks allows you to tailor your emergency supplies and preparation strategies effectively.
- How often should I practice my emergency plan?
I recommend practicing your plan every few months to keep everyone familiar and ready when emergencies hit.
- What should I include in my pet’s emergency kit?
Make sure to have food, water, medication, identification, and comfort items packed and ready for your furry companions.
- How can I keep my emergency plan simple?
Be clear and concise in your strategies, use visual aids as reminders, and regularly review your plan to minimize complexity.

by Preparation | Oct 19, 2024 | Preparedness
Hey there! Today, we’re diving into something that’s not just about fire alarms and evacuation routes—it’s about emergency drills. You might think they’re a bit boring or even pointless, but trust me, they can absolutely save your life. Let’s break down some of the major reasons why you should take emergency drills seriously. I promise, it’ll be worth your time!
Understanding Roles and Responsibilities
Team Coordination
One of the coolest things about emergency drills is how they teach you and your group to coordinate as a team. It’s not just about knowing how to evacuate; it’s about understanding where each person fits into the plan. When you practice these drills, it sets the stage for real-life situations where every second counts.
Think about it: during a real emergency, emotions can run high. Knowing who’s responsible for what can cut down the chaos significantly. For instance, if a fire breaks out, you might have one person responsible for getting everyone out while another checks for anyone needing help. Without those roles clearly defined, it’s a game of guesswork in a scary situation.
Plus, it fosters a sense of camaraderie. I mean, who doesn’t feel closer to a coworker after dashing out of the building together? Sharing those kind of experiences can build trust and teamwork that translate into a safer environment.
Clear Communication
Another golden nugget I’ve learned from emergency drills is the importance of clear communication. It’s essential to know how to convey messages effectively, especially under stress. During drills, you get to practice that—and you realize that everyone plays a part in keeping communication fluid.
From alerting your colleagues about a threat to updating them on safety protocols, good communication can make all the difference. I remember during one drill, our coordinator was incredible about making sure everyone was in the loop. It was a fun yet serious reminder of how crucial it is to stay connected.
So, here’s the deal: when you practice your communication skills in drills, you’re gearing up for any potential emergency. Whether it’s using a proper channel for alerts or simply hollering for help, knowing you can get your message through saves lives.
Situational Awareness
Diving into situational awareness, this is perhaps the most critical takeaway from any emergency drill. These practices help you identify exits, understand alarm sounds, and recognize the highest-risk areas in your environment. It’s like gaining a superpower!
In one of our recent drills, I became acutely aware of the layout of our office. I’d walked past those fire escape signs a million times without really looking, but during the drill, I was forced to pay attention. Knowing where to go and what’s around you in an emergency is definitely something I can’t stress enough.
Moreover, this awareness helps you stay calm. You won’t freeze because you’ve already envisioned the steps you need to take. You become proactive rather than reactive, and that’s a game-changer when chaos hits. Trust me, the more you practice, the sharper your instincts become.
Learning Proper Response Techniques
First Aid Knowledge
Let’s talk about first aid. Knowing the basics can really come in handy, and emergency drills often include training on how to handle injuries. It’s not just about knowing how to bandage a wound; it’s about understanding how to stabilize someone in critical condition until professionals arrive.
During one drill, we learned about CPR techniques, and wow, was that eye-opening. I mean, what if someone goes down and needs immediate help? Having at least a few people trained can truly make it feel like you’ve got a safety net. I know it sounds a bit intense, but being equipped with such knowledge really empowers you.
Also, imagine how much calmer you would feel in an actual emergency knowing you’ve got that training under your belt. It might be the difference between panic and action. Plus, it’s always a good conversation starter at parties!
Evacuation Procedures
Every drill includes lessons on evacuation procedures, and for a good reason! It’s one thing to hear about evacuation routes, but it’s another to practice them. I remember the first time I sprinted down those stairs, and it suddenly clicked how essential it was to know the path to safety. It’s like a mental map gets created in your head.
Understanding how to evacuate isn’t just about speed; it’s about knowing the safest routes and the alternative paths when a primary exit is blocked. Trust me, when you’re faced with smoke and confusion, that knowledge is like gold.
The other key takeaway? Always check your surroundings. You never know when you might need to adjust your route or help someone else get to safety. Each drill has reinforced the idea that preparation is preventative, and it reflexively builds our instinct to act in emergencies.
Psychological Preparedness
It sounds fluffy talking about psychological aspects, but drills really help with mental readiness. You may not realize it, but they condition your brain to handle emergencies. They mimic the adrenaline rush of real situations, which can really help you manage anxiety when something goes down.
When you know what to expect, it reduces panic levels. I can’t even count how many times I’ve seen people freeze during situations of shock. But those who participated in drills? They typically act with more purpose and precision. It’s a boost of confidence that’s hard to shake off!
Also, sharing experiences with others in the drill can create a supportive network. You’re all in it together, and it turns a scary situation into an empowering one. Who knew that practicing together would create such strong camaraderie?
Building Confidence in Crisis Situations
Calm Under Pressure
One of the most reassuring things I’ve experienced with drills is how they promote a sense of calm under pressure. The nervous energy fades when you realize you have gone through something similar before. When that test time comes, you can find your footing and keep moving along.
Believe me, there’s nothing wrong with feeling nervous—that’s totally normal! But, having gone through drills helps transform that anxiety into determination. You’re not paralyzed; instead, you’re ready to act when needed, and that’s a fantastic feeling.
It’s like preparing for a big game in sports; you can rehearse movements to a point where the pressure doesn’t faze you. The more confident you feel in responding to crises, the more effective you will be in helping yourself and others around you.
Problem-Solving Skills
Another surprising perk from these drills is the enhancement of your problem-solving skills. You’ll often have to think on your feet and make quick decisions under pressure. It’s a skill that translates to daily life, which I find super beneficial.
In one drill, there was a simulated explosion, and we had to decide quickly whether to leave or assist injured “victims.” Making those tough choices during a drill hones your critical thinking and gives you tools for additional problem-solving opportunities in non-emergency situations.
Every time you engage in a drill, you sharpen that instinct. You learn to assess risk and make choices that can save lives—now that’s a massive advantage in both emergencies and everyday life.
Promoting Community Preparedness
Lastly, drilling brings a community together and fosters preparedness. By encouraging participation, you’re not just prepping yourself—you’re arming your entire social circle with valuable skills. What’s better than being the epicenter of community safety?
When everyone has practiced together, it builds a neighborhood vibe where people look out for one another. Remember, emergencies don’t care about boundaries, so having trained buddies around enhances safety for everyone.
Engaging local organizations for community-wide drills can multiply this effect. It’s like creating a network of saver heroes, and frankly, who wouldn’t want to be a part of that? It creates a ripple effect aimed at keeping all of us safe.
Conclusion
So, there you have it! Emergency drills may seem tedious, but they’re a bold step toward ensuring you’re ready for just about anything life throws your way. From knowing evacuation routes to enhancing your problem-solving skills, these drills could literally save lives—maybe even yours!
I encourage you to be the champion of drills in your community or workplace. You don’t have to wait for a crisis to polish these skills; let’s keep our circle safer together. So, who’s in?
FAQs
- 1. Why should I participate in emergency drills?
- Participating allows you to gain essential skills, build confidence, and create a sense of teamwork and preparedness within your community. It’s all about being ready when the unexpected happens!
- 2. What are the main skills learned in emergency drills?
- Emergency drills build skills in roles and responsibilities, communication, first aid, evacuation procedures, and problem-solving behavior, helping you stay calm and effective during crises.
- 3. How often should emergency drills be conducted?
- It’s recommended to conduct drills at least once or twice a year. Regular practice ensures that information stays fresh, and people remain confident in their responses during emergencies.
- 4. Can emergency drills help with workplace safety?
- Absolutely! Not only does it prepare individuals for emergencies but it also fosters a culture of safety, teamwork, and assurance, making the workplace a much safer environment.
- 5. What should I do if I feel anxious about emergency drills?
- It’s perfectly okay to feel anxious! Take it as a chance to learn coping mechanisms and reach out to your coworkers or leaders for support. Remember, everyone’s there to learn and improve together!

by Preparation | Oct 18, 2024 | Preparedness
Gather Essential Supplies
Water and Non-perishable Food
First things first – let’s talk about food and water. When preparing for a blackout, it’s crucial to stock up on supplies you can rely on. I usually recommend having at least a gallon of water per person for a few days. Trust me, you don’t want to find yourself rationing water in the middle of a crisis!
In addition to water, grab some non-perishable food items. Canned goods, dried fruits, nuts, and granola bars are all great choices. Think about what you enjoy eating and what won’t spoil easily. You should have enough to last a few days, just in case.
Don’t forget about pets! If you’ve got furry friends, make sure you’ve got enough supplies for them too. It’s easy to overlook, but they depend on us during tough times.
Flashlights and Batteries
Now, let’s shine a light on another must-have: flashlights! It’s amazing how much we take light for granted until it’s gone. I suggest you have a few flashlights stashed around the house. I mean, you can’t put a price on safety!
When choosing flashlights, opt for LED versions. They last longer and are more energy-efficient, plus they often come with rechargeable options. Make sure to stock up on batteries too! I can’t count how many times I’ve rummaged through drawers searching for batteries only to come up empty-handed.
Keep those flashlights in places where they’re easy to find. Think about power outages that happen at night; you want to avoid stumbling around in the dark digging through junk drawers!
First-Aid Kit
Next up, we all need to consider health and safety. A well-stocked first-aid kit is another essential when preparing for an unexpected blackout. It’s often something that gets left on the back burner until it’s too late. I found out the hard way during my first blackout. Luckily, it wasn’t a severe situation, but I learned my lesson!
Your kit should include basic supplies like band-aids, antiseptic wipes, and pain relievers. Additionally, consider any prescription medications you or your family members may need. During an emergency, it’s best to be prepared!
Check your kit regularly to make sure items aren’t expired. Trust me; there’s nothing worse than pulling out an expired medicine when you need it the most.
Stay Informed
Battery-Operated Radio
While I may love my smartphone, when the power goes out, it’s a different story. I’ve learned over the years the importance of having a battery-operated radio. It keeps you connected to news updates and emergency broadcasts, ensuring you’re in the loop!
I prefer radios that not only run on batteries but also have a hand-crank option. You can charge it just about anywhere and ensure it’s always ready for action. It’s a nifty gadget that can literally save the day!
Make sure to test your radio from time to time. Familiarize yourself with how it works before you actually need it. Getting it all set up during a stressful experience is not the time to read the manual!
Community Alerts
Staying informed during a blackout is about more than just having a radio; it’s also about knowing your local resources. Most communities offer some kind of alert system – whether it’s through text messages or email notifications.
Sign up for these alerts, and don’t forget to encourage friends and family to join in as well! In my experience, being part of a community network can deliver peace of mind when things get tough.
Also, familiarize yourself with local emergency services. Knowing where the nearest emergency shelter is can be invaluable in a crisis. I’ve regretted not knowing the nearest spots during previous blackouts!
Family Communication Plan
Having an effective communication plan is key. During a power outage, staying connected with loved ones can be a challenge. I always make sure the whole family knows where to meet in the event of an emergency.
Establish a “go-to” person as well, just in case you guys get separated. We’ve all been in chaotic situations; creating that clear line of communication can make a world of difference!
Consider having a contact list written down to avoid relying solely on your phone. If things get dicey, you’ll be glad you have that info handy instead of rummaging through a dead phone!
Plan for Heating and Cooling
Alternative Heating Sources
If the blackout hits when it’s chilly outside, you’ll want to be prepared for the cold! I highly recommend having a secondary heating source, like a portable propane heater or a fireplace. Just ensure they’re safely maintained and vented!
Layering your clothing is another trick to keep warm. Sometimes, I just hunker down with blankets in front of the fireplace, enjoying a book while staying snug as a bug. It can actually be pretty cozy when you think of it as a little staycation!
Make sure to have extra blankets and warm gear on hand too. A cozy pajama setup is key to staying comfortable during long outages.
Cooling Options for Hot Weather
Let’s flip the script to summer outages. Keeping cool is just as important! I recommend investing in battery-operated fans or having a solar-powered option at home. It can be a lifesaver during hot months.
Head to the lowest level of your home if things get too toasty. Basements often stay cooler, offering a relief from the heat when electricity is scarce.
Staying hydrated is crucial, too! Keep that backup water supply handy and drink plenty of fluids to prevent dehydration.
Open the Windows Wisely
During a blackout, don’t forget the power of good airflow! If the weather allows, open the windows and let some fresh air in. This is particularly beneficial during warm seasons.
However, pay attention to your neighborhood. If conditions feel safer with the windows closed, trust your instincts. You don’t want to be inviting in any unnecessary risks!
Also, get creative with shades or curtains! Keeping them closed during the worst of the heat can help keep your space cooler while protecting your privacy.
Practice Safety Precautions
Use Candles Wisely
Candles can set a cozy mood, but they can also be a fire hazard. I’ve learned this the hard way, so trust me when I say to keep safety a priority! Use sturdy candle holders and never leave them unattended.
Opt for LED candles if you can; they provide the ambiance without the risk! These little guys work great in simulating an evening glow without worrying about flames.
Teach your family about candle safety too. Especially when kids are involved, making them aware of the potential dangers can be a huge lifesaver.
Gas Appliances Management
If you have gas appliances, be sure to keep them well-ventilated and check that they operate safely. If your stove works during a blackout, you can use it to prepare meals – just be careful, of course!
I always double-check gas lines and connections to avoid dreaded leaks. Safety first! It’s worth the effort to ensure your family stays safe during any unforeseen circumstances.
And don’t forget to read the manuals for any gas appliances. Knowing how to properly operate them can save you a lot of headaches later on!
Child and Pet Safety
Lastly, let’s not overlook our little ones and pets. During a blackout, they can easily become anxious or scared. Preparing them for the situation ahead of time can really do wonders in maintaining calmness.
Teach children about the importance of staying together and how to use flashlights safely. It helps to involve them in your preparedness plans, turning it into a bonding activity rather than a scary scenario.
For pets, ensure they have a safe space to retreat to during any chaos. Keep their essentials close by – food, water, and toys – to alleviate any stress they might feel during the darkness.
Frequently Asked Questions
What should I include in my emergency kit?
Your emergency kit should include water, non-perishable food, flashlights, batteries, a first-aid kit, and any personal medications. Don’t overlook items for pets or comfort items like blankets!
How do I stay updated during a blackout?
Consider investing in a battery-operated radio to tune into emergency broadcasts and stay informed. Also, sign up for local community alert systems for text or email notifications.
What are the safest ways to stay warm during a blackout?
Alternative heating sources, layering clothes, and having extra blankets are key. Your fireplace or a portable propane heater can definitely come in handy!
What should I do with candles during a blackout?
While candles can provide light, they pose fire risks. Use candle holders, never leave them unattended, and consider using LED candles instead for a safer option.
How can I involve my kids in blackout preparedness?
Involving kids in the planning process can ease anxiety. Teach them about staying together, using flashlights, and the importance of the emergency kit. It can even be fun if you turn it into a little adventure!


