by Preparation | Sep 25, 2024 | Preparedness
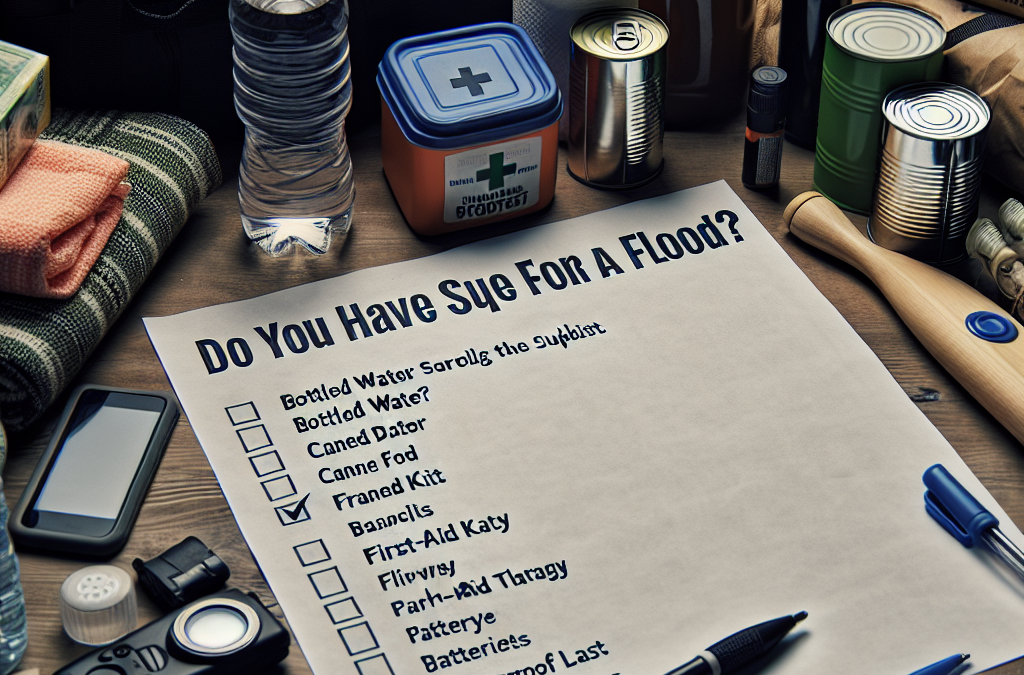
Do You Have Enough Supplies for a Flood? Here’s the Checklist
Top 4 Semantic Keyword Phrases
- Flood preparedness supplies
- Essential items for flooding
- Emergency kit for flood situations
- Safety measures during a flood
Do You Have Enough Supplies for a Flood? Here’s the Checklist
Flood Preparedness Supplies
Understanding the Importance of Flood Preparedness
Floods can hit incredibly fast. Think about it: one moment everything seems fine, and then the rain keeps pouring, and suddenly, you’re in panic mode. Being prepared isn’t just a nice thought; it’s a lifesaver. You have to ask yourself—what essentials do I need to keep my family safe and secure? Making a checklist of flood preparedness supplies is a smart move.
Having the right supplies can mean the difference between safely weathering the storm and feeling completely overwhelmed. It’s like having an insurance policy—not fun to think about, but super important. By putting together a list and checking it twice, you ensure that you’re ready when disaster strikes. Plus, it gives you peace of mind.
Whether you live in a flood-prone area or not, it’s wise to be prepared. Nature can be unpredictable, and floods can affect anyone. It’s all about being proactive instead of reactive when it comes to safety.
What Supplies Do You Really Need?
You shouldn’t just grab random items; you need to have a smart list. Essentials include things like water, non-perishable food, flashlights, batteries, and a first-aid kit. I can’t stress enough how important water is—one gallon per person per day should be the minimum for hydration. Trust me, in a crisis, you won’t want to be without it.
Don’t forget about personal medications, important documents, and items for pets if you have them. I always make sure to keep things like vaccination records for my furry friends in an easily accessible spot. You’d be shocked at how many folks overlook this until it’s too late.
Also, think about hygiene supplies! When the power goes out, sanitation is key. Include things like hand sanitizer, wipes, and toilet paper in your supply stash. Being clean can boost morale in tough times, and it keeps illness at bay.
Creating Your Flood Preparedness Kit
So, how do you start putting your kit together? First things first, I recommend getting a sturdy container or backpack—something that’s easy to grab and carry if you need to evacuate. An old duffle bag could work in a pinch, but a plastic bin might be more waterproof.
As you gather supplies, keep track of expiration dates regularly. You don’t want to end up with a box full of expired energy bars when you need them most. I usually go through my kit every six months or so to refresh it. It’s really just about making sure you are always prepared.
And don’t forget to label everything! This helps you locate items quickly if you need to grab them in a hurry. Simple things like writing “First Aid” or “Food” on the containers can save precious minutes when every second counts.
Essential Items for Flooding
Food and Water Considerations
When it comes to food during a flood, you have to think smart. I always opt for non-perishable items like canned fruits, vegetables, and meats. These are easy to store and can last a long time, even without power. Plus, they’re a quick grab if you have to leave in a hurry.
Now, about that water supply—having enough clean water is crucial. Besides the gallon-per-person-per-day rule, I like to throw in some sports drinks or electrolytes. They really help you stay refreshed and energized if you’re stuck without access to regular food for a while.
Don’t forget to pack a can opener! I can’t tell you how many people forget this little gadget. It’s super important because you don’t want to be wrestling with a can of beans while floodwaters are rising. Be practical, and get the right tools.
First Aid and Safety Supplies
A good first aid kit is your best buddy in emergencies. I personally have a fully stocked kit with band-aids, antiseptic wipes, gauze, and my go-to painkillers. Also, make sure to include a pair of scissors and some tweezers—little things that can come in handy at unexpected moments.
You should also think about flashlights and battery-operated lanterns. Being in the dark can feel disorienting and stressful, and having a way to light your surroundings brings comfort. I always like to toss in extra batteries too, just in case.
Consider adding a multi-tool or a Swiss Army knife to your kit. It’ll cover all sorts of needs, from opening cans to tightening screws. Plus, they’re compact and don’t take up much space, making them perfect for emergency situations.
Documents and Important Items
Storing your important documents is critical. I suggest having a waterproof container or zip-lock bags for things like passports, insurance information, and medical records. It’s all about making sure you can easily access these essential items if you have to leave home quickly.
Don’t forget about backup power supplies! I swear by having a portable charger for my phone. You might not think it’s vital, but being able to communicate with others could make a huge difference during a flood. Also, if you stash a few cash bills in your kit, you’d be surprised at how useful that can be if electronic systems go down.
Taking a few minutes to compile and store these documents can make an intense situation feel a tad easier. You’ll thank yourself later, I promise.
Emergency Kit for Flood Situations
Building Your Emergency Kit
Now, the heart of your flood preparedness is your emergency kit. This is the ultimate go-bag that should be ready to go at a moment’s notice. Start with basics: water, food, and first aid supplies. These are the non-negotiables.
I’m a big fan of keeping a little cash handy. As we all know, ATMs can go dark during emergencies, so having cash on hand means you can buy crucial items if necessary. I generally keep a mix of small bills just in case, so I don’t get stuck without change.
The size of your emergency kit really depends on your family size. If you have kids or pets, consider adding things like diapers, baby formula, or pet food. It’s about customizing it to suit your needs.
Staying Informed and Connected
Part of being prepared is knowing what’s going on in your area. I can’t stress enough how handy a battery-operated weather radio can be. During a power outage, this will be your lifeline to the latest information on the situation outside.
In addition to listening to the radio, I recommend having a plan in place to communicate with family members. If you get separated during a flood, knowing how to reach each other again can bring some peace of mind. Maybe establish a designated meeting spot, or have a group chat that everyone checks in with.
Don’t forget about entertainment! When you’re holed up in a safe space, it can get boring. Pack some books, cards, or games to help the time pass and keep spirits up.
Reviewing and Updating Your Kit Regularly
The last step? Make it a habit to review your emergency kit every so often. Life changes—the kids grow up, you move to a new house, or pets come into the mix. Every six months, I take the time to reassess what’s in my kit.
Don’t just forget about it. Update it based on new family members or changes in your lifestyle. I usually set a reminder on my phone so that I don’t let it slip my mind.
Trust me, you’ll feel so much better knowing you’ve done your part to be prepared. It’s all about taking control and saying, “I got this.”
Safety Measures During a Flood
Listening to Warnings and Evacuation Notices
First off, during a flood, always listen to local authorities. They provide the best guidance on whether to stay put or evacuate. I can’t tell you how many times I’ve seen people ignore evacuation orders only to regret it deeply once the waters rise.
Set up alerts on your phone for weather notifications and emergencies. That way, you’ll be in the loop and ready to act. Sometimes, just getting that little nudge from technology can keep you safe.
Make it a ritual to check the news or your local weather channel, especially during stormy seasons. It’s not just about craving new info; it’s about making smart choices for yourself and your family.
Creating an Evacuation Plan
An important aspect of flood preparedness is having an evacuation plan. Discuss this with your family so that everyone knows what to do when the time comes. I usually create a visual map of escape routes from our home, ensuring that everyone knows the best way out.
Make sure your plan includes where to go—have a friend or family member outside of town that you can stay with. It’s always good to have a safe spot in mind. Writing down this information and keeping it in your emergency kit can save you stress later.
And, of course, practice your plan! It sounds silly, but running through the motions when things are calm can make a world of difference when you’re in a situation.
Practicing Safety Tips During a Flood
If you do find yourself in floodwaters, never underestimate the power of safety tips. Avoid walking through strong currents—they can sweep you away before you even realize what’s happening. And if you’re driving, steer clear of flooded roads. A few inches of water can sweep you off the road; trust me, it’s not worth the risk.
Always look for higher ground. If you find yourself in a vehicle that’s starting to float, abandon it, and head to safer terrain. I know this can be tough to think about in the moment, but staying calm is crucial.
Lastly, don’t forget that floodwaters can be contaminated. It’s so important to avoid coming into direct contact with them if possible. The last thing you want to deal with, after all that chaos, is an infection from exposure to polluted water.
FAQ
What should I include in my flood preparedness kit?
You should include essentials like water, non-perishable food, a first aid kit, flashlights with extra batteries, important documents, and any medications your family may need. Don’t forget hygiene supplies and items for your pets!
How do I stay informed during a flood?
Keep a battery-operated weather radio handy for updates, and ensure you have your phone set to receive emergency alerts. Checking local news channels and government websites can also provide timely information.
How often should I update my emergency kit?
It’s a good idea to review your emergency kit every six months. Check expiration dates on food and medications, and update items as needed based on changes in your family or lifestyle.
What should I do if I receive an evacuation notice?
Act quickly! Gather your emergency kit, secure your home, and follow local evacuation routes. Make sure to have a plan in place for where you’ll go and how you’ll communicate with family members.
by Preparation | Sep 24, 2024 | Preparedness
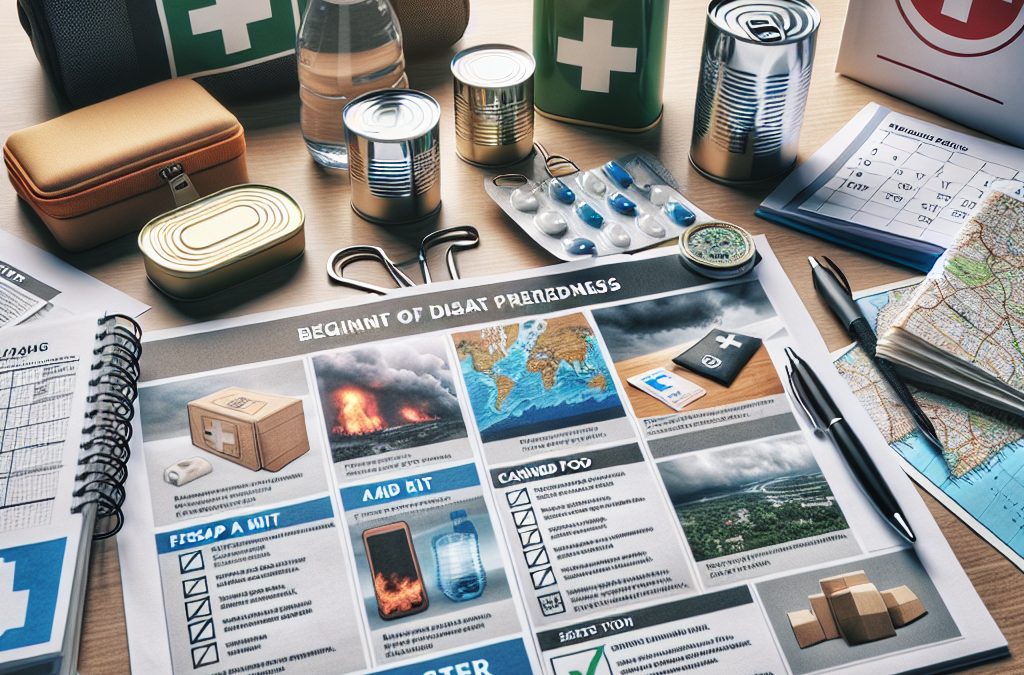
The Best Way to Start Your Disaster Prep Plan
The Best Way to Start Your Disaster Prep Plan
- Creating a Personalized Emergency Plan
- Gathering Essential Supplies
- Staying Informed About Local Risks
- Practicing Your Preparedness Strategy
Creating a Personalized Emergency Plan
Assessing Your Family’s Needs
When starting your disaster prep journey, the first thing I did was assess my family’s specific needs. You gotta think about everyone’s daily routine and any special requirements. If someone in your family has medical issues, you’ll need to factor those in. Even pets need consideration—don’t forget about their food and care needs in an emergency!
Next, sit down with your family for a chat. Make it a fun event, maybe over a casual dinner or coffee. Talk about what emergencies could affect your area, and discuss each person’s role in an emergency. This way, everyone knows what to do when things go south.
Finally, write down your plan. Get everyone’s input, and keep it somewhere handy. I like to stick mine on the fridge. Seeing it daily keeps it fresh in everyone’s mind, and encourages conversation about it.
Choosing an Emergency Meeting Spot
An essential part of your plan is choosing a safe meeting place. In the chaos of an emergency, things can get wild, so having a predetermined place to rally helps. My family chose a nearby park. It’s spacious and easy to get to for everyone.
Discuss two locations: one close to home for minor emergencies, and a second one farther away for more serious situations. If you haven’t already, make sure everyone knows how to get there. Consider transportation options, especially if you might be on foot.
Have a little fun with it! Maybe plan a family outing to that spot, so it becomes more familiar and less intimidating when you truly need it.
Documenting Important Information
Don’t forget to document critical information. I can’t emphasize this enough. Create an emergency contact list that includes family members, friends, and any local services you might need post-disaster. Also, collect important documents—think insurance papers, medical records, and IDs.
I’ve found keeping this info both digitally and physically helps. You can easily share the digital version through a family group chat, while keeping paper copies in a safe spot you can access quickly.
Lastly, be sure to update this info regularly. Great plans grow and evolve with your family!
Gathering Essential Supplies
Making a Supplies List
Gathering essential supplies is an exciting part of preparing. At first, it can feel overwhelming, but breaking it down into categories makes it manageable. Start with food—think non-perishables like canned goods, dry snacks, and ready-to-eat meals. I love adding a few comfort items like chocolate or my favorite energy bars to the mix!
Next on the list? Water. You’ll want enough for each person in your household to have at least one gallon a day for a minimum of three days. It sounds like a lot, but I found some great stackable containers that make storage simple.
And don’t forget first aid kits and personal hygiene items! These are essential for keeping everyone safe and clean during a disaster. You can buy pre-made kits, but I prefer to customize mine to fit our specific needs.
Organizing Your Supplies
Once you’ve gathered your supplies, organization is key. I like to use plastic bins for everything—labeling is crucial, not just for you but for anyone helping during an emergency.
Separate supplies into different bins: food, water, first aid, and communication tools. Keeping everything organized saves time and stress when the pressure is on.
Consider having an “easy access” box with the most essential items, like flashlights, batteries, and basic first aid supplies. It sounds simple, but when disaster strikes, you really don’t want to be rummaging through everything.
Regularly Reviewing and Updating Your Supplies
Having supplies is great, but maintaining them is just as important. I check my emergency stash every few months—replacing expired items and rotating stock.
This can also be a family fun day: have everyone help out! It turns into a reminder for everybody about the plan and gets everyone involved in the process.
Develop a calendar reminder for yourself so it doesn’t slip through the cracks. It’s easy to forget, but keeping your supplies fresh is crucial. Trust me, your future self will thank you!
Staying Informed About Local Risks
Identifying Local Hazards
Now that you’ve got a plan and supplies, it’s time to educate yourself on local hazards. Different regions have different risks, and knowing these can save you and your family.
I started by researching the most common disasters in my area—floods, earthquakes, and hurricanes, oh my! Find local resources, like community websites or your town’s emergency services page, to stay updated.
Also, check in with neighbors or local community groups. Sometimes, local knowledge can shed light on risks that official channels may overlook.
Utilizing Technology for Updates
There’s no escaping technology in today’s world—so why not use it to stay informed? I highly recommend downloading emergency apps on your phone. Many are free and provide alerts, emergency tips, and maps that can guide you during a crisis.
Set up alerts for local weather and emergency alerts to keep you informed in real-time. This way, you won’t be caught off guard when disaster strikes.
And hey, don’t just rely on tech! Cultivating relationships with your community can often be your first line of defense.
Participating in Local Preparedness Training
Lastly, step outside your comfort zone and join local preparedness programs. I attended a community workshop, and it opened my eyes to things I wouldn’t have learned on my own. They often teach valuable skills like basic first aid, how to shut off utilities, and even CPR.
Encourage your family to join so you all learn together. Plus, you meet folks in your community who can lend support in emergencies.
Practicing Your Preparedness Strategy
Conducting Drills
Alright, practice time! Just like athletes need practice, we need to drill our emergency plans. Get the family together and run through your plan at least twice a year.
You can make it a fun day outdoors—set up scenarios like a fire drill or lockdown situation, teaching kids how to react properly. I always add elements of fun to it, so they stay engaged!
Afterward, gather as a family to discuss what went well and what didn’t. This is all about growth, learning from mistakes, and tightening your plan over time.
Assessing Supplies During Drills
During your practice drills, take time to assess your supplies too. Make sure your emergency kit is where it should be and stocked up. You’d be surprised what gets used up or misplaced over time.
I’ve found that doing this during drills creates a sense of urgency without the stress—it’s a balancing act. Plus, it becomes second nature when real emergencies inevitably occur.
Updating Your Plan With Feedback
Remember that preparedness isn’t a one-and-done deal. After practicing your emergency drills, gather feedback from all family members. What did they find confusing? Was anything missing?
With this info, you can make changes to your plan and supplies. I’m continually tweaking my approach based on feedback, and it’s made our family a lot more confident in our emergency readiness.
FAQs
What should I do first when starting my disaster prep plan?
Start with assessing your family’s specific needs and creating a personalized emergency plan. Consider everyone’s routines and any special requirements, then document your plan clearly.
How often should I update my emergency supplies?
I recommend reviewing and updating your emergency supplies at least every few months. This ensures that things like food and medications are fresh and ready to go.
Where can I find information about local risks?
Check community websites, local emergency services pages, and connect with neighbors. Official sources often provide the most accurate information regarding local hazards.
How can I make practicing my plan fun for my family?
Implement games or challenges while running your drills! Make it a family day out where everyone participates, and celebrate afterward to keep spirits high while doing something serious.
by Preparation | Sep 23, 2024 | Preparedness
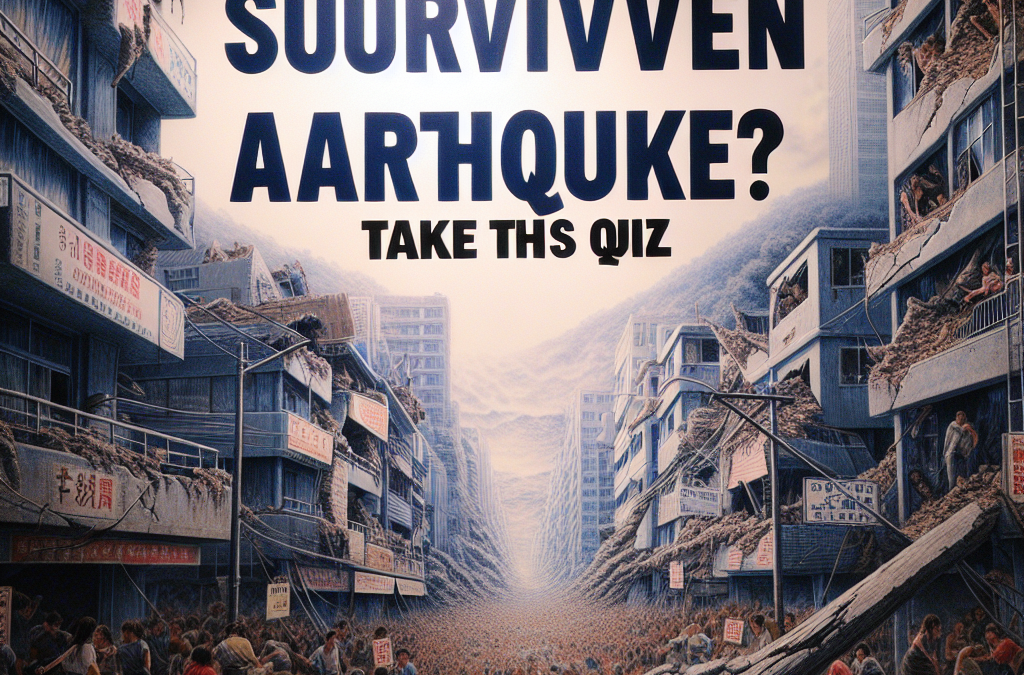
Could You Survive an Earthquake? Take This Quiz
Could You Survive an Earthquake? Take This Quiz
Here are the top 4 semantic keyword phrases for this article:
- Earthquake preparedness quiz
- Survival tips for earthquakes
- How to stay safe during an earthquake
- Understanding earthquake risks
Earthquake Preparedness Quiz
Know Your Risks
First of all, knowing your area’s seismic risk is crucial. I grew up in a place that wasn’t really earthquake-prone, so I didn’t think much about it. But one day, my friend who lived in California told me about their drills and I thought, “Wow, this is serious!” Depending on where you live, your risk can vary greatly, so take the time to check your local resources.
Once you’ve recognized your risk, it’s time to take that quiz! You can find many online, and they usually cover topics like preparedness kits and household safety measures. I remember taking one and realizing I was woefully underprepared! It made me step up my game and actually put a plan in place.
By understanding your risk and testing your knowledge with a quiz, you’ll feel a bit more in control. That’s what it’s all about—acknowledging the potential hazard and gearing up to face it head-on!
Survival Tips for Earthquakes
Creating an Emergency Kit
You can’t just wing it when it comes to earthquakes. An emergency kit can be your best friend. I’ve learned that packing plenty of water, non-perishable food, and first-aid supplies is a must. I also like to add extra batteries and flashlights to my kit. Just one small slip-up in not having these essentials could mean a world of difference if the ground starts to shake.
Don’t forget about communication. I have a small, waterproof bag where I keep copies of important documents and contact numbers. If the tech goes down, it’s my little safety net. Trust me, it feels good knowing that you have a backup plan. Be proactive!
Another tip? Think about your pets. They are part of your family too, right? I always make sure to pack some food and a favorite toy for my furry friends in case we ever need to evacuate. This little gesture can mean a lot to them and keep morale up in a stressful situation.
How to Stay Safe During an Earthquake
Drop, Cover, and Hold On
So you’re in the middle of an earthquake, and the ground is vibrating like crazy. What do you do? Remember the phrase, “Drop, Cover, and Hold On.” This motto isn’t just a catchy slogan; it’s about safety. I’ve practiced it a bunch of times in drills, and it truly sticks in your mind. First, drop to the ground to prevent being knocked over.
Then, cover yourself, preferably under sturdy furniture. If there’s nothing nearby, don’t just stand there—protect your head and neck with your arms. I learned the hard way that standing in a doorway is not always the safest option; it depends on the structure of your home.
Finally, hold on until the shaking stops. This part can seem a little nerve-wracking, but just remember that it’s crucial to stay where you are until everything calms down. Once it’s over, you’ll be surprised at how quickly your instincts kick in!
Understanding Earthquake Risks
Types of Earthquake Hazards
Understanding what risks exist in your area is vital. Did you know that aside from just shaking ground, there are other hazards? I used to think it was just about surviving the tremors, but things like landslides or tsunamis can be coupled with quakes, depending on where you live. It’s like a wake-up call to prepare for all possibilities.
Also, consider the aftershocks. When I first experienced an earthquake, I thought it was over after the major shake, but surprise! We had some strong aftershocks, and that taught me not to let my guard down too quickly. Just because the initial shock is over doesn’t mean it’s time to celebrate.
If you spend some time getting familiar with these risks, you’ll start to feel like you’re more in control of the situation. Once I got educated on all potential hazards, I felt way more equipped to handle anything that comes our way!
Final Thoughts: Taking Action
Developing a Family Emergency Plan
Now that you’re all fired up about staying safe, let me emphasize that having a family emergency plan is essential. It’s not as complicated as it sounds—just gather your family and talk about what to do when the big one hits. I’ll never forget the look on my mom’s face when we did our first plan; she was both nervous and oddly excited about getting things together!
Map out your meeting places, evacuation routes, and designate who you’ll check in with. Make it a fun family bonding experience! I even got my siblings involved by creating a little poster we hung on the fridge. No joke, it’s bright and colorful, so none of us can forget it!
Being prepared doesn’t have to be scary. Instead, it can be a bonding moment that turns anxiety into action. Trust me, the more prepared you are, the more confident you’ll feel when dealing with an emergency!
FAQ
What should I include in my earthquake emergency kit?
Your kit should have water, non-perishable food, a first-aid kit, flashlights, batteries, and copies of important documents. Don’t forget to include items for pets if you have them!
How can I find out if I live near a fault line?
Local government websites and geological surveys provide maps and resources showing fault lines and earthquake risks in your area. Take the time to dive deep into this information!
What are the first steps I should take during an earthquake?
Drop to the ground, take cover under something sturdy, and hold on until the shaking stops. Avoid running outside, as it can be the most dangerous place during an earthquake.
Can aftershocks be as strong as the original earthquake?
Yes, aftershocks can be significant and even stronger than the original quake. It’s essential to remain cautious after the main shaking stops.
by Preparation | Sep 22, 2024 | Preparedness
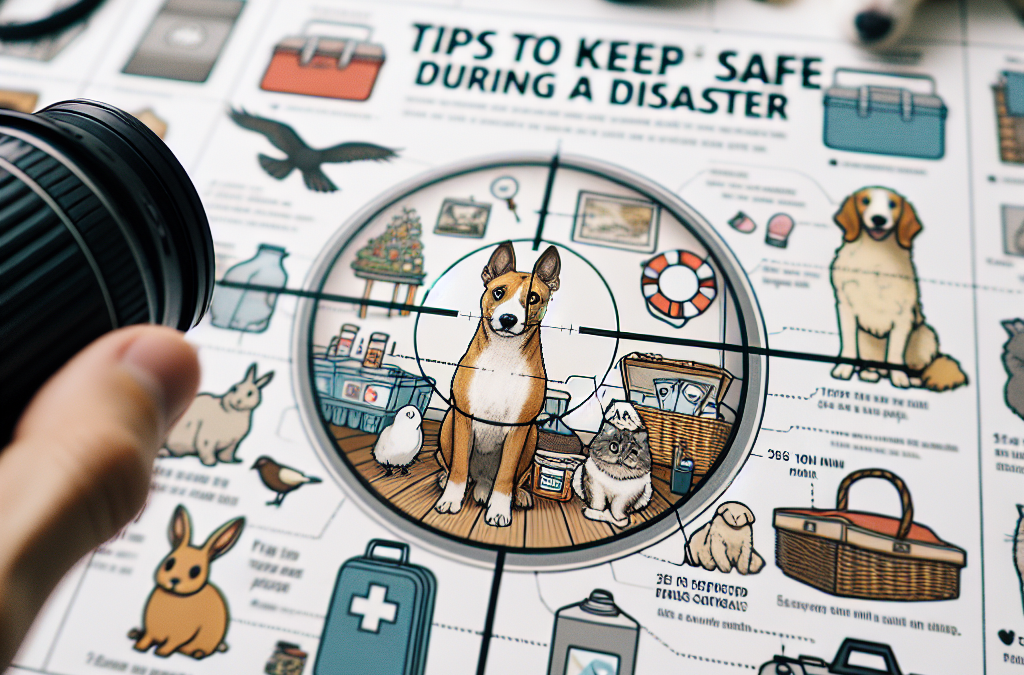
How to Keep Your Pets Safe During a Disaster
How to Keep Your Pets Safe During a Disaster
When it comes to our furry friends, keeping them safe during a disaster is a major priority for me. Over the years, I’ve learned a thing or two about how to prepare for the unexpected. Here are the top four keyword phrases that I believe encapsulate this essential topic:
- Disaster preparedness for pets
- Creating an emergency kit for pets
- Safe places for pets during emergencies
- Evacuating with your pet
Disaster preparedness for pets
Understanding the Risks
So let’s dive in! First off, understanding the types of disasters that could occur in your area is crucial. Natural disasters like hurricanes, floods, and fires can strike without much notice. It’s like Mother Nature’s version of “Surprise!” Knowing what could happen helps me create a solid plan.
I always take a moment to assess my surroundings. If I live in a place prone to flooding, I’d definitely want to prioritize making sure my pets have somewhere dry to go. In contrast, if wildfires are an issue, having an escape route mapped out is non-negotiable. It’s all about staying one step ahead.
Another thing to keep in mind is how pets react to stress. Just like us, they can freak out when things get crazy. Understanding their behavior can help me make better choices when disaster strikes, so I’m always on guard and ready.
Creating a Pet Emergency Plan
Now that I’ve covered the risks, it’s time to develop a disaster plan that incorporates my pets. One of the first things I do is talk to my family about what to do if something goes wrong. Communication is key, right? Everyone should know their role, whether it’s gathering supplies or knowing where to go.
In our family, we’ve established a central meeting spot in case we get separated. It’s something simple, but it gives me peace of mind knowing we have a plan. I also include the vibe of keeping calm because no one wants to be running around like a headless chicken during an emergency.
Lastly, I make sure I update our plan regularly. Pets can change! New members might join the family, and their needs might differ from before. So keeping everything fresh and relevant just feels right.
Training Your Pets for Emergencies
Believe it or not, training my pets to handle emergencies has been a game-changer. I’ve practiced commands that can help us during a crisis. Commands like “come” or “stay” can save their lives when things get chaotic. It’s not just about the cute factor; it’s about safety!
Another cool trick I’ve found helpful is desensitizing them to loud noises, like thunder or sirens. If a pet has been exposed to these sounds before, they’re less likely to freak out when it counts. I usually play those sounds during a quiet moment at home, allowing them to adjust.
Finally, I try to include them in drills. Crazy as it sounds, we’ve practiced our disaster plan in a calm setting. I find it helps them understand what’s expected when the real deal hits. It strengthens our bond and improves their responsiveness, which is a win-win.
Creating an emergency kit for pets
Gathering Essential Supplies
The first thing I did when putting together my pet emergency kit was gather all the essentials. Just like I pack for myself, I make sure my furry buddies have what they need, too. Food, water, medications – all that jazz. Here’s a list of what I’ve packed in our kit: dry food, water bowls, and any medications they might need.
It’s also smart to have a leash and a carrier on hand, just in case. I can’t tell you how handy it is to have a sturdy carrier ready to go. It keeps our pets secure, even in the chaos of an emergency. And don’t forget comfort items like a favorite toy or blanket; it can make all the difference when they’re scared.
Lastly, I make sure to have copies of my pets’ medical records, along with photos and any identification tags. You never know what could happen in an emergency, and having this info ready can help with reunification if you get separated.
Storing the Kit Properly
Storing the emergency kit is just as important as putting it together. I keep ours in an easily accessible location that everyone in the house knows about. We’ve got our kit near the front door, so it’s grab-and-go when I need it. You definitely don’t want to be hunting for stuff when time is of the essence!
It’s also crucial to check the kit regularly. I like to go through it every few months to replenish food and water and check expiration dates on anything. Life is busy, but this should be part of the routine. I also remind my family to keep an eye on this stuff, so I’m not the only one responsible.
I often throw in a couple of treats because, honestly, why not? A little bonus never hurt anyone. It gives my pets something happy to look forward to, even during stressful times.
Educating Family Members
Another key component of creating a solid emergency kit is educating my family about its contents. I often take time to walk through it with them, explaining each item and why it’s essential. It’s important for everyone to know how to use the kit, just in case I’m not around when disaster strikes.
I also encourage my family to add personal touches. Maybe someone wants to include their own pet’s favorite food or a special item. It’s like making the kit feel more personalized! It enhances that sense of security knowing everybody has a role in this part of our survival strategy.
And don’t forget about including kids in this! Teaching them early on about pet safety steps them up as responsible pet owners in the future. Creating that sense of awareness feels invaluable and genuinely strengthens the entire family unit.
Safe places for pets during emergencies
Identifying Safe Locations
When an emergency hits, I need to know where my pets will feel safest. Identifying safe spots in advance makes it easier when the moment arises. I’ve found rooms with minimal windows to be optimal, especially during storms. My pets can feel more secure with fewer visual distractions.
If I’m ever faced with a natural disaster, it’s good to check out local shelters in advance. Many shelters allow pets, but still, some might have restrictions. Being in the know about these options helps alleviate panic if a situation arises.
When discussing safety, I also consider my neighbors. If I know they’re pet-friendly, maybe I’ll make a plan to stick together during severe weather. Sometimes it just makes sense to band together for stability and support.
Preparing for Evacuations
If an evacuation becomes necessary, it’s vital to have designated safe places sorted beforehand. We’ve compiled a list of pet-friendly hotels and shelters in our area just for this purpose. It saves me so much time and stress during emergencies to know where I can go.
My pets are part of our family, so finding accommodations that welcome them is important. It’s heartbreaking to think of them being left behind or feeling out of place. And let’s be real- if I’m stressed, they’re stressed too, and I don’t want that for us.
Additionally, there might be times when I find myself at a friend’s place during an emergency. In that case, I always give them a heads-up about my pets, ensuring they’re cool with it. Having a set plan means less scrambling and more focus on keeping everyone safe.
Keeping Pets Calm in Stressful Situations
Keeping my pets calm during emergencies is often easier said than done. Familiar scents, like their blankets or toys, can help provide comfort. I make sure to include these items in my emergency kit because they offer a nice sense of security in times of uncertainty.
Using soothing sounds, like calming music, can help too. In our home, I’ve noticed that playing soft tunes does wonders for my pets in stressful situations. It’s like a blanket for their minds, allowing them to feel less anxious.
When the chaos sets in, I also talk to my pets in a soft, easy voice. It’s nearly instinctual for me to reassure them amidst the storm, reminding them they are loved and safe. It’s amazing how just a few kind words can work wonders to calm their nerves.
Evacuating with your pet
Creating a Pet Evacuation Plan
A few years back, I learned firsthand how crucial it is to have a solid evacuation plan for pets. It’s not enough to grab them and run. I’ve created a checklist that outlines everything to consider when I need to leave home quickly.
First, I ensure I have leashes, transport carriers, and identification ready to go. The last thing I want is to scramble for a leash when I really need to move. Having a check-in system that helps me stay organized gives me peace of mind.
Secondly, gathering important documents ahead of time helps immensely. A record of their vaccinations and medical history can be needed if I need vet care during or after an evacuation. I store this in a waterproof folder so that it’s safe and accessible.
Traveling with Pets
Traveling with pets can be challenging, but I’m happy to share that it’ll get easier with the right strategies. During evacuations, it’s important to keep them secure in vehicles. A carrier can help keep them comfortable and safe while traveling; it becomes a little sanctuary on wheels.
I also plan for frequent stops along the way to let them stretch their legs and do their business. It’s important for their mental well-being, and trust me, it saves me a headache down the road! Besides, it gives me a chance to grab snacks too.
When we’re on the road, I keep my pet-friendly items within reach. Things like food, water, and their favorite toy should be handy. Being prepared takes a lot of stress off both me and my pets, allowing us to navigate challenges together as a team.
Adjusting Post-Evacuation
Finally, I know the importance of helping my pets readjust after an evacuation. Moving them into a new environment can be pretty daunting, so I try to set up a cozy space where they can feel grounded. Familiar items can ease the transition, allowing them to explore at their own pace.
Also, I monitor their behavior closely during this phase. If they seem stressed, I try to be extra patient and give them the love and attention they need. Keeping their routines similar pays off, too! It adds that layer of normalcy when everything else feels upside down.
Remember, even after returning home, it’s important to continue monitoring their wellbeing. Reassessing their comfort level and re-establishing routines can take time, but together, we can overcome any hurdle that comes our way.
FAQs
What should I include in my pet emergency kit?
It’s smart to include essential items like food, water, medications, a leash, and a carrier. Don’t forget comforting items like toys or blankets and copies of their medical records.
How can I calm my pets during a disaster?
Using familiar scents, soothing sounds, and your calm voice can help ease your pets’ anxiety. Also, having their favorite toys or blankets can offer comfort during stressful times.
What do I do if I need to evacuate with my pets?
Have a solid evacuation plan in place. Gather supplies like leashes and carriers beforehand and make sure you have emergency contacts who can assist with your pets if needed.
How do I prepare my pets for an emergency?
Training your pets for emergencies, familiarizing them with certain commands, and including them in your emergency drills can make a huge difference in how they handle stressful situations.

by Preparation | Sep 21, 2024 | Preparedness
What’s the Best Way to Store Water for Hurricanes?
What’s the Best Way to Store Water for Hurricanes?
- How to Choose the Right Storage Containers
- Essential Water Purification Methods
- Strategic Planning for Water Supply
- Maintaining Your Water Storage System
How to Choose the Right Storage Containers
Understanding Container Options
When the threat of a hurricane looms, choosing the right container to store your water is crucial. Over the years, I’ve learned that not all containers are created equal. First off, you want something that’s durable. I recommend looking for food-grade plastic or stainless steel containers, as they won’t leach harmful chemicals into your water.
While it may be tempting to grab any old jugs or bottles lying around, trust me, investing in purpose-built containers can save you a lot of hassle later. I’ve had my fair share of mishaps, using repurposed containers that ended up cracking or developing funky smells!
Also, consider the size of your containers. For instance, if you have a big family, you might want larger 5-gallon jugs. On the other hand, if you’re just prepping for yourself, smaller, hand-held sizes might be better to manage and store easily.
Features to Look For
Aside from the type of material, I always recommend containers that are stackable. Why? Well, space during hurricane prep can be tight, so any feature that lets you save room is a win! Look for containers with wide mouths as well; this makes it easier to fill, clean, and pour.
Also, check if the containers come with a secure lid. I’ve had my water containers spill during a minor earthquake, and trust me, you don’t want that. A tight seal prevents contamination and keeps your precious water safe.
Lastly, consider portability. Should you need to transport your water supply, having handle-equipped containers will make your life a lot easier. I’ve learned this lesson the hard way, trying to lug heavy jugs without handles!
Storing Your Containers Safely
After choosing the right containers, it’s time to think about storage. Keeping your water in a cool, dark place away from direct sunlight is essential because UV rays can break down plastic over time. I generally use my garage or a basement for this.
Ensure that the area is clean and away from chemicals or any items that might contaminate your water supply. It’s all about keeping your water pristine for when you need it the most.
I also like to rotate my supplies. Every six months or so, I’ll drain the water and refill the containers. This way, I ensure that the water stays fresh and safe to drink come hurricane season!
Essential Water Purification Methods
Filter Your Water
The reality is, not all water is created equal. Preparing for hurricanes includes ensuring that the water you have stashed away is safe to drink. One of the best methods I learned is using a reliable water filter. There are various types on the market—the one I use has a great filtration system that removes bacteria and sediments.
Not only are filters essential for purification, but having one on hand during a hurricane can save you from relying on potentially unsafe sources. I personally stick with filters that are portable and can filter large quantities at once because when it’s storm season, efficiency is key!
Regularly changing your filter is a must too! Just like you wouldn’t wear the same old sneakers forever, you can’t rely on a filter that’s been in the game too long. Check the manufacturer’s guidelines for replacement recommendations.
Boiling Water
Historically, boiling water has been one of the simplest and most effective methods to purify water. I remember learning this from my grandparents. All you need is a heat source—whether it’s a camp stove or even your kitchen stove if you’ve got power.
Bring your water to a rolling boil and let it go for at least one minute. If you’re at higher altitudes, you’ll want to boil it for a bit longer. This method not only kills bacteria but also removes a lot of impurities.
Of course, let the boiled water cool before storing it in your containers. It’s practically like cooking—I mean, no one wants to drink scalding hot water, right?
Using Water Purification Tablets
On days when things are hectic, I’ve found water purification tablets to be incredibly handy. They’re compact, easy to use, and quite effective in neutralizing contaminants. Make sure to read the instructions carefully, as different tablets vary in their usage.
I typically keep a stash of these tablets in my emergency kit. You simply drop the tablet into the water, wait a designated amount of time, and voila—safe drinking water! They’re a lifesaver, especially if you find yourself in a pinch.
But remember, while tablets do make water safer to drink, they don’t improve the taste. I’ve found that it tends to leave a slightly chemical aftertaste. So don’t hesitate to use a filter or some lemon juice after purifying to jazz up that water!
Strategic Planning for Water Supply
Calculate Your Needs
Before hurricane season hits, I always take the time to determine how much water I truly need. The general guideline is about one gallon of water per person per day. If there’s a chance of extended outages, I try to plan for at least two weeks’ worth of supply.
For me, that usually means storing at least 14 gallons for myself. It’s easy math, but what’s often overlooked is that pets also need water, and they drink a surprising amount depending on their size!
It’s super helpful to have a checklist so I keep track of exactly how much I’ve got on hand. That way, in the hustle and bustle of storm prep, I won’t overlook this important step.
Community Resources
When I think about preparing my water supply, I also consider reaching out to community resources. Many cities set up water distribution points during severe weather events. Knowing where these are can save you when you’re running low.
Local organizations, churches, or community centers often come together to provide for those in need. Keeping up to date with local news ensures you’re aware of any emergency support systems that might be available.
I’ve often found that connecting with neighbors can also lead to shared resources, especially if someone has additional storage capabilities. It’s all about working together!
Stay Updated on Weather Reports
Finally, staying tuned to weather updates helps to determine how much water you might need. If they say a hurricane is coming, be proactive, not reactive. I always try to refill my emergency water supplies at the first sign of a storm brewing.
Apps on your phone or local radio stations can provide real-time updates on hurricane paths and expected rainfall. This foresight will allow you to gauge the severity of the situation and adjust your water storage plans accordingly.
It feels good to be prepared instead of scrambling last minute. Seeing storms on the radar can be nerve-wracking, but if you’re ready, it makes everything a bit easier!
Maintaining Your Water Storage System
Regular Inspections
Once you’ve got your water storage set up, it’s important to keep an eye on things. I make it a habit to inspect my water containers at least once every few months. Look for any signs of leaks, cracks, or even weird odors.
Sometimes when water’s been stored for a while, you might notice some film or slime developing. A thorough rinse and scrub with soap can help clear that up, but always ensure you rinse thoroughly before re-filling.
If you observe any changes in the clarity or smell of the water, it’s probably time to replace it. Trust your gut; fresh water is the goal, after all!
Proper Cleaning Techniques
Cleaning your containers is super important, but you don’t need to overcomplicate it. I usually use a mixture of 1 tablespoon of unscented bleach to a quart of water to sanitize my containers before reusing them. It’s simple and effective.
After applying the bleach solution, give the inside a good scrub with a clean brush, then rinse thoroughly with fresh water to ensure no bleach residue is left behind. It’s like a spa day for your water containers!
Make it a part of your bi-annual routine. It’s a small effort that pays off in peace of mind when you need that water the most.
Keeping Track of Expiration Dates
Water doesn’t actually expire, but the containers can become unsafe over time, so it’s good practice to rotate your supply. Use a label maker or some tape and a pen to mark your water bottles with a fill date. I love being organized, and it helps me remember to swap things out on a regular schedule!
Every six months, I take a few minutes to check, refill, and relabel. This systematic approach has kept my emergency water supply in top condition, and I always feel at ease knowing it’s safe for consumption.
Staying proactive ensures I never find myself scrambling for clean water during an emergency. If you’re prepared, you’ll feel much more relaxed, even when the storm clouds roll in.
Frequently Asked Questions
What type of water containers are best for storing water during a hurricane?
Food-grade plastic or stainless steel containers are the best choices. They don’t leach chemicals and can withstand varying temperatures and conditions.
How long can I store water before it becomes unsafe to drink?
Water itself can last indefinitely, but the containers can degrade over time. It’s best to regularly inspect and refresh your water supply every six months.
Can I use tap water or should I purify it before storing?
It’s generally advised to purify tap water before storing it to eliminate any bacteria or contaminants. You can use methods like filtration, boiling, or purification tablets.
What’s the recommended amount of water I should store for one person?
It’s recommended to store at least one gallon of water per person per day for a minimum of three days, or ideally for two weeks if possible.


