by Preparation | Apr 26, 2025 | Preparedness
Understanding Emergency Medical Training
What is Emergency Medical Training?
Emergency Medical Training (EMT) is all about preparing individuals to respond effectively in emergency medical situations. It provides the skills and knowledge necessary to manage crisis situations before professional medical assistance arrives. You might have seen the term thrown around in various contexts, but essentially, it encompasses various levels of training, from basic first aid to advanced life support.
From my experience, being trained in emergency medical scenarios has been such a game changer! You never know when an emergency will strike, whether at home, work, or in public spaces. Knowing I have the training to assist someone in need gives me a sense of empowerment and readiness.
What I particularly appreciate about EMT training is that it’s practical. The skills learned are often hands-on, which makes it easier to remember and apply when the situation arises. So, let’s dive into what you can expect from this training!
Core Skills in Emergency Medical Procedures
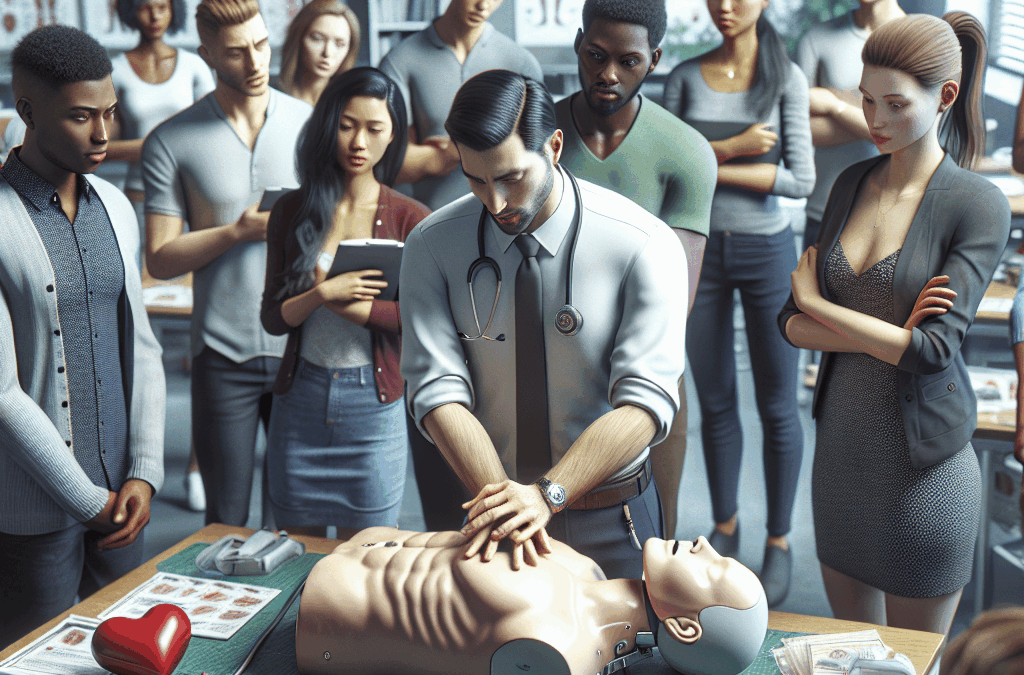
Basic Life Support (BLS)
Basic Life Support is a foundational skill any emergency responder should master. It includes CPR (cardiopulmonary resuscitation) techniques, which are essential for those facing cardiac arrest. The best part about learning BLS is that it’s a skill that can literally save lives.
During my training, I can’t stress enough how valuable the practice sessions were. Repeatedly performing CPR on manikins helped build my confidence. Plus, learning to recognize the signs of someone who might need CPR is crucial. Spotting those early warning signs can make a world of difference!
Not only is BLS about administering chest compressions, but it also encompasses how to use an automated external defibrillator (AED). Familiarity with the AED can be a lifesaver, and knowing how to operate it quickly can improve survival rates significantly.
Wound Management
Wound management might sound straightforward, but it covers a range of skills that are essential in an emergency. Cleanliness is paramount when dealing with injuries. Knowing how to properly clean and dress a wound can prevent infections and complications.
I remember one of my instructors emphasizing the importance of assessing the injury first before jumping straight into treatment. This allows you to prioritize care, especially in a situation where multiple injuries may be present. It’s crucial to stay calm, which is where your training kicks in!
Additionally, understanding when to contact emergency services is vital. If a wound presents a serious threat, like severe bleeding, knowing not just how to manage it but when to escalate care can save lives.
Shock Management
Shock can occur in various medical emergencies, and recognizing its signs is critical. Symptoms such as clammy skin, rapid pulse, and faintness should never be overlooked. My training taught me to assess for shock in any traumatic scenario.
When treating someone in shock, the goal is to keep them calm and maintain their body temperature. Covering them with a blanket or coat can be simple but effective. Knowing these little tricks can make your intervention much smoother!
Furthermore, ensuring they are lying down and elevating their legs can help blood flow to vital organs. Being aware of these techniques makes you feel more prepared for any knock-on scenario you might face in real life.
Legal Considerations in Emergency Response
Good Samaritan Laws
When stepping up to help during an emergency, understanding Good Samaritan laws in your state is crucial. These laws are designed to protect individuals who assist those in danger and reassure them not to hesitate in providing help.
I recall discussing this in training, with many folks unsure whether they’d be liable if they tried to help someone. It’s empowering to know that as long as you act in good faith and within your training, you’re generally protected.
However, it’s important to stick to what you know and can competently perform. Going beyond your training could expose you to legal issues, which is why understanding these laws should be part of your emergency training toolbox.
Informed Consent
Informed consent can be complex but is essential in emergency situations. It generally means that the person you are helping should understand the treatment you’re providing. In a chaotic emergency, this can be challenging, especially if the person is unconscious or unable to communicate.

In situations where a patient can provide consent, I found that explaining your actions—no matter how briefly—can help assuage their fears. It’s all about building trust in a moment of crisis, and I’ve seen firsthand how simply speaking to someone can calm their nerves.
In contrast, if a patient is unresponsive, the presumption of consent allows you to offer aid without delay. It’s a fine line to walk, and knowing the legalities is part of being a competent first responder.
Documentation and Reporting
After any emergency response, documentation of what occurred is critical. Writing down your observations, actions taken, and any changes in the patient’s condition helps provide essential information to incoming medical professionals.
In my field experience, I often felt overwhelmed right after an incident, but having a simple structure to follow—like noting down times and specific actions—made a world of difference later. It ensures that everyone involved has the information they need to proceed.
Ultimately, accurate documentation can also protect you legally if questions arise about your treatment. So incorporating this into your training will not only help your response but safeguard against potential legal issues!
Practical Experience and Continued Learning
Hands-On Training
There’s no substitute for hands-on training in emergency medical training. A classroom setting provides the theoretical foundation, but applying those skills in real-life scenarios is where the confidence builds. Whether it’s through simulations or training sessions, I find that getting your hands dirty (figuratively!) is key.
During my EMT course, we had mock scenarios where we’d have to respond to various emergencies, and those experiences were invaluable. Role-playing different scenarios with peers taught me how to communicate effectively and rethink strategies on the spot.
Even today, I seek out opportunities to practice through workshops or refresher courses, reinforcing those skills regularly. Continuing to hone your skills keeps you sharp and prepared for unexpected situations.
Staying Updated with Protocols
Medical protocols evolve, and it’s crucial to stay informed about new techniques and guidelines in emergency care. Each time I take a refresher course, I learn something new. Whether it’s updates in CPR techniques or changes in first aid recommendations, these insights are ever so important.
I often recommend subscribing to credible organizations or following their updates. Social media can be a great tool for this too. I keep an eye on updates from organizations like the American Heart Association to receive training updates directly!
Additionally, networking with fellow emergency responders through seminars or workshops can share new approaches and practices among peers, enhancing your knowledge in the field.
Advocating for Public Training Programs
I believe everyone should have access to emergency medical training. Engaging in your community to promote free training events, like CPR or first aid classes, can empower more people and create a safer environment.
The feeling of empowerment multiplies when more individuals are trained. I’ve volunteered my time to coordinate community events, and it was rewarding to see people take that knowledge into their lives!
Ultimately, the more people know how to respond in emergencies, the more lives we can save. Every little bit of effort counts, and it’s super fulfilling to contribute to that goal.
Conclusion
Emergency Medical Training isn’t just a nice-to-have; it’s a lifeline in critical situations. Whether it’s through understanding core skills, navigating legalities, or advocating for public awareness, we’re capable of making a difference. I can’t stress enough how important this training has been in my life, both personally and professionally. So, I encourage everyone to invest time in this invaluable training!
FAQ
- What does Emergency Medical Training cover?
- Emergency Medical Training covers essential skills such as CPR, wound management, and shock management, equipping individuals to respond in crisis situations.
- Are there legal protections for people who help in emergencies?
- Yes, Good Samaritan laws generally protect individuals acting in good faith when assisting someone in an emergency, ensuring they aren’t held liable for unintended consequences.
- How can I practice my emergency care skills?
- Engaging in hands-on training, refresher courses, and mock scenarios is a great way to practice emergency care skills and build confidence in your abilities.
- Why is documentation important in emergency medical care?
- Documentation helps provide vital information to incoming medical professionals and protects the responder from potential legal issues regarding their care.
- How can I promote emergency medical training in my community?
- Organizing community events, speaking about the importance of training, and providing accessible workshops are great ways to advocate for public emergency training programs.
by Preparation | Apr 26, 2025 | Preparedness
Assessing Your Needs and Environment
Understand the Purpose of Your Shelter
Before diving into building a shelter, I always remind myself to assess what I actually need it for. Are we talking about a short-term camping trip gone awry or a more prolonged situation due to unexpected events? Having a clear purpose in mind lays down the foundation (pun intended) for everything else.
For me, part of this assessment includes figuring out who will stay in this shelter. Is it just me, or do I have a family or a group of buddies? The more people involved, the more critical it becomes to have enough space. So this is definitely something to consider before picking up that axe.
Lastly, let’s not forget about the environment. Will your shelter have to withstand harsh winters or scorching summers? Different climates’ll prompt different design elements, and don’t forget to take local wildlife into account! You wouldn’t want to attract any unwanted guests.
Survey Your Surroundings
I can’t stress enough how important it is to explore the area where you plan to build. Finding a good location can make all the difference in the world. Look for flat ground that’s elevated to avoid flooding but also close enough to a water source. Plus, being near natural resources can ease the building process.
While scouting around, I usually pay attention to the direction of the wind and the position of the sun. Shelter design often depends on these factors—a place that blocks cold winds and allows sunlight to come in during the day is a total win!
Watch out for things like rotten trees or hanging branches; they could bring an unexpected crash if the weather decides to get rowdy. Avoiding such hazards will make your haven a lot more secure in the long run.
Gather the Right Resources
Your shelter is only as good as the materials you use, so I make sure to gather up everything I might need. Local materials like branches, leaves, and even stones can work wonders. However, always evaluate how sturdy or insulating each material is before committing.
Trust me; nothing feels worse than spending hours on a shelter only to find it’s flimsy as a house of cards. A solid framework can be achieved with hardwood sticks or logs for the main structure, and that’ll keep your shelter from collapsing—something I learned the hard way!
Don’t forget about insulation! Using grass or leaves can really help keep you warm in chilly conditions, while also giving your shelter that cozy vibe. Who says survival can’t have a touch of comfort?
Designing Your Shelter Structure
Selecting the Right Shelter Type
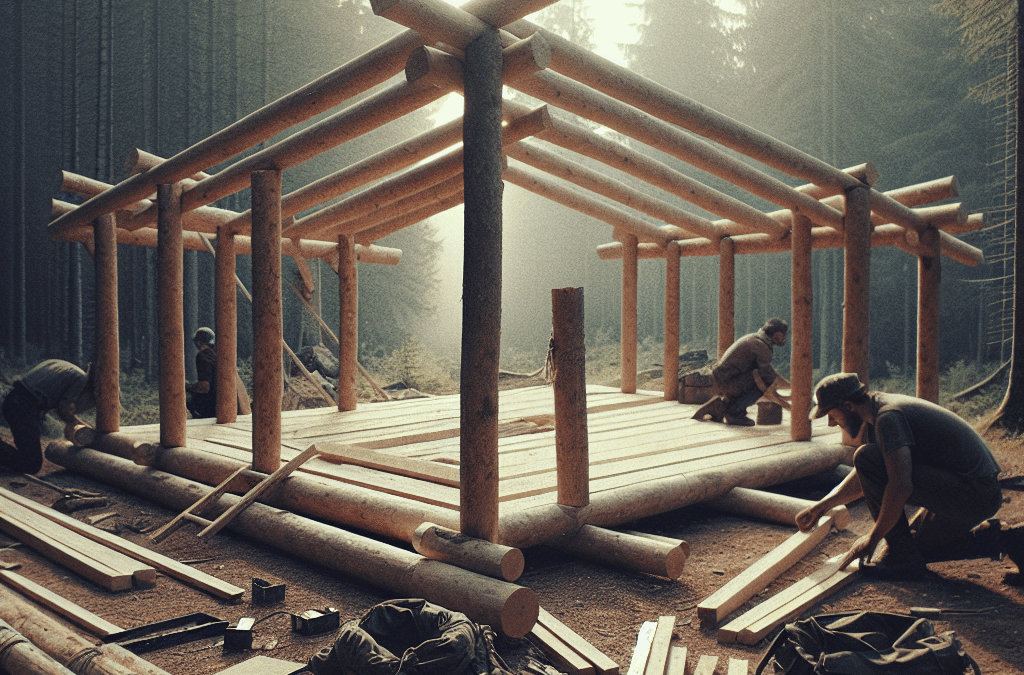
Once I’ve got my resources sorted, the fun part begins: designing the shelter! I usually weigh the pros and cons of different shelter types—will I go for a debris hut, a lean-to, or something a bit more complex like a log cabin? Picking the right one can be a game-changer.
If I want to stay hidden and use what the surroundings provide, a debris hut works beautifully. On the other hand, if I’m planning for a longer stay, then I’ll invest the time into a more robust design, like a cabin, which offers better protection.
Understanding the mechanics of how each structure holds up is crucial. I like to sketch out my designs to visualize how they’ll come together and to see where adjustments might be needed. It’s a bit like a puzzle, and I’m all in for a challenge!
Building Techniques
As I start constructing, I remember that solid building techniques can make all the difference. Starting with a good base is essential; if your base is weak, your entire structure is gonna follow suit. I usually like to create a framework first—it keeps me grounded, literally! I fasten logs together with rope or strong vines as I go to ensure everything’s stable.
When it comes to walls and roofs, I always prefer layering materials. Just slapping branches together won’t do; I’m layering these bad boys like a lasagna! Ventilation is super important, too; without it, I could easily turn my shelter into a sauna.
Lastly, I make it a point to regularly step back and assess my work. Sometimes it’s easy to get lost in the building process, but a quick look can help me spot any potential flaws before they become a non-fixable situation.
Improving Shelter Longevity
Once the structure is built, the next step is making it last. I always add some waterproofing measures—like ensuring the roof has a slope to let water run off instead of pile up. Nobody wants a soggy sleeping bag, am I right?
I also keep an eye on any wear and tear as the seasons change, fixing or reinforcing sections as needed. It’s the little things that end up saving me from disaster later on down the road.
Plus, I like to add natural camouflage to my shelter to blend into the surroundings. That extra touch not only makes it feel cozier but also keeps me safe from passersby who might not have my best interests in mind.
Optimizing Comfort and Safety
Furnishing Your Shelter
Now that my shelter’s solid and ready, it’s time to think about comfort. I usually start by keeping things simple—just a bed made from leaves and some branches. It’s amazing what a good layer of foliage can do for a good night’s sleep!
A little organization goes a long way, too. Having designated spots for food, tools, and gear keeps my space clutter-free. Nobody likes tripping over stuff when they’re trying to find a single spoon.
If I’m going to be in my shelter for a while, I might even set up a small cooking area outside to keep the cooking smells away. Safety comes first, and managing fire responsibly is key in any survival situation.
Emergency Preparedness
Always being prepared for emergencies is a big part of making a long-term survival shelter. I always have a first aid kit handy, plus some fire-starting materials in an easy-to-access spot. You never know when you might need it!
In addition, I make it a habit to keep a whistle or signaling device around. If things go south, I want a way to alert people. Better to have a plan in place than scramble when the time comes.
Keeping a small stash of extra food doesn’t hurt either—having a backup can provide a safety net when life throws curveballs at you. It’s all about being smart and proactive, right?
Community and Communication
Finally, I can’t stress enough how valuable community can be during survival situations. Having a buddy system not only boosts morale but also provides double the resources in tough times.
Staying in touch is also important. I usually set up a way to communicate if I have a group around. Whether it’s through walkie-talkies or even signal fires, keeping everyone informed can be crucial, especially if plans change suddenly.
And never underestimate the power of shared skills! Everyone brings something unique. Whether it’s hunting, foraging, or fire-making, pooling our strengths can make a world of difference in our survival journey.
Frequently Asked Questions
What materials are best for building a survival shelter?
Natural materials like branches, leaves, and stones are ideal. They provide durable support and insulation, so seeking them out in your environment is key. The more local, the better!
How long will my shelter last?
The durability of your shelter often hinges on the materials used and the conditions it faces. Regular maintenance and waterproofing can extend its lifespan considerably—don’t forget your upkeep!
Can I stay in my shelter year-round?
It’s entirely possible, especially if you build with the right insulation and design. I’ve known folks who made it through all seasons with some smart improvements.
Is it safe to build a shelter alone?
While you can build a shelter by yourself, having a partner is highly recommended for safety reasons and shared tasks. Having a buddy by your side can also enhance both the building and survival experience!
What’s the most crucial aspect of a long-term survival shelter?
Ultimately, it’s about being safe and comfortable. A sound structure with proper insulation helps fend off the elements while ensuring your wellbeing is essential during any survival scenario.
by Preparation | Apr 26, 2025 | Preparedness
Stay Calm and Breathe
Understanding the Power of Breath
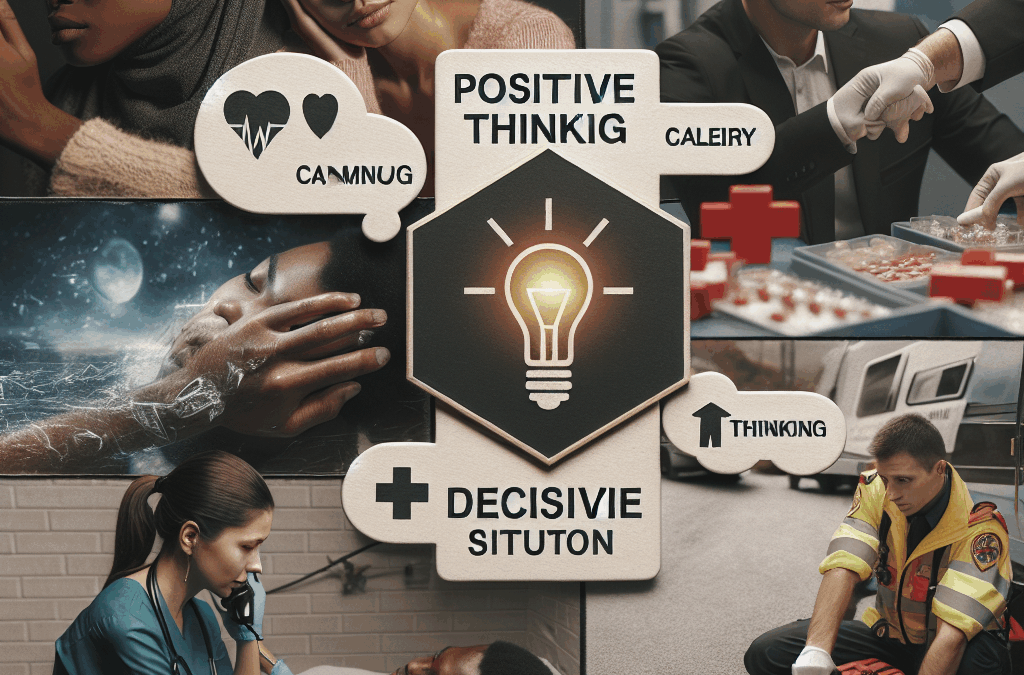
When an emergency strikes, our natural reaction might be panic. Trust me, I’ve been there. The first thing you’ve got to do is to hit the pause button. Breathing techniques can help clear the fog of panic. I remember a time when I was in a tense situation; focusing on my breath turned everything around for me.
Calming breaths essentially signal to your brain that it’s all going to be okay. When you exhale slowly, your body recognizes that it’s not in immediate danger anymore. It’s like telling yourself, “I got this!” I often find that inhaling deeply through my nose and exhaling through my mouth does wonders.
Try to implement deep breathing exercises every day, so you’re trained and ready when emergencies happen. Even simply counting your breaths can anchor you back in the present moment. Let this become your go-to strategy!
Reframe Your Thoughts
Identifying Negative Triggers
When trouble looms, our mind can go to dark places. I’ve learned the hard way that recognizing these negative thoughts is crucial. Grab a notebook, jot down your feelings during an emergency. Trust me, it’s validates what you’re feeling.
Reframing isn’t about lying to yourself; it’s about flipping the script. Instead of thinking, “I can’t handle this,” shift to, “I’m learning how to handle this.” This minor change in dialogue can really empower you to tackle the situation. It’s refreshing!
Next, consider the positive aspects of your predicament. For every emergency, there’s an opportunity for growth. Maybe it’s improving your crisis management skills or learning more about your support system. Keep reminding yourself: every cloud has a silver lining.
Visualize Success
Imagining Positive Outcomes
This might sound a bit cheesy, but visualization has been a game changer for me. When faced with an uncertain situation, I take a moment to vividly imagine a successful resolution. Picture it! What does that look like for you? The clarity really helps.
When you see yourself conquering the issue, you’re setting a positive tone for your actions. It’s like a mental rehearsal that boosts your confidence when faced with obstacles. Plus, I’ve noticed that imagining success reduces anxiety—how cool is that?
Can you envision your ideal outcome? Maybe it’s acing an important presentation or calmly managing a family emergency. Take that picture and hold on to it as a goal. Visualization can often lead to those goals manifesting in reality.
Seek Support
Don’t Hesitate to Reach Out
There’s a common misconception that we have to handle everything on our own. Let me tell you, that’s often not the case. When I face emergencies, reaching out to friends, family, or even professionals helps lighten the load. They can offer perspectives and support you might not even have considered.
Support networks are crucial during crises. I remember a time when I was unsure how to maneuver through a tough situation; talking it through with a friend not only eased my mind but also provided solutions I hadn’t thought of.
Encourage yourself to express your feelings openly. Engaging in constructive conversations can help you realize you’re not alone in your struggles. A listening ear may be exactly what you need to see things in a new light. Keep that connection alive!
Practice Gratitude
The Bright Side in Dark Times
It’s easy to get bogged down by negativity during emergencies, but I’ve found that practicing gratitude helps shift my focus. No matter how bad things seem, there’s always something to be thankful for! Even if it’s just having a place to rest your head that night, acknowledging those wins matters.
Gratitude can alter your perspective. I learned to list three things I’m grateful for every day, even amid chaos. This ritual constantly reminds me that life has its ups and downs, and recognizing what’s good helps create a more balanced outlook.
Consider keeping a gratitude journal. It’s a fantastic tool I’ve used to document positive aspects of my life, especially during tough times. Revisiting those moments fosters resilience and positivity, turning emergencies into opportunities for growth.
FAQs
What is the first step to take during an emergency?
First and foremost, stay calm and breathe. This helps clear your mind and allows you to think more clearly.
How can I reframe my negative thoughts effectively?
Identify your negative triggers and consciously shift your thoughts to a more positive perspective, focusing on your ability to handle the situation.
Does visualization really help in stressful situations?
Absolutely! Visualizing a successful outcome boosts your confidence and reduces anxiety, making it easier to face challenges.
Why is seeking support important during emergencies?
Support from friends and family provides comfort and additional perspectives, helping you navigate through difficulties better.
How can gratitude change my perspective during tough times?
Practicing gratitude helps shift focus from negativity to positivity, enhancing your resilience and outlook on situations.

by Preparation | Apr 26, 2025 | Preparedness
Awareness and Observation
The Importance of Being Aware
Let me tell you, awareness is your first line of defense in urban settings. I’ve found that keeping my head up and really observing my surroundings can be the difference between feeling safe and feeling like a sitting duck. You wouldn’t believe how many times I’ve avoided sketchy situations just because I was tuned in. It’s all about being present and engaged with the world around you.
When you’re out and about, make it a point to notice the little things. Who’s around you? What’s the vibe like? Is there something that feels off? By honing your awareness, your instincts kick in, and trust me, they usually keep you out of trouble. I’ve had my share of close calls, but it’s been my intuition, born from a keen sense of observation, that’s often guided me to safety.
Try to avoid staring at your phone when you’re walking outside. It’s a total no-no. Not only is it a distraction, but it also makes you an easy target for thieves or anyone with less-than-noble intentions. So, keep that phone down and your eyes up; it’s a simple habit that pays off big time.
Situational Awareness Skills
In addition to being alert, developing situational awareness skills is key. Always assess what’s happening around you. Who’s acting weird? Are people rushing away from something? I remember a night out where I noticed a crowd acting strangely, and just by the vibe, I could tell a fight was brewing. Trust me, ditching that area was the best choice I made that night!
Practice reading people. Noticing their body language can tell you a lot about someone’s intentions. If you see someone leaning in too close or acting overly aggressive, it’s usually a sign to take a step back. Pick up on those cues! Your gut will often steer you right, so don’t dismiss that feeling. Listen to it and react accordingly.
Finally, remember to always have an escape plan. No need to be paranoid, but having a route in mind can ease a lot of anxiety. Whether it’s knowing where the nearest exit is in a building or locating a safe area in a park, being prepared helps you feel grounded. I can’t tell you how many times that mental map has come in handy when the unexpected occurs!
Utilizing Technology
We live in a digital age, so why not use technology to our advantage, right? My phone is my best friend when it comes to personal safety. Apps like safety alert systems or neighborhood watch platforms can keep you plugged in with community information. Seriously, knowing which areas have had recent disturbances can be a game-changer in determining your route through the city.
GPS services can help you find the safest paths, especially if you’re out at night. I regularly check if there are well-lit streets or populated areas. It adds a layer of comfort knowing I’m not wandering into potentially dodgy parts of town. If a route feels off, don’t hesitate to change it up; just like with people, trust your instincts.
Lastly, consider carrying a personal safety device, like a whistle or pepper spray. I know it sounds a bit extreme, but having something to deter would-be troublemakers can be a major confidence boost. Just remember, the goal here is to feel empowered and prepared, not anxious!
Developing Confidence
Understanding Your Boundaries
Personal boundaries are crucial. It’s essential to understand what feels comfortable and what doesn’t. The first time I had someone get too close for comfort, I froze up. But after that experience, I learned to assert my space — not aggressively, but confidently. You have the right to establish your personal bubble!
Knowing how to draw the line can prevent uncomfortable or unsafe situations. Practice saying “no” if someone invades your space. Whether it’s a stranger or someone you know, being firm yet polite sends a powerful message. Trust me, it’s all about what you project. When you look confident, predators often steer clear.
Remember, confidence starts from within, but it shows on the outside. Own your space and take pride in your ability to handle various situations. Each little victory builds your confidence, making the next challenge feel a little less daunting.
Practicing Self-Defense
Look, I’m not saying everyone should train to be a ninja, but knowing some basic self-defense moves can be really empowering. I took a self-defense class a while back, and whoa, it wasn’t just about fighting; it was about learning how to stay calm and think on my feet. This aspect is priceless, especially in a city where unpredictability lurks.
Finding classes in your area can be a fun way to not only learn skills but also meet folks who share your interests in safety. A tight-knit group of friends who are all about urban survival is invaluable! Training builds camaraderie, and having a buddy system makes you feel safer while venturing out.
Even if you just practice a few techniques at home, it’s all about creating muscle memory. When things escalate, panic can set in. But feeling prepared and knowing how to react can mean the world between fear and survival. So roll up your sleeves and find a class — you won’t regret it!
Staying Calm Under Pressure
Let’s get real; it’s one thing to have knowledge, but staying calm when chaos hits is another. In my own experiences, I realized that breathing techniques can save you in seemingly stressful situations. When I was surrounded by a rowdy crowd, I took a moment to breathe, which helped me stay centered and think rationally about my exit strategy.
Practice mindfulness or meditation techniques to build this inner calm. Even a few minutes a day can do wonders. The more equipped your mind is to handle stressful situations, the less likely you are to feel overwhelmed when it matters most.
Finally, keep an open line of communication with friends or family during your outings. Letting people know your plans can lend extra peace of mind. If anything goes awry, someone has a heads-up and can check on you. Nothing beats a well-connected network, and it really adds to your confidence when you step out.
Building a Safety Network
Creating Connections
A strong safety network can be your best asset in urban survival. Whether it’s friends, family, or even co-workers, building a solid crew can prepare you for unexpected situations. I’ve often relied on a small group for late nights out, and knowing I had their backs and they had mine made it way more enjoyable and less stressful!
Don’t underestimate local community resources. Neighborhood watch programs or social media groups focused on local safety are fantastic platforms for sharing tips or alerting others about suspicious activity. Getting involved can help strengthen your network and foster a supportive vibe in your community.
Regularly check in with your circle. It’s easy to get caught up in our busy lives, but scheduling regular meets or chatting with your safety network ensures everyone stays connected and informed. A collective awareness is a powerful deterrent against crime.
Establishing a Buddy System
Having a buddy system is a classic but effective strategy. It’s just smart! There’s power in numbers, and knowing someone’s got your back can inherently boost your safety. Friends can cover each other’s blind spots and literally watch each other’s backs as you navigate through potentially sketchy scenarios.
Make it a habit to check in before heading out. “Hey, I’m going to this area”; simple texts can be lifesavers. Plus, if one of you senses trouble, you have someone to rely on, which can make all the difference in the world. Don’t leave home without a buddy (unless it’s absolutely necessary)!
Even if you don’t have a friend nearby, consider tagging along with groups or community events. There’s strength in numbers, and group outings often attract less trouble. Plus, you may make new friends along the way — it’s a win-win!
Resources and Support
Lastly, remember that resources exist for those who need additional help or guidance. Local organizations or helplines can offer support. Educate yourself about the area you live in, understanding what types of assistance are available for emergencies can add an extra layer of security.
Talk to your friends about sharing safety resources. Everyone wants to be in-the-know, and pooling resources might just lead to finding new safety apps or self-defense classes that none of you knew about previously. The more informed we all are, the better prepared we can be.
If you’re ever feeling threatened or unsafe, don’t hesitate to reach out to local support services. Whether it’s law enforcement or community outreach programs, these resources are available for a reason. Don’t tough it out alone — it’s perfectly okay to seek help.
FAQ
What should I do if I feel unsafe in a crowded area?
If you feel uneasy, trust your instincts. Move to a well-lit, populated space or seek out security personnel if available. Staying aware of exit routes can also help.
How can I improve my situational awareness?
Practice being present. Spend time consciously observing your environment without distractions like your phone. Look for odd behaviors or changes in the atmosphere.
What are the best apps for personal safety?
Some popular apps include bSafe, Noonlight, and Citizen. These can alert your contacts in emergencies and keep you connected to community safety alerts!
I don’t feel confident enough to handle dangerous situations. What should I do?
Consider taking self-defense classes to build your confidence. Additionally, practicing relaxation techniques can help you remain calm in stressful situations.
How can I build a safety network in my community?
Join local social media groups focused on safety, participate in neighborhood watch programs, and encourage friends and family to stay connected about safety concerns.

by Preparation | Apr 26, 2025 | Preparedness
Understanding Animal Behavior
Identifying Warning Signals
During my numerous outdoor adventures, I’ve picked up some crucial lessons on spotting the red flags animals exhibit when they feel threatened. When a creature is in ‘fight or flight’ mode, it’s not just about their aggression—it’s about their body language. A stiff posture, pinned ears, or baring teeth are all classic signs that an animal is ready to defend its territory. Paying attention to these signals can be a lifesaver.
One key takeaway I’ve learned is to stay calm and not panic. When you notice these warning signs, it’s easy for your heart to race, but remember: animals often react to our energy. If we can remain steady, there’s a better chance the animal will sense our calmness and not see us as a threat.
Another aspect I always keep in mind is the actual environment surrounding us. Certain animals are more aggressive when protecting their young or resources. Being aware of these dynamics can give me a leg up in avoiding a tricky situation altogether.
Knowing the Species
It’s essential to understand which animals are more likely to exhibit aggressive behaviors and why. For example, bears typically become defensive near their cubs, while some birds could dive bomb if you’re too close to their nest. Knowledge of these habits has saved me from more than one close encounter.
When I’m in unfamiliar territory, I always do a bit of homework. Before heading out, I research local species, their behaviors, and what to expect. Honestly, taking the time to get to know the wildlife is not just safer but also enhances the overall experience with nature.
Moreover, there’s a whole different approach when dealing with primates or canines. These creatures are often more intelligent and aware of human behaviors, which means I always stay cautious and respectful when crossing paths with them.
Knowing Escape Routes
After getting a solid grip on animal behavior and species knowledge, my next priority is ensuring I have a clear escape route. I cannot stress enough how important it is to know my surroundings. I once hiked in an area where I didn’t scope out a safe way out, and wouldn’t you know it—I ended up startling a moose. Thankfully, I remembered a side path I had seen earlier, which got me out of there quickly!
While exploring, I tend to have a mental map of potential hazards, whether they’re cliffs, dense forest, or areas where wildlife is known to roam. This mental preparation allows me to react swiftly if I sense aggression from a critter.
Moreover, when I hike with friends, I talk about our escape routes. It’s super important everyone is on the same page, so if something goes south, we can navigate together without chaos.
Keeping Calm During Encounters
Staying Present and Grounded
In the heat of the moment, I’ve found that my heart races and my mind races with it. Whether it’s a bear blocking the trail or a wild boar snorting nearby, I focus on my breath to stay grounded. In my experience, an instinctive reaction often leads to panic, which can escalate the situation quicker than you think.
I try not to make sudden movements or loud noises. Instead, I focus on remaining still and assessing the situation. Sometimes just standing quietly might lead the critter to lose interest and wander off. I know it sounds simple, but this really works when I’m faced with an animal that’s aggressive.
A fun tip I learned from a fellow outdoorsman is to keep your eye on the animal’s movements. I usually take mental notes of where they’re going, which helps me understand better how to navigate around them if that becomes necessary.
Using Your Voice Wisely
On one unforgettable trip, I found myself surprisingly close to a group of aggressive raccoons. Instead of panicking, I raised my voice to establish a human presence. Speaking firmly, yet not yelling, often diffuses tension—this approach has proven effective time and time again.
I’ve learned that making noise can also serve as a warning to oncoming wildlife that I’m in the area. A whistle or clap works like a charm. Just remember, though, not to overdo it; I’m not trying to startle them further!
Additionally, following up with a calm yet firm “Go away!” can signal that I am not a threat, but I’m also not backing down. It’s a balancing act, but one worth mastering to avoid escalating a situation.
Managing Fear and Anxiety
Handling encounters isn’t just about physical safety; it’s also about managing that gut-wrenching fear. I’ll admit, facing a mountain lion is a chilling thought. But there are ways I’ve learned to manage anxiety in these moments. Preparation is key. When I’m mentally ready for wildlife encounters, I feel more in control and less anxious.
Sometimes, I remind myself that most animals would rather avoid confrontation just like I would. Reflecting on this can help ease the panic, allowing me to breathe and focus on my next step.
Practicing mindfulness techniques while out in nature has been another game changer for me. Whether it’s focusing on my surroundings or taking deep breaths, it helps me navigate precarious moments with grace and focus.
Preventive Measures
Dressing Appropriately for Wildlife Encounters
When hitting the trails, I’ve learned that being dressed appropriately isn’t just about comfort—it can also prevent dangerous wildlife encounters. Wearing bright colors can make me more visible to animals such as deer, which actually helps in avoiding interactions altogether.
Additionally, I always pack some bear spray when I’m hiking through regions known for bear activity. Just the feeling of having it on hand gives me peace of mind. Knowing how to use it and recognizing when it’s necessary is a part of my pre-hike routine.
Footwear matters too! Last summer, I found myself in a sticky situation when crossing some rocky terrain while chasing an animal off my path. Good grip and proper footwear can save me from slips and stumbles when quick movements are essential.
Choosing the Right Hiking Locations
I’ve come to realize that being picky about hiking trails can also absorb a bit of risk. I always check local trail reviews and websites, noting any recent wildlife sightings or warnings. Sometimes, it’s simply not worth the risk if the area has had reported aggressive wildlife activity.
Sticking to established paths teaches me a lot too. Animals often avoid areas with heavy human traffic, so busier trails tend to lower risk. I make it a habit to choose places where I can enjoy nature while being as safe as possible.
And let’s not forget about group hiking! I always prefer a buddy over heading solo, as it decreases my chances of encountering aggressive wildlife. Plus, exploring nature is always more fun with friends anyway!
Creating Wildlife Awareness
When I’m out with friends or family, I emphasize the importance of wildlife awareness. The more we chat about our surroundings and potential dangers, the more prepared everyone feels. Having a plan in place empowers all of us to react better if we find ourselves face-to-face with creature intentions.
We often utilize local experiences or story-sharing sessions around a campfire. Sharing anecdotes from previous encounters can really drive home the seriousness of wildlife behaviors in an engaging way.
Finally, I encourage everyone to respect wildlife. We’re just passing through their territory, after all. A core principle I believe in is leaving no trace—maintaining wildlife habitats goes a long way in promoting harmony between humans and animals.
FAQs
1. What should I do if I encounter aggressive wildlife?
Stay calm, don’t run, and assess the situation. Back away slowly and avoid sudden movements while trying to make your presence known.
2. How can I recognize animal warning signs?
Look for body language such as pinned ears, growling, or bared teeth. Understanding these signals can help you react properly.
3. Should I use bear spray if I see a bear?
Yes, bear spray can be effective if used correctly. Make sure to familiarize yourself with its use before heading out.
4. Is it safer to hike in a group?
Definitely! Hiking in a group decreases the chances of a close wildlife encounter and provides support in emergencies.
5. How can I prepare mentally for a wildlife encounter?
Mental preparation includes understanding what to expect and practicing mindfulness techniques to stay calm in stressful situations.


