by Preparation | Apr 17, 2025 | Preparedness
Improved Response to Emergencies
Building Confidence in Crisis Situations
One of the most significant benefits I’ve experienced from positive preparedness training is the boost in my confidence when faced with emergencies. Understanding the various responses to different crisis situations has made a massive difference in how I approach unexpected challenges.
Before diving into this training, I often felt overwhelmed at the thought of having to respond to an emergency. However, through practical scenarios and role-playing exercises, I’ve learned that preparedness is about understanding possible outcomes and having a plan. This knowledge turns fear into action.
Now, whenever I find myself in a stressful situation, I remind myself of the skills I’ve gained. This mental shift from panic to confidence allows me to effectively lead others, which is incredibly empowering.
Effective Decision Making Under Pressure
Another fantastic aspect of positive preparedness training is sharpening my decision-making skills under pressure. The training techniques I’ve learned focus on quick thinking and prioritizing tasks, which serve me well in emergencies.
Through simulations, I’ve practiced making split-second decisions involving safety measures, resource management, and communication. Not only does this training provide me with a framework for decision-making, but it also helps alleviate the anxiety that can come with high-stress situations.
This ability to make effective decisions quickly has seeped into my daily life, assisting me in navigating everyday challenges with more poise and clarity. It’s incredible how this translates beyond emergencies, boosting my overall leadership capabilities.
Teamwork and Communication Skills Enhancement
Positive preparedness training isn’t just about individual readiness — it emphasizes the importance of teamwork and effective communication. Through various group exercises, I’ve learned how crucial it is to be aligned with my team during a crisis.
Working alongside others during training has taught me the importance of clear communication. Whether it’s coordinating responses or sharing valuable information quickly, I’ve found that strong communication skills are essential for successful outcomes. No one can do it all alone, and positive preparedness reinforces that notion.
This focus on collaboration has strengthened my relationships, both personally and professionally. I now understand different perspectives better and appreciate how valuable each team member’s input can be in any situation.
Increased Awareness and Understanding of Risks
Identifying Potential Threats
One of the first lessons I learned in positive preparedness training was how to identify potential threats accurately. This critical skill helps me assess situations better, away from purely reactive responses. Instead of waiting for an emergency to occur, I’m proactive in understanding my environment.
Being aware of possible risks enables me to think ahead and devise plans tailored to mitigate those risks. For instance, understanding what natural disasters might occur in my area has led me to prepare my home and personal safety kits with better knowledge.
Moreover, this proactive mindset has helped me share this valuable insight with others. I enjoy discussing risk awareness with friends and family — it feels good to empower them to take charge of their safety as well!
Understanding the Importance of Preparedness Planning
Through training, I’ve discovered that preparedness planning isn’t just a checkbox; it’s a vital aspect of personal safety. I learned to create and maintain plans that take into account various factors, like my location, resources available, and my family’s specific needs. This involves a whole lot of introspection and strategic thinking.
Incorporating flexibility into my plans is crucial too. Emergencies can be unpredictably chaotic, and being able to adapt my plans to moments of confusion has been a game-changer. I’ve learned that implementing a comprehensive, adaptable plan equips me to react effectively regardless of the scenario.
By understanding the significance of preparedness planning, I can ensure that my loved ones are also informed about what to do during emergencies, which creates a solid safety net for everyone involved.
Engaging in Continuous Learning and Training
One of the best parts about positive preparedness training is the culture of continuous learning it promotes. This training instills in me the motivation to stay updated with the latest safety practices and knowledge. I’ve learned that the landscape of emergencies is always changing, and being well-informed is key.
I make it a point to seek out additional workshops or community events focusing on preparedness strategies. Whether online or in-person, I thrive on interacting with others passionate about developing their skills — it’s a community effort!
Moreover, sharing my knowledge with others only deepens my understanding. When I explain concepts or teach strategies, it reinforces everything I’ve learned while helping others in the process. It feels like I’m contributing to a safer world, one person at a time.
Development of Lifelong Skills
Leadership Qualities Flourished
One of the unexpected yet rewarding benefits from positive preparedness training is the growth of my leadership qualities. I’ve found that taking charge during training exercises has fostered a sense of responsibility and confidence in my ability to lead during real-life situations.
Every time I engage in a training session, I’m encouraged to express my ideas, which promotes not only personal growth but also inspires others to engage and contribute. This collaboration reinforces teamwork, creating a supportive environment that everyone thrives in.
As I hone my leadership skills, I notice how others tend to respond positively, which emphasizes the importance of supportive and proactive leadership during crises. It’s fulfilling to guide others and play a vital role in their preparedness journey.
Enhancing Problem-Solving Techniques
Positive preparedness training has also helped me refine my problem-solving techniques. The hands-on exercises often present us with challenging scenarios where creative thinking is required to achieve the best possible outcomes.
Through trial and error, I’ve learned valuable lessons about analyzing multiple solutions and the importance of being resourceful even when faced with limitations. This mindset has trained me to view challenges as opportunities to innovate rather than roadblocks to progress.
Now, tackling problems, whether they are personal or professional, feels much more manageable. This skill translates beautifully into my everyday life, where I confidently approach situations with wisdom and adaptability.
Boosting Emotional Resilience
Lastly, positive preparedness training has significantly boosted my emotional resilience. Engaging in this training has exposed me to potentially stressful situations, teaching me to maintain my composure and confidence even when things get tough. It’s not just about technical skills, but also about mental toughness.
I’ve learned that emotional resilience is about understanding stress responses and managing anxiety effectively. Learning mindfulness practices during training helps me stay grounded in uncertain situations and provides me with a toolkit for navigating challenges in a calm and effective manner.
This newfound resilience has colored my interactions with others, allowing me to support friends and family in their times of distress. Emotional resilience not only serves me but allows me to become a pillar of strength for those around me.
Frequently Asked Questions
1. What is positive preparedness training?
Positive preparedness training focuses on equipping individuals with the necessary skills and knowledge to respond effectively to emergencies while fostering a proactive and optimistic mindset towards potential crises.
2. How does this training improve decision-making?
The training enhances decision-making by providing frameworks for quick thinking, helping participants prioritize tasks, and improving their ability to act decisively under pressure.
3. Can I apply positive preparedness training to everyday life?
Absolutely! Many skills developed during training, such as effective communication, teamwork, and problem-solving, are invaluable not only in emergencies but in daily interactions and challenges.
4. Is this training beneficial for families?
Yes! Families can greatly benefit from positive preparedness training as it promotes safety awareness, encourages open discussions about risks, and fosters teamwork in creating safety plans.
5. How can I find training programs in my area?
You can find training programs through local community centers, emergency management agencies, or online platforms offering courses. Joining local groups focused on safety and preparedness is also a great way to discover resources.


by Preparation | Apr 17, 2025 | Preparedness
Water is an essential part of our lives, but what happens when it becomes contaminated? It’s a serious issue that affects millions globally. Today, I’m here to share some personal insights and techniques that I’ve picked up over the years on purifying contaminated water. Let’s dive right in!
Filtration Techniques
Understanding the Basics of Filtration
First things first, let’s talk about what filtration really means. Basically, it’s the process of removing particles from water by using a barrier. This can be anything from a simple cloth to advanced filters. I’ve often found myself using a homemade coffee filter in a pinch. It’s amazing how effective a basic cloth can be in clearing up cloudy water!
Now, when we talk filtration, we’re really looking at various methods suited to different water sources. In my experience, gravity filters are super handy. You set them up, and they do the work for you while you’re busy with other tasks—like brewing a cup of tea!
Another method I’ve tried is using sand and gravel layers. It’s kinda cool to see nature’s way of cleaning water mirrored in our DIY efforts! Setting this up in a bucket was surprisingly rewarding, and it provided me with clean water for days.
Boiling Water
The Age-Old Method
Boiling water is one of the oldest techniques known to humanity—and for a good reason! I remember my camping trips where boiling our drinking water was a must. Just bring that water to a rolling boil for about 3 to 5 minutes, and voila! You’ve killed off most pathogens, bacteria, and parasites. It’s definitely an essential skill to take along on outdoor adventures.
However, keep in mind that this method may not remove chemical contaminants. So, if you’re dealing with heavily polluted options, boiling is more like a safety net. It’s reliable but not foolproof. I usually complement it with other techniques, just to be safe!
Plus, the whole process of watching the bubbles form and feeling reassured that you’re getting your water hot enough can be quite soothing. Just make sure you have a good pot, or you might be running into issues when it’s time to pour it out!
Chemical Treatment
Cleansing with Chemicals
I’ve found that chemical treatments are a game-changer. Water purification tablets, which usually contain chlorine or iodine, are my go-to when I’m in a bind or traveling. Simply drop one of those tablets in and wait a bit. It completely takes the worry out of drinking from questionable sources!
However, I advise checking the instructions on your tablets. Different brands might require different waiting times. I’ve had my fair share of hasty decisions, and believe me, nobody wants to deal with the fallout of not waiting long enough—yikes!
Another option I’ve dabbled with is using household bleach. It’s not the most glamorous option, but it’s effective! Just remember to dilute it properly! I can’t stress that enough—too much bleach can turn your water into a swimming pool. Fun for a swim, but not for sipping!
Solar Water Disinfection
Harnessing Sunlight
This one’s a unique method that really highlights how nature can be our ally. You simply fill clear plastic bottles with contaminated water and leave them in direct sunlight for a few hours. I learned about this technique from a friend who spent time in a region where clean water was scarce. It actually works, and I’ve tried it during summer picnics.
What’s fascinating about this method is that UV rays from the sun help kill microorganisms. It’s an eco-friendly way of ensuring you stay hydrated without burning a hole in your pocket.
However, I’ve made the mistake of underestimating the time required. Make sure you leave your bottles out long enough; don’t just assume an hour will do the trick! The longer, the better—sunlight is your homie in this case.
Reverse Osmosis
The High-Tech Approach
Now, reverse osmosis is where things get a bit more technical—yet, it’s super effective! This method uses a semipermeable membrane to remove ions, molecules, and larger particles from water. I’ve been fortunate enough to have access to a reverse osmosis water filter at home, and let me tell you, it’s a game changer! Having that access to clean water on a daily basis is a luxury I don’t take lightly.
While it’s not a method for the everyday person on a camping trip, it’s invaluable for home use. Setting it up can require a bit of effort, but once it’s working, you can just sit back and enjoy your fresh water. I often joke that it’s like having a personal chef, but for water!
But remember, maintenance is key! You have to change those filters regularly, or else all that hard work is for naught. I learned that the hard way with some funky-tasting water—definitely not something you want to sip on!
Frequently Asked Questions
What is the best method for purifying water at home?
The best method often depends on your specific needs. For everyday use, reverse osmosis is great for ensuring clean water. However, boiling and chemical treatments are also reliable options for emergency situations.
Can sunlight really purify water?
Absolutely! Solar disinfection is effective, especially in sunny climates. Just remember, it requires clear bottles and ample sunlight exposure to work its magic.
What should I do if the water looks clean but smells bad?
If water smells bad, it could indicate chemical contamination you can’t see. In such cases, it’s best to boil or use chemical treatments to purify it. Trust your senses!
Is it safe to use bleach for water purification?
Yes, but you must follow dilution guidelines carefully. Too much bleach can make your water unsafe to drink. Always measure accurately!
How often should I maintain my water purification system?
Maintenance frequency generally depends on the system you use. However, it’s a good practice to check filters monthly and replace them according to the manufacturer’s recommendations.
I hope these techniques truly empower you to tackle any water purification challenge you might face. Remember, clean water is key to good health, and with these methods, you can ensure that you and your loved ones stay hydrated and safe!

by Preparation | Apr 17, 2025 | Preparedness
Stay Informed
Follow Reliable News Sources
One of the first things I do when I hear there’s unrest is to turn on the news. It’s super important to know what’s going on, right? I always stick to reliable sources. We’ve got to sift through the noise and be sure we’re getting accurate updates about what’s happening around us. Sometimes it feels like the news can be sensational, so I focus on channels that maintain credibility.
Also, don’t forget about social media. While it can be a double-edged sword, platforms like Twitter can give real-time updates. Just be cautious though; not everything you see online is true. Cross-checking info from multiple sources has saved me from panicking over false alarms more than once!
Setting up alerts on my phone for breaking news allows me to stay in the loop wherever I am. I’d rather be overwhelmed with info than caught off guard. In moments of uncertainty, being informed is your best weapon.
Understand Your Surroundings
Before heading out, I always take a moment to survey my environment. Is there a crowd nearby? Are people congregating for a specific reason? Knowing my surroundings helps me gauge potential risks. I’ve learned the hard way that sometimes trouble can brew out of nowhere, and recognizing early signs can be vital.
Also, I make it a habit to know the locations of safe spots nearby. Whether it’s a police station, a government building, or just a good ol’ café, having a plan is key. If things get dicey, I want to have places in mind where I can seek refuge.
And let’s be honest, it’s not just about staying safe from conflict. Sometimes you just want to escape the noise and grab a cup of coffee until it’s safe to venture out again. Knowing the lay of the land can be a game changer.
Disengage When Necessary
This one’s a biggie for me. I’ve learned the hard way that it’s okay to walk away from a situation if it’s escalating. There’s no shame in choosing safety over bravado. If you find yourself in the midst of a protest or a crowd that’s turning volatile, my best advice is to exit the scene as discreetly and calmly as possible.
Resisting the urge to document everything on my phone has also been a crucial lesson. Sometimes, wanting to capture the moment can put you in harm’s way. Instead, I focus on getting to a safe zone and then assessing the situation if necessary. Trust me; there’s a time for releasing the shutter and a time for self-preservation.
Finally, don’t hesitate to seek help if things get out of hand. Whether it’s from law enforcement or fellow community members, reaching out for assistance can make a real difference.
Keep Your Communications Open
Stay Connected with Loved Ones
During unrest, I like to keep my friends and family in the loop. It gives everyone peace of mind knowing that I’m okay, and I also want to know they’re safe too. Group chats can be a lifesaver; it’s a quick way to pass on updates without having to individually reach out every time.
Before heading out, I usually let a friend or family member know my plans and intended routes. That way, if anything goes sideways, they’ll have an idea of my last known whereabouts. This simple step offers both me and them some extra reassurance.
Moreover, I make sure my phone is charged and I have backup power sources handy. Losing communication can lead to panic, so keeping my devices operational through this type of chaos is crucial.
Utilize Technology Wisely
Apps can be awesome tools during civic turmoil. I like to have a few downloaded that help with navigation, like Google Maps, but also ones that can keep me informed. Some apps send alerts about local disturbances or provide updates on safe areas in real-time.
Social media can be both an advantage and a disadvantage, so I use it wisely. Following local organizations that provide real-time updates can help ensure that I have access to factual information as situations evolve.
And if you have someone who can help from a distance, communicate with them. Having someone keeping an eye on the news can help guide your decisions. In essence, leverage those digital connections for your safety.
Prepare Your Emergency Kit
When unrest is on the horizon, I always make sure I have an emergency kit ready. I keep things simple: water, non-perishable snacks, and a first-aid kit. It’s surprising how calming it is to know that I have some essentials within reach if things take a turn.
I also include medications I might need, along with important documents. While it seems basic, having everything in one place ensures that I grab it quickly if I need to leave. I can’t tell you how many frantic searches I’ve avoided by being prepared.
Additionally, I pack a flashlight and spare batteries. Sometimes, disruptions lead to power outages or blocked roads and having a light source can keep me oriented. A little preparation goes a long way when the unexpected happens.
Be Aware of Legal Rights
Understand Your Rights to Assemble
As a citizen, I think it’s important to know my rights when it comes to demonstrations and civic engagement. It can be daunting to step out during unrest, but knowing that I have the right to voice my opinion can be empowering. I make a point to educate myself on local laws and regulations regarding gatherings.
However, I also remind myself that this isn’t a free pass to act recklessly. Understanding the framework can help me navigate situations much better and make informed decisions about participation or withdrawal from a protest.
Being prepared with this knowledge not only reassures me but also empowers me to stand by fellow citizens if something untoward happens. Community awareness of legal rights fosters a culture of support and protection.
Know How to Document Events
If I find myself in a situation where things turn chaotic, it’s essential to know how to document events conscientiously. This can include capturing video or photos, but here’s the catch: I prioritize my safety first. If documenting puts me in danger, I choose to step back.
When safely recording, I always make sure to be respectful of others’ privacy. The intent should never be to exploit someone else’s situation, and I believe it’s crucial to have empathy in such tense times. Remember, we’re all humans in distress, right?
Ultimately, I think documenting can play a significant role in providing accountability, but I emphasize staying aware of my environment. Balancing awareness and documentation can be tricky, but with practice, we can all share experiences while staying safe.
Have a Plan for Evacuation
Know Your Escape Routes
Planning an escape route can really save my skin during civil unrest. It’s like chess – you need to think a few steps ahead. I prefer to familiarize myself with multiple pathways out of crowded areas, as sometimes the most direct route might be blocked.
Mapping out escape routes might feel a bit paranoid, but trust me, a little forethought can go a long way. I find it useful to choose routes that take me away from potential conflicts rather than directly toward them. Keeping eyes peeled for alternate exits can provide that extra layer of assurance.
Also, when I’m at events, taking mental notes of where security personnel are positioned can guide my decisions should I need assistance or a faster exit. Better safe than sorry, right?
Practice Situational Awareness
I always stay tuned to what’s going on around me, even if I’m just grabbing lunch. It’s about cultivating that sixth sense for danger. This isn’t just being hyper-vigilant; it’s about being aware of body language, sounds, and any changes in the crowd’s behavior.
If things suddenly feel off, I pay attention and don’t hesitate to depart from the area. Trusting instincts has saved me on more than one occasion, and I believe it’s a skill anyone can cultivate with time.
Besides, I think it’s about being engaged with your community, too. The more familiar I am with the people around me and their usual behavior, the easier it becomes to detect when something’s not quite right.
Rehearse Your Exit Plan
Run through scenarios in your head; it may sound goofy, but I often visualize what I’d do if I needed to evacuate. Think of it as a fire drill for civil unrest. Preparing for potential situations mentally can bolster my confidence during an actual event.
Sometimes I even practice with friends and have discussions about what we would do together. This not only solidifies plans but helps keep everyone on the same page. A safer community starts with collective awareness and preparedness.
And if I’ve ever doubted the value of practicing, I look back on times when my gut instincts kicked in because I had prepared. Every little bit of readiness can make a significant difference when it counts the most.
Frequently Asked Questions
1. What should I do if I find myself in a Civil Unrest situation?
It’s crucial to remain calm. Assess your surroundings and decide whether it’s better to stay put or leave the area. Stay informed through reliable news sources and communicate with loved ones about your status.
2. How can I prepare my emergency kit for civil unrest?
Your emergency kit should include essentials like water, snacks, a first-aid kit, medications, important documents, and a flashlight with batteries. Keep everything in one place for quick access.
3. Are there legal considerations to be aware of during protests?
Yes, it’s essential to understand your rights to assemble and voice your opinion. However, ensure you’re aware of local laws to navigate situations responsibly.
4. How can I ensure my safety while documenting events?
Prioritize your safety first. If you can document events safely without putting yourself at risk, do so. Always avoid exploiting situations; approach documentation with empathy and respect.
5. What steps can I take if I feel unsafe in a crowd?
If you feel unsafe, trust your instincts to leave the area calmly and discreetly. Familiarizing yourself with escape routes and maintaining communication with friends can help elevate your safety during unrest.
by Preparation | Apr 17, 2025 | Preparedness
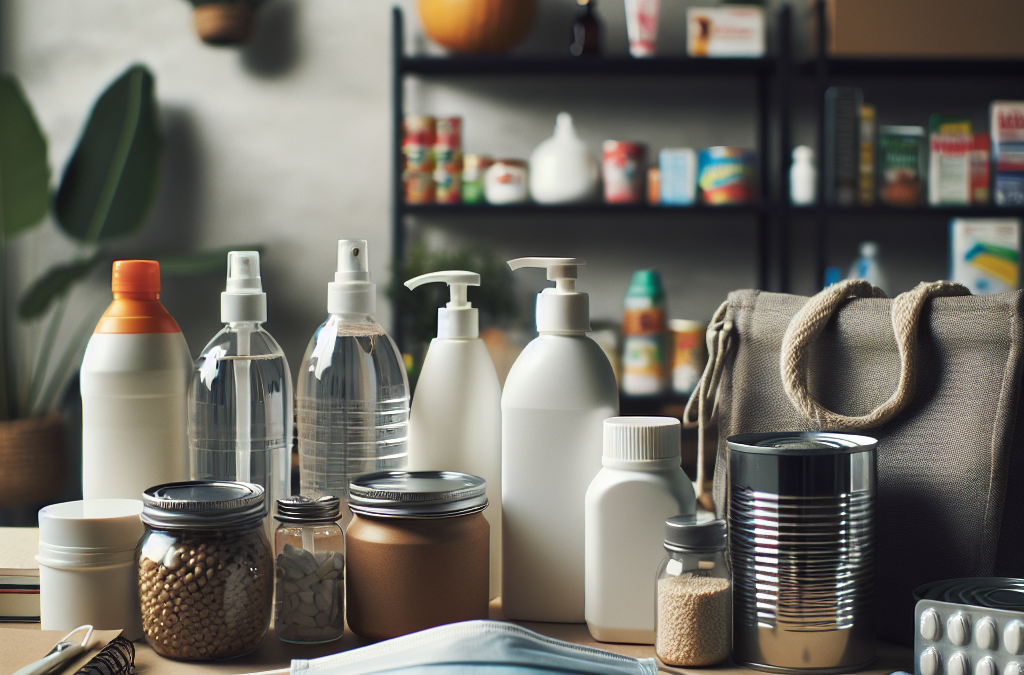
Hey there! As someone who’s been through a few challenges during past pandemics, I’ve come to realize just how crucial it is to be prepared. I remember the initial shock and panic that gripped everyone when the news first broke. It felt overwhelming, but with a little planning and the right supplies, it became a whole lot easier to handle. So, I’ve compiled a quick guide for you on what essential supplies to have at home to weather any future storms. Let’s dive into it!
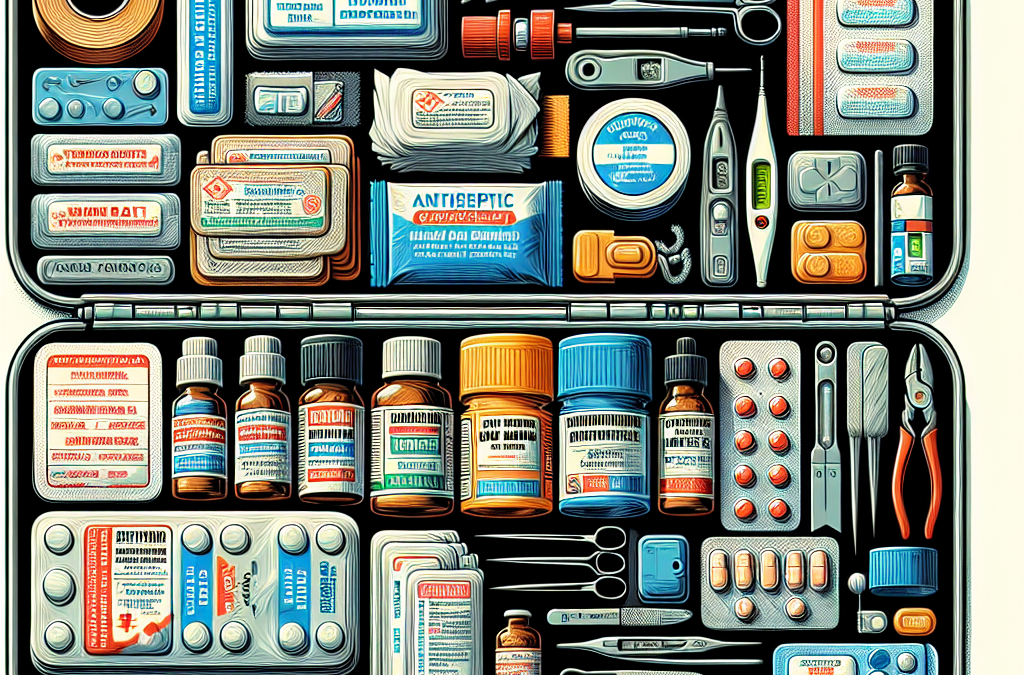
1. Medical Supplies
First Aid Kit Essentials
First off, you can’t go wrong with a well-stocked first aid kit. It’s sort of like having your own little emergency room right at home. I recommend including items like band-aids, antiseptic wipes, and gauze—these basics can make a huge difference. There’s nothing worse than a scraped knee with no way to treat it!
Don’t forget to personalize it based on your family’s needs. If you or someone in your household takes prescription meds, ensure you have a good stockpile just in case. Trust me, when things get hectic, it’s a huge relief to have everything you need on hand.
Also, it’s wise to include over-the-counter medications. Pain relievers, allergy medications, and antacids can save you a lot of hassle later. Remember, it’s better to be safe than sorry!
Regular Health Monitoring Tools
During any pandemic, health awareness is key. Having a thermometer, a pulse oximeter, or even a blood pressure monitor can help you keep tabs on your loved ones’ health. These tools can be lifesavers if anyone feels unwell.
It’s surprisingly easy to overlook the simple stuff, but trust me, monitoring health can prevent a lot of stress down the line. I remember when I had a fever and having a thermometer handy gave me peace of mind because I could track my symptoms easily.
If your family always has these tools in reach, it’s just one less thing to worry about when you’re feeling under the weather. Plus, it shows you’re taking your health seriously!
Face Masks and Sanitizers
Ah, the infamous face mask! Whether you love them or think they’re a nuisance, having a good supply at home is essential. I like to keep a stash of both cloth and disposable masks. They vary in comfort, and sometimes you just need that extra layer of protection.
And while we’re talking germs, hand sanitizers are a must-have too! I can’t stress how handy they were when I couldn’t wash my hands right away. Just a drop of sanitizer does the trick to keep those pesky viruses away.
So remember, a well-prepared medical supply kit isn’t just about basic first aid—it’s about your overall health and safety readiness!
2. Food and Water Supplies
Non-Perishable Foods
Next on my list is food. Non-perishable foods are a lifesaver during any crisis. Think canned goods, pasta, rice, and dried beans—items with long shelf lives that can be stored easily. I learned the hard way about the importance of stockpiling when my local grocery store was stripped bare.
Having a variety of foods can also help make sure your meals don’t get stale. Mix it up with some spices, sauces, and other flavor enhancers. Trust me, your taste buds will thank you when you’re in lockdown!
Also, don’t forget pet food if you’ve got furry friends at home. They depend on us too, and running out in the middle of a pandemic is definitely not a fun time!
Water Storage
Let’s talk about water. Staying hydrated is absolutely key, especially in stressful times. I suggest keeping at least a week’s worth of water stored. I like to have a mix of bottled water and larger containers that can be filled from the tap.
You might not think it’s necessary until you find yourself without easily accessible water. This past summer, we faced a minor drought, and it reminded me that having extra water on hand is never a bad idea!
Plus, if you ever need to boil water for safety concerns, having some bottled water can help ensure you have something to drink while you wait. Always plan ahead!
Meal Prep and Planning
Meal planning might sound boring, but when you have a well-thought-out grocery list, it makes things so much easier. I love sitting down once a week to plan out my meals and make a shopping list. This helps avoid those annoying last-minute runs to the store.
Try to get creative with what you have stocked and mix up your meals. I follow various recipes that incorporate pantry staples, so I’m never at a loss for meal ideas. Plus, it’s a fun way to keep cooking entertaining!
And with meal prep, you’ll always have something on hand. It can really save time when you’re juggling work or kids at home. Always good to have a strategy!
3. Cleaning Supplies
Disinfectants and Sprays
Keeping a clean environment is crucial, especially during a pandemic! I always stock up on disinfectants and sprays. You can never have too many wipes or cleaning sprays, am I right? It reassures me that my home is a germ-free zone when I’m constantly cleaning high-touch surfaces.
Make a checklist of all the surfaces you need to regularly disinfect—kitchen counters, doorknobs, light switches, and cell phones are top of my list. It’s amazing how quickly germs can spread if we aren’t careful!
And don’t be afraid to get creative! You can make your own disinfectant using household items like vinegar and baking soda. It’s a natural way to keep things clean and fresh.
Basic Cleaning Tools
Once you have your cleaning supplies, don’t forget basic tools! Mops, brooms, and sponges are vital for maintaining cleanliness. I keep an extra set of cleaning rags on hand too—nothing’s worse than realizing you’ve run out in the middle of a deep clean.
It can be super helpful to set up a regular cleaning schedule. I like to designate specific days for different tasks, making it much less overwhelming. Trust me, it makes a huge difference in how I feel about my living space!
So take it from me, get yourself set up with the right tools, and cleaning will feel like a breeze instead of a burden!
Personal Hygiene Supplies
Personal hygiene is super important during uncertain times. You’ll want to make sure you have plenty of toiletries, like soap, shampoo, toothpaste, and toilet paper. I still laugh when I think of all the toilet paper panic from the last pandemic!
Having an abundance of personal care items can ease the stress of running out in the middle of a crisis. Stocking up ahead of time helps you feel prepared and comfortable.
Lastly, consider including some self-care items in your stockpile. Facemasks, bath products, or even scented candles can help lift spirits during trying times. Don’t underestimate the power of a pampering session!
4. Communication Tools
Chargers and Backup Power
In our digital age, staying connected is essential. Make sure to have chargers handy for all your devices! I’ve learned my lesson the hard way about losing power during a storm—let’s just say I had to take a break from my phone and reconnect with the offline world!
Investing in a portable charger can help too. If the power goes out, having that backup can keep you connected to news, friends, and family. I love using mine when I’m on the go too—such a lifesaver!
It’s also good to have a small stash of batteries for any other devices you might need. Radios, flashlights, or even those battery-operated speakers can come in handy when you least expect it!
Social Media and Communication Apps
In times of crisis, staying in touch with people is key. I’ve found that group chats and social media become my lifeline when the world feels a bit too chaotic. It helps to know you’re not alone, and others might share your experiences.
Set up communication channels with your close friends and family—it’ll help you all feel more connected. Plus, sharing tips and updates during a pandemic can help everyone stay informed and safe.
Make sure to also turn off notifications occasionally. Sometimes, a little digital detox can be good for your mental health, especially when your feeds are flooded with pandemic news.
Emergency Contact Lists
Don’t forget to create an emergency contact list. Write down important phone numbers for family, friends, neighbors, and healthcare providers. Keep this list handy in case technology fails.
It’s kind of like your own mini directory, so don’t overlook it. Having these contacts made it so much easier for me when I had to reach out in a hurry.
And remember to update this list regularly as contact information changes. Keeping everything organized helps when you really need to reach someone!
5. Entertainment and Wellness
Books, Movies, and Games
Staying home during a pandemic can lead to some boredom. But it can be a chance to pick up that hobby you’ve been meaning to explore! Stocking up on your favorite books, movies, and games can really help keep morale high.
I remember going through my bookshelf and finding books I’d forgotten about. It was like a treasure hunt! Having a mix of entertainment options can take the edge off long days stuck at home.
Think about doing fun family activities too! Board games, puzzles, or even home movie nights can bring everyone together and create a welcoming atmosphere.
DIY and Hobbies
You might find that this is the perfect time to pick up a new hobby or dive into a DIY project! Whether it’s knitting, gardening, or even learning to cook, creative outlets can be a great escape.
Use supplies you already have around the house to get started! I found some old paint in my garage and turned my patio into a little art area. It became a cool new space to enjoy and reflect, and it keeps the creativity flowing!
Also, don’t forget about online tutorials! There’s a world of knowledge out there, and being able to learn something new from home can really help keep spirits high!
Mental Health and Mindfulness
Finally, don’t forget about your mental health! It’s super important during stressful times. I rely on mindfulness practices such as meditation, journaling, or even simple breathing exercises to stay grounded.
Having supplies like journals or calming essential oils can help create a soothing atmosphere at home. Establish a daily routine that includes time for self-care.
It’s essential to check in with yourself regularly. Make sure you’re processing everything, whether through talking with someone, engaging in creative outlets, or simply taking a break.
FAQ
1. What are the most essential medical supplies to have at home?
It’s crucial to have a stocked first aid kit, regular health monitoring tools like a thermometer, and plenty of face masks and hand sanitizers.
2. How much food and water should I store?
Aim to have at least a week’s supply of non-perishable food items and water. This ensures you’ll stay nourished and hydrated during tough times.
3. Why are cleaning supplies important?
Keeping your living space clean helps prevent the spread of germs and illness. Stock up on disinfectants, basic cleaning tools, and personal hygiene supplies.
4. What communication tools should I prepare?
Ensure you have chargers, backup power sources, and an updated emergency contact list so you can stay connected in any situation!
5. How can I maintain mental wellness during a pandemic?
Engage in hobbies, practice mindfulness, and set up a routine that focuses on self-care to help manage stress and anxiety.
So there you have it! Being prepared doesn’t have to feel daunting. A little planning can go a long way in ensuring you feel comfortable and secure at home. Stay safe, folks!
by Preparation | Apr 17, 2025 | Preparedness
Assess Your Needs
Understanding Your Travel Style
When I think about packing an emergency kit, the first thing I consider is how I travel. Whether you’re a backpacker heading to the wild or someone booking luxury stays, your kit should mirror your journey. Budget trips? You’ll want lightweight, compact options. Luxurious travels might allow for more tools, but think about whether you really need them.
My trips have taught me that being prepared means having things tailored to the situation. For example, if you’re planning a family road trip, your needs will gravitate towards snacks, entertainment, and first-aid options suitable for kids. Solo travel? Focus on compact, versatile items that can work in multiple scenarios.
Lastly, consider your destination. Is it urban or more remote? A city adventurer may need a different set of tools compared to someone trekking through a national park. Taking a moment to assess your own needs makes all the difference when it comes to packing smart.
Gather Essentials
Hygiene and First Aid Supplies
You can’t go wrong with starting your emergency kit with hygiene and first aid supplies. I remember one summer trip where I underestimated the power of hand sanitizer. Trust me, you’ll thank yourself later! A simple pack of wipes, hand sanitizer, and a small toothpaste can aid in a pinch, especially when traveling to places where cleanliness may not be a priority.
First aid essentials, like band-aids, antiseptic wipes, and pain relievers, are also non-negotiable. I once had a trekking buddy that cut himself while trying to impress us with his climbing skills. Having those supplies made it easy to handle the situation before we could seek professional care. You’d never think you’d need it, but trust me – it can happen!
Don’t forget disease prevention essentials like insect repellent or sunscreen depending on your destination. After a trip to Southeast Asia, where I’d forgotten the bug spray, I learned my lesson the hard way. Being prepared is all about planning for the “what-ifs”!
Pack Smart
Choosing the Right Bag
The bag you pick for your emergency kit is key. I mean, it should be compact yet spacious enough to fit the essentials. I usually opt for a lightweight backpack. It’s easy to carry around, and the best part? I can slide it into a larger suitcase if I need to. Versatility is a must.
Pockets are another thing to think about. I love bags with separate compartments because it keeps everything organized. No one wants to rummage through a jumbled mess when a scrape needs to be cleaned or when it’s time for snack time!
Also, consider the bag’s durability. If you’re trekking through varied terrains, snagging something that can withstand rain or the occasional fall is key. I learned that the hard way on a hike when my bag tore, and I lost important items.
Stay Updated
Regularly Check Your Supplies
One important lesson I’ve learned is to keep your emergency kit fresh. I mean, how many times have I grabbed an old granola bar that was definitely past the expiration date? Yikes! Regularly checking your supplies ensures that nothing’s stale or ineffective.
Plus, situations change! Maybe you’ve added new dietary restrictions or shifted your travel style since the last time you packed your kit. Spend a little time updating your supplies every couple of months – it’s worth the time and effort.
Taking notice of how your needs evolve keeps your emergency kit relevant. A simple check-in can remind you to adjust things, ensuring you’re prepared no matter where you wander off to next!
Know Emergency Protocols
Research Local Regulations and Contacts
Before heading off, I always take the time to look up local emergency protocols and contact information. This isn’t just a good idea; it’s crucial! Each country has different laws and customs, and being well-versed could literally save your life.
Know the number for police, fire, and medical emergencies for every destination. It’s also wise to jot down local embassies’ contact information. Emergencies can arise quicker than anticipated, and having those key contacts saved in your phone can make a big difference.
I also make sure to inform someone back home about my travel plans. Sharing your itinerary and contact information improves your safety net – sometimes I think of it as my own safety whistle. It gives me peace of mind knowing someone’s got my back!
FAQs
1. What should I include in my emergency kit?
Your kit should feature basic first aid supplies, hygiene products, snacks, water, and a few essential tools like a flashlight, multi-tool, and any personal items necessary (medications, etc.).
2. How often should I update my emergency kit?
Try to check and update your kit every few months or before major trips. This way, you can ensure all supplies are fresh and still relevant to your travel needs.
3. What type of bag is best for an emergency kit?
A lightweight backpack with compartments is usually the best choice. It should be easy to carry, durable, and spacious enough to hold all your essentials without being bulky.
4. Is it necessary to know local emergency protocols?
Absolutely! Each location may have different laws, services, and emergency numbers. Being prepared and informed could make a significant difference in a tough situation.
5. Can I include food in my emergency kit?
Yes! Non-perishable snacks like granola bars, nuts, or dried fruits are great options. Just remember to check expiration dates regularly when updating your kit!


