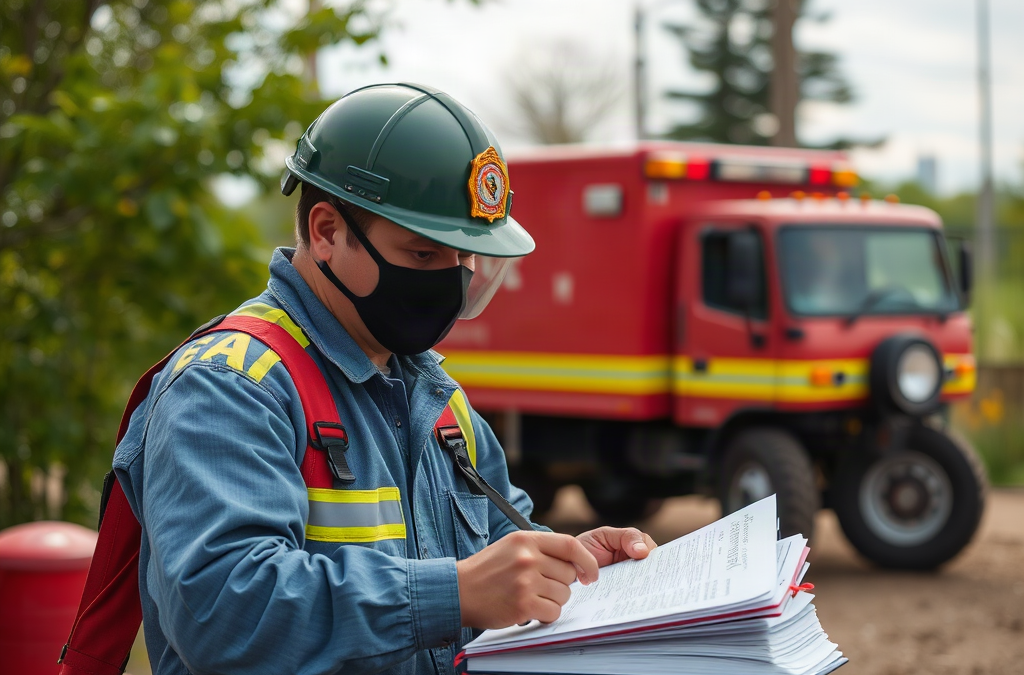
The first part of an emergency plan explains what people should do during the first minutes of a threat. A useful plan does not treat every emergency alike: sheltering from a tornado, leaving during a wildfire, responding to a home fire, and coping with a power outage require different actions. The plan should identify the hazards most plausible for the location and translate them into short, observable instructions.
Begin with the places that provide the best protection. Note the interior room or lower level used for severe weather, the exits from each sleeping area, the location of fire extinguishers, and the shutoffs that household members are authorized and able to use. The goal is not to create a technical manual. It is to remove hesitation when smoke, darkness, noise, or stress makes ordinary judgment harder.
A common weakness is writing “evacuate if necessary” without defining who makes the decision or what happens next. Set triggers that can be recognized, such as an official evacuation order, visible smoke approaching the property, a fire inside the home, or a loss of safe access. For a medical emergency, the plan may instead emphasize calling emergency services, unlocking the door, gathering medication information, and keeping pathways clear.
Households should compare a printed plan with actual mobility and safety constraints. A person using a walker may need more time and a clear route; a child may not know how to open a window; a pet may hide during alarms. Battery lighting, smoke alarms, hearing-alert devices, and accessible transportation can change the practical answer. The mistake is assuming that a plan works because it sounds sensible on paper. Walk the route, try the shelter location, and correct anything that cannot be performed quickly.
Supplies, Services, and Household Capabilities
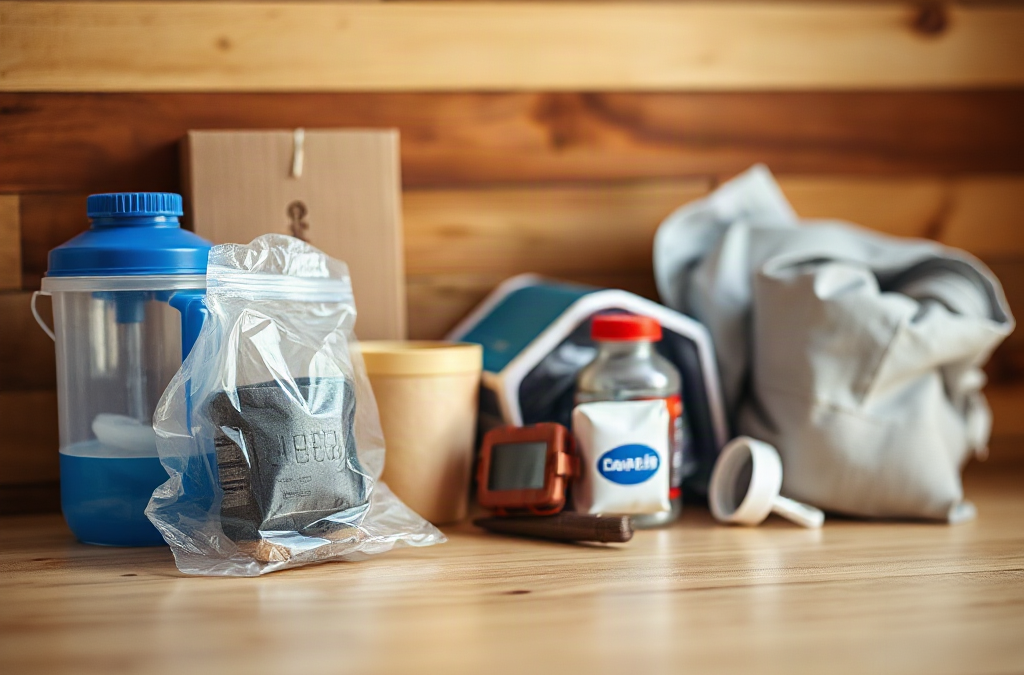
The second part covers the resources needed to remain safe when normal services are interrupted. Supplies are only useful when they are reachable, usable, and suited to the disruption. A household facing a short power failure may need lighting, safe food handling options, and device charging; a longer interruption may also require water arrangements, sanitation, medications, cash access, and a way to receive updates.
Build the inventory around actual use rather than a generic pile of products. Record prescription schedules, infant supplies, mobility aids, glasses, allergy needs, pet food, and backup methods for essential equipment. Include shelf-stable foods the household already eats and a manual can opener if cans are part of the inventory. Store drinking water and sanitation supplies where they will not be trapped by a flooded basement, blocked garage, or locked cabinet.
Capability matters as much as quantity. A portable generator, for instance, does not solve an outage unless it can be operated safely outdoors, fueled appropriately, and kept away from windows and doors. A battery bank is less useful if its charging cable does not fit the household’s phones. A large stock of frozen food may offer little protection during a prolonged outage, while shelf-stable meals may be difficult for someone with limited cooking ability. The better choice depends on storage space, budget, health needs, and the likely duration of disruption.
Use a compact priority check when resources are limited:
Life safety: medications, first-aid materials, safe lighting, alarms, and emergency contact information.
Basic function: drinking water, ready-to-eat food, sanitation, warmth or cooling, and charging options.
Continuity: documents, transportation funds, work or school needs, pet care, and replacement batteries.
Rotate items during ordinary life instead of waiting for an annual inspection. Check expiration dates, damaged packaging, battery condition, fuel storage rules, and whether medications require special handling. A frequent failure mode is confusing ownership with readiness: buying an item is not the same as knowing where it is, testing it, or ensuring every intended user can operate it. Link this inventory to Three parts every emergency preparedness plan should cover by recording the specific need each item addresses.
Communication, Evacuation, and Accountability
The third part defines how people will exchange information, separate safely, and reconnect when normal communication is unreliable. A plan should name an out-of-area contact, establish at least one local meeting place and one location outside the immediate area, and explain how household members report their status. These details reduce the chance that everyone makes separate assumptions during a fast-moving event.
Phone calls may fail because of congestion, damaged infrastructure, dead batteries, or poor reception. Text messages may work when voice calls do not, but a plan should not rely on one device or one network. Write important numbers on paper, keep a small charger where it can be found, and identify official alert channels for the local area. Agree on a simple message format, such as stating the person’s name, location, condition, and next destination.
Evacuation planning needs more than a route drawn on a map. Identify two ways out when possible, account for road closures, and decide who takes children, pets, medications, documents, and mobility equipment. A vehicle plan should include fuel awareness and a rule against leaving without essential passengers or supplies. People without cars need a specific transportation contact or public-service option; “find a ride” is not an operational instruction.
Consider a school-day scenario in which a storm closes roads while adults are at work. The plan should state whether children go to a designated caregiver, which adult has authority to collect them, and how that adult proves identity if required. For older relatives living elsewhere, record who checks on them and what information confirms that help has arrived. Avoid assuming that the closest person is the best responder; work schedules, disability, distance, and road access may make another person more reliable.
Keep copies of the plan in more than one safe location, but protect sensitive information. A paper copy at home can be paired with a secure digital copy accessible from outside the property. Review the contact tree after moves, job changes, new phone numbers, custody changes, or changes in medical needs. The practical test is whether a person who was not present during the planning conversation can follow the instructions without guessing. More on how these decisions fit together appears in Three parts every emergency preparedness plan should cover.
Testing and Updating the Plan
A plan becomes dependable through small tests, not through its length. Choose a quiet time to rehearse the most consequential actions: leaving the home, reaching the shelter room, locating the supply container, sending the agreed message, and meeting at the designated location. A short drill often reveals blocked exits, missing keys, dead batteries, confusing language, or equipment that no one knows how to use.
Test assumptions under realistic constraints. Turn off the lights briefly and see whether everyone can find the flashlight. Ask a child to explain where to meet without prompting. Check whether a neighbor can reach a household member who does not drive. If a medication needs refrigeration, confirm the backup arrangement with a pharmacist or clinician rather than guessing. For fuel-powered equipment, follow the manufacturer’s safety instructions and never test it inside a home, garage, or other enclosed space.
Different households should emphasize different parts. A renter may need landlord contacts and a plan for building evacuation; a rural household may need longer supply continuity and greater travel distances; an apartment resident may have limited storage but more nearby support. A plan for a person with a service animal should include the animal’s identification, supplies, and transportation needs. Treat these differences as design requirements, not optional additions.
After each drill or real incident, record what failed and assign a correction. Replace vague directions with names, locations, times, or conditions. Update the plan whenever household membership, health, transportation, housing, or local hazards change. A useful review asks four questions: Can everyone recognize the first action? Can the household function if utilities stop? Can separated people communicate and reunite? Can each person reach the needed supplies? The answers show where the next dollar or hour of preparation will have the greatest effect.
For a related way to organize priorities, use Three parts every emergency preparedness plan should cover as a recurring review rather than a one-time writing exercise. The strongest plan remains short enough to use, detailed enough to guide decisions, and flexible enough to handle conditions that were not anticipated.
Frequently Asked Questions
What are the three main parts of an emergency preparedness plan?
The three parts are immediate safety actions, supplies and service continuity, and communication, evacuation, and accountability. Each should reflect the household’s hazards and capabilities.
How often should an emergency plan be reviewed?
Review it at least annually and whenever someone moves, a phone number changes, medical needs develop, transportation changes, or a major local hazard occurs.
Should an emergency plan be printed?
Yes. A printed copy remains available when internet service, power, or a phone is unavailable. Keep it in a known, accessible location and protect sensitive personal details.
What is the most common preparedness planning mistake?
Many plans list supplies or general intentions without assigning actions. A usable plan names who acts, where people go, how they communicate, and what conditions trigger a decision.
How can a household prepare on a limited budget?
Prioritize life-safety items, medication continuity, water, lighting, sanitation, and communication. Use ordinary household purchases, rotate supplies, and improve one capability at a time instead of buying specialized gear first.
Further Reading
Authoritative Sources
Make a Plan ready.gov
Provides federal guidance for household communication, evacuation, sheltering, and emergency planning
Make a Plan redcross.org
Offers practical planning considerations for household members, pets, medical needs, and meeting locations
National Preparedness Planning fema.gov
Explains how preparedness planning connects risks, capabilities, response, and recovery
Conclusion
A dependable emergency preparedness plan connects decisions, resources, and people. Identify the hazards that could change what you do first, then make those actions easy to recognize under stress. Match supplies to real medical, mobility, dietary, pet, and transportation needs, and test equipment before an outage or evacuation makes testing difficult. Communication arrangements should include meeting places, backup contact methods, and clear responsibility for children or relatives who may need assistance. Finish by rehearsing one scenario and correcting the first weakness you find. Repeating that process keeps the plan aligned with changing household circumstances and turns a document into an operational tool rather than a forgotten list.
A thirty-day kit should be calculated from actual household use, not from a generic shopping list. Count every person, child, pet, and dependent adult, then identify needs that become more demanding when water, electricity, transport, or stores are unavailable. A person who normally relies on refrigerated medication, powered medical equipment, infant formula, or a special diet may require more planning than the basic volume of supplies suggests.
Write down one ordinary day of consumption before buying anything. Record drinking water, cooking water, meals, hygiene products, prescription doses, batteries, pet food, and waste supplies. That record exposes hidden dependencies: coffee equipment that needs power, a toilet that cannot flush, contact lenses that need cleaning solution, or a home oxygen device that needs a backup power source. The Thirty-day emergency kit planning for prolonged disruptions process becomes more accurate when it follows routines rather than product categories.
Storage capacity creates a genuine tradeoff. A large water reserve may be difficult to move, while an overreliance on purification equipment may fail if fuel, filters, or clear instructions are missing. Likewise, buying thirty identical meals can save space but create menu fatigue, poor nutrition, or waste if nobody will eat them. Separate supplies into a core reserve and a working supply. The core reserve remains untouched except during a disruption; the working supply is opened and replaced during normal life.
Use a priority order when money or space is limited:
Water, essential medication, and medically necessary equipment.
Ready-to-eat calories suited to the household.
Sanitation, infant care, pet care, and personal hygiene.
Lighting, communications, charging, and safe cooking.
Comfort items, tools, and longer-term convenience supplies.
A common mistake is treating the thirty-day target as a guarantee that conditions will remain stable. A disruption may include evacuation, contaminated water, extreme temperatures, or restricted access to the home. Keep a smaller grab-and-go set separate from stored supplies, and review whether the reserve is useful for sheltering in place, leaving quickly, or both.
Build Food and Water Reserves That Work
Food planning works best when shelf life, preparation requirements, nutrition, and familiarity are considered together. Choose foods that can be eaten without cooking alongside ingredients that need hot water or a short cooking time. Canned fish, beans, vegetables, fruit, nut butter, shelf-stable milk, whole-grain crackers, oats, rice, pasta, and commercially packaged meals can serve different purposes, but each item should fit the household’s dietary and equipment limits.
Ready-to-eat food is valuable when fuel is scarce, yet it often costs more and may contain more sodium than ordinary groceries. Dry staples are economical and compact, but they consume water and fuel. That comparison matters during a prolonged power outage: a bag of dry beans may be practical in a functioning kitchen but less useful when cooking fuel is limited. Include manual can openers, simple seasonings, familiar snacks, and foods that require no refrigeration. For allergies or medical diets, use labels and keep substitutes rather than assuming a general emergency meal will be suitable.
Water needs separate accounting for drinking, food preparation, medication, and basic hygiene. Store water in containers intended for that purpose, keep them away from chemicals and direct heat, and follow the container maker’s maintenance instructions. Commercially packaged water can simplify storage, while filled containers may offer flexibility but require closer attention to cleanliness, age, and handling. Do not let a filter replace stored water entirely: filtration performance depends on the device, the contaminant, and correct operation, and some products do not address every water hazard.
Plan a rotation system tied to normal meals. Put newer items behind older ones, mark opening dates on bulk packages, and inspect cans for swelling, rust, leaks, or severe dents. A useful test is a low-stakes weekend menu: prepare several stored meals using only the proposed equipment and measure the water, fuel, cleanup time, and waste produced. If one meal requires a missing tool or takes too much fuel, change the reserve before an emergency exposes the flaw.
Food safety also changes during a prolonged disruption. Refrigerated food may become unsafe before its appearance or smell changes, so keep a thermometer and avoid tasting questionable items. Do not place hot food into an already failing refrigerator and assume it will remain safe. The emergency kit plan should make the safest choice easier by emphasizing sealed foods, clean utensils, and meals that create little leftover waste.
Cover Medication, Sanitation, and Daily Care
Medication planning deserves early attention because a supply shortage may be harder to solve than a food shortage. Review prescription quantities, refill timing, storage requirements, and access to pharmacies. Ask a pharmacist or prescriber about lawful refill options and proper storage rather than changing doses or stockpiling medicines on your own. Keep an up-to-date medication list with names, strengths, schedules, allergies, prescriber contacts, and insurance information in a protected format.
Some medicines tolerate ordinary room conditions; others require temperature control, light protection, or special handling. A cooler can slow warming but is not automatically a safe long-term medical refrigerator. If a person depends on powered equipment, contact the equipment provider and utility company about documented backup requirements, but do not assume registration guarantees electricity or emergency service. Include spare tubing, consumable parts, batteries, or charging equipment only when they are appropriate for the device and within the manufacturer’s instructions.
Sanitation supplies prevent a manageable disruption from becoming a household health problem. Store soap, hand sanitizer, toilet paper, menstrual products, diapers, wipes, heavy-duty bags, disinfecting supplies, gloves, and a way to manage waste. Water used for drinking should not be silently diverted to cleaning unless the plan explicitly accounts for the loss. If toilets cannot flush, a safe waste procedure must be identified in advance; improvised containers should be lined, secured, and handled according to local public-health guidance.
Personal care needs are easy to underestimate because many items are used in small amounts each day. Count contact-lens supplies, hearing-aid batteries, glasses, dental products, incontinence products, mobility aids, and pet medications. A household with an infant may need more storage volume than a household of the same size because formula, diapers, and cleaning water cannot simply be substituted with adult supplies.
The failure mode to avoid is storing generic first-aid products while overlooking routine care. A first-aid kit may address a cut, but it will not replace a required prescription, ostomy supply, glucose-monitoring item, or infant feeding method. Review the list with the person who uses each item; the person affected often knows the practical limitation that a general checklist misses.
Prepare for Power, Information, and Cooking Limits
Power planning should begin with the devices that protect health and communication, not with entertainment. List phones, medical equipment, lights, radios, refrigerators, fans, and any device needed for accessibility. Identify each device’s input, charging time, battery type, and expected runtime. A power bank may charge a phone but cannot necessarily operate a high-draw appliance, while a generator may run selected equipment but introduces fuel, ventilation, noise, and carbon-monoxide risks.
Keep several charging paths: charged power banks, car charging, replaceable batteries where appropriate, and a small radio that does not depend on cellular service. Test cables with the actual devices rather than assuming connectors match. Store printed contact details, medication information, maps, insurance records, and copies of identification because a dead phone can remove access to information that was never written down.
Cooking choices should match the shelter location. Never use a fuel-burning camp stove, charcoal grill, or generator inside a home, garage, basement, or other enclosed area. Outdoor equipment also needs stable placement, dry fuel storage, and a method for safely handling hot cookware. If outdoor use is impossible, emphasize no-cook meals rather than treating an indoor flame as a harmless substitute for normal cooking.
Consider heat, cold, smoke, and mobility. A blackout in winter may require blankets, layered clothing, and a plan for protecting vulnerable people; a summer outage may make ventilation, hydration, and medication temperature more urgent. Battery lanterns are safer than candles for routine lighting, although candles may exist as a carefully controlled backup. Place lighting where it can be reached without crossing a dark room, and keep a flashlight beside beds rather than buried in a storage bin.
A common misconception is that a single “backup power station” solves every outage problem. Capacity declines when multiple devices compete for it, and recharging may be impossible during prolonged cloud cover or fuel scarcity. Test the system under the intended load, record which devices receive priority, and conserve power by charging phones at scheduled intervals instead of leaving them connected continuously.
Store, Rotate, and Test the Kit
Organization determines whether supplies can be used under stress. Store heavy items low, divide the reserve into labeled categories, and avoid placing critical medication or water behind seasonal equipment. Waterproof document storage, pest-resistant food containers, and visible inventory labels reduce the time spent searching. Keep some supplies on each floor if stairs may become unsafe, but do not scatter the inventory so widely that nobody knows the total quantity.
Use a simple inventory with the item, quantity, expiration or replacement date, storage location, and special instructions. Review it on a recurring schedule and connect rotation to an existing household task, such as a monthly bill review. Opened packages should not quietly become emergency stock; replace them after normal use. Mark batteries, filters, fuel, and water containers separately because their replacement cycles differ.
Run a practical drill that does not create unnecessary risk. Spend one day using only stored lighting and selected foods, prepare meals with the planned equipment, charge devices according to the power schedule, and record what becomes inconvenient or impossible. A successful test leaves enough water, acceptable meals, working lights, and a clear sanitation routine. Failure signs include missing adapters, confusing labels, excessive waste, spoiled food, or a dependence on a device nobody can operate.
Budgeting should favor reliability over novelty. A modest supply of familiar food, sound containers, basic hygiene products, and tested lights may outperform expensive specialized gear that requires proprietary parts. Reassess after changes in household size, medical treatment, pets, housing, or local hazards. The thirty-day reserve is not finished when it is purchased; it is ready when the household can locate, use, and replace its critical components.
Frequently Asked Questions
How much food should a thirty-day kit contain?
Calculate ordinary daily meals and calories for each person, then select shelf-stable foods that match dietary needs and available cooking equipment. Include ready-to-eat options for days when fuel or water is limited.
Should stored water be used for hygiene?
Reserve drinking-quality water first for drinking, medication, and food preparation. Store additional water or identify a safe treatment method if basic washing and sanitation will require more.
How can prescription medication be included safely?
Review refill timing and storage requirements with a pharmacist or prescriber, keep an updated medication list, and never alter dosing or storage conditions without professional guidance.
What is the safest way to cook during a blackout?
Use no-cook meals when possible. Fuel-burning stoves, grills, and generators must be operated outdoors and away from doors, windows, and vents to reduce fire and carbon-monoxide hazards.
How often should an emergency kit be checked?
Review it regularly, such as monthly or quarterly, and whenever household needs change. Rotate dated food, inspect containers, test lights and chargers, and replace supplies used from the reserve.
Further Reading
Authoritative Sources
Build a Kit ready.gov
Federal guidance on assembling basic emergency supplies and adapting them to household needs
Medication and Healthcare Emergency Preparedness fda.gov
Information about medication access, storage, and healthcare planning during emergencies
Emergency Water Supply and Safety cdc.gov
Public-health guidance for storing, treating, and using water when normal service is disrupted
Food Safety During Emergencies fsis.usda.gov
Practical advice on refrigerated food, power outages, and safe handling after disruption
Conclusion
A reliable thirty-day reserve is built around household consumption and constraints, not a fixed pile of products. Calculate water, meals, medications, sanitation supplies, pet needs, and power requirements separately, then test the combination in realistic conditions. Prioritize items that protect health and daily function: essential medicines, safe drinking water, familiar food, waste control, lighting, and communication. Keep no-cook meals available for fuel-limited days, and treat generators, grills, and indoor flames as serious safety concerns. Rotate supplies through normal use so expiration dates and missing components are discovered early. After each review, update quantities for new prescriptions, dietary changes, pets, mobility needs, and seasonal weather. The next practical move is to document one ordinary day of use and turn those numbers into a labeled, tested reserve.
A useful two-week reserve begins with a household inventory, not a dramatic shopping trip. Supply interruptions may affect grocery deliveries, fuel, pharmacies, utilities, banking access, or several services at once. The right list therefore reflects the people, animals, medical needs, cooking equipment, and storage limits in one home. A person living alone in an apartment needs a different arrangement from a large household with a freezer, a well pump, or an infant.
Count what you already use over seven ordinary days. Note drinking water, breakfasts, meals, snacks, medication, toiletries, pet food, diapers, cleaning products, and fuel. Double the quantities that are genuinely necessary, then add a modest margin for delays or waste. Avoid treating every item in the pantry as usable reserve: a large bag of dry beans is less practical if nobody has fuel, water, or time to cook it.
Separate needs into three tiers. Tier one includes water, vital medicines, food, sanitation, and safe shelter conditions. Tier two includes lighting, communications, battery charging, transport fuel, and pet or infant supplies. Tier three includes comfort items such as coffee, preferred snacks, books, or hobby materials. A limited budget should fund the first tier before expanding the others.
Storage: use a cool, dry, pest-resistant location away from chemicals and flood-prone floors.
A common mistake is buying a supply that is technically sufficient but operationally unusable. For example, canned meals may be abundant while a manual can opener is missing, or a freezer may contain food that cannot be kept cold during a prolonged outage. Compare the ideal list with the likely failure point: limited space favors compact, ready-to-eat foods, while a home with reliable cooking fuel can make better use of grains and legumes.
Use the related A two-week preparedness list for supply interruptions as a working document rather than a one-time checklist. Write quantities beside each item, identify the person responsible for checking it, and mark which supplies must be replaced first if money or storage becomes tight.
Choose Food and Water That Work Without Normal Services
Water deserves first priority because it is needed for drinking, food preparation, medicines, and basic hygiene. Store commercially packaged water or containers designed for water storage, and keep them in a location protected from sunlight, heat, chemicals, and freezing. Household needs vary with age, health, climate, activity, and local conditions, so use current public-health guidance for a precise quantity rather than assuming one container size fits every home.
Food selection should reduce dependence on refrigeration, deliveries, and complex preparation. Combine ready-to-eat items with foods that require only a short heating step: canned fish, beans, vegetables, fruit, nut or seed butter, shelf-stable milk, whole-grain crackers, oats, rice, pasta, and packaged soups can serve different roles. Include salt, oil, spices, and familiar beverages where they improve acceptability. A reserve that nobody will eat creates waste and can encourage unsafe improvisation.
Build meals around normal routines. A simple rotation might pair oats and shelf-stable milk for breakfast, canned beans with crackers and vegetables for lunch, and pasta with sauce or canned fish for dinner. Check sodium, sugar, allergens, and texture where a household member follows a medically advised diet or has swallowing limitations. Food should be practical for the people consuming it, not merely long-lasting.
Cooking requirements are a decisive constraint. Dry staples may cost less per serving, but they consume water and fuel. Ready-to-eat foods cost more and may create more packaging, yet they remain usable when power is unavailable. If using a camping stove, grill, or other outdoor appliance, follow the manufacturer’s instructions and operate fuel-burning equipment outdoors as directed; carbon monoxide can accumulate quickly indoors.
Test the reserve before depending on it. Open one unfamiliar can, prepare a meal using the planned equipment, and check whether the household can tolerate the taste, portion size, and preparation time. Replace dented, leaking, bulging, rusted, or otherwise damaged cans. Do not assume an expiration date means food becomes unsafe at midnight, but do use package guidance, storage conditions, and visible changes to make conservative decisions.
Use a second two-week preparedness list for supply interruptions reference when comparing food quantities, but keep the final inventory personal. A household with a baby, food allergy, or service animal should prioritize those requirements over a generic pantry formula.
Cover Health, Hygiene, Cooking, and Temperature Needs
A supply interruption becomes more difficult when routine health care depends on daily shopping. Review prescription timing with a pharmacist or clinician, especially for medicines that require refrigeration, controlled dispensing, special handling, or exact dosing. Keep an up-to-date medication list with names, strengths, prescribing contact details, and allergies. Do not stretch, stop, or change prescribed medicines without qualified medical advice.
Basic care supplies should match the risks of the home. Include personal hygiene items, toilet paper, menstrual products, diapers, soap, hand sanitizer, household disinfectant, disposable gloves when appropriate, first-aid materials, spare eyeglasses, hearing-aid batteries, and any mobility-device accessories. A first-aid kit does not replace professional care; its value is in handling minor cuts, blisters, and routine needs when access is delayed.
Sanitation planning must account for water loss. If toilets cannot be flushed, follow local utility or emergency instructions and keep waste handling separate from food preparation. Store cleaning chemicals in original labeled containers, never mix products, and keep them away from children and pets. Extra paper products may be more useful than a complicated sanitation device if storage is limited and the household has no special disposal requirement.
Temperature control is another overlooked dependency. A refrigerator stays safer longer when opened less often, while a freezer’s condition depends on how full it is, surrounding temperature, and the duration of the outage. Keep appliance doors closed during a power loss and use food-safety guidance to judge whether refrigerated or frozen food should be discarded. Never taste questionable food to decide whether it is safe.
Lighting and communication support health decisions without pretending to replace emergency services. Keep flashlights, spare batteries, charged power banks, charging cables, a battery or hand-crank radio if useful locally, and written emergency contacts. Cash in small denominations may help when card networks or internet access are unavailable. A household relying on powered medical equipment needs a specific backup-power and medical-support plan, not merely extra batteries in a drawer.
The common failure is treating health supplies as a miscellaneous final category. Put them beside food and water in the priority order. For a person who uses contact lenses, solution and glasses may matter more than an additional comfort food; for a pet, food, medication, carrier, waste bags, and vaccination records may be the actual non-negotiables.
Build a Rotation and Testing Routine
A reserve remains useful only when people can find it, recognize it, and use it safely. Label shelves or containers by category, place older products in front, and record purchase or best-by dates in a simple note or spreadsheet. Store the items most likely to be needed during a power outage where they can be reached without opening every box.
Use normal consumption to rotate supplies. When opening a can, take its replacement from the next shopping trip and move the oldest unopened item forward. This method avoids a large annual discard and reveals whether the household actually likes the food. Review water containers, batteries, medicines, pet supplies, and infant products on different schedules because their replacement needs are not identical.
Run a small test rather than staging a theatrical emergency. During a planned evening, prepare dinner without the microwave, use the intended lighting, charge a phone from the backup battery, and locate the medication list. Ask what caused delay: a missing opener, an incompatible cable, insufficient fuel, hard-to-read instructions, or food that required more water than expected. Each discovery should result in one concrete adjustment.
Compare two approaches to storage. A single sealed emergency bin is easy to count and transport, but it may be inaccessible if blocked or stored far from the kitchen. Distributed supplies are easier to use during an outage and can cover more than one floor, yet they are harder to audit. A practical compromise is a clearly labeled core bin plus small quantities of high-use items in their normal locations.
Do not let preparedness create a new hazard. Keep fuel, candles, batteries, and chemicals according to manufacturer instructions; secure heavy containers; protect supplies from pests and moisture; and leave exits and electrical panels clear. If a weather event or local emergency creates immediate danger, official instructions and evacuation needs take precedence over protecting stored goods.
Finish by writing a short action card: who checks alerts, who contacts relatives, where the water is stored, which foods can be eaten without cooking, and when to seek outside assistance. The test is successful when a tired person can follow it without guessing. It is failing when the plan depends on one knowledgeable household member or on services that the interruption may already have removed.
Frequently Asked Questions
What should be purchased first for a two-week reserve?
Secure drinking water, essential medicines, familiar food, sanitation supplies, and any infant, pet, or mobility-related necessities first. Add lighting, charging, and comfort items after those needs are covered.
How should food be chosen when the power may fail?
Favor foods that are ready to eat or need little water and fuel, then add a smaller quantity of staples suited to your cooking equipment. Test the meals before storing large amounts.
Should all emergency food be stored in one place?
A labeled central reserve simplifies counting, while distributed supplies improve access if one room is blocked or utilities fail. Combining both approaches usually works better than relying on either alone.
How can medicines be included safely?
Track refill dates, keep a current medication list, and ask a pharmacist or clinician about storage, refrigeration, and refill options. Never alter dosing or ration prescriptions without professional advice.
How often should the reserve be checked?
Use routine shopping to rotate dated goods and schedule periodic reviews for batteries, water containers, medication information, pet supplies, and equipment. A short practical test is more revealing than simply counting boxes.
Conclusion
A two-week reserve is strongest when it reflects the household that will use it. Put water, medication, food, sanitation, and special-care needs ahead of convenience purchases, then match the food to available fuel, storage, and refrigeration. Check the less visible dependencies: a can opener, charging cable, pet medication, glasses, cash, waste arrangements, and a written contact list can determine whether stored supplies are genuinely usable.
Make the reserve part of ordinary life by rotating items through regular meals and replacing what is consumed. Conduct a short no-power test, correct the failures it exposes, and review the arrangement whenever household members, prescriptions, equipment, or living conditions change. The goal is not a perfect stockpile; it is a practical buffer that reduces rushed decisions while normal supply channels recover.
Emergency documentation works when another person can understand the situation without being present. A useful record connects the condition observed, the action taken, the person or organization responsible, and the outcome. Writing “power outage handled” provides little operational value; writing “14:20, utility outage confirmed by phone; refrigerator moved to insulated containers; temperature check scheduled for 16:00” creates a traceable account.
The record should separate facts from interpretation. Facts include a visible hazard, a received message, a completed welfare check, a supply count, or a time-stamped call. Interpretation includes an assumption about how long an outage will last or why a person failed to respond. Both may matter, but they should not appear as if they carry the same certainty. Label uncertain information as unconfirmed, reported, estimated, or awaiting verification.
Document the actions most likely to affect safety, continuity, money, or later accountability. These often include evacuation or shelter decisions, medical assistance requests, utility shutoffs, access restrictions, contact attempts, movement of vulnerable people, use of shared supplies, and instructions received from authorities. A record for Emergency preparedness procedures for documenting critical actions should also show when an action was not completed and why. An omitted task can create more risk than a poorly worded completed task.
A practical entry usually contains five elements:
Time: use a consistent local time and mark estimates as estimates.
Observation: record what was seen, heard, measured, or received.
Action: state what someone did or decided.
Owner: identify the person, team, agency, or service involved.
Status: note completed, delayed, declined, unavailable, or pending verification.
Short entries are usually safer than elaborate narratives during an active emergency. The tradeoff is that brevity can hide context, so add a reference to a photo, message, receipt, map, or attachment when the detail may matter later.
How to Build a Usable Incident Log Under Pressure
A usable incident log has one obvious location, a fixed format, and a person responsible for maintaining it. Paper may be the best primary record during a power or network failure, while a digital copy can improve searchability and sharing once systems return. Choosing only a phone-based method creates a single point of failure if the battery, device, or service becomes unavailable.
Prepare a small documentation kit before an emergency. Include a notebook with numbered pages, several pens, a clock or time reference, a phone charging option, a flashlight, and a way to photograph or scan pages. A printed contact sheet and blank continuation pages are useful when the event lasts longer than expected. Avoid storing the only copy in a location that may be evacuated, flooded, or inaccessible.
The first log page should identify the location, date, people assigned to record information, and the event or operational period. Numbering pages discourages accidental loss and makes it easier to identify gaps. If multiple people write entries, require initials or another simple identifier. Do not make the form so detailed that nobody uses it; a compact log completed consistently is more valuable than a sophisticated form left blank.
Use a predictable entry sequence. Record the time before writing the action, then identify the source of information if it came from a call, message, official alert, neighbor, or direct observation. If a task requires follow-up, write the next check time and the person expected to perform it. A note such as “water delivery requested” is incomplete until it states who requested it, from whom, at what time, and whether delivery was confirmed.
Under pressure, people commonly document only major decisions and forget small actions that explain later conditions. A locked gate, relocated medication, disconnected appliance, or change in meeting point may affect safety even if it never becomes a headline event. The solution is not to record every conversation. Record changes to people, hazards, resources, access, instructions, and responsibilities.
For a small household or team, one person can maintain the master log while others send short updates. For a larger operation, separate activity records may be appropriate, but they need a shared time standard and a handoff process. A central log gives continuity; separate specialist notes preserve technical detail. The right balance depends on the number of actors and how quickly information changes.
Recording Decisions, Communications, and Handoffs
Decision records should show the information available at the time, not just the final choice. Emergencies develop with incomplete information, so a later reader needs to know whether a decision was based on a confirmed warning, a direct hazard, a failed communication attempt, or a precaution. This protects the integrity of the record and prevents hindsight from being mistaken for foresight.
For each consequential decision, document the decision-maker, time, reason, alternatives considered when relevant, and review condition. For example, “Shelter in place at 18:10 because exterior smoke was visible and the road was blocked; reassess if indoor air worsens or officials issue an evacuation order” is more useful than “stayed inside.” The entry does not need to defend every choice, but it should preserve the trigger that may require the decision to change.
Communication records need similar discipline. Log outgoing and incoming messages, failed attempts, instructions received, and acknowledgments. Record the exact wording of a critical instruction when practical, or identify where the original message is stored. A screenshot without a time or sender may be difficult to interpret later, while a log entry can connect it to the action that followed.
Handoffs are a frequent failure point. The departing person may remember pending tasks but fail to transfer them clearly, especially after fatigue or repeated interruptions. End each operating period with a short status check covering:
actions completed and actions still open;
people whose status is unknown or needs follow-up;
supplies, equipment, or access changes;
new hazards and information that remains unverified;
the next decision time and the person assigned to it.
A verbal briefing alone is weaker than a verbal briefing tied to written entries. The incoming person should be able to point to the last completed item and identify the next pending item. If the handoff cannot happen in person, use a dated message or photograph of the relevant log page, then confirm receipt when possible.
Do not record sensitive personal information more broadly than necessary. A critical-action log may need to show that a person received assistance, but it may not need extensive medical details. Restrict access to records containing addresses, health information, financial data, or identification documents. Good documentation supports continuity without turning an emergency notebook into an uncontrolled archive of private information.
Protecting Evidence and Reviewing the Record
Preserving the record matters because emergency actions may later need to be explained, repeated, reimbursed, audited, or improved. Keep original paper pages intact, photograph them when conditions permit, and retain source messages, receipts, photographs, and relevant forms together. Digital files should use descriptive names and a consistent date-time format rather than a camera’s default sequence.
Evidence should be connected to an entry. A photograph of damage is more useful when the log states when it was taken, where it was taken, and what decision it informed. Receipts should show which emergency need they relate to. A screenshot of an alert should retain the sender and timestamp if available. Do not edit original images or messages to make them easier to read; create a separate annotated copy if explanation is needed.
Review the record after immediate danger has passed, but do not rewrite it as though the event unfolded neatly. Corrections should preserve the original entry and show what changed, when it changed, and who made the correction. If an entry says a contact was confirmed but later evidence shows only a voicemail was left, amend the status rather than silently replacing the original wording.
A review should examine whether the record answered operational questions: Which actions were completed? Which were delayed? Where did information originate? Which instructions conflicted? When did supplies or access become constrained? Did the next person know what remained open? These questions reveal process weaknesses more reliably than judging the quality of prose.
Use the findings to make a small number of specific changes. A household might add a printed contact list after discovering that phones were unavailable. A volunteer group might assign a backup recorder after one person became occupied with transport. A building team might add a field for elevator status after residents were moved without a clear accessibility record. Improvements should address observed failure points, not create paperwork for its own sake.
Documentation can also become a burden. Excessive writing may distract from evacuation, first aid, hazard control, or communication. During immediate danger, protect people first and record the essential facts as soon as doing so is safe. A delayed but accurate entry is preferable to a detailed note that interferes with a life-safety action.
For operational terminology, incident documentation examples, and public emergency communication guidance, consult current materials from local emergency management offices, relevant national government agencies, and recognized disaster-response organizations. Match any template to the hazards, privacy requirements, and reporting duties that apply to your location rather than treating a generic form as authoritative.
Frequently Asked Questions
What is the simplest format for an emergency action log?
Use columns for time, observation or source, action, responsible person, and status. Add a follow-up time when the issue is unresolved.
Should emergency records be handwritten or digital?
Keep a paper option for power, battery, or network failures and use digital copies for backup, searching, and sharing when systems are available.
What should be documented first during an emergency?
Record life-safety decisions, hazards, evacuations or shelter actions, welfare checks, official instructions, resource changes, and unresolved tasks before routine details.
How can a log avoid recording unreliable information?
Identify whether each item is directly observed, reported, estimated, or confirmed. Keep unverified reports visible but label them clearly.
How long should critical-action records be kept?
Retention depends on the organization, event, privacy obligations, insurance needs, and local requirements. Preserve records long enough to complete follow-up, reporting, claims, and after-action review.
Conclusion
Strong emergency records are built around traceability, not polished writing. Capture the time, observed condition, action, responsible party, source of information, and current status while keeping safety decisions ahead of paperwork. Use paper and digital options together when practical, protect sensitive details, and connect photographs, messages, receipts, and forms to the entries they support. At each handoff, identify unfinished work, uncertain information, changed resources, and the next review point. After the event, correct errors transparently and turn recurring gaps into specific changes to contacts, forms, equipment, or assignments. Practicing the logging method during a drill makes it easier to use when communication is fragmented and attention is limited.
Effective disaster planning begins with an honest capability inventory rather than a shopping list. Record who lives in the home, who may need assistance, which medications or medical devices are necessary, how people communicate, and what transportation is available. Include pets, children, older adults, shift workers, and anyone who may be away when an incident begins. The purpose is to expose dependencies: a person may be able to walk but not carry a loaded bag, a caregiver may not be able to leave without arranging support, or a vehicle may be unsuitable for snow, flooding, or limited fuel.
Capability also includes money, storage space, cooking methods, physical stamina, language access, and familiarity with local routes. A household in an apartment cannot plan like a rural property with a generator shed and a private well. Someone with a small budget may gain more from shelf-stable food rotation, spare batteries, and a written contact card than from expensive specialized equipment. A plan should describe what residents can do safely, not what an ideal household might accomplish.
Use a simple inventory with four columns: capability, dependency, backup, and failure sign. For example, “electric stove” depends on grid power; the backup may be no-cook meals; the failure sign is an outage lasting beyond the household’s safe food and lighting routine. This method makes weak assumptions visible. Buying a portable generator does not solve the problem if the household cannot operate it safely, store fuel lawfully, or place it where exhaust will not enter the home.
Revisit the inventory after a move, new diagnosis, vehicle change, birth, job change, or loss of a caregiver. The household capability assessment should be a living record, not a document created once and forgotten.
Match Household Limits to Likely Hazards
A useful plan connects real capabilities to hazards that could disrupt the household, instead of treating every disaster as identical. Begin with local exposure: severe weather, wildfire, earthquake, flooding, extreme heat or cold, infrastructure outages, and transportation disruption may create very different decisions. The hazard determines whether staying put is safer than leaving, how quickly action may be required, and which supplies matter first.
Consider the interaction between the event and household limitations. A power outage during mild weather may mainly affect refrigeration, lighting, communications, and medical equipment. The same outage during extreme heat may make indoor shelter unsafe for an older adult or infant. A flood may block the usual route to a pharmacy, while smoke may make outdoor travel difficult for someone with respiratory sensitivity. These are not reasons to predict the exact future; they are reasons to prepare alternatives before a decision becomes urgent.
Build three scenario cards for each major hazard: stay, leave, and support needed. The stay card names the rooms that can be used safely, sanitation arrangements, food and water access, and charging options. The leave card identifies accessible exits, a destination, transportation limits, essential documents, and what must be carried. The support card names people or services to contact if the household cannot evacuate independently. A family with one car should not assign that vehicle to two separate evacuation routes without a second transport arrangement.
Common planning errors come from confusing possibility with readiness. “We can drive away” is incomplete if the vehicle lacks fuel, the driver may be at work, roads may be closed, or a wheelchair cannot be loaded quickly. Compare the preferred option with a slower alternative, such as leaving earlier, using a neighbor’s vehicle, or relocating temporarily with a relative. Hazard information from local emergency management agencies can refine these choices, but it should be translated into actions that fit the home’s actual constraints.
Build Priorities Around Essential Functions
Household supplies should protect essential functions in a deliberate order: communication, medication and care, hydration, nutrition, sanitation, temperature control, lighting, and safe movement. This order is not universal, but it helps prevent spending limited money on low-value equipment while a critical dependency remains exposed. A household that cannot maintain medication refrigeration or access to drinking water has a more urgent problem than one missing a specialized multitool.
Water planning illustrates why capability matters more than a fixed formula. The household must consider drinking, medication use, food preparation, hygiene, containers, storage temperature, and the ability to move heavy supplies. Smaller containers may be easier for an older adult to handle even if larger containers use less packaging. If storage is limited, rotate commercially packaged water and keep a practical amount in more than one location. Follow local public-health instructions when officials issue boil-water or contamination notices; emergency treatment methods are not interchangeable for every contaminant.
Food should fit cooking ability, dietary needs, allergies, dental limitations, and fuel availability. Ready-to-eat foods may cost more or provide less variety, but they reduce dependence on a stove, can opener, or lengthy preparation. Choose items the household already eats, then open and prepare a sample meal using the intended method. A box of dry beans is not a useful outage reserve if nobody can soak and cook them without electricity. Rotate supplies through normal meals so expiration, taste, and packaging problems are discovered early.
Medication and medical support deserve a separate review with a pharmacist or clinician when appropriate. Keep an up-to-date medication list, essential contact information, and instructions for equipment. Do not stock prescription medication beyond what can be obtained and stored safely, and do not improvise treatment from general emergency advice. The capability-based supply review should flag what cannot be solved with household supplies alone.
A compact priority check can guide purchases:
Identify the consequence if the item or function fails.
Choose the simplest safe backup that the household can operate.
Test it under realistic conditions, including darkness, fatigue, or limited water.
Replace or revise it when the test reveals a dependency.
Test, Revise, and Coordinate the Plan
A plan becomes credible when people can perform it without searching through unfamiliar instructions. Run short, low-risk tests: prepare dinner without electricity, locate emergency lighting in the dark, contact an out-of-area person, walk the accessible evacuation route, or pack the medication and document kit. Testing reveals friction that written plans hide, such as a dead flashlight battery, an inaccessible shutoff, a bag that is too heavy, or a contact who cannot answer during work hours.
Use observations rather than confidence as the measure of readiness. If a household completes a no-cook meal but cannot dispose of waste safely, sanitation needs attention. If everyone knows the meeting location but no one knows how to reach it without a phone, print the route and add a backup meeting point. If a child or person with cognitive impairment becomes distressed by alarms or sudden changes, practice calmly and involve their support network in the plan.
Coordination should be specific. Ask a neighbor whether they can check on the household, but clarify timing, access, pets, mobility needs, and what happens if the neighbor is also affected. Exchange only the information needed for the arrangement and avoid assuming that informal help is guaranteed. Schools, workplaces, landlords, utilities, local emergency management offices, and medical providers may publish procedures that change the household’s options.
Review the plan after every exercise and after meaningful household changes. Remove tasks that require abilities nobody has, assign backups for critical roles, and separate “must happen” actions from conveniences. The realistic household plan is working when residents can explain the first decision, the backup decision, and the point at which outside help is needed. Its strength comes from clear limits and tested alternatives, not from the number of supplies stored.
Frequently Asked Questions
What does capability-based disaster planning mean?
It means matching actions and supplies to actual household abilities, limitations, resources, health needs, transportation, and available support rather than copying an idealized checklist.
How should a household prioritize limited money?
Address high-consequence dependencies first, usually medication, drinking water, communication, food that needs little preparation, lighting, and sanitation. Choose simple items that can be tested and rotated.
Should every household plan to evacuate?
Every household should know when evacuation may be required, but the route, timing, transportation, destination, and support arrangement must reflect mobility, pets, work schedules, and local hazards.
How can a plan be tested safely?
Use short exercises such as preparing a meal without power, locating supplies in darkness, walking an accessible route, or making a contact call. Record failures and adjust the plan.
When should a household revise its disaster plan?
Review it after a move, health change, new caregiver responsibility, vehicle change, birth, job change, major weather event, or test that exposes an unworkable assumption.
Further Reading
Authoritative Sources
Make a Plan ready.gov
Provides federal guidance for household communication, evacuation, shelter, and individual needs
National Preparedness System fema.gov
Explains how preparedness planning can connect risks, capabilities, and coordinated actions
Emergency Preparedness for Children cdc.gov
Offers considerations for children’s health, medications, routines, and support needs during emergencies
How to Prepare for Emergencies redcross.org
Supplies practical planning information for household hazards, communication, and evacuation
Conclusion
Realistic disaster planning is a process of matching decisions to capacity. Map the people, health requirements, transportation, communication methods, storage limits, and outside support that exist now. Then connect those facts to local hazards and create separate stay, leave, and assistance decisions. Prioritize functions whose failure creates immediate danger, test the simplest backup, and revise anything that depends on perfect timing or unavailable skills. A smaller supply reserve that the household can carry, cook, maintain, and replace is more dependable than an impressive collection nobody has practiced using. Set a review date, run one short exercise, and document the next unresolved dependency. That sequence turns general readiness advice into a plan the household can actually execute.
A useful family crisis plan assigns decisions before stress, noise, distance, or disrupted services make discussion difficult. Begin by identifying who may be at home, school, work, or in transit, then record the barriers that affect each person. A toddler may need a car seat and familiar comfort item; an older adult may need mobility assistance; a family member with diabetes, asthma, or another ongoing condition may need medication, supplies, or temperature-sensitive storage. Pets, service animals, language needs, and access to a vehicle also change the workable options.
Write down two meeting locations: one close to home for a neighborhood evacuation and another outside the immediate area if roads or bridges are blocked. Choose an out-of-area contact who can receive check-in messages when local networks are congested. Each person should know how to send a short text, where the contact information is stored, and what to do if the preferred route or meeting place cannot be reached. A plan that exists only in one adult’s phone is fragile.
Communication details need boundaries, not just names and numbers. Decide who checks official alerts, who collects children, who assists a dependent relative, and who carries records or medication. Use a simple message format such as name, location, condition, and next destination. Avoid asking every relative to call repeatedly; a short text or designated contact may preserve battery life and reduce confusion.
Practice exposes problems that paperwork hides. A weekend drill may reveal that a child cannot open the emergency bag, a wheelchair cannot pass through the chosen exit, or the family has no agreed destination if a school closes early. Compare a stay-at-home scenario with an evacuation scenario rather than assuming one response fits every crisis. Review the plan when someone moves, changes medication, starts school, loses transportation, or takes on caregiving duties. A practical internal reference can be added here: family preparedness planning before, during, and after crises should reflect the household that actually exists.
Prepare Supplies, Information, and Household Skills
Supplies should support the family’s likely decisions, not simply fill a container. Store water, shelf-stable food, needed medications, first-aid materials, sanitation items, flashlights, batteries, chargers, blankets, and basic tools in locations that are dry, accessible, and known to more than one person. A large stockpile in a locked basement is less useful if flooding is possible or the person who manages it is away. Divide essential items between a home supply and portable bags when evacuation is plausible.
Food selection requires more judgment than buying the cheapest calories. Choose products household members will eat without extensive cooking, such as canned beans, ready-to-eat fish, nut or seed products, crackers, dried fruit, shelf-stable milk, and familiar infant or medical-diet foods where relevant. Include a manual can opener and consider how heat, water, and fuel limitations affect preparation. Rotate items into ordinary meals before quality declines. Buying unfamiliar foods in bulk can create waste and leave children or medically restricted relatives without suitable choices.
Information may be more valuable than an additional gadget. Keep printed copies of identification details, insurance information, prescriptions, emergency contacts, school contacts, utility shutoff instructions, and key account information in a protected location. A password manager or secure digital backup may help, but do not rely on internet access alone. Do not place unnecessary sensitive data in an openly labeled emergency container. Include copies of documents only where their security can be maintained.
Household skills reduce dependence on a single person. Adults and older children can learn how to use a fire extinguisher, shut off utilities when appropriate, operate a battery radio, administer basic first aid, and locate the family’s supplies. Generator use requires strict attention to manufacturer instructions and carbon-monoxide hazards; never operate fuel-burning equipment in a home, garage, or other enclosed area. Battery banks, solar chargers, and radios each have limits, so test them instead of assuming they work after months in storage. Use family preparedness planning before, during, and after crises to connect purchases with a specific task, person, and failure condition.
Make Decisions During Evacuation or Shelter
During a crisis, the family’s first task is to establish immediate safety and account for people. Check for fire, structural damage, hazardous air, rising water, exposed wiring, and blocked exits before gathering belongings. Follow official evacuation or shelter instructions when they apply, and use more than one information source if communications permit. A familiar route may be unsafe after a storm, wildfire, earthquake, chemical release, or transportation accident, so reassess conditions rather than following a memorized path automatically.
Evacuation works better when the destination is specific. Identify where the family will go, how long the drive may take under congestion, what fuel or charging limits exist, and which person carries medication, documents, food, and pet supplies. Keep the vehicle reasonably fueled or charged when local conditions suggest elevated risk. If one route is blocked, a secondary route and a known alternate destination prevent hurried debate. Leaving too late can reduce options, but leaving without confirming the household’s people and critical items can separate family members.
Sheltering in place is not passive. Close and secure openings when authorities advise it, move away from windows or unsafe rooms, conserve phone power, and maintain a clear way to receive alerts. For extreme heat or cold, consider how long the home can remain habitable without power. Refrigerated medication, oxygen equipment, infant feeding, and sanitation needs may require an earlier move to a safer location. A home may feel familiar while still being unsuitable for someone with limited mobility or a serious medical need.
Children need brief, concrete instructions rather than a detailed lecture. Give each child a role that is safe and observable, such as carrying a labeled comfort pouch or staying beside a designated adult. Keep pets secured because frightened animals may bolt. Common failures include assuming everyone heard the same alert, splitting up without a destination, and delaying departure to collect nonessential property. A compact priority order is people, immediate hazards, prescribed necessities, communication tools, and only then replaceable belongings. The best choice may differ between a fast-moving hazard and a prolonged utility outage; the plan should identify those differences in advance.
Recover Safely and Improve the Plan
Recovery begins with safety verification, not cleanup speed. Do not enter a damaged building until authorities or qualified professionals indicate that entry is reasonably safe. Watch for unstable structures, contaminated water, gas odors, downed lines, mold, spoiled food, and unsafe debris. Photograph damage when it is safe, preserve relevant receipts, and contact insurers, landlords, schools, employers, or service providers through verified channels. Avoid sharing personal documents or payment information with unsolicited callers claiming to offer assistance.
Account for the family’s practical needs over the following days. A short interruption may require replacement food, charging access, laundry, and transportation; a longer disruption may require temporary housing, work coordination, prescription refills, childcare, and support for an older relative. Keep a written log of expenses, calls, case numbers, and promised follow-up. Local assistance can be valuable, but availability and eligibility vary, so treat unverified social-media claims cautiously and confirm details with official agencies or recognized relief organizations.
Emotional recovery deserves a place in the operational plan. Children may show sleep changes, fear, irritability, or repeated questions after an event; adults may also struggle with exhaustion and concentration. Calm routines, honest age-appropriate explanations, familiar meals, and restored contact with trusted people can provide structure. Persistent or severe distress warrants professional support rather than an assumption that it will resolve on its own.
Conduct a review after immediate needs settle. Ask which alert was received, whether everyone knew where to go, which supplies were missing, and what became difficult because of cost, disability, work, pets, or transportation. Replace consumed or expired items, update phone numbers, and revise assignments. A plan that depends on expensive equipment may need a lower-cost alternative, while a plan built only for a short outage may need a medication or housing contingency. Revisit family preparedness planning before, during, and after crises after every exercise or real event so lessons become specific changes rather than vague intentions.
Frequently Asked Questions
What should a family prepare first?
Begin with communication, meeting locations, medical needs, evacuation options, and a way to receive official alerts. Supplies should reinforce those decisions rather than substitute for them.
How often should a family review its crisis plan?
Review it at least when contact details, school arrangements, medications, housing, transportation, or caregiving responsibilities change. A brief practice exercise can reveal updates that a calendar review misses.
Should families evacuate or shelter in place?
Follow instructions from local authorities and assess the hazard, building condition, medical needs, transportation, and available destination. Neither response is automatically safer for every event or household.
How can children participate without increasing fear?
Use simple explanations and assign safe tasks, such as carrying a labeled comfort item or learning a caregiver’s phone number. Practice calmly so the routine feels familiar rather than presenting preparation as a prediction of disaster.
What should happen after a crisis ends?
Confirm everyone’s safety, avoid damaged hazards, document losses, arrange medication and housing needs, and replace used supplies. Then record what failed and make specific revisions while the experience is still clear.
Further Reading
Authoritative Sources
Make a Plan ready.gov
Offers federal guidance for household communication, alerts, evacuation, sheltering, and special needs planning
Make an Emergency Plan redcross.org
Provides practical planning prompts for households, children, pets, and people who may need additional assistance
Emergency Preparedness for Children cdc.gov
Explains preparedness considerations for children, including family communication and continuity of care
National Preparedness fema.gov
Places household readiness within broader preparedness and recovery coordination guidance
Conclusion
Strong family readiness is a working system, not a storage bin. The highest-value actions are assigning communication and caregiving duties, choosing realistic meeting places, protecting medication and records, and practicing both evacuation and shelter decisions. During an event, account for people before property, verify information, and adjust to changing hazards. Afterward, treat safety checks, documentation, health needs, and plan revision as part of preparedness rather than separate tasks. Set aside a short household meeting this week: write down contacts, identify two destinations, inspect essential supplies, and choose one scenario to practice. Those concrete steps expose gaps while choices remain easier, cheaper, and safer to change.