
by Preparation Call Editorial Team | Jul 31, 2025 | Preparedness
Emergency Lighting Tools
Why You Need Emergency Lighting
We’ve all been there: a sudden power outage or a camping trip that goes sideways. Emergency lighting is not just a luxury; it’s a necessity! When darkness falls, having a reliable light source can make all the difference. You can say goodbye to fumbling around in the dark while searching for candles or your phone’s flashlight app.
Personally, I’ve experienced a blackout in the middle of cooking a family dinner. The sudden darkness sent us scrambling for our flashlight. It highlighted how crucial having a dependable light source can be—not just for safety but also for maintaining calm in chaos.
Battery-operated lanterns and flashlights can illuminate your surroundings efficiently. This means less stress and more focus on what’s really important: keeping everyone safe and comfortable, whether you’re at home aiming for your emergency kit or out in nature enjoying the stars.
Top Picks for Battery Operated Lights
When determining the best emergency lights, I’ve found that brightness and battery life are key. My go-to is the LED lanterns that give off a warm light and can last hours without needing a recharge. They even have settings for different brightness levels!
Some flashlights come equipped with solar charging options, which I think is super cool. This feature ensures that even if you forget to charge them, they’ll still work thanks to the sun’s power. I love being outdoors, so these flashlights are often by my side on hikes or nights under the stars.
Don’t overlook smaller options, either. A simple battery-operated clip-on light can save space in your emergency kit and is incredibly versatile. I often use them for late-night reads or even board games when the power goes out!
Maintenance Tips
Keeping your lighting tools in working order is crucial. I can’t stress this enough: make sure to check your batteries regularly. No one wants to be caught in the dark with dead batteries! I set reminders on my calendar every few months to give everything a check-up.
Additionally, store your lights in an easily accessible place while still ensuring they won’t accidentally turn on. A dedicated pouch in your emergency kit is a great idea. I’ve learned the hard way after throwing my gear in a backpack, only to find a flashlight that mysteriously drained its batteries.
Lastly, give your tools a good clean every now and then. Dust and dirt can affect their performance, and nobody wants that—especially in an emergency. A quick wipe with a damp cloth is often all it takes to keep things running smoothly!
Battery Operated Power Tools
Why Choose Battery Operated Tools
Battery-operated power tools are a game changer during emergencies or any unexpected home repairs. From drills to saws, these tools offer convenience without the hassle of cords or searching for an outlet. I particularly appreciate the mobility they offer—no matter where I’m working, I know I can get the job done.
It’s also worth mentioning the environmental advantage. Many modern battery-operated tools have lithium batteries, which tend to be more efficient and environmentally friendly than traditional corded power tools. Using less energy means we can all do our part to reduce our carbon footprint while tackling our home projects.
Throughout my DIY journey, I’ve accumulated a small arsenal of battery-powered tools, and they’ve saved me countless headaches, whether it’s assembling furniture or fixing things around the house. The ability to pick up and move freely is a massive benefit.
Choosing the Right Tools
When it comes to selection, focus on versatility. My favorite tool is a cordless drill that can switch from drilling to driving screws effortlessly. It saves time and minimizes the chances of losing my momentum when tackling a project.
Furthermore, consider the runtime of the tools. If you’re dealing with large tasks, ensure your battery can last long enough to complete them. Many tools today come with additional battery packs, which is fantastic—just swap it out and keep going!
Don’t forget to check reviews for durability. I’d recommend leaning towards brands known for their quality. It’s an investment, and you want something that’s going to last through all those unexpected emergencies.
Safety Tips
Battery-operated tools can still be dangerous if not used properly. Always read the manual before starting any project! I admit I was tempted to skip this step once, and it cost me a minor injury due to improper equipment handling.
Make sure to wear appropriate safety gear, regardless of whether you’re using manual or battery-operated tools. Goggles, gloves, and even dust masks can protect you from splinters or debris flying your way.
And if you’re ever unsure about using a specific tool, ask someone! Your safety should always come first, and there’s no harm in reaching out for help. I’ve learned so much from friends and family when I was stuck or confused.
Battery Backup Systems
What are Battery Backup Systems?
Battery backup systems are a fantastic way to ensure you have power when you need it most. They store electric energy to provide power during outages, whether it’s a storm taking out your electricity or an unexpected home emergency.
My experience with battery backup systems started after a particularly nasty winter storm that left my neighborhood without electricity for days. I invested in a battery backup system that kept my essentials powered, and it was one of the best decisions I made.
Not all systems are created equal, though. Some are designed just for smaller devices, while others can power larger appliances like refrigerators or medical devices. Assess your needs before making a purchase. It’s a crucial step that can save you a ton of hassle later!
Choosing the Right Battery Backup System
Consider the wattage requirements of the devices you intend to power. The last thing you want is to assume you can power a fridge when your backup can barely handle a light bulb. I once made that mistake, and it was definitely a lesson learned!
Look for units with multiple plug options. A system that only provides a few outlets is pretty limiting. My backup has multiple plugs and USB ports, so I can charge my phone and keep a few essential appliances running all at once.
Battery lifespan is another factor. I always opt for those that display how long they can sustain power at varying loads. The last thing you want is a system that doesn’t live up to its advertised capabilities when you need it most.
Maintenance and Storage Tips
Battery backup systems need a little TLC to keep them in top shape. Check and replace batteries regularly; this will ensure they’re always ready when needed. I check mine twice a year—it’s such an easy task!
Store your system in a cool, dry place. If you place it in places that are too hot, the batteries can degrade much faster than their intended lifespan. I always try to be mindful of temperature when setting up my emergency gear.
In summary, periodically testing your system is essential. I run through a quick test every few months to ensure it actually works—this way, I’m never caught off guard.
Portable Battery Chargers
The Importance of Portable Power
We live in such a tech-driven world, and running out of battery can feel like the end of the world. Portable battery chargers can help keep our devices powered, which can be especially critical during emergencies. I’ve found them to be essential during camping trips and travels where charging options are limited.
These handy chargers can fuel everything from smartphones to tablets and even small medical devices. Picture this: you’re in an emergency at home, and your phone dies. A portable charger could be what saves the day—you need a way to communicate with others!
They can also be a lifesaver during outdoor adventures. If you rely on GPS or other essential applications, you won’t want to run out of juice. Having a portable charger just brings peace of mind, knowing that I am covered, no matter what adventure I tackle.
Choosing the Right Portable Charger
When choosing a charger, look for one with a high capacity—something like 20,000mAh is a great choice for multiple charges. It might be a bit bulkier, but I assure you, it’s well worth the extra size when you’re out and about.
I prefer chargers with multiple outputs, which allows me to charge several devices simultaneously. If I’m camping with friends, it means we can all keep our devices charged together instead of fussing over who gets to use the charger first.
Quality matters too! Be sure to invest in a reputable brand, as low-quality chargers can pose safety risks. I learned this one the hard way after a cheap knockoff charger overheated. Scary stuff—I never made that mistake again!
Maintenance for Longevity
Treat your portable chargers with care. Avoid leaving them in extreme temperatures, as it can damage the batteries. I store mine in a cool place where they aren’t exposed to direct heat from sunlight or excessive cold.
Also, clean the connectors gently. Dust can build up quickly, which may prevent your devices from charging properly. A soft cloth does wonders to keep everything spick and span.
Lastly, don’t let your charger sit idle for too long. Periodically use it to keep the battery healthy. It’s easy to forget, but I’ve made it a habit to plug in my portable charger every so often, ensuring it’s always ready to go when I need it.
Emergency Communication Tools
The Need for Communication in Emergencies
Effective communication can make or break an emergency situation. Have you ever been left in the dark during a storm, unsure of the updates or what to do next? That’s where battery-operated communication tools come in.
From walkie-talkies to emergency radios, these tools ensure you stay connected even when regular systems fail. During a time when everyone is in panic mode, having a way to communicate can keep things calm and organized.
Personally, I love having a small emergency radio with NOAA Weather Band capability. It offers immediate information on weather updates during severe storms, and I can easily take it along when I go hiking. Knowledge is power, right? It’s crucial for staying safe!
Types of Emergency Communication Tools
Walkie-talkies are incredible for short-range communication. They can be great for family outings or situations where cell coverage might not reach. I picked up a pair, which transformed our family camping trips from “Where are you?” to promises of “I’m right here!”
Emergency radios provide peace of mind, especially during severe weather. I like models that can also charge my phone or have multiple power sources, including hand-cranking options. You never know when you might need it!
Don’t overlook options like signal mirrors or whistles. In a pinch, these tools can help you communicate without relying on battery power. They’re lightweight and can easily fit into your emergency kit—definitely a smart addition.
Keeping Communication Tools Ready
Be sure to check batteries regularly in your communication devices; I can’t stress this enough! It’s something I do alongside my lighting checks. A talking device that’s out of batteries won’t help anyone during a crisis.
Store all your communication tools in a designated bag within your emergency kit. This way, you know exactly where to find them when the time comes, instead of frantically rummaging through your supplies.
Learn how to use your devices ahead of time. I once stumbled in the dark while trying to tune an emergency radio during a storm. Familiarizing yourself with your devices beforehand can save precious time and reduce panic when a true emergency arises.
Conclusion
In closing, battery-operated tools are invaluable during emergencies. Their ease of use, portability, and reliability can help you navigate through unexpected situations with confidence. Remember to maintain your tools regularly, choose wisely, and always be prepared. I’ve learned the hard way that preparation truly is half the battle!
Whether it’s lighting a path in the dark, powering devices, or providing reliable communication, having the right tools can significantly impact safety and peace of mind. As someone who’s been through various emergencies, I can assure you: it’s better to be over-prepared than underprepared.
FAQ
1. What types of battery-operated lights are best for emergencies?
LED lanterns and flashlights are fantastic choices due to their brightness, longevity, and versatility. Look for ones with multiple brightness settings to cater to different scenarios.
2. How do I choose the right battery-operated power tools?
Prioritize versatility, battery life, and brand reliability. Tools like cordless drills that can switch between tasks are incredibly useful in a pinch.
3. What is a battery backup system, and why do I need one?
A battery backup system stores power to provide electricity during outages. It’s particularly vital for running essential appliances to ensure comfort and safety during emergencies.
4. How do I maintain my portable battery charger?
Store it in a cool, dry place, regularly check charge levels, and clean connectors to ensure optimal performance. Regular use can also keep the batteries in good shape!
5. What communication tools should I have during an emergency?
Invest in emergency radios, walkie-talkies, and even signal tools like whistles. These tools ensure effective communication when traditional means may fail.
by Preparation Call Editorial Team | Jul 31, 2025 | Preparedness
Choose the Right Location
Seek Natural Shelters
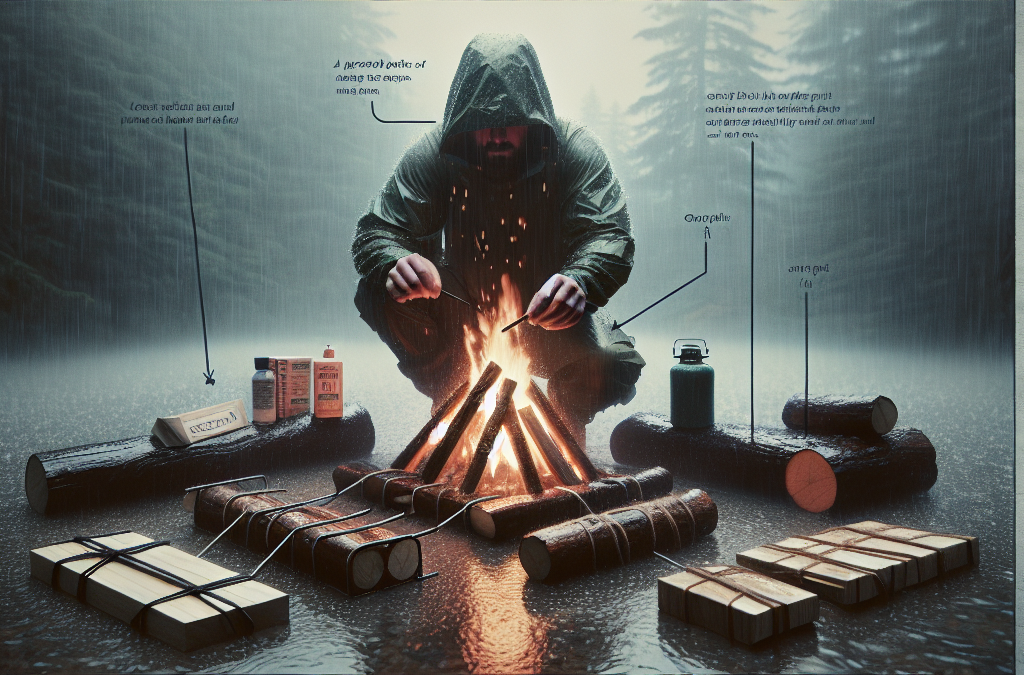
When trying to build a fire in wet conditions, the first thing I look for is a natural shelter. This can be anything from a thick patch of trees to a rock overhang. These spots can protect your fire from falling rain and wind, making it much easier to get your fire going. One time, I found a little nook between two large rocks that shielded my fire from a downpour!
Being near natural shelters also helps with firewood sourcing. You’ll typically find dry materials still intact under a thick canopy. Plus, the ground is less harmed by rain here, saving you from trying to dig through puddles for wet wood.
Always be mindful of how close you are to these shelters, though. Safety is paramount! You want enough space so that any sparks won’t unintentionally cause a wildfire. Natural shelters are great, but you gotta use common sense too.
Clear Away Debris
Once I’ve picked the spot, I make sure to clear away any debris from the area where I’m going to build my fire. Old leaves, sticks, and other organic matter can actually absorb moisture, making it tougher for your fire to take hold. I usually clear a spot about three feet in diameter to start.
It can be a bit of a workout, but trust me – it’s worth it! Make sure to toss the debris far enough away so it doesn’t end up blowing back into your fire. This way, you’re not just clearing your space but also reducing fire hazards.
This cleaning step also helps you keep an eye on the ground. If it’s muddy or soaked, I always consider raising my fire source using rocks or logs. This little effort can prevent cold, soggy ground from stealing your fire’s heat. Happy fire-building!
Assess the Wind Direction
I’ve learned the hard way that wind direction is crucial when building a fire. The last thing you want is smoke blowing directly in your face or embers being carried away before the fire even starts. Pay attention to the trees – they’ll give you hints about which way the wind is blowing.
When I pick where to set up my fire, I often angle myself so the wind helps rather than hinders. If I can find a place where the breeze flows behind me and towards the fire, it makes the whole process much easier. Whenever you feel the wind shift, adjust your setup accordingly.
Also, ensure there’s nothing highly flammable close by. You want to have a roaring fire, not a bonfire that takes the whole forest with it! Control and awareness are your friends out here, especially in unpredictable conditions.
Gathering Dry Materials
Finding Dry Tinder
Okay, so you’ve secured your spot—now it’s time for the real treasure hunt: finding dry tinder! I’ve had decent luck with looking under tree bark, in hollow logs, or even breaking apart smaller branches. These tend to retain some dryness even when everything else is soaked.
You can also look for materials that are lighter and fluffy, like dry grass or pine needles. I like to collect a good fistful for that initial spark. But don’t stop there! Gathering a mix of different kinds will give you a better shot. Variety is key!
One of my favorite tricks is to carry some fire starters, too. Whether it’s dryer lint or small waxed paper, a little backup never hurts. It always makes the difference when things get rough; I promise you’ll appreciate being prepared!
Collecting Kindling and Fuel
Next up, kindling! This is the stage where you transition from tinder to something that can hold a flame longer. I typically gather sticks about the thickness of a pencil and some larger branches to keep things rolling. Keep your eyes peeled for anything that isn’t too damp.
Sometimes, I even bring my hatchet along to break down larger pieces of wood. Just make sure it’s dry, as splitting the wood exposes the moisture trapped inside. Bonking it on the ground can also get a bit messy, so I find a flat spot to avoid too much chaos.
Once I’ve gathered what I need, I set it all up in a nice little teepee structure. This allows for airflow and helps the fire burn more efficiently. For those of us who are truly adventurous, you can even create a “fire log cabin” setup. Just get creative, and always think about airflow!
Using Fire-Starters and Techniques
Now that I have my wood collected, I usually move on to the ignition part. A good fire starter can save the day when sticks and twigs aren’t cooperating. I never thought I’d say it, but I’ve become a big fan of using cotton balls soaked in petroleum jelly. These beauties help get my fire going even in the wettest conditions!
I also like to be strategic about how I handle my spark. I use matches that are wax-coated or a lighter, but I have been known to get crafty with my flint and steel when the conditions dictate it. Every method can be a fun challenge!
For those of you who love a good survival skill, consider learning the bow drill method. It takes time but once you get it down, you’ll feel like a fire-starting wizard! As with everything in life, practice makes perfect—don’t be discouraged if it doesn’t work on the first try.
Building the Fire Structure
Choose an Efficient Structure
Building your fire doesn’t have to be all that complicated. My go-to method is always to create a teepee structure. It’s simple and allows for lots of airflow, which is crucial in wet conditions. Plus, it’s an efficient use of your gathered materials.
Start by placing your tinder in the center, then surround it with kindling. Once that’s set, slowly build out with larger branches, ensuring to leave openings to promote airflow. Just like with any building project, a solid base will lead to a strong finish!
As always, watch the orientation of your pieces. You want to avoid setting them up in a way that traps moisture instead of shedding it. So, don’t stack things too tightly; give your fire room to breathe and thrive!
Lighting the Fire
Once my structure is up, it’s go-time! I typically light it in several places to ensure it catches evenly. I focus on getting the tinder lit first, then let it catch onto the kindling. I always keep a close eye on it, gradually adding larger pieces once the flames are established. I’ve learned the hard way that trying to rush this part can extinguish your hard work!
A great tip is to have a few extra flames ready, just in case the first tries fizzle out. Sometimes, all it takes is one little breeze to ruin a hard-fought flame. Having a backup plan can ease that stress and allow you to enjoy the process.
If things are still being stubborn, don’t hesitate to adjust your fire structure slightly. Airflow is key! I’ve had moments where just shifting a branch a couple of inches made all the difference in igniting the whole setup. Never lose faith!
Maintaining Your Fire
Alright, you’ve got your fire crackling, but maintaining it is the next step. I like to watch how my fire behaves and make sure to add wood gradually. I measure the supply based on its needs. Sometimes it might need smaller pieces; other times, I can introduce larger logs.
The beauty of a fire is the way it evolves. I’ve learned to respect its rhythm and add accordingly. It’s almost like having a pet that requires care and attention. There are times when I’ll even shift the logs around to keep the airflow steady.
Lastly, if it’s consistently drizzly, remember that the surroundings will also accumulate moisture. Having a collection of dry tinder handy helps me combat this issue. It’s those little details that render wet fire-building a successful venture!
Extinguishing the Fire Safely
Putting It Out Properly
Now, if you’ve had a successful fire, the end is fast approaching. It’s essential to safely put out your fire. I fill a bucket with water beforehand to keep nearby, and when it’s time, I generously douse the coals. I can’t stress enough: being hasty won’t do, and just using dirt might not fully extinguish it!
As I extinguish, I’m always checking for hot spots. Sometimes, a little heat can linger, so it’s better to be safe than sorry. I often mix soil with the ashes to ensure that everything is thoroughly cooled down.
Lastly, I make a habit of leaving a clean site after I’m done. Whether it’s an official campsite or just the great outdoors, it’s about respecting nature and leaving it as I found it, or better!
Check for Residual Heat
After extinguishing, I’ll often run my hand over the area to check for any residual warmth. This act not only ensures my own safety but also helps keep my fellow outdoor lovers safe. Coals can stay hot for a long time, especially if they’re buried under dirt. I don’t want anyone stepping in the wrong spot!
Learning to understand how fires work has been a gel in my outdoor adventures. The more aware I am of my fire’s behavior, the better I can manage it effectively. It’s like being in harmony with the elements, super cool!
This serves as a reminder that we all share this land, and practicing fire safety keeps us all safe and healthy while enjoying Mother Nature.
Leave No Trace Principles
Ultimately, I’ve found that adopting Leave No Trace principles is vital. This means ensuring the area looks like I was never even there. I search for any bits of garbage that might have been left behind and pack them out with me. Every little bit counts, right?
It’s about being responsible in nature, understanding that our actions create ripples. Teaching others these principles helps spread awareness and fosters a greater respect for the environment.
So, whenever we gather around a campfire, I remind my friends to take a moment and appreciate how it connects us. Doing it safely and sustainably ensures we can enjoy these experiences for years to come. Cheers to great fires and beautiful memories!
FAQs
1. What should I do if I can’t find dry tinder?
If you can’t find dry tinder, look under tree bark, inside hollow logs, or break apart branches. You can also pack dryer lint or cotton balls for a backup, which work wonders!
2. How do I prevent my fire from being extinguished by rain?
Look for natural shelters like trees or rocks to protect your fire from rain. Also, build your fire above the ground using stones or logs to keep it away from moisture.
3. What type of wood is best for wet fire conditions?
In wet conditions, I find using split wood more effective, as it exposes drier interior layers. Look for standing dead wood (called snags), as they tend to have less moisture.
4. Can I use lighter fluid to start a fire in the rain?
While it can help, lighter fluid is not recommended as it can cause flare-ups and may be less effective in wet conditions. Natural fire starters are safer and easier to manage.
5. Why is it important to practice fire safety?
Practicing fire safety ensures that we protect ourselves and the environment. Controlled fires minimize the risk of wildfires, and leaving no trace helps preserve nature for future outdoor enthusiasts.
by Preparation Call Editorial Team | Jul 31, 2025 | Preparedness
Using Common Household Items
Finding Sources of Light Around the House
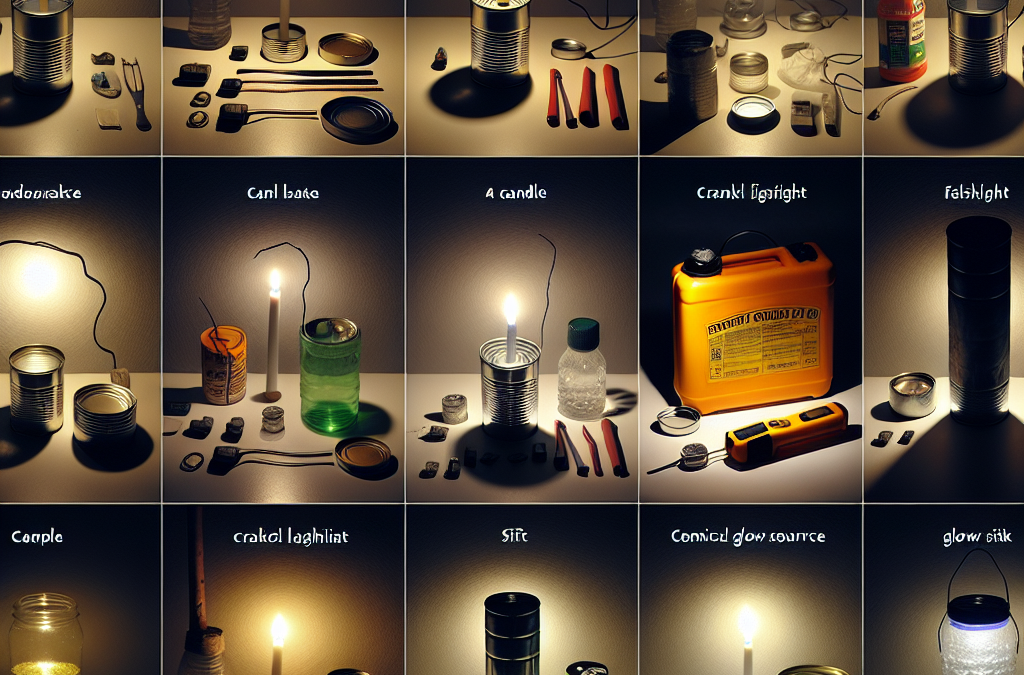
You’d be surprised at how many light sources you can find right in your own home when the power goes out. For instance, candles are a classic go-to. They not only light up a room but can also create a cozy atmosphere. So, gather up your candles, but don’t forget to have some matches or a lighter on hand. Otherwise, you’ll just be staring at something pretty!
Flashlights are another winner. If you’ve got a flashlight in your drawer or a camping gear kit, now’s the time to dig it out. Make sure you check the batteries, though. If they’re dead, it won’t help you much in the dark! I always keep a stash of batteries handy, just in case.
<pThen there’s your phone. Most of us have smartphones nowadays, right? They have built-in flashlight features that can be quite handy in emergency situations. Just remember to conserve your phone's battery; it’ll be your lifeline for more than just light if something goes sideways.
Create Your Own Oil Lamp
Gather Your Materials
If you’re up for a little DIY, making an oil lamp can be incredibly rewarding. You’ll need a container (an empty jar works perfectly), a wick (you can even use a strip of cloth), and cooking oil. It’s super easy, and I’ll show you how!
First, fill your container with oil, leaving enough space at the top to put the wick in. You want it to soak up the oil, so make sure it’s long enough to hang out of the jar a bit. This creates a nice flame when you light it. Just be careful — a flame means fire, and fire means safety precautions!
Once it’s assembled, light your wick, and voilà! You’ve just created your very own emergency light source. Trust me, it’s a pretty cool skill to show off and can really lighten up a dark space.
Harnessing the Power of Solar Energy
Using Solar Lights
If you have solar garden lights, you’re in luck! These little gems can be repurposed for indoor emergencies. Just bring them inside and, voila, instant light! They get their charge during the day, so if the sun’s out, they’ll be ready for any situation.
To maximize their effectiveness, try placing them in windows or sunny spots during the day. And if you’ve got a ton of these solar lights, you can even light up multiple rooms. It’s a fun little hack and incredibly resourceful.
The good thing about solar lights is that they don’t require any plug, so you can use them for outdoor emergencies as well, like camping or barbeques. Truly the gift that keeps on giving!
DIY Candle Holders for Safety
Choosing Safe Materials
When it comes to using candles, safety is key. You don’t want to accidentally start a mini bonfire in your home! Opt for sturdy, fireproof containers for your candles. Glass jars or metal tins work wonders. Just remember, don’t place them on surfaces that could catch fire!
To enhance safety, try using rice or sand as a base to stabilize your candle holder. Not only does it look nice, but it helps to keep the candle upright and secure. It’s a simple trick that makes a world of difference.
And always keep an eye on your candles while they’re burning. Nothing takes the cozy vibe away like a burnt-down candle causing chaos. Better safe than sorry, right?
Utilizing Rechargeable LED Lights
Battery Backup Systems
Rechargeable LED lights are a fantastic way to ensure you’re never left in the dark. Many of these lights can be charged using a USB cable, so they’re perfect if you have a power bank handy. I’d recommend investing in a few — they tend to be long-lasting and powerful.
Before an emergency strikes, make a habit of charging them regularly. You never know when you might need them, and it’s so much easier to grab a fully charged light at the last minute than rush to find the charger.
Plus, some of these lamps come with cool features like brightness settings. This means you can go full on disco mode for good vibes or mellow it out for a more relaxed ambiance. It’s your light, your rules!
FAQs
What are some easy emergency light sources I can create at home?
You can easily use candles, flashlights, and even your smartphone’s flashlight feature to create light when the power goes out.
How do I make a homemade oil lamp?
To create your own oil lamp, you’ll need a container, a wick, and cooking oil. Fill the container with oil, place the wick in it, and light it up!
Can solar lights be used indoors in an emergency?
Absolutely! Just bring your solar garden lights indoors and they will provide you with light. Ensure they’ve been charged during the day for best results.
What’s the safest way to use candles during an emergency?
Make sure to use sturdy, fireproof holders for your candles. Keep them away from flammable materials, and never leave them unattended while burning.
Are rechargeable LED lights worth it?
Yes! They are convenient, can be charged via USB, and often offer adjustable brightness. They are a wise investment for emergency preparedness.
by Preparation Call Editorial Team | Jul 31, 2025 | Preparedness
Identify Your Essential Documents
Personal Identification
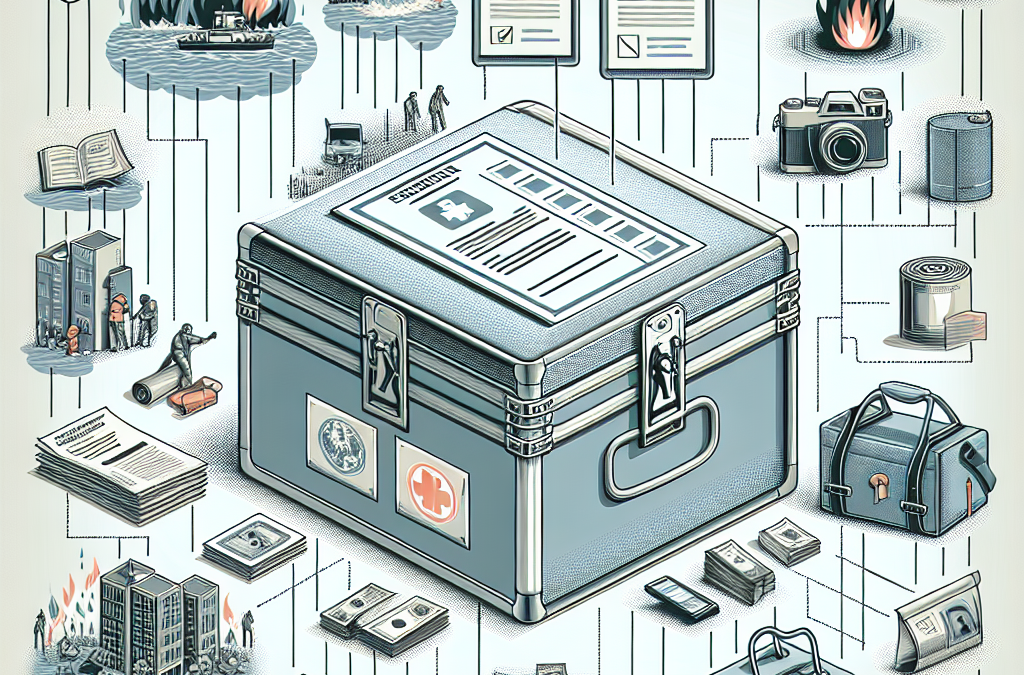
When I’m in a crunch, the first thing I focus on is my personal identification. This includes things like passports, driver’s licenses, and social security cards. These documents are often irreplaceable, and losing them can really complicate an already stressful situation. Without them, it’s tough to prove who you are, so I take special care to know where they are.
If I ever find myself needing to gather documents quickly, I have a mental checklist: Do I have my ID? My passport? These help not just in emergencies but also when traveling. Keeping these items safe and organized can save you a lot of hassle in the long run.
To make it easier on myself, I recommend keeping your IDs in a dedicated folder or envelope, so they’re all in one place. That way, when a crisis hits, the last thing I want to do is scramble and dig through piles of paperwork!
Financial Records
Next up on my list are my financial records. These cover everything from bank statements to investment paperwork. Personally, I find it super important to have this information on hand in case of theft, natural disasters, or anything else that might require me to prove my financial status.
In today’s world, it’s not just enough to keep a physical copy. I also use secure online storage options for digital copies. Having everything accessible yet protected gives me peace of mind knowing that if something happens, I won’t be starting from scratch.
Plus, being organized with your finances lets you manage your money smartly and makes tax time a whole lot easier! Seriously, nobody wants to be digging for their tax documents at the last minute.
Important Legal Documents
Legal documents can be a huge pain point when you’re in a bind. These include things like your will, property deeds, and any contracts. Keeping them safe is something I didn’t take seriously until I faced a situation where I needed them in a hurry.
Having these documents in a safe but accessible place is key. I suggest using a fireproof safe or a safety deposit box for the really important stuff. That way, I’m not left scrambling when I need to prove ownership or settle legal matters.
When I keep these documents close, it not only helps during a crisis but also makes me feel more in control of my life. It’s worth the effort to get them sorted and safely tucked away.
Organize Your Documents Effectively
Create a Document Inventory
When it comes to organization, I’ve learned that creating a document inventory is a game-changer. I list everything I have and categorize it: identification, finances, legal files, etc. This inventory acts as a roadmap when I need to find something quickly.
Every time I add or remove a document, I update the inventory. This way, I always have an accurate account of what I possess, which is helpful during emergencies or if I suspect something has gone missing.
Having this organized allows me to stay proactive. If something happens, I can whip out my list and know exactly what I need to grab. Super simple yet so effective!
Use a Secure Storage Solution
Finding the right storage solution made a world of difference for me. I recommend having both a physical storage option, like a fireproof safe at home, and a secure digital option, like a password-protected cloud service. Balancing both gives me the flexibility I need.
For the documents I keep digitally, I make sure to encrypt them, ensuring that they’re safe from prying eyes. It’s just another layer of protection, and honestly, it’s become second nature to me now.
Being a little extra cautious pays off, especially if I ever need access to my documents in a hurry. I feel like having a foolproof storage method really ups my preparedness game.
Regularly Review Document Status
Another thing that’s crucial in my document-safeguarding process is the regular review. I set reminders to go through my documents, check for updates or renewals, and ensure everything is where it needs to be. Sometimes things can slip through the cracks!
This practice not only keeps my documents current but also helps prevent any unpleasant surprises later on. It’s kind of like spring cleaning for my paperwork—it feels good to tidy everything up!
I also use this time to dispose of any unnecessary documents. Reducing clutter is like reducing stress; it helps me stay focused on what truly matters.
Utilize Technology Wisely
Cloud Storage Services
Let’s talk tech! Cloud storage has been a lifesaver for me. I use services like Google Drive and Dropbox to keep digital copies of all my important papers. This way, I can access them from anywhere, which is a huge perk if I’m ever out and about and need a digital version.
Of course, security is key here, so I make sure to use strong passwords and two-factor authentication. It might seem tedious, but trust me, it helps me sleep better at night knowing my documents are safe.
Plus, having everything in the cloud makes it easier to share files with trusted family members if needed. Coordination can be tricky in emergencies, so knowing they can access documents without hassle makes it all a bit easier!
Document Scanning Apps
File organization took a leap forward with document scanning apps on my phone. It’s super easy to scan documents directly from my phone. Apps like CamScanner or Adobe Scan let me create PDFs on the go, which is amazing for quickly digitizing important records.
When I’m at home, I can easily scan, upload, and organize everything right after I receive or create a new document. This not only reduces physical clutter but also ensures I have digital backups handy.
These apps really make the process efficient, allowing me to keep my documents neat without the worry of paper piling up around me. It’s a win-win situation!
Reminders and Alerts
When it comes to technology, I’m also a big fan of setting reminders and alerts. Whether it’s renewing my driver’s license or reviewing my files, tech can help me stay on top of it all. I use calendar apps to build alerts that give me a heads-up before deadlines.
In a crisis, time can fly, so these reminders keep me anchored. It minimizes stress when I know a renewal is around the corner, and I can plan accordingly.
It’s all about making technology work for me. By utilizing reminders, I seamlessly blend my organizational needs with digital help and stay one step ahead.
Share Critical Information with Trusted Individuals
Selectting Trusted Contacts
It’s important for me to choose my trusted contacts wisely. These are people who will help me in an emergency, whether it’s family members or close friends. I usually sit down and think about who I trust the most with my personal information.
Having these contacts in place provides me with a safety net. If something happens, I know that they will step in, whether that means accessing shared documents or helping me get through a difficult time.
Trusting someone with your document safety isn’t easy, but opening that door can truly be a lifesaver. Just be sure to pick folks who have your back no matter what!
Communicate Your Plans
Once I’ve decided on my trusted contacts, I make it a point to communicate my safety plans with them. This includes discussing where I keep my documents, how they can access them, and what to do in case of emergencies.
A clear communication channel makes it much easier to coordinate and reduces panic during stressful moments. I love the peace of mind that comes with knowing my closest allies are on the same page.
Also, I often have these conversations over dinner or casual catch-ups—keeping it light helps integrate these important discussions into our lives without feeling forced.
Establish Access Protocols
Lastly, I don’t just hand over access freely. Establishing access protocols is necessary to keep my documents secure while still allowing trusted contacts to help if needed. This could be a shared password for digital documents or a plan to go to a specific location to access physical files.
By laying down these protocols, I offer a level of control while ensuring my information doesn’t fall into the wrong hands. Honestly, it’s a balance, but I love feeling like I’m not in this alone.
Setting these guidelines brings accountability, and ultimately, it builds a safety net around my essential documents that I can rely on in tough situations.
Stay Informed About Document Protection
Understand Legal Requirements
One of the critical lessons I’ve learned in documenting protection is being aware of the legal requirements surrounding important documents. Different documents have different regulations, and knowing the basics helps a ton when it comes to safeguarding them.
I frequently check in with local laws and regulations regarding document security and storage. Make it a point to familiarize yourself with what you should be doing to keep your items secure and compliant.
Whether it’s updates on wills or legal changes in property ownership, staying informed can prevent a lot of unnecessary headaches later on. Knowledge is power!
Keep Up with Technology Changes
Just like any other area of life, technology is always evolving. I make it a priority to keep up with changes that might affect my document security. Whether it’s new encryption methods or better storage services, I’m always on the lookout for improvements.
There are plenty of resources out there, from tech blogs to webinars, and they offer valuable information on protecting your documents. By staying up-to-date, I can make sure that I’m taking advantage of the best practices available.
This way, I can incorporate any new tools that make the safeguarding process easier while still ensuring my information is safe.
Continual Education on Risks
Lastly, I focus on understanding potential risks that come with not safeguarding documents properly. Criminal activities and natural disasters can happen anytime, so being informed about the types of threats helps me proactively protect myself.
I often read articles or attend workshops about safeguarding personal information. Staying aware of what scams or real-world risks to look out for makes it easier for me to prepare.
This continual education gives me the upper hand and helps prevent any unfortunate surprises from shaking the foundations I built for protecting my important documents.
Frequently Asked Questions
1. What are the essential documents I should safeguard?
The essential documents include personal identification like passports and driver’s licenses, financial records, and important legal documents like wills and property deeds. It’s wise to have both physical and digital copies of these documents.
2. How can I create backups of my important documents?
You can create backups by scanning physical documents and storing them securely in the cloud. Apps like CamScanner can help convert hardcopies to digital formats, and always remember to use encrypted storage for security.
3. Why is it important to have trusted contacts for document access?
Having trusted contacts ensures you have help during emergencies. They can assist you in accessing essential documents or making informed decisions when needed.
4. How often should I review my document inventory?
I recommend reviewing your document inventory at least once a year, or whenever you have significant updates, like new documents or changes to existing ones.
5. What are the best methods for keeping documents secure?
Utilizing a mix of physical and digital storage solutions is key. Invest in a fireproof safe for physical documents, and use secure cloud storage with strong passwords for digital copies. Regularly update this information to keep it secure.
by Preparation Call Editorial Team | Jul 31, 2025 | Preparedness
Hey there! Let’s dive into an important topic that many people might not think about until it’s too late: where to hide during a home invasion. Having a plan can make a world of difference. Based on my experiences and discussions, I’ve pinpointed some essential spots that can really help you stay safe if things ever go sideways. So, let’s break this down into five main areas where you can hide. Trust me, it’s about being as prepared as possible!
1. Under the Bed
Assessing Space and Accessibility
First things first, not all beds are created equal! If you haven’t checked how much space is under your bed lately, do it now. Some beds have a fair bit of clearance, while others may be too low for comfort. You want to make sure you can squeeze in without feeling like you’re getting stuck in a tight spot.
Also, consider how quickly you can get under there. If you’re in a room and things go wrong, you need to get under fast. Take a moment to test it out! Practice crawling under and see if it feels manageable. Being able to move smoothly is vital when every second counts.
To wrap up, keep in mind what’s under there. It’s best to clear out any junk that might trip you up. A bit of space can help you breathe easier and not feel cluttered when you suddenly find yourself in the need to hide!
Camouflage Your Presence
Now that you’re under the bed, let’s talk about blending in. If you have bedding that drapes down low enough, it can hide you pretty well! It’s always good to have a cozy blanket or even an extra cushion that you can use to cover yourself up and not attract attention.
Don’t forget about sound! Keeping quiet is key. So, I recommend practicing not making noise while under there – maybe turning on some music and seeing how still you can stay. You want to be a ghost, not a drummer!
And remember, the calmer you are, the better you can think. Focus on your breathing and stay collected. This mental state can really help you as you await any resolution.
Exit Routes
Another key aspect to consider is what your exit routes look like when you’re under the bed. If you’ve got a window nearby, know if it can be an escape route if needed. Sometimes being aware of your surroundings under pressure can be a real game-changer.
Have a plan for when you might come out, and think ahead about which direction to go — whether it’s running to another room or bolting outside. Being under this cover should also help you observe the situation without being seen, so use that knowledge wisely!
Last but not least, always have your phone with you or a way to communicate if the situation allows it. You never know when you might need to call for help – every detail counts!
2. Inside a Closet
Choosing the Right Closet
When it comes to closets, it’s all about the size and the contents. If you’ve got a walk-in closet, that’s usually a sweet spot. You can close the door, and with the right positioning, you can remain hidden quite effectively!
If it’s a smaller closet, look for a corner where you can tuck yourself behind coats or shoes. In this scenario, the more clothes the better! It adds a layer of protection and camouflage. Remember that you don’t want to be in a spot where your presence might stand out.
Also, consider the accessibility of the closet. If there’s clutter or boxes in your way, get that sorted out beforehand. Being able to slip in without a fuss during a scary moment is stinking important!
Noise Management
Just as with being under the bed, noise management is key here. Keep your breathing quiet, and resist the urge to fidget with things – it’s so easy to knock something over and give away your hiding spot! Find a comfy position and stay super still.
Additionally, try to find something soft to sit on if the floor is hard. Think about bringing in a cushion or a rolled-up towel to make it more comfortable. The longer you can stay calm, the better your chances are!
It’s a good idea to mentally prepare what you would say if confronted. If you can keep your cool under pressure, it may help you handle any verbal confrontation far better than if you were freaking out.
Creating a Hiding Barrier
To effectively conceal your presence, think about how you can create barriers in the closet. Hanging clothes can act as a good shield – placing several on hooks can really help obscure you from view.
You can also think about throwing things like bags or shoes around to further disguise your spot. The more natural it looks, the less likely someone will notice anything amiss!
In summary, don’t forget about your phone. If you have a discreet hiding place for it within the closet, that’s your lifeline. Just remember, only try to use it if you feel absolutely safe doing so!
3. Behind a Door
Strategic Placement
Hiding behind a door might seem straightforward, but it’s actually a clever choice if done correctly! When facing an intruder, positioning yourself behind a door can offer a surprising level of protection and concealment.
The key is to choose the right door — preferably one that opens away from you. Trying to hide behind a door that opens in your direction only gives you away! Plus, don’t forget about ensuring the door is sturdy. You want to secure yourself in a safe spot.
When the door opens, staying close to the edge can also help obscure you. Think about how you can make your silhouette less defined; standing or crouching in a way that keeps you hidden is all part of the plan!
Minimizing Movement
Most importantly, stay super still! It’s all instinctive, but moving around unnecessarily can draw attention to yourself. In this spot, silence is truly golden. So, get comfortable in your stance and maintain a strong focus.
Focus on your breathing again. Slow, deep breaths can keep you calmer and help you think clearly. This is the moment to be silent and aware of everything going on around you.
And if by chance you have anything in your hands, get rid of it beforehand. Trust me, having free hands can make a huge difference at a moment like this when your focus needs to stay strong.
Smart Exit Options
Again, having an exit strategy is crucial. If you’re behind the door, think about how you’ll slip out if things go wrong. Visibility on the other side plays a big role. Maybe there’s a window you can access or another room that leads to safety. Mapping this out mentally is key.
Make sure to have an idea of what’s outside and how you can get to safety without being seen. Timing is everything. Watch for distractions or sounds that could help you make a break for it.
In closing, be aware of your surroundings when you’re exiting. Quick glances can help you decide whether to stay put a little longer or make your move!
4. In the Attic
Accessing the Attic
If you’ve got an attic, that could be a game-changer. It’s often not the first place someone would check. First, evaluate how easily you can access it — is there a pull-down ladder, or do you have to climb up through a hatch? Make sure you’re comfortable using it quickly.
Once you’re up there, check the layout. Some attics can be awkward and cramped, full of old boxes and gear. Know how you can navigate in the dark — falling over something can do you way more harm than good during a scary moment!
Creating a safe zone in your attic can also make a big difference. If there’s room, consider keeping a small pile of supplies with a flashlight and your phone. That way, you’re a bit more prepared for anything that comes your way.
Disguising Your Hiding Spot
Attics can be dark, but it’s crucial to disguise yourself well! If there are old boxes, old furniture, or anything that can help conceal your presence, use them to your advantage. Pile items around you, but make sure you still have room to breathe!
Ensure you can remain as unseen as possible. Something as simple as a dusty sheet covering your silhouette can provide the cover you need. Just be careful to not batch yourself in too tightly, as you still want to be able to escape if need be.
Being hidden in a less-than-clean space can make keeping calm harder, so try to find something comfy if you can. The more relaxed you are, the easier it’ll be to maintain your focus!
Exit Strategies from the Attic
When hiding in the attic, always keep a mental checklist of possible escape routes. Often, there’s that hatch where you came from or a rooftop you might be able to access. Know where those options lie, and how quickly you can get to them.
Checking what’s directly below you can also be pivotal. If your exit through the attic hatch leads into a room where someone is lurking, you’ll want to rethink your plan quickly!
Getting out without making noise is key! You don’t want to draw attention to your escape, so practice what that would look like. Planning for a quiet getaway sets you up much better than leaving it all to chance.
5. Behind Large Furniture
Choosing the Right Pieces
Sometimes, the best hiding spots can be right in plain sight! Large pieces of furniture, like a couch or a wardrobe, can be your secret weapon. Look around your home — it could be as simple as pulling a big chair away from the wall and slipping behind.
When you’re scouting for these spots, test how much space you have. A creaky chair can give you away, so moving a little can be a no-go. Ensure your hiding place can support your weight comfortably without noise!
Being behind larger pieces can give you that unexpected cover. Just ensure that it’s sturdy and won’t topple over if you lean against it. Protecting yourself is the main goal!
Staying Calm and Concealed
Once you’re behind the furniture, deep breaths again! Silence rules — staying still is key. If you feel tension rising, focus on outside noises or movement; it’s all about keeping your composure in such heightened moments.
You may not have much room, but make sure you’re comfortable enough to stay still for a while. If needed, find a small cushion to put behind your head to help keep your thoughts clear and your body relaxed.
Always listen carefully to what’s happening around you. If things start getting rowdy, staying concentrated on the sounds can help you gauge the situation without exposing yourself.
Planning Your Next Move
In summary, while hiding behind furniture, always be prepared with a plan. What’s your next step if things go wrong? A hasty retreat from behind the couch could be best to think about, but knowing where you’ll head to is just as important.
Having a clear exit route — even if it means making a run for it once you know you can get away unseen — is vital. If there’s a back door, window, or even an escape route into a neighboring area, make sure it’s fresh in your mind.
And above all, trust your instincts! Sometimes, your gut feeling will lead you to safety better than any strategy drawn up on paper. This readiness will give you the edge you need!
FAQ
- 1. What is the safest place to hide during a home invasion?
- The safest place really depends on your home’s layout and where you feel most secure. Under the bed, in a closet, or behind large furniture are all viable options that can help conceal your presence.
- 2. How can I prepare my home for a potential invasion?
- Preparation involves having a plan, knowing your escape routes, and keeping areas clear of clutter. Creating hiding spots and practicing your responses can make a big difference in high-stress situations.
- 3. Should I try to confront an intruder?
- Generally, it’s best not to confront an intruder. Prioritizing your safety should come first, so hiding and waiting for them to leave or for help to arrive is usually the safest route.
- 4. What should I keep in my hiding spots?
- Having essential items like your phone, a flashlight, or anything you need to stay quiet can be extremely helpful. It’s always good to have a little stash of supplies to make your hiding experience more manageable!
- 5. How can I stay calm during a home invasion?
- Staying calm involves finding ways to center yourself, like focusing on your breathing, staying still, and listening intently to your surroundings. Practicing mindfulness can help maintain your composure during high-pressure situations.
by Preparation Call Editorial Team | Jul 31, 2025 | Preparedness
Assessing Your Pet’s Needs
Understanding Common Health Issues
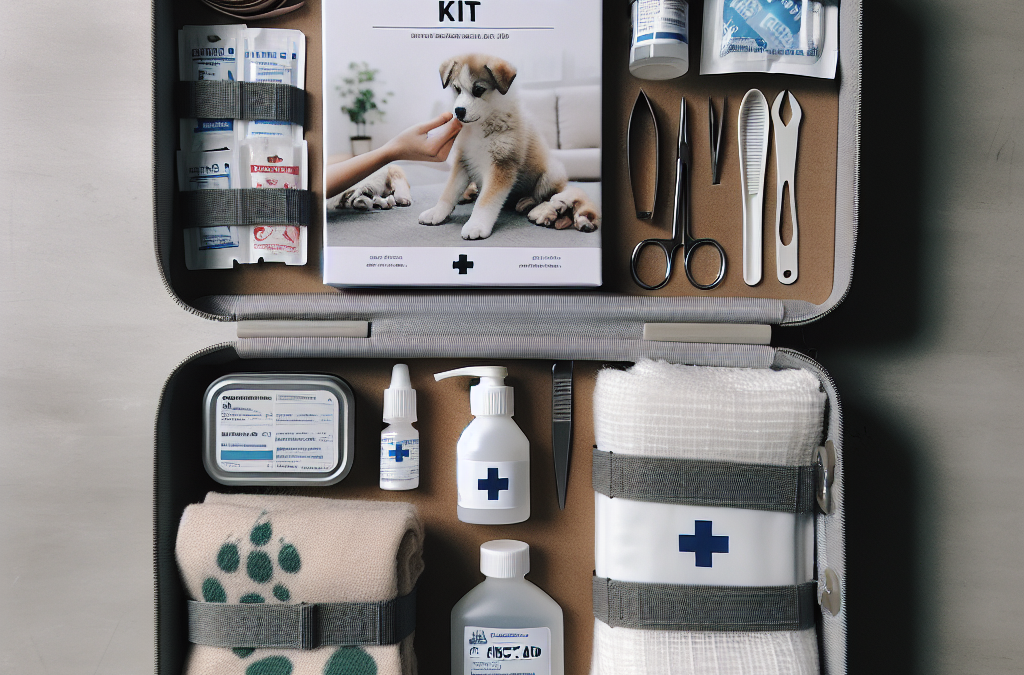
As you embark on the journey of creating a first aid kit for your furry friend, it’s crucial to understand what kinds of health issues you might encounter. Every pet is unique, and knowing their specific needs can make a huge difference in an emergency. When I first started thinking about my pets’ health, I made a list of common problems like cuts, bites, and allergic reactions. It gave me clarity on what to include in my kit.
For instance, my dog, Max, is prone to ear infections, while my cat, Bella, occasionally gets into tussles with other animals. By identifying these issues, I ensured I was prepared for any situation that might arise. Consider chatting with your vet about potential concerns—they can offer customized advice based on your pet’s age, breed, and health history.
Being proactive is key! Think about your pet’s lifestyle, whether they are active and adventurous or more relaxed. This can help you predict potential emergencies and prepare accordingly. It’s all about being one step ahead.
Talking to Your Veterinarian
One of the best resources I found while preparing my pet’s first aid kit was actually my veterinarian. They have a wealth of knowledge and could suggest essential items for my kit based on my pets’ unique needs. Just asking simple questions during our regular check-ups gave me valuable insights.
Don’t be shy about asking specific questions! For example, “What should I have on hand for a bee sting?” or “How can I handle a sudden illness?” These conversations can help you build a tailored kit that’s efficient and effective.
Make it a practice to update your kit according to your vet’s advice, as recommendations might change with seasons or health developments. Keeping an open line of communication with your vet can ensure that you’re always prepared for anything life throws your way with your pet.
Regularly Updating Your Kit
Over time, I realized that just building the kit wasn’t enough. Regularly updating it is super important! Just like you check the pantry for expired food, keep an eye on the contents of your first aid kit, too. If your pet’s health changes or they age, you may need to add new supplies.
Also, I’ve learned that I should check items like gauze and antiseptics to ensure they remain sealed and effective. Rotating supplies can also help ensure anything that needs attention is taken care of promptly. Make it a habit to do this every few months. You never know when you’ll need it!
Additionally, every few seasons, let’s say every six months, it helps to re-evaluate what’s in there. Some items might get used up or become obsolete. If you’ve had a change in your pet’s activities or health, adapt the kit to suit those new circumstances!
Essential Items for Your Kit
Bands and Wraps
When I think of first aid, one of the first things that comes to mind is bandages. The world of bandages is vast, and I’ve learned that having a variety is key. From adhesive bandages for small cuts to elastic wraps that can secure gauze on a more serious injury, each plays an essential role in pets’ first aid.
Having a set of stretchy bandages is great for wrapping injuries on a leg or paw, while smaller adhesive bandages work perfect for those tiny scrapes. Just keep in mind, don’t use human bandages, as they can contain materials that might be unsafe for pets if swallowed!
Stocking a few different types ensures you’re ready for small everyday boo-boos to bigger accidents. Trust me; after a couple of mishaps with Max and Bella, I learned this the hard way. The right bandage can really speed up healing and help minimize infections!
Cleaning Supplies
Next, we have cleaning supplies, an absolutely necessary component of any pet first aid kit. Keeping wounds clean is essential, and I often use sterile saline solution and antiseptics to help with that. It’s something I learned after witnessing a minor cut turn serious due to lack of proper cleaning!
Even knowing you can use natural options like witch hazel can help soothe your pet’s skin after cleaning. However, I always consult with my vet before trying new products, just to be on the safe side. You just never know what works best, especially if they have allergies.
Keep some cotton balls and swabs handy, too. They can really help with applying cleaning solutions, making things easier and more controlled. And let’s face it; the last thing you want is a messy clean-up job!
Medication and Treatment Essentials
I’ve faced the tough decision of having to give Max medication for unexpected allergies, and that’s when I realized having the right medications is crucial. Over-the-counter choices like Benadryl and activated charcoal can come in handy for treating mild allergies or poisoning.
However, it’s vital to consult your vet about dosages and what medications are safe for your specific pet. I always keep a little guide with standard dosages for my pets and maintain a line of communication about any changes to their health or medication needs.
Having a thermometer specific for pets is another essential tool that has saved me from guessing too much. If ever in doubt, taking a quick temperature gives definitive information. Those little pieces of knowledge make you feel more in control in an emergency.
Storing Your Kit
Choosing the Right Container
When I first built my first aid kit, I didn’t put much thought into the container. Boy, was I wrong! I later realized that having a good sturdy container makes a huge difference. You need something that’s durable, waterproof, and easy to carry around, please! I recommend a plastic box with labels for each section inside, so you know exactly where everything is in a moment’s notice.
Also, think about where you plan to keep this kit. Evaluate the environment; if it’s in a humid area, you might need to think about sealing everything inside properly. Keeping medications and supplies in their original packaging can also help prevent any mix-ups.
Once, I had everything scattered in a drawer, and it took me ages to find what I needed in an emergency. Trust me; it’s worth investing some time into organizing it properly to make things smoother later!
Labeling and Organizing Items
Another crucial aspect is labeling. I figured out that simply throwing things together isn’t enough; organizing by type helps a lot. Using labels for different sections like ‘bandages,’ ‘medications,’ or ‘cleaning’ copies not only saves time but ensures that others who might need to use the kit can find what they need in a hurry.
Consider creating a quick reference guide to put inside the kit. It could include emergency numbers for vets, poison control, or even your regular vet’s info. On one stressful occasion, I was frantically looking for numbers, only to realize I could’ve had that on hand!
Also, regularly checking and re-labeling supplies as needed keeps everything up to date. It’s a simple practice that can prevent any mishaps where you think you have the right item only to find out it expired or was used last week.
Location Accessibility
All in all, where you store your kit can make a world of difference. It’s an easy mistake to hide it away in the back of a closet; I did that once, and you can imagine how fun that was trying to dig it out during an emergency! Instead, I’ve learned to keep my first aid kit in a place that’s easily accessible yet safe from small hands and paws.
Keep a small kit in your car too, just in case emergencies happen while you’re out and about. This has been a lifesaver during long walks or hikes. Trust me, having it on hand prevents panic when unexpected problems arise.
To wrap up, maybe consider having a separate smaller kit specifically for travel, just to keep it all ready to tackle whatever comes your way during adventures. You’ll thank yourself later for being prepared and confident in handling situations when they pop up!
Training and Practice
Learning Basic First Aid Techniques
Honestly, having a first aid kit is just one part of the equation—knowing how to use it is another. I took a weekend class on basic pet first aid, and it was a game-changer! They walked us through techniques like how to bandage a leg and when to apply pressure to stop bleeding.
Hands-on techniques taught me to perform CPR on pets, which I certainly hope I never have to use, but it gives peace of mind to know what to do in a scary situation. I’d recommend checking for local classes, as many community programs offer these invaluable skills.
Alternatively, there are several online resources and videos to guide you. Just make sure they come from reputable sources or certified professionals. Knowing these skills can make that crucial difference if an emergency arises, and being prepared is so empowering.
Practicing with Your Pet
Another thing I found super helpful was practicing how I would handle my pets in an emergency. I set aside time to get used to the equipment and practice where all the items in my kit are located. It felt a bit silly at first, but it actually built confidence for me—and my pets were great sports about it!
Since my pets are pretty calm, practicing nudging their paws or holding them still for a bandage helped me prepare for the real thing. It was reassuring to know how they reacted and how I could best calm them if they were stressed.
Having my pets accustomed to being handled during these training sessions really paid off when things got tense. Your pets might surprise you by being more cooperative if they’ve had a little practice in advance!
Creating a Family Plan
All in all, involving the family in the process can create a sense of teamwork about your pets’ health and safety. I often include my kids in discussions about the first aid kit and what supplies we have. They’ve learned where to find everything and how to assist if needed in an emergency.
This also lays a foundation for valuable life lessons about responsibility and care of pets. My kids take pride in knowing they can help care for our animals and are more attentive during our walks and outings. It’s all about creating that bond between them and our pets!
Every few months, we have a family refresh on knowledge about the first aid kit, discussing what’s in it and why. What could be a mundane chore becomes a bonding session over our beloved pets. Teamwork makes the dream work, right?
FAQs
1. What should be included in my pet’s first aid kit?
Your kit should contain bandages, antiseptics, gauze, medications, and a thermometer, along with a few basic first aid tools like scissors and tweezers. Tailor it to your pet’s specific needs.
2. How often should I check and update my first aid kit?
I recommend checking your kit every few months, replacing expired items, and ensuring everything is in good condition. This keeps you prepared for any emergencies!
3. Is it necessary to take a pet first aid class?
While not mandatory, it’s incredibly beneficial. Learning basic first aid techniques increases your confidence and equips you with the skills you may need during a pet emergency.
4. Can I use human medications on my pets?
Some human medications are safe for pets, but you must consult your veterinarian before giving anything. Dosages vary widely, and some medications can be harmful to pets!
5. Where should I store my first aid kit?
Keep your first aid kit in an easily accessible, safe place that your pet can’t reach. Consider having smaller kits for your car and travel to ensure preparedness wherever you go!





