In today’s unpredictable world, being prepared for emergencies can mean the difference between chaos and calm. Whether it’s a natural disaster, a medical emergency, or an unforeseen event, having a solid plan in place is crucial. Let’s explore the ultimate emergency preparedness checklist you need to ensure safety for yourself and your loved ones.
## Understanding the Importance of Emergency Preparedness
Think about it: emergencies can strike at any moment. From hurricanes and earthquakes to fires and power outages, preparation is key to minimizing risks and ensuring survival. By understanding the importance of emergency preparedness, you equip yourself with knowledge that can save lives. It’s not just about having a stash of supplies; it’s about creating a culture of readiness within your household. A proactive mindset fosters resilience and confidence when faced with unexpected challenges.
## Essential Supplies Every Household Should Have
So, what should be in your emergency kit? Start with the basics: food, water, first aid supplies, and tools. Aim for at least three days’ worth of non-perishable food items—think canned goods, energy bars, or dehydrated meals—and one gallon of water per person per day. Don’t forget essential medications! A well-stocked first aid kit should include bandages, antiseptics, pain relievers, and any prescription medications you might need.
Also consider including flashlights with extra batteries, blankets for warmth, multi-tools for various tasks, and hygiene items such as hand sanitizer and wipes. If you have specific dietary needs or allergies within your household—be sure to account for those too! An often-overlooked item is important documents; keep copies of identification cards, insurance policies, medical records—all neatly packed in a waterproof container.
## Creating a Comprehensive Emergency Plan
Having supplies is just one step; crafting a comprehensive emergency plan is equally vital. This plan should outline evacuation routes from your home as well as designated meeting points for family members if you’re separated during an event. Discuss these plans regularly so everyone knows what to do when panic sets in.
Moreover, identify local shelters or safe zones if evacuation becomes necessary. Practice drills periodically—this helps build familiarity with the procedures while alleviating anxiety when real situations arise.
## Communications: Staying Connected During a Crisis
In times of crisis, staying connected can be challenging but paramount. Establishing communication protocols ensures that every family member knows how to reach one another during emergencies. Designate an out-of-state contact who will serve as a central point of communication; this helps alleviate confusion if local lines are down.
Consider investing in battery-powered radios or walkie-talkies as they can be invaluable when mobile networks fail.
## Special Considerations for Families and Pets
When preparing for emergencies, don’t forget about your furry friends! Create an emergency plan that includes pet care; ensure you have enough food supplies and medications specifically tailored to their needs. Keep leashes or carriers readily accessible in case evacuation becomes necessary.
For families with children—engage them in discussions about safety while providing age-appropriate education on what steps they should take during different scenarios.
## Regularly Reviewing and Updating Your Preparedness Plan
Lastly—and perhaps most importantly—make it standard practice to review and update your preparedness plan at least once each year (or whenever significant changes occur). Life evolves: new family members join us while others may leave; personal circumstances change that require adjustments in our plans.
By routinely assessing your readiness level—as well as refreshing supplies—you ensure that everyone remains secure no matter what life throws your way!
In closing: being prepared isn’t just about gathering supplies; it’s about fostering resilience through knowledge-sharing within families so all stay safe come what may!
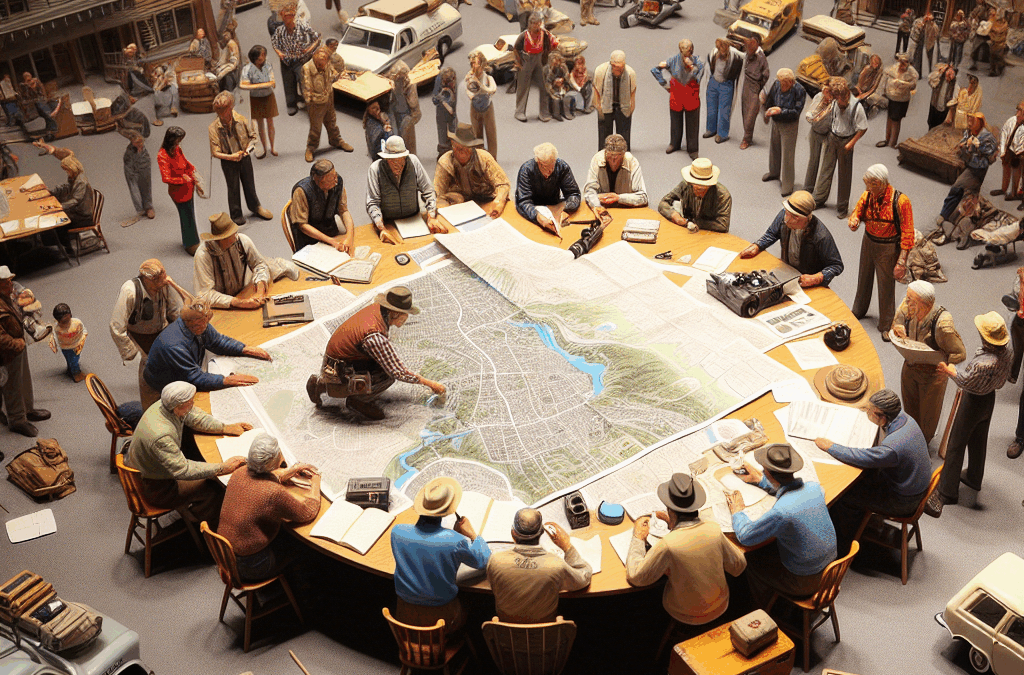
In my experience, understanding the local terrain can be a game changer when it comes to preparedness. Whether it’s knowing the nearest routes for evacuation or identifying natural barriers, a good grasp of the geography allows us to make informed decisions. If disaster strikes, those who know the lay of the land have a head start on escaping or finding safe havens.
I’ve often relied on my knowledge of local parks, rivers, and hills during emergencies. These features can act as natural refuges or obstacles, and knowing where they are can be crucial when time is of the essence. Take a moment to explore your area and envision how you would navigate it in a pinch. It can really pay off!
Plus, we have a bunch of hidden gems right in our backyards that can serve as rallying points or shelters. When we utilize these spots for preparedness, we’re not just planning— we’re engaging with our community and making connections that could save lives.
Community Networks and Resources
Local Organizations and Support Groups
Building a strong local network can make all the difference during a crisis. In my town, we have numerous organizations dedicated to disaster preparedness. From volunteer fire departments to local Red Cross chapters, these groups provide essential resources and support when things get tough.
Engaging with these organizations not only keeps us informed about safety protocols and resources but also allows us to form relationships with people who will be there for each other in challenging times. I’ve met some incredible folks while volunteering, and these connections have proven invaluable during emergencies.
Moreover, these local groups often offer workshops and training courses. I’ve attended a few myself and learned critical skills, like first aid and emergency response tactics. Knowledge sharing among community members leads to collective strength—a pillar of preparedness that shouldn’t be overlooked!
Cultural Insights and Local Traditions
Understanding Community Responses
One thing I’ve learned is that local cultures influence how communities respond to disasters. What might work in one area could fall flat in another due to differing values or traditions. Knowing these subtleties can help tailor our preparedness efforts to resonate with the folks around us.
For instance, family gatherings during holidays often serve as excellent opportunities to discuss emergency plans. Since many folks prioritize family, integrating preparedness discussions into these settings can ensure that information is communicated effectively. I’ve seen this work wonders in my community, fostering a sense of shared responsibility.
Plus, utilizing local traditions can serve as a way to strengthen the community fabric. Incorporating cultural events into preparedness activities not only makes learning fun but also ensures everyone feels included—because let’s be honest, nobody wants to feel left out during a crisis!
Local Emergency Services Knowledge
Contacts and Services Available
When it comes down to it, knowing who and what is available locally can save your life. I’ve spent time familiarizing myself with local emergency services, and trust me, it’s worth it. From understanding the closest hospital’s location to knowing the contact numbers for the fire department, having this knowledge at my fingertips is empowering.
Another aspect of this is knowing the capabilities of local services. Some areas might have specialized units like swift water rescue teams or hazmat responders. I can’t tell you how many times I discovered resources that I had no idea even existed until I started digging around!
And let’s not forget about social media; many local services have active online presences now. Following them keeps us informed on immediate responses during emergencies—updates that can be critical for preparedness.
Preparedness Education Tailored to Locale
Workshops and Training Resources
Last but not least, continuously learning about preparedness is vital. Participating in local workshops not only equips us with skills but also connects us to fellow community members on the same mission. These trainings often focus specifically on the types of disasters common in our area, ensuring that we are prepared for genuine threats.
For example, I attended a workshop that focused solely on hurricanes, which was super helpful because my region faces this risk. Learning about storm preparedness, like securing homes and creating a disaster supply kit, was eye-opening. The local emphasis on our specific risks made it all the more relevant.
There’s also an empowerment aspect; taking charge of my preparedness journey has helped me feel less anxious about potential threats. By sharing these experiences with others, we create a ripple effect of knowledge that enhances community resilience.
FAQ
Why is local knowledge crucial in emergencies?
Local knowledge provides insight into geography, resources, and community dynamics that can significantly impact preparedness and response efforts. It helps us navigate effectively during emergencies.
How can I start learning about my area’s resources for preparedness?
Begin by connecting with local organizations like the Red Cross or community centers. They often offer programs, workshops, and information about local emergency services.
What role do local networks play in crisis management?
Local networks provide support, share knowledge, and foster collaboration among community members. They enhance collective preparedness and ensure everyone has access to essential information and resources.
How can cultural insights impact preparedness strategies?
Cultural insights can shape how communities view emergencies and respond to them. Tailoring preparedness strategies to fit local customs can lead to more successful engagement and compliance.
Why should I participate in local preparedness training?
Participating in local training equips you with practical skills tailored to your area’s specific threats, creating a sense of community while building personal confidence in handling emergencies.
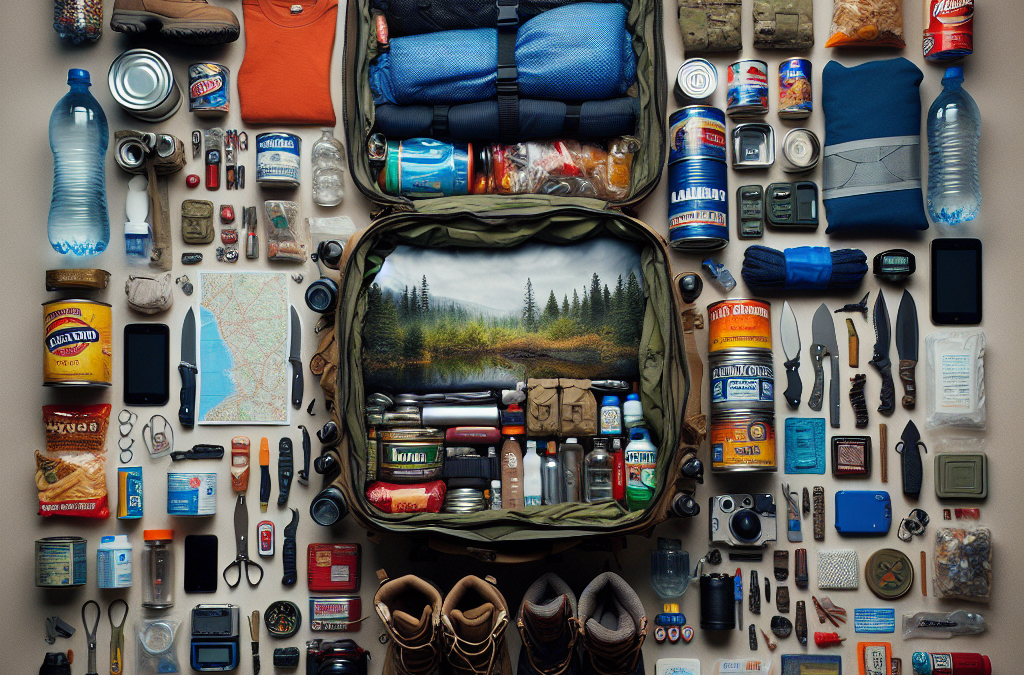
Alright folks, let’s get right into it! When you’re choosing a bug-out bag, you have to think about what you’re gonna need it for. Are you planning for a natural disaster, a road trip, or maybe just some wilderness adventure? Each scenario will require different items, so sit down and really consider what your top priorities are.
I remember when I first put together my bug-out bag; I just grabbed the biggest backpack I had lying around. That was a mistake! A bag that’s too big can get heavy fast, so ensure it’s not just spacious but organized enough to find everything you need quickly.
Also, your bag should be durable. Look for something made out of tough materials, with water-resistant properties. You want this bag to last through rough conditions, not fall apart after a few uses.
Different Sizes and Styles
Next, consider the size and style of your bag. You don’t want to go overboard; usually, something that holds 72 hours’ worth of supplies is ideal. That’s about 50-75 liters for most people. For me, I found that a medium-sized backpack with compressible features does wonders because it keeps everything compact.
Then there are different styles. You’ve got the classic backpack, sling bags, or even tactical options. I personally lean towards a tactical bag because of the versatility and extra features. They can be handy for attaching gear and organizing tools, which is super important when you’re on the go.
So, think about what fits comfortably and suits your style. If you don’t like carrying it, you won’t use it, and that’s the last thing you want in an emergency!
Budget Considerations
Let’s not forget about budget! I get it; you want to stock up on all the cool gadgets and tools, but it’s crucial to set a budget for your bug-out bag. You can find quality bags and supplies without breaking the bank. Check out sales or even second-hand options; sometimes, you can score fantastic gear for much less.
On my journey, I discovered that there’s no single “perfect” bag for everyone. Sometimes you find a decent bag that just needs a few tweaks with added pockets or pouches. Do a bit of research and read reviews before plopping your cash down.
Remember, the goal is to be prepared, so don’t skimp on quality where it really matters—like the bag itself—but also know you don’t need to spend a fortune to be ready for anything.
2. Essential Supplies
Food and Water
Moving on to supplies! When it comes to food and water, the rule of thumb is to pack enough for at least three days. I usually throw in some energy bars, freeze-dried meals, and even a couple of nice protein packs that I know won’t spoil quickly. High-calorie foods are your best friend here!
Water is a huge must-have. I always include a portable water filter and a few collapsible water containers. Trust me, carrying bottles around can become cumbersome. With a filter, you can refill from almost any fresh water source.
Don’t forget about the space! Keep everything compact to save room. You might want to consider some waterproof bags to keep your food fresh and dry in case of mishaps.
First Aid Kit
Now let’s talk about the first aid kit. I can’t stress how crucial this is! A well-stocked first aid kit can be your lifesaver. I started with a basic one and added my personal touch over time: more antiseptic wipes, bandages, and even some pain relievers.
Make sure you have items tailored to your specific needs, especially if you have allergies or chronic conditions. I’ve also found it helpful to keep a little instructional guide in my kit for emergencies. You never know when someone’s going to need some basic first aid!
Don’t forget to check your kit regularly and replace items that have expired. If you’re not prepared, it can lead to bigger problems when you actually need it.
Tools and Gear
Alright, now let’s cover tools and gear. You might be a whiz at survival skills, but having the right tools can make a massive difference. I always keep a multi-tool in my bag; they’re incredibly versatile and save space.
Flashlights, fire starters, and emergency blankets are also a must. And trust me, a good rope can come in handy in various situations—from securing items to makeshift shelter—in case you find yourself in a bind.
Lastly, don’t forget a map and compass or a satellite communicator if you’re going off the grid. Technology can fail, but the classics will always work. These tools can help you navigate back to safety when things go haywire.
3. Clothing and Shelter
Choosing the Right Clothing
Clothing should never be overlooked in your bug-out bag preparations. I mean, think about it—it’s your first line of defense against whatever Mother Nature throws at you! I always pack moisture-wicking base layers, a durable outer layer, and of course, a warm hat and gloves.
The trick is to layer, layer, layer! That way, you can adjust according to the temperature. Also, try to stick to neutral colors that blend in with your surroundings. Bright colors can attract attention you might not want!
Water-resistant fabrics are essential, so consider that when you’re selecting your clothing. I once got caught in the rain with cotton clothes, and trust me, you don’t want to feel soaked when you could be warm and dry.
Personal Shelter Options
When it comes to shelter, I always prioritize lightweight options, like a compact tent or a hammock with a rainfly. The last thing you want is to be weighed down by heavy gear. I remember the first time I set up a tent; it was a game changer. Having a place to stay dry and shielded from the elements is crucial.
Consider a thermal or emergency protection blanket too. They don’t take up much room, and boy, they work wonders in keeping your body heat in when the temperatures drop at night!
Plus, a tarp can provide versatile options, whether you’re building a makeshift shelter or covering your gear during poor weather. It’s about thinking ahead and preparing for the unknown!
Adjusting for Seasons
Now, don’t forget to adjust your clothing and shelter based on the season. In the summer, you might prioritize breathable fabrics, while in winter, insulating layers become essential. I try to review my bug-out bag every few months, swapping out items as the seasons change.
Also, keep an eye on the weather, and if you’re going somewhere specific, make the necessary adjustments! You wouldn’t want to be caught in the wrong gear during extreme conditions.
This attention to detail can greatly increase your chance of survival and comfort while you’re out adventuring. Always think about where you’re headed and prepare thoroughly!
4. Important Documents
Identification and Legal Papers
When I first put together my bug-out bag, I completely overlooked documents! Your ID, insurance papers, and any legal documents should always be on your packing list. You never know when you might need to prove your identity or access emergency services!
Make copies of important documents and store them in a waterproof bag. Even a digital copy stored on a USB can come in handy, so you have access regardless of what happens to the physical copies.
Think about things like financial information, medical records, and any permits you require depending on where you’re heading. These details can make navigating emergencies that much easier!
Emergency Contacts
Keep an updated list of emergency contacts, too. If you’re in a bind, you need to reach your family, friends, or even emergency services quickly. I keep mine in my wallet and a copy in my bug-out bag in case I misplace my phone.
Consider including an emergency communication plan with instructions on how to contact each other in case of separation. This can ease a whole lot of stress during chaotic situations.
It helps to ensure that you are on the same page with those closest to you, reducing panic if something goes wrong. Plus, it’s good to have everyone’s contact information in one place.
Miscellaneous Documents
Additional documentation like property deeds, titles for your vehicle, and financial information can help you get back on your feet later if disaster strikes. I like to keep these in a separate, waterproof pouch just to be safe.
In some situations, you might also need maps of your area or lists of critical resources nearby. Think about your location and what kind of documents could be beneficial, and then stash them in your bag!
Having these important papers at your fingertips when you need them can make a huge difference, so don’t overlook this aspect of your emergency preparation!
5. Regular Maintenance and Updates
Check and Replace Supplies
Last but definitely not least is the regular maintenance of your bug-out bag. It’s easy to throw stuff in there and forget about it, but trust me, you need to check your supplies regularly! You don’t want to find out that your food has expired or your flashlight batteries are dead when it’s go-time.
I usually set a reminder to go through my bag every six months. I check the food items, swap out batteries, and ensure everything is still in working condition. It’s a quick process if you stay on top of things!
Plus, you’ll probably spot things that need to be reinforced or improved. Each review means your bug-out bag just keeps getting better!
Stay Informed
Staying updated on potential threats in your area and new survival techniques can impact your bug-out strategy. I like to read up on survival blogs or join local prepping groups to stay in the loop; there’s always something new to learn!
Also, try practicing your skills. Go out camping or hiking and actually use your gear! It helps you know how to best utilize your bag when you really need it.
Knowledge is power in emergency situations, so keeping your skills sharp is as important as the supplies you carry!
Adapt to Changes in Life Circumstances
Your needs might change based on your lifestyle, so don’t forget to adapt your bug-out bag accordingly. Whether you have kids, pets, or new hobbies, think about how these elements fit into your kit.
As life evolves, so should your bug-out strategy. If you know you’re gonna be in a different region soon, adjust your supplies to fit that area’s specific needs. Every detail matters!
Remember, being prepared for anything means being adaptable. Take that to heart as you review and update your bug-out bag regularly!
FAQs
1. What is a bug-out bag and why do I need one?
A bug-out bag is a portable kit that contains everything you might need in an emergency situation where you have to leave your home quickly. It’s essential for being prepared for situations like natural disasters or unexpected evacuations.
2. How often should I check my bug-out bag?
It’s a good idea to check your bug-out bag every six months. This way you can replace any expired supplies and ensure everything is in working order.
3. What should I prioritize when preparing my bag?
Your priority should focus on food, water, shelter, first aid supplies, and important documents. Outside of essentials, think about your personal needs and preferences!
4. Can I pack my bug-out bag too heavily?
Absolutely! A heavily packed bag can slow you down. Aim for lightweight, essential items and regularly assess what you truly need.
5. What if I have special needs or kids to consider?
If you have special needs or children, ensure your bug-out bag reflects their needs. Pack any necessary medications, foods, and supplies that are specific to them for a successful evacuation.
When I first learned about defensible space, I didn’t think it was that big of a deal. I mean, it’s just the area around my home, right? But boy, was I wrong! This space is crucial in preventing wildfires from reaching your property. By creating a buffer zone where flammable materials are limited, you can fend off flames and embers, increasing your home’s chances in a wildfire scenario.
Defensible space is often broken down into zones, each requiring specific actions and considerations. Zone 1, which is closest to your home, should be maintained with no combustible materials, and plants should be spaced apart properly. In Zone 2, you can have landscaping, but it needs to be fire-resistant or at least thoughtfully maintained. It’s about creating layers of defense!
So, as you look at your property, consider making some changes. Trim those overhanging branches, clear dead leaves, and don’t underestimate the power of some carefully chosen plants. It’s all about that eye for detail that can make a real difference.
Landscaping with Fire-Resistant Plants
Choosing the right plants is like having a fire-fighting squad right in your garden! Fire-resistant plants can create barriers that slow the fire’s progress. I learned quickly that native plants are often the best because they’re adapted to the local environment and usually require less water, too. It’s like a win-win!
When landscaping, consider the layout as well. Grouping plants in clusters rather than scattering them throughout your yard can help contain a potential fire and ensure quick access for emergency responders if needed. Also, space those clusters out! It reduces the chance of a fire jumping from plant to plant.
Additionally, don’t forget about mulch! Using inorganic mulch or finely shredded bark can help reduce flammable material. Stay away from the traditional wood chips because they can be a fire hazard. Sometimes it’s the simple changes that bring the biggest benefits.
Regular Maintenance and Clean-Up
Man oh man, keeping up with maintenance can feel like a full-time job! But trust me, regular cleaning in the defensible space around your home is vital. I’ve adopted a routine of checking for fallen branches and leaves, especially after storms. It’s one of those “out of sight, out of mind” things if you’re not careful.
The key here is consistency. I set reminders on my phone every month to check my property. This way, I’m not scrambling to clean it all at the last minute. Plus, when fire season hits, you’ll be thankful for all that hard work that’s already been done.
Another important maintenance task is to manage your backyard debris. Old furniture, wood piles, and anything else that can accumulate should be stored neatly or discarded. It can often be easy to overlook those items, but a clean yard is a safer yard.
Emergency Kits and Evacuation Plans
What to Include in Your Emergency Kit
Having an emergency kit prepared can mean all the difference. I’ve put together one myself, and let me tell you, it’s like packing for a vacation—only this is way more important! Start with the essentials: food, water, medications, and a first aid kit. Also, think about including important documents and some cash—just in case things go south.
If you’ve got pets, don’t forget their needs! I made sure to stock up on their favorite food and also have a pet carrier handy, just in case. It’s one of those things that might slip your mind until you’re panicking, so make a checklist!
Lastly, make sure to update your kit regularly. I take an afternoon once every season to rotate out food and check that my supplies haven’t expired. Keeping your kit up-to-date gives you peace of mind.
Developing an Evacuation Plan
Now, let’s chat about evacuation plans. Honestly, this seemed a bit overwhelming at first, but it’s actually pretty straightforward. Sit down and plot out multiple escape routes from your home and neighborhood. Think about where you’d meet your family if things got chaotic. I personally like to map out both driving and walking paths—you can never be too prepared.
Additionally, have a plan for where you’ll go! Whether it’s a friend’s house, a nearby hotel, or evacuation sites established by local authorities, knowing your destinations ahead of time can calm your nerves during a crisis.
In our home, we also run through fire drills together, just like in school. It helps everyone remember the routes and keeps the panic at bay when the time comes to use them. Trust me, it makes a world of difference!
Staying Informed and Connected
In today’s world, information is everything! Staying connected—whether through local radio, social media, or community alerts—is critical when it comes to wildfires. I make it a habit to sign up for alerts from my local fire department. This helps me stay on top of conditions and any warnings that might come up.
Join community groups and forums; connecting with neighbors can provide both support and valuable information. Sharing tips and experiences has been a lifesaver for my confidence. We all throw in our ideas and strategies, and it just fosters a sense of community and preparedness.
Also, keep your smartphone handy. There are several apps designed to alert you to fires in progress, and downloading a few can be beneficial. Knowledge is power, and when it comes to wildfires, being informed can save lives.
Post-Wildfire Recovery and Prevention
Assessing Damage and Safety
After a wildfire, it’s easy to feel overwhelmed by what’s left behind. I remember after one near-miss proximity to my home, it was daunting to assess the damage. The first step is to ensure safety. Avoid any burnt areas or damaged structures until experts can evaluate them, and know that your health is paramount.
Take some time to survey your property, documenting damage for insurance purposes. It’s a painful yet necessary step, especially if you’re in a situation where you’ve lost valuable items. Be kind to yourself; it’s a process.
Reach out to local authorities and evaluate if assistance is available. Community resources can provide not just physical help, but emotional support, too. You’re not alone in this, so don’t be afraid to ask for help.
Implementing Recovery Strategies
Once it’s safe, turn your focus to recovery. This means cleaning up debris and beginning restoration efforts. Depending on the damage, it might be time to consult with professionals for rebuilding or repairing structures. I’ve learned that skipping this part can lead to bigger headaches later because it’s important to address underlying issues before they worsen.
Also, consider replanting efforts. Planting trees and shrubs can help restore the landscape and prevent further erosion, so invest in fire-resistant varieties. Not only does this aid ecological recovery, but it also enhances the overall aesthetics of the area.
In closing, look into grants or funding opportunities that exist to assist wildfire recovery in your area. My town has specific resources available, and it’s made a significant impact on both the community and individual homeowners trying to get back on their feet.
Implementing Preventative Measures
After experiencing a wildfire’s aftermath, it’s all about prevention for me. I’ve taken time to reinforce not just my home but my entire property. This includes hardening the structure by using non-combustible materials where possible. Simple things like installing ember-resistant vents can go a long way!
Regular monitoring and machinery maintenance are also crucial. Ensure power lines and trees are trimmed back and utilities are downgrading the risks of fire hazards. I came to learn that being proactive in these areas can be less stressful than dealing with the aftermath.
Lastly, educate your family about fire safety. Making sure everyone in your household knows how to handle these situations and knowing what steps will be taken can make a world of difference. Empowerment through knowledge is key!
Frequently Asked Questions
1. How do I create a defensible space around my home?
To create a defensible space, start by cleaning and maintaining a zone around your property that eliminates flammable materials. Use fire-resistant plants, space out vegetation, and regularly clean debris that can catch fire.
2. What should I include in my emergency preparedness kit?
Your emergency kit should include food, water, medications, pet supplies, a flashlight, batteries, a first aid kit, and important documents. Regularly check and update its contents to ensure everything is current and available when needed.
3. How can I develop an effective evacuation plan?
To develop a solid evacuation plan, map out multiple escape routes, decide on a meeting place for your family, and run drills to practice. Make sure everyone is aware of the routes and knows what to do in case evacuation becomes necessary.
4. How do I stay informed about wildfire risks or alerts?
Stay informed by signing up for local emergency alerts, following local fire department pages on social media, and using apps designed to provide wildfire risk notifications. Community groups can also be a valuable source of information.
5. What steps can I take post-wildfire to recover and prevent future incidents?
After a wildfire, first assess the damage safely. Focus on recovery strategies like cleaning up debris, restoring your property, and implementing preventive measures such as using fire-resistant materials. Educating your household also helps prepare for future risks.
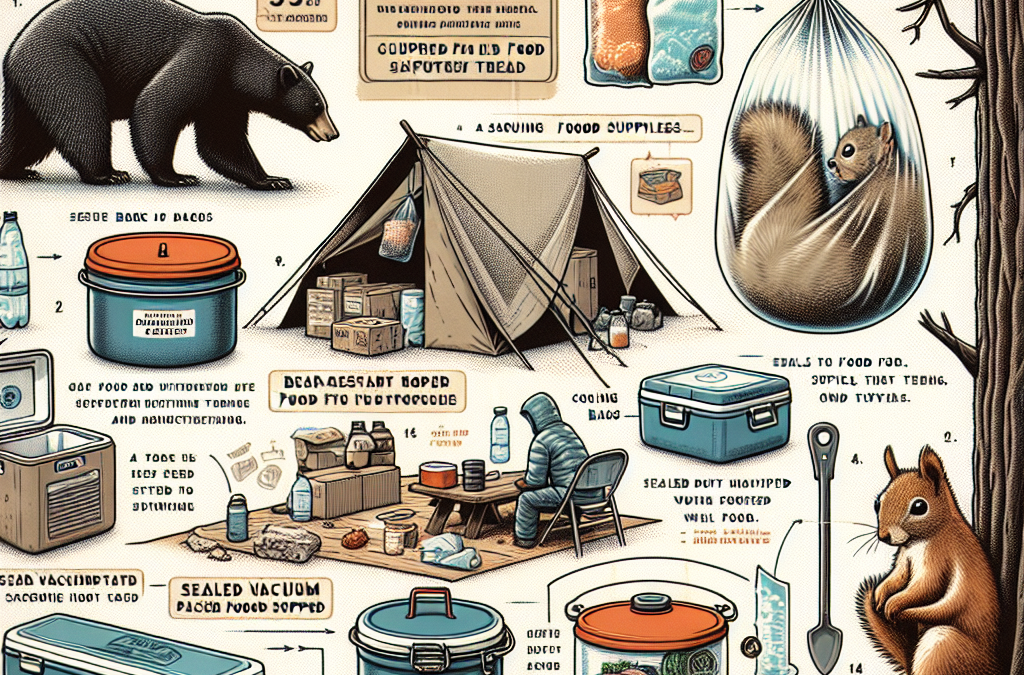
When I first started to deal with animals raiding my supplies, I quickly realized that understanding their behaviors was key. Animals like raccoons and rodents follow certain patterns. For instance, they tend to be more active at night. By observing their behaviors, I could adjust my own habits accordingly, such as securing my food right before dusk.
Did you know that some animals can smell food from great distances? This means that even if I think my food is well hidden, it can still be an easy target. Keeping food in sealed containers isn’t just about making it harder for the animals to get in; it’s about reducing the scents that attract them in the first place.
Learning to read the signs – like tracks or nests – gives me an advantage. The more I know about what these critters are up to, the better I can prepare to thwart their efforts. And trust me, once you have a few success stories, it becomes almost instinctual!
2. Proper Food Storage Techniques
Sealed Containers
I can’t stress enough how effective airtight containers have been in my efforts to secure food supplies. The investment in good quality bins has saved me lots of frustration. Not only do these containers keep out animals, but they also preserve freshness longer, which is a win-win.
Wooden crates or cardboard boxes just don’t cut it anymore. After a few encounters with mice gnawing through to my snacks, I quickly upgraded to thick plastic or glass bins. Every time I pop the lid open and see my food safely tucked away, it’s a little victory for me.
Labeling these containers with dates also helps me keep track of what I have. It’s so easy to forget what I stocked up on until it’s too late. Staying organized prevents waste and fortifies my defenses against animal intruders.
3. Creating Physical Barriers
Fencing Solutions
The first thing I did when trying to secure my food supplies was to build a fence around my garden. A simple fence made from wire mesh has proven to be quite effective. I opted for a height that would deter raccoons but also keep out smaller critters like rabbits.
Every few weeks, I take a stroll around the perimeter to check for any potential breaches. It’s all too easy for a tiny gap to turn into a quick access point for animals looking for a snack. Plus, I like to think of it as my weekly workout – who doesn’t want a little fresh air while ensuring security?
In areas where I store food outdoors, I also use gates and locks. While I wouldn’t call myself a master carpenter by any means, a simple latch and hinges can do wonders. Closing off access to food helps keep animals out and gives me peace of mind.
4. Utilizing Deterrents
Natural Deterrents
After countless snacks went missing, I turned to natural deterrents. Certain smells – like cinnamon or vinegar – repel many animals. So, I’ve started placing bowls of these substances around my food storage areas, and let me tell you, it’s been a game-changer!
Plants that animals dislike can also be strategically placed around my garden. For instance, marigolds are known to deter pests. Plus, they add a pop of color, so it’s a pretty functional decoration as well.
For me, utilizing these natural deterrents feels good because I’m not resorting to chemicals. I get to protect my food supplies and maintain a healthy environment. It’s about finding those eco-friendly solutions that align with my lifestyle.
5. Regular Maintenance and Monitoring
Frequent Check-Ins
Honestly, I stumbled into the habit of regular maintenance unintentionally. Once I started to see the difference in my food preservation, I began to check my storage areas daily. Doing quick visual scans can help me catch any signs of animals before they become a problem.
I keep a notebook handy where I jot down observations, like any unconventional activity or changes in odor. It’s not just a chore; it’s almost become a relaxing part of my day, as I reflect on how well my systems are working.
Also, I love involving my family in this process. Teaching kids about checking food supplies and understanding animal behavior has turned into a fun learning experience. Who knew that food security could turn into family bonding time?
FAQs
1. What types of containers are best for storing food?
Airtight containers made from heavy-duty plastic or glass work best. They help keep out moisture and odors, making it harder for animals to get in.
2. How can I tell if an animal has accessed my food supplies?
Look for droppings, gnaw marks, or tracks around the storage area. Any unusual odors may also be a sign that an animal has visited.
3. Are natural deterrents effective against all animals?
Natural deterrents can work well against many common pests, but results can vary. It’s good to combine them with physical barriers for the best results.
4. How often should I check my food supplies?
Frequent check-ins are essential, especially during warmer months when animals are more active. A quick daily visual scan can help you catch any issues early.
5. Can I train my pets to help deter animals?
Yes, pets like dogs can be trained to bark or patrol the areas where food is stored. Their presence can deter many animals.
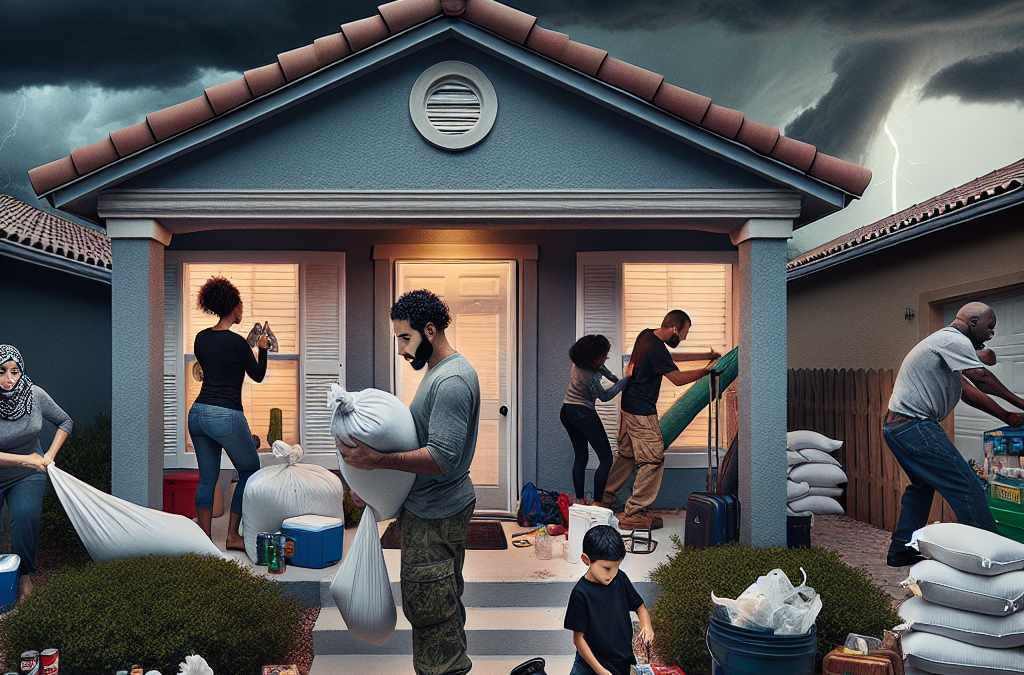
First things first, I always start with a thorough inspection of the home’s exterior. Look for any signs of wear and tear—roof shingles that are curling up, gaps in the siding, or peeling paint. Trust me, a little bit of maintenance can make a huge difference when a storm rolls in. I remember a friend neglecting this and having to deal with a massive leak during a hurricane. Not fun!
Next, don’t forget about your windows. Evaluate whether they’re strong enough to withstand flying debris. I’ve opted for storm shutters in my home, and let me tell you, it gives me peace of mind. If budget is a concern, there are DIY options available that can still provide protection.
All in all, check your landscaping. This is something I often overlook until it’s too late. Trim back any trees or shrubs that might become projectiles in high winds. I had to deal with a close call when a neighbor’s branch flew through my window a couple of seasons ago. You don’t want that to be you!
Secure Outdoor Items
Bring in the Loose Stuff
When hurricane season rolls around, I’ve learned that anything that isn’t tied down can turn into a projectile! I always gather outdoor furniture, plants, and decor and bring them inside or secure them in a safe place. I can’t tell you how many times I’ve seen patios transformed into treasure hunts for flying lawn chairs.
Even smaller items like garden tools should be stashed away. A few years back, I overlooked my kids’ toys, and as the winds picked up, it was a wild game of dodge the flying soccer ball. Lesson learned! Keep everything tidy and don’t forget to check the patio—a quick sweep clears potential hazards.
For anything that can’t be moved, make sure to anchor it down. Use weights or tie-downs to secure larger items. Your flower pots or grill should be safer against the elements that way. Trust me, you’ll thank yourself later when you don’t have to replace every single thing post-hurricane.
Stock Up on Supplies
Create a Hurricane Kit
I can’t stress enough how important it is to have an emergency supply kit ready before hurricane season hits. My hurricane kit includes non-perishable food, plenty of water, flashlights, batteries, and a first aid kit. Don’t wait until the last minute—trust me, the grocery store shelves might resemble a storm aftermath by then!
Don’t forget personal essentials too! Items like medications, pet supplies, and important documents should all be in one accessible place. I learned this the hard way when I had to scramble around looking for my kid’s meds during a storm. Now, everything is neatly packed and easy to find.
During the week leading up to the season, I like to take inventory and make sure I have everything. It’s a simple check that can save a lot of hassle. If you’re missing anything, there’s still time to grab it while the shelves are stocked!
Plan Your Evacuation Routes
Know Your Options
Having an evacuation plan is honestly one of the best things I’ve done for my family’s safety. I’ve gone through the experience of leaving during a storm, and let me tell you, knowing your routes ahead of time reduces a lot of stress. Familiarize yourself with the local roads and potential traffic issues.
Share your plan with everyone in your household! It’s crucial that everyone knows where to go and how to get there. I sit down with my family each year to go over the options and make sure we’re all on the same page. Even the kids feel reassured when they know what the plan is.
Additionally, it’s smart to have backups. I always prepare alternative routes just in case of road closures or detours. It gives me peace of mind, and no one wants to be stuck in flooding or traffic when time is of the essence!
Stay Informed and Updated
Follow the Weather Updates
Lastly, staying informed about weather conditions is key. I can’t stress this enough, as things can change quickly during hurricane season. I always have a reliable weather app on my phone that pushes notifications. It’s crucial—I once got caught off guard without realizing a storm was headed my way!
In addition to apps, listen to local news stations or follow trusted meteorologists on social media for updates. They often provide details specific to our area that national networks may skip. I’ve found local updates to be extremely helpful in making timely decisions.
Also, consider a NOAA weather radio for uninterrupted alerts. It’s a safety net that can keep you informed, even if the power goes out. I have one in my home, and it’s been an invaluable resource when storms approach. Knowledge is power, especially in hurricane season!
Frequently Asked Questions
1. How can I assess the vulnerability of my home?
Start by inspecting your home’s exterior for any weaknesses, check the condition of windows and doors, and evaluate your landscaping to minimize potential projectiles. Regular maintenance is key!
2. What outdoor items should I secure before a hurricane?
Bring in loose furniture, secure garden tools, and make sure any decor is either brought inside or tied down. Anything that can fly in high winds should be stored safely or anchored.
3. What items should I include in my hurricane kit?
Your hurricane kit should include non-perishable food, water, flashlights, batteries, a first aid kit, and any personal medications. Don’t forget items for pets or important documents as well!
4. How should I plan an evacuation route?
Know your local evacuation routes and communicate them to everyone in your household. It’s also wise to have backup routes in mind. Discuss the plan together to ensure everyone is prepared.
5. What’s the best way to stay informed about hurricanes?
Utilize a reliable weather app on your phone, follow local news channels, and consider investing in a NOAA weather radio for real-time updates, especially during power outages.