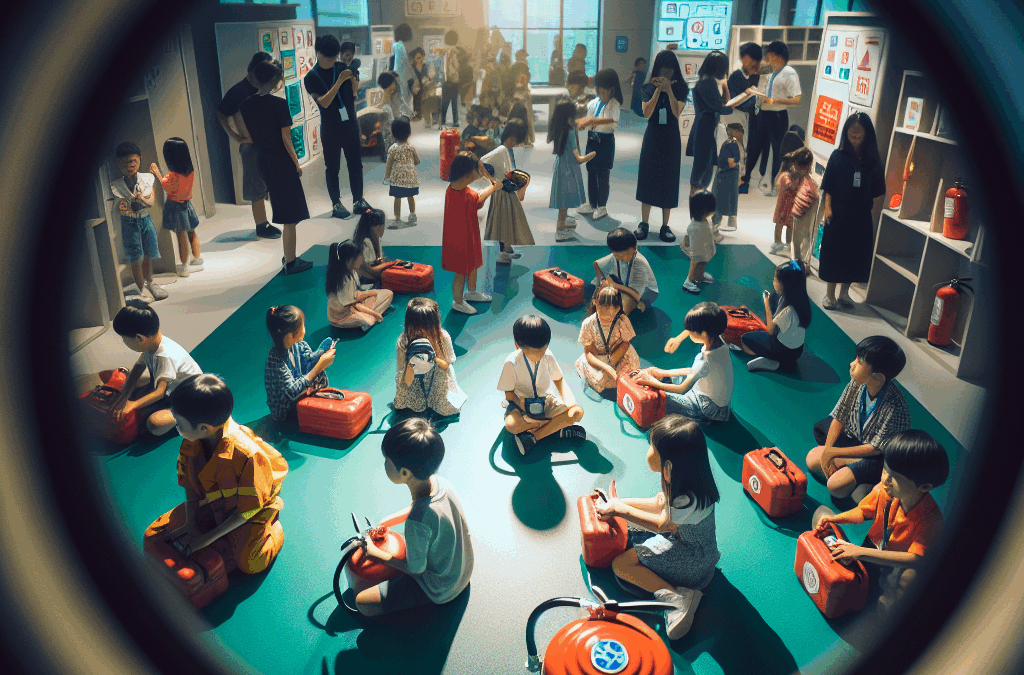
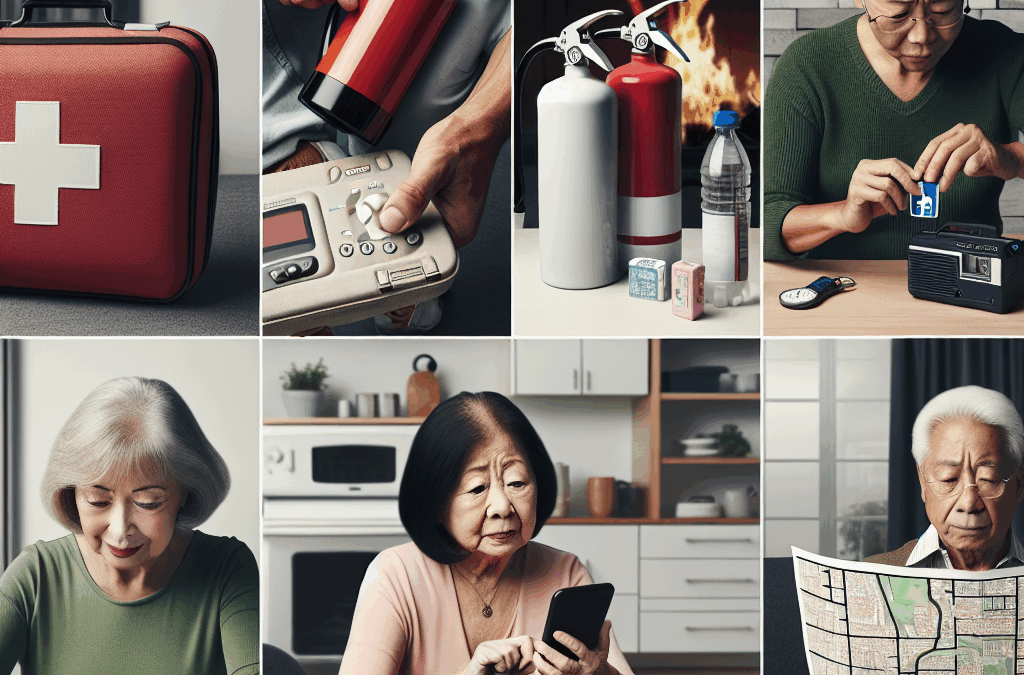
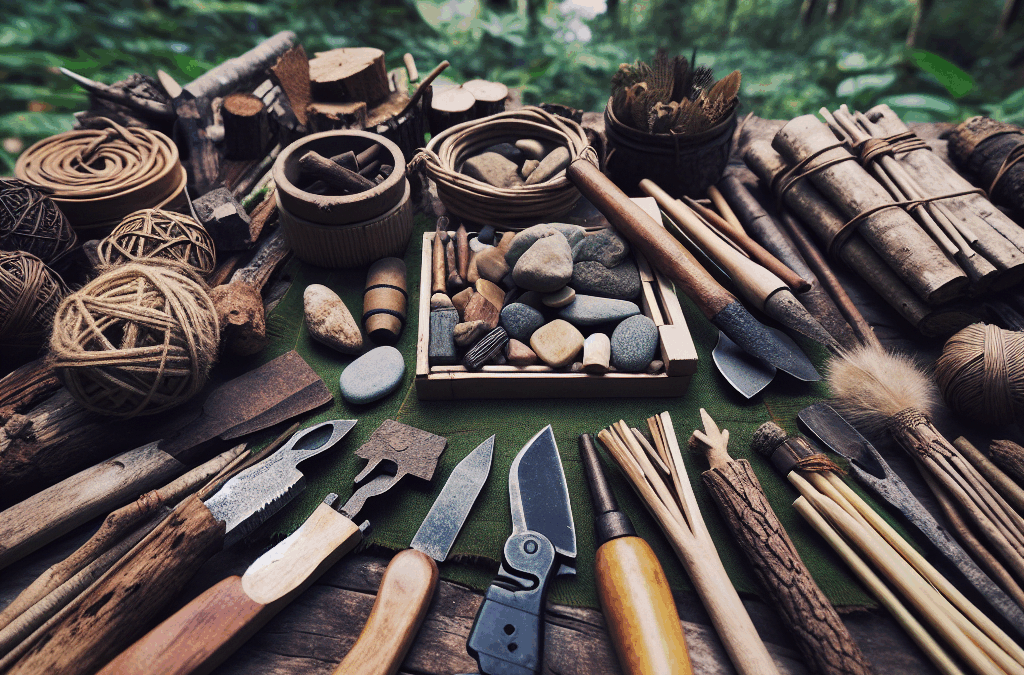
Let’s kick things off by talking about what exactly an emergency is. In simple terms, it’s any situation that poses an immediate risk to health, life, property, or environment. Some common examples include natural disasters, house fires, and health issues. When I first started explaining this to my kids, I realized I needed to use scenarios they could relate to. Recognizing what constitutes an emergency helps them stay alert and prepared.
Not every unexpected situation is an emergency, so it’s essential to break them down. For instance, a minor scrape on the knee isn’t the same as a fire in the kitchen. I often use examples from our daily life—like that thunderstorm that knocked out the power. Teaching them how to differentiate these situations empowers them to act wisely when something serious happens.
Lastly, there are many types of emergencies. Kids will usually relate well to physical examples, like storms and accidents. Still, don’t forget about emotional emergencies like sudden loss or bullying. They’re just as important and require just as much attention in our discussions.
Building Awareness and Preparedness
Creating a Family Emergency Plan
On my journey to prepare my kids for emergencies, I found that having a solid family emergency plan is key. We gathered around the table one weekend and mapped out what our action steps would be. Having a plan creates a sense of security in kids, knowing that there are set procedures to follow when things go south.
Include specific routes for exiting the house in case of fire or designated meeting spots after a natural disaster. My kids loved using markers to draw the house layout and mark escape routes. It’s amazing how a little creativity went a long way in making them feel invested in the whole process.
All in all, remember to involve them in regular discussions about this plan. Don’t treat it as a one-and-done task. We often revisit our emergency plan during dinner discussions or car rides. Keeping it fresh in their minds ensures that they’re more likely to recall it during an emergency.
Developing Safety Skills
Basic Life Skills
This part is super important! I wanted my kids to know some basic life skills that could help them in emergencies. Things like showing them how to call 911 was a top priority for me. I made it a game at first, having them practice dialing with a toy phone. It eased their anxiety and made the process fun!
Next up, I taught them basic first aid. We had a little first-aid kit at home, so I showed them how to clean a cut and apply a bandage. We watched some kid-friendly videos together, which made a huge difference in their understanding.
Ultimately, role-playing various scenarios can really drive the point home. We created fun scenarios like “What if we hear a loud bang?” or “What if we get separated in a crowd?” and acted out the responses. Not only did this build their confidence, but it also promoted critical thinking about how to handle various situations.
Practicing Responding to Emergencies
Simulated Drills
Drilling emergency responses has been one of the most engaging parts of our preparation. We periodically run through fire drill routines at home. It’s just like when we practiced tornado drills back in school. The kids giggle but take it seriously. I often mention how serious the situations can be, and that keeps them focused.
In addition to fire drills, we simulate other emergencies, like an earthquake. We all huddle under the dining table and wait for a moment before “emerging.” It makes them feel a sense of urgency—plus, it’s a fun way to bond over something that can be quite unsettling.
Make sure to mix up the scenarios each time so they don’t get too comfortable with any one routine. The unexpectedness encourages them to think on their feet and prepare for any situation that could arise.
Encouraging Open Communication
Discussing Feelings and Reactions
Let’s be real—talking about emergencies can be scary. I had to instill an open environment in our home where my kids could express their thoughts and feelings around these topics. We often talk about their feelings during or after practicing drills. I want them to know it’s totally okay to be anxious about emergencies, but we have tools to handle those emotions.
To promote open communication, I make sure to ask questions and encourage them to share their thoughts. “How did that make you feel?” or “What do you think we should do next time?” This helps them process what they’ve learned and prepares them for future discussions.
Lastly, I introduced the concept of resilience. Instead of fearing emergencies, I teach them how to bounce back. Sharing stories of real-life problems and how they were solved—whether ones from the news or personal experiences—keeps them grounded in reality and helps them understand there’s always a way to overcome challenges.
FAQ
1. What is the most important thing to teach kids about emergencies?
The most crucial thing is teaching them to recognize what an emergency is. Once they understand that, they can learn the appropriate responses and safety skills necessary for those situations.
2. How often should we practice emergency drills?
I recommend practicing drills at least once every couple of months. It keeps everyone fresh on the procedures and can even bring some excitement to routine home life!
3. Should we involve kids in creating our family emergency plan?
Absolutely! Involving them makes the plan feel more engaging and personal. It also ensures they remember the plan better because they played a role in creating it.
4. What are some fun ways to teach first aid?
Using games and role-playing scenarios can make learning first aid fun. Additionally, using a stuffed animal or dolls for practice can make it more relatable and less intimidating for kids.
5. Why is open communication important when discussing emergencies?
Open communication allows kids to express their fears and uncertainties. It encourages them to ask questions and feel supported, which is essential for building confidence and resilience during such talks.
Emergencies can come in all shapes and sizes. From natural disasters like hurricanes and earthquakes to unexpected health crises, identifying what qualifies as an emergency is the first step in getting prepared. In my experience, it’s better to over-prepare than under, especially when it comes to our beloved seniors.
Think about the types of emergencies that might occur in your area. Maybe it’s wildfires in California, or perhaps tornadoes are more common where you live. Knowing these can help you create a focused plan.
It’s not just about natural disasters, though. Medical emergencies such as heart attacks or falls can happen at any time. Every senior should have a clear understanding of what emergencies might be relevant to them.
Why Seniors Are at Risk
Seniors may face unique vulnerabilities during emergencies, given factors like mobility limitations, chronic health conditions, and social isolation. I’ve seen how a simple task can become monumental for an elderly person in a crisis.
Physical limitations can affect their ability to evacuate quickly. A friend of mine struggled to get out of her house during a storm simply because she couldn’t move fast enough. Planning can mitigate such risks significantly.
Moreover, social isolation can prevent seniors from having immediate assistance or help during emergencies, particularly if friends or family are not nearby. Establishing a network can make a real difference here.
Recognizing Personal Needs
No two seniors are identical, so it’s crucial to recognize the unique needs of each person when preparing for emergencies. I encourage folks to sit down and think through their specific requirements—like medications, mobility aids, or even personal items that bring comfort.
This is the time to take stock of any medical supplies that might be essential during an emergency. Do you need extra inhalers, hearing aid batteries, or mobility devices? Jot these down; it can literally save someone’s life.
Take into account emotional needs too. Having a familiar quilt or family pictures can be a huge comfort during an unsettling time.
Creating an Emergency Plan
Formulate a Family Communication Strategy
First things first, a solid emergency plan starts with how you communicate. Have you ever tried getting in touch with family during a crisis? Trust me, it can be chaos. Setting up a dedicated tree or group chat can keep everyone informed.
Moreover, having a designated meeting spot is key. Maybe it’s the local library or the big oak tree at the corner park—just somewhere everyone knows to go, no matter the situation.
Also, have that family meeting! Get everyone on board with the plan and ensure that even the littlest family members know what to do. It’s teamwork that can pull a family through tough times!
Gather Emergency Supplies
When it comes to emergency supplies, it’s like prepping for a camping trip. It’s not all about canned beans, but you want to gather a range of essential items. Think about non-perishable food, water sources, and first-aid supplies.
One thing I’ve learned is that having a portable charger can be a lifesaver—not only for keeping in touch with loved ones but also for charging medical devices. So, stash one in your emergency kit!
Don’t forget about getting a battery-operated radio. During emergencies, mobile networks can go down, and traditional news channels might be shaky. A radio keeps you informed without needing power.
Know Your Evacuation Routes
Being aware of your local evacuation routes can save precious time in an emergency. I once had a tiny panic moment when a wildfire was approaching, and I didn’t even know where to go. Trust me, you won’t want to be in that situation.
Study the maps of your area, and if possible, do a little drive to scout out the routes. Knowing these paths allows for quick decisions when time is critical.
Practice the routes as a family too. This familiarity will bring confidence—and confidence can be the difference between a stressful evacuation and a smooth one.
Building a Support Network
Connecting with Neighbors
Your neighbors can be your first line of defense during an emergency. I’ve made some great friends on my block by merely stopping to say hello. Establish a rapport with them, and you might be surprised by how quickly they become your circle of support.
Having a buddy system can also be a partnership of sorts. Pair up with a neighbor who checks in on each other regularly, ensuring you both know that you’re never alone.
And don’t hesitate to find community programs that focus on senior safety. Many local organizations offer resources to help you stay connected and prepared!
Utilizing Local Resources
Don’t overlook the organizations in your community. Many places have resources, whether it’s the local fire department doing prevention workshops or senior centers offering classes on emergency preparedness.
Check in with your local services like Meals on Wheels or senior advocacy groups, as many of these organizations are committed to helping seniors through emergencies.
They can provide tailored advice too! I’ve learned so much from attending community seminars. Don’t think of it as just a class; it could be a life-saving investment.
Staying Informed about Emergencies
In our age of technology, staying informed about potential emergencies is easier than ever. Most communities have alert systems that keep you updated. Sign up for notifications if you can—it’s as simple as filling out a form online.
Also, look into social media groups or community boards where locals share timely information. Being privy to these discussions keeps you one step ahead.
Lastly, encourage family members to help set up alerts on smartphones or tablets, ensuring that communication is ever-present, especially in a crisis situation.
Executing Your Emergency Plan
Regular Drills
Like any good plan, practice makes perfect! Conducting regular drills can help you and your family feel more comfortable executing your emergency plan. And believe me—sometimes, you’ll realize a few adjustments need to be made.
It can be as simple as timing how long it takes to gather supplies or to get to your meeting spot! The first time we did a drill, it was eye-opening. There were lots of things I hadn’t even thought about.
These exercises can offer peace of mind too. Knowing you have a game plan helps quell anxiety when faced with unexpected situations.
Keeping Your Supplies Updated
When was the last time you checked your emergency supplies? It’s easy to forget, but it’s super important to ensure everything is up to date—especially perishables! Months can fly by, so make it a point to review your stash regularly.
Consider setting a calendar reminder every few months to check the dates on all items. If something is nearing expiration, just use it up or donate it if viable!
It’s also wise to stay informed about new tools or products that can benefit your emergency kit. Maybe a new water filtration system has hit the market that is much more efficient than what you have. Staying informed helps you keep the best items on hand.
Communication During an Emergency
When the time has come to execute your plan, stay calm and stick to your communications plan. I’ve learned that panic can lead to confusion, so trying to be a steady hand can help keep everyone focused.
If you’ve set communication channels in place, use them! Text messages, phone calls, or established meeting spots should all be utilized as the plan goes into action.
And remember, sometimes things don’t go as planned. Flexibility is key. If circumstances change, adapt as necessary and lean on your support network for guidance. Together, you’re a fortified system of assisted care!
Conclusion
Preparing for emergencies is an essential task for seniors and their caregivers. With the right knowledge, planning, and support, we can navigate crises more effectively. I hope this guide helps inspire you to take the necessary steps toward a safer, more prepared life.
FAQ
1. Why is emergency preparedness particularly important for seniors?
Seniors often face unique challenges such as mobility limitations and chronic health issues. Proper preparedness can help ensure their safety and well-being during unexpected situations.
2. What should I include in an emergency supply kit?
An emergency supply kit should include non-perishable food, water, medical supplies, necessary medications, a battery-operated radio, and a portable charger, among other essentials.
3. How often should I update or review my emergency plan?
It’s a good idea to review and update your emergency plan and supplies every six months to one year. This way, you can catch any expired items and adjust your plan as necessary.
4. What role do neighbors play in emergency preparedness?
Neighbors can be vital in emergencies, providing immediate assistance or checking in on each other. Establishing a strong network can foster support and security for everyone involved.
5. How can I stay informed about local emergencies?
Stay informed through community alert systems, social media groups, and local news. It can be helpful to sign up for notifications regarding hazards specific to your area.
Let me tell you, there’s something incredibly satisfying about making your own tools from materials you find in nature. They not only save you cash, but they also give you a great sense of accomplishment. Since ancient times, humans have relied on the bounties of nature to create everything from simple utensils to complex hunting tools. It’s kind of like tapping into an age-old survival instinct that’s been passed down through generations.
When you think about it, nature has everything you need. Sticks, stones, and leaves can all be transformed into functional tools. Just imagine hacking your way through the bush with a spear or carving out a pot for cooking. It’s empowering! Plus, it connects you to the environment in a way that you’ve probably never experienced before.
Understanding the resources around you is crucial. Knowing what can be fashioned into tools can greatly enhance your survival skills. Rather than viewing the wild as intimidating, I’ve learned to see it as a treasure trove of potential. So, keep your eyes peeled, folks; nature is filled with hidden gems just waiting to be uncovered!
Identifying Potential Materials
Common Materials in Your Surroundings
As I’ve explored various terrains, I’ve learned to identify materials that can be turned into tools. For example, sturdy branches make great handles for implements like knives or axes. You might even find tougher roots that can serve the same purpose. When you’re out gathering, look for materials that seem particularly durable or flexible. These will be your best friends in crafting!
Rocks are another treasure. Some are sharp enough to be fashioned into cutting tools. You can flake away smaller pieces to create a sharp edge, turning an ordinary stone into something you can easily slice with. Over time, you become adept at picking out which stones can do the job, and it’s thrilling to turn something so rugged into a useful tool!
Don’t overlook natural fibers, either. Plants like hemp or even certain types of grasses can be twisted into cords for binding or lashing. I’ve wrapped them around my spearheads and axes to create a more secure grip. The point is, once you start recognizing these materials and their potential, your imaginations for tools will soar!
Crafting Your First Tool
Step-by-Step Method for Tool Creation
Now comes the fun part—actually crafting your tool! I remember my first time trying to make a simple spear. Start off by selecting a straight, sturdy branch as your base. This will be the handle, and you want something that feels comfortable in your grip. Don’t rush this; a good foundation helps make an effective tool!
Next, look for a sharp stone to create your spear tip. I would usually find one that fits nicely in my hand. If you’re unsure how to shape your stone, start by lightly tapping it with another stone to chip away at it—think of it as sculpting! It’s crucial to be careful here, as you want it to be sharp enough to do the job, but not so jagged that it’s unusable.
To wrap up, secure the stone to the wooden handle using plant fibers for a tight fit. I’ve often knotted the fibers around the base of the stone and the handle several times. This part took a bit of practice, but once it’s well-strapped, you’ll have a trusty spear that’s ready to go. Remember, the first tool might not be perfect, but it’ll get you started!
Practicing Your Skills
Refining Techniques and Tool Usage
Once you’ve made your first tool, practice using it! Early on, I was clumsy; I dropped my crude spear several times, and got frustrated. But with practice, I began to master the art of tool usage. Start by utilizing your tool in controlled settings—maybe a backyard or a safe area in the woods where you can hone your skills without feeling pressed.
Experimenting with your crafted tools will teach you what works best for your style of use. For instance, I discovered the importance of balance when throwing a spear. It’s all about trial and error, and each mistake will make you a better craftsman in the long run. Just embrace the learning curve!
In no time, you’ll be using your handmade tools for practical tasks like gathering food or constructing simple shelters. The key is to remain patient and observant. Recognizing the right techniques will elevate your confidence tremendously, laying the groundwork for more intricate projects down the line!
Sharing and Learning from Others
The Value of Community Learning
One of the most enjoyable aspects of immersing myself in the world of DIY survival is sharing experiences and learning from the community. There are so many passionate folks out there who have valuable knowledge to share. Participating in workshops or online forums is an easy way to expand your horizons and delve deeper into crafting tools.
During my journey, I’ve joined local survival groups where we gather to trade tips and techniques. We often hold competitions to see who can create the most effective tool from the materials we find in nature. It’s a playful way to test your mettle and learn some creative tricks from peers. Plus, the camaraderie is hard to beat!
Don’t underestimate social media either! From YouTube tutorials to Instagram craft challenges, there’s a plethora of resources available. Last week, I stumbled upon an online community sharing unique methods of cordage making, and it took my own skills to a new level. Engaging with others not only deepens your knowledge, but it also builds friendships along the way!
Frequently Asked Questions
1. What materials are the best for crafting tools?
Some of the best materials you can find include sturdy branches for handles, sharp stones for cutting, and natural fibers for binding. It’s all about looking around and using what nature provides!
2. Can I craft tools safely?
Absolutely! While crafting tools can involve some risks, practicing safety guidelines like using gloves and being cautious with sharp stones can significantly reduce accidents. Take it slow, and don’t rush through your projects!
3. How do I learn more about crafting tools?
Engaging with local survival groups, watching online tutorials, or attending workshops are excellent ways to enhance your skills. Learning from others and sharing experiences can really help you grow.
4. What’s the easiest tool to start with?
A spear or a simple cutting tool is often the best starting point. They’re relatively straightforward to make and use, allowing beginner crafters to build confidence while honing their skills.
5. Can I use these tools in modern times?
Definitely! While these tools are excellent for survival situations, many people also enjoy them for recreation, gardening, or camping activities. It’s all about using your creativity and enjoying your time outdoors!
Hey there! Let’s chat about the sustainable practices I’ve embraced for long-term food storage. It’s kind of a passion of mine, you know? It’s all about being smart with what we have and ensuring that good food doesn’t go to waste. So, here are the five key areas I focus on, and I can’t wait to share my experiences with you!
Choosing the Right Storage Containers
Materials Matter
First things first, the materials you choose for food storage can really make or break the whole operation. I’ve experimented with glass, metal, and plastic containers. Personally, I love glass because it’s non-toxic and doesn’t leach chemicals into my food. Plus, it’s super easy to clean!
That said, I do have a few sturdy plastic containers for things like grains and beans. It’s all about balance! Just make sure any plastic you use is BPA-free to keep things safe and healthy.
Don’t forget about vacuum seal bags! They’re fantastic for stashing away the goodness while eliminating extra air. It’s like wrapping your food in a protective hug, helping it last longer.
Size and Shape
Let’s talk about size and shape! I’ve got various sizes of containers – small for snacks and large for bulk items. It’s super practical to have a variety on hand. I can’t tell you how many times I’ve regretted using too big of a container for just a bit of food.
Also, consider the shape of your containers. I mean, stackable containers can save a ton of space in the pantry or freezer. Plus, you get that satisfying look of organization that makes me feel all warm and fuzzy inside!
Remember, it’s not just about storage; it’s also about making your kitchen look good. You know, eye-catching containers make a difference, and we all love a bit of aesthetic appeal.
Sealing and Labeling
Sealing is like the cherry on top of good storage practices! Make sure your lids are airtight to keep moisture and pests at bay. I love doing the double-check, making sure I hear that satisfying ‘pop’ when I seal a jar.
And can we talk about labeling? I can’t stress how much easier meal prep becomes when I know exactly what’s in each container. I started using a simple label maker and it’s a total game-changer. No more mystery jars lurking in the back!
And hey, don’t forget about dates! It’s important to keep track of when things were stored, especially if you’re using the “first in, first out” method. It saves you from the stress of trying to remember what’s in there!
Utilizing Preservation Techniques
Canning
Canning has been an absolute lifesaver for me! I remember the first time I tried it; I was so nervous but now it feels like second nature. The thrill of watching those jars seal is just exhilarating. I like to can tomatoes, fruits, and even some pickles.
The best part? It preserves the taste of summer all year long! Just be sure to follow safe canning guidelines. We don’t want any botulism creeping into our goodies.
I always set aside a weekend for canning, turn up some tunes, and have fun with it. It’s like a mini-party in the kitchen, and I get to share the fruits of my labor with friends!
Freezing
Freezing is another awesome technique I swear by! Seriously, it’s amazing how much food you can save by freezing. Fresh fruits, veggies, and even some cooked meals can easily be frozen for later use. I often spend a few hours prepping food for freezing whenever I have a surplus from the garden.
One tip I’ve learned is to slice or chop food before freezing. It makes it easier to portion and use later. Plus, foods like berries freeze perfectly on a baking sheet before they get stored in bags, preventing those clumps.
Don’t overlook the power of meal prep on your freezing days! I like packing entire meals in freezer-safe containers, so all I need to do is pop one out and heat it up. Believe me, it’s a lifesaver on those busy weeknights!
Dehydrating
Dehydrating food has become somewhat of a hobby for me! I love turning fruits into tasty chips or creating my own vegetable powders. It’s pretty cool knowing I can stretch out the life of food in a fun and creative way.
If you’re thinking about trying dehydrating, get a good dehydrator! It makes the process so much easier. I often whip up a batch of apple chips or dried herbs, and they last forever.
Plus, dehydrated foods make awesome snacks for road trips or hikes. They’re lightweight and packed with nutrients, which is a win-win. I even toss some in my granola, and it takes breakfast to a whole new level!
Buying and Storing in Bulk
Finding Local Sources
Buying in bulk from local farmers and markets is one of my favorite ways to save money and minimize packaging waste. I love talking to the vendors about their practices and knowing where my food comes from. It’s like connecting with my food on a deeper level!
Also, many local co-ops offer bulk buying options for grains, beans, and spices. Plus, you can bring your own containers, which feels great and helps cut back on single-use plastics.
Support your local economy! It’s so rewarding to build relationships with farmers and see my money going directly to them instead of big corporations.
Proper Storage Techniques
When it comes to storing bulk items, organization is key! I use clear bins labeled for grains, beans, and other staples. It makes it easy to grab what I need without rummaging around, saving me time and potential mess.
Also, keep a close eye on the temperature and humidity in your storage area. A cool, dark place is ideal for most items. Trust me, it’s worth investing in good storage solutions to protect your bulk buys.
Don’t be afraid to portion bulk items into smaller containers for easier use. I often do this with items like rice or flour, just to keep things fresh and manageable.
Using the Right Oxygen Absorbers
All in all, I use oxygen absorbers when I’m storing large quantities of dried foods. They help keep them fresher for longer! Just make sure to follow the instructions for how many to use based on the size of your storage container.
I like to buy them in bulk online, and they’re a total game changer! Knowing that I’m preserving my food efficiently gives me peace of mind and reduces waste. It’s like having a secret weapon in my food storage arsenal.
And don’t forget: Always check the expiration dates and replace the absorbers as needed. Keeping things fresh means you’ll always have delicious food at the ready!
Creating a Meal Planning Routine
Plan Ahead
Meal planning has been a total lifesaver for maintaining my food storage. I try to dedicate a bit of time each week to plan out meals based on what I have stored. It not only reduces waste but also saves time during busy weeks!
I love creating a simple template to keep track of what I’ll be using from my pantry and freezer. It’s nice to know that I can whip something up without scrambling for ingredients at the last minute.
Plus, it’s a fun opportunity to try new recipes! I regularly browse through cookbooks or blogs for inspiration, especially to make use of whatever’s in season. Cooking becomes an adventure!
Incorporating Seasonal Foods
When meal planning, I always keep the seasons in mind. Incorporating seasonal produce not only supports sustainable practices but also enhances flavor. Being aware of what’s in season often leads me to new ideas for dishes!
Using seasonal ingredients can also save you money when shopping at local markets. It helps me stay connected with nature’s cycles and keeps my diet varied and exciting.
Don’t hesitate to explore farmers’ markets for unique seasonal finds. You might discover some delightful fruits or veggies that you’d never thought about using before!
Keeping Track of Inventory
In closing, keeping an inventory of what I have on hand is essential. I simply use an app on my phone or even a good old-fashioned notepad. It helps me stay organized and avoid overbuying.
Plus, it’s satisfying to check things off as I use them up. I often feel like I’m on a mission to use everything in my pantry before it goes bad!
Don’t forget to regularly reassess your stock, especially when buying in bulk. This way, you can prioritize meals and ensure that what you have is being used rather than stored indefinitely.
Incorporating Sustainable Practices
Minimizing Waste
Sustainability isn’t just a trend; it’s a lifestyle. I focus on minimizing waste by using food scraps creatively. Those veggie peels? Yes, they can become broth! And stale bread? Croutons, here I come!
I’ve made it a point to share these tips with friends and family. It’s honestly heartwarming to see others embracing less waste in their lives. Plus, sharing ideas can spark fresh inspiration!
By keeping our waste minimal, we contribute to a healthier planet. It’s a small change that can lead to significant impacts. We can all make a difference, one food scrap at a time!
Educating Others
I believe that sharing knowledge can lead to broader changes in our communities. Conversations about food storage, sustainability, and minimizing waste can lead to real action. I love hosting little workshops with friends where we dive into storage techniques and canning.
Social media is another great platform for spreading the word. I often share my food storage successes (and sometimes failures!) on social channels to encourage others to give it a go. It feels like a supportive community effort!
Everyone can benefit from learning about food storage practices. The more we know, the more empowered we feel to make sustainable choices!
Supporting Sustainable Brands
One more way to practice sustainability is by supporting brands that focus on eco-friendly practices. I’m mindful of where I buy my storage containers, food, and other supplies. It feels good to invest in companies that prioritize our planet.
There are awesome brands out there that make biodegradable or reusable storage solutions. I often do a little research before making purchases to ensure my money goes to the right places!
By supporting sustainable brands, we send a message that we care about the environment. It feels good to know that I’m playing a part in fostering change, and I hope it inspires others to do the same!
Extreme weather doesn’t just mean a bit of rain or a windy day; it’s all about those severe conditions that can really throw a wrench in our day-to-day lives. Think hurricanes, tornadoes, snowstorms, and even intense heat waves. Each of these presents unique challenges and dangers that we, as responsible individuals, must be aware of.
Knowing what constitutes extreme weather is the first step in effective preparation. For instance, a hurricane watch means you need to be ready for the worst, while a heat advisory can alert you to the need for hydration and sun-safety measures. Honestly, if something feels extreme, it probably is, and a little precaution can save a lot of hassle.
In my experience, staying informed about local weather forecasts and climate patterns is key. I found that having a weather app on my phone has helped me keep track of what Mother Nature has in store, so I never feel blindsided by unexpected weather changes.
Creating an Emergency Preparedness Plan
Gather Your Family and Make a Plan
When there’s a threat of extreme weather, gathering the family to set out a plan is crucial. This means discussing where to meet if you need to evacuate, knowing the routes to safety, and making sure everyone understands the plan. A family meeting sounds old school, but honestly, it really helps to create a sense of unity and preparedness.
Everyone in the family should have a role. Assign tasks to younger members, like gathering supplies or keeping track of the time. Making it a team effort not only spreads the workload but helps everyone understand the importance of emergency preparation. Believe me, this creates a sense of responsibility and reduces panic.
Plus, don’t forget to practice! Run through your plan a couple of times, maybe during a calm evening. It’ll feel less daunting if the moment arises since everyone will know what to do and where to go. Practice really does make perfect, and trust me, it eases the stress when actual emergencies happen.
Building an Emergency Supply Kit
Essentials You Should Have
Okay, let’s talk supplies! An emergency kit is basically your lifeline during extreme weather. I recommend starting with some basics: water, non-perishable food, a flashlight, batteries, and a first aid kit. These items are often the bare minimum, but they cover quite a lot when push comes to shove.
But don’t just stop there. Think about the things your family specifically needs. Do you have pets? Make sure to include their food and supplies too. Medications are crucial—stress might mess with our memories, so having those little bottles packed ready can be a lifesaver.
Lastly, consider the documents you might need during an emergency. Store them in a waterproof bag. I keep copies of my insurance policies, identification, and emergency contact information handy. It’s one less thing to worry about, and trust me, during a crisis, every little bit helps.
Staying Informed During Events
Utilizing Reliable Sources
Keeping abreast of the weather is so important; we’ve all seen how rapidly things can change. Relying on good sources of information can save you a ton of headaches. Local news stations, weather apps, and radio broadcasts are great ways to get timely updates. I always recommend having a battery-operated radio just in case the power goes out—you don’t want to be in the dark, literally and figuratively!
Additionally, social media can be a double-edged sword. It’s fantastic for real-time updates, but it can also be a hotbed of misinformation. Stick to credible accounts and channels, and be cautious when sharing information yourself. You don’t want to spread panic for no reason.
During extreme weather, I make it a ritual to check my phone frequently for updates while remaining conscious of the outside world. Sometimes things happen that aren’t covered on your app, so it pays to look out the window and listen for announcements or alerts!
Recovery and Post-Event Action
Assessing Damage and Starting Over
Once the event has passed, the recovery phase begins, and it’s essential to tackle it head-on. After an extreme weather event, don’t rush into assessing your property right away. Take a moment to breathe and ensure you’re in a safe environment first. It’s easier said than done, but your safety is the top priority.
Once it’s safe, I recommend walking through your space room-by-room, noting any damage, and gathering your insurance documents. Create a thorough inventory for your insurance company. It’s super tedious but trust me, having a clear record helps when you’re making claims.
Lastly, remember that it’s okay to ask for help during recovery. Whether it’s friends, family, or professional services, people generally want to lend a hand after disasters. No one should have to go through recovery alone, and leaning on your support system can make a significant difference during tough times.
Frequently Asked Questions
1. What types of extreme weather should I be prepared for?
Extreme weather includes hurricanes, tornadoes, blizzards, floods, and heat waves. Each type requires different preparations, so it’s important to know what could potentially affect your area.
2. How do I create a family emergency plan?
Gather your family, discuss potential scenarios, assign roles, and practice your plan. Ensure everyone knows where to meet and how to evacuate if necessary.
3. What essentials should be in my emergency kit?
Your kit should include water, non-perishable food, a flashlight, batteries, a first aid kit, medications, and any special supplies for pets or family members. Don’t forget important documents!
4. How can I stay informed during extreme weather?
Use reliable sources like weather apps, local news stations, and radio broadcasts. Keep a battery-operated radio handy for updates during power outages.
5. What should I do after an extreme weather event?
Ensure your safety first, then assess the damage carefully. Document everything for insurance claims, and don’t hesitate to ask for help during recovery.
When putting together a survival kit, the first thing I think about is the environment where I live and possibly travel. For example, if you’re in a region prone to earthquakes, your gear will differ significantly from someone living in a forested area where wildfires are a concern. I always suggest evaluating seasonal factors too—winter gear, for instance, would include items for cold weather survival.
It’s critical to make a list of potential survival scenarios you might encounter. This can include anything from natural disasters to being lost in the woods. Each situation requires a nuanced approach to gear selection. Taking the time to think about your needs will save you time and potentially your life down the road.
To wrap up, keep in mind that your personal skills also dictate what gear you might need. If you’re a skilled fisherman but not a hunter, include fishing gear over hunting tools. Tailoring your kit to your abilities enhances your chances of survival in stressful situations.
Identify Key Situations
Next up, I recommend identifying key situations you might face and which gear is essential for each. For example, if you find yourself outdoors frequently, having the right navigation tools is crucial. A compass or a reliable GPS should be part of your primary gear list. There’s no excuse for getting lost, especially when a little preparation could make all the difference.
You might also want to think about emergencies at home. If you live in a flash flood zone, gear that’s waterproof is essential. You never realize how much you need certain tools until it’s too late, so prepping for specific situations can help you choose wisely among the available gear.
Lastly, keep your local threats in mind. Hurricanes? Pack a weather radio. Wildfires? Ensure you have breathing masks and fireproof blankets. The more prepared you are, the less likely you’ll feel overwhelmed when a real emergency arises.
Assess Group Size
The size of your group is another vital consideration. If you’re prepping for just yourself, you can get away with more minimalistic gear. However, if you’re packing for a family of four, you’ll need to rethink your entire kit. I remember hearing a friend share his survival story where he underestimated how much food and water he would need for his kids. It really drove home the point that you can’t ignore group size!
In a larger group, I’ve found it helpful to break down gear assignments. If everyone knows their roles and the gear they’re responsible for, it minimizes chaos when the pressure hits. Everyone can’t have a giant backpack; distributions of smaller, specialized items work wonders.
Ultimately, every person needs gear that fits their skills and needs. A smaller, lightweight pack works for kids, while adults might need something more robust. It’s all about finding that balance to keep everyone safe during tough situations.
Choose Essential Survival Gear
Prioritize Basic Needs
Confession time: I used to think I needed all sorts of gizmos in my survival kit. But after a bit of trial and error, I learned that the basics—food, water, shelter—are what you must prioritize. You can have all the fancy gadgets in the world, but if you don’t have clean drinking water or food that you can cook, you’ll be in serious trouble.
Food in your kit should ideally be non-perishable. Think energy bars or canned goods. I’ve found freeze-dried meals to be a game-changer too—they’re lightweight and easy to prepare. You just add water, which you better make sure you have as a backup!
Water, on the other hand, can be more challenging to store. I always keep a portable water filter on hand, as it allows me to purify water from creeks or ponds. And let’s not forget about shelter: a durable tarp or a lightweight tent can be a blessing when the weather turns nasty.
Add Tool Variety
When I began my survival journey, I learned the importance of variety in the tools I carried. A multi-tool can function like a Swiss Army knife with various uses for cutting, screwing, and opening. I’d say it’s one of the must-have items in your kit. You never know when you need to fix something or build a makeshift shelter!
Don’t underestimate the importance of a first-aid kit either. Accidents happen, and having basic medical supplies can provide immediate help. I consider including things like antiseptics, bandages, and even scissors crucial for dealing with common injuries. Your fists can only do so much in a pinch!
Lastly, think about self-defense tools if that’s a concern in your area. A whistle or a simple personal alarm system can be a lifesaver when you’re trying to draw attention to yourself. Covering all your bases will ensure you’re better prepared for whatever comes your way.
Include Comfort Items
Now, this may sound odd, but don’t overlook the comfort items in your survival gear. After a long day in the wild, the last thing you want is to be miserable. Items like a decent sleeping pad or lightweight blanket can make a world of difference. I tell ya, having a comfortable place to sleep at night is a game-changer for morale!
You might also consider packing a portable charger or solar charger, depending on your situation. Keeping your phone charged for emergencies seems trivial, but it’s essential for navigation and communication. I can’t stress enough how useful that connectivity is even in outdoor scenarios.
And let’s face it, mental well-being matters too. A book, journal, or even a small pack of cards can help break the monotony. Laughter can do wonders in tough times, so bringing along something to lift spirits can turn a dire situation into a bonding experience.
Package and Maintain Your Gear
Organize Your Kit
Once you’ve sourced all your gear, I can’t stress enough how important it is to keep everything organized. I’ve had instances where I’ve frantically searched for items only to find them buried under an avalanche of stuff. A well-organized kit is easy to navigate, making chaos that much more manageable when you’re in a survival situation!
I recommend using labeled zip bags or compartments in your backpack. When everything has its own spot, you can easily grab what you need without turning into a hot mess. Not to mention, you’ll know if something is missing, which means you can restock long before you need it.
Also, don’t forget to check your kit regularly. Gear can wear out or expire, and I’ve been guilty of forgetting about items until it’s too late. Create a routine—maybe once a season—for checking everything so that you’re always prepared.
Train with Your Gear
Now that you’ve nailed down your gear and organized it like a pro, the real fun begins: training! Yep, knowing how to use your gear is just as important as having it. I’ve learned this the hard way during a camping trip when I struggled to set up my tent in the dark. Talk about embarrassing!
Consider doing a trial run of your kit in a safe environment. This helps you understand what works and what doesn’t without the pressure of a real emergency. Practice making quick meals, setting up your shelter, or even using your first-aid kit. Knowledge and familiarity can give you the confidence you need during a real-life situation!
Additionally, I suggest connecting with local survivalists or groups. Learning from others not only exposes you to new techniques and gear but can also lead to a strong support network. Trust me, having friends who are on the same path can provide a much-needed experience boost!
Stay Updated on New Gear Options
The world of survival gear is extensive and continuously evolving. I often find exciting new products that make survival more manageable and efficient. Keeping up with new supplies can better your kit and adapt to modern challenges. I keep an eye on blogs, forums, and even outdoor expos to stay informed about the latest trends.
Sometimes, social media can be a treasure trove for discovering innovative gear. Following enthusiasts and survival experts can introduce you to tools others have found effective. Plus, you can read reviews and feedback, making it easier to determine what suits your unique needs.
Also, don’t shy away from trying DIY. Some of the best survival gear I’ve made have come from experimentation. You might find that you can easily tailor existing items to your needs. Just keep safety and functionality in mind as you explore your options!
FAQs about Choosing the Right Gear for Your Survival Kit
1. What are the most essential items for a survival kit?
The essentials include food, water, shelter, a first-aid kit, and multi-tools. Prioritizing basic survival needs ensures you can stay safe in various scenarios.
2. How often should I check my survival gear?
I recommend checking your survival gear at least once a season. This ensures everything is in good condition and ready for use when needed.
3. Can I make my survival gear?
Absolutely! DIY solutions can provide custom adaptations tailored to your needs. Just ensure you’re considering functionality and safety when creating your gear.
4. Is it necessary to train with my survival gear?
Yes! Training with your gear can build confidence and ensure you know how everything works, which is vital in emergencies.
5. What should I do if I realize I don’t have a needed item in my kit?
Don’t panic! Assess the situation, and if time allows, source the needed item. Regular checks can help prevent this scenario, but adaptability is key!