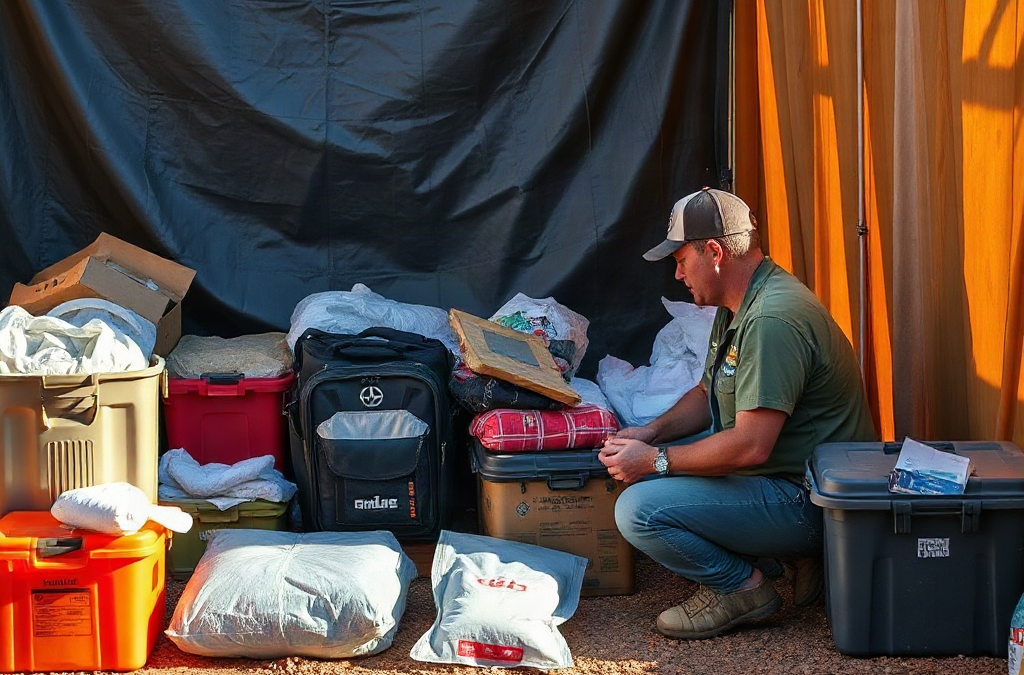
Usable capability is the practical difference between owning emergency resources and being able to use them when normal services are interrupted. A household may have bottled water, a flashlight, a first-aid kit, and several phone numbers saved, yet still be poorly prepared if the water is difficult to locate, the flashlight has dead batteries, nobody can open the storage container, or the contact plan depends on a single working cell tower. Readiness is demonstrated by performance under realistic limits, not by the appearance of a full shelf.
The idea applies to both people and equipment. People need enough knowledge to select a safe action, communicate needs, conserve resources, and recognize when a situation exceeds their ability. Equipment needs to be charged, compatible, labeled, maintained, and available at the point of use. A portable radio locked in a distant storage area has less operational value during a nighttime evacuation than a simple radio kept with a charged power source near the exit.
Consider a winter power outage. Preparedness may include blankets, shelf-stable food, a battery bank, prescription information, and a way to receive local updates. Usable capability also requires knowing how to heat food safely, avoid indoor use of fuel-burning devices, keep refrigerator doors closed, check on a dependent neighbor, and decide when conditions require relocation. The supplies support those actions, but they do not replace them.
A common mistake is treating preparedness as a purchasing task with a finish line. Buying more items can create clutter, duplicate products, and false confidence while leaving basic gaps unresolved. A short capability review is more revealing: can each person find water, illuminate a room, contact an out-of-area person, manage an essential medication, and leave safely if the usual route is blocked? The answers show where the next dollar and hour should go. The usable capability approach keeps attention on outcomes rather than inventory.
The Capabilities That Matter Most
Core emergency capability usually rests on five connected functions: staying informed, maintaining basic needs, communicating, moving or sheltering safely, and assisting vulnerable people. These functions overlap, so a weakness in one can undermine the others. For example, a family may have enough food for several days but lack a way to open containers, cook without grid power, or manage a dietary restriction. The quantity looks adequate; the actual capability is lower.
Information capability means receiving trustworthy updates and distinguishing official instructions from rumors. A battery-powered or hand-crank radio may provide an alternative when internet access fails, but it is only useful if household members know which local agencies provide alerts and how to conserve its power. Communication capability includes a written contact list, an agreed meeting location, and a method for checking in when direct calls fail. A plan should account for people who do not share the same carrier, live in different locations, or need accessibility support.
Basic-needs capability should be designed around use, not abstract quantities. Water containers need safe storage and a practical dispensing method. Food should match allergies, medical needs, cooking equipment, and the ability of the household to eat it without excessive water or fuel. Lighting should cover both routine movement and task work, such as reading medication instructions. Sanitation supplies deserve equal attention because disrupted water service can make ordinary waste handling difficult.
Mobility and care add another layer. A person using a wheelchair may need a route that avoids steps, while an older adult may need help with hearing alerts or carrying supplies. Pets, infants, and people dependent on refrigeration or powered medical equipment require specific arrangements rather than general advice. The weak assumption is that one standard kit serves every household equally. A smaller, tailored set that people can carry and operate may be more useful than a larger collection selected without considering physical ability or local hazards.
Use the following priority order when resources are limited:
Immediate safety: fire prevention, evacuation, shelter, and hazard avoidance.
Basic survival needs: water, food, temperature control, sanitation, and essential medications.
Information and contact: alerts, charging, written contacts, and meeting arrangements.
Recovery support: documents, cash access, transportation, and replacement supplies.
This order does not mean every household should ignore comfort or long-term resilience. It means critical functions should be made workable before adding specialized gear. A capability-based preparedness plan starts with the people, hazards, and services most likely to shape the first hours.
How to Test Whether Readiness Works
Testing turns assumptions into observable evidence. A useful test does not need to recreate a dangerous event; it can simulate a narrow disruption, such as a six-hour power loss, a blocked driveway, or no mobile data. The purpose is to see whether people can complete important tasks with the tools and information actually available. If the test exposes confusion, missing parts, or unsafe workarounds, it has identified a repair priority.
Begin with a task rather than a product. Instead of asking whether the household owns a charger, ask whether a phone can be powered after the wall outlet stops working. Instead of checking for a first-aid kit, ask whether someone can find gloves, identify basic contents, and obtain professional help when needed. Test battery banks under load, inspect fuel and ventilation arrangements, rotate food before quality declines, and confirm that stored water containers remain clean and accessible. Manufacturers’ instructions should govern equipment use, particularly for generators, heaters, and battery systems.
A short scenario can expose problems quickly. Imagine a storm causes a nighttime outage while one household member is away and another needs medication kept cool. Can the person at home receive an alert, illuminate the path, contact the absent member, protect the medication according to its instructions, and decide whether to stay or relocate? If the answer depends on searching several rooms or remembering an unrecorded phone number, the capability is fragile. If the answer is clear and the actions have been practiced, the same supplies have greater value.
Testing also reveals tradeoffs. A generator may provide substantial power but requires fuel, outdoor placement, maintenance, and safe connection practices. A small battery system is quieter and simpler but may not support high-demand appliances for long. Paper maps work without batteries but require route familiarity. Digital maps update more easily but depend on charged devices. Choosing between options should reflect the task, the user’s skill, storage conditions, and the likely duration of disruption rather than brand preference.
After each test, record three observations: what worked without assistance, what required explanation, and what failed completely. Correct the failed items first. Recheck the system after a move, a new medication, a change in household members, or a seasonal shift. Readiness that is never exercised gradually becomes an unverified claim.
Prioritizing Capability Under Real Constraints
Budget, storage space, disability, time, and local conditions all shape what preparedness can realistically accomplish. A sound approach ranks consequences before shopping. Flood-prone areas may need waterproof document storage and an evacuation route more urgently than extensive indoor supplies. A remote household may place greater value on communications and transportation. An apartment resident may need compact lighting, stair access, and building-specific information instead of equipment that cannot be operated safely in shared spaces.
Start by listing the disruptions that could interrupt essential services, then identify the task that becomes difficult for each one. If the risk is a winter outage, the tasks may include staying warm, preparing food, charging phones, and checking on neighbors. If the risk is evacuation, the tasks may include leaving quickly, transporting medications, securing pets, and reaching a designated contact. This converts a broad concern into decisions about people, time, access, and equipment.
Limited budgets are usually better directed toward versatile, frequently used items and modest training. A dependable flashlight, spare batteries, water containers, a manual can opener, basic sanitation supplies, and printed contact information can solve several immediate problems. Specialized equipment may be justified when a household has a specific medical, mobility, climate, or occupational need, but it should come with maintenance instructions and a practice routine.
Storage location matters as much as ownership. Supplies split between a hot vehicle, a locked shed, and an inaccessible attic may not be available when roads are blocked or smoke limits movement. Keep critical items where they can be reached safely, label unfamiliar equipment, and use more than one location when a single point could be damaged. The tradeoff is convenience versus redundancy: duplicating a few high-use items may be more sensible than buying a large reserve of low-priority goods.
Weak plans also overlook dependence on outside help. Emergency services, neighbors, pharmacies, transportation providers, and utility companies may remain valuable, but their availability and response time can change during a widespread incident. Capability does not require total self-sufficiency; it requires knowing which tasks the household can handle, which need a backup arrangement, and which need early contact with an organization or professional.
Turning Practice Into Reliable Readiness
Reliable readiness comes from maintaining a small operating system rather than assembling a one-time kit. Assign simple responsibilities, record important information, and schedule checks that match the items being maintained. A monthly look at lighting, communications, medications, and access points may be more useful than an annual review that becomes too large to complete. Seasonal checks should address clothing, heating or cooling needs, vehicle condition, and changes in local hazards.
Household instructions should be brief enough to use under stress. Write down emergency contacts, meeting places, medication details, pet arrangements, utility shutoff information, and the location of essential supplies. Include alternatives: a second meeting place, a contact outside the immediate area, and a route that does not depend on one bridge or road. Paper information is valuable when phones are lost, damaged, or reserved for urgent calls.
Practice should include the people who may need to act, not only the person who usually organizes supplies. A child may need to know how to identify a safe adult; a visitor may need to find the exit; a caregiver may need a transport plan for someone with limited mobility. Keep exercises focused and explain why a step exists. Repetition should build judgment, not encourage automatic actions that are unsafe when conditions differ.
Signs of improving capability include faster access to essential items, fewer questions during a drill, clear responsibility for dependent people, and equipment that works without improvisation. Signs of failure include expired supplies, instructions nobody can interpret, a plan that relies on one person, or a response that becomes unsafe when the first option is unavailable. Correct those weaknesses before expanding the inventory.
For readers refining their approach, the next practical review is simple: choose one likely disruption, perform three essential tasks, document the obstacles, and fix the most consequential obstacle. That cycle creates evidence of readiness and keeps preparation connected to actual household capability.
Readers can strengthen a capability-based approach by consulting local emergency management offices, public health departments, utility providers, and official guidance for specific hazards. Equipment manuals and local evacuation information are particularly useful because safe procedures, routes, and service conditions vary by location.
Frequently Asked Questions
Why is usable capability a better definition than having emergency supplies?
Supplies only create value when people can find, operate, maintain, and replace them. Capability includes skills, decisions, communication, access, and equipment that works in the conditions expected.
What should a household test first?
Test the tasks tied to immediate safety and essential needs: receiving an alert, using lighting, accessing water, contacting household members, and leaving or sheltering safely.
Does usable capability require complete self-sufficiency?
No. It means knowing what the household can handle, where outside assistance may be needed, and what backup arrangements reduce dependence on one person or service.
How can preparedness improve with a limited budget?
Prioritize versatile items, basic training, written information, water access, lighting, sanitation, medication needs, and communications before purchasing specialized equipment.
How often should emergency capabilities be reviewed?
Check high-use and time-sensitive items regularly, then review the full setup after household, medical, seasonal, housing, or transportation changes.
Conclusion
Emergency readiness becomes credible when a household can demonstrate what it will do, not merely show what it owns. Put immediate safety, water, sanitation, essential medications, communication, and mobility ahead of low-priority additions. Then test one realistic disruption with the actual people, storage locations, and equipment involved. Record failures such as dead batteries, inaccessible supplies, unclear contacts, unsafe fuel use, or an overreliance on one organizer, and correct the most serious gap first. A capable setup may be compact or modest, but it should remain accessible, maintained, adaptable, and understandable to the people who depend on it. Repeating short, safe practice sessions turns preparation from a collection of intentions into a dependable set of actions.
Emergency readiness is a team activity, even when the plan covers only one household. A storm, wildfire, flood, hazardous-material release, or extended power outage can disrupt normal assumptions at the same time: phones may be unreliable, transportation may be limited, and familiar routes may be unsafe. Preparatory coordination gives people a shared set of decisions to follow when stress makes improvisation slower and less reliable.
The practical difference appears in small details. One person may know where the first-aid supplies are, while another knows the utility shutoffs; neither fact is useful if the other household members do not know it exists. A coordinated arrangement records responsibilities, access information, contact methods, and fallback choices. It also states who makes decisions if the usual contact is unavailable. Emergency preparedness means coordinated action before danger because the time to negotiate basic responsibilities may disappear once conditions deteriorate.
Coordination does not require an elaborate binder or expensive equipment. A two-person household may need a shared contact card, medication list, evacuation route, and meeting location. A larger family may need a primary and alternate caregiver, transportation assignments, and a method for confirming that everyone is safe. The more complicated the household, the more valuable clear ownership becomes.
A common mistake is treating stockpiling as the entire task. Supplies can support a plan, but they do not decide whether to evacuate, identify who collects a child, or explain how a person using powered medical equipment will manage an outage. Begin with decisions and relationships, then purchase items that support those decisions.
Turn Hazards Into Shared Decisions
A useful plan connects likely hazards to specific actions rather than listing every imaginable catastrophe. Local conditions should shape the first questions: Does the area face floodwater, severe winter weather, wildfire smoke, earthquakes, extreme heat, or frequent outages? Each hazard creates different timing and movement problems. Flooding may require leaving before roads become impassable, while an outage may make sheltering at home reasonable if cooling, medication, and communication needs can be met.
For each serious hazard, decide what triggers action, where people go, how they reunite, and what makes the preferred option unsafe. An evacuation decision might rely on official instructions, visible smoke movement, rising water, or a loss of safe access. A shelter-in-place decision should identify the room, ventilation approach, supplies, and conditions that would require leaving instead. These choices should be written in plain language so a tired or anxious person can use them without interpreting vague statements.
Consider a household with one adult at work, a child at school, and a dog at home when a fast-moving storm damages roads. “Everyone come home” is not a complete plan. The family needs authorized pickup information, a school contact procedure, a pet arrangement, and an alternate meeting place if the home cannot be reached. The best option may change depending on whether the school is open, transit is operating, or authorities have restricted travel.
Weak assumptions often undermine otherwise sensible plans. Do not assume every person will have a charged phone, that a neighbor can always help, or that the nearest route remains open. Create alternatives without producing an unmanageable document. A compact priority sequence works well: protect immediate life safety, follow official directions, account for household members, secure essential medication and mobility needs, then address property and comfort.
Use the same topic-specific review at least periodically: what hazard is most plausible, what action comes first, who owns it, and what backup exists? That review turns coordinated action before danger from an abstract principle into a set of choices people can recognize.
Connect People, Information, and Supplies
Supplies are most useful when they are assigned to a purpose and linked to a person or decision. Water, shelf-stable food, flashlights, batteries, sanitation items, first-aid materials, chargers, copies of documents, and needed medicines address different disruptions. A household should know where each item is stored, how it is accessed, and which items must travel during an evacuation.
Separate stay-at-home resources from a portable departure kit. Heavy water containers and extra sanitation supplies may be practical for sheltering, while identification, medications, phone power, essential clothing, and pet supplies need to be easy to carry. Buying one oversized collection of equipment can create a transport problem. A smaller, labeled kit near an exit may be more valuable than a larger box buried in a garage.
Information is another resource that requires coordination. Keep paper copies of phone numbers, addresses, prescriptions, insurance information, emergency contacts, and meeting locations in a secure place. Digital copies can provide useful backup, but they should not be the only version when electricity or internet access may fail. Check privacy exposure before distributing sensitive documents, and give relevant information to trusted caregivers rather than posting it publicly.
Communication plans should include a primary method and alternatives. Text messages may work when voice calls are congested, but neither method should be assumed to function everywhere. An out-of-area contact can provide a central point for updates if household members cannot reach one another directly. Agree on what a brief status message means and when someone should stop waiting at a meeting location.
Needs beyond the average adult deserve explicit attention. Infants, older adults, people with disabilities, people who rely on refrigerated medication or powered equipment, and pets may require extra time, transport, or specialized supplies. A common failure is discovering these requirements during the emergency. Ask what must be carried, what needs electricity, who can assist, and what replacement or backup exists. Emergency preparedness means coordinated action before danger when supplies, responsibilities, and communication support the same decisions.
Test the Plan Under Real Constraints
A plan becomes credible when people practice enough of it to find friction. A short household exercise can reveal that the meeting place is inaccessible, the flashlight batteries are depleted, the contact list has old numbers, or one person cannot lift the intended go-bag. Testing is not a prediction of exactly what will happen; it is a way to expose assumptions while correction is still easy.
Begin with a modest scenario. Ask household members what they would do if the power failed during severe heat, an evacuation order arrived while someone was away, or a blocked road separated the home from the usual clinic. Let each person describe the first action without looking at the written plan. Differences in answers identify unclear language or missing authority. Then walk through the preferred route and the alternative.
Physical checks matter as much as conversation. Confirm that exits open, mobility aids can pass through them, smoke alarms function, fire extinguishers are accessible, and emergency lighting reaches key areas. Test whether a child can identify the meeting location and whether an older relative can use the backup communication method. A plan that works only for the fastest and strongest person is incomplete.
Compare a tabletop discussion with a full drill. Discussion is safer and less disruptive for evacuation or medical scenarios, while a limited practical test may be needed for equipment, transport, or communication. Do not simulate dangerous conditions unnecessarily. The goal is to check sequence, access, timing, and understanding, not to create avoidable risk.
Record failures without blaming individuals. If no one knows who carries medication, assign the task. If the alternate meeting place is too far away, select a realistic one. If the family cannot contact a relative, identify another channel. Signs of a working plan include quick agreement about first actions, visible access to priority items, and a clear way to report status. Signs of failure include contradictory instructions, inaccessible supplies, and dependence on one person who may not be present.
Maintain Readiness Without Waste
Maintenance keeps coordination accurate after routines change. People move, children change schools, prescriptions expire, pets develop new needs, and phone numbers become obsolete. A plan that was correct last year may create delay now. Review it after a move, major household change, new medical equipment, severe local event, or change in work and school schedules.
Use a simple maintenance cycle rather than waiting for a major occasion. Check communication details, replace expired or damaged supplies, rotate food and water where appropriate, recharge devices, inspect batteries, and confirm that everyone knows the meeting locations. Mark essential items with dates or ownership so the review is quick. The purpose is not to accumulate indefinitely; it is to keep the few high-consequence elements dependable.
Budget limits require prioritization. First address life-safety equipment, essential medication access, reliable lighting, water, communication information, and a workable evacuation or shelter decision. Add convenience items later. A household choosing between duplicate specialty gear and a needed prescription-management backup should resolve the medication issue first. Preparedness should reduce vulnerability, not create financial strain or storage clutter.
Do not confuse official information with rumors or familiar routine. During an incident, use relevant local authorities and emergency-management channels for instructions, then compare those instructions with the household plan. The plan should support official direction, not compete with it. If authorities order evacuation, a preferred shelter-at-home arrangement may no longer apply.
Keep the final version short enough to use. A contact card, one-page decision sheet, and labeled supply locations may outperform a long document no one opens. For more detail on applying the principle to household choices, see Emergency preparedness means coordinated action before danger. Review the plan with every person who may need to act, then make one concrete improvement this week.
Frequently Asked Questions
Why does preparedness require coordination?
Emergencies can separate people, disrupt communications, and restrict travel. Shared responsibilities and fallback decisions reduce confusion when normal routines fail.
What should a household decide first?
Identify likely local hazards, immediate protective actions, evacuation or shelter locations, communication methods, and responsibilities for dependents, pets, and essential medical needs.
Are emergency supplies enough without a written plan?
No. Supplies do not establish who acts, when to leave, how people reunite, or how specialized needs are supported. Store items where the assigned person can reach them.
How can a family test its readiness?
Run a short scenario discussion, check routes and equipment, and ask each person to explain the first action and backup option without relying on one knowledgeable household member.
How often should an emergency plan be updated?
Review it periodically and whenever contact details, residence, school or work routines, medications, mobility needs, or pets change.
Further Reading
Authoritative Sources
Ready.gov: Make a Plan ready.gov
Provides federal guidance on household communication, shelter, evacuation, and individual needs
American Red Cross: Make an Emergency Plan redcross.org
Offers practical planning considerations for households, pets, contacts, and reunification
FEMA: National Preparedness fema.gov
Explains preparedness as coordinated capability across people, organizations, and hazards
Conclusion
Effective readiness is measured by whether people can make and carry out shared decisions before conditions become chaotic. Map the hazards that matter locally, assign responsibilities, document primary and backup communication, and separate portable supplies from resources intended for sheltering. Give extra planning time to children, older adults, disabilities, pets, and medical or power requirements. Then test one realistic scenario and correct the specific failure it reveals. A modest plan that household members understand and revisit is more dependable than an impressive inventory no one can coordinate. Make the next improvement concrete: update the contact card, label a kit, confirm a meeting place, or practice the first five minutes of an evacuation or outage response.
Limited resources change response work from a simple checklist into a sequence of choices. A household, volunteer group, or small organization may face insufficient staff, restricted transport, weak communications, limited cash, or supplies that cannot be replaced quickly. Under those conditions, the first question is not whether every need can be met. It is which action protects life, preserves decision-making capacity, or prevents a manageable problem from becoming harder to control.
Scarcity creates practical dependencies. A person who needs medication may also need refrigeration, transport, a prescription record, and a way to contact a provider. A building evacuation may depend on lighting, accessible routes, keys, mobility assistance, and someone who knows who has left. Treating each item separately produces false confidence. Mapping the chain exposes the point most likely to fail and allows a cheaper substitute to be prepared.
For example, a battery-powered radio is useful only if someone knows how to interpret official instructions and relay them to people without access to the broadcast. A vehicle may expand options, but it also consumes fuel and can become unavailable because of blocked roads. Cash may help when payment systems fail, while storing too much cash introduces security concerns. Resource-aware preparedness weighs these tradeoffs rather than labeling one product as universally essential.
A practical first exercise is to describe the response in time blocks: the first minutes, the first day, and the period when outside help may be delayed. Compare the actions in that sequence with what is actually available. Preparedness for effective response under resource limits is strongest when it records assumptions, names alternatives, and shows who acts if the preferred option disappears.
How to Set Priorities Before Supplies Run Short
Priority setting should follow consequences, time sensitivity, and substitution difficulty. Life-threatening hazards and urgent medical needs come before comfort, convenience, or long-term optimization. A resource that is inexpensive but unavailable locally during a disruption may deserve earlier attention than a more sophisticated item that can be obtained later. The aim is not to own everything; it is to protect the functions that cannot safely pause.
Use a short ranking process for each likely scenario. Identify the harm, the first decision that limits it, the resource needed, and the fallback if that resource is missing. Water, essential medicines, safe temperature control, lighting, sanitation, and a method for receiving verified instructions often rise near the top. The order changes by setting: a rural property may prioritize fuel and vehicle access, while an apartment may place greater emphasis on stairwell lighting, building contacts, and shelter-in-place conditions.
Protect first: people facing immediate danger, serious medical needs, and safe movement away from hazards.
Preserve next: water, sanitation, food preparation, communications, power for critical devices, and access information.
Improve later: comfort supplies, specialized tools, redundancy beyond the most likely failure points, and convenience upgrades.
Consider two approaches to food. Buying a large quantity of unfamiliar products may appear efficient, but it can waste money if no one eats them, if cooking requires unavailable fuel, or if storage conditions are poor. A smaller rotation of ordinary shelf-stable foods, a manual opener, and a simple cooking alternative may provide more usable capacity. The same principle applies to equipment: a basic flashlight with spare batteries and a known storage place may be more dependable than a complex device that is rarely tested.
A common failure is treating the purchase price as the full cost. Maintenance, replacement dates, training time, space, and disposal all consume resources. Keep a written priority list and fund it in order. When an item is postponed, record the risk it leaves open and select a temporary workaround rather than assuming the gap does not matter.
Building Low-Resource Communication and Decision Systems
Communication systems must continue when the preferred channel is overloaded, unpowered, or inaccessible. Effective preparation combines a primary method with simpler backups: charged phones when networks work, text messages when calls are congested, printed contact details when devices fail, and a prearranged meeting or check-in process when electronic contact is impossible. The system should specify who contacts whom, what information is sent, and when a missed check-in changes the next action.
Short messages reduce confusion. A useful status message can state the person’s location, immediate condition, intended destination, and next check-in time. Printed information should include addresses, medical details that responders may need, emergency contacts, building access information, and instructions for critical equipment. Store copies where they can be reached without relying on a single phone or online account, while protecting sensitive information from unnecessary exposure.
Decision rules are equally valuable. A group may agree that smoke, rising water, a confirmed evacuation order, or loss of safe indoor temperature triggers movement or a call for assistance. Such rules reduce debate during stress, but they should not replace current instructions from emergency authorities. Local conditions can make a previously safe route dangerous, so every trigger needs an exception: if the route is blocked, use the designated alternative or seek official direction.
Imagine a small household with one vehicle, limited fuel, and a member who uses a mobility aid. A strong system does not merely say “evacuate if needed.” It identifies the accessible exit, confirms who carries essential documents, decides which destination can receive the household, and sets a fuel threshold for leaving before roads become crowded. If the vehicle fails, the plan names a neighbor, transit contact, or emergency assistance route rather than leaving the most vulnerable person as an afterthought.
Communication plans often fail because they depend on one technically confident person. Rotate responsibility and test the process with a dead phone, missing contact, or unavailable meeting place. Preparedness for effective response under resource limits should make the next action understandable to the least experienced person who may need to carry it out.
Practicing, Reviewing, and Adapting the Response
Practice turns stored capability into usable capability. A response plan may look complete on paper yet fail when a key is missing, a flashlight has depleted batteries, a route includes stairs, or a person cannot remember the code for an account. Short, realistic drills reveal these defects at lower cost than discovering them during an actual disruption.
Begin with one narrow scenario and one measurable task. Turn off normal lighting briefly and locate the emergency lights. Rehearse sending the agreed status message. Pack the items needed for a medical appointment or evacuation and check how long movement actually takes. Test a cooking method without relying on the usual appliance, but follow the equipment instructions and avoid unsafe indoor fuel use. The purpose is not theatrical simulation; it is finding friction that can be removed.
Review the result using observations rather than impressions. Ask what was unavailable, what took too long, which instruction was ambiguous, and what created unnecessary consumption. A plan is improving when people can find supplies quickly, explain the first two decisions, and use the backup communication method without improvising key details. It is failing when tasks remain assigned to absent individuals, supplies are scattered, or everyone assumes another person has checked on a vulnerable neighbor.
Budget limits make maintenance especially important. Label storage locations, inspect batteries and water containers on a recurring schedule, rotate food into normal use, and update contacts after moves or job changes. Keep a modest reserve for replacement rather than spending the entire budget on initial purchases. Low-cost tools can be effective, but only when they are compatible with the people, environment, and skills available.
Review the plan after a near miss, household change, seasonal hazard, or failed drill. Avoid adding complexity to correct every weakness. Remove steps that no longer serve a clear purpose, combine supplies where safe, and strengthen the single dependency that could stop the whole response. For more planning context, Preparedness for effective response under resource limits should remain a living record of decisions and limits, not a document stored and forgotten.
Frequently Asked Questions
What should receive priority when money is limited?
Address immediate hazards, essential medicines, water, sanitation, lighting, communication, and the ability to leave or shelter safely before buying comfort or specialty items.
How can a response plan work without internet access?
Keep printed contacts and instructions, establish check-in times and meeting places, and practice a low-tech alternative such as voice radio or an in-person relay where appropriate.
Why are backup plans necessary for basic supplies?
Water, power, transport, and communications can fail together. A backup reduces dependence on one device, supplier, route, or person and exposes fewer single points of failure.
How often should preparedness arrangements be tested?
Use short checks throughout the year and repeat a drill after major household, workplace, seasonal, or equipment changes. Test the tasks people will actually perform.
What indicates that a resource-limited plan is too complicated?
If people cannot explain the first actions, find supplies quickly, or continue when one person or device is unavailable, simplify the sequence and strengthen the most consequential backup.
Further Reading
Authoritative Sources
Ready.gov ready.gov
Offers official preparedness information on alerts, communications, supplies, household planning, and disaster-specific actions
FEMA National Preparedness fema.gov
Provides government resources for building capabilities, coordinating response, and considering community-level constraints
American Red Cross Emergency Preparedness redcross.org
Provides practical household advice for emergency kits, communication, evacuation, and caring for household members
Conclusion
Effective response under resource limits comes from disciplined prioritization rather than an oversized supply collection. Protect immediate life safety, essential medical needs, water, sanitation, usable communication, and safe movement first. Then examine the dependencies behind each function: fuel, charging, transport, access, skills, and the person expected to act. Choose affordable resources that can be maintained and used correctly, and pair every critical capability with a practical fallback. A short drill will reveal more than an untested binder, especially when it includes a blocked route, a missing phone, or an unavailable helper. Review the results, correct the most consequential gap, and keep the plan current as people, hazards, and available resources change.