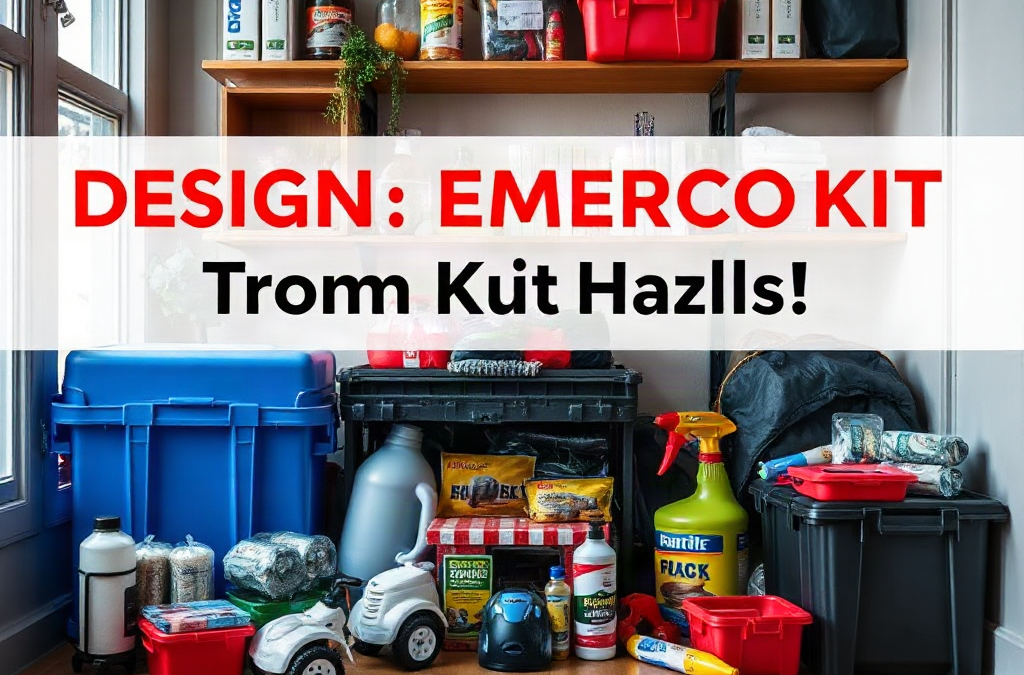
A useful kit begins with a hazard map, not a prepacked bucket. Walk through the home and identify what could injure someone, interrupt basic needs, trap occupants, or make communication difficult. The relevant risks differ sharply between a basement apartment, a rural house with a private well, and a high-rise unit where elevators may stop working.
Look at both the event and its consequence. A severe storm may cause a power outage, spoiled refrigerated food, loss of heating or cooling, and a closed garage door. A plumbing failure may create contaminated water and slip hazards but require very different supplies from a wildfire smoke event. A gas leak calls for rapid evacuation and utility knowledge, not an attempt to repair the line with household tools.
Record hazards by likelihood, severity, and response time. Smoke from a kitchen fire demands immediate action; a multi-day outage allows more time to ration supplies. Flooding may make lower-level storage inaccessible, while an earthquake can scatter items and block cabinets. This comparison prevents a common failure: spending heavily on rare, specialized equipment while lacking medication, lighting, or a reliable way to open stored food.
Use a short inspection of each room to capture details that generic lists miss:
Kitchen: cooking fires, broken glass, spoiled food, gas or electrical hazards, and the need for a manual can opener.
Bedrooms and hallways: darkness, smoke, blocked exits, footwear, eyeglasses, and mobility concerns during nighttime evacuation.
Utility areas: water shutoff access, electrical panels, heating equipment, sump pumps, and protective gloves.
Bathrooms: sanitation, stored medicines, hygiene supplies, and water that may become unavailable.
Garage or exterior storage: flood exposure, extreme heat, fuel hazards, and supplies that could become inaccessible if the main door fails.
Do not treat a hazard map as a prediction. Its purpose is to reveal dependencies. If every flashlight is in one cabinet, every charger needs wall power, or the only drinking water is stored below a flood-prone window, the kit has a design weakness even when the inventory looks impressive. For broader household readiness decisions, the hazard-based kit assessment should be updated whenever someone moves in, develops a new medical need, or changes heating, cooking, or transportation arrangements.
Match Supplies to Rooms, People, and Failure Points
Supplies work best when they are placed where a person can reach them during the first minutes of a disruption. A single large tote may be efficient for inventory, but it is a poor design if a fallen shelf, smoke, or a locked garage separates the household from it. Divide the kit into a central reserve and small location-specific modules.
Bedrooms need a different setup from the kitchen. Keep sturdy shoes, a flashlight, spare glasses, and a whistle near sleeping areas because broken glass and darkness are immediate problems after an earthquake or severe storm. Near the kitchen, store a fire extinguisher appropriate for the likely fire class, heat-resistant gloves, and a flashlight; do not place supplies so close to a stove that they become inaccessible during a fire. In a utility area, label the main water shutoff and keep gloves, absorbent materials, and a headlamp available for inspection.
Household members also change the design. Infants may need formula, bottles, diapers, and a way to prepare food without safe tap water. Older adults may need backup hearing-aid batteries, assistive devices, and a written medication list. A person who uses a wheelchair may need an evacuation plan that accounts for stairs rather than simply adding more supplies. Pets require food, water, carriers or leads, waste bags, and copies of veterinary information.
The practical distinction is between survival supplies and access supplies. Water and food sustain people over time, while shoes, lighting, keys, gloves, and medication access determine whether those supplies can be reached. A household that prepares only the first group may still fail during a short, chaotic event.
Consider a two-story home with a finished basement. Storing all bottled water downstairs may look tidy, but a burst pipe or flood could remove the reserve first. A better arrangement keeps a modest amount on each occupied floor and a larger reserve in the safest accessible location. The tradeoff is less compact storage and more rotation work, but redundancy matters when the preferred route is blocked. Avoid storing emergency supplies in a locked cabinet, under heavy items, or in a container that one person cannot move.
Include copies of identification, insurance information, emergency contacts, medication details, and household instructions in a waterproof pouch. Digital copies can supplement paper records, but they should not be the only option when phones lose power or cellular service is interrupted. The room-by-room supply checklist should make access as visible as the inventory itself.
Build the Core Kit Around Loss of Utilities
Utility loss is often the bridge between a hazard and a household crisis. When electricity, water, heating, cooling, or communications stop, ordinary routines become difficult even if the building remains intact. Build the core reserve around those failures, then add hazard-specific equipment rather than treating every disaster as identical.
Water deserves first attention because it supports drinking, food preparation, and basic hygiene. Store commercially packaged water or containers intended for water storage, and keep a separate amount for pets if applicable. Food should require little or no cooking when power is unavailable. Shelf-stable options such as canned beans, fish, fruit, vegetables, nut butter, crackers, and ready-to-eat meals are more useful than foods that depend on a refrigerator, oven, or complicated preparation. Add a manual opener and utensils where cans are stored.
Lighting should not depend on one device. A flashlight for each sleeping area, a headlamp for hands-free work, and spare batteries provide more flexibility than a single bright lantern. Rechargeable units can reduce battery waste, but they need a charging method and a maintenance check. A battery bank is helpful only if it is charged before the outage and paired with the cables used by the household’s actual phones.
Heating and cooling create different constraints. Blankets, warm layers, and hats may help during a cold-weather outage, while breathable clothing, shade, battery-operated fans, and extra drinking water may be more relevant in heat. Never improvise indoor heating with a grill, camp stove, or fuel-burning device. Carbon monoxide can accumulate without obvious warning, so fuel-burning equipment must be used only as directed and in appropriate outdoor locations.
A compact priority order keeps spending rational:
Immediate safety: smoke alarms, fire extinguishers, escape lighting, shoes, gloves, and a whistle.
Medical continuity: prescriptions, first-aid supplies, a medication list, and needed health devices or batteries.
Water and food: safe drinking water, ready-to-eat meals, opener, utensils, and pet supplies.
Sanitation and communication: soap, wipes, toilet supplies, waste bags, radio, chargers, and contact information.
Hazard-specific tools: dust masks suited to the task, tarps, duct tape, shutoff labels, or flood barriers where justified.
Do not confuse a dust mask with protection from every airborne hazard, and do not assume a first-aid kit replaces professional care. Supplies can reduce exposure and manage minor problems while people seek appropriate help; they cannot make an unsafe building safe. Check guidance from local authorities for evacuation, water advisories, and fire response rather than relying on the kit to answer decisions outside its purpose.
Store, Test, and Rotate the Kit
Storage determines whether preparation survives contact with a real emergency. Keep the main reserve in a dry, temperature-moderate area that remains reachable without power. Avoid attics and unconditioned garages when heat or freezing temperatures could damage food, batteries, medicines, or plastic containers. Use clear labels showing contents, expiration dates, and the date of the last inspection.
Test the kit under realistic conditions. Turn on each flashlight, connect each charging cable, inspect first-aid packaging, and confirm that adults can open containers without special tools. Practice locating the water shutoff and electrical panel with the lights off. If an item works only when someone remembers an undocumented procedure, it is not fully ready.
Rotation is more than replacing expired food. Batteries corrode, adhesive dries out, medications have storage requirements, clothing becomes the wrong size, and contact information changes. Tie inspections to a recurring household event, such as the beginning and end of daylight-saving time, and use normal consumption to rotate shelf-stable foods. Keep medication decisions with the prescribing clinician or pharmacist; do not stockpile or alter prescriptions casually.
Accessibility creates an important tradeoff. A heavy waterproof tote may protect supplies from a leak, but it is unsuitable if no household member can lift it. Several smaller containers are easier to move and audit, though they require clearer labeling. A child may be able to carry a small comfort or communication pouch, but should not be assigned responsibility for critical medication or evacuation equipment.
Watch for signs that the design is failing: supplies are repeatedly returned to the wrong place, nobody knows who carries documents, chargers do not fit current phones, or the household cannot explain what happens if the main exit is blocked. Correct those failures during a calm review. The household hazard plan should reflect actual behavior, not an idealized storage system that works only on paper.
Use a Scenario Check Instead of a Shopping List
A scenario check tests whether the kit supports decisions, not merely whether it contains popular products. Choose several hazards that fit the property and ask what the household must do during the first hour, the first night, and a longer interruption. The answers expose missing supplies and unsafe assumptions quickly.
For a nighttime power outage, the first-hour needs may be lighting, shoes, communication, and a check on medical equipment. By the first night, food preparation, temperature control, sanitation, and charging become more relevant. For a kitchen fire, the correct response may be alarm, evacuation, and calling emergency services; the kit should support escape rather than encourage someone to retrieve belongings or fight a growing fire.
For flooding, move people and essential documents away from the affected area, avoid contact with contaminated water, and expect lower-level storage to become unavailable. For an extended heat outage, identify the coolest safe location, monitor vulnerable residents, and arrange an alternative location if indoor conditions become dangerous. These scenarios demonstrate why the same item can have different value: a battery radio is useful during broad communication disruptions, while a headlamp is more useful when both hands are needed to inspect a dark utility space.
After each exercise, remove products that do not solve a credible problem and fund the gaps that do. A compact review can ask:
Can everyone reach lighting, shoes, water, and essential information without entering a dangerous area?
What happens if the refrigerator, elevator, garage door, phone network, or basement is unavailable?
Which person, pet, or medical need requires a separate supply or transport arrangement?
Which item depends on electricity, internet access, batteries, or a skill nobody has practiced?
Keep the result proportional to the home. Preparedness does not require purchasing every specialized product, and more gear can create clutter that obscures the essentials. A well-designed kit makes the most likely household hazards easier to manage, leaves clear boundaries for when to evacuate or seek help, and can be revised after every drill, repair, move, or change in household needs.
Frequently Asked Questions
Should every household have the same emergency kit?
No. A kit should reflect local hazards, building layout, utilities, medical needs, pets, and the people who must carry or use the supplies.
Where should emergency supplies be stored?
Keep a main reserve in a dry, accessible location and place small modules near bedrooms, exits, utility areas, or other points where immediate access matters.
What should be checked twice a year?
Test lights and chargers, inspect batteries, rotate food and water, review medications and documents, replace damaged first-aid items, and confirm that clothing and pet supplies still fit current needs.
Do emergency kits need specialized tools for every disaster?
No. Add specialized items only when a credible household hazard justifies them. Basic safety, medical continuity, water, food, sanitation, lighting, and communication usually come first.
Can a generator be used indoors during a power outage?
No. Fuel-burning generators and similar equipment can produce carbon monoxide and must be used only as directed in a safe outdoor location away from openings.
Conclusion
A strong emergency kit reflects the hazards that can actually affect the home and the obstacles those hazards create. Map risks by room, place immediate-use supplies near sleeping areas and exits, and build the central reserve around water, ready-to-eat food, lighting, medication continuity, sanitation, and communication. Then add equipment for specific conditions such as flooding, smoke, utility shutoffs, extreme temperatures, or pet care.
Test access rather than trusting labels: use the flashlight, connect the charger, open the food, and rehearse what happens when a usual route is blocked. Review the arrangement twice a year and after any household change. The goal is not the largest collection of gear; it is a reachable, maintained system that supports safe decisions and makes clear when the correct response is evacuation or professional assistance.
A home-sheltering kit is most useful when it supports the first few days of restricted travel, utility loss, severe weather, or contamination outside the home. The contents should be selected around specific household functions: hydration, calories, medication, hygiene, temperature control, communication, and safe movement through dark rooms. Buying miscellaneous gear without assigning those functions often produces duplicate flashlights while leaving out prescription refills or a way to manage waste.
Begin with the people who will use the kit. A toddler may need formula, diapers, and a familiar feeding method; an older adult may need hearing-aid batteries, mobility equipment, or refrigerated medicine; a pet may require food, water, litter, and medication. A person with food allergies cannot rely on a generic assortment of canned meals. These details change the kit more than the brand of backpack or storage bin.
Use a priority order when money or storage space is limited. Water and medically necessary items come before comfort products, while lighting and sanitation usually deserve attention before specialized tools. A compact household inventory can include:
Water containers and a practical method for dispensing water.
Foods that match dietary needs and can be eaten with minimal cooking.
Prescription medicines, first-aid supplies, hygiene products, and waste bags.
Flashlights, batteries, a radio, charging equipment, and basic tools.
Documents, contact information, cash, clothing, and supplies for dependents or animals.
A common mistake is treating the kit as a sealed emergency box that never changes. The better approach is a household system: one accessible supply area, smaller grab-and-use items where they are needed, and a written inventory. A basement location may be unsuitable if flooding is possible, while a high shelf may be inaccessible to someone using a walker. The right placement is dry, identifiable, and reachable without moving heavy furniture.
Water, Food, and Cooking Equipment
Water deserves the first storage decision because people use it for more than drinking. A home kit may need water for beverages, preparing food, taking medication, and limited hygiene. Store water in food-grade containers, keep it away from chemicals and direct heat, and follow the container or local public-health guidance for replacement. Smaller containers are easier to lift and pour than one very large vessel, especially when the household includes children or older adults.
Food should be chosen for actual use rather than impressive shelf life alone. Ready-to-eat canned goods, shelf-stable cartons, nut or seed spreads, crackers, dried fruit, cereal, and familiar packaged meals can reduce reliance on electricity and cooking fuel. Include a manual can opener, sturdy utensils, cups, and resealable bags. Foods with high sodium may increase thirst, and very dry foods can be difficult to use when water is limited, so balance convenience with hydration needs and dietary restrictions.
Cooking equipment creates a safety tradeoff. An indoor-rated electric appliance may be useful while power is available, but outdoor fuel-burning equipment should not be used inside a home, garage, or enclosed porch because combustion can produce dangerous gases. If a household owns an alternative stove, store its fuel according to manufacturer instructions and keep a fire extinguisher accessible. No cooking option is preferable to an unsafe one.
Test the food plan before an emergency. Prepare one meal using only the stored ingredients, available water, and the proposed opener or stove. This exposes problems such as cans that no one likes, packets that require more water than expected, or cookware that is difficult to clean without running water. A useful rotation method is to place newer items behind older ones and mark purchase dates. Replace damaged, swollen, leaking, or badly rusted cans rather than assuming every shelf-stable item remains safe indefinitely.
For a fuller household inventory, compare this checklist with your Preparedness kit contents for sheltering at home notes, then adjust quantities for the number of residents and the likely duration of the disruption.
Health, Sanitation, and Personal Needs
Health supplies often determine whether sheltering remains manageable after the first day. Keep routine medicines in their original labeled containers when possible, maintain an up-to-date medication list, and ask a pharmacist or clinician how to handle continuity for essential prescriptions. Do not replace prescribed treatment with general first-aid products. Include spare eyeglasses, contact-lens supplies if appropriate, hearing-aid batteries, and copies of relevant medical information.
A first-aid kit should match likely household needs rather than serving as a substitute for medical care. Bandages, gauze, adhesive tape, antiseptic supplies, disposable gloves, scissors, tweezers, a thermometer, and commonly used over-the-counter products may be useful when used according to their labels. Add items for known conditions, but check expiration dates and storage instructions. A kit that contains only tiny adhesive strips is poorly matched to a household that regularly manages larger dressings or has young children.
Sanitation becomes harder when water service, sewer systems, or garbage collection is interrupted. Stock toilet paper, soap, hand sanitizer, toothbrushes, toothpaste, menstrual products, diapers, wipes, disinfecting supplies, paper towels, and heavy-duty trash bags. Separate clean supplies from waste-handling items. If toilets cannot be flushed, follow local instructions for temporary waste management rather than improvising a method that could expose people to contamination.
Personal comfort has a practical role. Spare underwear, warm layers, blankets, sturdy shoes, towels, and basic cleaning cloths make it easier to remain indoors safely when heating or cooling is limited. Comfort supplies should not displace water or medicine, but they can reduce unnecessary movement outside and help a household function during a long outage. Keep a small supply of preferred foods for children or people with sensory sensitivities; refusal to eat unfamiliar emergency food is a foreseeable failure, not a minor inconvenience.
Many kits fail because they serve an imagined average person. Review the contents by resident: allergies, mobility, language, age, medical equipment, pregnancy, infant feeding, and pet care may each require a separate line on the inventory. Include a spare leash or carrier for animals and enough familiar food to avoid abrupt dietary changes where possible.
Light, Information, Power, and Household Safety
Lighting and information supplies help a household make safer decisions when normal services are unavailable. Give each frequently used area a reliable flashlight or lantern, with spare batteries stored in their packaging or a protected container. Headlamps can leave both hands free for carrying water or assisting another person, while lanterns are better for illuminating a shared room. Candles may provide light, but they introduce an open-flame risk and should not be the default solution in homes with children, pets, or crowded spaces.
Keep a battery-powered or hand-crank radio, a charged power bank, charging cables for household devices, and a written list of emergency contacts. A phone may still work during a power outage, but its usefulness declines as the battery drains or networks become congested. Paper copies of addresses, medical contacts, insurance information, identification details, and utility shutoff instructions provide a backup when screens are unavailable. Store sensitive documents securely rather than leaving them exposed in an open kit.
Basic tools should solve likely household tasks: a multipurpose tool, work gloves, duct tape, adjustable wrench, pliers, a whistle, utility ties, and a fire extinguisher suited to the home. Add a smoke alarm and carbon-monoxide alarm only if the existing devices are missing or overdue for replacement, and follow manufacturer instructions for testing and placement. Never use a generator, charcoal grill, camp stove, or vehicle exhaust source indoors or near openings.
Consider temperature and air quality separately. Blankets, warm socks, layered clothing, and hats may help during cold conditions, while light clothing, battery-powered fans, and drinking water may be useful during heat. Do not assume a portable heater is safe merely because it is small; inspect its fuel requirements, clearance rules, and ventilation instructions. If authorities advise evacuation or leaving an unsafe building, a shelter-in-place kit is not a reason to remain.
The weak assumption here is that technology will solve every communication problem. Batteries fail, cables break, and internet service can disappear. Test the radio, recharge the power bank, label cables, and practice receiving local alerts. Use the Preparedness kit contents for sheltering at home checklist to identify which items provide information, which provide light, and which reduce direct safety risks.
Store, Test, and Rotate the Kit
Storage determines whether supplies remain usable under stress. Keep heavy water containers low, place frequently needed medicines where they can be reached quickly, and avoid locking the entire kit in a location that may become inaccessible. A main supply shelf can hold bulk items, while a smaller container near the bedroom can hold a flashlight, shoes, glasses, and a phone charger. Waterproof labels or a simple written map help visitors and family members find supplies without opening every container.
Schedule a practical inspection rather than relying on memory. Check food dates, water-container condition, batteries, power-bank charge, first-aid supplies, child sizes, pet food, prescriptions, and seasonal clothing. Open packaging that has never been used, test the can opener, and confirm that everyone knows where the radio and extinguisher are kept. A flashlight that works on the purchase date may have corroded contacts months later.
Use a short household drill to reveal operational gaps. Turn off a circuit briefly and prepare a no-cook meal, locate the sanitation supplies, send a test message to an agreed contact, and account for pets or dependents. Note what takes too long, what requires two people to lift, and what cannot be used without power. Those observations are more valuable than adding another novelty gadget.
Storage also involves security and resilience. Keep cash in small denominations, protect documents from moisture, and avoid advertising the location or contents of supplies. Share the inventory with trusted household members, but do not assume every resident will remember an elaborate system. Simplicity is an advantage: clear labels, familiar foods, accessible tools, and a repeatable review date usually outperform a complicated collection of specialized equipment.
For a final review, use the Preparedness kit contents for sheltering at home list room by room and mark each item as present, usable, accessible, or needing replacement. That status-based check catches more failures than counting objects alone.
Frequently Asked Questions
How much water should a home sheltering kit contain?
Use household size, local guidance, storage capacity, and the expected disruption to set the amount. Store water in manageable food-grade containers and include some capacity for basic hygiene, not only drinking.
What foods work best without electricity?
Choose familiar shelf-stable foods that need little or no cooking, such as canned meals, crackers, nut or seed spreads, cereal, and dried fruit. Add a manual can opener and check whether the food requires more water than you can spare.
Should a preparedness kit include a generator?
A generator is optional and requires careful fuel storage, ventilation, maintenance, and carbon-monoxide precautions. Never operate one indoors, in a garage, or close to doors and windows.
How should prescription medicines be handled?
Keep essential medicines available as allowed by the prescription and pharmacy process, retain labels, and maintain a current medication list. Ask a pharmacist or clinician about safe backup arrangements for temperature-sensitive or controlled medicines.
Where should home sheltering supplies be stored?
Use a dry, accessible location away from flood risk and excessive heat. Keep heavy items low, place critical items where they can be reached quickly, and use labels so every household member can find them.
Further Reading
Authoritative Sources
Emergency Supply Kit ready.gov
Provides federal guidance on assembling household supplies for disruptions and emergencies
Food Safety During an Emergency cdc.gov
Explains food and water safety concerns when power or normal services are interrupted
Survival Kit Supplies redcross.org
Offers practical household supply recommendations, including needs for medications and pets
Conclusion
A useful sheltering kit is organized around household functions, not a shopping list of impressive gadgets. Put water, medication, sanitation, suitable food, lighting, communication, and special-needs supplies ahead of low-priority comfort items. Test the opener, radio, power bank, and cooking plan before they are needed, and inspect dates, batteries, prescriptions, clothing, and pet supplies on a recurring schedule. Store heavy containers safely and keep critical items accessible if the power fails or movement through the home becomes difficult. Review official local instructions during an incident, especially when authorities address evacuation, contaminated water, fire, or unsafe air. A modest, tested kit that residents can use confidently is more dependable than a large container filled with unfamiliar or inaccessible supplies.
The first part of an emergency plan explains what people should do during the first minutes of a threat. A useful plan does not treat every emergency alike: sheltering from a tornado, leaving during a wildfire, responding to a home fire, and coping with a power outage require different actions. The plan should identify the hazards most plausible for the location and translate them into short, observable instructions.
Begin with the places that provide the best protection. Note the interior room or lower level used for severe weather, the exits from each sleeping area, the location of fire extinguishers, and the shutoffs that household members are authorized and able to use. The goal is not to create a technical manual. It is to remove hesitation when smoke, darkness, noise, or stress makes ordinary judgment harder.
A common weakness is writing “evacuate if necessary” without defining who makes the decision or what happens next. Set triggers that can be recognized, such as an official evacuation order, visible smoke approaching the property, a fire inside the home, or a loss of safe access. For a medical emergency, the plan may instead emphasize calling emergency services, unlocking the door, gathering medication information, and keeping pathways clear.
Households should compare a printed plan with actual mobility and safety constraints. A person using a walker may need more time and a clear route; a child may not know how to open a window; a pet may hide during alarms. Battery lighting, smoke alarms, hearing-alert devices, and accessible transportation can change the practical answer. The mistake is assuming that a plan works because it sounds sensible on paper. Walk the route, try the shelter location, and correct anything that cannot be performed quickly.
Supplies, Services, and Household Capabilities
The second part covers the resources needed to remain safe when normal services are interrupted. Supplies are only useful when they are reachable, usable, and suited to the disruption. A household facing a short power failure may need lighting, safe food handling options, and device charging; a longer interruption may also require water arrangements, sanitation, medications, cash access, and a way to receive updates.
Build the inventory around actual use rather than a generic pile of products. Record prescription schedules, infant supplies, mobility aids, glasses, allergy needs, pet food, and backup methods for essential equipment. Include shelf-stable foods the household already eats and a manual can opener if cans are part of the inventory. Store drinking water and sanitation supplies where they will not be trapped by a flooded basement, blocked garage, or locked cabinet.
Capability matters as much as quantity. A portable generator, for instance, does not solve an outage unless it can be operated safely outdoors, fueled appropriately, and kept away from windows and doors. A battery bank is less useful if its charging cable does not fit the household’s phones. A large stock of frozen food may offer little protection during a prolonged outage, while shelf-stable meals may be difficult for someone with limited cooking ability. The better choice depends on storage space, budget, health needs, and the likely duration of disruption.
Use a compact priority check when resources are limited:
Life safety: medications, first-aid materials, safe lighting, alarms, and emergency contact information.
Basic function: drinking water, ready-to-eat food, sanitation, warmth or cooling, and charging options.
Continuity: documents, transportation funds, work or school needs, pet care, and replacement batteries.
Rotate items during ordinary life instead of waiting for an annual inspection. Check expiration dates, damaged packaging, battery condition, fuel storage rules, and whether medications require special handling. A frequent failure mode is confusing ownership with readiness: buying an item is not the same as knowing where it is, testing it, or ensuring every intended user can operate it. Link this inventory to Three parts every emergency preparedness plan should cover by recording the specific need each item addresses.
Communication, Evacuation, and Accountability
The third part defines how people will exchange information, separate safely, and reconnect when normal communication is unreliable. A plan should name an out-of-area contact, establish at least one local meeting place and one location outside the immediate area, and explain how household members report their status. These details reduce the chance that everyone makes separate assumptions during a fast-moving event.
Phone calls may fail because of congestion, damaged infrastructure, dead batteries, or poor reception. Text messages may work when voice calls do not, but a plan should not rely on one device or one network. Write important numbers on paper, keep a small charger where it can be found, and identify official alert channels for the local area. Agree on a simple message format, such as stating the person’s name, location, condition, and next destination.
Evacuation planning needs more than a route drawn on a map. Identify two ways out when possible, account for road closures, and decide who takes children, pets, medications, documents, and mobility equipment. A vehicle plan should include fuel awareness and a rule against leaving without essential passengers or supplies. People without cars need a specific transportation contact or public-service option; “find a ride” is not an operational instruction.
Consider a school-day scenario in which a storm closes roads while adults are at work. The plan should state whether children go to a designated caregiver, which adult has authority to collect them, and how that adult proves identity if required. For older relatives living elsewhere, record who checks on them and what information confirms that help has arrived. Avoid assuming that the closest person is the best responder; work schedules, disability, distance, and road access may make another person more reliable.
Keep copies of the plan in more than one safe location, but protect sensitive information. A paper copy at home can be paired with a secure digital copy accessible from outside the property. Review the contact tree after moves, job changes, new phone numbers, custody changes, or changes in medical needs. The practical test is whether a person who was not present during the planning conversation can follow the instructions without guessing. More on how these decisions fit together appears in Three parts every emergency preparedness plan should cover.
Testing and Updating the Plan
A plan becomes dependable through small tests, not through its length. Choose a quiet time to rehearse the most consequential actions: leaving the home, reaching the shelter room, locating the supply container, sending the agreed message, and meeting at the designated location. A short drill often reveals blocked exits, missing keys, dead batteries, confusing language, or equipment that no one knows how to use.
Test assumptions under realistic constraints. Turn off the lights briefly and see whether everyone can find the flashlight. Ask a child to explain where to meet without prompting. Check whether a neighbor can reach a household member who does not drive. If a medication needs refrigeration, confirm the backup arrangement with a pharmacist or clinician rather than guessing. For fuel-powered equipment, follow the manufacturer’s safety instructions and never test it inside a home, garage, or other enclosed space.
Different households should emphasize different parts. A renter may need landlord contacts and a plan for building evacuation; a rural household may need longer supply continuity and greater travel distances; an apartment resident may have limited storage but more nearby support. A plan for a person with a service animal should include the animal’s identification, supplies, and transportation needs. Treat these differences as design requirements, not optional additions.
After each drill or real incident, record what failed and assign a correction. Replace vague directions with names, locations, times, or conditions. Update the plan whenever household membership, health, transportation, housing, or local hazards change. A useful review asks four questions: Can everyone recognize the first action? Can the household function if utilities stop? Can separated people communicate and reunite? Can each person reach the needed supplies? The answers show where the next dollar or hour of preparation will have the greatest effect.
For a related way to organize priorities, use Three parts every emergency preparedness plan should cover as a recurring review rather than a one-time writing exercise. The strongest plan remains short enough to use, detailed enough to guide decisions, and flexible enough to handle conditions that were not anticipated.
Frequently Asked Questions
What are the three main parts of an emergency preparedness plan?
The three parts are immediate safety actions, supplies and service continuity, and communication, evacuation, and accountability. Each should reflect the household’s hazards and capabilities.
How often should an emergency plan be reviewed?
Review it at least annually and whenever someone moves, a phone number changes, medical needs develop, transportation changes, or a major local hazard occurs.
Should an emergency plan be printed?
Yes. A printed copy remains available when internet service, power, or a phone is unavailable. Keep it in a known, accessible location and protect sensitive personal details.
What is the most common preparedness planning mistake?
Many plans list supplies or general intentions without assigning actions. A usable plan names who acts, where people go, how they communicate, and what conditions trigger a decision.
How can a household prepare on a limited budget?
Prioritize life-safety items, medication continuity, water, lighting, sanitation, and communication. Use ordinary household purchases, rotate supplies, and improve one capability at a time instead of buying specialized gear first.
Further Reading
Authoritative Sources
Make a Plan ready.gov
Provides federal guidance for household communication, evacuation, sheltering, and emergency planning
Make a Plan redcross.org
Offers practical planning considerations for household members, pets, medical needs, and meeting locations
National Preparedness Planning fema.gov
Explains how preparedness planning connects risks, capabilities, response, and recovery
Conclusion
A dependable emergency preparedness plan connects decisions, resources, and people. Identify the hazards that could change what you do first, then make those actions easy to recognize under stress. Match supplies to real medical, mobility, dietary, pet, and transportation needs, and test equipment before an outage or evacuation makes testing difficult. Communication arrangements should include meeting places, backup contact methods, and clear responsibility for children or relatives who may need assistance. Finish by rehearsing one scenario and correcting the first weakness you find. Repeating that process keeps the plan aligned with changing household circumstances and turns a document into an operational tool rather than a forgotten list.