by Preparation Call Editorial Team | Jul 30, 2025 | Preparedness
Improvised First Aid Supplies
Bandaging Cuts and Scrapes
We’ve all been there, right? A little kitchen accident can quickly turn a fun cooking session into a mini-crisis. That’s when I discovered that clean kitchen towels make excellent makeshift bandages. Just remember to fold them to make them thicker and tie them off after applying pressure to the wound. If you’ve got a little duct tape lying around, it can work wonders to hold your makeshift bandage in place!
Another great item you might overlook is that old T-shirt you’ve been meaning to toss out. Cut it into strips, and voilà – you’ve got yourself a fashionably practical bandage! Not only is it absorbent, but it’s also soft against the skin, which is a win-win in my book. Just be sure to clean the wound first with whatever clean water you have on hand.
If the cut is a bit deeper and you need to create a more secure dressing, you can use plastic wrap to cover the area before wrapping it with the T-shirt strips. The plastic acts as a barrier against bacteria, and that’s key in keeping infections at bay until you can access proper medical attention.
Using Ice and Heat Packs
A sprain or strain during a hike can really put a damper on things. For quick relief, I’ve learned to fill a Ziploc bag with ice cubes or frozen veggies from the freezer. Honestly, next time I’m in a pinch, I might just grab that bag of peas! It’s not just cool; it’ll really help with reducing the swelling. Just wrap the bag in a towel before applying it to the affected area. We don’t want frostbite on top of the injury!
Now, if your pesky pain needs some warmth instead, a rice sock does the trick beautifully. Fill a clean sock with uncooked rice, tie it off, and pop it in the microwave for about 30 seconds. Bingo, you have an instant heat pack for those achy muscles. The rice holds heat really well and contours to whatever body part you’re soothing.
Keep in mind that both ice and heat should be used thoughtfully. Always take breaks in-between applications, maybe 20 minutes on, followed by a similar break, to give your body a chance to heal without too much shock or irritation.
Cleaning Wounds with Household Products
In case of minor cuts and scrapes, I’ve discovered that most of us have hydrogen peroxide hiding in our medicine cabinets. This is great for cleaning wounds, as it helps kill off bacteria. Just remember not to use it too often, as it can damage new skin cells. But in an emergency, it’s certainly better than leaving it uncleaned.
Now, if you run out of hydrogen peroxide, white vinegar can be a lifesaver. It’s a natural antiseptic! Just dab a little on a clean cloth and gently clean around the wound. I tend to follow this up with aloe vera from my houseplant, which can help soothe and promote healing. It’s an old trick I learned from my grandma.
Always remember to keep the area clean and dry while healing. Cover it with a clean bandage and change it regularly. Trust me, staying on top of this makes a world of difference in recovery time.
Homemade Fire Starters
Using Cardboard and Egg Cartons
If there’s one thing that has gotten me out of a tough spot while camping, it’s these homemade fire starters. Cut up cardboard and use it with empty egg cartons to create your own firestarter kits. Just pack the cardboard into each cup of the carton, then soak everything in a bit of melted wax or candle stubs. Trust me, this brilliant method will have a fire roaring in no time!
Once they’ve set, simply break off one of the compartments, place it under your kindling, and light it up. The egg carton holds everything together nicely, and the wax makes it burn longer, giving your kindling time to catch. It’s such a simple way to recycle and ensure you have a reliable fire starter ready at hand.
Plus, not to forget, this is a fantastic project to engage the kids in! They can have a blast decorating and filling up those egg cartons, prepping for future camping adventures or even chilly nights in the backyard.
Using Dryer Lint
You know when you’re cleaning out the dryer and thinking about all that lint going to waste? Don’t throw it out! Line a little container or baggie with dryer lint, and you’ve got another excellent fire starter. It lights quickly and burns hot, making it perfect when you’re in a bind.
To amp it up a notch, I’ve been known to soak that lint in used cooking oil for added longevity. Just stuff the oily lint into some old toilet paper rolls and seal one end with a piece of tape. When you need warmth, you just light the open end, and let it work its magic.
Remember, it’s not just for camping! These fire starters can come in handy for those chilly nights you want to have a fire in the backyard or even just to light up the fireplace indoors. Keep a few handy in your camping gear or emergency kit for quick access!
Using Pine Cones
Pine cones are my happy little fire-making friends. You can toss them right into the fire pit for extra flair, as they ignite splendidly. But wait, there’s more! You can enhance them by dipping them in wax for a slow-burning fire starter. Just like with the cardboard, make sure they’re thoroughly coated but not dripping wet.
For the best result, allow the wax-covered pine cones to harden in a cool spot before tossing them in your emergency gear. When you need a quick fire starter, just toss a few of these babies on the pile, and they’ll put on a show while everything else catches. Plus, they smell so good while they burn!
If you’re camping, collecting pine cones can double as a fun little nature scavenger hunt for kiddos while gathering supplies. Talk about making memories and being prepared at the same time!
Water Filtration Options
Use Coffee Filters for Clarity
Did you know that coffee filters can do more than just help you brew a good cup of joe? When in a pinch for clean drinking water, you can easily use a coffee filter to get rid of visible particles. Simply pour your water through the filter into a container, and voilà! You’ve got yourself clearer water.
Now, this won’t purify the water entirely, but it’s a great first step if you’re in a bind. Just be careful to always follow this up with boiling the water if you have the means to, or use purification tablets if you have them on hand. Safety first, right?
Another great tip? Layer multiple coffee filters for more effective filtration. The more, the merrier when it comes to debris! This simple idea can make your water much more palatable, especially when you’ve been out in the elements for a while.
DIY Sand Filter
If you’ve got a little time and access to some sand, gravel, and a clean container, you can make a simple sand filter! Start with a layer of clean gravel at the bottom of your container, then add a fine layer of sand on top. Lastly, put a coffee filter on top of the sand to catch the larger impurities.
When you pour unfiltered water in, gravity will do its thing, and the sand will catch smaller particles while letting you collect cleaner water below. It’s not quite as fun as making desserts, but it’s a substantial survival skill to have learned!
And remember, just like with the coffee filters, always boil or chemically treat the water afterward. This method is about getting the gunk out; we want to ensure we’re drinking safe water!
Using Activated Charcoal
If you have activated charcoal on hand, you’re in luck! This stuff can be used to purify water due to its porous nature, which traps impurities. If you’ve got a breathable fabric like cheesecloth, you can create a filter by placing activated charcoal in it and letting water drip through.
When setting this up, make sure to layer it well. The more charcoal, the better the filtration! Just remember, once again, this doesn’t guarantee safe drinking water unless you boil or chemically treat it afterward. It’s a great step toward making unfit water safer.
Don’t forget to store your activated charcoal properly; moisture can diminish its effectiveness. Consider stashing this stuff in your emergency kit along with those coffee filters – they’re the perfect team when it comes to ensuring safe hydration!
Home Cleaning Solutions
Vinegar for Disinfecting
When it comes to cleaning, vinegar has been my go-to for ages! In emergencies, whether it’s dealing with minor smells or surfaces that need disinfecting, vinegar is super effective and non-toxic. I often mix equal parts vinegar and water in a spray bottle and use it as an all-purpose cleaner.
This combo can do wonders on countertops, bathroom surfaces, and even fabrics (but be careful with colors, folks!). It’s a stellar natural disinfectant that keeps things clean without harsh chemicals. Plus, it’s affordable and typically already in most households!
And here’s a pro tip: If you’re dealing with mold, mixing vinegar with baking soda can create a powerful cleaning solution that not only cleans but helps to eliminate that pesky odor as well. Just be sure to rinse thoroughly afterward!
Baking Soda for Odor Control
Baking soda isn’t just for baking; it’s an absolute lifesaver when it comes to neutralizing odors! Whether it’s the fridge or your dog’s favorite spot in the house, I’ve sprinkled baking soda in those places to absorb unpleasant smells.
For carpets, I often mix it with a few drops of essential oil to make a gentle carpet powder. Just sprinkle it on, let it sit for a bit, and vacuum. Fresh-smelling rooms on a dime!
And let’s not forget its versatility when it comes to emergencies. It can also be a gentle abrasive for scrubbing surfaces, so I sometimes combine it with a splash of water to make a paste for cleaning tougher stains around the house.
Casting Out Bad Smells with Citrus
If you’ve got citrus fruits lying around, they can work wonders for freshening up your home in a heartbeat. What I love to do is take any leftover citrus peels and toss them in a pot of water on the stove. It becomes a lovely natural air freshener that fills the house with a pleasant aroma.
Beyond that, citrus cleaners can be made by combining peels with vinegar for a scrubbing solution. Just let the peels soak in vinegar for a couple of weeks and use it as you would with regular vinegar. It’s both delightful and effective!
So next time you’re slicing up an orange or a lemon, don’t toss those peels! Keep them aside for some nifty cleaning tricks that make your home smell oh-so-good.
Frequently Asked Questions
1. Can these household items actually work in emergencies?
Absolutely! Many household items can be repurposed effectively for emergency scenarios, and often they are more useful than we give them credit for. It’s all about knowing how to utilize them appropriately!
2. Are there any safety considerations to keep in mind?
Definitely! Always ensure that any items you use for first aid or cleaning are clean and suitable for the task. When dealing with food or body substances, hygiene is key. And for water purification, always boil or chemically treat any water that you aren’t 100% sure is safe!
3. How can I prepare my household for emergencies?
Start by creating an emergency kit stocked with basic household items, first aid supplies, and instructions on how to use them. This way, when emergencies arise, you’ll have your bases covered.
4. Can I use essential oils for cleaning during emergencies?
Yes! Essential oils can enhance cleaning solutions and provide pleasant scents. Just ensure they are safe for the surfaces you’re cleaning, and remember that some oils may not mix well with certain materials.
5. Is it suitable to use items like vinegar and baking soda around children?
Yes, both vinegar and baking soda are generally safe around children but should still be used with caution and supervision. Always store any cleaning products, even natural ones, out of reach of little ones!

by Preparation Call Editorial Team | Jul 30, 2025 | Preparedness
Understanding the Impact of Isolation
Emotional Consequences
Honestly, dealing with isolation after a disaster isn’t just a minor inconvenience; it’s a real emotional rollercoaster ride. I remember feeling a massive weight on my chest, as if the walls were closing in. It’s crucial to recognize that feeling isolated can lead to heightened anxiety, sadness, and even depression. Many people might not realize just how much these feelings can affect not only our mental health but also our physical well-being.
Every human being thrives on connection. So when that connection is severed, even through unforeseen circumstances like a disaster, it can leave one feeling lost and alone. I’ve talked to folks who found themselves brewing over what they lost, both materially and in terms of community. It’s this sense of community that builds shared experiences and support, and without it, the feelings of desolation can amplify.
So understanding this impact is the first step. The next time you speak to someone struggling with isolation, give them the space to express it. Sometimes, just acknowledging that their feelings are valid can provide a lifeline to hope.
Rebuilding Communication Channels
Utilizing Social Media
I can’t emphasize enough how powerful social media can be. After a disaster, I found platforms like Twitter and Facebook essential when rebuilding the community feel. It’s crazy how a post can reconnect you with friends, family, and even neighbors you may not have spoken to in ages. So take to the digital streets, share your thoughts, and don’t be shy about reaching out!
Those little updates on social media can work wonders. It reminded me of how before everything went down, I often took connection for granted. You might find that others are also craving that sense of togetherness and your post can encourage them to share their stories. This can create a beautiful cycle of communication—even if it’s virtual.
Also, don’t underestimate a good old-fashioned group chat! Bringing together family or friends from different corners can also help maintain relationships and foster encouraging dialogues—nothing beats lifting someone’s spirits through a witty meme or a shared memory.
Finding Support Systems
Local vs. Online Support Groups
In my experience, finding the right support group can be a game-changer. Local support groups can help you connect in person, but they don’t always keep up with the needs of those feeling isolated. I’ve seen some groups meet in local community centers, and they create a warm environment for sharing experiences. Sometimes, just exchanging smiles with people who understand can bring a sense of relief.
On the flip side, after a disaster, online support groups burst into life! I found plenty of forums and chat groups that aligned with what I was going through. These communities can be incredibly empowering as they offer anonymity and the ability to connect with others who are miles away but feeling the same as you.
The key is to explore both avenues and see what resonates with you. Being around people who share your experiences—even if it’s virtual—can lighten the burden and connect you with amazing support systems that you never knew existed.
Rediscovering Personal Hobbies and Interests
Engagement Through Creativity
Diving back into hobbies can be a fantastic way to cope with isolation. I found peace and healing in picking up my old paints; focusing on creating art allowed my mind to escape the confines of reality, even if just for a moment. Engaging creatively brings out emotions that sometimes words can’t capture, and it’s therapeutic in its own right.
Moreover, it’s a reminder that we can channel our pain into something meaningful. Journal writing is another great way to get your thoughts flowing. I often recommend putting pen to paper as an emotional outlet. I would write about my experiences, and it felt like I was sharing my burdens, even if only with myself.
So, rediscovering those hobbies can give you a renewed sense of purpose. Whether it’s painting, writing, gardening, or cooking—find that passion and run with it! You might just stumble upon your new favorite way to express yourself.
Strengthening Community Engagement
Volunteering Efforts
So, let’s talk about volunteering; what an incredible way to tackle feelings of isolation! I’ll tell you, getting involved with local charities or community efforts can create a beautiful bond with those around you. I remember signing up for a food drive and, honestly, it turned into more than just a way to help others—it connected me to amazing people.
Volunteering can not only help ease your feelings of isolation but also remind you of the strength and resilience of humanity. It’s like seeing the best of the world sprout from the ashes of despair. The stories you encounter, those shared moments of laughter and hope—they fill your heart in ways you might never expect.
Plus, working together with others helps build a competitive spirit while progressing toward common goals. So, find something you’re passionate about. It can be anything from environmental cleanup to helping the elderly—you’ll find camaraderie that makes the journey through isolation much less daunting.
FAQs
1. What are the emotional effects of isolation after a disaster?
The emotional effects can include anxiety, depression, and a feeling of desolation. It’s essential to acknowledge and validate these feelings to help ease the burden.
2. How can social media help reconnect with others post-disaster?
Social media provides a platform to reach out and connect with others who may be going through similar experiences. It can foster a sense of community and togetherness even in times of isolation.
3. What resources are available to find support groups?
Local community centers and online platforms often host support groups. Websites and social media can direct you to forums or local organizations focused on post-disaster recovery.
4. Why are hobbies important during times of isolation?
Hobbies provide an outlet for expression and creativity, which can be incredibly therapeutic. They help distract from negative emotions and offer a sense of purpose.
5. How can volunteering alleviate feelings of isolation?
Volunteering connects you with others in a meaningful way—sharing experiences, stories, and working toward a common cause can significantly reduce feelings of loneliness.
by Preparation Call Editorial Team | Jul 30, 2025 | Preparedness
Understanding Your Energy Needs
Assessing Your Current Energy Usage
First things first, you need to know what your energy consumption looks like. Take a week or two to track your daily energy usage. This isn’t just about turning off lights; it includes all your devices, appliances, and even that sneaky vampire energy—things like chargers plugged in but not in use. Jot those numbers down, and you’ll start to see a clearer picture.
After you’re done with that, it’s time to categorize your energy needs. Some devices are non-negotiable—your fridge, for instance. Others might be more discretionary. This breakdown can help in deciding what to prioritize when the power goes out. If a storm hits, knowing that your refrigerator and heating system are top priorities will help you make quicker, smarter decisions.
Remember, understanding your current usage isn’t just about numbers; it’s also about habits. Do you leave the lights on? Do you run the AC at full blast? Building awareness around your habits can really inform your energy strategy!
Choosing the Right Backup Energy Source
Exploring Options: Generators, Batteries, and More
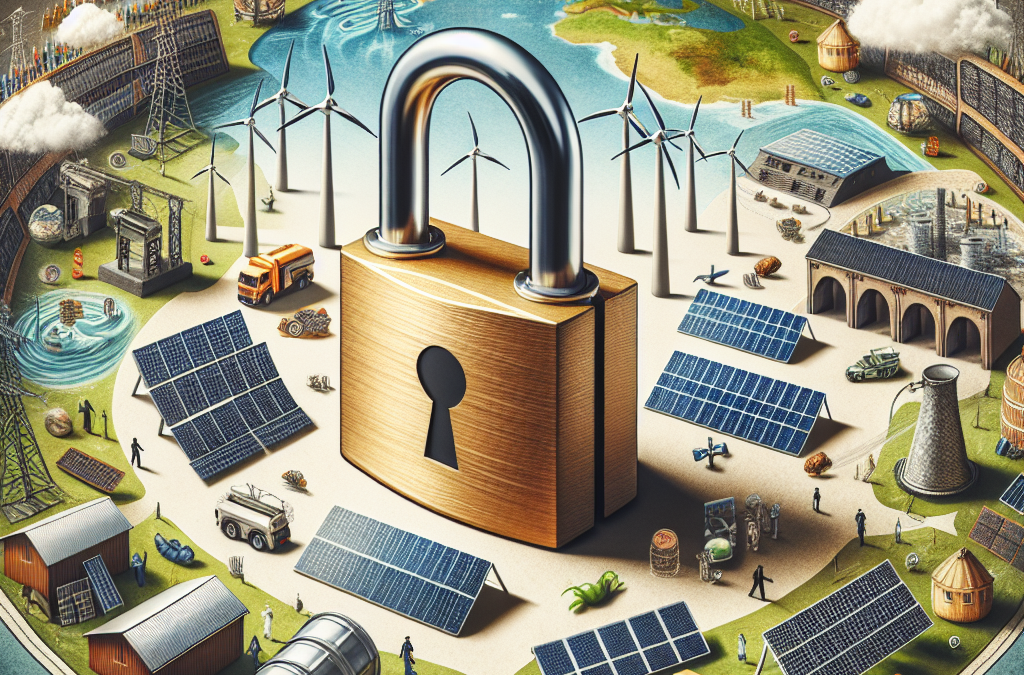
Okay, once you’ve got a sense of your energy needs, let’s talk about backup sources. There are a few routes you can take—generators, battery systems, and even solar panels. Each has its perks and drawbacks, so you’ll want to think about what fits your lifestyle and budget.
Generators are usually the go-to for many folks because they can kick in and get you running quickly. Just remember to factor in the cost of fuel! If you’re looking for something more sustainable, battery systems are a hot topic—especially if you’re keen on solar power. They can store energy for later use, helping you rely less on grid energy.
And let’s not forget about fuel cells. Although they’re a bit on the pricier side, they have this neat ability to keep your energy supply flowing with minimal fuss. It’s all about doing your homework and picking the right vibe for your home.
Planning for Maintenance
Creating a Maintenance Schedule
So, you’ve chosen your energy backup method, now what? Well, it’s time to keep it in tip-top shape! Create a maintenance schedule that works for you. Regular checks can ensure that everything is running smoothly—like checking generator oil every few months or cleaning your solar panels.
Don’t underestimate the power of a good inspection. Just like you visit the doctor for regular check-ups, your equipment needs attention too! This reduces the likelihood of a failure when you need it most—trust me, you don’t want to scramble at the last minute because your generator won’t start.
Also, if you’re handy, dive into the functionality of your backup source. Learn how to troubleshoot basic issues. This way, you won’t be indefinitely stuck if something goes awry and you won’t have to call for help every time something seems off.
Building an Emergency Plan
Creating a Response Strategy
Now, this might feel like a bit of an obvious step, but trust me—having a plan is crucial. The moment a storm is brewing, you don’t want to be panicking like a chicken with its head cut off! Outline the steps you’ll take when you know that the power is about to go out.
Your emergency plan should clearly detail who does what when the lights go out. Is it your job to grab the generator? Is your partner in charge of checking the fuel levels? It might sound silly, but assigning roles can make a chaotic situation much more manageable.
Also, consider how you’ll communicate with each other in case you’re separated when the outage happens. A predetermined meeting point or a reliable method of communication can make all the difference, especially if the outage happens during more dramatic weather.
Educating Your Household
Sharing Knowledge with Family Members
Last but definitely not least, let’s talk about sharing the load—literally and figuratively! It’s super important that everyone in your home knows how backup systems work. Gather the family and have a little powwow about your backup energy plan.
Make it fun! You might set up a mini-scenario to practice what everyone would do in the case of a power failure. Not only does this make sure everyone is on the same page, but it also builds confidence. If everyone knows the steps, there’s less chance for panic!
This exercise can also cover what to do during an emergency. Reviewing safety protocols and knowing where equipment is located can empower your entire family to act effectively if the need arises. Plus, it’s a great bonding experience!
FAQ
1. What’s the best backup energy source for emergencies?
There’s no one-size-fits-all answer! It really depends on your specific needs and budget. Generators are quick to get you back on track, while battery systems and solar can be more sustainable long-term.
2. How often should I maintain my backup systems?
It’s good practice to check them every few months. Make a maintenance schedule that fits your life, but be diligent; a regular inspection can save you a ton of headaches later!
3. How do I create an effective emergency plan?
Start by outlining the roles everyone in your household will play during a power outage. Make sure to consider communication methods and establish a meeting point, too!
4. Can I combine different energy sources?
Absolutely! Many folks use a mix of generators, battery systems, and solar. Each has its unique benefits, so combining them can give you a robust backup plan.
5. Why is educating my family about backup energy sources important?
When everyone knows what to do, there’s less panic. Education empowers your family to respond calmly and effectively, making the situation less stressful for everyone involved.