by Preparation Call Editorial Team | Jul 6, 2025 | Preparedness
Emergency Kit
Essentials for Your Kit
When I think about emergency preparedness, the first thing that comes to mind is an emergency kit. This is your lifeline in a crisis. I usually include items like first aid supplies, non-perishable food, and water. It’s surprising how many people overlook these basics and then scramble at the last minute. Trust me, having these essentials ready can make all the difference.
As for the quantity, I suggest stocking up on enough supplies to last at least 72 hours. This gives you time to recover from the initial shock and find more resources if necessary. Don’t forget about any personal items specific to your needs, like medications or pet supplies. I’ve made the mistake before of thinking about my needs but forgetting about my furry friend!
Remember, your kit isn’t a one-size-fits-all. Personalize yours based on your unique situation. Think about the climate you live in, your family members, and even your hobbies. For example, if hiking is your jam, pack some gear along with the basic food and water. That way, you’re not only prepared but also comfortable.
Communication Plan
Establishing Your Network
During any disaster, clear communication is crucial. After reflecting on previous experiences, I can’t stress enough how vital this is. Gather your family and friends to discuss who will be in charge of what, should an emergency arise. I can remember a time when we rushed to evacuate but didn’t establish who would contact whom. It added unnecessary stress!
I also recommend using text messaging over traditional calls since text messages can often go through when calls can’t. Create a family group chat specifically for emergencies. Make sure everyone knows how to access this information and practice it so there’s no hesitation when it really matters.
Think about other communication channels too, like social media, local bulletin boards, or community centers that can serve as meeting points. I’ve found that having multiple layers of communication gives everyone peace of mind, especially the little ones who might not understand the gravity of the situation.
First Aid Supplies
Building the Perfect First Aid Kit
A solid first aid kit is a non-negotiable. Trust me on this one; I’ve had my share of scrapes and bruises that needed more than a Band-Aid! Start with the basics: antiseptic wipes, gauze pads, adhesive tape, and a good pair of scissors. You’d be amazed at how often you’ll need these during even minor emergencies.
Don’t forget to add a manual or reference guide, especially if you’re like me and sometimes forget where the aspirin is when you need it most! You can find really handy booklets that talk you through common injuries and their treatments. I also include personal medications, like antihistamines, because allergies don’t take a break during a crisis!
As your skills grow, consider attending a first aid or CPR class. I did this a few years back, and it was enlightening. It’s like being a superhero – you don’t just have a kit; you’ve got the know-how to use it. Plus, it’s fun to learn something new and potentially save a life.
Water Supply
Understanding Your Needs
Water is essential, and I can’t stress this enough. In emergencies, clean drinking water becomes a precious commodity. I always make a plan to store at least one gallon of water per person per day. You might think that’s a lot, but trust me, you’d rather have more than not enough!
Remember to also consider pets and the extra water they might need. I once had a friend who forgot about her dog during a storm, and let’s just say we learned a valuable lesson that day! Consider storage options for water – there are many kinds of containers that can keep your water supply safe and free from contaminants.
And hey, think about purification methods too! Water filters, iodine tablets, and even a good old-fashioned boil could be necessary if local sources are questionable. I’ve used filters during hikes, and they’ve saved me a few times. Just don’t be like me and forget to check the replacement filters!
Emergency Power Supplies
Choosing the Right Power Options
With all the tech we have today, keeping the lights on during a disaster is super important. I always recommend investing in a portable power bank; it’s a lifesaver! It’s no fun when your phone dies while trying to get updates or making emergency calls.
Batteries play a vital role here too. I make sure to stock up on various sizes because you never know what might be in need of a change. I hate being caught off guard by a flashlight with dead batteries. C’mon, no one wants to stumble around in the dark!
If you’re feeling adventurous, consider solar-powered gadgets. I’ve been using a solar charger for my devices, and it’s great. Not only does it help the planet, but it also means less reliance on conventional power sources – which is key when emergencies hit!
FAQ
1. What items should I include in my emergency kit?
Your emergency kit should include essentials like non-perishable food, water, first aid supplies, batteries, and a flashlight. Personalize it by considering your family’s specific needs.
2. How often should I update my emergency kit?
It’s a good idea to review and update your emergency kit at least once a year. Check expiration dates on food and medications, and refresh items that have been used.
3. How do I create a communication plan?
Gather your family to discuss who will contact whom during an emergency. Set up a group chat, specify meeting points, and practice emergency procedures to ensure everyone is on the same page.
4. What is the best way to store water?
Store water in food-grade containers, avoiding anything that previously contained chemicals. A general rule is to have at least one gallon of water per person per day, along with extra for pets.
5. Are there eco-friendly power options for emergencies?
Yes, consider solar-powered chargers and equipment that minimize dependence on traditional power. They are great for sustainability and can provide energy during outages.
by Preparation Call Editorial Team | Jul 6, 2025 | Preparedness
Assessing Your Needs
Understanding Your Household
Before diving into food storage, I always like to take a good look at my household dynamics. How many people are eating here? What are their favorite meals? Are there any dietary restrictions? Knowing this helps ensure that I’m stocking up on food that we’ll actually enjoy. Trust me, you don’t want to be in a situation where you have six cans of lima beans and nobody wants to eat them!
It’s important to survey the tastes and preferences of everyone in your household. Ask questions, have a family meeting, and get everyone on board with the ideas you’re cooking up. It saves so much time and heartache when the food you’ve stored gets gobbled up instead of tossed.
Also, consider potential emergencies. Do you live in an area prone to natural disasters? If so, you might want to build a more robust plan. Understanding your needs upfront sets a solid foundation for everything you’re about to do in this process.
Calculating Your Food Requirements
Once I’ve assessed my household, the next step is figuring out just how much food I need. Typically, I calculate based on three meals a day for three months. Sure, it sounds slightly overwhelming, but we can break it down! A simple spreadsheet can help track what you have and what you need.
A good rule of thumb is to aim for about 2,000 calories a day per adult, but this can vary based on lifestyle and health requirements. I also take into account snacks for those late-night cravings! I love keeping some cookies or chips handy because, let’s be real, they’re too hard to resist.
At this stage, I jot down categories of food: proteins, grains, fruits, vegetables, and dairy. From there, I estimate how many servings of each category I’ll need. For example, if we need 120 servings of grains over three months, I can start calculating how many bags of rice, pasta, or oats I’ll have to stock up on.
Watching for Dietary Restrictions
As I’ve mentioned, it’s critical to keep an eye on dietary restrictions—if you have them! If a family member is gluten-free or vegan, try to include substitutes in your food storage plan. Luckily, there are many options available today, but that was not always the case.
I like to compartmentalize my shopping list to make sure I’m accounting for everyone’s needs. If you’ve got a picky eater, plant-based options can sometimes save the day while still being appealing to others in the family.
Ensure you have a variety of foods that are accessible for everyone. Not only does it make mealtimes easier, but it encourages a sense of inclusivity when everyone is stocked with their favorites!
Choosing the Right Foods
Long-lasting Items
When I venture into selecting foods for my storage, I focus on shelf-stable items. Rice, beans, canned goods, and pasta are staples that I can rely on. I like to purchase food in bulk for savings, but you can also look for sales or use coupons to make it more budget-friendly.
Ensure that you check expiration dates. I know it seems tedious, but no one likes to discover that they only have month-old snacks stashed away in their pantry. A rolling rotation system usually works wonders; I try to use the oldest items first, so nothing goes to waste.
Consider high-nutrition items too. Foods like peanut butter or powdered milk can add substantial energy boosts while sitting on the shelf. The more varied the nutrition, the better equipped you’ll be for any occasion!
Incorporating Variety
If you’re anything like me, variety is key. The last thing I want is a food storage plan that feels like a boring diet. I love mixing things up with flavored rice, different kinds of pasta sauces, and seasonings. This keeps me excited about cooking and trying new recipes!
Incorporating various cuisines can also make meal planning way more fun. I use spices and sauces to transform basic ingredients into worldwide meals, making it easy even when I’m pulling from long-term storage.
Plus, variety helps prevent burnout. If you’ve stored the same bland ingredients, mealtime can quickly feel stale, and nobody wants that! So think creatively and stock up on spices, herbs, and versatile bases that will keep your taste buds tantalized.
Add in Preservatives
Long-term food storage often requires some preservatives. Items like vinegar, sugar, and salt can help enhance the shelf-life of foods, especially if you’re considering canning or pickling. I’ve recently gotten into experimenting with preserving vegetables—what a game-changer!
Again, I recommend double-checking what you’re buying and how to store it properly. For example, sugar can effectively prevent spoilage in certain fruits, whereas salt can help with proteins.
Always follow guidelines or recipes when it comes to preserving food, as it’s essential for safety. It’s a bit of a science project but totally worth the effort when you can crack open a jar of homemade pickles later on!
Storing Your Foods Properly
Choosing the Right Containers
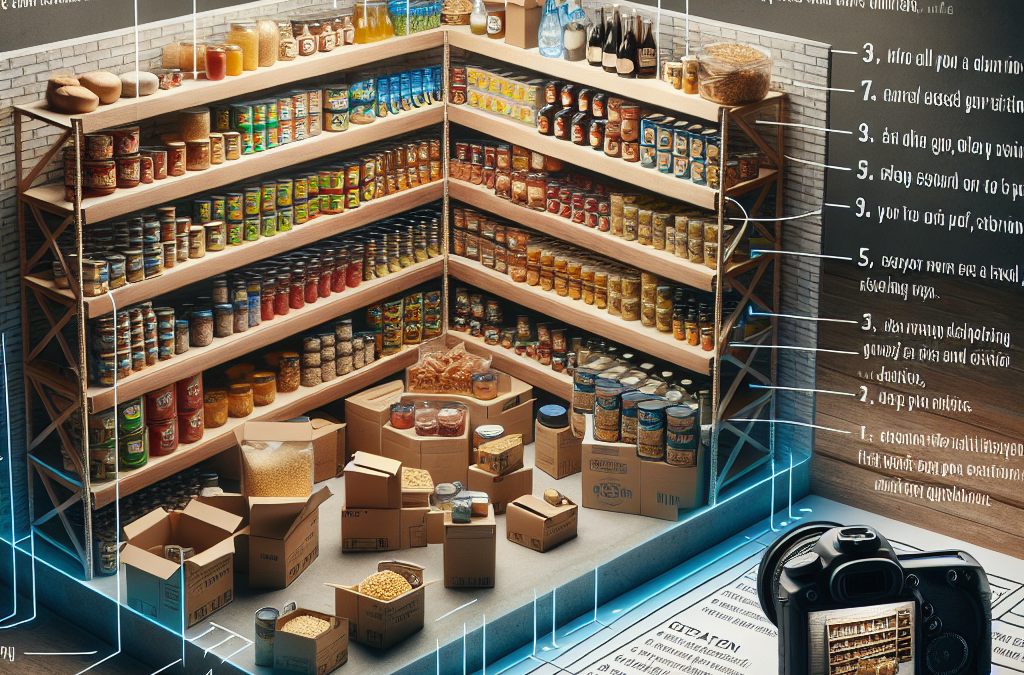
Oh boy, this is where the fun begins! I love finding the perfect containers to organize my food storage. Glass jars, sturdy plastic bins, and vacuum-sealed bags are my go-tos. They keep foods safe from pests and moisture, making it easier to maintain quality over the months.
Make sure all containers are clearly labeled with the contents and expiration dates. I create a system where I can easily check what I have on hand instead of digging through a mountain of mismatched containers. Clarity is everything!
Also, consider your space. I optimize storage by stacking where possible and using underutilized areas like under beds or in storage closets. Just because it’s food storage doesn’t mean it has to look cluttered!
Optimal Temperature and Environment
Storing food correctly really comes down to temperature and environment. I always ensure my storage area is cool, dark, and dry. A basement or a pantry away from direct sunlight is perfect. Too much heat can spoil your goods before their time.
It’s also good to monitor temperature swings. If you live in an area with extreme seasonal changes, consider investing in a thermometer and humidity gauge. You can avoid unnecessary mishaps caused by environmental factors.
Take stock of how foods are performing over time. It might be worth your while to check in on them every month, reshuffling and rearranging if needed to prolong their life better.
Regular Maintenance
One thing I can’t stress enough is regular maintenance. Don’t think about your food storage as a ‘set it and forget it’ kind of deal. At least once a month, I like to do a quick inventory check to ensure everything is good to go and nothing is nearing its expiration date.
Also, do a taste test every once in a while. Using some of your stored food in regular meals can help prevent surprises when you’re in a pinch. Plus, this way, it’s integrated into your lifestyle rather than just sitting in storage.
In summary, keep learning! There are always new methods and ideas out there about food preservation. Keeping yourself educated is key to a sustainable food storage plan!
Creating a Meal Plan
Working with What You Have
Now, this is where the magic happens! Every month, I sit down to create a meal plan using the food I have in storage. I find it’s a great way to ensure variety while minimizing trips to the grocery store. Plus, it helps keep waste down.
I usually do a few different lists—one for breakfast, lunch, dinner, and even snacks. It’s awesome knowing that I can whip something up without having to run out for last-minute ingredients.
At times, I like to introduce themed nights—Taco Tuesday, Pasta Night, or Stir-fry Saturday! It gives a bit of structure to my meal planning while making it fun every week!
Incorporating Fresh Items
While I’m all about long-term food storage, I don’t forget about the importance of fresh ingredients! I love to incorporate fresh vegetables and fruits into my meals when I can. This could be buying local produce or growing a little garden of my own.
Knowing which fresh ingredients pair well with your staples can make meals pop. Think about complementing dried beans with some fresh herbs or combining grains with seasonal veggies to elevate your dishes.
It’s important to be resourceful! I also recommend managing what fresh foods you have and how quickly they might spoil. Make sure they fit into your meal plans while they’re fresh and vibrant!
Planning for Variety
To wrap up, I always emphasize variety in my meal plans. Mix things up with cuisines, flavors, and ingredients. It helps not to get into a food rut where you’re dreading the same old meals.
One trick I picked up is to create a “swap” for meals. Like, if we’re having chili one week, I’ll consider a chili-like recipe with different ingredients the next. It creates excitement and keeps things interesting.
Creative planning is key! I get the family involved to choose themes or suggest meals, which makes everyone feel included and eager to try new things. It’s a great team effort!
Reviewing and Adjusting Your Plan
Checking Inventory Regularly
The only way to improve is to review, right? I make a habit of checking my inventory during my monthly meal planning. If you notice some things are consistently not getting used, this is your cue to adjust. Let’s face it, we can’t store unpopular items indefinitely.
I also create a little chart on my fridge that helps me track what’s being eaten and what’s just sitting there. Every month is an opportunity for an adjustment, and I love it!
Keeping an open mind when reviewing your inventory will allow improvements and keeps things fresher in your storage and plans. It’s about finding what works best for you and your household.
Feedback from Family and Friends
Involving family and friends in discussions about meal plans and what they love keeps things collaborative and engaging. Sometimes I’ll sit down for a meal together and will ask what everyone thinks about a certain dish or how it could be tweaked.
In sharing feedback, I learned something interesting: I could introduce new flavors that nobody knew they’d like! Sometimes it’s about trial and error, and I say bring it on!
Receiving insights allows you to adapt your food storage plan and make it more appealing to everyone involved. This inclusion fosters a sense of community and satisfaction around meals.
Staying Informed on New Options
Food trends change, and so do our tastes! I make it a point to stay updated on new food options or preservation techniques emerging in the market. It’s exciting to discover what’s out there!
By reviewing new recipes or even learning about alternative foods, I not only enhance my storage plan, but I expand my cooking repertoire. Who knew that I could incorporate so many textures and flavors from varying regions?
Learning is a journey, and keeping up with the latest trends gives food storage a fresh vibe while ensuring I’m continuously improving my practices.
FAQ
1. How long can food be stored?
Food can last for several months to years, depending on the type of food and storage conditions. Properly stored and monitored, many items can be eaten safely even after long periods.
2. What items are best for long-term food storage?
Staples like rice, beans, canned goods, pasta, and freeze-dried foods tend to have longer shelf lives and are great for storage. These foods provide essential nutrients and are versatile for meal planning.
3. How can I keep track of inventory?
Creating an inventory list on your computer or even a simple chart on your fridge can help you stay aware of what you have. Regular checks during meal planning can also help manage what’s left.
4. Can I store fresh produce long-term?
While fresh produce generally has a shorter shelf life, learning preservation techniques like canning, freezing, or dehydrating can help extend their usability in your food storage plan!
5. How do I avoid food waste in storage?
By carefully planning meals based on what you have and practicing regular inventory checks, you can significantly reduce waste. Engage your family in meal planning to ensure everyone’s tastes are considered!

by Preparation Call Editorial Team | Jul 6, 2025 | Preparedness
1. Emergency Supplies: More Than Just Water and Canned Food
Understanding Your Needs
When I first started prepping for hurricanes, I thought buying a few cases of bottled water and canned beans was enough. I quickly learned that emergency supplies go beyond the basics. First off, consider the specific needs of your family. Do you have young kids, elderly family members, or pets? Their needs may require additional supplies.
For example, I realized that I hadn’t thought about my dog’s food and medication. Pet-friendly preparations are vital because a hurricane can last several days. Make sure to stock up on food and other essentials specific to your pets to avoid scrambling last minute.
Think about adding personal items like toiletries, hygiene supplies, and any specific medications that your family members take regularly to your emergency stash. Keeping a well-rounded supply kit is key, trust me.
Non-Food Items That Matter
Next, let’s expand our minds beyond food and water. Items like flashlights, batteries, first aid kits, and blankets should also be high on your list. I once found myself fumbling around in the dark because I didn’t have enough working flashlights. You’d be surprised how unsettling it feels to be without light during a storm!
Charging devices is another big deal. Ensure you’ve got portable chargers and charging cables to keep your phones and other devices powered. In our tech-heavy society, communication can be a life-saver, especially in emergencies.
And don’t forget cash! ATMs and card machines might not work during a power outage, so having some cash on hand can really save your neck. It’s a little thing that makes a big difference!
Regularly Update Your Kit
Just like that old can of beans you find in the back of your pantry, your emergency supplies need refreshing too. I’ve learned the hard way that items in my kit can expire or degrade over time. Checking your supplies at least twice a year helps ensure you’re not left high and dry.
Make it a family activity! Update your kit together, and even encourage kids to get involved. They’ll enjoy picking out which snacks to include or getting to pack their favorite toy. This can help them feel less anxious about the impending storm, too.
Trust me when I say that your emergency supplies can become a lifesaver when preparation meets planning. So keep it stocked, relevant, and ready for action.
2. A Family Communication Plan is Essential
Setting Clear Roles
The chaos of a hurricane can turn calm family members into frantic kids in no time. Having a clear communication plan helps keep everyone in the loop about what to do. Each family member should know their role, whether it’s ensuring pets are secure or fetching supplies.
When I made my emergency plan, I realized I needed to detail who was in charge of different tasks. Assigning roles helps eliminate the “who’s doing what” confusion that can lead to chaos during stressful times.
If you’ve got older kids, let them help out! This could be a great opportunity to teach them about the importance of emergency preparedness by giving them a little responsibility.
Deciding on Meeting Points
Where’s the first place you’ll meet up if you get separated? Have those conversations before the storm hits. I’ve heard too many stories of families trying to reconnect in the maelstrom of a hurricane without any clear agreement. It just leads to confusion and panic!
It’s helpful to choose a spot that’s recognizable and easy to get to, like a neighbor’s house or even a local landmark. Write this meeting point down and share it with each family member before the chaos hits.
Even if you think, “Oh, we’ll just stick together!” trust me – when the wind is howling, and everything’s flying around, those plans can change fast. Better to have a backup plan!
Keep in Touch and Reassess
Lastly, how are you gonna communicate? Consider whether you’ll be able to use your cell phone or if you’ll need to resort to alternative methods. Social media platforms or messaging apps can be lifesavers if voice calls aren’t an option. I’ve started using group messaging apps to keep everyone updated during stressful situations.
I’d also suggest downloading emergency apps that will keep you informed. The last thing anyone wants is to be cut off from crucial safety information, especially when hurricanes change course or intensify without much warning.
Planning ahead with communication tactics in mind can help everyone feel a little more secure no matter what’s blowing around outside.
3. Don’t Forget Your Insurance Policies
Review Coverage Regularly
Insurance isn’t the most exciting topic, but trust me – it’s crucial when a hurricane is on the way. Take the time to review your homeowner’s or renter’s insurance coverage. I learned that the hard way; having the right coverage can make all the difference when recovering from damage.
Don’t just glance at it once and put it away! I recommend sitting down once a year to really dive into your policy. Are you covered for flooding? Wind damage? If not, you might want to consider additional coverage, especially if you live in zones prone to hurricanes.
After all, you want peace of mind before the storm, not a headache afterward, right?
Get Everything Documented
Take a bit of time to document your possessions through photos or videos. I always keep a digital copy of all my important documents in the cloud. Being able to verify what was lost prevents headaches during claims later on.
I also have crucial documents saved on a USB drive that I keep in my emergency kit. Birth certificates, insurance papers, and home inventory lists are all things that can be lost amid the chaos if you’re not careful.
Know what you’re likely to need because clarity shines in stressful situations. This might save you a world of trouble in the long run.
Understand the Claims Process
It’s worth letting you in on a little secret: understanding the claims process is essential to make sure you get what you’re owed without getting lost in red tape. I took time to educate myself about how claims work in my area, so I wasn’t caught flat-footed when I needed help.
Reach out to your insurance company and become familiar with their procedures. Knowing what to expect can ease a lot of stress when you’re already dealing with the aftermath of a storm.
Plus, make sure to ask questions regarding anything you’re unsure about. Being proactive helps ensure you’re more prepared for whatever comes your way.
4. Create a Home Safety Plan
Reinforcing Your Home
Ever since I’ve moved to a hurricane-prone area, I became a fan of reinforcing my home against storms. Investing in reinforced doors and windows can be a game-changer. I used to overlook these things until I found out the hard way how fragile our homes can be!
Consider boarding up windows ahead of time or investing in storm shutters. This isn’t just for looks – it’s about protecting your home, your family, and ultimately your peace of mind.
Also, check your roof! Make sure there aren’t any leaks or loose shingles because a strong storm can wreak havoc. Taking these steps goes a long way in creating a safe space during a hurricane.
Know Your Evacuation Routes
Every family should know where to go if they need to evacuate. I used to think that “we’ll just go with the flow,” but having a solid plan is way better. Check local maps and identify the safest routes. Making a plan in advance relieves the stress of running against time during an evacuation.
It’s always a good idea to have alternate routes mapped out too. Sometimes even minor roads can become impassable, and having backup plans will keep you from being stuck.
Plus, I try to have a “go-bag” ready for evacuation. This should include essentials, supplies for the kids, and some snacks – because who wants to handle hangry kids during an emergency? Seriously, it helps!
Stay Informed and Alert
Staying updated during the storm action is crucial. I recommend signing up for local weather alerts and checking your region’s website for emergency updates. The situation can change rapidly, so being in the know helps tremendously.
Also, have a battery-operated radio, just in case your internet and cell service goes down. Hearing the news from someone can be comforting amidst the chaos.
Keep your family safe by creating a setup to gather the latest updates. It doesn’t hurt to have an emergency plan that focuses on information, as it can become vital to ensuring safety!
5. After the Storm: Don’t Neglect Recovery and Mental Health
Initial Safety Checks
After the storm passes, give your home that safety check. Start by assessing damage and checking for hazards like downed power lines or gas leaks. I remember my first experience post-storm; I was eager to power things back on but discovered that was a bad idea in some cases.
Ensure that emergency services have cleared your area before determining if it’s safe to return home. Waiting it out a bit for safety checks will save you tons of heartache later on.
Always prioritize safety, even after the worst has passed. It’s easy to get caught up in recovery activities, but keeping your family safe during the transition is key.
Take Care of Mental Health
Being hit by a hurricane can be overwhelming, emotionally and physically. Your family can experience varying degrees of trauma from the experience, so managing mental health is equally important. I suggest talking openly about feelings and fears with your loved ones post-storm.
Consider reaching out for professional help if needed. Familiar faces in the community can provide support, and local organizations often lend a helping hand during tough times. Remember, it’s okay to ask for help!
Additionally, building a routine once things calm down is critical. Stability can greatly benefit mental health, providing a sense of normalcy amid chaos.
Start the Recovery Process
Once you’ve assessed the damage, prioritize repairs and cleanup. I cannot emphasize enough how important it is to keep everything organized! I’ve tackled too many projects simultaneously and found myself overwhelmed. Break tasks down into smaller, manageable parts.
Connect with local assistance programs for those needing help and support. Sometimes, communities rally so beautifully during these times, forming bonds that last far beyond the storm.
Recovery isn’t just about fixing homes; it’s about restoring peace of mind as well. Take one step at a time, and you’ll navigate this journey successfully.
FAQs
1. What should I include in my emergency supply kit?
Your emergency kit should have water, non-perishable food, first aid supplies, flashlights, batteries, personal hygiene items, essential medication, and cash.
2. How can I stay informed during a hurricane?
Sign up for local weather alerts, and keep a battery-operated radio and apps on your phone for timely updates from local agencies.
3. Why is it important to have a family communication plan?
A communication plan ensures everyone knows their roles and where to meet if you get separated during the storm.
4. What should I do after a hurricane passes?
Conduct safety checks for hazards, take care of your mental health, and start the recovery process, making sure to seek help if needed.
5. How often should I review my insurance policy?
It’s wise to review your insurance policy at least once a year to ensure adequate coverage for hurricane-related damages.