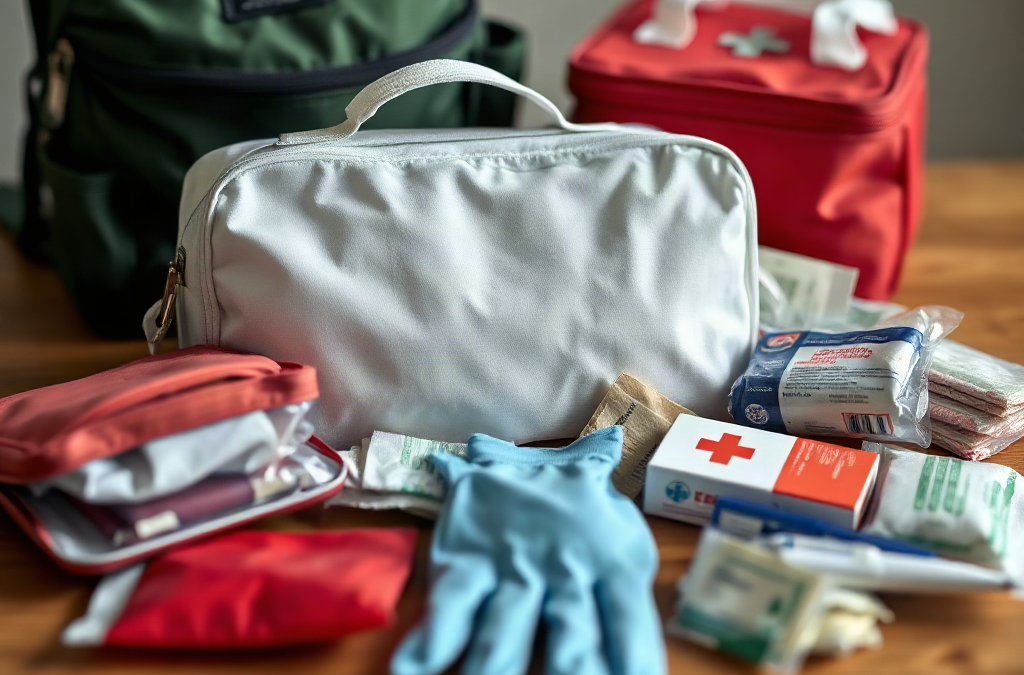
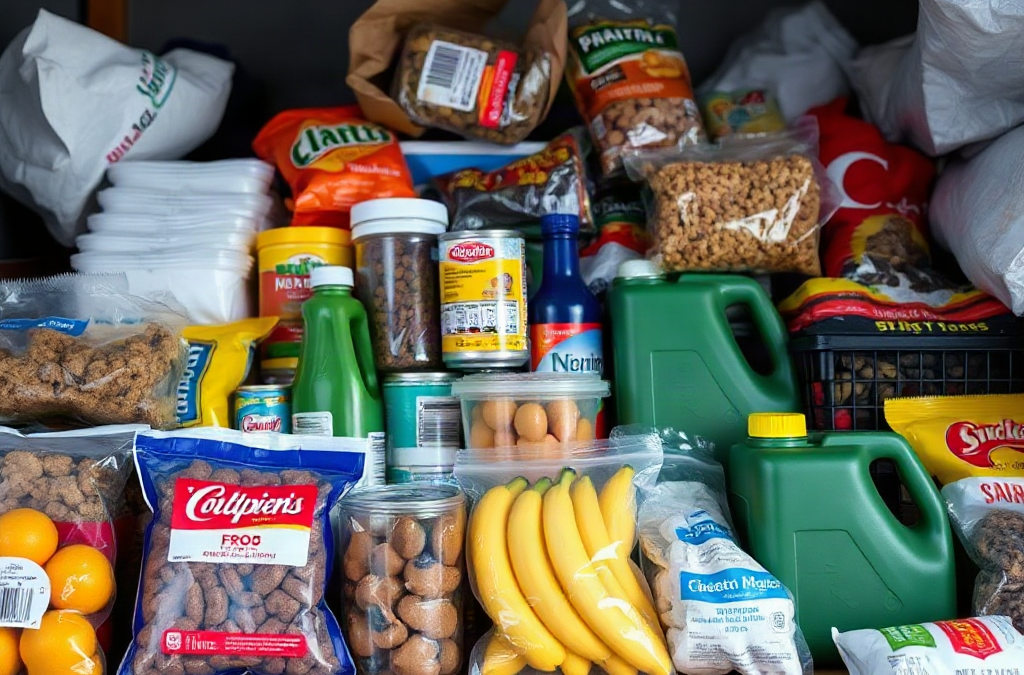
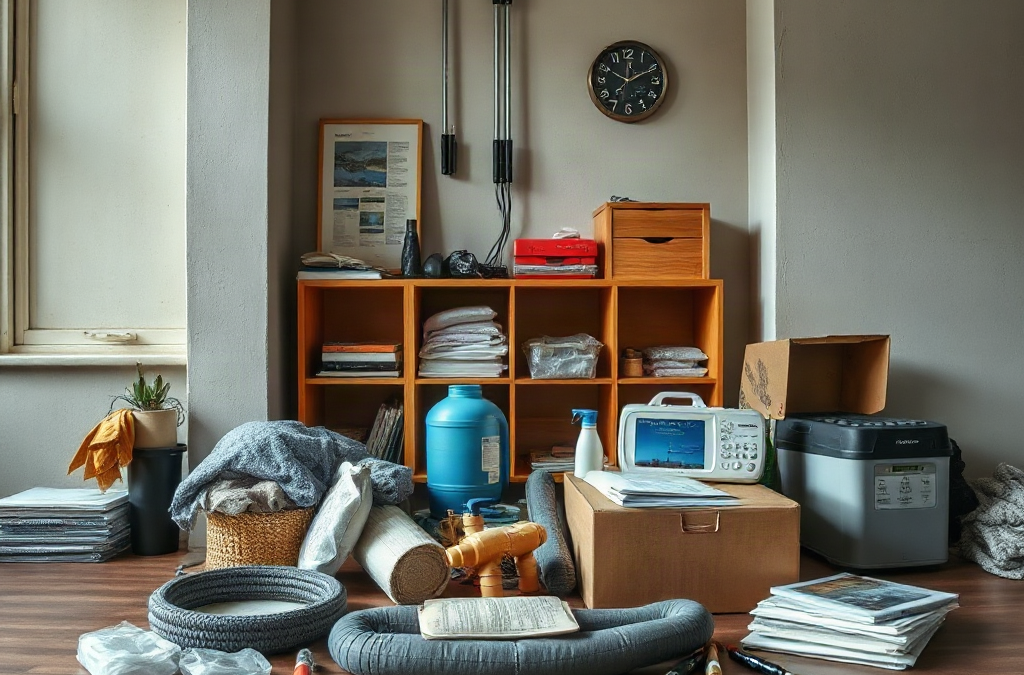
A first aid kit is ready for use when its contents can be identified, reached, and used safely under pressure. A large container filled with miscellaneous products may look well supplied but still fail if sterile dressings are buried, gloves have degraded, or nobody knows which items are intended for serious bleeding. Readiness is an operational condition, not a shopping-list total.
Build the kit around three needs: protecting the responder, controlling immediate threats, and supporting care until professional help arrives. Nitrile gloves, hand sanitizer, barrier protection for rescue breathing when appropriate, gauze, adhesive dressings, medical tape, bandages, antiseptic supplies, scissors, tweezers, and a digital thermometer cover common minor injuries. Trauma-focused additions may include pressure dressings, wound-packing gauze, a commercial tourniquet, and a marker for recording key information. A flashlight, spare batteries, emergency blanket, and written emergency contacts can matter when power or visibility is poor.
The best contents depend on location and users. A home kit for children may need child-appropriate medication guidance and burn supplies, while a hiking kit must stay compact and tolerate moisture. A workplace kit may need several pairs of gloves and supplies for multiple people. Avoid assuming that a larger kit is automatically safer; excess packaging can slow access and encourage storage in a place nobody checks.
A common failure is mixing first aid equipment with unrelated household items. If pain relievers, sewing materials, expired creams, and loose batteries fill the same pouch, a person responding to a cut may waste time searching. Keep the core kit limited to recognizable supplies, label unusual items, and place a short emergency instruction card on top. The related first aid equipment readiness checklist should be treated as a living inventory rather than a one-time purchase.
How to Organize Supplies for Fast Access
Organization should follow the order in which a responder is likely to act. Put gloves and a face covering in an exterior pocket or clearly marked top compartment, followed by bleeding-control materials and large dressings. Minor wound care, medications, cold packs, and comfort items can occupy separate sections. This arrangement reduces the need to empty the entire container while someone is bleeding.
Use transparent pouches or strong labels such as “Bleeding,” “Burns,” “Wounds,” and “Medication.” Color coding can help, but labels should remain readable in low light and should not depend on a phone or electronic inventory. Keep scissors, tape, and a flashlight in fixed locations. If several people share the kit, every regular user should be able to return items to the same compartment.
Consider the difference between a grab-and-go kit and a household supply cabinet. A portable kit should contain the minimum equipment needed to leave quickly: gloves, dressings, tape, trauma supplies, a light, identification information, and essential personal medications where appropriate. A larger reserve can hold replacement dressings, extra water, sanitation supplies, and additional protective equipment. Combining both roles in one oversized box creates a tradeoff: it increases stock but decreases portability and search speed.
Test the layout with a simple timed rehearsal. Ask someone unfamiliar with the kit to locate gloves, gauze, a pressure dressing, and the flashlight without coaching. If that person opens every pouch or cannot distinguish sterile from non-sterile material, the system needs revision. A frequent misconception is that memorizing the contents is enough; visible placement and consistent labeling are more dependable when stress narrows attention.
Top or outer pocket: gloves, barrier protection, emergency contacts, and a light.
Immediate-care compartment: gauze, pressure dressings, tape, bandages, and burn coverings.
Support compartment: thermometer, cold pack, tweezers, scissors, blanket, and spare batteries.
Separate reserve: replacement stock and items that are not needed for the first response.
Inspection, Replacement, and Storage Checks
Readiness deteriorates through expiration, heat, moisture, contamination, and ordinary use. Inspect the kit on a recurring schedule and after every incident. Check that sterile wrappers are sealed, adhesive products still stick, elastic materials have not become brittle, and liquids have not leaked. Batteries should be tested in the device they power rather than assumed usable because they are present.
Storage conditions affect equipment differently. Adhesives and medications may degrade in hot vehicles; fabric dressings can become damp in poorly sealed containers; plastic packaging can crack when repeatedly crushed. A cool, dry, clearly marked location near an exit or common living area is usually more useful than a hidden “secure” location that nobody can access quickly. Keep supplies away from children unless the container is secured in a way responsible adults can still open promptly.
Medication storage requires extra caution. Do not transfer tablets into unmarked bags, and do not rely on a general medicine supply for someone else’s prescription. Retain original labels, follow package directions, and consider allergies, age, pregnancy, and existing conditions. A first aid kit should support basic care, not encourage improvised prescribing. If a medication has changed color, texture, smell, or packaging condition, replace it according to the manufacturer’s guidance.
Use an inventory card with the date checked, items used, items nearing expiration, and the person responsible for restocking. Rotate consumables before they expire rather than waiting for a crisis. The most common inspection mistake is counting products without opening the case. A kit can contain ten rolls of gauze and still be functionally unavailable if they are wet, unsealed, or packed beneath heavy equipment. For more detailed planning, compare the storage approach with your emergency supply setup and identify which items must remain portable.
Matching Equipment to Real Emergency Scenarios
Equipment choices should reflect the injuries and conditions most plausible in the setting. A kitchen requires burn coverings, clean dressings, gloves, and supplies for cuts. A garage or workshop may justify stronger eye-protection support, larger dressings, and bleeding-control equipment. Outdoor travel adds weather exposure, blisters, insect-related concerns, and the need to carry the kit without damaging it.
For severe bleeding, the priority is immediate pressure and rapid contact with emergency services. Gloves protect the responder, while gauze or a pressure dressing can support sustained compression. A commercial tourniquet may be appropriate for life-threatening limb bleeding when the user has suitable training, but it should not be treated as a universal substitute for direct pressure or professional guidance. Supplies should be stored together so the responder does not lose time deciding which compartment contains trauma materials.
For burns, clean cool running water is often more useful initially than a crowded collection of creams. Dressings should not be applied in a way that traps heat or adheres to damaged tissue, and severe burns require urgent medical assessment. For suspected fractures or spinal injury, the kit cannot replace evaluation; improvised movement may worsen harm. A flashlight, blanket, and phone power bank may be more useful than another small adhesive strip when an incident occurs outdoors after dark.
Scenario testing exposes weak assumptions. Imagine a cyclist with road rash, a child with a deep cut, or an adult who becomes faint after an injury. Ask what the first responder needs within thirty seconds, what can wait, and which symptom requires escalation. A kit designed only for paper cuts may be inadequate for a remote location, while a trauma-heavy kit in a supervised office may be unnecessarily complex. Choose equipment by exposure, distance from medical care, number of users, and responder skill.
Using a Kit Without Delaying Professional Care
First aid equipment supports immediate actions while help is being arranged; it does not diagnose serious illness or replace emergency treatment. Call local emergency services for uncontrolled bleeding, breathing difficulty, loss of consciousness, chest pain, serious allergic symptoms, major burns, suspected stroke, or severe injury. The person calling can often remain on speaker while another responder retrieves the kit.
Use protective barriers first when blood or other body fluids are present. Apply only procedures you understand, follow instructions supplied with unfamiliar equipment, and monitor the injured person rather than focusing exclusively on the wound. Note the time of major actions, such as applying a tourniquet or giving an authorized medication, so that information can be passed accurately to responders. Do not remove an embedded object simply because the kit contains tweezers.
Training changes the value of equipment. A pressure dressing is more useful when the user has practiced opening the package and applying firm pressure; a tourniquet can create confusion when it is bought but never handled. Consider a recognized first aid or CPR course for household members, caregivers, and workplace responders. Training should include when to stop self-care and seek urgent assistance, because overconfidence can be more dangerous than a modestly stocked kit.
After an incident, isolate contaminated materials, replace used supplies, clean reusable equipment according to its instructions, and document what happened while details are fresh. If symptoms worsen, bleeding resumes, the person becomes confused, or normal breathing is absent, escalate immediately. A reliable kit is therefore part of a larger response: clear communication, protective behavior, appropriate first aid, and timely medical care work together.
Frequently Asked Questions
What should be checked first in an emergency kit?
Check gloves, bleeding-control supplies, dressings, the flashlight, and any item needed for the immediate injury. Confirm that packaging is sealed and equipment is reachable.
How often should first aid equipment be inspected?
Inspect it on a recurring household or workplace schedule, after every use, and after exposure to heat, moisture, flooding, or rough transport. Review expiration dates during each inspection.
Is a larger first aid kit always better?
No. A larger reserve can provide useful replacements, but an overloaded kit may be difficult to carry or search. Keep immediate-use supplies compact and store reserve stock separately.
Should a first aid kit include prescription medication?
Keep personal prescriptions in their original labeled containers and follow the prescribing instructions. Do not share prescription medication or place unidentified tablets in a communal kit.
When should first aid give way to emergency medical care?
Seek urgent help for uncontrolled bleeding, breathing problems, unconsciousness, severe burns, chest pain, serious allergic symptoms, suspected stroke, or any rapidly worsening condition.
Further Reading
Authoritative Sources
American Red Cross First Aid redcross.org
Provides recognized first aid education and guidance on responding to common injuries while arranging professional care
Build a Kit ready.gov
Explains how emergency supply kits can be assembled, stored, and adapted for household needs
Medical Services and First Aid osha.gov
Offers workplace-oriented information about first aid supplies, access, and emergency response arrangements
Drug Expiration Dates fda.gov
Clarifies why expiration dates and storage conditions matter when medications are kept in an emergency kit
Conclusion
Reliable first aid equipment is defined by access, condition, organization, and fit for the setting. Put protective gear and bleeding-control supplies where they can be reached immediately, separate them from minor-injury items, and test the layout with someone who did not pack the kit. Inspect seals, batteries, medications, adhesives, and moisture damage on a recurring schedule, then restock after every use. Match the kit to likely hazards, travel distance, weather, and the skill level of the people expected to use it. Pair supplies with basic first aid training and a clear decision to call emergency services when symptoms are severe or worsening. A smaller, maintained kit that people can use confidently is more valuable than a larger box that is inaccessible or outdated.
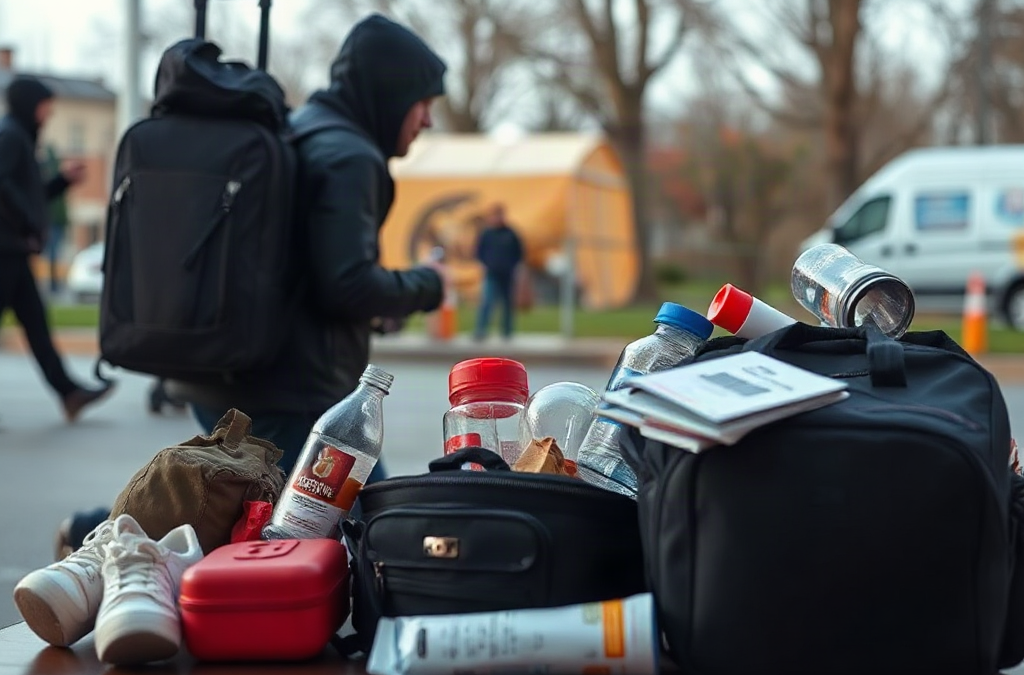
Rapid departure changes packing from a shopping exercise into a time-and-access problem. Smoke, flooding, a damaged road, a utility failure, or an official evacuation notice may leave little opportunity to search drawers, charge devices, or compare options. A useful bag therefore protects the first few hours away from home rather than attempting to recreate an entire household.
Use a priority order based on consequences. Items that protect life, preserve access to care, or enable communication belong at the top. Documents, medications, water, a phone charger, keys, glasses, and payment methods generally deserve space before entertainment, extra cookware, or multiple outfit changes. A bag that is technically complete but too heavy to carry can fail at the doorway, so weight is part of the safety calculation.
Identity and access: identification, insurance details, emergency contacts, keys, cash, and payment cards.
Communication and power: charged phone, charging cable, power bank, flashlight, and a small radio if appropriate.
Water, food, and protection: bottled water, ready-to-eat food, weather-appropriate layers, sturdy shoes, and hygiene supplies.
The most common mistake is treating every item as equally urgent. If a household has only ten minutes, someone should be able to grab the bag, take essential medication, secure pets, and leave without debating what to remove. Use An emergency packing list for rapid departure as a written reference, but tailor the order to actual medical, mobility, and transportation needs.
Build the First-Departure Bag
The core bag should support movement, communication, and basic self-care for the initial period away from home. A durable backpack or soft-sided carry bag is usually easier to manage than a rigid container because it leaves both hands available and fits more readily in a vehicle. Choose a size that a smaller or older household member can lift; a large bag packed to its maximum capacity often becomes a burden rather than an advantage.
Place frequently needed items in exterior or top compartments. Medication, identification, keys, a flashlight, and a phone cable should not be buried under clothing. Put paper records and electronics in resealable waterproof pouches, but do not assume a plastic bag makes equipment safe in every flood or prolonged exposure. Keep a duplicate of important contacts on paper because a dead phone, damaged screen, or weak signal can remove access to digital information.
A compact starting load can include:
Identification copies, insurance information, emergency contacts, and a small amount of cash.
At least one refill or supply of regularly used medication when medically and legally practical, plus a medication list showing names, doses, and prescribers.
Water, shelf-stable snacks, a manual can opener if canned food is included, and a small reusable cup or bottle.
Phone charging cable, power bank, flashlight, spare batteries where compatible, and a whistle.
Basic hygiene items, hand sanitizer, tissues, menstrual supplies, and necessary incontinence products.
Lightweight clothing layers, socks, sturdy footwear if the departure location makes changing shoes difficult, and a simple rain layer.
Food selection should reflect immediate practicality. Choose items that can be eaten without refrigeration, heating, or complicated preparation, such as packaged crackers, nut or seed products where safe, dried fruit, or ready-to-eat bars. Avoid adding foods that melt, leak, require a utensil, or conflict with allergies. Water is heavy, so households may divide bottles among bags or keep additional water in the vehicle rather than making one person carry the entire supply.
Another weak assumption is that a first-departure bag must contain every emergency tool. A compact multitool, duct tape, or a large cooking kit may be useful in a longer-term supply cache, but they should not displace medication, identification, or footwear in a bag designed for immediate movement. The better approach is to maintain a light departure bag and a separate household reserve.
Adapt Supplies for People, Pets, and Weather
A general list becomes reliable only after it reflects the people who must use it. Children, older adults, people with disabilities, and anyone managing a chronic condition may need specific equipment, extra time, or a different carrying arrangement. Write down the item and the reason it matters rather than relying on memory. For example, “spare glasses” is more actionable than “vision supplies,” especially when someone else may be packing.
Medication deserves special handling. Keep an up-to-date list with drug names, strengths, dosing instructions, allergies, and relevant clinician or pharmacy contact information. Do not place heat-sensitive medication in a hot vehicle for extended periods, and follow the product’s storage instructions. If a supply is difficult to replace, ask a pharmacist or clinician about a lawful, medically appropriate backup approach rather than improvising during a crisis.
Mobility and sensory needs also change the packing plan. A wheelchair user may need a charging cable, cushion, transfer equipment, or repair information. A person who relies on hearing aids may need batteries or a charging case. Someone with a service animal may require food, medication, identification, waste bags, and a leash or harness. Comfort items for children can reduce distress and make transit more manageable, but they should be compact and attached to the child’s or caregiver’s bag so they are not left behind.
Pets need a separate, clearly marked supply pouch or container. Include food, water, a bowl, leash, carrier access, medications, waste supplies, and a recent photograph or identifying information. Never assume an emergency shelter or transportation service will accept an animal without conditions; check local arrangements when possible. The same principle applies to livestock or outdoor animals, whose needs may require a separate relocation plan rather than a backpack.
Weather determines which tradeoffs are sensible. Cold conditions increase the value of insulation, dry socks, gloves, and head protection. Heat increases the need for water, shade, breathable clothing, and a plan to avoid leaving people or animals in parked vehicles. Flood conditions may make sandals unsafe and can damage paper records, while wildfire smoke may make eye protection or well-fitting respiratory protection relevant. These additions should be scenario-specific; carrying every possible item creates weight that slows departure.
Use An emergency packing list for rapid departure alongside a short household profile: medical needs, mobility limits, allergies, pets, likely transport, and seasonal hazards. That profile prevents a common failure—owning a generic kit that does not work for the actual people leaving.
Store, Test, and Improve the Kit
Storage determines whether a packed bag is usable. Keep it near a normal exit, not in a locked basement, inaccessible attic, or vehicle that may be blocked. Every household member should know its location, and at least one person should know how to retrieve medication, documents, and pet supplies if the primary packer is absent. A bright label can help visitors or caregivers identify the bag without opening every container.
Test the bag under realistic conditions. Lift it with one hand, walk it to the vehicle or meeting point, and check whether the contents shift, leak, or snag. Try locating the flashlight and medication in low light. Confirm that charging cables match current phones and that batteries have not corroded. A kit that looks organized on a shelf but takes several minutes to open is not ready for a rushed exit.
Review the contents on a schedule tied to real changes: medication refills, seasonal weather, school or work changes, new pets, a move, or a new mobility requirement. Replace expired food, damaged packaging, wet documents, and clothing that no longer fits. Recharge power banks after use and test flashlights rather than assuming a spare battery solved the problem.
Separate “leave now” items from “take if time allows” items. The first group should fit in one manageable bag and include health, identity, communication, water, and protection. The second group might include additional clothing, a laptop, sentimental items, extra food, or specialized tools. If both groups are mixed together, people often spend valuable minutes sorting through low-priority belongings.
Practice also reveals transportation conflicts. A bag that works for a car may be too large for a bus, while a family with no vehicle may need smaller individual packs and a folding carrier for supplies. Decide who carries which item, where people meet if separated, and which documents can be accessed digitally without relying on a single device. Those decisions make the checklist operational rather than merely comprehensive.
For a more detailed household setup, connect this checklist with An emergency packing list for rapid departure and keep a second supply cache for situations in which leaving is not required. The two purposes should not compete: rapid-departure gear favors low weight and immediate access, while a home reserve can hold bulkier food, water, tools, and sanitation supplies.
Frequently Asked Questions
How large should a rapid-departure bag be?
Use a bag that the person assigned to carry it can lift and walk with comfortably. A smaller, prioritized bag is usually more useful than an oversized pack that cannot be moved quickly.
What should be packed first?
Pack medication, identification, keys, phone power, water, communication tools, and weather protection before comfort items or bulky equipment.
Should emergency food require cooking?
Food for immediate departure should normally be ready to eat and stable without refrigeration or heating. Cooking equipment belongs in a separate longer-term supply cache unless the situation specifically requires it.
Where should the bag be stored?
Keep it near a normal exit in a dry, accessible location known to everyone who may need to leave. Avoid placing it where a locked door, debris, or a vehicle could make retrieval difficult.
How often should the contents be checked?
Review the bag whenever medications, household members, pets, seasons, or transportation arrangements change, and periodically inspect food, batteries, electronics, clothing, and documents.
Further Reading
Authoritative Sources
Build a Kit ready.gov
Provides federal guidance on assembling supplies for emergencies and adapting a kit to household needs
Survival Kit Supplies redcross.org
Offers practical supply categories and considerations for people, pets, and different emergency situations
Conclusion
A rapid-departure bag succeeds when it can be found, lifted, understood, and used without sorting. Put health information, medication, identification, keys, communication power, water, and weather protection ahead of bulky gear. Adjust the contents for mobility needs, children, pets, allergies, climate, and the transportation available to your household. Store the bag near an exit, divide responsibilities, and test the arrangement by walking it through an actual departure drill. Keep a separate reserve for supplies that support a longer disruption so the quick-exit bag remains light. Review it after any change in prescriptions, household membership, season, or travel pattern. The next useful step is to pack one bag today, weigh it, label it, and remove anything that delays access to the items most difficult to replace.
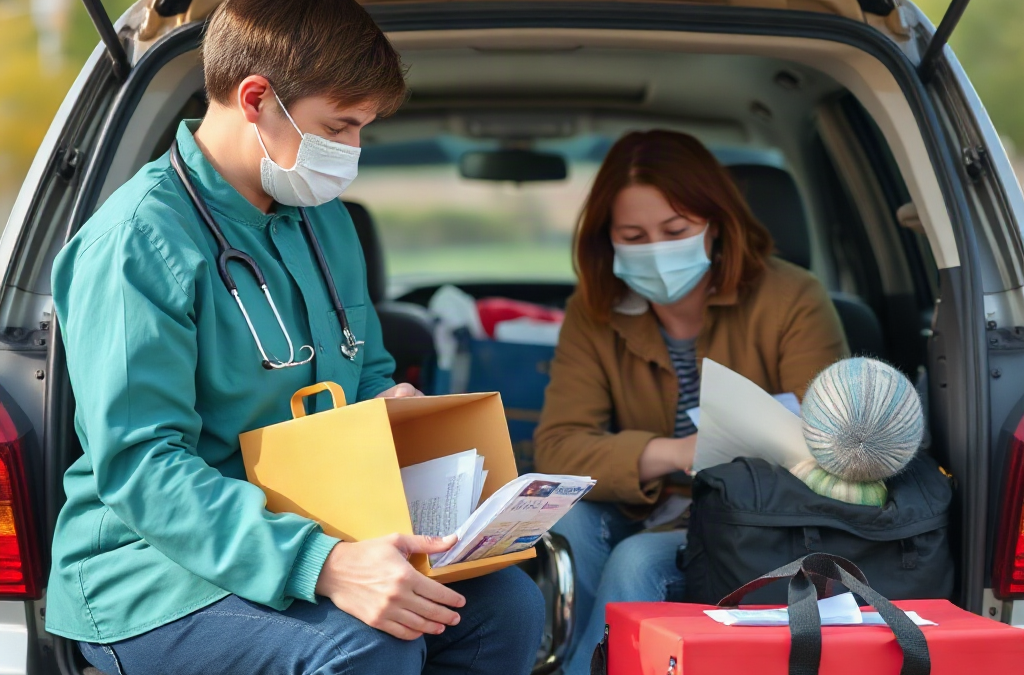
Evacuation planning begins with an individual care profile, not a shared household packing list. A dependent may need help walking, lifting, eating, communicating, regulating sensory input, managing medication, or staying oriented in an unfamiliar place. Those needs can change under pressure: a child may become less verbal, an older adult may become confused, and a person who normally transfers independently may need additional support when roads are crowded or elevators are unavailable.
Write down the practical details a substitute caregiver would need. Include the person’s full name, preferred communication method, mobility equipment, allergies, medication schedule, calming techniques, toileting requirements, and signs of distress. Record what assistance is safe and what should not be attempted without training. For example, transporting a wheelchair user is not the same as carrying a person who can walk short distances, and a generic instruction such as “help as needed” leaves too much open to interpretation.
A useful assessment separates essential support from helpful comfort. Essential support might include a powered medical device, hearing aid batteries, feeding supplies, or a prescribed medication. Comfort items such as a familiar toy, noise-reducing headphones, or a preferred snack can still matter because distress may make movement and cooperation harder. The tradeoff is space: prioritize anything that protects life, safe mobility, communication, or continuity of care before adding convenience items.
Review the profile at least when there is a change in medication, school or adult-care placement, mobility, diagnosis, custody arrangement, or household caregiver. A plan built for a toddler may be unsafe six months later, and a plan that assumes one adult can manage two dependents may fail if the evacuation requires stairs, a long wait, or separate vehicles. The caregiver readiness for dependents during evacuation checklist should reflect actual abilities rather than optimistic assumptions.
Build a Transport and Communication Plan
A workable evacuation plan answers four questions before departure: who moves each dependent, how they travel, where they go, and how caregivers confirm everyone arrived. Assign one primary caregiver and one backup for every dependent. Avoid relying on a single adult who may be injured, delayed at work, separated from the household, or unable to drive. If two dependents have competing needs, assign roles in advance rather than expecting people to negotiate during an alarm.
Transportation needs should be specific. Confirm whether a car seat, wheelchair tie-down, walker, transfer board, stroller, or accessible vehicle is required. Keep mobility equipment close to the exit, but do not block the route. If a dependent uses a power wheelchair or oxygen equipment, identify charging or power requirements and determine how the equipment will be protected during loading. A vehicle with more seats is not automatically the safer choice if it cannot accommodate the person and essential equipment securely.
Choose at least two destinations in different directions, such as a relative’s home and an accessible hotel or community shelter. Call ahead when possible to confirm sleeping arrangements, medication storage, refrigeration, accessibility, pets, and supervision. A destination that accepts the household but cannot support a dependent’s care needs may create a second emergency. The evacuation care plan should also state when to leave, which route to try first, and what conditions require switching to the backup destination.
Communication must work without internet access. Keep a printed contact sheet, a paper map, written medical information, and a simple identification card for each dependent. Include contacts outside the immediate area who can relay information if local phone networks are congested. For children or adults who may wander, use an identification method that protects privacy while still giving responders a way to reach the caregiver. Teach every capable dependent one short instruction, such as their caregiver’s name and the agreed meeting location, without assuming fear will not affect recall.
The common mistake is treating a group text as the entire communication plan. Phones can be lost, batteries can fail, and caregivers may receive conflicting instructions. Use a contact sequence and a meeting point that remains meaningful even if the household leaves in separate vehicles. Test the plan by having one adult call the backup caregiver while another checks the printed information for missing or outdated details.
Pack Supplies That Preserve Care Continuity
Evacuation supplies should preserve the dependent’s normal care routine as far as conditions allow. Pack medications in original labeled containers when practical, along with a current medication list, prescribing information, dosing instructions, and relevant medical contacts. Do not place all medication in one shared bag if caregivers may separate; each responsible adult should know what is carried and when it is needed. Temperature-sensitive items require a specific storage method rather than a vague instruction to “keep cool.”
Build an individual go-bag for each dependent and a separate caregiver kit. The individual bag can include spare clothing, continence supplies, formula or feeding tools, glasses, hearing-aid supplies, communication cards, comfort objects, and hygiene products. The caregiver kit can hold documents, chargers, first-aid materials, cash, water, shelf-stable food, and copies of contact information. Label bags plainly, but avoid displaying unnecessary medical details where strangers can see them.
Food planning requires more than counting meals. Consider allergies, texture restrictions, swallowing concerns, diabetes-related routines, infant feeding, and the likelihood of delays. Pack foods the dependent already tolerates rather than introducing unfamiliar products during an evacuation. If refrigeration, heating, or clean water may be limited, choose items that fit the person’s established care plan and verify packaging before travel. General emergency food may be unsuitable for an infant, a person with a severe allergy, or someone who cannot safely chew it.
Use a compact priority order when space is limited:
Immediate safety: medications, mobility and communication equipment, identification, and essential medical supplies.
Care continuity: food, water, hygiene items, clothing, and written routines.
Stress reduction: familiar objects, sensory supports, entertainment, and preferred snacks.
Check supplies on a schedule tied to real changes, not just a calendar reminder. Replace outgrown clothing, expired products, dead batteries, and depleted medications. A frequent failure is assuming that a fully stocked adult kit covers dependents equally well. It may contain water and flashlights while missing the exact item that enables safe feeding, communication, or movement. The dependent-specific evacuation checklist should be tested by the person who will actually use it.
Practice Departure, Handoffs, and Backup Options
Practice turns an abstract plan into a sequence caregivers can perform under noise, fatigue, and incomplete information. A useful drill does not need to imitate a disaster; it can rehearse waking a dependent, dressing them, collecting the go-bag, loading equipment, securing the vehicle, and confirming the destination. Time the sequence only to identify bottlenecks, not to create pressure or make a dependent feel blamed for moving slowly.
Start with the hardest realistic constraint. If a caregiver has limited mobility, practice from the room where the dependent sleeps. If a child refuses unfamiliar clothing, test the selected clothing during a calm day. If an older adult becomes disoriented after waking, rehearse using a written cue card and a familiar voice. These details reveal whether the plan works in practice. A route that looks short on a map may become unsuitable when it involves stairs, a narrow doorway, a long walk from the parking area, or a shelter intake line.
Handoffs need the same precision as transport. Write who may collect a child or assume care, what identification they must show, and which information must be exchanged. For an adult dependent, document consent, guardianship, or facility coordination needs according to the person’s circumstances; personal paperwork should be stored securely and shared only with appropriate people. Do not assume a neighbor or relative knows medication timing, transfer technique, or behavioral cues simply because they are trusted.
After each practice, ask what failed and why. A missing charger may indicate poor packing, but repeated confusion about the meeting location may indicate that the plan itself is too complicated. Signs of readiness include caregivers completing roles without argument, finding supplies quickly, and explaining the dependent’s needs consistently. Signs of failure include duplicate responsibilities, unassigned equipment, unclear authority, or a backup destination that has never been contacted.
Rehearse alternatives rather than only the preferred route. Identify a second driver, a second pickup location, and a way to proceed if the household must split temporarily. Record the dependent’s status at each handoff. Short written notes such as time, location, caregiver, and next destination reduce confusion when several adults are coordinating through poor connectivity.
Further Reading
For current evacuation instructions, accessibility information, and local shelter arrangements, consult the emergency-management agency serving your area, the dependent’s medical or care providers, and the facility or school where the person spends time. Official local guidance should take priority over an old household plan because routes, shelter locations, and transportation services can change.
Frequently Asked Questions
What should a caregiver do first when an evacuation order is issued?
Confirm the dependent’s immediate safety, collect medications and essential mobility or communication equipment, assign the backup caregiver, and leave according to the safest available route rather than waiting to assemble nonessential items.
How can caregivers prepare for a dependent who has mobility limitations?
Document the person’s safe transfer method, identify accessible transportation, protect mobility equipment during loading, and practice the route from the person’s usual sleeping and living areas.
What information belongs on a dependent’s emergency card?
Include the person’s name, caregiver contacts, communication method, allergies, essential medications, mobility or sensory needs, and instructions for reaching the responsible adult. Share only information that responders or caregivers need.
Should caregivers pack separate bags for each dependent?
Yes. Individual bags make it easier to locate age- and need-specific supplies, prevent one person’s medication or feeding items from being overlooked, and allow bags to travel with separate caregivers if the household divides.
How often should an evacuation care plan be reviewed?
Review it after changes in medication, mobility, school or care placement, household roles, contact information, or equipment. A brief practice after each major change can reveal problems that a written review misses.
Conclusion
Caregiver readiness is demonstrated by a dependent-specific plan that works when roads, phones, routines, and staffing become unreliable. Identify the assistance each person needs, assign primary and backup caregivers, select destinations that can actually provide care, and prepare transport for equipment as well as people. Keep medications, identification, communication tools, food, and comfort supplies organized so departure does not depend on memory. Practice the difficult parts—loading, transfers, handoffs, and route changes—then correct weaknesses while conditions are calm. Review the plan whenever a dependent’s needs or household roles change. A short, tested plan is more useful than a large supply kit built around assumptions.
A useful kit begins with a hazard map, not a prepacked bucket. Walk through the home and identify what could injure someone, interrupt basic needs, trap occupants, or make communication difficult. The relevant risks differ sharply between a basement apartment, a rural house with a private well, and a high-rise unit where elevators may stop working.
Look at both the event and its consequence. A severe storm may cause a power outage, spoiled refrigerated food, loss of heating or cooling, and a closed garage door. A plumbing failure may create contaminated water and slip hazards but require very different supplies from a wildfire smoke event. A gas leak calls for rapid evacuation and utility knowledge, not an attempt to repair the line with household tools.
Record hazards by likelihood, severity, and response time. Smoke from a kitchen fire demands immediate action; a multi-day outage allows more time to ration supplies. Flooding may make lower-level storage inaccessible, while an earthquake can scatter items and block cabinets. This comparison prevents a common failure: spending heavily on rare, specialized equipment while lacking medication, lighting, or a reliable way to open stored food.
Use a short inspection of each room to capture details that generic lists miss:
Kitchen: cooking fires, broken glass, spoiled food, gas or electrical hazards, and the need for a manual can opener.
Bedrooms and hallways: darkness, smoke, blocked exits, footwear, eyeglasses, and mobility concerns during nighttime evacuation.
Utility areas: water shutoff access, electrical panels, heating equipment, sump pumps, and protective gloves.
Bathrooms: sanitation, stored medicines, hygiene supplies, and water that may become unavailable.
Garage or exterior storage: flood exposure, extreme heat, fuel hazards, and supplies that could become inaccessible if the main door fails.
Do not treat a hazard map as a prediction. Its purpose is to reveal dependencies. If every flashlight is in one cabinet, every charger needs wall power, or the only drinking water is stored below a flood-prone window, the kit has a design weakness even when the inventory looks impressive. For broader household readiness decisions, the hazard-based kit assessment should be updated whenever someone moves in, develops a new medical need, or changes heating, cooking, or transportation arrangements.
Match Supplies to Rooms, People, and Failure Points
Supplies work best when they are placed where a person can reach them during the first minutes of a disruption. A single large tote may be efficient for inventory, but it is a poor design if a fallen shelf, smoke, or a locked garage separates the household from it. Divide the kit into a central reserve and small location-specific modules.
Bedrooms need a different setup from the kitchen. Keep sturdy shoes, a flashlight, spare glasses, and a whistle near sleeping areas because broken glass and darkness are immediate problems after an earthquake or severe storm. Near the kitchen, store a fire extinguisher appropriate for the likely fire class, heat-resistant gloves, and a flashlight; do not place supplies so close to a stove that they become inaccessible during a fire. In a utility area, label the main water shutoff and keep gloves, absorbent materials, and a headlamp available for inspection.
Household members also change the design. Infants may need formula, bottles, diapers, and a way to prepare food without safe tap water. Older adults may need backup hearing-aid batteries, assistive devices, and a written medication list. A person who uses a wheelchair may need an evacuation plan that accounts for stairs rather than simply adding more supplies. Pets require food, water, carriers or leads, waste bags, and copies of veterinary information.
The practical distinction is between survival supplies and access supplies. Water and food sustain people over time, while shoes, lighting, keys, gloves, and medication access determine whether those supplies can be reached. A household that prepares only the first group may still fail during a short, chaotic event.
Consider a two-story home with a finished basement. Storing all bottled water downstairs may look tidy, but a burst pipe or flood could remove the reserve first. A better arrangement keeps a modest amount on each occupied floor and a larger reserve in the safest accessible location. The tradeoff is less compact storage and more rotation work, but redundancy matters when the preferred route is blocked. Avoid storing emergency supplies in a locked cabinet, under heavy items, or in a container that one person cannot move.
Include copies of identification, insurance information, emergency contacts, medication details, and household instructions in a waterproof pouch. Digital copies can supplement paper records, but they should not be the only option when phones lose power or cellular service is interrupted. The room-by-room supply checklist should make access as visible as the inventory itself.
Build the Core Kit Around Loss of Utilities
Utility loss is often the bridge between a hazard and a household crisis. When electricity, water, heating, cooling, or communications stop, ordinary routines become difficult even if the building remains intact. Build the core reserve around those failures, then add hazard-specific equipment rather than treating every disaster as identical.
Water deserves first attention because it supports drinking, food preparation, and basic hygiene. Store commercially packaged water or containers intended for water storage, and keep a separate amount for pets if applicable. Food should require little or no cooking when power is unavailable. Shelf-stable options such as canned beans, fish, fruit, vegetables, nut butter, crackers, and ready-to-eat meals are more useful than foods that depend on a refrigerator, oven, or complicated preparation. Add a manual opener and utensils where cans are stored.
Lighting should not depend on one device. A flashlight for each sleeping area, a headlamp for hands-free work, and spare batteries provide more flexibility than a single bright lantern. Rechargeable units can reduce battery waste, but they need a charging method and a maintenance check. A battery bank is helpful only if it is charged before the outage and paired with the cables used by the household’s actual phones.
Heating and cooling create different constraints. Blankets, warm layers, and hats may help during a cold-weather outage, while breathable clothing, shade, battery-operated fans, and extra drinking water may be more relevant in heat. Never improvise indoor heating with a grill, camp stove, or fuel-burning device. Carbon monoxide can accumulate without obvious warning, so fuel-burning equipment must be used only as directed and in appropriate outdoor locations.
A compact priority order keeps spending rational:
Immediate safety: smoke alarms, fire extinguishers, escape lighting, shoes, gloves, and a whistle.
Medical continuity: prescriptions, first-aid supplies, a medication list, and needed health devices or batteries.
Water and food: safe drinking water, ready-to-eat meals, opener, utensils, and pet supplies.
Sanitation and communication: soap, wipes, toilet supplies, waste bags, radio, chargers, and contact information.
Hazard-specific tools: dust masks suited to the task, tarps, duct tape, shutoff labels, or flood barriers where justified.
Do not confuse a dust mask with protection from every airborne hazard, and do not assume a first-aid kit replaces professional care. Supplies can reduce exposure and manage minor problems while people seek appropriate help; they cannot make an unsafe building safe. Check guidance from local authorities for evacuation, water advisories, and fire response rather than relying on the kit to answer decisions outside its purpose.
Store, Test, and Rotate the Kit
Storage determines whether preparation survives contact with a real emergency. Keep the main reserve in a dry, temperature-moderate area that remains reachable without power. Avoid attics and unconditioned garages when heat or freezing temperatures could damage food, batteries, medicines, or plastic containers. Use clear labels showing contents, expiration dates, and the date of the last inspection.
Test the kit under realistic conditions. Turn on each flashlight, connect each charging cable, inspect first-aid packaging, and confirm that adults can open containers without special tools. Practice locating the water shutoff and electrical panel with the lights off. If an item works only when someone remembers an undocumented procedure, it is not fully ready.
Rotation is more than replacing expired food. Batteries corrode, adhesive dries out, medications have storage requirements, clothing becomes the wrong size, and contact information changes. Tie inspections to a recurring household event, such as the beginning and end of daylight-saving time, and use normal consumption to rotate shelf-stable foods. Keep medication decisions with the prescribing clinician or pharmacist; do not stockpile or alter prescriptions casually.
Accessibility creates an important tradeoff. A heavy waterproof tote may protect supplies from a leak, but it is unsuitable if no household member can lift it. Several smaller containers are easier to move and audit, though they require clearer labeling. A child may be able to carry a small comfort or communication pouch, but should not be assigned responsibility for critical medication or evacuation equipment.
Watch for signs that the design is failing: supplies are repeatedly returned to the wrong place, nobody knows who carries documents, chargers do not fit current phones, or the household cannot explain what happens if the main exit is blocked. Correct those failures during a calm review. The household hazard plan should reflect actual behavior, not an idealized storage system that works only on paper.
Use a Scenario Check Instead of a Shopping List
A scenario check tests whether the kit supports decisions, not merely whether it contains popular products. Choose several hazards that fit the property and ask what the household must do during the first hour, the first night, and a longer interruption. The answers expose missing supplies and unsafe assumptions quickly.
For a nighttime power outage, the first-hour needs may be lighting, shoes, communication, and a check on medical equipment. By the first night, food preparation, temperature control, sanitation, and charging become more relevant. For a kitchen fire, the correct response may be alarm, evacuation, and calling emergency services; the kit should support escape rather than encourage someone to retrieve belongings or fight a growing fire.
For flooding, move people and essential documents away from the affected area, avoid contact with contaminated water, and expect lower-level storage to become unavailable. For an extended heat outage, identify the coolest safe location, monitor vulnerable residents, and arrange an alternative location if indoor conditions become dangerous. These scenarios demonstrate why the same item can have different value: a battery radio is useful during broad communication disruptions, while a headlamp is more useful when both hands are needed to inspect a dark utility space.
After each exercise, remove products that do not solve a credible problem and fund the gaps that do. A compact review can ask:
Can everyone reach lighting, shoes, water, and essential information without entering a dangerous area?
What happens if the refrigerator, elevator, garage door, phone network, or basement is unavailable?
Which person, pet, or medical need requires a separate supply or transport arrangement?
Which item depends on electricity, internet access, batteries, or a skill nobody has practiced?
Keep the result proportional to the home. Preparedness does not require purchasing every specialized product, and more gear can create clutter that obscures the essentials. A well-designed kit makes the most likely household hazards easier to manage, leaves clear boundaries for when to evacuate or seek help, and can be revised after every drill, repair, move, or change in household needs.
Frequently Asked Questions
Should every household have the same emergency kit?
No. A kit should reflect local hazards, building layout, utilities, medical needs, pets, and the people who must carry or use the supplies.
Where should emergency supplies be stored?
Keep a main reserve in a dry, accessible location and place small modules near bedrooms, exits, utility areas, or other points where immediate access matters.
What should be checked twice a year?
Test lights and chargers, inspect batteries, rotate food and water, review medications and documents, replace damaged first-aid items, and confirm that clothing and pet supplies still fit current needs.
Do emergency kits need specialized tools for every disaster?
No. Add specialized items only when a credible household hazard justifies them. Basic safety, medical continuity, water, food, sanitation, lighting, and communication usually come first.
Can a generator be used indoors during a power outage?
No. Fuel-burning generators and similar equipment can produce carbon monoxide and must be used only as directed in a safe outdoor location away from openings.
Conclusion
A strong emergency kit reflects the hazards that can actually affect the home and the obstacles those hazards create. Map risks by room, place immediate-use supplies near sleeping areas and exits, and build the central reserve around water, ready-to-eat food, lighting, medication continuity, sanitation, and communication. Then add equipment for specific conditions such as flooding, smoke, utility shutoffs, extreme temperatures, or pet care.
Test access rather than trusting labels: use the flashlight, connect the charger, open the food, and rehearse what happens when a usual route is blocked. Review the arrangement twice a year and after any household change. The goal is not the largest collection of gear; it is a reachable, maintained system that supports safe decisions and makes clear when the correct response is evacuation or professional assistance.
Build a Rotation System Around Use and Replacement Dates
A reliable stockpile rotation system begins with a complete inventory, not with a new shelving unit. Record each item, quantity, purchase date, printed date, and storage location. The printed date may describe quality rather than an automatic safety cutoff, and its meaning varies by product, but it remains useful for deciding which supplies deserve earlier attention. Items with clear manufacturer expiration dates, such as some medicines, should be managed more conservatively than unopened dry staples whose quality may change gradually.
Separate the stockpile into practical groups: everyday foods, long-term foods, water, first-aid and medicines, cleaning supplies, batteries, and personal-care products. Each group has a different rotation rhythm. Canned beans used regularly may enter the household meal plan every few weeks, while spare batteries might only need inspection for leakage and corrosion. Treating every item as though it needs the same monthly action wastes time and makes the system harder to maintain.
The simplest method is first in, first out. Place the newest purchase behind matching older items, then take from the front. For products with several date formats or multiple lots, add a removable month-and-year label to the shelf edge. A spreadsheet can help when quantities are large, but a handwritten shelf card may be more durable during a power outage. The best system is the one that matches how the household actually shops and cooks.
For example, if a household adds six cans of tomatoes each month, it should use the front cans for pasta sauce, soup, or chili and place the new cans behind them. If the household rarely eats canned tomatoes, buying more may be the wrong response to a perceived preparedness gap. Rotation exposes that mismatch: supplies that never enter normal use are likely to become forgotten, duplicated, or unsuitable for the household’s preferences.
Use Stockpile rotation methods for preventing expired supplies as an operating routine rather than a one-time cleanup. At the first setup, prioritize items with the shortest remaining date, duplicate packages, damaged labels, and goods stored in hot or damp locations. That sequence produces a quick reduction in risk before you spend time cataloging low-risk items.
Arrange Shelves So Older Supplies Move First
Physical arrangement determines whether rotation happens naturally or depends on memory. Store identical products together, keep labels facing outward, and leave enough space to slide older packages forward. A crowded shelf encourages people to pull from the easiest visible position, which is often the newest item. That behavior quietly reverses the intended order.
Use separate zones for active household use and reserve stock. The active zone contains products currently being consumed; the reserve zone holds additional units. When an active-zone item is used, replace it from the reserve before buying more. When new stock arrives, place it at the back of the reserve group. This two-zone approach is often easier than trying to maintain a single deep shelf where every package is difficult to see.
Storage conditions matter as much as shelf order. Heat, humidity, sunlight, pests, and repeated temperature swings can shorten useful life or damage packaging before a printed date arrives. Keep dry foods in a cool, dry, dark area; protect paper goods from moisture; and avoid placing cans directly on a concrete floor where condensation can contribute to rust. Follow product-specific instructions for medicines, chemicals, and batteries rather than assuming a pantry is suitable for everything.
A basement shelf illustrates the tradeoff. It may provide convenient space for canned goods, but a damp basement can damage labels, encourage corrosion, and make an inventory difficult to inspect. A smaller indoor cabinet may hold less but provide better visibility and more stable conditions. Capacity is not the only measure of a useful stockpile; accessibility and inspectability determine whether the contents will actually be used.
Do not keep damaged cans merely because their dates look acceptable. Bulging, leaking, severe rust, broken seals, swollen packaging, unusual odors, or signs of pests warrant caution. Do not taste questionable food to test it. When an item is unsuitable, remove it from the inventory immediately and record the replacement need. Leaving it on the shelf creates false confidence and forces the same decision during the next review.
Handle Different Supply Types and Storage Risks
Food, water, medicine, batteries, and hygiene products should not share one uniform rotation rule. Food rotation usually depends on household consumption, package condition, and quality dates. Water storage depends on the container, treatment approach, storage environment, and the guidance associated with the specific product. Medicines require particular attention to labeled expiration dates, storage instructions, and changes in appearance. Batteries need checks for leakage, corrosion, and compatibility with the devices in which they are kept.
Dry staples such as rice, pasta, oats, and flour are easy to overlook because they may appear stable. Their risks include moisture, insects, rancidity in higher-fat products, and gradual quality loss after opening. Store smaller quantities in containers that can be closed securely, and mark the opening date when the original package is transferred. A bulk package is not automatically a better value if the household cannot use it before quality declines.
Canned foods are generally easy to stack and rotate, but stacking too high can hide older cans and make inspection difficult. Group cans by type and use the shortest-date group first. For foods with a best-by date, assess the package and product according to applicable food-safety guidance rather than treating every date as identical. When doubt involves a damaged container or questionable seal, discard the item instead of trying to recover its value.
Nonfood supplies create different failure points. Alkaline batteries can leak when left for long periods in equipment, so store them according to manufacturer guidance and inspect devices separately. Adhesives, disinfectants, sunscreen, and some personal-care products can lose performance or change texture over time. A stockpile that contains plenty of products but lacks working batteries, usable tape, or effective cleaning supplies is not fully functional.
Choose rotation priority by consequence as well as age. A slightly stale snack may be inconvenient, while an out-of-date prescription medicine or compromised water container may create a more serious problem. Keep medicines and chemicals separated from food, and follow professional or official disposal guidance for unwanted medicines and hazardous products. The rotation record should identify these high-consequence items clearly so they do not disappear among ordinary pantry checks.
Run Monthly Checks Without Creating Excess Work
A sustainable inspection routine has a short monthly check and a more deliberate seasonal review. The monthly check should confirm that older products remain accessible, newly purchased items were placed behind existing stock, and any visible damage or date issue has been recorded. It does not need to involve counting every packet if the system is organized by defined shelf zones and standard quantities.
During a seasonal review, remove items from deep shelves, clean the storage area, check for moisture or pests, and compare actual quantities with the household’s intended reserve. Review whether the stockpile still reflects current diets, household size, allergies, medical needs, and available storage. A change in living arrangements may make a formerly sensible quantity excessive or inadequate.
Use a simple decision sequence:
Use soon: Move approaching-date items into normal meals or daily household use.
Relocate: Bring older matching items forward and put replacements behind them.
Remove: Dispose of compromised or unsuitable supplies through appropriate channels.
Rebuy selectively: Replace only what the household uses and genuinely needs.
Calendar reminders work better when linked to an existing event, such as the first weekend of each month or a regular grocery trip. A printed checklist on the storage door can outperform an app that nobody opens. If several adults use the stockpile, label the system plainly: “front items first,” “new stock behind,” and “record removals.” Shared visibility prevents rotation from becoming one person’s hidden responsibility.
Common failure occurs after a large shopping trip or donation. New cases are stacked in the most convenient space, older cases remain behind them, and the inventory no longer reflects reality. Correct that immediately by dating the new purchase, moving older units forward, and adjusting the count. A rotation method is working when older supplies are regularly consumed, missing items are noticed quickly, and the reserve remains easy to audit without emptying the entire room.
Match Stockpile Size to Household Consumption
The most effective stockpile is sized for realistic consumption rather than an aspirational shopping list. Review several ordinary grocery cycles and identify foods, drinks, hygiene products, and household consumables that are already used consistently. Those items are natural rotation candidates because they can leave reserve storage through normal routines instead of requiring special projects.
Preference matters. A household that does not eat canned fish will not reliably rotate it, even if it has a long stated shelf life. A person who uses a particular soap, coffee, or infant-care product may rotate those supplies quickly and notice changes in packaging or availability. Substitution is possible, but it should be tested before an item becomes part of the reserve. Buying unfamiliar foods only because they are inexpensive often produces waste and weakens confidence in the system.
Budget and space also shape the right approach. Limited space favors compact, frequently used items and smaller quantities reviewed often. A larger storage area may support deeper reserves, but it increases the burden of labeling, environmental control, and inspection. The extra capacity is worthwhile only if the household can maintain visibility and afford replacements before older goods become unusable.
Linking rotation to meal planning is a practical compromise. Select one or two reserve items for ordinary meals each week, then replace what was consumed during the next shopping trip. Keep a small “use next” basket for items nearing their preferred-use date, but do not use it as a holding area for damaged products or goods requiring special storage. The basket should reduce forgotten inventory, not postpone a disposal decision.
For more detailed household organization, connect this routine with Stockpile rotation methods for preventing expired supplies and review the system whenever the household’s needs change. The goal is not to preserve every package indefinitely. It is to maintain a clean, known, usable reserve whose contents match actual needs and whose oldest items have a clear path into regular use.
Frequently Asked Questions
What is the simplest stockpile rotation method?
Use first in, first out: place newly purchased matching items behind older ones, keep labels visible, and consume the front items first.
How often should a household inspect its stockpile?
A brief monthly check is suitable for shelf order, damage, and obvious date issues; conduct a deeper seasonal review for storage conditions and quantities.
Should every expired food item be thrown away?
Not every date label has the same meaning, but damaged packaging, swelling, leakage, severe rust, or questionable seals should be treated as disposal concerns. Follow applicable food-safety guidance.
How can I rotate supplies in a small apartment?
Use shallow, labeled zones and keep reserves limited to products the household already consumes. Smaller quantities with frequent review are safer than inaccessible bulk storage.
What should be checked besides expiration dates?
Inspect seals, swelling, corrosion, leaks, pests, moisture, odors, texture changes, battery leakage, and whether medicines or chemicals were stored according to their instructions.
Further Reading
Authoritative Sources
Food Product Dating fsis.usda.gov
Explains how date labels on foods should be interpreted and why product dating does not mean every label has the same purpose
Don’t Be Tempted to Use Expired Medicines fda.gov
Provides safety-focused information for deciding how to handle medicines beyond their labeled expiration dates
Conclusion
Preventing expired supplies is mainly an organization and consumption problem, not a shopping problem. Record what enters storage, place older matching items where they will be used first, and separate food from products with different handling requirements. Monthly shelf checks catch misplaced purchases and visible damage, while seasonal reviews expose moisture, pests, changing household needs, and quantities that no longer make sense. Prioritize medicines, water, damaged containers, and heat- or moisture-sensitive goods according to their specific instructions. For food, build the reserve around meals the household already eats so rotation happens naturally. A smaller, visible stockpile that is routinely used and replenished is more dependable than a larger cache hidden behind newer purchases.
An apartment earthquake plan begins with understanding which decisions belong to the resident and which belong to the building owner, utility provider, or emergency services. In a detached home, a person may know exactly where the gas meter and main shutoff are located. In an apartment, gas equipment may be outside the unit, locked away, absent altogether, or controlled by a central system. Treating a breaker panel or valve as if it were yours to operate can create safety, access, or liability problems.
Walk through the unit and identify hazards rather than simply labeling rooms as safe or unsafe. Note tall furniture, glass, mirrors, hanging fixtures, water heaters, appliances, overloaded outlets, and items stored above head height. Pay special attention to the kitchen, where broken glass, spilled liquids, and shifted appliances can make an ordinary exit dangerous. A balcony, stairwell, hallway, or exterior wall may also contain falling material that is not visible from inside the apartment.
Ask management or maintenance specific questions in writing. Find out whether the building has a central gas system, where authorized utility controls are located, whether residents can access electrical breakers, and how water damage should be reported after hours. Ask which alarms, sprinklers, elevators, and emergency lighting are connected to backup power. The goal is not to perform building maintenance; it is to know whom to contact and what not to touch.
A common mistake is assuming that no gas shutoff means there is no fire-related utility risk. Electrical arcing, damaged extension cords, ruptured water lines, and battery failures can still create hazards. Conversely, another mistake is rushing to manipulate unfamiliar controls after shaking. Mark locations, save management and utility contacts, and follow posted building instructions unless immediate life safety requires evacuation.
Secure Rooms for Shaking and Falling Objects
Most apartment preparation begins with reducing what can fall, slide, shatter, or block an exit. The objective is not to make every object immovable. It is to keep heavy items from landing on occupants and preserve a usable path from sleeping areas to the outside. Furniture anchored to a stud or suitable structural point is generally more dependable than furniture merely placed against a wall.
Secure bookcases, televisions, tall cabinets, and freestanding shelves with hardware appropriate for the wall construction. Do not assume that drywall alone will support a heavy cabinet. Place heavy objects low, latch cabinets that hold breakable items, and move glassware away from beds and frequently used seating. Window coverings can reduce contact with broken glass, but they do not replace distance from windows during shaking.
Bedrooms deserve special attention because people are often there when an earthquake begins. Keep sturdy footwear, a flashlight, essential medication, and a way to make a phone call within reach of the bed. Shoes matter because broken glass and damaged flooring may make bare feet unsafe. A flashlight is preferable to using a candle or open flame when wiring, appliances, or unknown fumes may be involved.
Practice the protective action that fits the space: drop, cover, and hold on under a sturdy table or desk when available, or protect the head and neck away from windows and unstable objects. Do not run down stairs while the building is moving, and do not use an elevator during or immediately after shaking. A useful comparison is speed versus survivability: reaching the hallway first is not an advantage if falling objects or stair movement create greater exposure.
Check the plan from the perspective of a child, older adult, person with a disability, and pet owner. A blocked route that is manageable for one resident may be unusable for another. Rearrange storage, add a second route where possible, and identify which doors may jam if the frame shifts. Do not store emergency supplies in a locked closet that requires a key kept elsewhere.
Build Supplies Around Water, Power, and Sanitation
Without a resident-controlled gas shutoff, supplies should support sheltering, inspection, communication, and sanitation rather than only cooking. Water service may stop or become unsafe, elevators may be unavailable, and a damaged electrical system may make normal lighting and charging unreliable. Apartment storage is limited, so portable, stackable supplies usually outperform bulky equipment that is difficult to move through stairs.
Store drinking water in several manageable containers instead of one large vessel. Smaller containers are easier to carry, share, and move if a leak develops. Add shelf-stable foods that can be eaten without cooking, a manual can opener, personal medications, hygiene items, gloves, dust protection, basic first aid materials, a battery or hand-crank radio, spare batteries, charging cables, and a power bank. Keep copies of identification, lease information, emergency contacts, and relevant prescriptions in a water-resistant pouch.
Lighting and sanitation deserve equal priority with food. A headlamp leaves both hands available for opening doors or helping someone, while a lantern can illuminate a shared room. Have heavy-duty bags, toilet paper, hand sanitizer, wipes, and a plan for separating waste from living areas if plumbing is unavailable. Never improvise indoor cooking or heating with charcoal, gasoline equipment, or appliances designed for outdoor use; carbon monoxide can accumulate without an obvious odor.
Supplies should be divided into a bedside or grab location, a main apartment cache, and a small evacuation bag. The bedside set addresses immediate injury and darkness. The main cache supports staying put if the unit is safe. The evacuation bag supports a rapid departure and should not be so heavy that it prevents stair travel. This layered approach is more practical than keeping everything in a single container that may be inaccessible after furniture shifts.
First: shoes, light, medication, phone, and a way to open the exit.
Next: water, ready-to-eat food, sanitation supplies, first aid, and communications.
Then: documents, clothing, pet supplies, tools, and replacement batteries.
A frequent failure mode is buying supplies without testing them. Open the food packaging, charge the power bank, check medication expiration dates, and carry the packed bag up a flight of stairs. If the setup is too heavy, too complicated, or stored behind a blocked door, revise it before an earthquake exposes the weakness.
Use a Building-Specific Response Sequence
After the shaking stops, pause before moving through the apartment. Protect yourself from glass and debris, look for immediate fire or smoke, listen for alarms, and check whether anyone needs urgent assistance. If the building shows serious damage, fire, a strong chemical odor, flooding, or unstable ceilings, leave by the safest available stairs and follow emergency instructions. Do not assume that a familiar hallway remains safe simply because it was safe yesterday.
The absence of a gas shutoff changes what residents should inspect first. Do not spend critical time searching for a valve you cannot access. Instead, look for sparks, burning smells, damaged cords, hot outlets, water near electrical equipment, and active leaks. If a local breaker can be reached safely and residents are authorized to operate it, follow building guidance; otherwise report the condition and keep clear. A water leak can spread quickly through floors, so notify management while also protecting people from electrical contact.
Remain outside if officials or building personnel direct residents not to reenter. Elevators may be trapped, disabled, or stopped between floors, so stairs are the normal evacuation option when they are visibly usable. Take only the evacuation bag if leaving is necessary. Returning for extra belongings can expose residents to aftershocks, falling materials, smoke, or doors that no longer open normally.
Use a simple decision sequence:
Check people, fire, smoke, fumes, major leaks, and visible structural damage.
Move away from immediate hazards and use stairs rather than elevators.
Report the apartment number, floor, injuries, fire, flooding, or utility damage clearly.
Use text messages when calls are congested, and monitor official instructions.
Do not reenter or restore utilities based only on a visual guess.
A weak assumption is that the apartment is safe because the building is still standing. Nonstructural damage can injure residents or start fires even when the main structure appears intact. Another weak assumption is that a phone battery will last through repeated updates. Reduce screen use, carry a backup power source, and agree in advance on an out-of-area contact and meeting location.
Coordinate With Management and Neighbors
Apartment readiness works better when residents understand the building’s communication and access arrangements before an earthquake. Management may have procedures for elevator shutdowns, water isolation, fire alarms, inspection, pets, and temporary relocation. Those procedures can vary by building design, so generic household advice cannot replace the property’s own instructions.
Ask whether there is a resident emergency contact tree, a designated assembly area, and a process for reporting units that need welfare checks. Share only appropriate information, but let trusted neighbors know if someone may need help with stairs, medication, hearing alarms, or moving a mobility device. A neighbor who knows the need exists can respond more effectively than one who discovers it during a noisy evacuation.
Residents should also clarify who has authority to enter units, shut down systems, post notices, or arrange inspections. Do not block fire doors, wedge security doors open, or place supplies in corridors. A personal cache in a hallway may become an obstruction during evacuation. If an item must be stored outside the unit, obtain building approval and keep it out of egress paths.
Consider two scenarios. If the apartment is intact but water service is interrupted, residents may be able to shelter while using stored supplies and receiving building updates. If a neighboring unit has a fire or a stairwell is damaged, the priority shifts immediately to evacuation and accountability. A plan that only covers staying home fails in the second scenario; a plan that assumes everyone must leave may waste resources when the building is safe enough to shelter.
Review the arrangement twice a year and after any move, renovation, new appliance, medication change, or household change. Walk the stairs, test communication methods, replace depleted batteries, and confirm that management contact details still work. For broader Earthquake planning for apartments without gas shutoffs, connect the apartment checklist to neighborhood hazards and local alerts. A building-specific Earthquake planning for apartments without gas shutoffs approach is strongest when residents know both their personal limits and the building’s responsibilities.
Frequently Asked Questions
Should apartment residents shut off the gas after an earthquake?
Only if the shutoff is accessible, residents are authorized to use it, and building or utility instructions support doing so. Never search in a dangerous area or operate unfamiliar equipment; report suspected damage instead.
What should residents do if there is no gas service?
Focus on electrical hazards, fire, water leaks, evacuation routes, communication, and sanitation. No gas system removes one hazard but does not make the apartment automatically safe.
Where should earthquake supplies be stored in an apartment?
Keep a small immediate-use kit beside the bed, a main cache in an accessible interior location, and a lightweight bag near an exit. Avoid closets or corridors that could become blocked.
Is it safe to use an elevator after an earthquake?
Do not use an elevator during shaking or when evacuation is advised. Use a visibly usable stairway and follow officials or building personnel, since elevators may lose power or stop between floors.
How can neighbors support residents who cannot use stairs?
Coordinate before an earthquake, identify trusted helpers, and tell management about accessibility needs. Never carry someone down stairs without suitable training or an approved evacuation procedure.
Further Reading
Authoritative Sources
Earthquakes ready.gov
Federal preparedness information covering protective actions, supplies, alerts, and recovery decisions for earthquake households
Earthquake Hazards Program usgs.gov
Explains earthquake hazards, aftershocks, shaking, and risk information that can inform apartment-level decisions
Earthquake Safety and Preparedness fema.gov
Provides government guidance on reducing household hazards and responding safely after an earthquake
Conclusion
Apartment earthquake readiness is less about owning a gas wrench and more about controlling the hazards you can actually influence. Secure furniture and glass, protect sleeping areas, store portable water and sanitation supplies, and keep a lightweight evacuation bag where it remains reachable. Learn the building’s utility boundaries, emergency contacts, stair routes, inspection process, and communication system before shaking occurs. Afterward, look for fire, smoke, damaged wiring, flooding, and structural warning signs rather than assuming a standing building is safe. Coordinate with management and neighbors, especially when mobility, medical, or pet needs affect evacuation. Review the setup after household changes and practice the route once or twice a year so the plan remains usable under real apartment constraints.