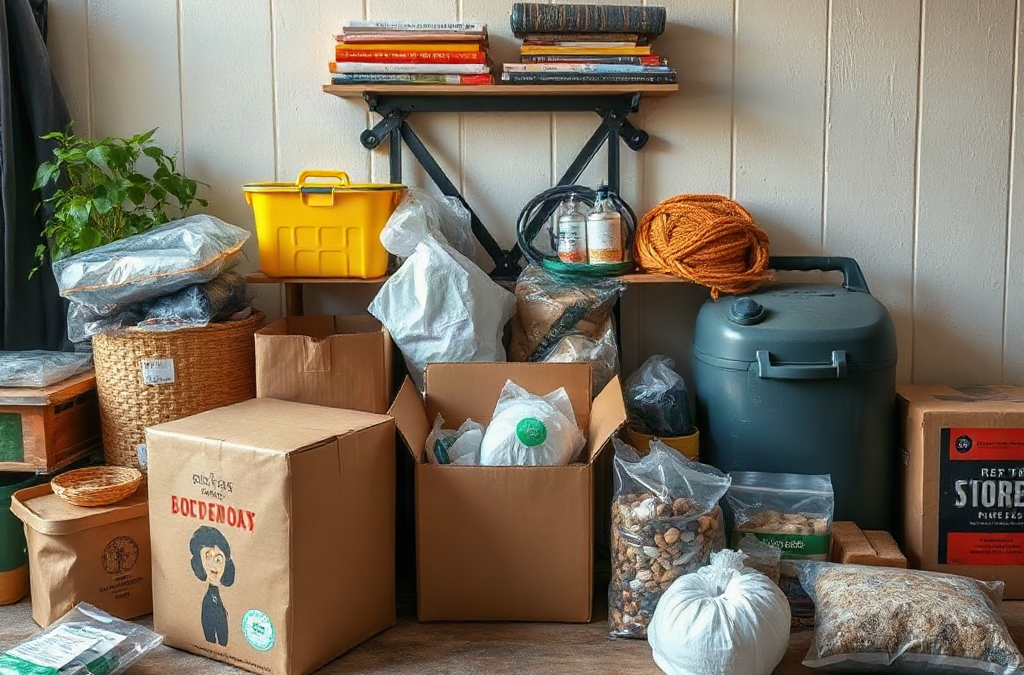
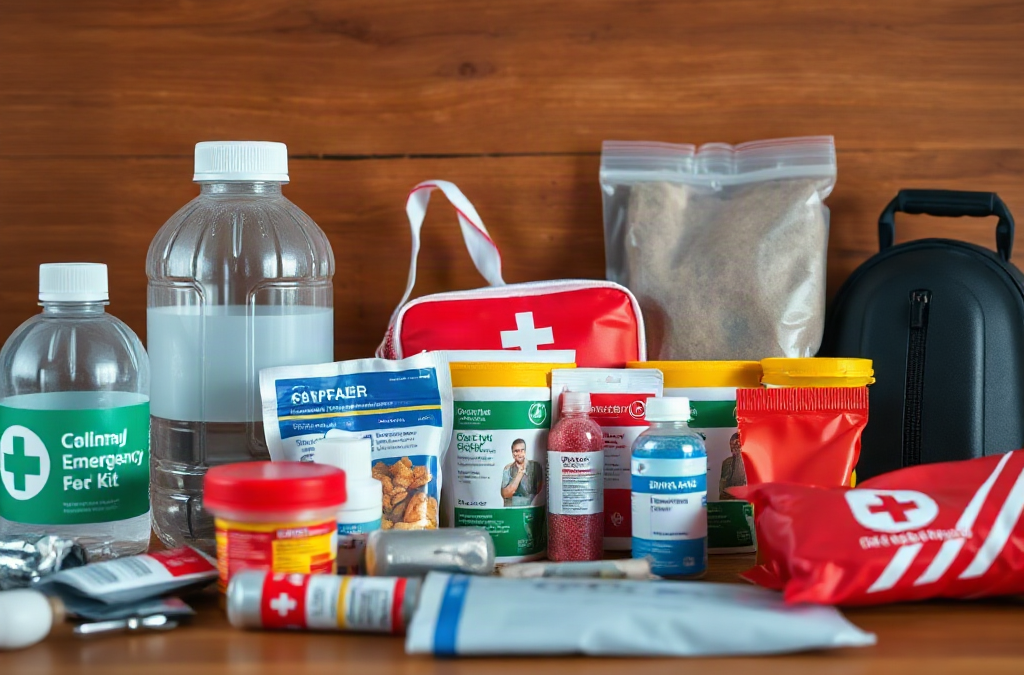
Free supplies are worth accepting when their condition, purpose, and history can be reasonably verified. The safest no-cost additions are usually ordinary items with simple failure modes: unopened shelf-stable food, clean food-grade containers, blankets, manual can openers, paper maps, basic hygiene products, and working flashlights. These items do not become safe merely because they cost nothing, so inspect them as carefully as something purchased at a store.
A useful distinction is the difference between a low-consequence convenience and a safety-critical tool. A donated plastic tote with a cracked lid may still hold towels, but a damaged water container can leak or introduce contamination. A spare cotton shirt can serve as clothing or a dust cover, while an unknown respirator, expired medication, or altered electrical cord should not be treated as dependable protective equipment. Free prepping supplies sourced without unsafe substitutions depend on matching the item to a task it can actually perform.
Prioritize supplies that are identifiable and inspectable:
Factory-sealed food and drinks within their labeled dates and stored in reasonable conditions.
Clean, food-grade containers with intact interiors, lids, and threads.
Unused soap, toilet paper, trash bags, menstrual products, and other sealed hygiene goods.
Working flashlights, lanterns, radios, and batteries that fit the device and show no leakage.
Blankets, sturdy clothing, storage bins, paper supplies, and hand tools with no obvious damage.
The safer choice may be to decline an item even when another person calls it useful. Unknown powders, unlabeled liquids, recalled baby products, moldy textiles, badly corroded batteries, and opened sterile medical supplies introduce uncertainty that is difficult to remove. A free object saves money only if it does not create a health hazard, damage another item, or fail at the moment it is needed. Treat uncertainty as a cost, not as a bargain.
Where to Find Useful Items Without Buying Them
Reliable no-cost sourcing usually comes from organized exchanges rather than random scavenging. Local mutual-aid groups, neighborhood sharing networks, community centers, food pantries, school surplus programs, workplace safety closets, and library lending programs may offer supplies or point residents toward them. Disaster agencies and local governments sometimes distribute water, information materials, sanitation goods, or other assistance during specific events. Availability varies, so confirm eligibility, collection times, storage rules, and quantity limits directly with the organization.
Reuse within your own home is often the most controllable source. Retired backpacks can hold evacuation documents, clean jars can store dry goods if they are appropriate for food contact, and sturdy boxes can organize supplies off the floor. Reuse works best when the original function is close to the new one. A food container reused for food is easier to assess than a container that previously held automotive fluid. A clean towel can support hygiene, but it is not a substitute for a sterile dressing.
Community exchanges require more screening than household reuse because the item’s history may be incomplete. Ask specific questions rather than relying on broad assurances:
What was the item used for, and how was it stored?
Is the package sealed, labeled, and within its usable date?
Does the item have a model number, recall history, or manufacturer instructions?
Can it be inspected or tested before acceptance?
For example, a community giveaway of bottled water may be useful if cases are sealed and have been stored away from heat and chemicals. Loose bottles in a garage with unknown exposure deserve more caution. A donated camp stove may be valuable if its fuel connection, hose, controls, and instructions are present, but a missing regulator is not a reason to improvise one. The less information available about a device, the more appropriate it is to choose a simpler, lower-risk item instead.
Use free prepping supplies sourced without unsafe substitutions as a sourcing standard, not a promise that every community offer is suitable. A polite refusal protects the usefulness of the rest of the collection.
How to Screen Donated and Reused Supplies
Screen each item in four stages: identify it, inspect it, test it, and assign it a clear use. Identification means locating the label, material, size, expiration date, model information, or instructions. Inspection looks for cracks, swelling, leaks, corrosion, contamination, missing parts, frayed cords, and evidence of heat or moisture damage. Testing should be limited to normal operation and should never involve bypassing a safety feature or combining parts that were not designed to work together.
Food and water storage need special attention because contamination may not be visible. Reject cans that are leaking, bulging, deeply rusted at seams, or severely dented near the lid. Do not use a container that previously held chemicals for drinking water, even if it has been washed. Glass jars can be practical for dry foods, but they are breakable and may be a poor choice for transport. Clear labeling and a protected storage location reduce confusion when several people are using the supply.
Electrical and fuel-powered devices deserve a higher threshold. Examine battery compartments for leakage, confirm that replacement batteries are the correct type, and check cords for cuts or exposed conductors. For fuel appliances, confirm that the fuel type, connector, regulator, and ventilation requirements are known. Never test a questionable combustion device indoors. A free flashlight with a clean compartment is preferable to a powerful lantern with damaged wiring or an unknown fuel system.
Medical and protective items should not be accepted merely because they look new. Opened bandages, expired sterile products, unsealed gloves, unknown ointments, and prescription medicines may not be dependable or appropriate. A clean roll of gauze in an intact package has a different risk profile from a loose dressing in a plastic bag. When a task involves injury treatment, fire protection, electrical work, or chemical exposure, use equipment made and labeled for that task rather than a homemade substitute.
Record the result with a simple status system: accepted for direct use, accepted for low-risk backup, quarantined for more information, or rejected. This prevents a questionable item from quietly entering the main supply. If a flashlight fails during a ten-minute household test, mark it for repair or recycling rather than placing it back in the emergency drawer. Screening is successful when the collection becomes smaller but more dependable.
Building a No-Cost Supply Priority List
A practical priority list begins with immediate household functions, not an impressive inventory. Ask what must continue during a short outage or an unexpected departure: drinking, eating, sanitation, lighting, communication, warmth, and access to essential information. Free sources should fill these functions in that order. A decorative item or specialized gadget can wait while the household lacks a clean water container, soap, or a way to open food.
Use a three-column assessment: need, safe free source, and backup if unavailable. For drinking water, the free source might be a clean, labeled food-grade container; the backup could be a commercially produced container obtained later. For lighting, a working flashlight from a household drawer may be enough, while candles introduce flame risk and should not be treated as an automatic replacement. For communication, a paper list of phone numbers and addresses costs little and remains useful even if electronic devices lose power.
A compact priority order can look like this:
Water storage and safe drinking access.
Shelf-stable foods that household members can actually eat.
Soap, sanitation materials, waste bags, and personal hygiene supplies.
Lighting, spare compatible batteries, charging cables, and a manual information source.
Warmth, basic tools, documents, and mobility supplies.
Household needs change the ranking. A person with an infant may prioritize sealed feeding supplies and diapers; someone with mobility limitations may need a stable bag, seating support, or transportation coordination before adding more food. A pet household needs species-appropriate food and water containers, not human food substitutions. The goal is functional coverage, not equal quantities of every category.
Review the list after a realistic trial. During an evening without normal lighting, note what was hard to locate, what required power, and which donated items were awkward or unusable. If a free storage bin is too heavy to move when full, it may work better for stationary supplies than for evacuation. If household members cannot identify the contents quickly, add labels and group items by use. Practical testing exposes weaknesses that a visual inventory hides.
Common Substitution Mistakes and Safer Alternatives
The most dangerous substitutions replace a safety feature with a material that merely resembles the original item. A scarf is not a certified respirator, a kitchen towel is not a heat-resistant glove, and a repurposed bottle that held cleaner is not a water vessel. Similar appearance does not mean equivalent filtration, temperature resistance, chemical compatibility, or structural strength.
Another mistake is treating a missing component as optional. A stove without its correct regulator, a flashlight without a compatible battery, or a water filter without its specified cartridge may look nearly complete while being unusable or unsafe. Manufacturer instructions matter because fittings, pressure, voltage, and filtration performance are designed as systems. If the original part cannot be found, choose a simpler complete item instead of forcing a workaround.
Expiration dates also require judgment. Dates on some products relate to quality rather than an instant change in safety, but that does not justify ignoring all dates. Infant products, sterile medical supplies, medications, chemical treatments, and temperature-sensitive goods deserve particular caution. For ordinary packaged foods, inspect the seal and condition, follow storage directions, and use household judgment; do not distribute questionable food to someone with limited ability to assess it.
When deciding whether to substitute, ask three questions: Does the replacement perform the same technical function? Can its condition and compatibility be verified? What happens if it fails? If failure could cause poisoning, burns, serious injury, loss of clean water, or inability to evacuate, do not improvise. If failure only causes inconvenience, such as using a box for organization instead of transport, a carefully inspected reuse may be reasonable.
Keep questionable items separate from the dependable supply and explain the reason to anyone sharing the collection. That simple practice prevents a well-meaning person from using an unlabeled container or damaged tool under pressure. The strongest no-cost approach combines reuse, community support, and disciplined refusal. For additional planning ideas, compare your inventory with Free prepping supplies sourced without unsafe substitutions and remove anything whose safety depends on guessing.
Frequently Asked Questions
What free prepping supplies are usually safest to accept?
Sealed food, clean food-grade containers, unused hygiene products, blankets, paper information, and tested basic lighting are generally easier to evaluate than chemicals, medicines, fuel systems, or protective equipment.
Can reused containers hold drinking water?
Use only containers designed for food or water contact, with a clean interior, intact lid, and no history of chemical storage. Do not rely on washing an unknown chemical container.
Should expired donated food be kept?
Inspect the packaging, storage history, and product type. Reject leaking, bulging, badly damaged, or questionable packages, and use extra caution with products for infants or people with special dietary needs.
What items should never be improvised?
Avoid improvised substitutes for respirators, sterile medical supplies, fire protection, electrical components, fuel connections, and chemical-handling equipment because failure can cause serious harm.
How can a free item be tested safely?
Identify its intended use, inspect labels and condition, test normal operation in a controlled setting, and keep it out of the main supply if compatibility or safety remains uncertain.
Further Reading
Authoritative Sources
Ready.gov Emergency Kit ready.gov
Provides a government-maintained starting point for evaluating household supplies and adapting them to personal needs
Food Safety at Home fda.gov
Explains practical food handling and storage considerations relevant to donated and stored food
Hygiene and Handwashing cdc.gov
Offers public-health guidance for selecting and using sanitation supplies when normal services are disrupted
Conclusion
Free sourcing works best when it reduces cost without reducing confidence. Begin with water storage, food, sanitation, lighting, and communication, then accept only items with a clear purpose and inspectable condition. Household reuse and organized community exchanges are usually easier to control than anonymous donations, but every item still needs a decision about contamination, compatibility, expiration, and failure consequences.
Separate low-risk convenience items from safety-critical equipment, and never replace a certified or purpose-built component with something that merely looks similar. Test supplies before storing them, label what you keep, and remove anything that depends on guesswork. A smaller collection of verified, usable goods will serve the household better than a larger pile of uncertain substitutes.
Seasonal shortages tend to affect products with concentrated demand, limited production windows, transportation exposure, or short shelf lives. Winter storms can interrupt deliveries and increase demand for heating-related goods, while hurricane season can quickly tighten supplies of bottled water, batteries, fuel containers, and shelf-stable food. Holiday periods may strain baking ingredients, packaging, toys, and popular household goods. Seasonal illness waves can create temporary pressure on thermometers, tissues, disinfecting products, and certain over-the-counter medicines.
The practical implication is that a useful stock-up list is based on household dependence, not internet popularity. A family that cooks from dry staples may benefit from rice, beans, canned tomatoes, and cooking oil; a household with an infant, a pet, or a member who uses a particular medical product needs a different priority order. The Items to stock up on before seasonal shortages should therefore be products with predictable use, realistic storage requirements, and few acceptable substitutes.
A common mistake is waiting until a shortage is visible. Once shelves are empty, buyers often accept expensive alternatives, unfamiliar brands, or quantities they cannot store properly. A better approach is modest, repeated purchasing during ordinary shopping trips. Watch for products that are consistently used, difficult to replace, or needed on a fixed schedule. Prescription medicines require special attention because refill rules, insurance limits, and clinician guidance may affect how early they can be obtained; do not change a medication schedule simply to create a surplus.
Another weak assumption is that every seasonal disruption produces a long-term shortage. Many gaps are brief and uneven, with one store or brand affected while alternatives remain available. Buying a reasonable reserve protects against inconvenience without encouraging waste or tying up money in low-priority goods. The goal is continuity for essential routines, not an attempt to purchase an entire season at once.
Foods Worth Buying Early and Rotating
Food reserves work best when they extend ordinary meals rather than create a separate emergency diet. Shelf-stable staples such as rice, pasta, oats, flour, canned beans, canned fish, canned vegetables, fruit packed in juice, broth, cooking oil, peanut or other nut butter, and shelf-stable milk can cover different meal patterns. Choose products that match allergies, cultural preferences, cooking equipment, and water availability. A dry ingredient may be inexpensive, but it is less useful if it requires lengthy cooking when fuel or electricity is limited.
Buy foods in layers. First cover several familiar meals with ingredients already used each week. Then add foods that require little preparation, such as canned soups, ready-to-eat beans, crackers, and packaged grains. In closing, consider specialty items for dietary needs. This order protects the budget and lowers the chance of discovering that a large purchase is unpopular or difficult to prepare. For example, a household that normally eats oatmeal can rotate extra oats through breakfast, while a large container of an unfamiliar grain may remain untouched until it expires.
Rotation matters more than maximum quantity. Place newer packages behind older ones, mark open dates when useful, and inspect cans for severe dents, swelling, leakage, or rust that compromises the container. Keep dry goods sealed against moisture and pests, and store foods in a cool, dry location rather than a hot garage or damp basement. Manufacturer dates may relate to quality rather than an automatic safety deadline, but damaged packaging and poor storage still create real risks.
Bulk buying has tradeoffs. Large packages often reduce unit cost, yet they can waste money if a household cannot consume them before quality declines. Smaller packages may cost more per ounce but provide better rotation and less exposure if storage conditions are uncertain. Use the seasonal shortage supply list as a decision aid: prioritize versatile ingredients, compare usable servings rather than package size, and leave room for water, cooking fuel, and foods that require refrigeration.
High priority: foods already eaten regularly and compatible with household dietary needs.
Useful additions: low-preparation items for days when cooking time, fuel, or power is limited.
Lower priority: novelty products, fragile packages, and bulk items without a clear meal plan.
Household, Health, and Personal-Care Supplies
Nonfood supplies can become difficult to replace because people tend to buy them only when they are nearly gone. Toilet paper, tissues, soap, toothpaste, menstrual products, diapers, pet food, laundry detergent, dish soap, trash bags, and basic cleaning products deserve an early review. These items are not equally urgent: a household may find a substitute for one brand of dish soap, while a particular infant size, skin-sensitive product, or pet diet may have fewer acceptable options.
Health-related supplies need a conservative approach. Keep a working thermometer, bandages, gauze, adhesive tape, hand soap, and any routinely used over-the-counter products that are appropriate for the household. Check labels, expiration dates, storage instructions, and duplicate active ingredients in combination products. Buying multiple medicines with the same ingredient can create avoidable dosing problems, especially when different family members use products for similar symptoms. Follow package directions and ask a pharmacist or clinician when a medicine, health condition, pregnancy, or child’s age creates uncertainty.
Seasonal conditions also change which household items are useful. Before winter, inspect heating-related accessories, batteries, flashlights, cold-weather clothing, and safe alternatives for basic lighting. Before storm-prone months, check manual can openers, water containers, portable phone charging options, and supplies for pets. Before hot weather, review fans, sunscreen, insect protection, and cooling supplies. These purchases should be based on the home’s actual risks; buying equipment that cannot be safely operated or maintained is less useful than improving a simple, reliable setup.
The common failure is treating all consumables as interchangeable. Unscented soap may be a reasonable replacement for one person but unsuitable for someone with a skin sensitivity. A generic pet food may not suit an animal with dietary restrictions. A different battery size cannot replace the one required by a flashlight. Record preferred brands or specifications for products where substitution could cause a problem, then purchase those items earlier and keep a modest reserve. The household supply checklist should reflect these constraints rather than simply counting packages.
How to Set Quantities Without Overspending
Quantity decisions become clearer when they are tied to normal consumption and replenishment time. Track how much a household uses during one ordinary month, then identify products that would be difficult to replace for several weeks. A small reserve may be enough for flexible products, while a larger buffer can make sense for infant supplies, pet food, or a product with limited local availability. Avoid choosing a target number without checking storage space, cash flow, expiration dates, and realistic consumption.
A simple three-part priority system works well. First, protect continuity: list products that would disrupt eating, hygiene, health routines, caregiving, or pet care if unavailable. Second, protect flexibility: add versatile foods, basic cleaning supplies, batteries, and simple lighting. Third, add convenience items only after the first two groups are covered. This prevents a cart filled with snacks or duplicate gadgets from displacing soap, cooking staples, or needed personal-care products.
Compare the cost of holding stock with the cost of replacement. A two-pack of a frequently used product may be sensible, but a large case that occupies valuable space can force poor storage or expire unnoticed. Use a written inventory with the item, quantity on hand, purchase date, expiration or best-by date when relevant, and preferred substitute. Review it before each seasonal shopping cycle. Signs the system is working include fewer last-minute purchases, regular use of older stock, and no crowded storage area that prevents inspection.
Budget pressure calls for sequencing rather than abandoning the effort. Add one or two high-use items during routine shopping, choose store brands when quality and suitability are acceptable, and avoid buying perishable products simply because they are discounted. A sale is not a saving if the item is unwanted, unsafe for the household, or likely to expire before use. For larger households, divide purchasing across weeks and assign storage locations so the inventory remains visible.
Storage, Rotation, and Substitution Mistakes
Storage conditions determine whether a stockpile remains useful. Keep food, medicines, batteries, and cleaning products in locations that match their labels and manufacturer instructions. Separate chemicals from food and medicines, prevent children and pets from accessing hazardous products, and avoid placing heavy containers where they can fall. Temperature swings, moisture, sunlight, and pests can damage supplies even when the package appears intact.
Rotation should be routine rather than a once-a-year purge. Put recently purchased goods behind older ones, use the older item first, and replace it during normal shopping. Opened packages deserve particular attention because seals may be weaker and contamination or quality loss can occur sooner. For foods, plan occasional meals around older stock. For batteries, test devices rather than assuming every battery is ready; discard damaged or leaking batteries according to local disposal guidance.
Substitution planning is useful, but it should be specific. Pasta may replace rice in some meals, yet neither replaces a gluten-free staple for someone who needs one. A different soap may be acceptable, but a different medication or infant formula requires more caution. Write down two acceptable alternatives only where the household has already used them successfully. This reduces panic buying while avoiding the mistake of assuming every substitute is safe or practical.
One failure mode is storing supplies in a place that is technically available but operationally inaccessible. A basement shelf blocked by boxes, a garage exposed to heat, or a cupboard packed so tightly that dates cannot be checked is not dependable storage. Keep the most frequently used items at reachable height, label bins by function, and leave enough room to inspect packaging. Reassess after each season: products that remain untouched, deteriorate, or create clutter should be removed from the next buying cycle.
For food storage and household safety decisions, consult current guidance from the USDA Food Safety and Inspection Service, the U.S. Food and Drug Administration, local public health departments, and product manufacturers. Their instructions are more reliable than general storage claims when a food, medicine, chemical, or appliance has specific handling requirements.
Frequently Asked Questions
How far ahead should I buy seasonal supplies?
Begin reviewing likely needs several weeks before the season or event that increases demand. Buy gradually, giving extra lead time to products with few acceptable substitutes or unreliable local availability.
Which foods are easiest to store and rotate?
Foods your household already eats are easiest to rotate. Rice, pasta, oats, canned beans, canned vegetables, broth, cooking oil, and nut butter are useful only when they fit your meals, dietary needs, and cooking setup.
Should I buy medicine in bulk before a shortage?
Follow package directions, pharmacy policies, insurance limits, and clinician advice. Avoid duplicating active ingredients, and do not change a prescription schedule or use an unfamiliar medicine without appropriate professional guidance.
How can I stock up with limited storage space?
Prioritize compact, high-use products and avoid oversized packages that cannot be rotated. Use a written inventory, store items by function, and replace products during normal shopping instead of creating a large reserve at once.
What is the biggest stock-up mistake?
Buying large quantities without considering actual use, expiration, storage conditions, or substitutes is the most common mistake. A smaller supply of suitable products is more useful than a large reserve that becomes inaccessible or wasteful.
Conclusion
Effective seasonal stock-up decisions begin with products that protect ordinary routines: familiar foods, necessary personal-care items, household consumables, basic health supplies, and seasonal equipment suited to local conditions. Buy early enough to avoid peak demand, but keep quantities tied to consumption, storage capacity, budget, and replacement difficulty. Rotate older goods into daily use, inspect packaging, separate hazardous products, and record items that cannot be easily substituted. A practical inventory is not the largest one; it is the one that remains visible, usable, and appropriate for the people, pets, and routines it serves. Review the list before each seasonal shift, add a few priority items during normal shopping, and adjust based on what was actually used rather than what remained untouched.
A function-based supply list is organized around what you need to accomplish rather than where an item is normally sold or stored. “Water,” “food,” and “tools” are familiar categories, but they do not show whether a household can collect, treat, carry, and use water. Grouping supplies by function makes those dependencies visible.
Consider a basic lighting setup. A category list may record flashlights and lanterns, yet omit batteries, charging cables, spare power banks, mounting options, or a way to find the equipment in darkness. A function list asks a more useful question: can each person safely see, move, read, and signal during the expected interruption? That shift turns an inventory into an operational check.
The approach is especially useful when supplies serve more than one purpose. A utility knife may support food preparation, repairs, and packaging, while heavy-duty bags may support sanitation, water transport, and waste control. Category-based lists often duplicate these items in several places or hide them under an unrelated heading. A functional map shows shared equipment and makes it easier to decide where it belongs.
Use Supply lists organized by function instead of category when storage space, budget, or attention is limited. It does not require abandoning familiar categories; categories can remain useful for shopping and inventory. Function should lead the planning, while category can support purchasing and labeling afterward.
How to Build a Function-Based Supply List
Begin with the situations the supplies must support, then describe the required outcome in plain language. A short power outage, an evacuation, a minor injury, and several days at home create different functional demands. Avoid starting with a favorite product or a list copied from a container. Start with the task, duration, users, and constraints.
For each function, identify five layers: the primary item, the inputs it consumes, the accessories that make it usable, the information needed to operate it, and the replacement or maintenance requirement. Water treatment, for example, may involve a treatment method, untreated water containers, clean storage vessels, a measuring device, written instructions, and a way to clean the equipment. Omitting one layer can make the apparent solution unreliable.
A practical worksheet can use columns for function, required outcome, items, consumables, dependencies, location, and review date. The location column matters because a supply that exists but cannot be reached during a blocked doorway, nighttime search, or rushed departure is not equally useful as one stored at the point of need.
Useful functions may include:
Producing and storing safe drinking water.
Preparing food without relying on normal utilities.
Providing light, charging, and basic information access.
Managing sanitation, waste, and personal hygiene.
Handling minor injuries and protecting essential medications.
Communicating, carrying, repairing, and leaving the area safely.
These labels should remain specific enough to test. “Communication” is too broad if it does not distinguish receiving information, contacting someone, and keeping devices powered. “Shelter” may need separate checks for warmth, weather protection, privacy, and sleeping comfort. The right level of detail is the smallest set of functions that can be reviewed without confusion.
Testing Completeness Under Real Constraints
A list becomes useful when it is tested as a system rather than admired as an inventory. Choose a realistic scenario and walk through the first hour, first day, or expected duration. Ask what must happen in sequence, which item is used first, what gets consumed, and what happens if one component fails.
Imagine a household leaving after a local hazard warning. A category list may contain food, clothing, tools, and documents in separate locations. A function-based review checks whether someone can receive the warning, gather people and pets, carry water, protect documents, illuminate the route, charge a phone, and access transportation information. The result may show that the household owns enough individual items but lacks a grab-ready container, spare vehicle access, or a clear document location.
Testing also exposes weight and volume problems. A large stock of supplies may be suitable for staying home but impractical for a vehicle or rapid departure. Compare two versions of each function: a home version with greater capacity and a portable version with fewer items. A compact water container, small light, basic hygiene materials, and charging equipment may serve departure better than a full household reserve. The tradeoff is reduced duration, so the list should state what each version can realistically support.
Run a simple review in this order:
State the scenario, number of people, and expected duration.
Mark every function that must operate during the first few hours.
Trace dependencies such as fuel, batteries, water, access, instructions, and transport.
Use or inspect representative items instead of checking boxes from memory.
Record one failure point and one improvement for each function.
Signs the method is working include faster retrieval, fewer duplicate purchases, clear ownership of maintenance, and fewer items that remain unused because nobody knows their role. Signs it is failing include vague headings, supplies split across inaccessible locations, expired consumables, and equipment that depends on an input not listed anywhere. A function that cannot be demonstrated should be treated as incomplete.
Common Mistakes and Better Priorities
The most common mistake is confusing possession with capability. Owning a water filter does not prove that water can be treated; owning a radio does not prove that information can be received or understood; owning food does not prove that it can be opened, prepared, or tolerated by everyone who will eat it.
A second mistake is giving every function equal weight. Priorities should reflect consequence, frequency, and dependency. Drinking water, required medication access, sanitation, safe lighting, and communication may deserve attention before specialized tools. A rare repair task should not displace the basic items needed every day during a disruption. Limited funds are better assigned to closing a complete function than adding a second version of an incomplete one.
Another weak assumption is that one universal list fits every household. Children, older adults, pets, mobility limitations, dietary requirements, work locations, and transportation options change the functional design. A person who cannot carry a heavy container needs a different water and transport arrangement from someone who can. A household dependent on refrigerated medication needs a power and temperature plan that cannot be replaced by general first-aid supplies.
Review each function for four failure modes: missing component, wrong location, depleted input, and unfamiliar operation. Labeling bins by function can improve retrieval, but labels should not conceal dependencies. “Lighting” should point to lights, power sources, chargers, and any required adapters. Keep a small number of high-use functions together, while storing bulky reserves separately if the location is clearly marked.
Use the functional list as a decision tool during purchasing. For every proposed item, ask which function it completes, which existing item it replaces, what it consumes, and whether it adds capability or merely redundancy. Recheck the list after seasonal changes, household changes, equipment failures, or a move. A quarterly hands-on review is more informative than repeatedly editing a spreadsheet without using the supplies.
Turning the List Into an Maintainable System
A strong function-based list includes ownership and timing, not just item names. Assign someone to check batteries, replenish consumables, inspect containers, verify contact information, or confirm that instructions still match the equipment. Without an owner, maintenance becomes an assumption and small omissions accumulate.
Separate durable equipment from consumables and from documents or instructions. Durable items need inspection and occasional operation; consumables need rotation and quantity checks; documents need secure access and current information. This separation makes review faster without returning to a category-only system. It also helps identify the true cost of a function, which includes replacement parts, fuel, charging, storage, and time.
Use a priority scale such as required now, useful next, and optional later. “Required now” should mean that the function is unsafe or unusable without the item, not that the item is appealing. For example, a charging cable that matches the household’s actual phone may be more valuable than an additional device. A manual can be more useful than a specialized accessory when unfamiliar equipment is involved.
Finish by conducting a small drill that does not create risk: locate the supplies in darkness, assemble the cooking method without igniting it, pack the portable version, or explain the water process to another household member. The objective is not theatrical practice. It is finding friction while there is still time to correct it. A revised functional inventory should record what was difficult, what was missing, and what can be simplified.
For practical planning details, consult local emergency-management guidance, public-health instructions for water and sanitation, and manufacturer documentation for any stove, battery system, filter, or medical device included in the list. These sources can clarify operating limits and maintenance requirements that a general inventory cannot establish.
Frequently Asked Questions
What does a function-based supply list include?
It includes the outcome a household needs, the items that produce it, required inputs, accessories, instructions, storage location, and maintenance schedule.
Are category-based lists still useful?
Yes. Categories are useful for shopping and storage, but functions are better for checking whether the supplies work together and cover real tasks.
How many functions should a list have?
Use enough detail to test important tasks without creating dozens of vague entries. Water, food preparation, lighting, sanitation, communication, medical needs, transport, and repair are common starting points.
How can I prioritize supplies on a limited budget?
Complete high-consequence functions first, including water, required medication access, sanitation, safe lighting, and communication. Avoid buying duplicates before dependencies are covered.
How often should a functional list be reviewed?
Review it after major household or equipment changes and perform a hands-on check at least several times a year, with extra attention to batteries, fuel, medications, and other consumables.
Conclusion
Organizing supplies by function changes the central question from “What do we own?” to “What can we reliably do?” Build each function around a specific outcome, then account for inputs, accessories, instructions, storage, and maintenance. Test the list against a realistic duration and scenario, separating portable needs from home reserves where necessary. Prioritize complete, high-consequence capabilities before buying specialized or duplicate items. A short hands-on review will reveal more than a long inventory: missing batteries, inaccessible containers, unfamiliar equipment, and expired consumables become visible immediately. Keep category labels for shopping if they help, but let functional tests determine whether the system is genuinely usable.
Build Around the First 24 Hours, Not a Large Stockpile
Limited storage changes the objective from collecting everything to covering the earliest, most disruptive needs. A compact kit should help one person manage a short interruption in power, water access, transportation, communication, or shelter. That usually means choosing a small core load that can be carried or moved quickly, then storing a few household-specific items elsewhere when space allows.
Water deserves early attention because it is difficult to compress and often cannot be replaced by a gadget. Store some drinking water if your space permits, but do not let a large container crowd out medications, phone power, or sanitation supplies. A collapsible bottle can save space when empty, while purification tablets or a compact filter may provide an additional option. These tools have different limitations: treatment products may require clear instructions and a filter may not address every contaminant. Follow the product label rather than assuming one method works for every water source.
Food selection should favor ready-to-eat items that tolerate room temperature and do not require cooking. Small nut or seed packets, shelf-stable nutrition bars, crackers, canned fish with a pull tab, and single-serve fruit can provide variety without a large cooking setup. Check allergy, medical, and cultural requirements before buying a generic assortment. A compact kit filled with foods nobody can eat is less useful than a smaller kit matched to the person carrying it.
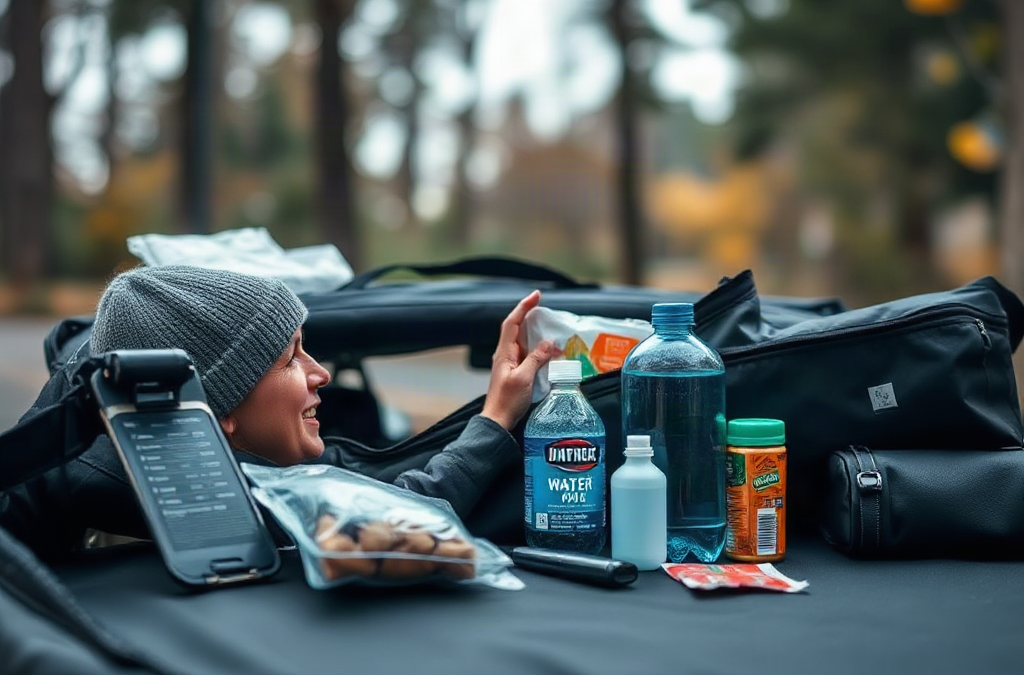
Use Emergency kits for people without storage space as a starting point, then remove anything that duplicates an item already carried daily. The first working version might fit in a commuter backpack: water container, food, light, power bank, charging cable, basic first aid, hygiene items, copies of key information, and a small communication aid. The common failure is trying to create a miniature warehouse. A deliberately limited first-day kit is easier to store, move, inspect, and actually use.
Choose Supplies by Volume, Weight, and Multiple Uses
Every item in a small emergency kit should earn its space through frequency, consequence, or versatility. A headlamp, for example, provides hands-free light while a person carries water, unlocks a door, or manages a minor injury. A phone power bank supports communication, navigation, alerts, and access to digital records. Multipurpose choices reduce volume, but only when their primary function remains reliable.
Start with a simple priority test. Ask what problem the item addresses, whether another item already covers it, whether it needs batteries or maintenance, and whether a lighter alternative exists. A small pair of scissors may be more useful than a bulky multitool for some users, while a multitool may suit someone who routinely needs pliers or screwdrivers. Neither is automatically better; the choice depends on likely tasks and the user’s ability to handle it safely.
Flat and soft packaging can make a meaningful difference in a studio apartment or shared room. Resealable pouches, compact soap sheets, folded masks, travel tissues, and a small towel occupy less irregular space than rigid kits. Keep critical supplies visible and grouped rather than scattering them through drawers. A zippered pouch inside a backpack can hold first aid and medication information, while a separate outer pocket can hold the light and phone cable for quick access.
Do not confuse high density with usefulness. A compressed blanket may occupy little room but does not replace warm clothing, and a tiny first-aid pouch may contain dressings too small for the injuries it claims to address. Compare a “survival gadget” against ordinary items already owned: a spare eyeglasses case, durable socks, a whistle, or a sealable bag may solve a specific problem more simply. Include written instructions for unfamiliar equipment. An item that requires internet access, a special battery, or complex assembly may fail precisely when the kit is needed.
Make a compact checklist that reflects the person rather than a catalog:
Communication: charged power bank, cable, contact card, and a small radio when appropriate.
Light and navigation: headlamp or flashlight, spare batteries if required, and a paper address or route note.
Health: essential medication information, prescribed supplies, glasses, basic first aid, and protective gloves.
Water, food, and sanitation: refillable container, treatment option, ready-to-eat food, wipes, tissues, and waste bags.
That list is a decision aid, not a fixed shopping order. Someone with diabetes, mobility limitations, pets, or an infant will need to allocate space differently and should not remove medically necessary supplies to preserve a minimalist aesthetic.
Use Small-Space Storage Locations Without Creating New Problems
The best storage location is compact, accessible, and protected from heat, moisture, and accidental disposal. Under-bed space, the back of a closet, a coat pocket, a desk drawer, or the area beside an exit can work better than a high cabinet. The correct choice depends on the building and the person’s routine. A kit hidden behind seasonal boxes may technically exist but be unavailable during a nighttime evacuation or power failure.
Use containers that match the space rather than forcing every item into one large bin. A backpack is useful when the kit may need to leave with its owner. A shallow lidded box suits a bed frame or shelf, while a soft organizer can fit in a narrow closet. In a shared home, label the container clearly and tell everyone where it is. In a dormitory, shared housing, or small apartment, avoid blocking hallways, exits, heaters, electrical panels, or building equipment.
Storage conditions affect reliability. Heat can damage some medications, batteries, adhesives, and food; dampness can ruin paper records, cardboard packaging, and metal tools. Keep documents in a sealed sleeve, but avoid sealing items that need ventilation or are prone to condensation. Inspect the container after moving furniture or changing rooms. A formerly convenient spot may become inaccessible once luggage, a bicycle, or a new appliance occupies the same area.
Consider a two-layer arrangement instead of one oversized kit. The first layer is a grab-and-go pouch with light, phone power, identification copies, medication details, glasses, and keys. The second layer is a compact reserve with food, water treatment, sanitation items, clothing, and extra medical supplies. This approach suits a person who cannot store a large tote but still needs more than can fit in a coat pocket. The tradeoff is that separate layers can be forgotten or divided between roommates, so both locations should be labeled and checked together.
Common storage mistakes include placing batteries loose beside metal objects, keeping food where pests can reach it, and storing the kit in a vehicle without considering temperature swings. A vehicle may be a useful supplemental location for certain durable items, but it should not be the only place for medication, identification, or supplies needed immediately at home. Test whether you can retrieve the kit in low light and with one hand occupied; that practical test reveals problems a tidy shelf arrangement can hide.
Rotate, Test, and Adapt the Kit to Your Situation
A small kit stays useful through short, repeatable checks rather than a once-a-year shopping session. Set a calendar reminder every few months to inspect expiration dates, battery condition, water containers, food packaging, medication needs, and the fit of clothing or protective equipment. Replace items before they become unusable, and use suitable food in ordinary meals when possible so rotation does not create waste.
Test equipment under ordinary conditions. Turn on the flashlight, connect the power bank to the intended phone, check that the cable fits, read the water-treatment directions, and confirm that the radio or other communication device functions as expected. If a light flickers, a battery leaks, a cable is missing, or a device has an unfamiliar interface, the problem is easier to solve at home than during an outage.
Personal changes should trigger an update. New prescriptions, a change in eyesight, a move to another building, a new pet, or a different commute can alter priorities. A person who works from home may need less commuting equipment but more power and printed contact information. Someone who spends long periods outside may prioritize weather protection. A resident on an upper floor may need a different carrying method than someone who can leave directly at street level.
Keep a short record of what was used during drills or minor disruptions. If the phone cable was difficult to find, move it to the outer pouch. If the food required a can opener, replace it with pull-tab packaging or add a compact opener. If the backpack was too heavy, remove duplicates before purchasing lighter versions. Signs the approach is working include quick retrieval, familiar equipment, intact packaging, and a load the user can carry comfortably. Signs it is failing include forgotten contents, expired supplies, inaccessible storage, or a bag so bulky that it is left behind.
Use official emergency-management guidance for hazards specific to your location, since flood, wildfire smoke, winter weather, earthquake, and building evacuation needs differ. The compact kit should support those plans, not replace them. Add only items tied to a credible local need or a clear personal requirement; space is too limited for impressive-looking objects that do not solve a likely problem.
Frequently Asked Questions
What container works best when storage space is extremely limited?
A backpack or shallow lidded box is usually practical because it protects supplies while remaining easy to move. Choose the container based on where it will live and whether you may need to carry it.
How much water should a compact kit include?
Store as much safe drinking water as your space and local guidance allow, while adding a refillable container and an appropriate treatment option. Do not assume a filter or tablet solves every water-quality problem.
Which items should be prioritized over bulky emergency gear?
Prioritize prescribed medications and health information, light, phone power, water, ready-to-eat food, sanitation supplies, identification copies, and weather-appropriate protection before specialized gadgets.
Can a car serve as the main storage location?
A vehicle can supplement a home kit with durable items, but temperature extremes and distance may make it unreliable. Keep medication, documents, and immediately needed supplies accessible where you live.
How often should a small emergency kit be checked?
Check it every few months and whenever prescriptions, household members, pets, seasons, or living arrangements change. Test lights, power banks, packaging, and other equipment instead of checking dates alone.
Further Reading
Authoritative Sources
Build a Kit ready.gov
Provides official guidance for selecting supplies and adapting an emergency kit to household needs
Survival Kit Supplies redcross.org
Offers practical supply categories that can be scaled for small homes and individual situations
Food Safety and Emergency Preparedness Resources cdc.gov
Helps readers evaluate food, water, medication, and sanitation concerns during disruptions
Conclusion
People with little storage space do not need to imitate a large household stockpile. A compact, reachable kit should cover the first day’s most consequential needs: communication, light, water, food, sanitation, health supplies, and essential information. Use a backpack, shallow box, or divided pouch system; select items that are flat, durable, familiar, and useful for more than one task when that does not compromise reliability. Keep the kit away from heat and moisture, test equipment, and rotate food, batteries, and personal supplies on a calendar. Reassess it after a move, prescription change, seasonal shift, or local hazard warning. The strongest small kit is not the one with the most gadgets; it is the one a person can find, carry, understand, and maintain.
A miniprep kit is best treated as a short-duration bridge, not a miniature version of a large emergency stockpile. Its job is to help one person remain safer and more functional during a delay, sudden closure, transportation problem, power interruption, or unplanned overnight stay. The compact format imposes a useful discipline: every item must solve a likely problem, serve more than one purpose, or protect a personal need that cannot be replaced easily.
Start by defining the situation the kit must cover. A commuter may need to walk home, wait several hours for transportation, or remain at work after public services slow down. A person who travels by car may need supplies for a roadside delay, while someone working remotely may need a small household grab pouch near the entryway. These scenarios do not require identical contents. A heavy blanket may be reasonable in a vehicle during cold weather but wasteful in a desk drawer.
A practical 24-hour kit usually addresses five functions: hydration, energy, basic health, visibility and communication, and personal continuity. Water is difficult to compress, so the kit may use a small sealed bottle, a collapsible container, or a method for obtaining and treating water where that is lawful and appropriate. Food should be familiar, shelf-stable, and usable without cooking. First aid should cover minor cuts, blister care, pain relief that the user already tolerates, and any prescribed medication that can be safely carried.
Personal continuity deserves equal attention. A contact card, small charging cable, spare cash, identification copy stored securely, glasses, menstrual supplies, hearing-device batteries, or allergy-related items may matter more than another general-purpose gadget. The common mistake is building around dramatic scenarios while ignoring the ordinary constraint that actually stops a person: a dead phone, inaccessible medication, wet socks, or inability to contact family.
Use Miniprep kits for compact personal readiness as a design exercise rather than a shopping category. Write down the first six hours of the likely disruption, then identify what could prevent movement, communication, warmth, hydration, or medication access. That list is more reliable than copying a universal checklist.
Choosing Compact Supplies Without Creating Gaps
Compactness should reduce friction, not merely reduce size. A tiny item that breaks easily, requires an obscure battery, or cannot be used in poor light is not automatically a good choice. The strongest supplies are familiar, durable, and easy to verify. Packaging matters as much as the object: a crushed food wrapper, leaking liquid, or loose medication can compromise the rest of the pouch.
Choose food according to calories, tolerance, temperature, and preparation limits. A nut-free bar, crackers, dried fruit, shelf-stable spread, or other familiar snack may work for one person, while allergies, dental limitations, diabetes, or medication timing may require a different combination. Avoid testing a new product during a disruption. A compact food item that causes stomach upset or cannot be opened without a knife has failed its main purpose.
Water planning requires realistic expectations. A small bottle provides immediate access but does not equal a full day of hydration, particularly in heat or during physical exertion. A collapsible bottle saves space when empty but may be less convenient to refill and more vulnerable to puncture. Water treatment products can be useful in specific travel or outdoor contexts, but instructions, expiration dates, and source-water limitations must be understood before relying on them.
Lighting and power deserve a similar comparison. A small LED light is usually more useful than a phone flashlight because it preserves the phone battery for communication and can be positioned hands-free. A power bank adds capability but also adds weight and needs periodic charging. Carrying a cable that does not match the phone, or storing a power bank at zero charge, creates false confidence. The practical test is simple: connect the cable, turn on the light, and confirm that both work before returning them to the kit.
Medical supplies need restraint and personalization. A few adhesive bandages, gauze, tape, antiseptic wipes, blister protection, and gloves may cover common minor problems. Prescription medication should remain in original labeling when possible and should follow the user’s clinician or pharmacist guidance. Do not substitute a generic medicine merely because it is small, and do not use the kit as a place to store loose pills without clear identification. The better tradeoff is a modest, familiar medical layer plus personal items that are genuinely difficult to replace.
Building the Kit for Work, Travel, and Home
The container should match the way the kit will move. A slim zip pouch works for a desk, backpack, or coat pocket; a brighter, tougher case may be better in a vehicle; and a small handled bag can serve a home entry point. The container should open quickly, resist ordinary moisture, and make missing items visible. Multiple small cases can be useful when one contains medication or hygiene supplies, but excessive compartmentalization makes inspection slower.
For a workplace kit, prioritize quiet, low-mess items that can stay in a drawer: sealed water, a familiar snack, compact light, charging cable, basic first aid, hand-cleaning supplies, a mask if the wearer uses one, and a contact card. Include weather-appropriate comfort items if the commute may involve walking, such as thin gloves or foldable rain protection. A desk kit should not depend on access to a kitchen, locker, or personal vehicle unless those are reliably available.
A vehicle kit can carry more weight but faces heat, cold, vibration, and theft risk. Food, medication, batteries, and adhesives may degrade faster in temperature extremes, so not every household kit belongs permanently in a car. A reflective item, water, work gloves, light, phone power support, basic first aid, and a paper map or local contact information may be more useful than a large collection of tools. Check vehicle-specific needs separately, because a tire problem and a personal delay require different equipment.
At home, a miniprep kit is most useful when it can leave with the person quickly. Place it near an exit rather than burying it in a storage room. It can hold a small radio or charging solution, light, medication information, hygiene supplies, snacks, water containers, and copies of essential contact details stored with appropriate privacy protection. If several people share the home, individual medication and comfort needs should not be hidden inside one undifferentiated communal bag.
One compact priority list is more useful than an overfilled pouch:
First: medication, glasses, communication, and personal medical needs.
Second: water access, familiar food, light, and weather protection.
Third: basic first aid, hygiene, documents, cash, and small repair items.
Last: specialized tools, duplicate gadgets, and items included only because they appear on broad lists.
Compare the kit with the alternative of carrying nothing. The purpose is not to eliminate every inconvenience; it is to prevent a short interruption from becoming a medical, communication, or mobility problem. A commuter who already carries water and a power bank may need only the missing pieces, while a person with no regular carry system may benefit from a slightly larger pouch. Reusing a Miniprep kits for compact personal readiness checklist is sensible only after adapting it to the person and location.
Testing, Refreshing, and Improving the Kit
A kit becomes dependable through use and inspection, not through assembly alone. Test it under the conditions in which it may be needed: open the food with cold or wet hands, locate the light without turning on a room light, connect the charging cable, and read medication labels. These small trials expose problems that a visual inventory misses.
Run a short access test every few months and whenever the kit changes location. Check seals, leaks, battery charge, cable compatibility, food dates, medication dates, and the legibility of contact information. Seasonal changes should alter the contents: hot-weather commuting may call for sun protection and additional water planning, while cold-weather travel may require gloves, warmer layers, or a safer way to stay visible. Do not assume that a kit stored in a temperature-controlled room can be moved to a vehicle without review.
Look for signs that the design is working. The user can name the location of each critical item, open the container quickly, identify what needs replacing, and carry it without abandoning it for being uncomfortable. Failure signs include supplies remaining unused because they are inconvenient, multiple dead batteries, food that no one will eat, missing medication, or a pouch so full that its contents cannot be found. Each failure points to a design change rather than a need for more gear.
Refresh the kit after travel, illness, a weather change, a phone replacement, a move, or a change in work schedule. Replace consumed items immediately instead of waiting for the next scheduled check. Keep a small note inside with the inspection month and any item that must be remembered, but avoid writing sensitive health details where strangers could read them.
The most common misconception is that a larger kit is automatically safer. More equipment creates more weight, more maintenance, and more opportunities for confusion. A smaller kit with tested items, accurate personal information, and a clear purpose is often easier to carry and more likely to be present when needed. For related planning, the Miniprep kits for compact personal readiness approach works best when it is reviewed alongside household supplies rather than treated as a replacement for them.
For additional planning, consult local public-safety agencies, transportation providers, workplace policies, and medication guidance from a pharmacist or clinician. Those sources can clarify conditions that a generic compact kit cannot, including local weather, travel restrictions, accessibility needs, and safe medication storage.
Frequently Asked Questions
How large should a miniprep kit be?
It should hold the supplies needed for the intended short disruption without becoming too heavy or difficult to access. A desk pouch, backpack insert, vehicle case, and home grab bag may each need a different size.
Should water be included in a compact readiness kit?
Yes, when practical, but treat a small bottle as immediate support rather than a complete daily supply. Add a refill approach only if its use and limitations are understood.
What food works best in a small kit?
Choose familiar, shelf-stable food that matches allergies, dietary needs, medication timing, and the available preparation method. Test packaging before storing it.
Can medication be kept in a miniprep kit?
Personal medication needs should be planned with a pharmacist or clinician. Keep identification clear, respect storage requirements, and avoid relying on unlabeled loose tablets.
How often should the kit be checked?
Inspect it every few months and after use, travel, seasonal changes, a phone change, or any change in health or schedule. Batteries, food, seals, cables, and medication deserve particular attention.
Conclusion
A compact readiness kit earns its place by solving the disruptions most likely to affect the person carrying it. Define the scenario first, then protect medication access, communication, hydration, food, light, basic health, and weather comfort before adding specialized equipment. Match the container to its location, test every item in realistic conditions, and remove supplies that are too fragile, unfamiliar, or difficult to maintain. A workplace pouch may need different choices from a vehicle case or home exit bag, and none should be treated as a complete substitute for larger household planning. Build a modest first version, carry it for a normal week, note what was awkward or missing, and revise it during the next inspection rather than buying more items by default.
A prophylactic kit for contamination prevention is a prepared collection of barriers, cleaning aids, containment materials, and instructions intended to reduce accidental transfer before, during, and after a contamination event. The emphasis is prevention: keeping a substance from reaching skin, eyes, clothing, clean equipment, food-contact areas, or other people. A kit is most useful when it is assembled before an incident, because searching for gloves or waste bags after exposure has already begun increases hurried handling and cross-contamination.
Contamination commonly spreads through a chain rather than a single dramatic failure. A person touches a questionable surface, handles a phone or door handle, removes gloves incorrectly, and then touches their face or clean supplies. Clothing can carry residue beyond the original work area, while damp cloths and shared brushes can move material across a wider surface. The kit should therefore support the entire sequence: approach, isolation, protection, removal, cleaning, disposal, and hand hygiene.
For example, a small spill of an unknown household chemical requires a different response from a known, low-risk dirt transfer or a suspected biological exposure. The first situation may require distance and professional advice rather than hands-on cleanup. The second may be manageable with gloves and cleaning materials suited to the surface. Treating both events as identical is a common mistake because protective equipment only works when its material and use match the hazard.
Use the kit to control a defined, limited task, not to justify entering an unsafe area. If there is strong odor, visible vapor, fire, a large spill, a needle or sharp object, suspected infectious material, or an unknown substance, stop and seek guidance from emergency services, poison-control resources, workplace safety personnel, or the relevant authority. A well-stocked kit supports cautious action; it does not turn an untrained person into a hazardous-materials responder.
Essential Components and How They Work Together
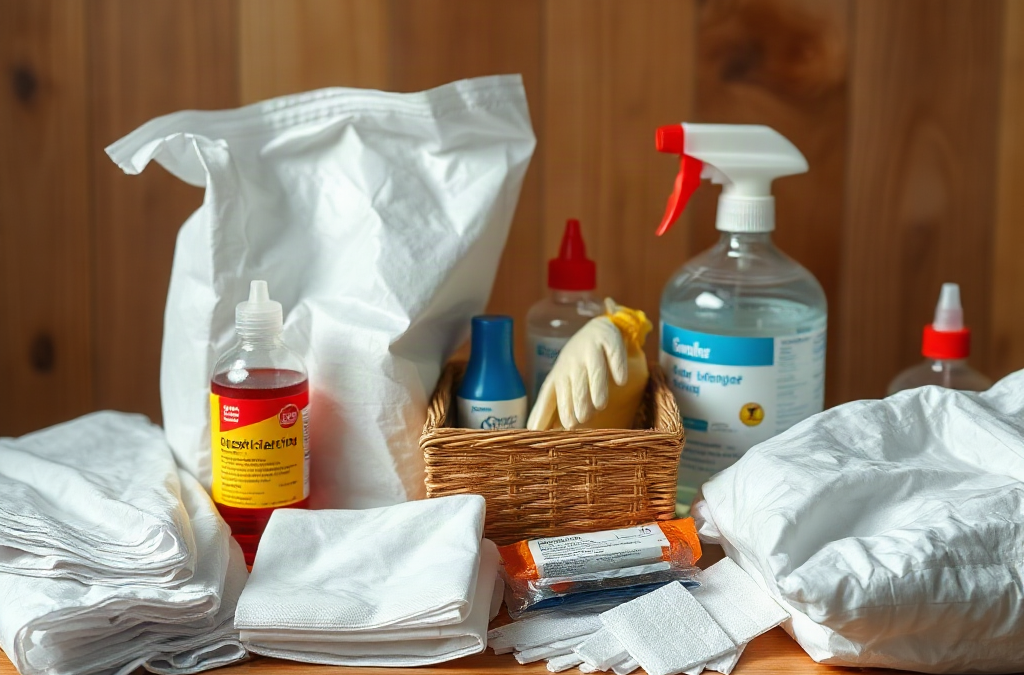
The most useful kit contains compatible layers rather than a random assortment of products. Disposable nitrile gloves are often practical for routine surface contact, but glove choice depends on the substance and the manufacturer’s resistance information. Add eye protection that covers the sides, a disposable apron or coverall when clothing may be splashed, and a face covering only when it is appropriate for the identified hazard. A face covering should not be treated as protection against every vapor, gas, or airborne risk.
Hand hygiene supplies are equally important. Include soap access where possible, alcohol-based hand sanitizer for situations in which hands are not visibly soiled, and disposable towels. Cleaning and disinfection are separate functions: cleaning removes soil and residue, while disinfection uses a product and contact time appropriate to the target organism or surface. A disinfectant cannot reliably work through heavy dirt, and mixing cleaning chemicals can create dangerous reactions.
Containment supplies prevent a used item from becoming a second contamination source. Useful additions include sealable bags, absorbent material selected for the substance, disposable cloths, sturdy labels, and a marker. Add a small flashlight and a simple instruction card if the kit may be used in poor lighting or by more than one person. The instruction card should identify what not to touch, where clean items are stored, how used items are isolated, and who to contact for escalation.
Barriers: gloves, eye protection, and protective clothing suited to the task.
Control materials: absorbent pads, disposable wipes, bags, labels, and ties.
Hygiene supplies: soap, sanitizer, towels, and a clean-water option when feasible.
Information: product labels, hazard instructions, contact numbers, and replacement dates.
A compact kit is easier to inspect and carry, while a larger kit provides more sizes and replacement stock. The tradeoff is not simply quantity. Excess supplies can become disorganized, expired, or difficult to identify under pressure. Arrange unused protective items in one clean section and containment or waste materials in another. That separation makes it less likely that a clean glove will be handled with contaminated hands.
Readers building a broader supply inventory can connect this kit with A prophylactic kit for contamination prevention as part of a clearly labeled preparation-supplies area. The useful test is whether a person can identify the first three actions without opening every container.
Choosing Supplies for Different Contamination Risks
Supply selection should begin with the exposure route and the material involved. Contact contamination calls for barriers, controlled handling, and hand hygiene. Splash risk raises the priority of eye and face protection. Dust or airborne particles may require a properly selected respirator and a fit-related process that ordinary disposable masks do not provide. Chemical exposure requires checking the product’s safety information and glove compatibility rather than relying on the label “heavy duty.”
Consider a kitchen surface, a bathroom cleanup, and a workshop spill. A kitchen task may prioritize food-safe cleaning procedures and separation of clean utensils. A bathroom task may involve body fluids, requiring careful containment and disinfection according to product instructions. A workshop spill may involve solvents, fuels, or corrosives for which household gloves and paper towels are unsuitable. The same plastic bag and disposable glove may appear useful in all three settings, but their limitations differ sharply.
Known information improves decisions. Keep original product labels, safety data sheets where available, and manufacturer directions with the kit. Record whether a cleaner is intended for hard, nonporous surfaces, whether it must remain wet for a stated contact period, and whether ventilation is required. Never assume that a stronger concentration is safer; excessive concentration can damage surfaces, increase fumes, or create skin hazards without improving the result.
Budget constraints favor a small, replaceable core: several glove sizes, eye protection, bags, labels, towels, soap, and a suitable general-purpose cleaning product. Higher-risk workplaces may need task-specific chemical gloves, face shields, spill-control materials, or professionally selected respiratory protection. The advanced option is worthwhile when the setting routinely handles a known hazard; it is not worthwhile to collect specialized equipment that no one has been trained to use.
Use this decision sequence before opening the kit:
Identify the substance if it can be done without approaching or touching it.
Estimate whether contact, splash, dust, vapor, or sharps create the main exposure route.
Isolate people, pets, food, and clean equipment from the area.
Choose protection and cleaning materials supported by the product instructions.
Escalate when the substance is unknown, the area is large, or symptoms occur.
One weak assumption is that “more protective” always means better. Bulky clothing can impair vision and dexterity, leading to poor glove removal or accidental contact. Protection should be sufficient for the credible risk and usable for the task. If the risk cannot be characterized, distance and expert advice are safer than improvisation.
Safe Use, Packing, and Replacement
A kit works best when its sequence is visible before use. Store it in a dry, accessible location away from heat, sunlight, food, and ordinary household chemicals. Keep clean supplies sealed, label the outside by function, and place the instruction card where it can be read without opening the contaminated section. A monthly visual check is useful for damaged packaging, depleted gloves, dried wipes, leaking bottles, and missing labels.
During use, establish a clean zone and a contaminated zone. Put on protection before approaching the material, limit movement, and take only the supplies required for the task. Avoid touching phones, light switches, cabinet handles, or personal items while wearing used gloves. If a glove tears, stop, move to a safe position, remove it carefully, wash hands, and replace it; continuing because the task is nearly finished is a frequent failure mode.
Removal of protection deserves as much attention as putting it on. Treat the outer surfaces of gloves, aprons, and eye protection as contaminated. Remove them slowly without snapping or shaking, place disposables directly into the designated bag, and wash hands afterward. Reusable goggles or tools should be cleaned according to their material and the suspected contaminant before returning to the clean section. Do not place used items on a kitchen counter or back into the original kit.
Replacement timing should follow condition and manufacturer information rather than an arbitrary promise of indefinite shelf life. Replace gloves or bags when packaging is damaged, products are brittle, wet, contaminated, or past their stated use period. Review the kit after every deployment and record what was used. A kit that looks full but lacks the correct glove size, working cleaner, or intact bags is not operationally ready.
For a home or small workplace, a short written checklist may outperform a larger collection of supplies. Link the checklist with the contamination-prevention kit inventory and identify the person responsible for inspection. That simple ownership step prevents the common problem in which everyone assumes someone else replaced the missing items.
Common Mistakes and Practical Boundaries
The most damaging mistakes involve cross-contamination, chemical improvisation, and overconfidence. Wiping a surface with a dry cloth may spread residue; spraying an unknown substance may create droplets or fumes; wearing gloves may encourage a person to touch more objects. Gloves protect hands only while they remain intact and are used correctly. They do not make face touching, food handling, or careless disposal safe.
Another mistake is using bleach, ammonia, solvents, or other cleaners together or outside their labeled purpose. Keep products in their original containers, follow label directions, and provide ventilation only when the instructions and hazard allow it. If eyes, skin, or breathing are affected, move away from the exposure and seek appropriate medical or emergency advice rather than continuing cleanup.
Disposal is also context-dependent. Ordinary household waste rules may not apply to contaminated sharps, chemical residues, large amounts of biological material, or items from a regulated workplace. Seal and label waste temporarily when appropriate, but do not assume a sealed bag makes hazardous material suitable for regular trash. Local authorities, workplace procedures, product manufacturers, or emergency services can clarify the correct route.
The practical priority is a usable barrier-and-containment system supported by clear limits. Test the kit by asking someone unfamiliar with its contents to locate gloves, eye protection, bags, hand-cleaning supplies, and contact instructions. If that person cannot do so quickly, reorganize the kit. Readers seeking related planning material may also review contamination prevention supplies and handling procedures before adding specialized equipment.
Frequently Asked Questions
What is the most important item in a contamination-prevention kit?
No single item is sufficient. Intact gloves, eye protection, hand-cleaning supplies, sealable waste bags, and clear instructions work together to interrupt transfer.
Can one kit handle every type of contamination?
No. Chemical, biological, particulate, and sharps hazards may require different materials, procedures, disposal methods, or professional response.
How should used disposable items be handled?
Place them directly into a suitable labeled bag or container without touching clean surfaces, then follow local or workplace disposal requirements.
How often should the kit be checked?
Inspect it regularly and after every use. Replace damaged, depleted, leaking, or expired supplies and confirm that instructions and contact details remain current.
When should a person avoid using the kit?
Avoid hands-on cleanup when the substance is unknown, the area is extensive, fumes or fire are present, sharps are involved, or symptoms develop. Seek qualified assistance instead.
Conclusion
A useful contamination-prevention kit is not defined by how many items it contains. Its value comes from matching barriers, cleaning materials, containment supplies, and instructions to the exposure that could realistically occur. Keep clean and used materials separate, make hand hygiene part of the sequence, and inspect the kit often enough to catch damaged packaging or missing components. Treat unknown substances, strong fumes, sharps, and significant exposures as escalation situations rather than ordinary cleanup tasks. Assemble a compact core for routine, limited incidents, then add specialized equipment only when the hazard is known and users understand its limitations. The next practical step is to inventory the kit, label its zones, and rehearse safe removal and disposal without an active contamination event.