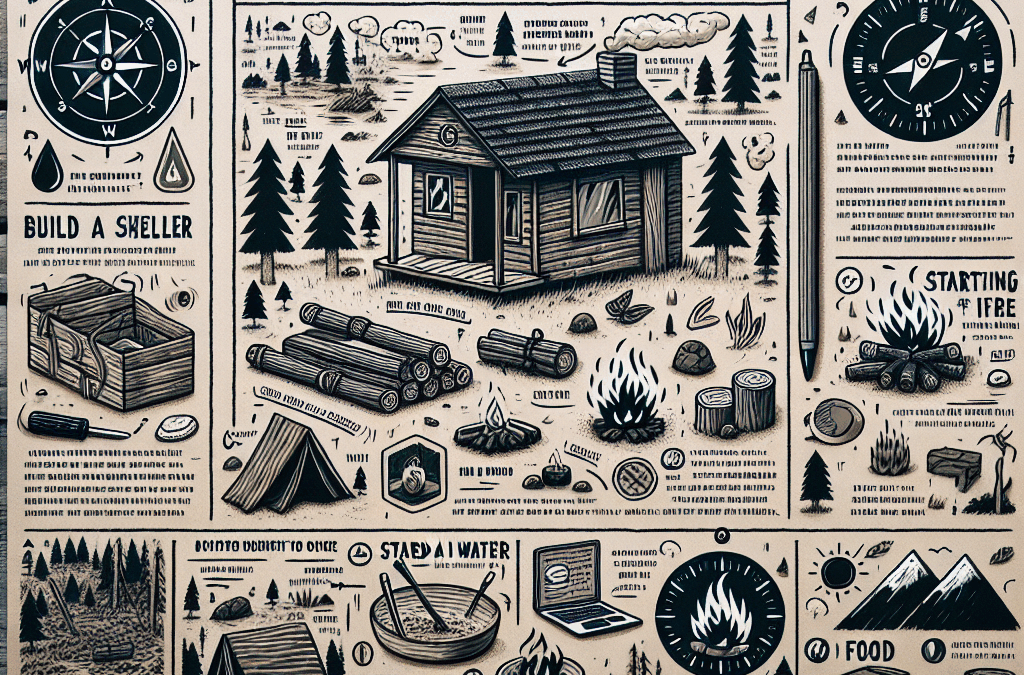
Hey there! If you’re reading this, it means you’re either planning a trip into the great outdoors or just curious about how to survive if things go south. Trust me, I’ve been in quite a few sticky situations while out in nature, and I’m here to share what I’ve learned. Let’s dive into the major areas of wilderness survival and get you prepared for whatever Mother Nature throws your way.
Finding and Purifying Water
Locating Water Sources
First things first — you gotta know how to find water. In my experience, looking for streams or rivers is a great starting point. Water flows downhill, so if you’re in the mountains, follow the slope. You’d be surprised how often you’ll come across a small trickle. Also, keep an eye out for animal tracks; they usually know where the water is located.
Another trick I learned was to look for wet ground or plant life. Green plants are usually a sign that water is nearby. Even digging a bit in that muddy patch can yield results. Just make sure not to go overboard digging if you’re in a dry area — you don’t want to waste your energy!
Lastly, look for dew in the morning. It might not seem like much, but collecting dew from leaves with a cloth can give you a refreshing sip in an otherwise dry camp. Every drop counts, right?
Methods of Purifying Water
Once you’ve found some water, it’s time to make sure it’s safe to drink. I can’t stress enough how important this step is. Boiling water is the most basic and effective method. Just get it rolling for a few minutes, and it should kill any nasty microorganisms lurking in there.
If you can’t boil it, try filtering through a cloth or using natural materials like sand and charcoal to create a makeshift filter. It’s not perfect, but it can help clear out some impurities and make it more palatable.
For those with a bit more gear, water purification tablets can be a lifesaver. I always keep a few in my pack. Just remember to follow the instructions on the package, and you’ll be good to go!
Staying Hydrated
Hydration is key, folks! I learned this the hard way — dehydration is no joke in the wild. Always drink small amounts frequently instead of guzzling a ton all at once because your body absorbs it better that way.
If you’re sweating a lot, don’t forget to replenish electrolytes. You can carry sports drinks or eat some salty snacks to keep your sodium levels in check. Or, you can go the natural route — some wild plants can help too.
Keep an eye out for signs of dehydration, such as headaches or dizziness. Listen to your body; it’s amazing at sending signals when things aren’t right.
Building a Shelter
Choosing the Right Location
Finding a good spot for your shelter is super important. I once made the mistake of setting up camp too close to a stream, and guess what happened? I woke up soaked! Look for higher ground to avoid flooding — always a solid choice.
Aim for an area that provides some natural windbreak, whether it’s a cluster of trees or rocks. They not only block the wind but also offer some insulation. I like to set up my shelter in a way that it faces away from the direction of the prevailing wind as well.
Lastly, avoid areas where there’s an obvious risk of falling branches, known as widow makers. You don’t want to wake up feeling like you’re in a horror movie because a tree decided to drop a branch on you while you were sleeping!
Types of Shelters
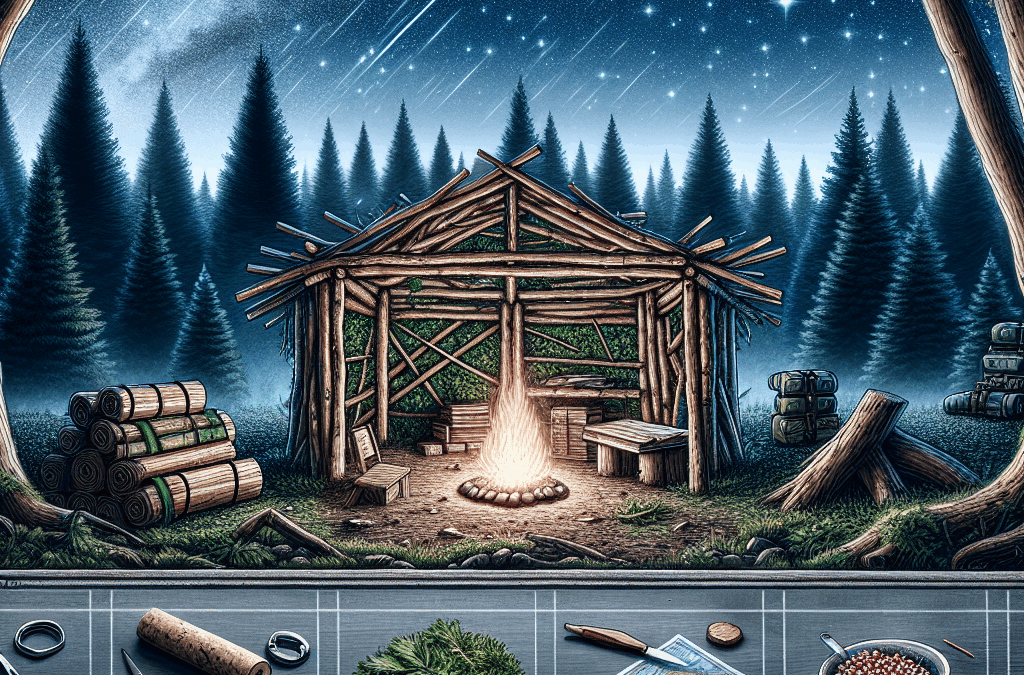
When it comes to the type of shelter, your options really depend on your environment. In the forest, I often go for a simple lean-to made from branches and leaves. It’s quick to set up and provides great coverage from rain.
In a colder climate, I’ve built a snow cave, which is surprisingly warm. Digging into the snow may take some effort, but once you’re in there, the insulation it provides is fantastic. Just don’t forget to create an air hole; ventilation is key!
If you’re lucky enough to have a tarp or emergency blanket, using that over some branches can make for a fast and effective shelter too. Creativity goes a long way in survival situations!
Insulating Your Shelter
Insulation is all about keeping the warmth in and the cold out. When I’ve built shelters, I always gather ample foliage to line the walls and the floor. It’s surprising how much warmth it can trap.
If you’re in a pinch, your own body heat can be used for insulation, so huddle up if you’ve got friends around! I remember one cold night where we all snuggled together for warmth – it made for good bonding too!
Lastly, consider the orientation of your shelter. Keeping it small and cozy helps retain heat, so don’t go building a mansion in the woods. Go for a snug fit; it’s much more effective than sprawling out in the cold.
Finding Food
Identifying Edible Plants
Alright, let’s talk food. I’ll be honest — I was overly cautious at first about foraging. But once I got familiar with a few plants, I realized it’s a good skill to have! Start with plants you know; dandelions and clover are great beginner options.
You can also check your surroundings for nuts and berries. Just make sure you have a good guide or app to identify what’s safe; some wild berries can be tricky. I always remember the old saying: “When in doubt, don’t eat it!”
Plus, look for natural food sources like insects — yes, crickets are a thing! They are packed with protein and are very crunchy. Just don’t think too hard about it!
Setting Traps
If you’re more into hunting, traps can be a useful tool. I’ve set a few snares in my time, and it’s fulfilling to catch your own meal. But, I’d advise practicing how to set them before you find yourself in a situation where you need to.
Try using natural materials like twigs or vines to create your traps; they blend well into the environment. There are tons of resources online showing different techniques to employ — a bit of research can go a long way.
Just be mindful of local regulations, and remember to check your traps regularly if you set them. You want to avoid cruelty and wasting food!
Cooking Options
So once you’ve snagged yourself some food, you’ll want to cook it. Fire is definitely your best friend here. If you don’t have a pot, you can wrap food in large leaves and cook them over hot stones. My first attempt at this ended up with smokey flavors that were surprisingly delicious!
If you have any cooking gear, don’t hesitate to use it. A lightweight stove or a simple portable grill can make a world of difference when you need to cook something up quickly.
Always make sure you’re cooking your food thoroughly to prevent any nasty stomach aches. No one wants that when they’re trying to enjoy a wilderness adventure!
Starting a Fire
Gathering Materials
Fire might just be the most crucial skill in the wild, so let’s break down how to get it going. First, gather your materials. You’ll need tinder (think dry grass, leaves, or bark), kindling (small sticks and branches), and heavier logs for fuel.
The way I see it, the earlier you gather your materials the better. It can be a challenge to find dry kindling if it’s been rainy, so I always keep a few fire-starting materials in my pack just in case. It’s amazing how a little planning can save the day!
And remember, don’t forget to keep some of that burning material close to your site, so when it’s time to settle down, you can ignite a fire quickly, even if your hands are a bit cold.
Ignition Techniques
Now, on to actually starting the fire. There are multiple methods, but the classic matches or lighter works best for me. I always carry waterproof matches in my kit just for those damp days when I know fire is crucial.
If you want to go old school, try using flint and steel. It’s rewarding when you see that spark, but it does take practice. I remember my first fire; it took me ages and a lot of frustration before I All in all got it. But once I did, I felt like a true wilderness pro!
Ultimately, you can even use a magnifying glass if you have one. Just focus the sunlight on your tinder, and it could catch. It’s a neat trick to have up your sleeve for sunny days!
Maintaining a Fire
Once you’ve got that fire blazing, maintaining it is key. Keep an eye on the size of your flames; you want them to burn steadily, not wild. Adding more fuel gradually helps ensure that the fire lasts longer.
Always have a backup plan for wind and rain; there are ways to create a windbreak for your fire if the weather turns. Using rocks or sticks can help create a shield. Trust me, it can save the day during a surprise downpour!
Lastly, don’t forget fire safety! Make sure to fully extinguish your fire when you’re done. Douse it with water and stir it up so that it’s completely out before you leave. We want to leave the wilderness just as we found it!
Outdoor Navigation
Using a Compass and Map
Alright, let’s talk about navigation. I can’t stress enough how important it is to have a good map and compass on hand. Even in this digital age, a physical map can be invaluable. I personally love the feeling of unrolling a real map and plotting my course — it feels adventurous!
Learning how to use a compass can be a bit tricky, but once you’ve got it down, it’s game-changing. Always make sure that you orient your map in the direction of the north indicated on your compass. Practice before you need to rely on it, so you won’t waste time fumbling in an emergency.
And remember, don’t just rely on technology, as batteries die and signals can be lost. Old-school skills keep you grounded, literally.
Natural Navigation
I’ll never forget the first time I tried to navigate using natural signs — things like the position of the sun and stars. It’s incredible how much information nature gives us. For instance, the sun rises in the east and sets in the west, which can guide you during the day.
At night, I rely on the North Star — it’s the brightest star in the Little Dipper and can point you north. It’s a skill that takes a bit of practice, but once you get it down, it’s pretty fun to show it off to friends!
Lastly, pay attention to the moss growth on trees. It’s usually lusher on the north side in the Northern Hemisphere. Use everything around you to your advantage!
Landmarks and Signs
As I wander through the wilderness, I always keep an eye out for natural landmarks. They serve as great reference points. Remembering a rock formation or a unique tree can help orient you as you hike. It’s like leaving breadcrumbs on your way out!
Keep track of your direction and distance as you travel; I often jot things down in a small notebook because it helps me remember my path. It’s easy to get turned around when you’re deep in the woods.
And don’t forget to share your navigation skills with your buddies — it makes the adventure more fun and engaging. Plus, it’s always safer when everyone knows where they’re heading!
Frequently Asked Questions
1. What should I pack for a wilderness survival trip?
You should pack essentials like a good knife, water purification tablets, a first-aid kit, fire-starting tools, and non-perishable food. Don’t forget a map and compass for navigation!
2. Is it safe to drink water from streams or lakes?
No, it’s not safe to drink untreated water from natural sources. Always purify your water by boiling or using purification tablets before drinking.
3. How can I keep warm at night in the wilderness?
Layering is key! Use extra clothing, build a cozy shelter, and ensure you’re insulated from the cold ground. A good fire can help too!
4. What should I do if I get lost in the woods?
Stay calm, and don’t panic. Try retracing your steps to a known area. If that fails, find a safe place to shelter and signal for help. Use your map and compass to navigate if you have them.
5. How do I start a fire without matches?
You can use flint and steel or even create a fire using a magnifying glass on a sunny day. Both methods take practice, so try them out beforehand.
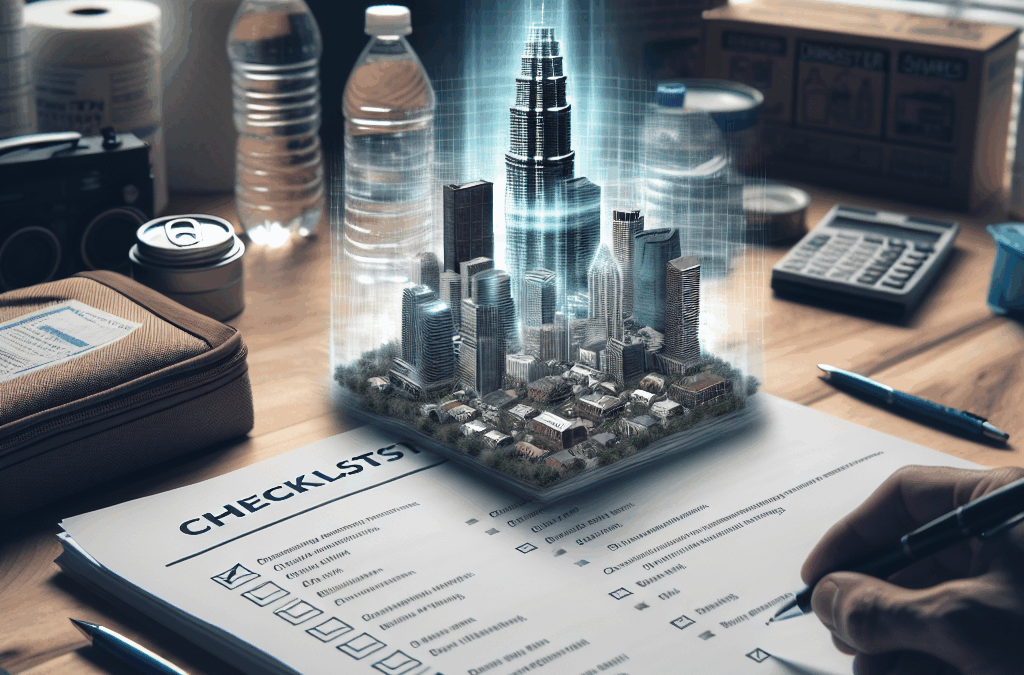
Let me start by saying, checklists are not just mundane tools; they are lifesavers. Through my own experiences, I’ve come to realize that the human brain can only hold onto so much information at once. When a disaster strikes, it’s easy for our thoughts to spiral. A well-constructed checklist serves as a grounding tool that brings clarity in moments of chaos.
Using checklists in disaster planning allows me to streamline my response. For instance, when preparing for a natural disaster, I can tick off items like ‘water supply’ or ‘first aid kit’ as I gather them. This not only keeps me organized but also gives me peace of mind knowing that I’m less likely to forget something critical in a high-stress situation.
Moreover, checklists help different members of a team stay aligned. If everyone on an emergency response team knows their checklist, it enhances coordination. I’m all about teamwork, and having a clear plan outlined in a checklist means we can respond efficiently, reducing panic and confusion.
Creating Your Checklist: Key Components
Essential Items to Include
When I sit down to create a checklist for disaster preparation, I consider what items are absolutely critical. This might include food supplies, water, medications, and important documents. Each of these items might seem obvious during calm times but can easily slip my mind when the stress kicks in. That’s why I always make sure they’re on my checklist.
Next, I always include communication tools on my checklist. Whether it’s a charged phone or a designated meeting place, having a reliable way to connect with loved ones or team members during a crisis is vital. It’s easy to overlook, but trust me, it can make all the difference.
Lastly, I think about non-tangible items like mindset and preparedness. I often write reminders on my checklist to stay calm and think clearly. This is just as important as gathering physical items. In a panic, the storm of emotions can cloud judgment, so it helps to have that reminder visually in front of me.
Implementing Your Checklist Effectively
Practice Drills
Now, creating the checklist is only half the battle. The real power of checklists comes from actively using them. A technique that works wonderfully for me is conducting practice drills. This might sound like a daunting task, but practice makes perfect! It’s great to simulate different scenarios so I can get comfortable using my checklist in real-time.
During these drills, I can see firsthand which items I always forget and adjust my checklist accordingly. Repetition helps to solidify the information, and before I know it, I’m more confident and prepared. Every drill feels like a mini workout for my disaster planning skills!
Involving my family or team in these drills not only helps everyone feel more prepared but also fosters teamwork. Engaging with everyone on the checklist helps me identify strengths and weaknesses and gives us a chance to brainstorm on improvements collaboratively.
Reviewing and Revising Your Checklists
The Importance of Regular Updates
Just like everything else in life, checklists need a little TLC. Regularly reviewing and revising my checklist has been a game changer. After each drill or real-life situation, I take some time to reflect on what worked and what didn’t. This helps to keep the checklist relevant and useful over time.
New information always emerges about disaster response strategies. By keeping myself informed and updating my checklist accordingly, I can ensure that I’m using the most effective practices available. Nobody wants to be outdated in their disaster prep, and a few tweaks here and there can elevate my game tremendously.
Additionally, I make sure to revisit the checklist after major life changes. Moving to a new location, welcoming a new family member, or even changes in my work can all necessitate updates. Keeping my checklist current reflects my current reality and needs.
Spreading the Word About the Benefits of Checklists
Educating Others
One of the most fulfilling aspects of learning about checklists is sharing that knowledge with others. I often host workshops or casual meets with friends or community groups to discuss disaster preparedness and checklist strategies. Educating others not only spreads awareness but also reinforces my own learning. Talking about checklists is like music to my ears!
During these sessions, I show how personalized checklists can cater to different lifestyles and needs. It’s amazing to see people coming together around the shared goal of preparedness. We bounce ideas off each other while creating customized strategies based on our unique environments.
Lastly, I emphasize the emotional component. Advocacy around checklists shouldn’t just be about ticking boxes; it’s about empowering individuals to create a sense of safety in their lives. It’s such a rewarding experience to see others gain confidence in their disaster preparedness through tools I’ve shared.
Frequently Asked Questions
1. What should I include in my disaster preparedness checklist?
Your checklist should include essential items like water, food, medication, and important documents. Additionally, consider including communication tools and reminders about mental preparedness.
2. How often should I update my checklist?
It’s a good practice to review your checklist after every drill and any significant life changes. Keeping your checklist up-to-date is crucial for effective disaster planning.
3. What are some effective ways to conduct practice drills?
You can simulate different scenarios where your checklist comes into play. Have family members or team members act out roles, use timers, and create urgency to better replicate real-life situations.
4. How can I educate others about the importance of checklists?
Host workshops, join community associations, or simply have conversations with friends and family. Sharing your knowledge not only helps others but reinforces your own understanding as well.
5. Are checklists only useful for physical items?
No, checklists are useful for non-tangible items too! Reminders about mindset, communication, and preparedness strategies are just as important and should definitely be included.
First things first, you have to know your environment. I remember when a major storm hit my area; I immediately regretted not assessing how vulnerable my place was. Flood risks? Tornado shelters? It all matters. If you live in a hurricane area, gear up; if snowstorms are your jam, prep for that. Always know what you’re facing!
Take the time to sit down and think about potential disasters in your region. Jot down the history of natural events that have impacted your community. Having this context can help you provide adequate supplies and support.
And don’t forget about local advice. Check in with emergency services or neighborhood groups; they’ve got the insider scoops on what really goes down during disasters. They’re living and breathing this stuff every day!
Identifying Essential Supplies
Once you’ve assessed your needs, the next step is figuring out what supplies you really need. I’ve found it super helpful to create a list! You can mix must-have items like first aid kits and non-perishable food, along with personal essentials like medications and important documents.
Look, it’s easy to go overboard and pack everything you think you might need. But trust me, focus on essentials. A backpack filled with snacks, water, a flashlight, and a battery charger can save your life. Think practicality – what could you realistically carry if you had to evacuate?
Lastly, remember to personalize your supplies. For instance, if you’ve got pets, don’t forget their food and gear. They’re family too! Tailoring your packing list ensures you’re not just packing the basics but everything necessary for everyone in your household.
Creating a Packing Checklist
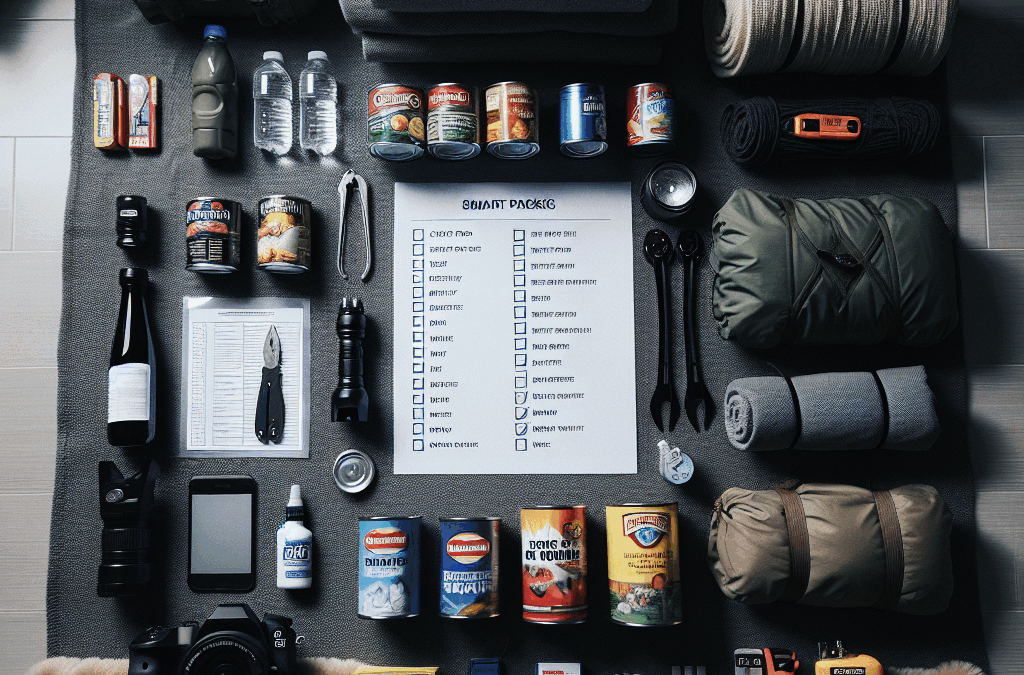
Oh, man, packing can be a mess if you don’t have a checklist! From my own experience, having a visual guide helps keep me on track. I love checking items off as I go! Start with the basics – water, food, shelter, and safety items. Don’t skip cleaning supplies either because, surprise! You might need to tidy up even in chaos.
When I created mine, I organized items into categories, making it easier to see what I had and what I needed. I’d have sections for food and water, medical supplies, clothing, and documents. This way I wasn’t scrambling around at the last minute looking for things.
Make sure to keep the checklist in a place where you can easily grab it, like on your fridge or pinned to a bulletin board. And don’t forget to update it regularly. Life changes with moving, new pets, or even allergies – keep your list current!
Storing & Organizing Your Gear
Choosing the Right Containers
Let’s talk about storage! Choosing the right containers is crucial to keeping your packing organized and effective. I’ve gone through a range of storage options – bins, backpacks, even duffel bags. The goal is to have something that’s both durable and easy to carry.
The size of your containers matters too. If you can fit your gear in one bag or bin, that’s the way to go. I love using clear storage bins because you can see what you have without digging through everything. Plus, labeling them makes it so much simpler!
Additionally, consider waterproof options. Whether it’s rain, flooding, or another unexpected mishap, keeping your supplies dry should be a top priority. You don’t want to arrive at safety only to find all your supplies are soaked and unusable!
Establishing a Packing Routine
Setting up a packing routine has been a game-changer for me. I don’t wait until disaster is looming before I start throwing things together. Instead, I’ve made it a habit to review my supplies quarterly or with every season change. This way, I’m not left scrambling when something unexpected happens.
With my packing routine, I go through items, check expiry dates on food and medicine, and refresh anything that needs to be swapped out, like seasonal clothing. Plus, it keeps me connected to my gear, so I know exactly where to find everything when I need it!
And don’t forget to involve your family in this routine! Turn it into a family event; it can be educational for kids and they’ll better understand why being prepared is important.
Practicing Emergency Plans
Simulating Evacuation Drills
If you think having a plan is enough, think again! I swear that practicing evacuation drills has saved my family and me in real emergencies. By simulating what you’d do if you needed to leave quickly, you get a feel for how everything works, and it helps calm the nerves when the situation arises.
It’s really about finding a good flow. Map out your escape routes ahead of time. Know where you’ll go, how you’ll get there, and who’ll meet up where. Having a plan gives you a sense of security even amidst panic!
After practicing, sit down as a family and discuss what went well and what could be improved. Feedback is golden! Each drill can make you that much more prepared when disaster actually strikes.
Communicating with Family and Friends
To wrap up, let’s chat about communication. In an emergency, it’s crucial to have a solid line of communication set up with your family and friends. This can mean everything from discussing your plans to having a group chat set up on your phones; don’t leave it to chance!
When I was preparing for the last big storm, we set up a family group chat and agreed on specific codes for different situations. It sounds silly, but when things are chaotic, simple messages can make communication clearer.
Also, think about how you’d update close family or friends if you were separated during an emergency. Share your plans with them, and maybe even establish a check-in buddy or two. This way, you all stay in the loop regardless of what happens.
FAQs
1. What are the essential items I should include in my disaster pack?
Your disaster pack should include water, non-perishable food, a first aid kit, flashlights, batteries, a multi-tool, personal documents, and any medications necessary to maintain your health.
2. How often should I review and update my disaster supplies?
I recommend reviewing your disaster supplies at least once every few months. Make adjustments based on seasons, new needs, or changes in your family dynamic.
3. Should I have emergency plans for my pets as well?
Absolutely! Your pets are family too. Make sure to include food, water, and any necessary supplies for them in your disaster kit, and include them in your evacuation plans.
4. What are some common mistakes people make when packing for emergencies?
One common mistake is underestimating the importance of organization. People often throw things together without thinking what they might need. Another mistake is not customizing supplies for their unique needs, like personal medications or comfort items.
5. How can I prepare my children for emergencies?
Involve them in the process! Kids should know the plan, what’s in the disaster bag, and why it’s essential. Making it a fun learning experience will help them feel empowered and ready to handle situations effectively.
When disaster strikes, the impact can be devastating. However, being prepared can mean the difference between chaos and calm. Understanding the risks associated with your location is a vital first step in creating a robust emergency preparedness plan.
*Understanding the Risks: Identifying Potential Disasters in Your Area**
Every region has its own set of potential disasters. Earthquakes may rattle California, while hurricanes threaten coastal communities. Wildfires are a concern in dry areas, whereas severe storms can wreak havoc in others. Start by researching local hazards—visit government websites or community resources to gather information about historical events that have impacted your area. Once you’ve identified these risks, consider how they could affect you and your loved ones specifically.
*Building Your Emergency Kit: Essentials for Every Household**
An emergency kit is essential for every household and should be tailored to meet the needs of your family members. Begin with the basics: water (one gallon per person per day for at least three days), non-perishable food items (think granola bars, canned goods), a flashlight, batteries, a first aid kit, and necessary medications. Don’t forget personal hygiene items and important documents stored securely but accessibly! It’s wise to include items like multi-tools or Swiss Army knives as well as cash; ATMs may not function during emergencies. To wrap up, remember any special requirements for infants or pets!
*Creating a Family Emergency Plan: Communication and Evacuation Strategies**
Once you’ve gathered your supplies, it’s time to create a comprehensive family emergency plan. Communication is key during crises; establish designated meeting points both close to home and further away in case evacuation becomes necessary. Discuss various scenarios with everyone involved—what will you do if an earthquake strikes while at work? What about when kids are at school? Assign roles based on each family member’s capabilities so everyone knows their responsibilities.
Moreover, ensure all contact numbers are saved both on phones and written down in case electronics fail. It’s also prudent to connect with neighbors; establishing a support network makes everyone safer.
*Staying Informed: Utilizing Technology and Resources During a Crisis**
In today’s digital age, staying informed during an emergency is more manageable than ever! Utilize apps from trusted sources like FEMA or Red Cross—these provide real-time alerts about impending dangers such as severe weather warnings or evacuation notices. Additionally, social media platforms often serve as excellent tools for up-to-the-minute updates from local authorities.
Don’t rely solely on technology though; have battery-operated radios handy too since power outages can occur unexpectedly!
*Practicing Preparedness: Drills, Meetings, and Staying Ready for the Unexpected**
Preparedness doesn’t end with planning—it requires practice! Conduct regular drills simulating different disaster scenarios so that everyone knows what steps to take when fear sets in or confusion reigns supreme. Schedule periodic family meetings to evaluate your plan’s effectiveness—are there gaps? Can improvements be made?
Encourage open discussions about fears related to natural disasters; sometimes talking through anxieties helps alleviate them while fostering teamwork among family members.
In closing, preparing for emergencies may feel overwhelming initially but breaking down these steps into manageable parts will empower you and your loved ones when faced with uncertainty. Be proactive today—because when disaster strikes tomorrow, you’ll be ready!
In a world where uncertainties loom large, being prepared for emergencies is no longer just a luxury but a necessity. The adage “Don’t wait for a crisis” resonates deeply when it comes to safeguarding your family and home. So, how do you proactively step into preparedness? Let’s explore the essential components that will help you stand strong in the face of adversity.
## Understanding the Risks: Assessing Your Vulnerabilities
Before you can prepare, it’s crucial to understand what you’re preparing for. Take a moment to assess your environment and identify potential risks. Are you living in an area prone to natural disasters like hurricanes, earthquakes, or floods? Consider technological hazards as well—chemical spills or power outages can disrupt life just as dramatically. Engage in conversations with neighbors or local emergency services to gain insights into common threats in your region. Once you’ve identified specific vulnerabilities, prioritize them based on likelihood and potential impact. This foundational understanding will guide your subsequent steps toward effective preparedness.
## Building Your Emergency Kit: Essentials for Every Household
One of the most tangible actions you can take is assembling an emergency kit stocked with essentials. Imagine facing a blackout during a storm—would you have enough supplies on hand? A well-rounded kit should include non-perishable food items, water (at least one gallon per person per day), first-aid supplies, flashlights with extra batteries, necessary medications, and personal hygiene products. Don’t forget important documents; keep copies of identification and insurance information in a waterproof bag.
Additionally, consider special needs within your household: infants may require baby formula and diapers; pets need food and leashes; elderly family members might need mobility aids or specific medications. Regularly review and update your kit every six months to ensure everything remains fresh and functional—your preparedness shouldn’t gather dust!
## Creating a Family Emergency Plan: Communication and Evacuation Strategies
Once you’ve assessed risks and built your kit, it’s time to map out an actionable family emergency plan. Start by establishing clear communication strategies—who will contact whom if disaster strikes? Designate an out-of-town friend or relative as the central point of contact so everyone has someone to reach out to during chaos.
Next, outline evacuation routes from your home to predetermined safe locations like shelters or designated meeting spots. Practice these routes regularly so everyone knows what to do when time is of the essence. Include contingencies for various scenarios; if you’re separated during an emergency or unable to return home while away at work or school, having alternatives reduces anxiety.
## Staying Informed: Resources and Training for Ongoing Preparedness
Preparedness isn’t merely about having supplies—it’s also about knowledge! Utilize available resources such as FEMA’s website or local community workshops focused on emergency response training. Enroll yourself—and even older children—in CPR classes or first aid training sessions; these skills could save lives when seconds matter most.
Establish routines that keep everyone informed about ongoing threats—subscribe to alert systems that notify you of severe weather warnings or emergencies in your area through texts or apps.
To wrap up, embracing proactive steps toward emergency preparedness transforms uncertainty into confidence. By understanding risks unique to your surroundings, building an effective emergency kit tailored for all household members, creating comprehensive family plans, and staying informed through continuous learning—you’re not just waiting for crises but actively fortifying yourself against them! Equip yourself today so that tomorrow’s challenges don’t catch you off guard!
When you’re out in the wild, you might find yourself wondering where to get water. It’s all around us—in lakes, rivers, and even streams. However, not all water is safe to drink. During my first solo camping trip, I realized just how crucial it is to learn about different water sources. Brush up on how to identify them so you’re not left high and dry!
One common source of water is the runoff from mountains or hills. As I hiked, I spotted trickles of water running down the slopes. Make sure to collect water from fast-moving sources, as they tend to be cleaner than stagnant ones. Just be careful and always check for nearby wildlife—you’d be surprised where things can go wrong!
Remember to look for natural containers like tree hollows or large leaves that can hold rainwater. This method has saved me a few times when I was caught in unexpected downpours with no water source in sight. Be resourceful, and don’t shy away from exploring what nature offers!
Purification Techniques
Now that you’ve located a water source, you’ll need a little know-how to purify it. One of the simplest methods I’ve used is boiling. If you can get a fire going, let that water bubble away for at least a minute—bacteria don’t stand a chance against high heat!
If you’re in a situation where boiling isn’t possible, I recommend using portable water filters. They can be a lifesaver when you’re hiking and want to stay hydrated. I’ve used them countless times, and they pack light, making them an essential part of my survival kit.
Always keep in mind that water purification tablets are another great option if you’re in a pinch. They don’t require much know-how or extra gear. Just drop them in the water—easy peasy, right? Trust me, being hydrated can really keep morale up while you’re out there.
Staying Hydrated
Once you’ve secured your water, don’t overlook how important it is to stay hydrated. Being in the wilderness can drain your energy faster than you think, especially on hot days. During a trek, I always make it a point to sip on water regularly, rather than waiting until I feel parched.
An easy trick is to carry a small water bottle that you can refill throughout the day. Aim for about two liters daily, though this can vary based on your activity level. Monitor how you’re feeling— dizziness or fatigue can be signs you need more fluids.
Also, be mindful of how much you’re sweating! If you’re sweating buckets, it’s crucial to drink even more to compensate. I learned this the hard way on a particularly hot day in July. Listen to your body and respect its needs, especially when it comes to H2O!
2. Building a Shelter
Choosing the Right Spot
Alright, let’s talk about shelter. Choosing a good spot is half the battle, folks. When I first set up camp, I made sure to find flat ground and stay away from any potential hazards, like falling branches or flooding areas. You don’t want to wake up soaked or smacking your head on a tree!
Look for natural windbreaks—like cliffs or dense foliage—to help shield you from the elements. It’s these little details that can make a big difference, especially if you’re stuck out there for an extended period. I once spent a soggy night because I ignored this simple rule!
Make sure to check for nearby resources too. You don’t want to set up your shelter way far from your water source or fire pit. It saves you energy when everything’s within an arm’s length. Trust me, making your life easier in the wild is key to survival.
Types of Shelters
There are many ways to build a shelter, but let’s keep it simple. The lean-to is one of my favorites. It’s quick to build and can save you from rain. Just prop a large branch against a tree and cover it with smaller branches and leaves—you’ve got yourself a cozy nook!
If you’re feeling a bit more adventurous, try building a debris hut. It’s not just cool to say you’ve done it. It provides excellent insulation. Just be prepared to spend some time gathering materials to make it effective. I once hunkered down in one of these during a chilly night, and let me tell you—it held in the warmth!
Regardless of the type you choose, make sure your shelter is big enough for you and any gear. Don’t want a raccoon stealing your snacks while you’re bundled up! A little space can help keep things organized and cozy.
Using Natural Materials
When you’re out there, Mother Nature is your best friend. Always look for materials like leaves, grass, and branches to enhance your shelter. I’ve used moss for insulation more times than I’d care to count. It’s amazing how effective it is!
Make use of fallen limbs and twigs to create a sturdy frame for your shelter. It’s about working smart with what’s around you. You’ll be surprised how quickly you can piece something together just by using your surroundings!
Lastly, be sure to take your time. There’s no rush in the wilderness. Building a proper shelter can take effort, but it’s immensely rewarding when you climb in and feel the protective comfort of your hard work. Every moment spent building is worth it when the night falls!
3. Starting a Fire
Gathering Materials
Starting a fire is like magic, really. And it all starts with gathering the right materials. In my early camping days, I learned that dry leaves, small twigs, and bigger logs were essential. I always make sure to collect a hefty amount of dry tinder before I start the fire-making process.
Whenever I venture out, I can’t stress enough how crucial it is to scout for materials first. Look around for dead twigs since they ignite easier than green ones. On a particularly chilly evening, I was so glad I had enough tinder gathered because it took me from frozen to feeling cozy in no time!
If you can, look for materials that catch fire easily, like birch bark or dry pine needles. A little preparation can go a long way when things get tough. Just remember, the more material you gather upfront, the easier it’ll be down the line.
Fire Techniques
Now, let’s get into how to actually start that fire. I’ve used matches, lighters—you name it! But I also learned the beauty of fire starters, like cotton balls soaked in petroleum jelly. Those little suckers ignite quickly and can help you out when traditional methods fail. Trust me, having a backup makes a world of difference!
Don’t underestimate the teepee fire structure either. I like to build my wood in a teepee shape—it allows proper airflow and makes it easier for the flames to catch. My first few fires were all about trial and error, but more than a few successes came from this design, let me tell you!
If by chance, you’re feeling adventurous, try the old-school flint-and-steel method. It takes practice but can be super rewarding. Nothing like the satisfaction of starting a fire without modern conveniences. Just make sure to have your tinder ready because it’ll be a quick burn!
Fire Safety
Fire safety is crucial. You don’t want to become a fiery story for the wrong reasons! The moment I build a fire, I make sure to clear away any flammable debris surrounding it. A little precaution goes a long way when the flames start dancing.
Always have a way to put it out, whether it’s water or dirt—something handy nearby that can douse the flames if needed. I’ve had a close call once because I didn’t plan outweighing my excitement with caution. Never again!
Once you’re done, make sure to fully extinguish the fire—no glowing embers left behind. Not only is it essential for safety, but it’s also respectful to nature. The last thing we want is another risk for wildfires. Always leave no trace!
4. Foraging for Food
Identifying Edible Plants
Let’s dive into a topic that’s close to my heart: foraging! It sounds like part treasure hunt, part survival technique. Understanding which plants are edible can be a game-changer when you’re in the wild. I remember my first plant identification session—it was a mix of excitement and nerves!
Always carry a field guide or a foraging app if possible. Take your time to get familiar with what’s safe to eat and what’s not! I’ve come to love wild blueberries, but I also steered clear of poison ivy—yikes! Research beforehand can save you from a rough runtime.
Seasonality plays a role too. Some plants shine at certain times of the year, so keep your eyes on what’s in season. You’d be surprised how much variety there is as the months pass. Planning ahead is essential and can lift your spirits when the snacks seem to diminish!
Hunting and Trapping Basics
If you’re feeling a bit braver, you might consider hunting or trapping. This isn’t something to jump right into without preparation, though! Learn the local regulations before you even think of taking aim. I’ve faced challenges along the way, but patience often pays off.
Start with basic traps. Nothing complicated—simple snares can be made with cordage you find in the wilderness. I once caught a rabbit with a snare I made on that very premise, and it felt like winning a lottery of sorts. Just remember, it takes practice and patience!
For hunting, I’ve also learned that knowing the land and local wildlife behaviors can make your efforts way more successful. Spend time observing before you attempt to hunt. It’s all about learning the rhythm of nature and how to blend in.
Cooking Over a Fire
After you’ve secured food, cooking it becomes the next adventure. Cooking over an open flame can be incredibly satisfying, and let me tell you—everything tastes better al fresco! I usually stick to quick meals that don’t require a ton of prep. Think of skewers with meat and veggies; it’s always a hit!
Make sure to keep an eye on your cookware to avoid any disasters. Don’t be like me and forget about your meal, only to find it burned to an inedible crisp. I’ve made that mistake a few times; the scent alone serves as a reminder!
And if at all possible, get creative. Try baking bread in the ashes or seasoning any catch you have with herbs from the wild. It’s a genuine survival excitement that adds a whole new level of enjoyment!
5. Signaling for Help
Understanding Signal Methods
You never know when you might need to signal for help, and trust me—it’s a good idea to know how! Whether it’s a whistle, mirror, or bright clothing, I’ve found that having multiple signal methods can increase your chances of getting rescued. It’s all about visible measures!
For example, during one hike, I took a brightly colored bandana just for signaling purposes. Loud noises can also grab attention. Consider carrying a whistle around your neck; it’s lightweight and effective. Just remember to use multiple signals—it gets the message across quicker!
Visual signals are equally meaningful. An arranged pattern of rocks or logs in a prominent spot can attract attention. I once arranged my supplies in an “SOS” formation, and it felt empowering to take proactive steps toward staying safe.
Advanced Signaling Techniques
If you’re feeling adventurous, consider fire as a signaling tool! Smoke can attract attention—use dry materials to create a large fire if you’re in a safe location for doing so. I’ve signaled a couple of hiking parties this way, and it offers peace of mind when others might be nearby.
Also, using a reflective surface like a mirror can send a signal even in daylight! Just angle it toward where you’d expect searchers to be. It’s these little tips and tricks that could change the game if things go sideways on your adventure. Keep an open mind!
In essence, it’s about creativity and being prepared. Making backup plans gives you more tools at your disposal when you need them! You’ll feel more secure knowing you have a strategy to get help if needed.
Conclusion
Surviving in the wilderness is all about preparation, knowledge, and staying calm. From finding water to signaling for help, each skill I’ve mentioned plays an essential role in thriving outside your comfort zone. It’s a journey of learning, and with practice, everything becomes second nature!
So, gather your gear, pick your spot, and let the adventures begin! Remember, the wilderness is not just about survival skills; it’s also about enjoying nature and embracing every moment. Make your experiences meaningful, and take the time to appreciate the beauty around you.
FAQ
1. What should I prioritize when starting my wilderness survival journey?
I recommend starting with water purification. Knowing how to locate and purify water is essential to your survival.
2. How do I know if a plant is safe to eat?
Always research beforehand! Use field guides or foraging apps to familiarize yourself with edible plants. If in doubt, do not eat it.
3. What type of shelter is best for beginners?
A lean-to is a great first shelter option. It’s simple to construct and offers good protection from the elements.
4. How important is fire safety in wilderness survival?
Fire safety is crucial! Always clear the area, have a way to extinguish the fire, and make sure it’s fully out before leaving.
5. Can I signal for help without a whistle or mirror?
Absolutely! You can arrange rocks or logs in a visible pattern or create a large fire for smoke. Just be creative with what you have!