
by Preparation Call Editorial Team | Jul 31, 2025 | Preparedness
We’ve all been there—unexpected expenses pop up and suddenly, it feels like the world is caving in on our finances. Personally, I’ve faced my share of financial crises, and let me tell you, it’s a wild ride. But over time, I’ve learned some valuable lessons on how to prepare and protect myself from going broke during tough times. Let’s dive into the strategies that I’ve found helpful over the years.
Build an Emergency Fund
Understand the Purpose of an Emergency Fund
When I first heard about an emergency fund, I thought, “Do I really need that?” But then life tossed me a few curveballs—unexpected car repairs, medical bills, you name it. An emergency fund is essentially your safety net. It provides peace of mind knowing that you have money set aside for emergencies, so you’re not scrambling to find cash in a crisis.
The idea is simple: set aside enough money to cover at least three to six months’ worth of living expenses. This way, if something goes wrong, you’re prepared. It’s like having a cushion for when things get bumpy.
Plus, it helps you avoid putting expenses on credit cards or borrowing from friends and family, which can create additional stress and complications.
How to Start an Emergency Fund
Getting started is easier than you might think. First, take a look at your monthly expenses. Create a realistic budget that highlights where you might be able to pull some cash aside. I started out with small, manageable contributions—like skipping that extra venti latte each week!
Automating your savings can be a game-changer. Set up a regular transfer from your checking account into your savings account. This way, you won’t have to remember to do it—it just happens. Before you know it, you’ll see your emergency fund growing.
And don’t forget to celebrate your small wins! Each time you hit a savings milestone, treat yourself to something nice (but not too pricey). This makes saving feel rewarding rather than a chore.
Keep Your Fund Accessible yet Secure
Now, while it’s important to have your fund accessible, you don’t want to mix it up with your daily spending money. I recommend keeping your emergency fund in a high-yield savings account. This way, you can earn a little interest while still having quick access when you need it.
Just remember: this money is for emergencies, not for that cute handbag or the latest gizmo. Being disciplined about its use is key. I’ve had to remind myself, “This is for when life happens, not just when I feel like treating myself.” You’ve got this!
Reduce Debts Wisely
Assess Your Debt Situation
Debt can feel like a heavy weight on your shoulders. Trust me; I’ve been there. Before anything else, take a clear inventory of your debts. List everything out—credit cards, student loans, mortgages—whatever it is, get it down on paper. This clarity helps you understand just how much you’re dealing with.
Different types of debt can have different interest rates and terms, so knowing the details is crucial. It gives you a roadmap for repayment strategies down the line. Plus, it’s empowering to see the full picture—it’s the first step in taking control.
Don’t forget to reflect on what led to your current debt situation. This doesn’t mean berating yourself; think of it as learning from your past. What decisions can you change moving forward?
Create a Debt Repayment Plan
Once you have that assessment, it’s time to make a game plan. One technique I swear by is the snowball method: pay off your smallest debts first while making minimum payments on the others. There’s something super motivating about crossing that first debt off the list!
Alternatively, if you’ve got high-interest debt, consider the avalanche method. Tackle those high-interest debts first and save the most cash in the long run. Whichever method you choose, just get started! Action is the key here.
And remember to stay consistent. Set reminders to track your progress and adjust your plan if necessary. Life happens, and it’s okay to tweak things as you go. The goal is to keep moving forward!
Avoid Accumulating New Debt
As you work on reducing your current debts, it’s equally important to avoid adding new ones. I had to challenge myself to only use credit for planned purchases, and I stuck to it. If it wasn’t in the budget, it wasn’t happening.
Leverage cash instead of credit; believe me, there’s something satisfying about handing over cash and watching your spending limit right there in your wallet! Plus, it helps you stay conscious of how much you’re really spending.
Alongside this, consider building a lifestyle that encourages saving rather than overspending. Trust me, it opens up so many possibilities for financial freedom down the line!
Diversify Income Sources
The Importance of Multiple Income Streams
Having multiple sources of income has saved my bacon more than once. Whether it’s a side hustle, freelance work, or passive income, diversifying your income can provide security. It’s like having little safety nets scattered across your financial landscape.
In my experience, starting a side hustle doesn’t always mean turning your entire life upside down. Look for skills or passions you can monetize. For instance, I turned my love for writing into freelance gigs, and it has proven to be incredibly rewarding—both creatively and financially.
Don’t underestimate the power of passive income too! Whether it’s renting out a room, dividend stocks, or creating an online course, there are countless ways to grow your income streams. Get creative with it!
Explore Gig Economy Opportunities
In today’s gig economy, opportunities abound. Apps and platforms like Uber, Fiverr, and TaskRabbit can connect you to quick gigs whenever you have some extra time. I often pick up tasks on weekends or when I have a free hour here and there—it’s a fantastic way to bolster my income without committing to something long-term.
Experiment with different roles to find what fits your lifestyle and interests. Not only can this give you extra cash, but it can also lead to potential career changes or new skills you never expected to acquire!
And if there’s something you’re passionate about—like art, cooking, or coaching—why not try turning it into a side business? The possibilities are endless.
Invest Smartly
When it comes to diversifying income, investing is a powerful ally. In my journey, I’ve learned that even small investments can grow over time. Whether it’s stocks, mutual funds, or real estate, educating myself on different investment options has paid off tenfold.
Start small if you’re unsure—consider a robo-advisor for guided investment choices. And remember: the earlier you start investing, the more time your money has to grow!
Keep in mind that investing involves risks, so make sure to do your research and consider what fits your risk tolerance. Get in the habit of continuously learning about investment strategies to sharpen your skills further.
Stay Informed and Adaptable
Continuous Financial Education
Staying informed about personal finance is crucial. Over the years, I’ve made it a routine to read books, follow experts, and listen to podcasts. Financial literacy is the best form of self-defense against financial crises, in my opinion.
The world of finance is ever-evolving. New investment strategies, savings tips, and financial tools pop up frequently. Keeping up with these changes can make a world of difference in how I approach my own financial planning.
Consider joining online communities or forums dedicated to finance. Sharing insights with others and learning from different experiences can be invaluable. It’s like having a support system on your financial journey.
Track Financial Trends
Understanding broader financial trends can help you remain adaptable. For instance, keeping an eye on economic indicators, interest rates, and stock market fluctuations can provide insights that impact how you manage your funds. I often find myself watching financial news a few times a week to stay updated.
This knowledge empowers me to make more informed financial decisions—whether it’s knowing when to invest, when to save, or when to adjust my budget based on inflation, for example.
And if you’re not into traditional news outlets, look for financial apps that provide real-time updates and alerts about changes that could affect your financial situation. Stay plugged in!
Adjust Plans as Life Changes
Life is unpredictable. I’ve learned to embrace change and adapt my financial plans as needed. Whether it’s a new job, a change in family dynamics, or relocating, adjusting my budget and savings plans accordingly has kept me afloat during turbulent times.
Be proactive rather than reactive. Regularly review your financial goals and make any necessary adjustments. This habit ensures I’m always prepared, no matter what life throws my way.
Flexibility—it’s not just a yoga term, folks! In finance, being flexible means keeping a cool head and finding new paths when needed.
Seek Professional Advice
When to Consult a Financial Advisor
There’s no shame in asking for help! If you’re feeling overwhelmed, reaching out to a financial advisor can provide clarity and direction. I’ve done this a few times, and honestly, it’s been a game changer. Advisors are trained to see the bigger picture and offer personalized strategies.
They can help you assess your investment strategies, create a retirement plan, or even work through debt management. Choosing the right advisor makes all the difference. Look for someone reputable, ideally a fiduciary who puts your interests first.
And don’t forget, these consultations don’t have to break the bank. Many offer a free initial consultation, which can give you valuable insights without the commitment of a full service right away.
Utilizing Online Resources
If you can’t swing professional help yet, there are loads of online resources available. Websites, forums, and financial apps offer a wealth of information, often for free! I’ve found success with budgeting apps that guide me in tracking expenses and improving saving habits. They’re super handy!
Online courses or webinars can also offer guidance on specific topics—whether it’s investing basics, retirement savings, or tax strategies. I recommend dedicating some time to explore these resources to empower yourself.
Knowledge is a powerful tool; the more informed you are, the better decisions you can make. Take advantage of the resources at your fingertips!
Networking with Financial Peers
Believe me when I say networking can provide insights that professionals might overlook. Engage with others in financial wellness groups, online forums, or local meetups. Sharing experiences and strategies can open your eyes to new paths and resources you hadn’t considered before.
Talk about your financial goals and challenges with trusted friends or family. Those discussions often lead to helpful tips or support that can make a world of difference during tough financial times.
Remember, you’re not alone on this financial journey. Connecting with others who face similar challenges can provide motivation and accountability!
Frequently Asked Questions
1. How much should I have in my emergency fund?
It’s generally recommended to save three to six months’ worth of living expenses. This amount can vary based on your personal situation, risk tolerance, and job stability.
2. What is the best approach to paying off debt?
Two popular methods are the snowball method (paying off smallest debts first) and the avalanche method (paying off high-interest debts first). Choose the one that fits your motivation style best!
3. How can I find additional income opportunities?
Explore freelance gigs, side hustles, or even renting out a room on services like Airbnb. The gig economy is booming, and there’s plenty of opportunities waiting for you!
4. What should I do if I can’t save money each month?
If saving feels impossible, start small. Even setting aside a tiny amount can add up over time. Look for areas in your budget to cut back, even if it’s just a little at first.
5. When should I consider hiring a financial advisor?
If you’re feeling overwhelmed with your finances, a financial advisor can provide tailored advice and strategies. It’s especially useful during life changes, such as starting a family or nearing retirement.
by Preparation Call Editorial Team | Jul 31, 2025 | Preparedness
Stay Calm and Assess the Situation
Take a Deep Breath
First things first, when you get bitten, it’s easy to freak out. Trust me, I’ve been there! But taking a moment to breathe can make a world of difference. Just like in a heated moment in life, staying calm allows you to think more clearly and decide what to do next.
After a bite, our instinct might be to panic – to run to a mirror or shout for help. Instead, focus on your breathing. Count to four as you inhale, hold for four, then exhale for four. This grounding technique can help curb that immediate anxiety and prepare your mind for the next steps.
Once you’re a bit calmer, take a moment to really assess the situation. Look closely at the bite. Is it bleeding? Are there signs of a sting? This assessment will help determine if you need to seek medical help or if you can treat it yourself.
Evaluate the Type of Bite
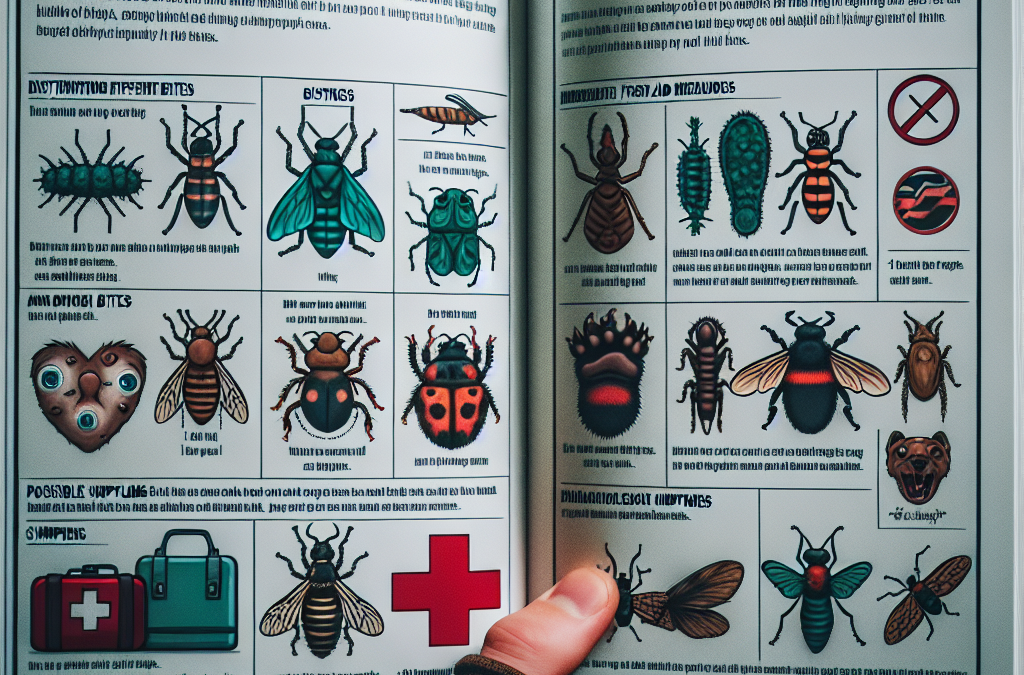
Next up, identifying what type of bite or sting you’re dealing with is crucial. Animal bites, insect bites, and stings from bees or wasps all have different implications. Sometimes, it’s easy, like a bee sting, but other times, things can get tricky.
If you’ve been bitten by an animal, try to remember the type. Was it a dog, cat, or something wild? Domestic animals’ saliva might require different treatment compared to wild animals, which can carry various diseases.
Insect bites can vary hugely in their effects, too. For instance, a mosquito bite might just be itchy, while a spider bite could lead to more serious complications if it’s venomous. Getting a clear picture will help in your response.
Check for Allergic Reactions
One of the scariest parts of bites is the possibility of an allergic reaction. I can’t tell you how many times I’ve seen my friends jump into action with a bee sting, only to find out they have an allergy. Keep an eye out for symptoms like swelling, difficulty breathing, or hives.
If you notice any of these signs, it’s essential to act fast! Call for help or take an antihistamine if you have one on hand. Allergy severity can sometimes escalate quickly, so don’t hesitate.
Even if you haven’t experienced reactions in the past, that doesn’t mean it can’t happen now. Always err on the side of caution and keep an EpiPen close if you know you’re at risk.
Administer First Aid
Clean the Area
After you’ve assessed the situation, it’s time to take action. First, cleaning the area is crucial. You don’t want to risk infection on top of your bite, so make sure you wash your hands and the affected area with soap and water.
If you have an antiseptic handy, even better! Apply it gently, giving it a moment to dry before moving on to the next steps. I’ve learned the hard way that skipping this can lead to more trouble down the line.
After cleaning, be sure to cover the area with a clean bandage if it’s bleeding or at risk of getting dirty. You want to create an environment that promotes healing – and that starts with cleanliness!
Control Swelling and Pain
If the bite is swelling or painful – and let’s be honest, many of them can be – controlling that discomfort is next on my list. Cold packs or ice wrapped in a cloth can work wonders for reducing inflammation.
Applying it intermittently for about 15-20 minutes can take down that swelling and numb the pain. Just be careful not to put ice directly on your skin; we don’t want frostbite added to our woes!
If you have over-the-counter pain relievers like ibuprofen or aspirin, those can help too. Always follow the dosage instructions! Some people forget how potent these meds can be.
Monitor Symptoms Over Time
Lastly, monitoring your symptoms is key. Just because you feel better at first doesn’t mean it can’t change later on. It’s so important to pay attention to how your body reacts in the hours and days that follow.
Keep an eye out for any new symptoms, and if things seem to worsen, don’t wait to get help. Your health is way more important than hesitating. I’ve made that mistake, and it didn’t end well!
Documenting your progress can also be helpful, especially if you need to see a doctor later. Take photos and write down any symptoms that arise – it can provide the professionals with valuable information.
When to Seek Medical Attention
Signs of Infection
Sometimes, despite all our best efforts, infections can set in. If you notice increased redness, warmth, or pus around the bite area, that’s a significant red flag. Infections can escalate quickly, so don’t wait it out!
Additionally, if you’re running a fever or experiencing chills, those can be more signs that something isn’t right. Not to mention, feeling unusually tired can also indicate that your body is fighting off an infection.
In these cases, it’s best to reach out to a healthcare professional, who can evaluate the situation and provide the right treatment. Don’t downplay these signs; it’s better to be safe!
Allergic Reaction Symptoms
If you experience any signs of a serious allergic reaction, such as difficulty breathing, swelling in the face or throat, or a rapid heartbeat, time is of the essence. Call emergency services immediately. Every second matters when it comes to allergy symptoms!
These kinds of symptoms require an urgent response, and having someone to help can make a significant difference. I can’t stress enough how crucial it is to recognize these signs early on. Knowing your risks and what to look out for can ultimately save you from serious harm.
Even if you have treated smaller bites in the past, know that allergy reactions can change. Don’t be complacent – always be prepared for the unexpected!
Persistent Pain or Other Symptoms
Sometimes, even if everything seems normal, you may still feel lingering pain, numbness, or other symptoms after a bite. If pain doesn’t subside or the area feels increasingly tense, don’t hesitate to seek medical advice.
It’s better to go to a professional just to be sure everything is fine. They can offer insights or treatments that will help ease your pain and ensure you’re heading toward a full recovery.
Don’t let pride hold you back! Reaching out for help shows strength and responsibility towards your health, something I believe is essential in our busy lives.
Prevention Tips
Stay Informed About Local Wildlife
As someone who loves the outdoors, knowing about local wildlife and insects can really help prevent bites. Research the common animals and insects in your area, especially if you’re heading somewhere new. You’ll feel much better prepared!
I’ve read horror stories of people hiking and running into venomous snakes or aggressive wildlife. Taking your time to understand what to expect can help you enjoy your adventures even more. Awareness can spark caution!
Additionally, taking note of the seasons and weather can be crucial too. Some pests are more active during warmer months. Planning your outings when they’re less active can truly save you a world of hurt!
Use Repellents When Necessary
When it comes to being outside, using repellents can be a game-changer. Bug spray with DEET, picaridin, or oil of lemon eucalyptus can help fend off those pesky insects. I’ve made it a habit to apply it before I step out, especially on hikes or camping trips.
Don’t just apply repellents to exposed skin – think about your clothing too! Special clothing meant to keep bugs away can be a fantastic investment if you’re in an area with high insect activity. I surely wish I had learned about those sooner!
Always follow the instructions for safe usage, and reapply as indicated, especially if you’re sweating or in water. A few minutes of preparation can save you hours of discomfort later!
Practice Caution in Vegan Areas
Many insects are attracted to food, so practicing caution around picnics or outdoor meals can help you avoid bites. Whenever I go for gatherings outside, I always try to keep food sealed and put away until I’m ready to eat.
Trash cans and food scraps can draw unwanted insects. Keeping your area tidy can help deter these pests. I also like to avoid sweet-smelling lotions or perfumes before heading to such events – they can attract the wrong crowd!
Lastly, when hosting an outdoor event, consider informing your guests about the precautions. It’ll keep everyone aware and help minimize potential bites. A little teamwork goes a long way!
Frequently Asked Questions
What should I do immediately after an animal or insect bites me?
First, try to stay calm. Clean the bite area with soap and water, apply an antiseptic, and then monitor for any symptoms and swelling.
How can I tell if my bite is infected?
Signs of infection include increased redness, warmth, swelling, pus, or fever. If you notice any of these, seek medical attention.
What are the symptoms of an allergic reaction to a bite?
Symptoms can include difficulty breathing, swelling of the face or throat, hives, and rapid heartbeat. If you experience these, seek emergency help immediately.
When is it necessary to go to the doctor?
If you experience severe symptoms, persistent pain, or signs of infection after a bite, it’s best to contact a healthcare professional for advice and treatment.
How can I prevent insect or animal bites?
Stay informed about local wildlife, use insect repellent, and be cautious with food when outdoors. Keeping these tips in mind can help reduce your risk of bites.
by Preparation Call Editorial Team | Jul 31, 2025 | Preparedness
Preparing for the Unexpected
Understanding Your Environment
When you’re out in the wild, the first thing to remember is that Mother Nature doesn’t always play by our rules. You need to understand your surroundings—whether it’s a forest, mountain, or desert. Familiarize yourself with the area before embarking on your adventure. Map out where help might be available, even if it’s miles away. Knowing how to navigate can help calm those pre-birth jitters.
Get to know common plants and animals in the area. Believe it or not, some plants can aid in pain relief or serve as natural antiseptics. It’s like being a walking pharmacy! And who knows, you might even encounter some friendly wildlife that could help if you’re lucky. Just don’t count on it!
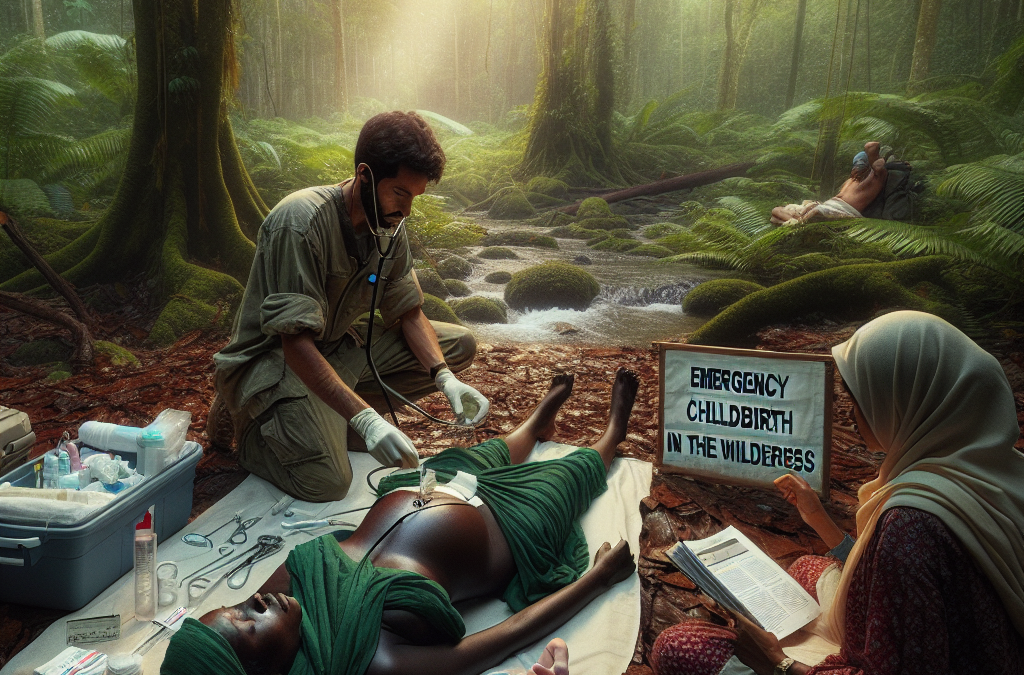
Preparation is your best buddy in this scenario. Take the time to gather supplies ahead of time—think about things like clean cloths, a makeshift blanket, and some basic first-aid gear. Your backpack should have what you need to manage a delivery. Trust me, having these essentials can transform a chaotic situation into something more manageable.
Recognizing the Signs of Labor
Knowing When to Act
Okay, so let’s get real here. If someone’s in labor, the last thing you want to do is be clueless. There are a few classic signs to look for, like contractions. They might start off mild and then become more intense. Pay attention—this isn’t the time to be distracted by your surroundings!
Other signs to watch for include a sudden burst of energy, which is not uncommon. This is sometimes referred to as “nesting.” The person might also feel anxious or even a bit crampy. If you see the water breaking, that’s your cue. Grab your gear and get ready—things are about to get real.
Don’t freak out! It’s totally normal to feel some panic. Just take a deep breath and focus. Clear the space around you and ensure the person feels safe and supported. Sometimes all someone needs is a calm companion to help ground them in a wild moment.
Essential Steps for Delivery
Gathering Your Supplies
Before you get into the nitty-gritty of delivery, make sure you have everything ready. You want your supplies close to you. Personally, I recommend a waterproof bag to keep everything dry just in case the rain decides to join your little party.
Things to have on hand include clean towels or cloths, a warm blanket, and some thin string or a clean shoelace to tie off the cord. Remember, sterile is key, so do your best to ensure everything is as clean as possible—even in the wilderness. Someone’s life depends on it!
It’s also a good idea to have a flashlight handy. It might get dark before you know it, and trust me, there’s nothing worse than trying to navigate a delivery in the dark. Plus, it can help signal for help if needed. Knowledge is power, my friends!
Managing Complications
Being Prepared for the Unexpected
So what if things don’t go as planned? First off, don’t panic. Complications can arise, and staying calm is the best way to approach them. Know that things can happen, but remember you’re not alone—you’re equipped with knowledge and supplies. If there’s something you need to improvise, don’t be shy. Creativity can go a long way!
Recognizing signs of distress in both the mother and the baby is crucial. If the contractions are too close together or if the mother is experiencing excessive bleeding, you need to act swiftly. Having a partner can hugely help in these moments. Someone can focus on the laboring person while the other assesses the situation and seeks help.
There’s no shame in reaching out for help. If you have a phone and coverage, don’t hesitate to call 911. Even if you’re deep in the woods, many areas have emergency services that can get to you quickly. Information is key, so be sure to relay all necessary details to them.
Aftercare and Support
Post-Delivery Care
Congratulations! You’ve made it through! But wait—there’s still work to be done. Taking care of the mother and the newborn immediately after delivery is essential. Ensure the baby is breathing and wrapped securely in a clean blanket. Skin-to-skin contact can help regulate the baby’s temperature—good stuff!
Don’t forget about the mother’s needs. Hydration is important; a sip of water can do wonders. Monitor her for any signs of distress or complications, like heavy bleeding. Check on her emotional well-being, too. This can be a wild ride, and discussing every part of the experience can help ease anxiety.
Lastly, don’t forget to reach out to family and friends for support once you’re back in civilization. New parents need their support crew more than ever during these first few weeks. It’s a whole new world, and having a strong support system is invaluable.
Frequently Asked Questions
-
What should I pack for an emergency childbirth in the wilderness?
Be sure to have clean towels or cloths, a warm blanket, string or shoelaces for tying off the cord, and a flashlight. Having these items can make a huge difference!
-
How will I know when labor is happening?
Look for signs like contractions, a sudden burst of energy, and water breaking. If you notice these signs, it’s time to be ready for action!
-
What if complications arise during delivery?
Stay calm and assess the situation. If the mother or baby shows signs of distress, have a plan for how to address these issues, including calling for help if necessary.
-
What is the most important thing to do immediately after childbirth?
Make sure both the mother and baby are safe and secure. Wrap the baby in a clean blanket and monitor the mother’s condition closely for any complications.
-
How can I prepare myself for a potential wilderness childbirth?
Learn about childbirth basics, familiarize yourself with your environment, gather supplies, and practice staying calm under pressure. Preparation is key!

by Preparation Call Editorial Team | Jul 31, 2025 | Preparedness
Utilize Trusted News Sources
Know Where to Look
When an emergency hits, you want to get accurate information quickly. It’s crucial to have a list of trusted news outlets you can turn to. Local news stations are often first on the scene and provide real-time updates. I personally like to check in with my local radio stations, which can be super helpful when other means of communication are down.
Online news we’re all familiar with, like CNN or BBC, often have live updates during major events. They not only cover national news but also lend a hand with what’s happening in local communities. A word of caution, though—make sure to filter out sensationalism and focus on objective reporting.
Social media can also be a valuable tool, especially when you’re looking for on-the-ground updates. Twitter, for instance, can provide firsthand accounts from people who are experiencing the emergencies. Just be sure to verify information with trusted sources before taking any action based on it!
Set Up Emergency Alerts
Local Alerts and Notifications
These days, setting up emergency alerts is easier than ever. I remember the first time I got an emergency alert on my phone; it felt like I was connected to a lifeline. You can sign up for notifications from your local government or emergency services, which will send you text messages or push notifications about urgent situations in your area.
Each state has its own alert system, so take a moment to find out what’s available in your area. The National Weather Service, for example, pushes out alerts for weather emergencies that can save lives. FYI, it’s often as simple as texting a keyword to a designated number!
Don’t forget to customize your notifications! You can choose which alerts you want to receive, so you’re not overwhelmed with unnecessary information. Being selective keeps you focused on what truly matters during a crisis.
Communicate with Friends and Family
Establish a Communication Plan
In tough times, staying in touch with loved ones is crucial. I’ve learned that having a realistic communication plan can give everyone peace of mind. Discuss how you’ll contact each other during an emergency—whether it’s through calls, text messages, or even social media.
I like to designate a central contact person in the family, someone who can keep everyone updated. If it’s tough to reach an individual, this person serves as the point of communication for the group. It makes things flow a lot smoother!
Make sure everyone knows how to reach this person and keep their contact information handy. Quick access can save precious time when you’re worried about your family’s safety during an emergency.
Stay Engaged on Social Media
Follow Reliable Accounts
Alright, let’s talk about social media. When an emergency unfolds, platforms like Twitter and Facebook can provide vital information. It’s best to follow reliable accounts related to emergency management, local authorities, and trusted news outlets. Think of it like creating your own “go-to” list for urgent information!
Being part of local community groups can also help you stay in the loop. Many neighborhoods have Facebook groups or Nextdoor forums where people share alerts, advice, and resources during emergencies. This way, you’re not only getting information but also connecting to your community!
Keep an eye on what’s trending. During emergencies, there’s usually a lot of chatter online. However, be cautious—don’t get caught up in the panic. Stick with your trusted sources for the most accurate details.
Prepare a Go-Bag for Emergencies
Contents of Your Go-Bag
A little preparation goes a long way. I can’t stress enough how important it is to have a go-bag ready to grab in case of emergencies. Think about what essentials you’d need to survive for a few days if things got really bad. I include water, non-perishable food, and basic first-aid supplies—stuff that would keep you going.
Don’t forget about documents! I keep copies of identification and important papers in there too—you know, just in case. It’s also a good idea to have cash on hand since, in emergencies, ATMs may not be working.
Lastly, consider adding items that cater to your family’s specific needs, like medications or pet supplies. Preparing this go-bag ahead of time takes a weight off your shoulders when you’re facing an emergency, trust me!
FAQs
1. What should I do first when an emergency occurs?
First, stay calm. Assess the situation and check in with reliable news sources to see what’s going on.
2. How can I ensure I’m getting accurate information?
Stick to trusted news outlets and official emergency services. Also, verify information before taking any action.
3. What goes into a good emergency go-bag?
Your go-bag should include water, non-perishable food, a first-aid kit, important documents, and anything specific to your family needs like medications.
4. How do I set up local alerts?
Visit your local government’s website to sign up for emergency notifications. It’s usually straightforward and needs just a little bit of your info.
5. Why is social media useful during emergencies?
Social media can provide real-time updates and firsthand accounts from those directly affected, although it’s vital to ensure you’re following reliable sources to avoid misinformation.
by Preparation Call Editorial Team | Jul 31, 2025 | Preparedness
Assess Your Needs
Understanding Your Travel Style
When I think about packing an emergency kit, the first thing I consider is how I travel. Whether you’re a backpacker heading to the wild or someone booking luxury stays, your kit should mirror your journey. Budget trips? You’ll want lightweight, compact options. Luxurious travels might allow for more tools, but think about whether you really need them.
My trips have taught me that being prepared means having things tailored to the situation. For example, if you’re planning a family road trip, your needs will gravitate towards snacks, entertainment, and first-aid options suitable for kids. Solo travel? Focus on compact, versatile items that can work in multiple scenarios.
Lastly, consider your destination. Is it urban or more remote? A city adventurer may need a different set of tools compared to someone trekking through a national park. Taking a moment to assess your own needs makes all the difference when it comes to packing smart.
Gather Essentials
Hygiene and First Aid Supplies
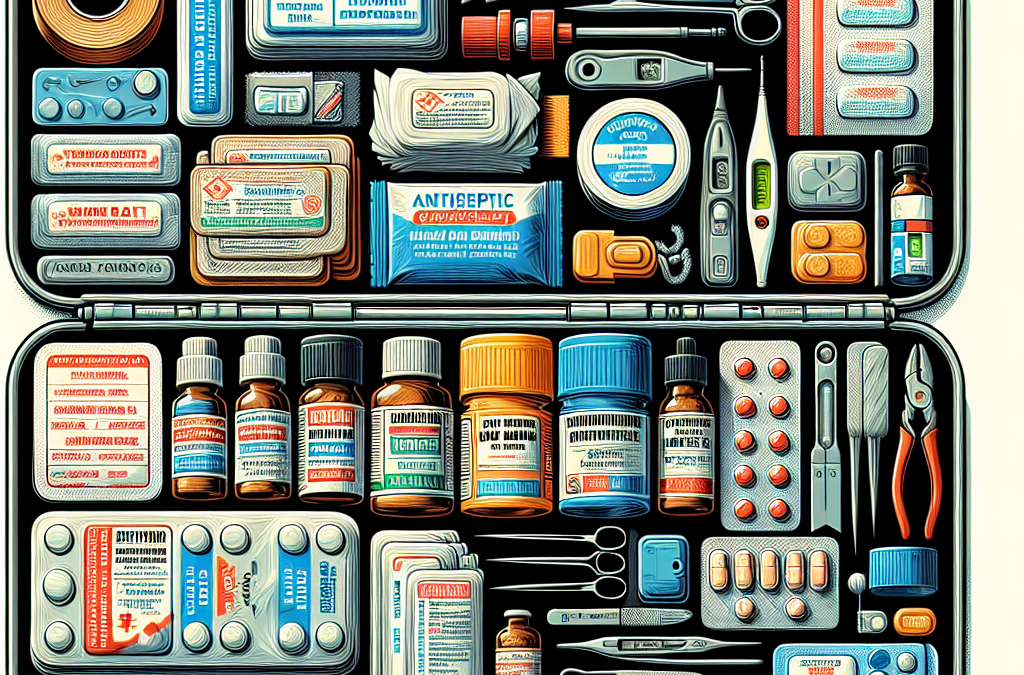
You can’t go wrong with starting your emergency kit with hygiene and first aid supplies. I remember one summer trip where I underestimated the power of hand sanitizer. Trust me, you’ll thank yourself later! A simple pack of wipes, hand sanitizer, and a small toothpaste can aid in a pinch, especially when traveling to places where cleanliness may not be a priority.
First aid essentials, like band-aids, antiseptic wipes, and pain relievers, are also non-negotiable. I once had a trekking buddy that cut himself while trying to impress us with his climbing skills. Having those supplies made it easy to handle the situation before we could seek professional care. You’d never think you’d need it, but trust me – it can happen!
Don’t forget disease prevention essentials like insect repellent or sunscreen depending on your destination. After a trip to Southeast Asia, where I’d forgotten the bug spray, I learned my lesson the hard way. Being prepared is all about planning for the “what-ifs”!
Pack Smart
Choosing the Right Bag
The bag you pick for your emergency kit is key. I mean, it should be compact yet spacious enough to fit the essentials. I usually opt for a lightweight backpack. It’s easy to carry around, and the best part? I can slide it into a larger suitcase if I need to. Versatility is a must.
Pockets are another thing to think about. I love bags with separate compartments because it keeps everything organized. No one wants to rummage through a jumbled mess when a scrape needs to be cleaned or when it’s time for snack time!
Also, consider the bag’s durability. If you’re trekking through varied terrains, snagging something that can withstand rain or the occasional fall is key. I learned that the hard way on a hike when my bag tore, and I lost important items.
Stay Updated
Regularly Check Your Supplies
One important lesson I’ve learned is to keep your emergency kit fresh. I mean, how many times have I grabbed an old granola bar that was definitely past the expiration date? Yikes! Regularly checking your supplies ensures that nothing’s stale or ineffective.
Plus, situations change! Maybe you’ve added new dietary restrictions or shifted your travel style since the last time you packed your kit. Spend a little time updating your supplies every couple of months – it’s worth the time and effort.
Taking notice of how your needs evolve keeps your emergency kit relevant. A simple check-in can remind you to adjust things, ensuring you’re prepared no matter where you wander off to next!
Know Emergency Protocols
Research Local Regulations and Contacts
Before heading off, I always take the time to look up local emergency protocols and contact information. This isn’t just a good idea; it’s crucial! Each country has different laws and customs, and being well-versed could literally save your life.
Know the number for police, fire, and medical emergencies for every destination. It’s also wise to jot down local embassies’ contact information. Emergencies can arise quicker than anticipated, and having those key contacts saved in your phone can make a big difference.
I also make sure to inform someone back home about my travel plans. Sharing your itinerary and contact information improves your safety net – sometimes I think of it as my own safety whistle. It gives me peace of mind knowing someone’s got my back!
FAQs
1. What should I include in my emergency kit?
Your kit should feature basic first aid supplies, hygiene products, snacks, water, and a few essential tools like a flashlight, multi-tool, and any personal items necessary (medications, etc.).
2. How often should I update my emergency kit?
Try to check and update your kit every few months or before major trips. This way, you can ensure all supplies are fresh and still relevant to your travel needs.
3. What type of bag is best for an emergency kit?
A lightweight backpack with compartments is usually the best choice. It should be easy to carry, durable, and spacious enough to hold all your essentials without being bulky.
4. Is it necessary to know local emergency protocols?
Absolutely! Each location may have different laws, services, and emergency numbers. Being prepared and informed could make a significant difference in a tough situation.
5. Can I include food in my emergency kit?
Yes! Non-perishable snacks like granola bars, nuts, or dried fruits are great options. Just remember to check expiration dates regularly when updating your kit!
by Preparation Call Editorial Team | Jul 31, 2025 | Preparedness
Growing Your Own Food
Understanding the Basics of Home Gardening
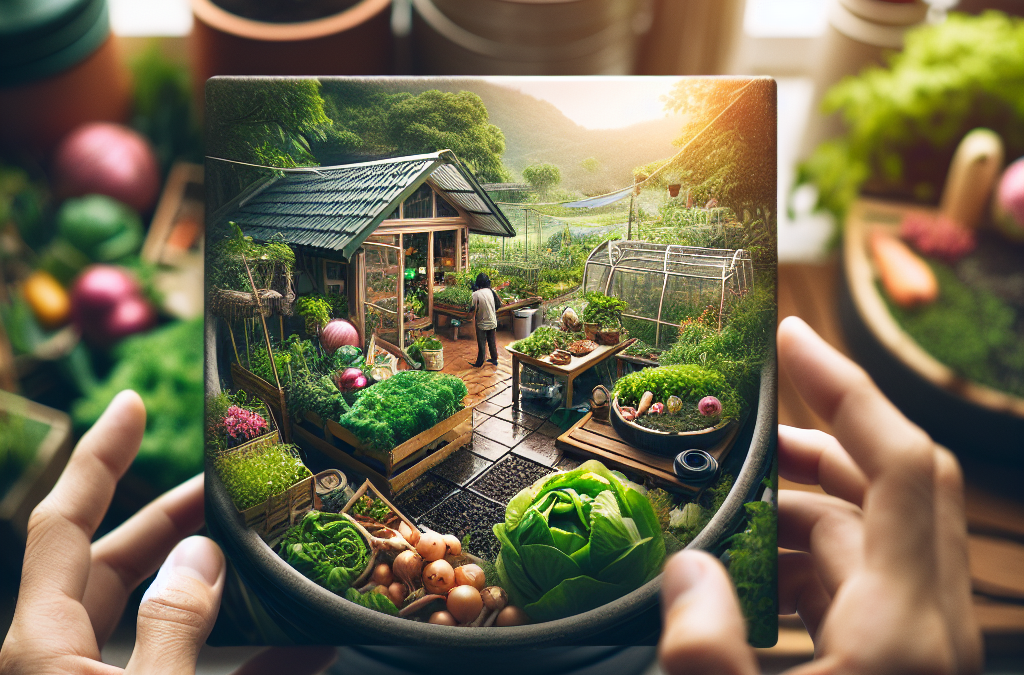
One of the first steps I took on my journey to create a sustainable food system at home was to learn the basics of gardening. It sounds simple, but trust me, it’s a game changer! I started by picking up a few essential tools, like a shovel, a hand trowel, and some gardening gloves. It’s all about getting your hands dirty and developing a connection with the soil.
Next, I turned some of my backyard into garden beds. It didn’t have to be perfect; just enough sunlight in the right spots worked for me. I started small with a few pots of herbs and gradually expanded to tomatoes and peppers. Each plant taught me a little something about growing—like the importance of soil quality and water balance. Patience truly pays off!
Lastly, I researched companion planting, which is essentially planting different crops close together for mutual benefit. For instance, tomatoes thrive with basil, while carrots and onions can help each other out too. This holistic approach not only maximizes space but also minimizes pests naturally.
Composting: Turning Waste into Nutrients
Before diving into composting, I’ll admit—I was skeptical about mixing food scraps together, thinking it would smell terrible. But wow, was I wrong! Composting is a robust way to recycle my kitchen waste back into something valuable for my garden. It starts with a simple bin in the corner of your yard or kitchen counter.
I learned that it’s about balance: greens (nitrogen-rich materials like vegetable scraps and grass clippings) and browns (carbon-rich materials like dried leaves and shredded paper). Layering these helps speed up the decomposition process. I found that turning my compost every few weeks really did wonders, speeding things up and keeping that “fresh soil” vibe.
Composting not only reduces how much trash I send to the landfill but also enriches my garden soil. It took a bit of practice to get it right, but when I saw that dark, rich compost ready to mix into my flower beds, it felt like pure magic!
Choosing the Right Plants for Your Climate
When I started my gardening journey, I was so excited about growing all these incredible vegetables that I completely overlooked the importance of climate. Researching my local growing conditions helped me pick plants that would thrive without too much fuss. I learned about hardiness zones and figured out what plants actually do well in my area.
Once you know your climate, selecting the right seeds is a breeze. I remember my first year, I planted a bunch of beautiful French heirloom tomatoes, only to find out they needed way more sun than my shady plot offered. Now, I opt for varieties that are known to flourish in my specific conditions, making all the difference!
Additionally, I’ve recognized the value of seasonal planting. Incorporating crops that are ready to harvest in spring and fall maximizes yields. Quite honestly, the variety adds excitement to my gardening routine, and I just love the idea of eating the freshest vegetables right from my patch!
Creating a Community Network
Finding Local Growers and Farmers
Part of building a sustainable food system involves connecting with like-minded folks. I made it a priority to locate local farmers and growers in my community—trust me, it’s worth it! Visiting farmers’ markets has been a delightful excuse to spend my weekends checking out fresh produce, baked goods, and even homemade jams.
Plus, I realized that shopping local not only supports the community but also helps reduce my carbon footprint. And let’s not forget the enhanced flavors! Nothing beats fresh, local fruits and vegetables. I often chat with vendors about their growing practices, and it deepens my appreciation for each bite.
Engaging with local food groups on social media or joining community-supported agriculture (CSA) programs has become a regular part of my routine. Sharing tips and tricks with fellow enthusiasts is so fulfilling and really makes the journey more enjoyable!
Participating in Community Gardens
A few years back, I discovered the concept of community gardens, and it’s been a total game-changer for me. These spaces are invaluable for meeting neighbors and cultivating friendships with those who have the same passion for growing food. It’s a brilliant way to learn from experienced gardeners who can guide you based on their years of experience.
Community gardens offer access to land that might not be available at home, so it’s perfect for those with limited space. I love volunteering at mine, where we all pitch in to grow a variety of crops. The sense of pride when we harvest and share our bounty is absolutely incredible!
Overall, what really excites me about participating in community gardens is the diverse array of crops we plant—getting to try new veggies I may not have thought to grow at home. It feels great knowing we’re all contributing to more sustainable food practices together.
Networking for Sustainability Ideas
Being part of groups focused on sustainability has opened my eyes to countless innovative ideas. I find inspiration in connecting with entrepreneurs and everyday people who are passionate about creating better food systems. It’s super refreshing to share ideas, brainstorm projects, and motivate one another to make a positive impact.
Through online forums and local meet-ups, I’ve discovered fantastic resources like seed exchanges and permaculture workshops. You learn so much from others—techniques for organic gardening, how to save seeds, or even basic permaculture principles that can be applied anywhere.
Building this network has enriched my experience and commitment to sustainability. Knowing I’m doing this alongside others makes the journey feel less overwhelming and more about building a resilient community together.
Reducing Food Waste at Home
Understanding Expiration Dates and Food Storage
To really get into reducing food waste, I took the time to educate myself about expiration dates. Quite often, I found myself discarding food that was still perfectly edible! There’s a big difference between “sell by,” “use by,” and even “best before” labels. I learned that many items can be perfectly fine well after those dates with proper storage.
Speaking of storage, I’ve switched to glass containers and airtight options to keep food fresh for longer. I also learned some nifty storage tips, like keeping potatoes and onions separate to prevent sprouting. What a difference it made in my grocery shopping practice!
Realizing how much I was wasting made me rethink my shopping habits. Now, I plan my meals better and focus on what I truly need and can use within that timeframe, which inadvertently saves me money too. Win-win!
Repurposing Leftovers Creatively
Turning leftovers into something new has become one of my favorite kitchen activities. I’ve learned that rather than simply reheating meals, I can take a little creativity and transform them into exciting dishes! For example, leftover roasted vegetables can be tossed into a stir-fry or blended into a hearty soup.
Another fun trick is to make smoothies out of overripe fruits that are a bit too mushy for snacking. Throw them into the blender with some yogurt and spinach, and voilà, delicious and nutritious! I often look at what I have left at the end of the week and think, “What can I make that’s a little different?”
By repurposing food creatively, not only do I reduce waste, but I also keep things interesting in the kitchen. It’s like a little game I play, and the results often surprise me! Plus, it feels great to salvage food that would have otherwise been tossed.
Composting Food Scraps
As I mentioned earlier, starting a compost bin was a huge part of my food waste reduction mission. Rather than tossing apple cores or banana peels into the trash, they find a new life in my compost. It feels good knowing that I’m minimizing waste and also enriching my garden.
By implementing this step, I realized just how much food scraps I was actually discarding. Now, being mindful of where those scraps go has become a habit. I even keep a small compost bucket in the kitchen to make things easier, tossing everything from coffee grounds to vegetable trimmings right into it.
Seeing the compost transform into nutrient-rich soil is a beautiful cycle, and I love using it to nourish my plants. It’s a rewarding experience that continuously reinforces the idea of sustainability at home.
Educating Yourself and Others
Engaging with Educational Resources
My journey in building a sustainable food system wouldn’t have been complete without diving into educational resources. I hit the library and browsed online platforms for books and courses about gardening, permaculture, and sustainability practices. Knowledge is power, folks! I found some incredibly inspiring books and documentaries that fueled my passion.
I’ve also subscribed to a few gardening blogs and YouTube channels, which have become a treasure trove of tips and inspiration. The helpful tutorials and discussions opened my eyes to techniques I never even knew existed. I find joy in learning from seasoned gardeners who share their successes and failures, it’s like having a mentor right in my living room.
As I gained knowledge, I felt compelled to share it. Hosting small workshops and informational meet-ups in my community became a great way to uplift others. Through social media and word-of-mouth, I encourage newcomers to get excited about gardening and sustainability, guiding them where I can.
Sharing Knowledge with Friends and Family
Nothing feels quite as fulfilling as sharing what I’ve learned with those closest to me. I regularly invite friends over for a garden tour or cooking session, showing them all the edible plants thriving in my backyard. It’s amazing how enthusiasm can ignite others’ interest!
Cooking up recipes from my garden harvest and having them over for a meal has become a beloved tradition. I share my journey, discussing the importance of sustainability and the small steps we can all take. It’s rewarding to inspire them to grow their own food at home!
One powerful way I’ve found to disseminate knowledge is through hosting community workshop sessions where we delve into gardening tips, techniques, and even recipe-sharing. The more we all learn together, the stronger our community becomes.
Advocating for Sustainable Practices
As I learned more about sustainability, I realized the importance of not keeping all this great knowledge to myself. Advocating for sustainable practices locally and online became pivotal in my mission. I began to voice the significance of supporting local farmers and promoting sustainable food systems in conversations.
Engaging with local councils and participating in initiatives has broadened my influence. Whether it’s lobbying for a community garden or speaking at events, bringing awareness to the importance of sustainability is crucial. I’m happy to be a part of this bigger conversation!
Additionally, I’ve utilized social media platforms to share sustainable food ideas and practices. Inspiring others through posts, stories, and even videos inspires a ripple effect. It’s about building momentum and changing mindsets one heart at a time.
Frequently Asked Questions
1. What’s the best way to start a home garden?
Starting a home garden is easy—begin with selecting a sunny spot, preparing the soil, and choosing plants that thrive in your climate. Start small with pots or a few garden beds!
2. How can I effectively compost at home?
To compost effectively, create a balance of nitrogen-rich greens and carbon-rich browns, turn the compost regularly, and monitor moisture levels. A simple compost bin or pile works great!
3. How can I reduce food waste while cooking?
Plan meals, use leftovers creatively, and educate yourself on food storage to reduce waste. Keeping track of what’s in your fridge helps too!
4. How can I connect with local farmers?
Visit farmers’ markets, join community Supported Agriculture (CSA) programs, or follow local farms on social media. Building relationships is key!
5. What sustainable practices can I share with my community?
Share books, host workshops, and engage friends in gardening projects. Advocate for sustainability through conversations and by setting an example in your daily life. Every small step matters!





