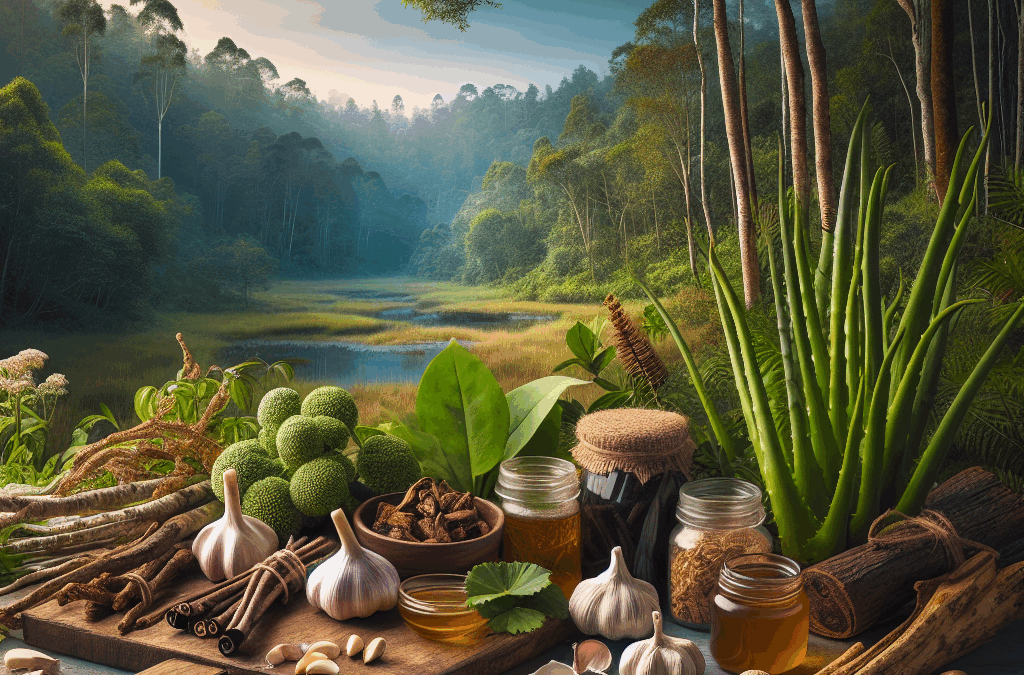
When I think about survival situations, one of the first things that pops into my mind is how to treat wounds. I’ve had my fair share of scrapes and cuts, and herbal compresses truly come to the rescue. Using fresh herbs like chamomile or calendula made into a compress can help reduce inflammation and promote healing.
You can make a compress by steeping the herbs in hot water and then soaking a clean cloth in this infusion. When you press it onto the wound, you’re not just applying moisture—you’re delivering those healing properties right where you need them. I’ve found this method incredibly soothing.
Just a heads-up though, always make sure the wound is clean before applying anything. It’s essential to avoid any kind of infection, which can really complicate healing. Trust me on this—I’ve learned the hard way!
Essential Oils for Disinfection
Essential oils like tea tree, lavender, and oregano come in really handy for disinfection. I always keep a small bottle of tea tree oil with me, as it’s known for its antibacterial and antifungal properties. When faced with a wound, diluting a few drops of the oil with a carrier oil can provide a natural disinfectant without the sting of conventional products.
Application is super easy; just dab it gently with a cotton ball on the affected area. I love the scent of lavender, plus it helps with relaxation—perfect when you’re stressed about being in a tough situation.
But remember, essential oils are potent! Always do a patch test to ensure you don’t have any allergic reactions. I can’t stress this enough; knowing your body’s reactions can make a world of difference.
Nutrients for Accelerated Recovery
Nutrition plays such a critical role in recovery that I can’t overlook it. I make it a point to consume plenty of vitamin C-rich foods like berries and citrus whenever I’m dealing with a wound. They help with collagen production and healing processes. If you can forage or have access to these foods in the wild, don’t skip them!
Additionally, incorporating protein sources like beans or nuts is vital in building new tissues. I’ve relied on nuts for energy and protein on numerous outdoor trips, and they’ve never let me down.
Remember, every little nutrient counts! Your body needs all the help it can get when bouncing back from injuries, so keep that diet packed with natural goodness.
Digestive Aids
Herbal Teas for Upset Stomachs
Upset stomach? Yikes! I’ve been there, especially after being out in nature for a few days with questionable cuisine. That’s when herbal teas come to the rescue. Peppermint or ginger tea can work wonders for soothing digestive issues. Just a few sips can help ease nausea and discomfort.
In the wild, I’ve managed to make ginger tea with wild ginger roots. It’s refreshing and works incredible magic on a troubled tummy. Make sure to steep the ginger properly, and you’ll feel that warm embrace soothing your insides.
And don’t forget about chamomile! That little flower has a calming effect on both your stomach and mind. Perfect combo in a tense situation, right?
Probiotics from Natural Sources
Keeping gut health in check is a survival priority, and fermented foods are packed with probiotics that can really help. Though in a tough situation, options might be limited, look for wild edibles that could have some fermentation properties.
I’ve often found wild dandelion greens—great for promoting digestion. They’re super nutritious, and I like munching on them when I feel off. Plus, they can help with nutrient absorption—so again, totally worth it!
If you have access to yogurt, that’s also a fantastic source of probiotics. Just one serving can boost your gut health immensely. I treat it like liquid gold during my adventures.
Natural Laxatives
In the world of survival, constipation isn’t just uncomfortable; it can actually become a serious issue. That’s why I always keep my eye out for natural laxatives like senna leaves or prunes, which help keep everything moving along.
Senna is a powerful herb that’s been traditionally used for its laxative properties. Just be cautious on dosages; I’ve learned the hard way that a little goes a long way! Steeping senna in hot water is the way to go for a relaxing drink.
And if you can find some wild berries or apples, they’re not only delicious—especially after a rough day—but they’ll also keep your digestive system functioning like clockwork. Easy, natural remedies right from nature!
Respiratory Relief
Steam Inhalation Techniques
Breathing issues? They can really put a damper on your survival situation. I’ve found that steam inhalation can work wonders. Whenever I have a cold or am dealing with congestion, simply boiling water and inhaling the steam can provide immediate relief. Adding a few drops of eucalyptus oil elevates the benefits even more.
To do this safely, I always keep a safe distance from the boiling pot—no one wants a face full of steam burns! Covering my head with a towel creates a mini steam tent that traps all that therapeutic goodness. It’s like a spa treatment wherever you are!
The warmth and moisture also help with throat irritations, which let’s be real, can happen way too easily when you’re out and about. Just give it a try next time you feel stuffy.
Natural Expectorants
If you’ve got a phlegmy cough, nature’s got your back! Some herbs like thyme and peppermint work as natural expectorants. I usually brew a strong herbal tea from these plants when I feel my throat getting scratchy. They’re not just soothing; they help loosen mucus too!
Making a simple syrup from honey and thyme is another trick I keep in my toolkit. If you’ve never tasted it, you are missing out! Not only is it sweet and enjoyable, but it works brilliantly to ease throat discomfort.
So next time you’re feeling under the weather, turn to your local herbs and see what they can do to help you breathe easier!
Herbal Cough Syrups
When I’m dealing with a nagging cough, I’ve found that homemade herbal cough syrups work wonders. Combining honey with herbs like marshmallow root or slippery elm creates a soothing mixture that coats the throat. It’s a game-changer for those stubborn coughs!
This is super easy to make—just mix the herbs with honey and let it infuse over a couple of days. I’ve even improvised with other sweeteners when honey wasn’t around, and it still did the trick. The key here is to keep it natural and gentle while soothing your throat.
It’s pretty cool knowing that I can whip up something effective from my surroundings or pantry, rather than relying on store-bought options that might not even be handy in a pinch!
Skin Care for Harsh Conditions
Natural Sunscreens
When you’re out in nature, protecting your skin from harsh sun rays is non-negotiable. I’ve experimented with various natural sunscreens using ingredients like coconut oil infused with shea butter and zinc oxide. It’s not only effective but also moisturizing, which is a bonus!
Mixing a little bit of carrot seed oil into the blend gives it added sun protection benefits. You can easily create a homemade sunscreen in a jar and warm it up before applying it as needed. I swear by applying this every few hours, especially during long hikes or outdoor activities.
But always remember to patch test any new concoctions on your skin before slathering it on. The last thing you want is a reaction that could ruin your adventure!
Moisturizers from Nature
Harsh environments can lead to dry, cracked skin, which is where natural moisturizers come into play. I’ve often used shea butter or even plain coconut oil to keep my skin hydrated. They’re simple yet incredibly effective and totally safe for sensitive skin too.
In addition, if you find aloe vera while out there, grab it! The gel is fantastic for soothing sunburns or dry patches. Trust me; I’ve turned to the aloe plant more times than I can count, and it never lets me down.
Making sure your skin stays soft can help avoid further complications or infections, so make this a priority when you’re in survival mode.
Natural Insect Repellents
Insects can really make survival situations harder, especially mosquitoes. I learned how to whip up natural repellents using essential oils like citronella and lemongrass mixed in carrier oils. Applying this blend, not only keeps the bugs away, but it smells good too!
I’ve also used witch hazel mixed with essential oils as a spray. It’s light, refreshing, and really practical. If I can’t find any ready-made version, this DIY spray comes in handy to keep those pesky insects at bay.
Remember, reapplication is key! These natural options might not last as long as chemical ones, but it’s still worth it to avoid those nasty bites.
FAQs
1. What are the best natural remedies for treating wounds?
Using herbal compresses, essential oils for disinfection, and ensuring good nutrition can greatly aid in wound healing.
2. How can I soothe an upset stomach naturally?
Herbal teas like peppermint or ginger are fantastic for settling stomach issues. Also, looking for wild edibles that can aid digestion is beneficial.
3. What should I do about respiratory issues while in the wild?
Steam inhalation and herbal expectorants, as well as making your own cough syrup with honey and herbs can help ease respiratory discomfort.
4. How can I protect my skin from the sun naturally?
Natural sunscreens made from coconut oil, shea butter and other ingredients provide a great barrier against sun damage while moisturizing your skin too.
5. What are some effective natural insect repellents?
Essential oils like citronella and lemongrass, mixed in a carrier oil or witch hazel, work effectively to keep insects at bay.
Before you dive into food storage, I found it super helpful to figure out what my family actually consumes regularly. It’s all about translating our eating habits into practical storage solutions. I took a week to jot down everything we ate and how often we went grocery shopping for those items. Trust me, this little exercise saved me a ton of time and money later on!
By understanding our patterns, I could prioritize the items that needed to be stocked up more frequently. For example, if we were downing peanut butter and jelly sandwiches for lunch on repeat, it made sense to buy these in bulk! Plus, it helps to identify seasonal foods that I could preserve or store for later use.
Once I had this laid out, organizing my pantry became way easier. I could categorize things, creating sections for our staples, snacks, and even our baking goods. A bit of foresight goes a long way!
Considering Storage Space
The next step in my journey was to take a look at the available space in my home. I mean, you can have the best food storage system planned out, but it won’t mean squat if you don’t have the room! I started by evaluating my kitchen, pantry, and even closets.
After measuring shelves and emptying some areas out, I realized I could repurpose a few underutilized spots. Like, who knew that shallow bins under the bed could hold some extra canned goods? It felt like finding treasure!
I highly recommend thinking vertically too. Installing some simple shelving can provide a whole new realm for your food items, allowing you to store things without cluttering countertops. Keeping it organized is key to a successful food storage strategy.
Identifying What to Store
Once I had a good grip on my consumption patterns and storage space, the next thing I had to tackle was what actually needed to be stored. I wanted a balance of non-perishables that made sense for my family’s taste! I came up with a list that included grains, dried beans, canned veggies, and protein options.
<pI also kept an eye on expiration dates for anything I was considering for long-term storage. Trust me, you don't want to end up with a pantry full of expired goods! I honestly had to toss a few things during my initial clean-up because I’d neglected them for too long.
It was also essential for me to rotate items—new purchases go to the back while older ones move to the front. This little hack has been a lifesaver! It minimizes waste and ensures that items I bought ages ago don’t just sit there, collecting dust.
Choosing the Right Storage Containers
Types of Containers
Okay, let’s talk about containers because they are crucial for keeping food fresh! I learned the hard way that not all containers are created equal. Glass jars are my best friends when storing grains and dried fruits because they seal really well and are easy to see through. However, I use plastic bins for larger items like flours or sugars that I buy in bulk.
I’ve also discovered vacuum-sealed bags, which are fantastic for longer-term storage of meats and cheeses. They reduce the risk of freezer burn and keep everything fresh! Seriously, if you haven’t tried vacuum sealing, you’re missing out.
My advice? Make sure your containers are airtight and preferably opaque, as light can spoil some foodstuffs. Plus, I label everything! It saves me the time of digging around trying to remember what’s in what.
Temperature and Environment
Temperature can be a sneaky little culprit when it comes to food storage. I learned that some foods are more sensitive than others. Items like oils and spices do best in a cool, dark place. My old habit was to keep them above the stove, but now I have a dedicated spice cabinet that’s cooler.
The fridge is another area to be mindful of. I always thought it was just about keeping things cold, but different zones have different temperatures. For instance, storing fruits and veggies in separate drawers keeps them fresh longer. It’s all about the right environment!
Lastly, I’ve got to give a shout-out to humidity. It can create a breeding ground for mold. If you live in a high-humidity area, consider using desiccants in your storage spaces to absorb excess moisture.
Accessibility and Organization
With everything in place, I found that making my stored food easily accessible was key! I worked on creating a system so that everyone in my household could find and put things back without confusion. Clear bins for snacks and pantry staples have become my go-to method!
Another cool tip I picked up? Labeling is a must! It cuts down on the chaos. Plus, I used different colors for different types of food, making it visually appealing and super easy to locate.
The final touch was to make use of lists. I created a master inventory for my pantry and shared it on the fridge. This way, we can keep track of what we have, what needs restocking, and we avoid those frantic last-minute grocery runs.
Implementing a Rotation System
Understanding FIFO (First In, First Out)
Implementing a rotation system, like FIFO, has made a huge difference in managing my food stocks effectively. The idea here is simple—use what you bought first before tapping into the newer stuff. When I first heard of this concept, it seemed so straightforward, but I didn’t realize how impactful it would be!
I started applying this method as I organized my pantry, and it became way easier to keep track of what needed using up. Each time I brought home new groceries, I’d just slide the older items to the front and into my cooking routine.
This habit minimizes waste and reminds me to get creative with what I already have. Trust me, some of my best meals have come out of needing to use up ingredients before they expired!
Utilizing Clear Labeling
Alongside FIFO, I found that clear labeling helped reinforce this system. I labeled not just the contents, but also the dates when items were purchased or opened. This allows me to make informed decisions, especially when packing my lunch or planning dinners for the week.
When I see a jar of pasta with yesterday’s date, I know that it’s time to incorporate it into tonight’s dinner. It keeps the whole process smooth and efficient! I also encourage everyone to personalize their labeling systems—maybe you prefer a fancy font or artistic doodles!
For me, the visual cues speed things up and help my family members jump in and help out too. It’s become a little game of “who can use up what!”
Scheduling Regular Checks
To wrap up, I’ve made it a routine to check on my food storage regularly—honestly, it’s become a family affair! I set aside a Saturday afternoon, maybe once a month, for a good old pantry and freezer review. We go through everything, toss out things that have expired, and replenish what we need to stock up on.
These checkups help me stay ahead of things. Like, if something is looking a bit sad or close to expiry, we come up with meal ideas together as a family. It’s fun and contributes to less food waste!
It’s also a time to celebrate what we “saved” or stored! It kind of turns into an informal “pantry party,” where we experiment together. It’s a lovely way to bond over food and get creative with what we’ve stockpiled.
Expanding Your Food Storage Knowledge
Researching Preservation Techniques
If you’re passionate about food storage, diving into different preservation methods is seriously empowering. I’ve explored canning, dehydrating, and even fermenting, and let me tell ya, it has opened up a new world of flavors and options! Estimatedly, you can save lots of money while enjoying seasonal delights all year round.
When I experimented with canning fruits from our local farmer’s market, not only did I save money, but I ended up with the most delicious homemade jams and sauces! This knowledge expanded my culinary skills and got me all giddy for being self-sufficient.
Online resources and community workshops have been invaluable. Connecting with others who share the same interests fuels my motivation to continue learning and trying new things!
Joining Community Groups
Networking within local groups or online forums has become a game changer. I stumbled upon a local gardening and preserving group, and wow, the tips and shared experiences are unbelievable! I got to learn from others’ successes and even their mistakes, which makes my food storage journey feel a lot less lonely.
These groups offer incredible resources, whether it’s sharing where to find good bulk items or giving me the heads-up on local sales. Plus, the confidence boost that comes from being part of a community is priceless!
Remember, we’re all in this together. So, don’t shy away from asking questions and sharing your own experiences. It’s all about learning and growing as a home cook and food saver!
Staying Updated on Trends
The last step in expanding my food storage knowledge has involved keeping up with trends. I love following blogs or subscribing to channels that focus on sustainable living, which often touch on food storage tips too! You’d be amazed at how often these trends evolve and what genius methods people come up with.
These insights might inspire you to switch up your storage methods or explore new food items you hadn’t considered trying before. I think it’s crucial to not just stick to what we know but continuously adapt and improve our strategies.
And let’s be real, who doesn’t love hearing about the latest ‘superfood’ or trending preservation method? It’s kind of like keeping a pulse on the culinary world in addition to being practical for my family’s food needs!
FAQs
1. Why is it important to assess my food consumption patterns?
Assessing your food consumption patterns helps you understand what you actually use and need to store. This way, you can avoid waste and ensure that your storage system is tailored to your family’s eating habits.
2. What types of containers are best for food storage?
Airtight containers, glass jars, vacuum-sealed bags, and clear bins are the best options for food storage. They help keep food fresh and organized, and they should be durable enough for regular use.
3. How often should I check my food storage?
Regular checks can be done monthly. It helps ensure that you’re staying on top of expiration dates, allows you to rotate items, and keeps your pantry organized and functional.
4. Can I store all types of food in the same space?
No, different types of food have varying needs in terms of temperature and humidity. For best results, separate dry goods, refrigerated items, and perishables to ensure optimal freshness.
5. Where can I learn preservation techniques?
You can learn preservation techniques through community workshops, online resources, forums, and books. It’s a great way to expand your knowledge and share experiences with others who have similar interests!
In a world where unforeseen events can strike at any moment, preparedness is not just a luxury; it’s a necessity. Whether it’s natural disasters like hurricanes and earthquakes or man-made emergencies, having a solid plan in place can mean the difference between chaos and calm. Let’s explore the five pillars of emergency preparedness that every family should know to navigate through crises with confidence.
*Pillar 1: Risk Assessment – Understand Your Threats**
Before you can formulate an effective strategy, it’s crucial to identify the specific threats your family may face. Each region has its unique risks—flooding in low-lying areas, wildfires in dry regions, or even civil unrest in urban settings. Start by researching local hazards and consider historical data on past emergencies. This knowledge allows you to tailor your preparedness efforts accordingly, ensuring that you’re ready for what might come your way. After all, understanding potential risks is the first step towards effective planning.
*Pillar 2: Emergency Plan – Creating a Family Safety Strategy**
Once you’ve assessed the risks, it’s time to craft an emergency plan that involves everyone in your household. Your plan should include evacuation routes, designated meeting points, and contacts for family members who may be away from home during an emergency. Be sure to discuss this plan openly with all family members so everyone knows their role when disaster strikes. A well-thought-out strategy will foster a sense of security and enable smooth coordination during stressful times.
*Pillar 3: Essential Supplies – Building Your Emergency Kit**
An essential part of being prepared is assembling an emergency kit stocked with supplies that can sustain your family for at least 72 hours. Include water (one gallon per person per day), non-perishable food items like canned goods or energy bars, first-aid supplies, flashlights with extra batteries, personal hygiene products, and any necessary medications. Don’t forget important documents—keep copies of IDs, insurance policies, and medical records both digitally and physically accessible. Make it a habit to review and update this kit regularly so that nothing expires or goes unused.
*Pillar 4: Communication – Staying Connected During a Crisis**
During emergencies, communication channels can become disrupted or overloaded. Establishing alternative ways to stay connected with loved ones is vital. Designate an out-of-area contact person who can relay messages if phone lines are down locally; text messages often get through when calls do not. Additionally, using apps designed for crisis communication may enhance your ability to stay informed about each other’s safety during chaotic situations.
*Pillar 5: Training and Drills – Practicing for the Unexpected**
Preparedness isn’t just theoretical; it requires practice! Schedule regular drills so everyone knows how to respond under pressure—whether it’s evacuating quickly or using fire extinguishers effectively. Encourage each family member to learn basic first aid skills as well as CPR techniques; these could prove invaluable in critical moments.
*Conclusion: Staying Proactive and Prepared for Any Situation**
Being proactive about emergency preparedness means taking control rather than waiting for problems to arise unexpectedly. By focusing on these five pillars—risk assessment, creating an emergency plan, building essential supplies, establishing reliable communication methods, and practicing regularly—you empower yourself and your loved ones against uncertainty.
*Additional Resources – Helpful Links for Further Learning**
For those looking for more information on how best to prepare their families:
Ready.gov
The American Red Cross
FEMA’s Emergency Management Guide
*Call to Action – Start Your Family’s Preparedness Journey Today**
Don’t wait until it’s too late! Begin discussing these pillars with your family today and take actionable steps toward creating a safer future together. Remember—the best time to prepare was yesterday; the second best time is now!
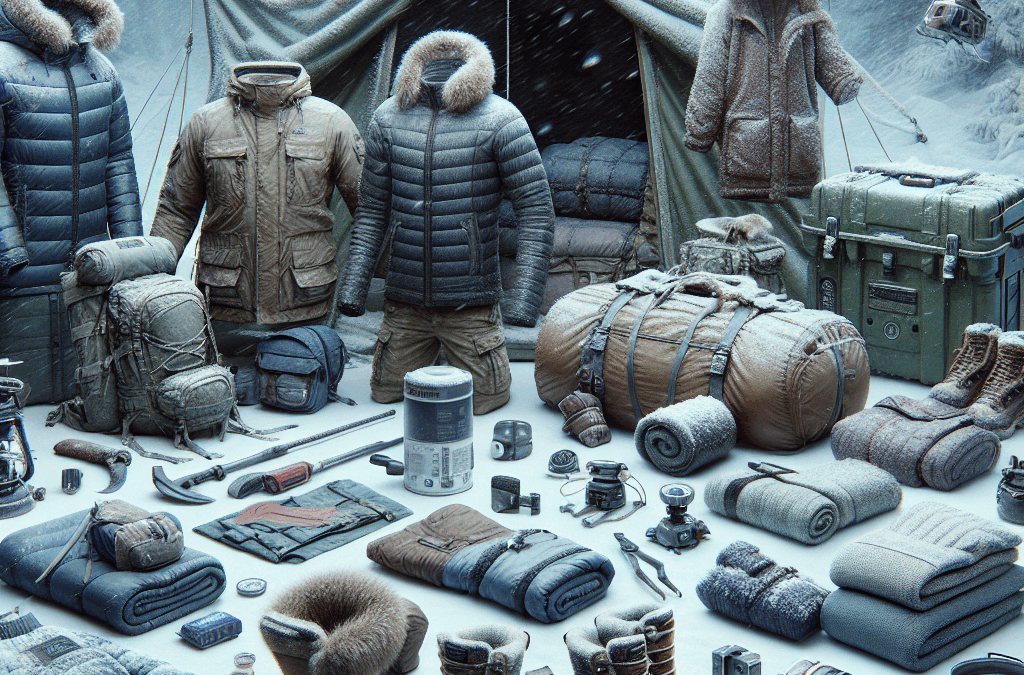
When it comes to surviving harsh weather, layering is a game changer. I always start with a moisture-wicking base layer that keeps the sweat away. Trust me, feeling soggy is the last thing you want when the temperatures drop.
Next, I add an insulating mid-layer. This could be a fleece or down jacket, depending on how cold it is. I remember one trip where my fleece saved me from freezing; I was so grateful for that extra warmth!
In closing, I finish off with a waterproof and windproof outer layer. A good shell jacket protects me from harsh winds and rain. I once got caught in a downpour, and my high-quality jacket was the only thing keeping me dry—worth every penny!
Footwear Matters
Let’s talk boots. I’ve learned the hard way that the right footwear is crucial. Insulated and waterproof boots are essential to keep my feet warm and dry. You wouldn’t want to be hiking in soggy shoes—trust me!
I also make sure my boots have good traction. Slips and falls in snowy or icy conditions can really ruin a good trip. I like to pick ones with Vibram soles, as they help grip better on slippery surfaces.
Lastly, don’t forget about warm socks! Wool socks are my go-to. Not only do they keep my feet cozy, but they also wick away moisture, which helps prevent blisters during long treks.
Accessories for Protection
Accessories may seem minor, but they make a big difference. I always pack a good hat that covers both my head and ears. On cold days, it can trap warmth and stop the chilling wind from making my ears turn red.
Gloves are just as important! I prefer layered gloves: a thinner glove underneath for dexterity and a thicker, insulated glove on top. I once tried to make a fire with cold fingers, and let’s say it didn’t go too well.
Lastly, don’t overlook sunglasses! Snow glare can be brutal, and UV rays reflect off white surfaces surprisingly well. Protecting your eyes can save you from headaches and enhance your visibility in those bright snowy landscapes.
Navigation Tools
Compasses and Maps
In the wilderness, relying solely on technology can backfire. I always have a trusty compass and a physical map handy. GPS devices can fail, especially in remote areas, so it’s essential to know how to read a compass.
When I first started hiking, I got lost because I didn’t have a map. It was a learning moment! Now, every adventure comes with a printed map of the area, annotated with trails I plan to take.
Plus, learning how to navigate can be incredibly rewarding. There’s something empowering about orienting yourself with a map and compass—it connects you to the land in a way that technology rarely does.
Portable GPS Devices
While maps are important, I do enjoy the convenience of portable GPS devices. They can provide real-time information about your location, altitudes, and even track your route. Just make sure to carry extra batteries or a solar charger!
During my last camping trip, the GPS really came in handy when we accidentally wandered off the track. It helped us get back on a safe path quickly. Technology can be your buddy if used wisely!
However, it’s crucial to know how to use them properly. Don’t just rely on it. Always check any devices before heading out to ensure they’re updated and functional.
Emergency Beacons
In the event of a serious situation, having an emergency beacon can be a lifesaver. These devices send out distress signals that can go a mile in getting you help. I always keep one in my pack, just in case.
I remember a camping trip in a remote area where our group faced sudden weather changes. Having that beacon gave us peace of mind that if things took a drastic turn, we could call for help.
Moreover, many beacons are now compact and lightweight, making it easy to include them as part of my gear without adding much bulk. Safety is always worth the extra weight!
Shelter and Sleeping Gear
Tents and Tarps
A good shelter is critical. I prefer those lightweight tents that are easy to set up and pack away. They provide a cozy place to sleep and protect me from wind, rain, and critters.
Tarps also play an important role. I often use a tarp in versatile ways, whether it’s as an extra layer for my tent or even to create a makeshift shelter when I need it. There’s something satisfying about finding multiple uses for one item!
Just remember to check the weather forecast before your trip and choose a tent suited for the conditions you might face. There’s nothing worse than being caught unprepared!
Sleeping Bags
Choosing the right sleeping bag can make or break your outdoor experience. I always look for bags that are rated for at least ten degrees cooler than the expected night temperatures. Trust me; you won’t want to wake up shivering!
Also, pay attention to the weight and compressibility. If I’m hiking, the last thing I want is to haul around a bulky bag. I’ve found that a good down bag strikes the balance between warmth and packability.
Before heading out, I always check for drafts, zippers issues, and any holes in my sleeping bag. A good night’s sleep can keep you energized for the adventures ahead!
Ground Pads
Never underestimate the comfort of a good ground pad! It serves as insulation from the cold ground and adds a bit of cushioning. After trying multiple types, I usually opt for inflatable pads as they’re lightweight and easy to pack.
I remember a backpacking trip where I didn’t bring an insulated pad, and I ended up feeling every rock underneath me! It was a rough night, and I realized comfort is key to enjoying the journey.
Investing in a good ground pad is worth every penny, especially on long expeditions where good rest can make a huge impact on your physical and mental state.
Cooking Gear
Portable Stove
Having a reliable stove transforms camping meals from bland to delightful. I always carry a lightweight portable stove, which makes cooking outdoors super easy. Even boiling water for coffee feels like a treat!
When choosing a stove, consider its fuel efficiency and ease of use. Some stoves run on multi-fuel options, allowing me to adapt to the resources I have at hand. Nothing is worse than running out of fuel miles away from camp!
Plus, cooking can be a fun activity, especially with friends or family, making mealtime a shared adventure. Good food not only warms your belly but warms your spirit, too!
Cookware and Utensils
In my experience, lightweight and durable cookware is essential; it should be able to withstand the rigors of the outdoors yet not weigh you down. I typically pack a multipurpose pot and pan that can handle various meals.
Don’t forget utensils! A good spatula and a sturdy spoon have saved me countless times while preparing meals. It pays off to have a dedicated set of easy-to-clean utensils so that I can enjoy great food without unnecessary hassle.
Lastly, be sure to bring along a trash bag for proper disposal of waste. Keeping nature clean is important, and it also makes life easier when you pack out your garbage with your gear!
Food Supplies
When it comes to food, preparing ahead can save you time and stress. I always pack non-perishable items like nuts, dried fruits, and energy bars for quick snacks on the trail. They keep me fueled up throughout the day!
For meals, I prefer dehydrated food packets. They’re lightweight and easy to cook; just add water. I couldn’t believe how enjoyable dehydrated meals could be until I tried them!
Lastly, don’t forget about hydration! Carry a water filter or purification tablets to ensure you have access to clean drinking water. Staying hydrated keeps my energy levels up, especially after long hikes!
First Aid and Emergency Gear
First Aid Kits
A well-stocked first aid kit is essential for any outdoor adventure. I always make sure mine contains items like adhesive bandages, antiseptic wipes, and pain relief medication. A little preparation goes a long way in case of a minor mishap.
Additionally, I add some specialized items like blister pads or even a snake bite kit, depending on the terrain I’ll be exploring. It’s all about considering the unique risks of your specific adventure.
Taking a wilderness first aid course can also enhance my skills significantly. Knowing how to handle injuries on the spot can make a world of difference in an emergency situation!
Emergency Blankets
Compact emergency blankets are lifesavers. They’re lightweight and keep heat in, which can be crucial if someone is feeling overly cold. I always pack a couple in my pack, just in case.
Using an emergency blanket isn’t just about warmth, either; it can serve multiple purposes, like reflecting light for signaling or shielding from rain when necessary. It’s such a versatile piece of gear to have!
One day, we got stuck out in unseasonably cold weather, and having those emergency blankets made a big difference for our comfort level. You never know when they’ll come in handy!
Whistles and Flashlights
A whistle is a simple tool that packs a big punch in emergencies. It can carry much farther than a shout, making it invaluable if you’re separated from your party or in need of help.
Flashlights (along with extra batteries) are essential for navigating dark conditions. I prefer headlamps because they keep my hands free for tasks. The last thing I need is to fumble around in the dark!
These small pieces of gear can really provide comfort and security in unfamiliar situations, making them must-haves in my survival kit.
Conclusion
Equipping yourself with the right survival gear for harsh weather conditions isn’t just about surviving; it’s about thriving during your adventures. Each piece of gear has a specific role that can make your journey safer and more enjoyable.
Whether you’re trekking through snow, rain, or extreme temperatures, proper gear makes all the difference. Listen to your instincts, rely on what works for you, and enjoy the great outdoors without fear!
FAQs
1. What are the most important layers of clothing for harsh weather?
The most important layers are a moisture-wicking base layer, an insulating mid-layer, and a waterproof outer layer. This combination helps regulate temperature and keep you dry.
2. How do I choose the right cooking gear?
Opt for lightweight and durable cookware that fits your needs. Consider the types of meals you plan to prepare and pack multipurpose items to save space and weight.
3. What should I include in my first aid kit?
Include adhesive bandages, antiseptic wipes, blister pads, pain relief medication, and emergency items specific to your needs or the environment you’ll be in.
4. Are portable GPS devices reliable?
Yes, but it’s important to have backup options like maps and compasses. Always check that the devices are functioning properly before heading into the wilderness.
5. How can I stay safe in extreme weather conditions?
Be prepared with the right gear, know your limits, stay informed about the weather, and always have an emergency plan in place. Trust your instincts while in the outdoors!
In a world that often feels unpredictable, the importance of emergency preparedness cannot be overstated. Natural disasters, health crises, and unexpected emergencies can strike at any time. Understanding the need for preparation is the first step in safeguarding yourself and your loved ones.
*Understanding the Need: Why Emergency Preparedness Is Critical**
Why should you invest time and resources into preparing for emergencies? The answer is simple—uncertainty. From hurricanes to pandemics, various events can disrupt our lives without warning. These situations may lead to power outages, food shortages, or even evacuation orders. Preparedness allows individuals and families to respond effectively rather than react impulsively when faced with a crisis.
*Essential Supplies: What to Include in Your Emergency Kit**
An effective emergency kit is your frontline defense. Start by stocking up on essentials such as water (one gallon per person per day for at least three days), non-perishable food items, a flashlight with extra batteries, a first-aid kit, and any necessary medications. Don’t forget important documents like insurance papers and identification—store them in a waterproof container! It’s also wise to include tools like multi-tools or duct tape; these versatile items could prove invaluable during an unforeseen event. Tailor your kit based on the specific risks you face in your area—whether it’s floods, earthquakes, or wildfires.
*Creating a Family Emergency Plan: Communication and Safety Strategies**
Having supplies is only part of the equation; creating a family emergency plan is equally crucial. Sit down with your family members and discuss potential scenarios you might encounter. Determine meeting points in case you’re separated and designate an out-of-area contact who can relay messages if local communication fails. Practice escape routes from your home; ensure everyone knows how to respond when danger strikes. This proactive approach not only enhances safety but also fosters unity among family members during stressful times.
*Staying Informed: The Role of Information in Crisis Situations**
Knowledge is power—especially during emergencies! Make staying informed part of your preparedness strategy by subscribing to local alerts through weather apps or community notification systems. Social media platforms can provide real-time updates as well but remember to verify information before acting on it; misinformation can lead to panic or poor decision-making. Also consider keeping a battery-operated radio handy—it can be a reliable source of updates if power goes out.
*Practicing Preparedness: Drills and Training for All Scenarios**
Preparedness isn’t just about gathering supplies; it requires practice too! Conduct regular drills with your family so everyone understands what actions they need to take during various emergencies—from fire evacuations to severe weather warnings. Consider enrolling in classes that teach basic first aid or CPR techniques; these skills could save lives when seconds matter most.
*Beyond the Basics: Community Resources and Support Networks**
Ultimately, don’t underestimate the value of community resources! Local organizations often provide training sessions or disaster response workshops that equip residents with vital skills and knowledge. Building relationships within your neighborhood creates a support network that can be indispensable during tough times—a united front tends to weather storms better than individuals alone.
Emergency preparedness isn’t just about surviving; it’s about thriving amid chaos. By understanding its importance and taking proactive steps now, you’ll feel more secure facing whatever uncertainties lie ahead!
After a disaster hits, the first thing that rushes to my mind is checking on everyone around me. Are we all safe? It’s not just about me—I’m looking for my family, friends, and even neighbors. I usually shout out names to make sure everyone is accounted for. This can feel a bit chaotic, but I think it’s important to ensure everyone is still standing on their feet, both physically and mentally.
If someone is hurt, that’s a whole different ballgame. I’ve learned that staying calm is key. First aid knowledge comes in handy, so I try to remember those basic steps. If medical help is needed, I wouldn’t waste time; I’d grab my phone and call for assistance right away. Time is of the essence, after all!
Sometimes, though, it’s the emotional safety that needs checking too. I try to observe how people are reacting—anxiety, fear, even shock are common. Sometimes all it takes is a reassuring word or even just being present to help someone feel a little more grounded again.
Evacuate if Necessary
Know When to Leave
Now, trying to figure out if I need to head out of dodge can be tricky. Disasters can come in all forms—flood, fire, hurricanes—each with their own set of warning signs. A few years back, I was caught in a flash flood warning and didn’t think much of it until I saw water creeping into my living room. It was a wake-up call. I had to learn that sometimes, leaving is the best option.
I keep an eye on alerts, whether it’s through an app or local news. It’s surprising how quickly conditions can change, and I don’t want to be the person hanging around just for the sake of it. I’d rather be safe than sorry. Plus, knowing the routes to safe zones beforehand helps keep the stress levels down when things get hectic.
A solid evacuation plan is something I can’t stress enough. I usually have a bag packed with essentials—water, ID, meds, and some snacks. It’s just a reminder that being mentally prepared can make a world of difference when the unexpected happens.
Document the Damage
Take Photos and Notes
Alright, once the immediate danger is over and I’ve ensured safety, I can’t forget to document what’s happened. I’ve learned the hard way that having a record of damage is crucial—especially for insurance claims. I whip out my phone and start snapping away, taking pictures of everything—it’s kind of therapeutic in a weird way, too. I find myself looking for details I might not think to mention otherwise.
But it’s not just about photos; I jot down notes of what I see, where it’s located, and any other specifics that could come in handy later. I remember when a storm hit last year, and I was so caught up in the chaos that I forgot key details. Those notes could’ve made dealing with the aftermath so much smoother.
Also, sharing this info with neighbors is something I try to do. If we all keep track, it builds a stronger community support network. Plus, I find it can be empowering to come together and review what we’ve gone through as a group!
Contact Your Insurance Provider
Report the Damage
Getting in touch with your insurance provider might seem like a chore, but trust me, it’s vital. My experience taught me that waiting too long can result in headaches down the road. So, I have my policy numbers written down in my emergency kit, ready to go. I swear by having those tools handy; it saves me from a frantic search when I’m already stressed.
When I In closing reach them, I make sure to be clear and concise about what happened. I’ve experienced the importance of being detailed about damages—I once left certain parts out and it came back to bite me later. So I ensure every little thing is accounted for and push through the process. Sometimes, I do feel like I’m getting nowhere fast, but persistence pays off!
Lastly, I keep a record of conversations. You know, names and any claim numbers I can jot down. I don’t want to be that person who gets lost in the shuffle. Keeping everything documented adds that extra layer of control back into an otherwise chaotic situation.
Reach Out for Support
Tap into Your Network
Once everything starts settling, it hits me how lonely the aftermath can feel. Reaching out for support is something I prioritize—friends, family, even community groups. Talking it out really helps my mental clarity. I remember after a minor disaster, gathering a group of friends to share stories made the burden feel lighter.
Social media also comes in handy; a quick post can connect me with others who might be going through similar situations. It’s comforting to know I’m not alone. Sometimes, just knowing someone out there understands what you’re going through makes it a tad easier to face.
I also make it a point to look for local resources that provide guidance and support for disaster recovery. Whether it’s a local shelter, church groups, or even psychological support services, having help around me gives me a sense of peace amidst the chaos.
FAQ
1. What should I prioritize immediately after a disaster?
First, ensure personal safety for you and those around you. Once you’re sure everyone is okay, assess if you need to evacuate and then start documenting damages for insurance purposes.
2. How can I prepare for a disaster before it strikes?
Having an emergency kit, establishing an evacuation plan, and keeping important documents organized can make a huge difference. Being proactive now helps you stay more calm and collected later.
3. Why is it important to document damages?
Documenting damages is crucial for filing insurance claims. Providing photo evidence and detailed notes can help ensure you get full compensation for your losses.
4. Who can I turn to for emotional support post-disaster?
Reach out to friends, family, or local community groups. Don’t hesitate to seek professional help if needed, as talking to someone who understands can facilitate the healing process.
5. How can I stay informed about disaster alerts in my area?
Utilizing weather apps, local news updates, and signing up for community alerts are great options. Staying informed helps you to react more quickly when a disaster occurs.