by Preparation Call Editorial Team | Jul 31, 2025 | Preparedness
Assessing Your Food Supply
Check Expiration Dates
Alright, first things first—let’s take a good look at what you’ve got in your pantry and fridge. The first step is to check those expiration dates on everything. This may seem tedious, but trust me, it’s totally worth it when you’re staring down the barrel of a blackout.
Don’t just shove items to the back and forget about them! You’d be surprised how quickly stuff can go bad. Make a little checklist if you need to. This way, you won’t get stuck with expired food when you might really need it.
Once you’ve got everything sorted, make sure to toss out anything past its prime. There’s no sense in keeping items that could potentially make you sick. Your health is the priority!
Organizing Your Coolers
Now that you’ve checked for expiration dates, it’s time to gather your coolers. Yes, those plastic boxes that just sit in the garage most of the time! If the power goes out, these will be your best friends. I like to keep a couple handy for emergencies just like this.
Fill them up with ice or frozen gel packs before a blackout hits. If your power is out for an extended period, you can use the cooler to keep essential items cold—like milk, meat, and leftovers. Just make sure you have everything form-fitted to avoid any mess. Ain’t nobody got time for that!
Also, try to minimize how often you open the cooler. Each time you pop that lid, you let cold air escape, which can raise the temperature inside. A little patience here goes a long way!
Prioritize Food Storage
If you have a deep freezer, take advantage of it. Fill it with essential items! But here’s the trick: always remember to keep it as full as possible. A full freezer will maintain its temperature longer than a half-empty one.
In the unfortunate event that the power shuts off, don’t open the deep freezer unless it’s absolutely necessary. Most full-freezers will keep food frozen for about 48 hours if kept closed. That’s some solid insulation work!
If you suspect that the blackout is going to last longer than 48 hours, consider cooking some of the food in advance. This way, you have meals ready to go, and you won’t end up losing anything important.
Keeping Track of Food Temperatures
Using a Thermometer
Okay, let’s talk about temperatures. This is super important! Investing in a good refrigerator thermometer is one of the best things you can do. I can’t stress enough how vital it is to know exactly what’s going on inside your fridge.
You should aim to keep your fridge below 40°F (4°C). If it goes above that, you might need to toss out some items, especially perishables. So make sure to keep that thermometer handy and check it frequently.
If you don’t have a thermometer, just know that if the fridge is cool to the touch, you’re probably in the clear. But just remember, a solid thermometer takes the guesswork out of the equation!
Timing is Everything
Another great tip is to write down when the power goes out. This can help you keep track of how long your food has been out of refrigeration. The general rule? If the food has been exposed to temperatures above 40°F for more than two hours, it’s safer to throw it away.
Keep an eye on your food and check the temperature regularly. Trust me, it’s a small effort that can save you from a nasty case of food poisoning later on.
Also, having a timeline helps when connecting with your friends or neighbors. You can all team up to track your food safety—safety in numbers!
Communicating with Power Providers
Don’t forget about the importance of keeping in touch with your local power provider. If you know a blackout is on the way, call them to get updates. They can give you an idea of how long you might be in the dark.
A lot of providers these days have apps or websites where you can report outages and get real-time updates. This can be a huge help in planning how to manage your food storage strategically.
Staying connected will definitely help ease your mind and allow you to make effective decisions when it comes to your food supply during uncertain times like a blackout.
Utilizing Emergency Meal Kits
Stocking Up on Essentials
If you haven’t already thought about it, having an emergency meal kit is a game-changer. I’m all about being prepared. Canned goods, dried foods, and any non-perishables should be your go-to items.
Make it fun! Try to involve your family in picking out foods they like. When they help, they’ll be more inclined to eat them when the time comes. Plus, a little teamwork goes a long way in stressful situations like a power outage.
Don’t forget about water, either. Every person needs at least a gallon a day, so stock up accordingly. It’s amazing how fast it can disappear when you least expect it!
Creating Balanced Meals
It’s not just about having food, but also about having nutritious food! When setting aside your emergency kit, think about the balance. Include protein, grains, and some fruits or vegetables if possible.
When you’re making your emergency kit, aim for foods that can be easily cooked over a camp stove or even eaten straight from the can. I mean, who wants to cook during a blackout?
Give some thought to including comfort foods as well. In those moments when things get a bit overwhelming, a little taste of home can help lift spirits. Choose wisely, my friend!
Regularly Review Your Kit
Lastly, don’t just toss everything in a box and forget about it. You need to check your emergency meal kit regularly! I like to do this every few months. Check expiration dates and refresh your stock as needed.
Sometimes the things you thought weren’t going to expire for ages suddenly turn into little time bombs of stale food. Keeping your kit updated is crucial for spending those unexpected blackout hours worry-free.
Plus, it’s a great excuse to have a little fun with food! Try out new recipes, taste-test some items, and who knows—you might even discover a new favorite meal for future emergencies!
FAQs
1. How long can food stay safe during a blackout?
Generally, a full freezer can keep food frozen for 48 hours if the door remains closed. A refrigerator will keep food safe for up to 4 hours if it stays closed.
2. What should I do with food in the fridge during a blackout?
If the power is out for more than 4 hours, check the temperature. If it’s above 40°F for two hours or more, it’s best to toss it.
3. How can I keep food cold without power?
Use coolers packed with ice or frozen gel packs. Limit how often you open them to keep the cold air inside.
4. Are emergency meal kits necessary?
Absolutely! Having an emergency meal kit ensures you have safe, non-perishable food available during unexpected outages.
5. When should I replace food in my emergency kit?
Check your emergency kit every few months and replace items as needed before their expiration dates. Keeping it updated is key!
by Preparation Call Editorial Team | Jul 31, 2025 | Preparedness
When life throws a curveball, being prepared can make all the difference. Emergencies come in various forms—from natural disasters like hurricanes and earthquakes to unforeseen events such as fires or medical crises. Understanding these risks is your first step in crafting a solid emergency preparedness plan.
## Understanding the Risks: Identifying Potential Emergencies in Your Area
Every region has its unique set of risks. Start by researching the types of emergencies that are prevalent where you live. For instance, coastal areas may face hurricanes, while those in the Midwest might be more concerned about tornadoes. Local government websites often provide helpful resources detailing historical data on natural disasters and other emergencies that could affect your community.
Additionally, consider personal risks—do you have family members with medical conditions? Are there particular hazards in your home environment? By identifying these potential threats early on, you can tailor your emergency response efforts effectively.
## Building Your Emergency Kit: Essential Supplies for Every Household
Next up is assembling an emergency kit—a crucial component of any preparedness strategy. This kit should contain essential supplies to sustain you and your family for at least 72 hours following an emergency.
Start with the basics: plenty of water (one gallon per person per day), non-perishable food items like canned goods or energy bars, a flashlight with extra batteries, a first-aid kit, and any necessary medications. Don’t forget items that cater to specific needs; these might include baby formula if you have infants or pet supplies for furry family members.
Also, consider adding important documents (like IDs and insurance papers) stored in waterproof bags, a multi-tool for various tasks, and cash since ATMs may not be operational during emergencies.
## Creating a Family Emergency Plan: Communication and Evacuation Strategies
Once you’ve identified risks and built your kit, it’s time to create an actionable family emergency plan. This blueprint should encompass communication strategies to ensure everyone knows how to reach one another during chaos. Designate an out-of-town contact who can act as a central point for information exchange.
In addition to communication protocols, outline clear evacuation routes from your home and identify safe meeting spots outside your neighborhood or town. Regularly practice this plan through drills so each family member feels confident navigating it when the time comes.
## Staying Informed: Resources for Ongoing Preparedness and Response
Preparedness doesn’t end once your kit is packed and plans are laid out; staying informed is paramount. Subscribe to local news alerts or download apps that provide real-time updates about emergencies in your area. The Federal Emergency Management Agency (FEMA) offers preparedness resources that can keep you ahead of potential threats.
Engage with community preparedness programs or workshops—they’re often free or low-cost—and connect with neighbors so that everyone can contribute towards collective safety efforts. Sharing knowledge strengthens resilience within communities, making it easier for everyone to bounce back when disaster strikes.
Ultimately, embracing an attitude of calm preparedness allows you to navigate uncertainties with confidence. By understanding risks specific to your area, building comprehensive kits, formulating effective plans, and staying educated about ongoing developments—you not only safeguard yourself but also empower those around you during times of crisis. So take action today—because tomorrow may just depend on it!
by Preparation Call Editorial Team | Jul 31, 2025 | Preparedness
Use Visual Signals
Colorful and Bright Items
One of the simplest and most effective ways to grab attention in a remote area is to use colorful or bright items. When you’re out in nature, it can be hard to stand out from the surroundings. I once found myself in a thick forest, and the trees were all shades of green and brown. That’s when I realized how vital it was to use something that really pops—like a bright orange backpack or a red jacket. For me, these items became lifesavers.
You can also create a larger visual signal by laying out items in an open space. Think of it like making a giant SOS sign with rocks or logs. The more contrast you create against the background, the better your chances of being seen. Remember to always have a high-visibility item with you when you’re heading into remote areas, just in case.
And don’t forget about reflective materials! If you have shiny or reflective gear, such as a mirror or a space blanket, it can catch the sun’s rays and send a signal over considerable distances. I’ve seen a simple mirror reflect sunlight across a canyon, which really hammered home how powerful these simple tools can be!
Sound Signals
Using Whistles
When I was hiking in a particularly isolated area, I learned the power of sound signals. Whistles are one of the most effective tools you can carry. They require minimal effort and can carry much farther than your voice can. I always keep a whistle clipped to my backpack. It’s lightweight, and the sound carries over long distances, even amidst the wind or rustling trees.
It’s also helpful to remember how to use your voice effectively. Shouting for help can be exhausting, plus it only works if someone is reasonably close. I’ve found that intermittent shouting combined with whistle blows can capture attention better. People are naturally drawn to odd sounds, and alternating between these can really increase your chances of being heard.
Try to use rhythmic patterns, too. For instance, three short blasts on a whistle followed by a pause can stand out better than random noises. It’s like a code that people can easily recognize as a distress signal. I’ve experienced firsthand how this method can draw attention from miles away, especially in secluded terrains.
Fire Signals
Creating a Signal Fire
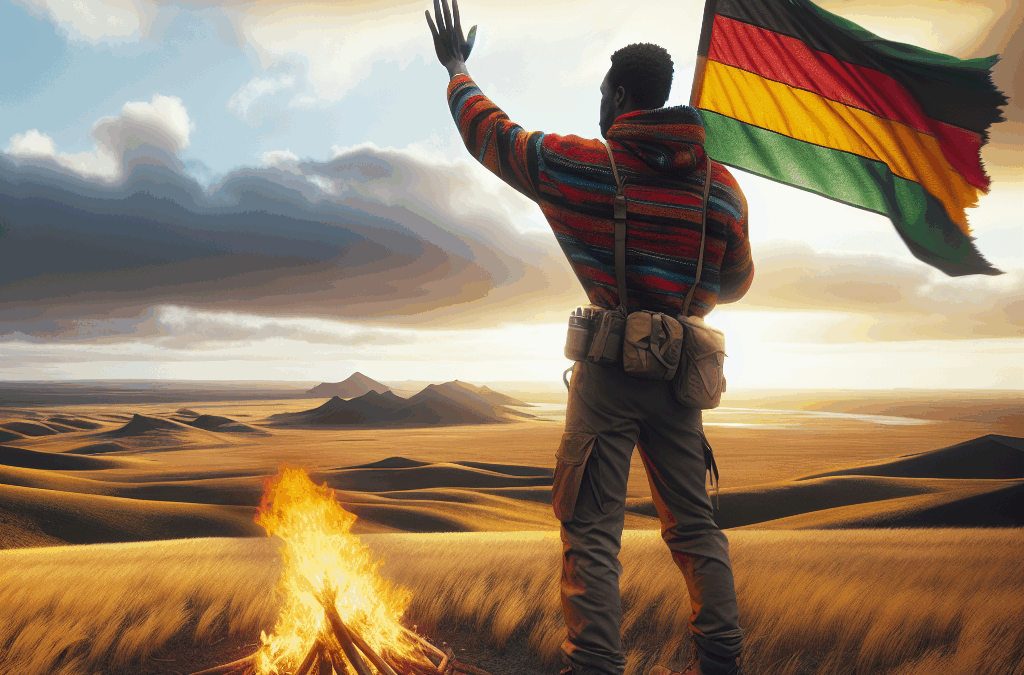
Ah, fire! The age-old method of signaling. When done right, a signal fire can be seen from a far distance, which is why it’s one of my favorite techniques. If you’re in a survival situation, build your signal fire in a clear area and use all available materials to create a smoke signal. I’ve often used green branches or leaves to produce thick smoke that rises high into the air.
Make sure you’re following safety protocols when it comes to fire! It’s important to know the fire regulations in the area, and always have water or an extinguisher handy. You want to signal for help, not create a wildfire! I can tell you from experience that safety should always come first in these situations.
Also, burning pieces of rubber or other materials that produce a lot of smoke can be effective, but only if it’s safe to do so. Always check your surroundings and if there’s any wind direction to consider. Trust me, it’s about being smart while definitely standing out with your fire signals!
Electronic Devices
Using a Satellite Phone or GPS Device
If you’ve got access to technology, it can make signaling a breeze. I remember one time being out on a remote camping trip when I realized how handy having a satellite phone could be. It allows you to call for help without relying on cellular service, which is often nonexistent in isolated areas.
Always keep your electronics charged before heading into the wild. I also suggest carrying a portable solar charger, just in case you need a power boost in the middle of your adventure. With these devices, sending out your location or a distress message could be as simple as pressing a button, cutting out the stress of trying to find your way back.
Plus, many modern devices also have SOS features that send your location along with a help request. I’ve found peace of mind knowing that my devices give me that safety net when I’m out exploring. It’s a game changer and can literally be your lifeline in emergencies.
Enlisting Natural Signals
Using Wildlife and Nature
Believe it or not, nature can assist you in signaling for help. Animals often act as indicators of human presence or potential dangers. For instance, if you see birds flocking in one direction, it can indicate the presence of water, people, or even food source nearby. In my early days of backpacking, I learned to keep an eye on wildlife behaviors—it’s fascinating how they can lead you to safety naturally!
Gathering natural resources to help make your signals louder or clearer is also crucial. Using a walking stick, for instance, to tap on trees or rocks can create a rhythmic signal. I often used this method when I was further away from more populated areas. It can produce a unique sound that might catch the attention of other hikers.
Moreover, learning the behavior of local wildlife can help you communicate more effectively. An approach I employed was whistling to mimic bird calls, allowing me to echo back and forth in responses. It’s amusing how much we can learn from the creatures around us, and it can definitely help increase your chances of being noticed!
FAQ
1. What’s the best way to signal for help in the wilderness?
The best way to signal for help is to combine visual signals, like brightly colored items or smoke, with sound signals, such as whistles and shouting. Each method amplifies the chances of being noticed.
2. Can I use electronic devices for signaling?
Absolutely! Satellite phones or GPS devices are excellent for signaling in remote areas. Just ensure they’re charged and functional before your trip.
3. What should I include in my emergency kit for signaling?
An emergency kit should include a whistle, reflective items, a signal mirror, possibly a satellite phone, and materials for making a fire. Always be prepared!
4. How do I create a signal fire safely?
To create a signal fire safely, find a clear area away from flammable materials. Use dry wood and add green foliage for thick smoke. Always have water or an extinguisher on hand and follow local regulations on fire safety.
5. How do natural signals help in emergencies?
Natural signals can guide you toward resources or potential help. Animals’ behavior can indicate safety, while using natural materials can amplify sound or visual signals in your surroundings.
by Preparation Call Editorial Team | Jul 31, 2025 | Preparedness
Listen to Local Authorities
Stay Updated with Alerts
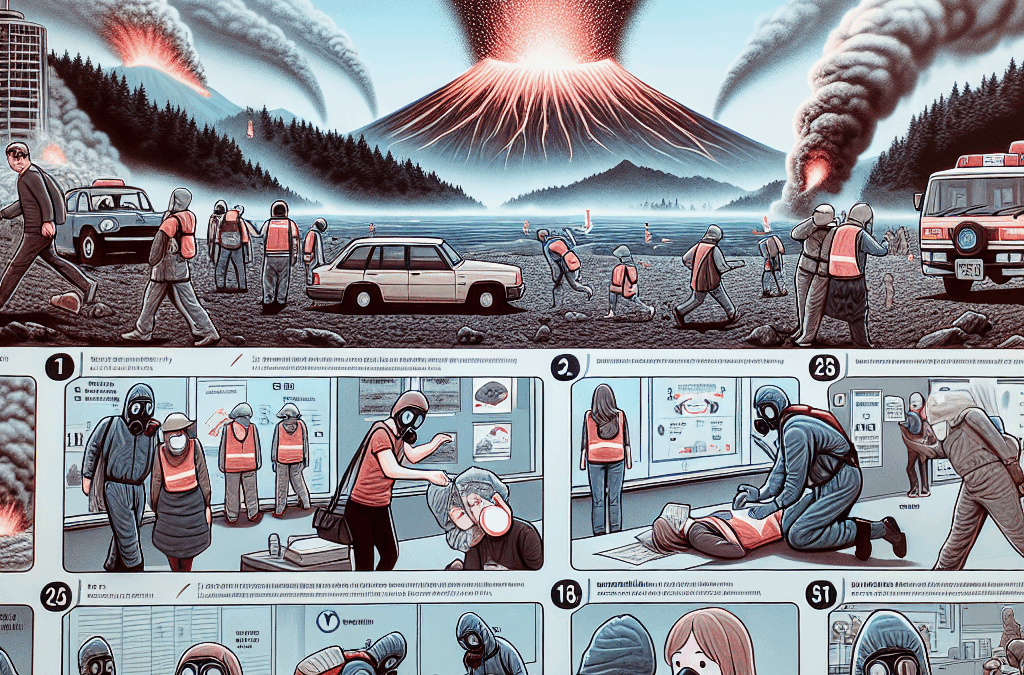
One of the very first things that I emphasize when it comes to staying safe during a volcanic eruption is to keep your ears open to the local authorities. They usually have the latest news and will alert you about any immediate dangers. This can mean the difference between safety and disaster.
Local news stations, radio broadcasts, and official social media accounts are great resources to find real-time information. I remember a time when a nearby volcano showed signs of activity, and being tuned in saved a lot of my friends from unnecessary panic and confusion.
In many regions with volcanic activity, they have early warning systems in place that can notify residents about potential risks. Don’t underestimate this; being informed is your first line of defense.
Follow Evacuation Orders
Evacuation orders are not just suggestions—they’re often based on thorough assessments by experts who know way more than we do. In the moment, when all the adrenaline is rushing and fear kicks in, following those orders can feel overwhelming. But trust me, it’s crucial.
During my time living close to a volcano, I saw how quickly things can escalate. Ignoring an evacuation order can lead to dire situations, including being caught in ash falls or lava flows. If you’re told to go, pack your essentials and hit the road!
And remember, evacuate sooner rather than later. Delaying could mean getting stuck in traffic or worse. Always err on the side of safety and take orders seriously.
Participate in Community Emergency Drills
Participating in community drills can not only give you peace of mind but also equip you with the knowledge you need come crunch time. I know it might sound boring, but practicing evacuation routes and safety procedures genuinely makes a difference.
When I took part in my town’s emergency drills, it was eye-opening. I got to familiarize myself with escape routes and jot down critical locations, like where to meet friends or family after an incident.
Plus, community drills foster camaraderie. Nothing like facing potential disasters together to bring people closer. It’s all about being prepared together and knowing we have each other’s backs!
Prepare an Emergency Kit
Gather Essential Supplies
When putting together an emergency kit, it’s important to think practically. You should include food, water, first aid supplies, and any medications you or family members might need. A kit isn’t just a box; it’s your lifeline during a volcanic eruption.
In my own experience, I’ve found it’s a good idea to have at least a three-day supply of food and water ready to go. Things like energy bars and canned goods work wonders when you need something quick and nutritious.
A fun tip? Pack some comforting items as well, like a favorite book or a game. You’ll be surprised how much these little things can lift your spirits during a chaotic time.
Include Important Documents
When you’re evacuating, time is crucial, and you don’t want to waste it rummaging through piles of paperwork. Keep copies of important documents in your emergency kit—things like ID, insurance papers, and medical records.
I learned this the hard way when, in a rush, I left behind my important paperwork. It ended up being a headache I didn’t need on top of everything else. So make copies, file them away neatly, and don’t overlook their importance!
Having your documents ready can help you re-establish your identity fast, which is super essential, especially if your house or belongings get affected.
Prepare for Ash Fall
A volcanic eruption often comes with the byproduct of ash, and trust me, dealing with that stuff isn’t fun. It can cause respiratory issues, so having masks and goggles easily accessible in your kit is a must.
The last time ash fell in my area, I saw folks trying to cover their faces with whatever they could find. It was chaotic. If you have proper masks stored away, it’ll save you a headache later and help keep you safe.
Additionally, know how to clean ash off your home and car without causing damage. It’s a little prep work that goes a long way. Look it up before you need it!
Stay Indoors During an Eruption
Seal Your Home
When the eruption starts, the last thing you want is for ash and debris to get indoors, so sealing your home is key. I remember watching the news and seeing how important this step was during a neighboring eruption.
Close all windows and doors tightly. If you have air conditioning, switch it to recirculate to avoid pulling in outside air. Those little steps can protect you from having your indoor space turn into a dust bowl.
If you discover gaps or drafts in your home, take the time to seal them. You’ll be much better off in a snug space than one constantly bombarded by volcanic ash.
Limit Outdoor Exposure
As tempting as it might be to peek outside during an eruption, limiting your outdoor time is crucial. You don’t want to be caught in ash storms or airborne debris. It can wreak havoc on your lungs!
I once made the mistake of stepping outside for “just a minute” during an ash fall; it turned into a good old-fashioned choking hazard. Trust me, it’s safer to stay inside until authorities say it’s clear.
While you’re cooped up, find ways to keep entertained—read a book, watch a movie, or tackle a project you’ve been putting off.
Stay Informed While Indoors
Even when you’re safe at home, continuing to stay informed is key. Make sure you have multiple channels available for alerts, including a battery-powered radio. It might sound old school, but these babies can really save the day!
My experience has shown that social media can also be a powerful tool for receiving updates. Follow credible pages that provide alerts regarding the volcano activity, local government announcements or emergency services updates.
Keep an eye on the news and follow updates—knowledge is power, especially when it comes to the uncertainty of volcanic eruptions.
Have a Plan for After the Eruption
Assess Your Situation
Once it’s safe to emerge after the eruption, assess your surroundings before going anywhere. This is a biggie I can’t stress enough. Look for hazards like downed power lines or unstable debris that could cause injuries.
It’s also a good idea to connect with friends or family to ensure everyone’s okay. I found it comforting to check in with my neighbors after a huge eruption in my area a few years back. It’s great to have a support network!
Caution is key, so take your time to evaluate the landscape. Your safety is worth spending a little extra time ensuring it.
Know Your Evacuation Routes Back
When returning home, re-familiarize yourself with evacuation routes. What worked before might not be viable anymore, given that the landscape could be altered. I often refer back to my community emergency plan to remind myself of alternative routes.
Trust your instincts and have a backup plan. Sometimes, roads might be blocked or two-way streets could be one-way. Being prepared can help you avoid unnecessary stress.
Also, watch for potential hazards in the roadways—like ash buildup, landslides, or fallen trees—once again putting that assessment skill to the test!
Check for Damage Before Re-Entering Your Home
Before you walk back into your home, inspect it for signs of damage. I remember advising friends to check their roofs for ash accumulation or potential leaks from the volcanic lining that could collapse.
Always carry a flashlight and a first aid kit, just in case there’s an area that’s hard to navigate. Walking into a damaged home can be risky, and I’d hate to see anyone get injured because they weren’t careful!
Once you’ve checked and feel it’s safe, take your time to clean up thoughtfully and responsibly. It’ll be a journey, but you can do it!
FAQs
1. What should I take in my emergency kit for a volcanic eruption?
Your emergency kit should include essential supplies such as food, water, a first aid kit, masks, goggles, flashlights, batteries, and important documents. Don’t forget comfort items to help ease stress!
2. How can I find out about evacuation orders?
Stay tuned to local news, radio broadcasts, and official social media accounts of your local authorities. They provide the most reliable updates on evacuation orders.
3. Is it safe to go outside during a volcanic eruption?
It’s generally advised to stay indoors during an eruption. If you must go outside, wear protective gear like masks and goggles, and limit your exposure as much as possible.
4. What are the risks of ash fall?
Ash fall can cause respiratory issues, visibility problems, and more—for both people and property. Make sure to seal your home and use masks to protect your lungs during ash fall.
5. How do I clean ash from my property safely?
When cleaning ash, wear masks and use damp cloths or mops to minimize dust. Don’t use vacuums unless they are specifically designed for ash to avoid damage to the appliance.

by Preparation Call Editorial Team | Jul 31, 2025 | Preparedness
Food and Water Supplies
Types of Food to Stockpile
When it comes to post-disaster survival, food is a must-have. I’ve learned that non-perishable food items like canned goods, rice, beans, and dehydrated meals are invaluable. They not only last a long time but are also compact and easy to carry around if you need to relocate.
In my personal stash, I like to include some comfort foods, too. Things like chocolate bars or powdered drink mixes can really uplift spirits in tough times. Remember, having a morale booster is just as vital as having nutritional food!
Don’t forget to think about dietary restrictions. If you or those you may barter with have allergies or special diets, it’s important to stock up on foods that cater to those needs.
Water Filtration and Purification
You can’t survive long without water, and that’s why I recommend investing in good water filtration systems. During my research, I discovered that portable filters can provide clean drinking water without relying on electricity, which is super important in a disaster scenario.
Also, purification tablets are a game-changer. They’re small, lightweight, and can be used to make sure any water source is safe to drink. Storing a supply of these can easily become a bartering item.
Lastly, never underestimate the value of water containers. Whether it’s jugs, bottles, or storage tanks, having a way to collect and store water can make a significant difference in your survival strategy.
Cooking Equipment
If you’re trying to make the best out of scarce resources post-disaster, having cooking gear is essential. A small camping stove or portable grill can seriously elevate your food game. I mean, who wouldn’t want a hot meal instead of cold beans from a can?
Alongside that, I find utensils and cookware like pots, pans, and cutlery are neat to have. In a barter situation, these could attract a good trade for the right people, especially if they are planning to cook their own food.
Moreover, I believe a backup power source, like solar chargers or even batteries, is handy. Heating meals could literally mean the difference between survivors’ morale or despair.
Medical Supplies
First Aid Kits
First aid kits are an obvious essential. I’ve always made sure to have a well-stocked kit with bandages, antiseptics, and pain relievers. It’s amazing how quickly one can get hurt when chaos unfolds, so having this in place could save a life.
Don’t forget about prescription medications here, either! I’ve seen firsthand how crucial it is to have any necessary medications on hand for chronic conditions. These can be a hot ticket item for bartering, especially if someone has been cut off from their regular supply.
Lastly, some basic knowledge about how to use these supplies effectively can be crucial. Being able to treat injuries to not only yourself but others can position you as an essential person in a disaster scenario.
Hygiene Products
Let’s be real, hygiene might fly out the window during a disaster, but it shouldn’t. It dubs as a much-needed bartering item. I always keep things like soap, toothpaste, and sanitary products locked away in my emergency stash because trust me, they’re hard to come by when supplies are limited!
Wipes and hand sanitizers are lifesavers too. You never know when you might be stuck without water, so having alternatives handy can keep you feeling somewhat fresh and healthy.
All in all, make sure to have a supply of trash bags to keep your living area clean. This is not just for hygiene but also prevents the spread of disease, making it crucial for survival.
Knowledge and Skills
Skills can be the most valuable currency during a crisis. I placed a huge focus on learning skills like basic medical assistance, gardening, and even self-defense. The more skills you have, the better you’ll be prepared for bartering!
Sharing knowledge can also be a worthwhile barter. If you can teach someone how to grow food or start a fire, you can exchange that for goods you wouldn’t otherwise have. Skills are versatile and can transcend the need for physical items!
So, take some time to invest in your own skills. Whether it’s online classes or hands-on practice, being skilled means you’re in a stronger position to survive and barter in a post-disaster scenario.
Tools and Equipment
Basic Tools
Having a toolkit with basic hand tools can be incredibly handy. I strongly suggest gear like pliers, screwdrivers, hammers, and wrenches. You never know when you might need to fix something or construct a shelter!
I once traded a small toolkit with a neighbor for some water. Tools can often be overlooked, but they’re essential for maintaining your environment and improving your situation.
Plus, if you become the go-to person for repairs or building projects, you’ll find that others will approach you when they need something fixed, allowing you to barter for goods or services.
Self-defense Items
In uncertain times, having something for self-defense is non-negotiable. I’ve personally researched options like pepper spray or personal alarms which are great for keeping intruders at bay without needing a firearm.
Additionally, something as simple as a sturdy walking stick may serve a dual purpose for defense and mobility. I appreciate tools that work for multiple situations!
In a barter scenario, self-defense items can be immensely valued. Many people dread the idea of being unprotected, so having extra items might put you in a position to make favorable trades.
Communication Devices
Being able to communicate is key in a disaster, so think about investing in walkie-talkies or ham radios. I once had to rely on these gadgets during an emergency, and they were a lifesaver!
My recommendation is to keep spare batteries as well since a dead device isn’t going to help anyone. These items make for great bartering tools when others realize how essential they are when the communication lines are down.
Furthermore, understanding how to use these devices is vital for effective communication. In a crisis where information is scarce, knowledge of survival communication can make you invaluable.
Community and Relationships
Building Connections
Lastly, I want to stress how important connections are. Building relationships within your community can be the strongest form of bartering. Trust me, the stronger your network, the better your survival chances.
People share resources and skills within a community; for instance, I’ve seen neighbors exchange food for medical advice. This gives everyone a sense of support and hope in tough times.
Don’t forget to work on your interpersonal skills too. Sometimes your biggest resource in dire situations can be the friendships you’ve cultivated.
Sharing Resources
Don’t hoard everything for yourself! Learning to share resources with others in your community can turn the tide during a disaster. I found it rewarding to share supplies and skills, as this helped build trust among us.
Pooling resources can create a more resilient group. If there are assorted supplies, it makes it easier for everyone to survive and increases the chances of successful bartering.
Remember, sharing can earn you goodwill, and in a barter situation, that can translate to significantly favorable conditions for you!
Group Strategies
Being part of a group can be beneficial when it comes to survival. In my personal experience, I’ve found that groups help strategize the best way to gather supplies and defense. There’s strength in numbers!
Plus, you can divide tasks based on skills. If one person is a fantastic cook and another knows how to collect water, everyone contributes their strengths for mutual benefit.
Ultimately, working together can improve your chances in bartering as the collective knowledge and resources create more opportunities for advantageous exchanges.
FAQ
What are considered essential bartering items for post-disaster survival?
The essential items include food and water supplies, medical supplies, hygiene products, tools and equipment, and community relationships.
How do I effectively barter in a post-disaster situation?
To effectively barter, be prepared with a variety of items and skills. Know the needs of those around you and use your network of relationships to trade items or services.
What foods should I stock up on for emergencies?
Ideal foods are non-perishable items like canned goods, rice, beans, and dehydrated meals. Don’t forget comfort foods to keep spirits high!
Are medical supplies important for bartering?
Absolutely! First aid kits, prescription medications, and hygiene supplies are highly valuable when others are in need, making them top bartering items.
How can I prepare my community for a potential disaster?
Engage in open communication with your community, share resources, focus on building trust, and work together for emergency preparedness plans to ensure everyone’s survival.

by Preparation Call Editorial Team | Jul 31, 2025 | Preparedness
Recognize the Importance of Preparedness
Understanding Natural Disasters
Let’s face it, the subject of natural disasters can be pretty heavy. From hurricanes to wildfires, it’s easy to feel overwhelmed. But I’ve found that having a grasp on what these disasters really are is key to preparing your kids. I often sit my children down and explain in simple terms what natural disasters are and how they can affect our lives. This understanding helps them process the information better.
When kids know what to expect, they feel less anxious. For instance, I tell my kids that not all storms are catastrophic; some may be just a little windy and rainy. We’ve had many discussions about types of disasters, and I always try to include some visuals to make it more engaging.
It’s also important to instill a sense of resilience. I remind my kids that while disasters can be scary, they’re part of life. Knowing that we can face challenges together tends to ease their minds and fosters a greater sense of security.
Importance of Family Discussions
Having regular family talks about emergencies can make a world of difference. In our house, we set up a dedicated time to discuss our family’s emergency plan. We talk about what everyone’s roles would be if a natural disaster happens. Making it a family effort makes it feel less intimidating and more of a team activity.
Each discussion gives my kids the space to express their feelings and ask questions. They often have great insights that I hadn’t thought of! This way, they feel included in the conversation, and it allows them to take ownership of their preparedness.
Sometimes, we even role-play different situations. While it may feel silly, it helps solidify their understanding of what to do—and it guarantees a few laughs, too!
Resources for Learning
There are a ton of resources available that can help make learning about natural disasters fun for kids. I always recommend books geared toward their age group that cover the topic in a friendly and approachable way. For example, there are great picture books that can help littles understand complex ideas without overwhelming them.
Interactive websites and apps can also be awesome. We often explore educational games that teach kids how to respond during various disasters. It’s a lively way to reinforce what we’ve discussed and keeps them engaged learning about preparedness!
Don’t forget about local community resources! Many communities offer workshops for families on disaster preparedness. We recently attended one where my kids got to meet local firefighters; it was an absolute hit!
Create an Emergency Plan Together
Involve Children in Planning
Crafting our emergency plan together has been one of the most rewarding experiences. My kids love the idea of being able to contribute their thoughts and ideas about what we should include. We sit down with snacks and brainstorm what our family needs to do during emergencies, and you wouldn’t believe the creative ideas they come up with!
Involving them in the planning process not only empowers them but also makes them more likely to remember the plan. We make a poster with our plan and hang it in a spot they’ll see regularly, a little reminder that we’ve got this covered as a family.
We also make it a point to discuss who we can reach out to in case of an emergency and create contact cards for them, which is a fun little project. It feels like they’re gearing up for an adventure rather than just solving a serious issue.
Setting Up Communication
Communication is crucial when disaster strikes. My kids and I often talk about different ways to stay connected if something happens. We’ve established a meet-up spot that’s safe and easy for everyone to reach, so they know where to go if they get separated.
We’ve also created a list of emergency contacts that they can memorize. I joke with them about how ‘cool’ it is to have a secret code for safety. They love the idea of having a ‘code word’ that they can share with trusted adults if there’s ever a situation where they need help.
Having these conversations has made my kids feel a lot more at ease about the potential chaos of an emergency situation. They feel equipped with tools to handle the unexpected, which is inspiring to see as a parent.
Practice Makes Perfect
Just like anything else in life, practicing the plan reinforces learning. I like to schedule regular drills throughout the year. It’s not only practical but also fun! We might take a Saturday morning to go over different scenarios, and hey, a little practice never hurt anyone!
During drills, we switch up what we do to keep things unpredictable because life is anything but predictable, right? Sometimes we’ll simulate a power outage to encourage them to rely on whatever resources we’ve prepared. It’s incredible how calm they can be when they’ve had the chance to practice a few times.
And let’s not forget the flair! We turn our drills into themed events—sometimes it’s “Earthquake Awareness Day” with themed snacks and games that emphasize safety during an earthquake. It’s a great way to keep their spirits high while learning serious skills.
Build an Emergency Kit
Essential Items for the Kit
Building an emergency kit together has turned out to be one of my favorite family projects. We gather essential items such as water, food, first aid supplies, and flashlights. I let my kids pick out some items themselves, which adds a personal touch to our kit and makes them more invested in it.
It’s important to explain to them why each item is in the kit. For example, we talk about the necessity of having non-perishable food and how life may not look the same after a natural disaster. They start to see the importance of those boring canned beans—trust me!
When the kit is all set up, we have a small celebration. I find that if you make something feel rewarding, your kids will be more vested in keeping it updated and looking after it!
Regularly Update Your Kit
One of the best lessons I learned when building our emergency kit is that we have to check on it regularly. As a family, we schedule a “kit inspection day”—this is when we switch out expired items, add fresh supplies, and give the kit a refresh. It’s a great way to get the kids involved and reminds them of its importance.
We also use this day to discuss other possible items that may be relevant to the upcoming seasons, like extra blankets in wintertime or sunscreen in the summer. It keeps the discussion ongoing and ensures that our kit is always ready to go.
During our checking sessions, I love asking them what else they think might make our kit even better. Their creative suggestions always keep the spirit alive. It’s exciting because they don’t realize they’re learning, and it’s also bonding time for us.
Educating through Hands-on Experience
Education through hands-on experience has been a real game-changer for us. When we build our emergency kit, I encourage my kids to help assemble it. Walking them through the reasons behind each item makes it more memorable.
I often pull up videos or real-life stories of communities responding to emergencies to give them context for our efforts. I try to convey that being prepared isn’t just about our family; it’s about looking out for our friends and neighbors, too.
We sometimes create a mini-kit for their favorite toys or dolls. They enjoy imagining what their furry friends would need in a disaster, and it keeps the conversation light and fun while still educational. It’s fantastic to see them utilize creativity in such important discussions!
Stay Informed After a Disaster
Keeping the Lines of Communication Open
When a disaster does strike, staying informed is key. I make sure my kids know we’ll come together as a family to process what happened. We chat about different sources of information—news, social media, even what our neighbors are saying, and we prioritize credible sources.
I let them express their feelings about what’s happening. Sometimes they’re scared, and other times they just want information. This open line of communication has helped them cope better with the aftermath of any situation. I want them to feel comfortable sharing their worries with me!
Understanding that it’s perfectly okay to feel anxious after a disaster is crucial. I remind them that I’m here to support them, and we talk through their emotions, creating a safe space where they can voice their concerns freely.
Making Sense of the Situation
After a disaster, I focus on helping my kids understand what happened, breaking down the event into digestible pieces. Sometimes I use drawings or maps to explain how certain events occur, like floods or earthquakes, which helps demystify it all.
Once we’ve talked about the event, I encourage my kids to express their thoughts and feelings through art. We’ve had discussions about how to process emotions and how that can look different for everyone. Their drawings become activities for us to share and reflect upon together.
It’s so rewarding to see how they interpret their feelings through creative outlets. It reinforces their understanding of that particular disaster while also giving them a healthy way to express how they feel.
Finding Support Resources
It’s essential to remind my kids that help is available, whether through school counselors or community support services. We explore these resources together if they ever feel overwhelmed after a disaster.
Some organizations offer counseling and workshops specifically for children affected by disasters, and I’ve found sharing this information helps my kids feel more connected to their community. It lets them know they’re not alone and that there are people who care.
Together, we create a list of contacts they can pull data from if they ever need extra support. This proactive approach makes my kids feel empowered and reassured that they’ve got a solid support network in place.
FAQ
- 1. How do I explain natural disasters to my children?
- Use simple language, provide visuals, and incorporate discussions about resilience. Frame it as an opportunity to learn rather than instill fear.
- 2. What should I include in our emergency plan?
- Your plan should include communication methods, meet-up locations, and roles for each family member during emergencies. It’s essential to keep it accessible and visible.
- 3. How can I make preparing for disasters fun for my kids?
- Involve them in planning, use role-playing activities, and celebrate milestones in preparedness. Gamifying the experience makes it less daunting!
- 4. How often should we update our emergency kit?
- Regularly check your kit, at least twice a year or before a season change, to ensure supplies are fresh, and add items relevant to any upcoming weather conditions.
- 5. What resources are available for ongoing disaster education?
- Look into community workshops, educational apps, and books specifically targeting children. Engaging resources keep kids informed while they learn important skills.