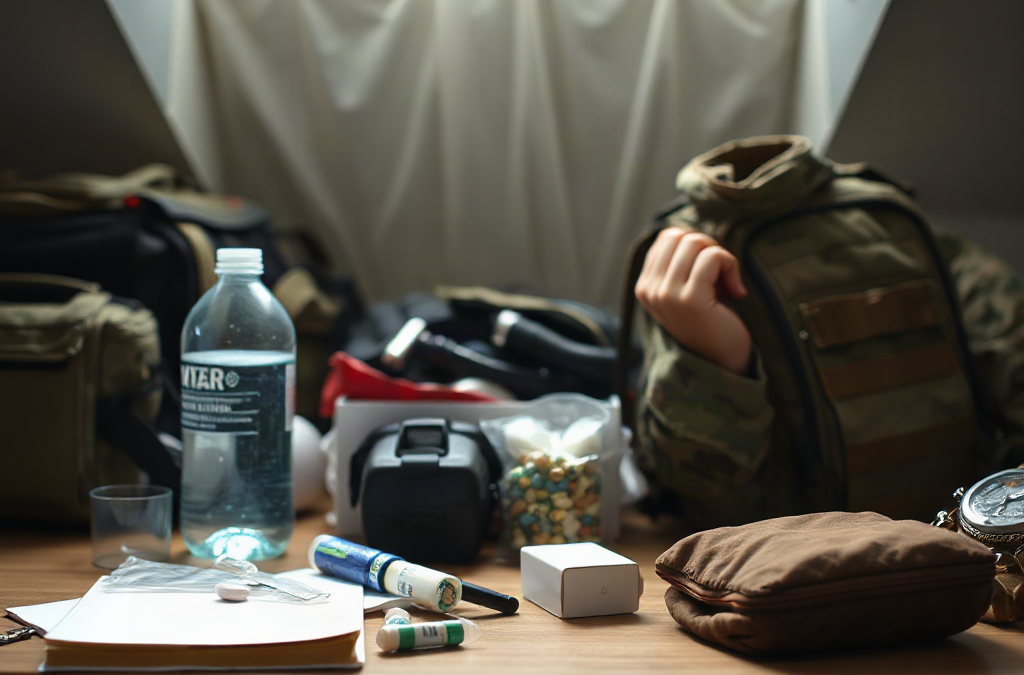
A deployment-style packing list works for civilian emergencies when its central idea is retained: every item should serve a clear function, remain usable under disrupted services, and earn its space and weight. A household evacuation, apartment fire, flood, extended outage, or sudden relocation may require different equipment, but all can punish disorganized packing. The useful adaptation is not a uniform or tactical appearance; it is disciplined prioritization.
Military or field packing often assumes shared equipment, resupply, specialist training, and a known mission. A civilian may have none of those advantages. Your bag must therefore support basic self-care while leaving room for changing instructions. Water, medicines, identification, communication, and weather protection generally outrank gadgets. A compact radio may be useful, but it cannot replace prescription medication or a way to carry drinking water.
Separate supplies into three layers. The carry layer stays light enough for walking and contains items needed during the first several hours. The vehicle layer adds bulkier food, charging equipment, blankets, and tools when a car is available. The home layer supports staying in place and should not be treated as a substitute for an evacuation bag. This structure limits the damage if a vehicle is inaccessible or a single pack is lost.
Immediate: identification, medications, water, food, light, phone power, and basic first aid.
Conditional: tools or specialty equipment selected for local weather, terrain, transport, and household needs.
A common failure is copying a generic field list without considering the civilian mission. Heavy cutting tools, excess cookware, or duplicate containers may feel capable but reduce mobility. A better test is simple: if the item does not help you drink, eat, move, communicate, stay warm and dry, manage a health need, or comply with an official instruction, it probably belongs in a lower-priority layer. The civilian packing list should reflect your actual route and household rather than an imagined expedition.
Build the 72-Hour Carry Kit
The carry kit should be organized around the first 72 hours, but that period is a planning window rather than a promise that assistance or utilities will return on schedule. Pack in waterproof bags inside a durable backpack, using small pouches for medication, documents, food, and electronics. Label contents plainly so another household member can find them under stress.
Water deserves special attention because it is heavy, essential, and difficult to improvise. Carry a practical amount for your route and physical capacity, then add a compact treatment option appropriate for the kind of contamination authorities may warn about. A filter, tablets, or boiling method has different limitations; none should be assumed to make every source safe. Keep drinking containers accessible rather than buried beneath clothing.
Food should be edible without refrigeration, cooking, or extensive cleanup. Familiar items such as shelf-stable nutrition bars, nut butter packets, crackers, dried fruit, canned fish with a pull tab, or other foods tolerated by the household are more useful than impressive but unfamiliar ration products. Include a manual opener if any package requires one. People with allergies, diabetes, swallowing difficulties, or infant-feeding needs need dedicated supplies rather than a generic substitution.
Pack medicines in original labeled containers when possible, along with a written medication list and relevant contact details. A small first-aid kit can address minor cuts, blisters, and routine wound covering, but it is not a replacement for urgent medical care. Keep copies of identification, insurance information, emergency contacts, and essential household instructions in a sealed pouch. Digital copies can supplement paper copies, not replace them when devices or networks fail.
Lighting and communication equipment should be tested together. A headlamp leaves both hands free, while a small flashlight provides a backup. Store spare batteries correctly or use a rechargeable light with a power bank, but check connector compatibility before packing. Phone charging gear is valuable only if the cable, battery, and phone work as a system. The usual mistake is adding multiple electronic devices while omitting a written contact card and a way to signal or read information when the network is unavailable.
Pack for Shelter, Travel, and Personal Needs
Clothing in an emergency pack is a protection system, not a fashion change. Choose layers suited to the season: a moisture-managing base layer, insulating layer, and weather-resistant outer layer when conditions warrant. Add sturdy footwear or keep it immediately available, plus spare socks, work gloves, and eye protection if debris, smoke, or broken materials are plausible. Avoid packing a single bulky garment that becomes useless if wet; several adaptable layers usually provide better control.
Shelter supplies should match the likely decision. A person evacuating by car may need blankets, a tarp, and a change of clothes, while someone walking through crowded streets benefits more from a compact poncho and low-profile insulation. A sleeping bag can be helpful in cold conditions but may be excessive for a short indoor relocation. Space and climate change the answer. Test the packed load in the clothing you may actually wear, because a comfortable bag indoors can become awkward on stairs or uneven ground.
Sanitation prevents small problems from becoming barriers to travel or sheltering. Pack toilet paper in a sealed bag, hand sanitizer, soap sheets or a small soap container, menstrual products, toothbrush supplies, waste bags, tissues, and any continence supplies. Include a small towel or absorbent cloth. These items are inexpensive but frequently omitted because they seem less dramatic than tools. In a crowded shelter, personal hygiene supplies also reduce dependence on uncertain availability.
Personal circumstances should change the list more than internet checklists do. A child may need comfort items, spare clothing, and food that can be eaten safely. A person with limited mobility may require transfer aids, extra batteries for equipment, or a route-specific transport arrangement. Pets need food, water containers, medication, identification, a leash or carrier, and waste supplies. Keep copies of care instructions so another person can help if family members become separated.
Do not confuse defensive equipment with general preparedness. Knives, weapons, or specialized protective gear may create legal, safety, or transport problems and require training that a packing list cannot provide. Prioritize visibility, footwear, communication, and avoiding hazards. A frequent misconception is that more tools create more security; in civilian travel, excess weight and unfamiliar equipment can slow movement, invite loss, or distract from official evacuation directions.
Test, Stage, and Maintain the Load
A packed bag is only useful if its owner can carry it, identify its contents, and use the equipment without instruction. Conduct a short walk on stairs and ordinary pavement with the intended load. Check whether straps rub, footwear causes hot spots, or the bag blocks access to medication and water. If the pack is too heavy, remove duplicates and low-probability tools before removing core health, hydration, or weather items.
Run a household drill that begins with a realistic prompt: a building alarm, a local evacuation notice, or a multi-day outage. Have each person retrieve their own bag, secure pets, collect phones and glasses, and leave by the intended route. The exercise often reveals practical defects that shopping cannot: a child cannot open the food, a charger uses the wrong connector, documents are stored in a locked drawer, or the chosen shoes are not near the exit.
Stage supplies where the hazard allows. Keep the carry bag near an exit but not where smoke, floodwater, or falling objects are most likely to block access. Store vehicle supplies in a way that does not become a projectile and avoid leaving heat-sensitive medicines or batteries in extreme temperatures. If evacuation may involve public transport, favor a compact soft-sided arrangement over several loose containers.
Maintenance should follow use and seasons. Replace consumed food, inspect seals, rotate batteries, update contact information, and review medication needs with the appropriate clinician or pharmacist. Recheck clothing as children grow and as weather changes. A simple inventory can record item, quantity, expiration or inspection date, and location. The point is not perfect readiness; it is preventing a known failure from recurring.
Use the packing list as a decision tool after every drill. If a component was difficult to access, unsafe, uncomfortable, or irrelevant to the scenario, revise it. Keep a written route and meeting arrangement, but follow current instructions from local emergency officials when they conflict with an old household assumption. The strongest kit is not the largest one; it is the one that remains usable when time, information, and carrying capacity are limited.
Frequently Asked Questions
How much should a civilian emergency bag weigh?
Keep it light enough for the least mobile intended user to carry over the planned route. Test the actual load and shift bulky items to a vehicle or home cache.
Should food be packed for three full days?
Pack ready-to-eat food for the people and pets who may rely on the bag, while recognizing that local conditions, evacuation timing, and access to shelter can change the required amount.
What matters most if there is little room?
Prioritize medications, water, identification, phone power, light, weather protection, essential food, and sanitation. Remove duplicates before removing these functions.
Should every family member carry the same items?
No. Share heavy items where practical, but give each person essential identification, medication access, water, and age-appropriate comfort or communication items.
How often should the bag be checked?
Review it after every use, before seasonal weather changes, and whenever medications, contact details, clothing sizes, pets, or household mobility needs change.
Further Reading
Authoritative Sources
Build an Emergency Kit ready.gov
Provides federal guidance on core household supplies and adapting them to personal needs
Survival Kit Supplies redcross.org
Offers practical suggestions for assembling supplies for evacuation and sheltering
Emergency Water Information cdc.gov
Explains safer responses when drinking-water service or quality is uncertain
Conclusion
A civilian adaptation of a deployment packing list should make movement and short-term sheltering more manageable without pretending that a backpack can solve every emergency. Build separate carry, vehicle, and home layers; put health, water, identification, food, lighting, communication, clothing, and sanitation ahead of novelty tools; then tailor the result to route, climate, mobility, pets, and medical needs. Test the bag on foot, practice retrieving it under a realistic prompt, and correct failures while they are still inexpensive to fix. A smaller load that the household understands and can use is more valuable than a heavier collection of supplies left unopened or forgotten.
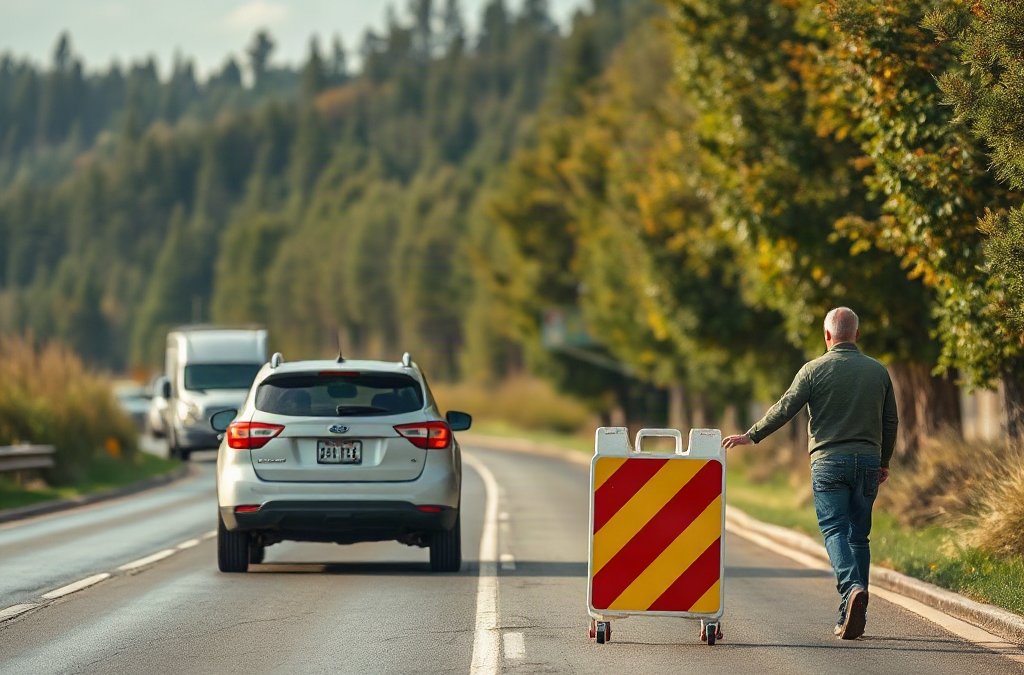
A route has failed when it no longer provides a reasonably safe and usable path to the intended destination. A fallen tree, bridge closure, rising water, wildfire smoke, collision, police activity, gridlocked traffic, or loss of road access can all turn a familiar route into a trap. The plan should describe these conditions in plain language rather than relying on a vague instruction to “find another way.”
Separate route failure from ordinary delay. A slow road may still be usable if vehicles can move, fuel is available, and emergency access remains open. A blocked road, rapidly changing hazard, or official direction to leave the area requires a different response. Waiting beside a closure can expose people to smoke, floodwater, falling debris, or traffic moving unpredictably. The first decision should be whether to turn around, use the nearest signed detour, shelter temporarily, or proceed to a different destination.
Write down the assumptions behind the decision. Can every vehicle turn around? Is the route suitable for a trailer, wheelchair, or vehicle with limited fuel? Does the destination remain safe if the hazard expands? A route that works for a small car may be unsuitable for a large vehicle or a person needing accessible facilities. A family may also need separate arrangements for pets, children, medication, or mobility equipment.
Use a simple hierarchy: life safety first, official instructions second, route convenience third. Do not choose a shorter road that crosses moving water or enters a visibly affected area merely because it avoids congestion. The Contingency plan for a failed evacuation route should name a primary destination, at least one nearer fallback, and a condition that makes each option unsuitable.
Build Alternate Routes That Work
An alternate route is useful only if it has been checked against the same hazard that defeated the primary route. Map two or three options from important starting points, not just from the home. Include a route from work, school, or a regular medical appointment if household members may evacuate separately. Mark major junctions, bridges, dead-end roads, fuel stations, public facilities, and places where a vehicle can safely turn around.
Do not assume that a minor road is automatically safer. Narrow roads may become impassable when residents leave at once, and rural routes may have limited lighting, fuel, shoulders, or reception. A route through a low area may be a poor substitute during flooding; a wooded shortcut may be unsuitable during wildfire conditions; and a road near the original hazard may become blocked without warning. Compare alternatives by hazard exposure, road width, traffic direction, fuel demand, and the ability to reverse course.
A practical route record can fit on one printed page. For each option, note the starting point, first turn, major decision points, destination, known restrictions, and the reason it may fail. Keep a paper map with the marked routes in each vehicle because a phone may lose power, data service, or accurate location information. Digital maps remain useful for traffic and closures, but they should support—not replace—local knowledge and official messages.
Consider a household leaving during a fast-moving fire. The primary route is closed at a junction, while the navigation app continues to display it because the closure has not reached the mapping service. A preselected secondary road may still be open, but only if it leads away from the smoke and does not depend on the same downstream bridge. If both routes converge later, they are not truly independent alternatives. That shared point is a failure dependency and should be treated as another decision point.
Test the route at the time and with the equipment likely to be used. A daylight drive may not reveal poor visibility, school-zone congestion, steep grades, or a gate that is closed overnight. Testing does not guarantee availability, so record conditions rather than treating the route as permanent. Update the map after construction, seasonal closures, or changes to household vehicles.
Set Triggers, Decision Points, and Communications
Clear triggers prevent indecision at the moment the primary route becomes unusable. A trigger might be an official closure, water reaching the roadway, visible smoke reducing safe visibility, emergency personnel directing traffic elsewhere, or a complete standstill at a known choke point. The trigger should identify the next action: take Route B, move to a nearby holding location, or abandon the destination and use Route C.
Give every traveler the same decision points. For example, the instruction might be: “If Junction Oak is closed, do not continue toward the bridge; turn toward the library and reassess at the marked intersection.” A named landmark is easier to recognize than a street number, especially in darkness or stress. Decide in advance who can change the plan. A driver must be able to respond to immediate danger, while a designated contact can help coordinate people who are traveling separately.
Communication should work through several channels. Use local emergency alerts, official websites or radio broadcasts, and direct calls or text messages when networks function. A short message is more useful than a long explanation: state the person’s location, route status, next destination, and whether assistance is needed. Establish a check-in schedule only when it does not distract the driver. Never require someone to keep calling while operating a vehicle.
Choose a meeting arrangement that does not depend on one exact road. A primary meeting point can be paired with a secondary point in another direction. If family members cannot reach either location, they should know which out-of-area contact will receive updates. The contact should not make tactical decisions without current information; their role is to relay messages and reduce conflicting reports.
Common communication failures come from assumptions: everyone has a charged phone, everyone knows the destination, or a message sent means it was received. Keep a car charger or battery pack where it can be reached safely, but do not depend on electronics alone. A printed contact card, paper map, and written route codes provide a low-technology fallback. Reassess the plan when official instructions conflict with a household preference; official evacuation directions take priority over a privately chosen shortcut.
Practice the Plan Under Real Constraints
Practice should test decisions, not merely prove that someone can recite street names. Run a tabletop scenario in which the primary exit is blocked, then ask each person what they would do, where they would turn, and how they would report their status. Follow with a short drive on the alternate route when conditions are safe. The exercise may reveal that a child cannot identify the meeting place, a pet carrier is inaccessible, or the printed map is stored in a locked compartment.
Assign practical roles without making the system dependent on one person. One adult may drive, another may check official information, and an older child may carry the contact card. Anyone traveling alone needs a simpler version: route cards, a fallback destination, and a clear rule for stopping safely before making a call. People with mobility limitations may need additional time, an accessible vehicle, or a route that avoids stairs and uneven surfaces. Pets require carriers, leashes, and destination confirmation because not every shelter or lodging option accepts animals.
A compact pre-departure check should confirm:
phones, chargers, identification, medication, and essential mobility items;
fuel level, tire condition, lights, and room for all passengers;
paper maps with primary and alternate routes marked;
pet restraints, child seats, water, and weather-appropriate clothing;
the current destination, meeting point, and communication contact.
The checklist is not a substitute for judgment. If smoke is thickening, floodwater is moving across the road, or officials are redirecting traffic, abandon the exercise’s planned sequence and follow immediate safety instructions. A route is failing when progress requires risky improvisation, repeated reversals, or entry into a visibly worsening hazard. That is a sign to use the next fallback, not to preserve the original itinerary.
Review the plan after every drill or real evacuation. Record where the route became confusing, which messages arrived late, and whether the destination had capacity. A shorter route is not necessarily a better route if it lacks room to turn around or shares the same vulnerable bridge. The best revision may be less convenient but more robust: an earlier departure trigger, a farther meeting point, or a destination outside the original hazard zone.
For route-specific decisions, consult local emergency-management offices, transportation departments, fire agencies, and official alert systems. Their closure notices and evacuation instructions are more reliable than crowdsourced map comments during a fast-changing incident.
Frequently Asked Questions
How many alternate evacuation routes should a household have?
Identify at least two alternatives when geography allows, then check whether they share bridges, tunnels, low points, or the same final junction. Shared dependencies reduce the value of having several lines on a map.
When should someone abandon the primary evacuation route?
Change course when officials close it, the hazard reaches the roadway, visibility becomes unsafe, traffic cannot move, or continuing would require entering a restricted area. Do not wait beside a confirmed blockage for conditions to improve.
Are phone navigation apps enough for evacuation planning?
No. Apps can lack current closure data or fail when power and networks are limited. Pair them with a paper map, predriven routes, official alerts, and written decision points.
What should a family do if members are separated when a route fails?
Use the agreed destination hierarchy and send brief status messages when safe. A designated out-of-area contact can relay information, while each traveler follows the route and meeting rules rather than chasing uncertain updates.
How often should an evacuation contingency plan be reviewed?
Review it after route construction, household changes, vehicle changes, seasonal hazards, or any drill. A short annual drive and tabletop exercise can expose assumptions that a written plan hides.
Conclusion
A failed evacuation route demands a prepared decision, not improvised navigation at a dangerous roadblock. Build alternatives that do not share the same vulnerable crossing, mark recognizable decision points, and pair digital information with paper maps and written contacts. Set clear triggers for changing direction, but leave room to follow official instructions when conditions move faster than the plan. Test the routes with the actual vehicles, passengers, pets, and accessibility needs involved. Afterward, correct confusing turns, weak communications, and destinations that cannot accommodate the group. The next practical step is to mark one primary route and two independent fallbacks, then explain the sequence to everyone who may have to travel without the household’s usual coordinator.
A week-long utility outage should be treated as a temporary loss of several systems at once, not merely a power failure. Electricity may stop refrigeration, water pumping, heating, cooling, internet access, card payments, and some medical equipment. The first useful step is to count the people, pets, and services that depend on your home, then build supplies around those actual needs.
Water deserves the earliest attention because people can reduce food variety more easily than they can reduce drinking and sanitation needs. Include drinking, cooking, hand cleaning, tooth brushing, and medication use in the calculation. Store commercially packaged water where possible, and add containers for collecting or transferring water without opening every stored bottle. If anyone takes daily medication, uses formula, relies on mobility equipment, or needs refrigerated treatment, that requirement changes the baseline.
A small apartment and a detached home face different constraints. An apartment resident may have limited storage and may be unable to use a balcony grill or fuel-burning appliance safely. A homeowner may have more room for water and a generator but also more responsibility for sump pumps, well systems, septic equipment, and frozen pipes. The right approach is not the largest possible stockpile; it is a workable reserve that fits the dwelling and can be used safely.
Write the baseline on paper rather than trusting memory. Include:
People, pets, infants, older adults, and anyone with medical or dietary requirements.
Drinking and sanitation water, including a separate reserve for pets.
Food requiring little or no cooking, plus a manual can opener.
Prescription medicines, first-aid items, hygiene products, and essential documents.
Lighting, charging, weather-appropriate clothing, and a way to receive official updates.
A common failure is buying supplies without checking whether they work together. Dry food is less useful if it requires boiling water, and a generator is not a complete solution if fuel storage, ventilation, extension cords, or appliance loads have not been considered. Test the equipment before an outage and record expiration dates. The week-long utility outage preparation process becomes manageable when every item has a defined purpose, storage location, and safe operating method.
Protect Water and Food When Refrigeration Stops
Food and water decisions become more difficult after the refrigerator warms, so separate supplies into three groups: items used immediately, foods that remain safe at room temperature, and foods that should be discarded if temperature control is uncertain. Keep refrigerator and freezer doors closed as much as possible. A thermometer placed in the refrigerator and freezer gives better information than smell or appearance, which cannot reliably confirm safety.
Choose foods according to preparation limits rather than marketing labels. Ready-to-eat canned beans, fish, vegetables, fruit, nut butter, crackers, shelf-stable milk, dried fruit, and individually packaged meals can cover different textures and nutritional needs. Include foods that require little water and no heating. A family that stores only dehydrated meals may discover that its water reserve is consumed quickly, while a household with only canned food may lack a way to open or serve it.
Use a normal-food-first rotation. Keep newer items behind foods already in the pantry, and mark unusual preparation requirements on the package or storage bin. During an outage, eat refrigerated perishables first only if they remain within safe temperature limits; do not gamble on meat, dairy, leftovers, or cut produce after prolonged warming. Frozen food that still contains ice crystals may sometimes be moved or cooked promptly, but uncertain items should not be rescued merely to avoid waste.
Water storage needs protection from heat, chemicals, pests, and freezing. Use containers intended for potable water, keep them off the floor when practical, and follow the container maker’s replacement or treatment instructions. Do not assume water from a swimming pool, decorative pond, water heater, or rain barrel is ready to drink. Water from an unverified source may require treatment appropriate to the contaminant, and some treatment methods do not remove chemicals or fuel.
Cooking equipment creates a major tradeoff. An indoor electric hot plate is useless without electricity, while a camp stove may create fire and carbon monoxide hazards indoors. If cooking outdoors is permitted and conditions are safe, use equipment exactly as labeled and keep it away from doors, windows, and combustible materials. Otherwise, make no-cook foods the foundation and regard heated meals as optional. A weak assumption is that a full pantry equals a usable pantry; the practical test is whether every person can eat safely when refrigeration, water pressure, and cooking power are unavailable.
Keep Light, Communication, and Charging Available
Lighting should be distributed, not stored as one powerful flashlight that nobody can find. Place a flashlight or lantern near sleeping areas, the kitchen, the main exit, and the electrical panel. Headlamps are useful when both hands are needed for carrying water or checking a breaker. LED lights generally provide efficient illumination, but their batteries still need testing and rotation.
Communication equipment matters because utility restoration times can change and local hazards may develop. Keep a battery-powered or hand-crank radio, spare batteries in their original packaging, a written list of utility contacts, and a paper record of key phone numbers. A charged phone is valuable, but a phone alone is fragile: cellular networks may become congested, charging may be unavailable, and stored numbers may be inaccessible if the device fails.
Power banks should be charged before severe weather or planned maintenance, then reserved for high-value uses such as emergency calls, medical devices, or official alerts. Avoid spending the first evening streaming video or repeatedly checking social media. If a vehicle is used to charge equipment, operate it outdoors in an open area and never inside a garage, even with the door open.
Backup generation requires a load decision before purchase. List the appliances that truly need power, such as a medically necessary device, refrigerator, well pump, or sump pump, then determine their starting and running requirements from manufacturer documentation. A smaller battery station may quietly charge phones and lights but may not run a heating appliance. A fuel generator may handle larger loads but introduces carbon monoxide, fire, fuel storage, noise, and maintenance concerns. Neither option replaces insulation, warm clothing, water, or a communication method.
Test the complete setup rather than individual components. Connect the intended cable, locate the adapter, check whether the battery holds charge, and confirm that the device accepts the available output. Common failures include incompatible connectors, dead batteries, tripped breakers, overloaded power strips, and extension cords used for loads they cannot safely carry. Clear labeling and a short written procedure reduce mistakes when the home is dark or someone is tired.
Manage Sanitation, Temperature, and Safety
Sanitation becomes a utility problem when toilets cannot flush, water pressure drops, or wastewater systems stop operating. Store liquid hand soap, hand sanitizer, toilet paper, absorbent materials, heavy-duty bags, disinfecting supplies, and personal hygiene products. Keep sanitation supplies separate from food and water so a leaking cleaner cannot contaminate the reserve.
Before an outage, learn whether the home uses a municipal sewer, septic system, private well, or pump-dependent plumbing. Do not repeatedly flush a toilet when the system may not have water or power to move waste. A temporary waste arrangement may be necessary, but it must be kept away from food preparation, sealed appropriately, and handled according to local public-health instructions. Never mix bleach with ammonia, acids, or other cleaners; dangerous gases can form.
Temperature control depends on the season and the occupants. In cold weather, close off unused rooms, block drafts, dress in layers, and protect plumbing that may freeze. Never heat a home with an oven, charcoal grill, outdoor heater, or generator. In hot weather, use shades during the day, ventilate when outdoor conditions permit, drink regularly, and check on people who are sensitive to heat. Fans may improve comfort but do not make dangerously hot indoor conditions safe by themselves.
Households with oxygen equipment, powered beds, refrigerated medicines, dialysis needs, or other electrically dependent care should contact the equipment provider and health-care team before an outage. A generic battery backup may not be approved for specialized equipment. The best alternative may be relocation to a designated support site rather than attempting to operate every device at home.
Security and fire prevention also change. Unplug sensitive electronics when power is unstable, leave one light switched on so restoration is noticeable, and keep candles out of the routine when battery lighting is available. A frequent mistake is treating a generator as an indoor appliance or placing it near a window for convenience. Carbon monoxide has no reliable warning odor, so outdoor placement and an operating carbon monoxide alarm are non-negotiable safety measures.
Use a Practical Outage Routine
A seven-day reserve works better when supplies are organized into daily-use bins instead of buried in a closet. Put the first-night items together: lights, chargers, water, ready-to-eat food, medications, hygiene supplies, and a radio. Keep a second set of essential items accessible if the outage begins while someone is away from home. Store heavier water containers where they can be lifted safely; an emergency supply that cannot be moved is an avoidable hazard.
When the outage begins, check immediate safety before inventory. Look for downed lines, gas odors, flooding, extreme indoor temperatures, and anyone who depends on powered medical equipment. Report the outage through the utility’s official channel, but do not assume an estimated restoration time is firm. Turn off or unplug selected appliances, leave one lamp on, and avoid opening the refrigerator unnecessarily.
Use a simple daily rhythm: inspect water and temperature needs in the morning, prepare food before darkness, recharge priority devices during the best available window, and check sanitation supplies before they run low. Keep a written consumption record. If water use is higher than expected, change handwashing methods, reduce dishwashing, and move to foods with fewer preparation demands rather than discovering the shortage on the final day.
After power returns, restoration is not the same as immediate normal operation. Check appliances before reconnecting everything, verify that refrigerated food remained safe, and inspect the home for leaks, electrical damage, spoiled food, or frozen pipes. Replenish used supplies while the experience is fresh. The outage readiness checklist should reflect what actually ran out, what failed, and what was never needed.
A useful rehearsal is a short evening without normal utilities. Switch off selected conveniences, use the intended lights, prepare a no-cook meal, locate water, and practice the communication process. This reveals hidden problems such as inaccessible storage, insufficient lighting, missing adapters, or food nobody will eat. The goal is not to imitate hardship; it is to expose preventable friction before a real outage lasts a full week.
Frequently Asked Questions
How much water should be stored for a week-long outage?
Use your household’s drinking, cooking, medication, and sanitation needs as the baseline, then add a separate amount for pets and special care. Official local guidance should take priority where available.
What foods work best when the power is off?
Choose ready-to-eat canned foods, nut butter, crackers, fruit, vegetables, shelf-stable milk, and other items that need little water and no refrigeration. Include a manual opener.
Can a generator run inside a garage with the door open?
No. Generators must be operated outdoors, away from doors, windows, and vents. An open garage does not reliably prevent carbon monoxide from entering the home.
How can food be kept cold during an outage?
Keep refrigerator and freezer doors closed, use appliance thermometers, and follow food-safety guidance when deciding what to keep. Do not rely on smell or appearance alone.
What should households with medical equipment do?
Ask the equipment provider and health-care team about approved batteries, backup power, and relocation options before an outage. Do not assume a consumer power station is compatible.
Further Reading
Authoritative Sources
Power Outages ready.gov
Provides federal emergency guidance on outage hazards, planning, medical needs, and generator safety
Food Safety During a Power Outage cdc.gov
Explains how to handle refrigerated and frozen food when electricity is unavailable
Emergency Disinfection of Drinking Water epa.gov
Describes recognized methods and limitations for treating drinking water during an emergency
Carbon Monoxide Safety cpsc.gov
Offers consumer safety information about generators, fuel-burning appliances, and carbon monoxide exposure
Conclusion
Readiness for a week without utilities depends on matching supplies to the home’s real vulnerabilities. Secure drinking water first, then choose food that remains usable without refrigeration or indoor fuel-burning cooking. Add distributed lighting, charged communication devices, medications, sanitation materials, and season-appropriate ways to stay safe. Treat generators and stoves as specialized equipment with strict placement and ventilation requirements, not as casual indoor conveniences. A short rehearsal can expose missing adapters, inaccessible storage, unrealistic meal assumptions, and excessive water use. After the outage, inspect food, plumbing, appliances, and supplies before returning to normal. Make the next step concrete: count household needs, assemble a first-night container, test every powered device, and replace anything consumed or expired.
Household preparedness works best when it reflects disruptions that are plausible where you live and difficult for your household to manage. A winter storm may create a heating and travel problem, while a summer outage may create a cooling, medication-storage, and food-safety problem. A plumbing failure can affect sanitation without interrupting electricity. Treating all hazards as identical produces an expensive pile of equipment that may not solve the first problem you actually face.
Begin with a short risk review. Consider the hazards identified by your local emergency management office, the age and mobility of household members, medical dependencies, pets, building type, evacuation routes, and how long a repair or service interruption could reasonably affect you. An apartment resident may need compact water storage, stair lighting, and a communication plan rather than fuel-heavy tools. Someone in a rural home may need more water, vehicle capability, and a longer bridge to outside services.
Rank risks by likely disruption and consequence, not by how dramatic they sound. A useful first tier often includes loss of electricity, unsafe or unavailable tap water, severe weather, fire, illness, and temporary inability to shop. The ranking should change with location: wildfire smoke may make air filtration more relevant than flood barriers, while flood-prone homes need higher storage placement and an evacuation decision point.
A common mistake is preparing only for the event and ignoring the household function that fails. “Power outage” is a label; the practical questions are whether you can see, charge a phone, refrigerate insulin, prepare food, flush or clean, and remain at a safe temperature. Use the broader Preparedness guide 101 for realistic household risks approach by naming the service interruption first and then choosing a response for each affected function.
Build a Baseline for Water, Food, and Health
Water deserves early attention because drinking, food preparation, medication use, and basic hygiene all depend on it. Store commercially packaged water or clean, food-safe containers in a cool, accessible location, and follow current public-health guidance for container sanitation and replacement. Keep some water where it can be reached without moving heavy boxes. A supply that exists but cannot be safely carried during an outage is less useful than a smaller supply distributed across practical locations.
Food storage should reduce preparation demands without forcing the household into a completely unfamiliar diet. Combine shelf-stable foods that require little or no cooking with ordinary ingredients you already eat, such as canned beans, fruit, fish, nut butters, crackers, oats, shelf-stable milk, and ready-to-eat grains. Include a manual can opener and utensils. Infants, older adults, people with allergies, and pets may need separate items rather than generic household portions.
Cooking choices involve tradeoffs. A camping stove may be convenient outdoors, but fuel devices require ventilation, safe placement, and strict compliance with the manufacturer’s instructions. No grill, camp stove, or generator belongs inside a home, garage, or other enclosed space because combustion can create dangerous gases. Foods that need no heating are less satisfying for some households but simplify the first hours of a disruption and reduce fuel use.
Health preparation is more than buying bandages. Keep routinely used medicines, copies of prescriptions, spare glasses, hearing-aid supplies, personal protective items, and a written list of important medical information. Do not stock prescription medication beyond what is lawful and medically appropriate; ask a pharmacist or clinician about continuity options. A first-aid kit is useful for minor injuries, but it is not a substitute for emergency medical care. Include a clear decision rule for calling emergency services when symptoms or injuries exceed household capability.
Weak assumptions usually appear in the food and water area: assuming tap water will remain safe, assuming everyone can eat the same food, or assuming canned goods can be opened without a tool. Check packaging, expiration dates, allergies, and storage temperatures. Then connect this section to Preparedness guide 101 for realistic household risks by recording which supplies support drinking, sanitation, medication use, and feeding pets.
Maintain Light, Communication, and Temperature Control
Electricity loss creates secondary risks quickly. Light prevents falls, communication provides updates, and temperature control protects people, food, and some medical supplies. Keep flashlights or headlamps in bedrooms, near exits, and in the main living area rather than placing one device in a remote storage bin. Headlamps leave both hands available for stairs, repairs, or helping a child.
Use a layered charging setup. A charged power bank can support a phone for a limited period, while vehicle charging may provide another option if the vehicle is safely operated outdoors. Battery radios can receive local information when mobile networks are congested, but they should not be treated as a guarantee of coverage. Write down key phone numbers, meeting locations, utility contacts, and an out-of-area contact because a dead phone or damaged screen can erase access to stored information.
Heating and cooling require more judgment than simply purchasing a device. During cold weather, close off unused rooms, dress in layers, protect plumbing where appropriate, and never use an oven or fuel-burning appliance as an improvised heater. During heat, reduce indoor heat gain, drink safe fluids, monitor vulnerable people, and identify an air-conditioned public location or trusted nearby home before conditions become dangerous. Fans may improve comfort but do not replace cooling when indoor temperatures become unsafe.
Generators can power selected equipment, but they introduce fuel storage, carbon-monoxide, electrical-connection, and noise concerns. A small generator may support a refrigerator and essential charging if loads are managed; it may not run an entire home. Transfer equipment and electrical connections should be installed or reviewed by a qualified professional when required. An alternative approach is a smaller battery power station for lights, communications, and selected medical devices, accepting that its runtime and recharge options are limited.
The frequent failure is testing equipment only after the outage begins. Put fresh batteries in a labeled container, charge power banks on a schedule, learn the generator’s controls, and confirm that critical devices can run from the chosen power source. Store fuel only as directed by local rules and the manufacturer. A useful household goal is not “backup power for everything,” but a safe list of the few functions that must continue.
Turn Supplies Into a Working Household System
Supplies become effective when people know where they are, how to use them, and who makes decisions. Create a simple household plan covering sheltering, evacuation, communication, pets, medical needs, and access for people with disabilities. Use printed information alongside digital copies. Identify two meeting places: one nearby for a local separation and another outside the immediate area if roads or buildings are inaccessible.
Assign tasks according to capability rather than habit. One person might monitor official alerts, another might gather medication and documents, and another might handle pets or shutoffs if it is safe. Children can learn how to use a flashlight and identify trusted contacts without being given responsibilities beyond their age. Guests, caregivers, and neighbors may need to know essential information, especially when a household member is away.
Organize storage by use and urgency. A small accessible “first response” container can hold lights, chargers, basic medical items, gloves, and contact information. Longer-term food and water can remain in a cooler, darker area, while evacuation documents and medication should be easy to grab. This is better than keeping every item in one heavy tote that is difficult to locate or carry.
Documents and finances also affect recovery. Keep identification copies, insurance information, lease or mortgage details, prescriptions, emergency contacts, and pet records in a water-resistant folder or secure digital location. Cash in modest denominations may help when electronic payment systems are unavailable, but it should be stored discreetly and never replace normal financial safeguards.
Consider a realistic apartment fire, where there may be minutes to leave and no safe opportunity to collect a large kit. The correct priority is an accessible exit, working alarms, shoes and light near the bed, keys, medication access, and a family meeting point—not a storage room full of supplies. A household that plans only for staying home may fail when evacuation is the safer choice. Review both branches and make the decision threshold explicit.
Test, Rotate, and Improve the Setup
Testing reveals the difference between ownership and readiness. Choose a short practice window and simulate a common interruption: turn off selected lights, use only stored water for a meal, find the emergency contacts without a phone, or walk the evacuation route. Do not create a dangerous simulation involving live flames, unsafe electrical work, or deliberate disconnection of necessary medical equipment.
Observe what happens rather than judging the exercise by intention. Can everyone find the flashlight? Is the can opener usable? Does a phone charger fit the devices in the home? Can an older family member lift the water container? Does the pet carrier fit through the planned route? These observations identify failure points that a shopping list cannot show. If a solution works only for the strongest adult, it is not a complete household solution.
Use a rotation system for water, food, batteries, medications, and seasonal clothing. Place newer items behind older ones, label opening dates, and inspect cans for damage, swelling, rust, or leakage. Batteries may corrode, power banks may lose capacity, and stored fuel may require careful management. Follow product instructions rather than relying on a universal replacement schedule.
Keep a short improvement log with three columns: problem, correction, and next test date. If a meal required too much fuel, add a no-cook alternative. If a battery failed, replace it and test the device. If alerts were missed, revise notification settings and identify an official local source. This feedback loop is more economical than repeatedly buying new equipment without correcting the process.
Revisit the setup after a move, new medication, household change, severe weather season, or major purchase. Preparedness should remain proportionate: spend first on water, health needs, lighting, communication, sanitation, and safe temperature options before adding specialized gear. The most reliable system is the one people can access, understand, maintain, and adapt.
Frequently Asked Questions
What should a household prepare for first?
Start with likely service failures: power, water, communication, food access, sanitation, and temperature control. Add local hazards such as flooding, wildfire, hurricanes, or winter storms.
How much food should be stored?
Choose an amount your household can store, rotate, and actually eat. Begin with familiar shelf-stable meals and expand after checking water, cooking, medical, and pet needs.
Is a generator necessary?
Not for every household. A generator may suit homes with critical electrical needs, while battery power, vehicle charging, cooling centers, or nearby support may be safer and more practical for others.
Where should emergency supplies be stored?
Keep frequently needed items accessible, dry, and away from hazards. Distribute lights and basic supplies rather than placing everything in one difficult-to-move container.
How often should preparedness supplies be checked?
Check them whenever seasons, medications, household members, or living arrangements change, and use routine rotation for food, water containers, batteries, and other dated items.
Further Reading
Authoritative Sources
Ready.gov Emergency Kit ready.gov
Provides federal guidance for assembling supplies around common disruptions and household needs
Carbon Monoxide Safety cdc.gov
Explains the danger of carbon monoxide and safe practices for fuel-burning equipment
Food Safety During a Power Outage fda.gov
Offers practical information for handling refrigerated and frozen food after power loss
How to Prepare for Emergencies redcross.org
Covers household planning, communication, evacuation, and hazard-specific preparation
Conclusion
A realistic household setup begins with the disruptions most likely to interrupt daily functions, not with an extreme-event shopping list. Secure safe water, familiar food, medication continuity, lighting, communication, sanitation, and a way to manage dangerous heat or cold. Then make those resources usable: store them where people can reach them, document evacuation and contact decisions, and account for pets, mobility, allergies, and medical equipment.
Test one ordinary scenario before adding specialized gear. A failed can opener, dead battery, inaccessible container, or unsafe cooking method provides more useful information than another untested purchase. Review the system seasonally and after household changes, correcting the specific problem each test reveals. For more structured application, revisit Preparedness guide 101 for realistic household risks and turn its priorities into a short, maintainable household routine.
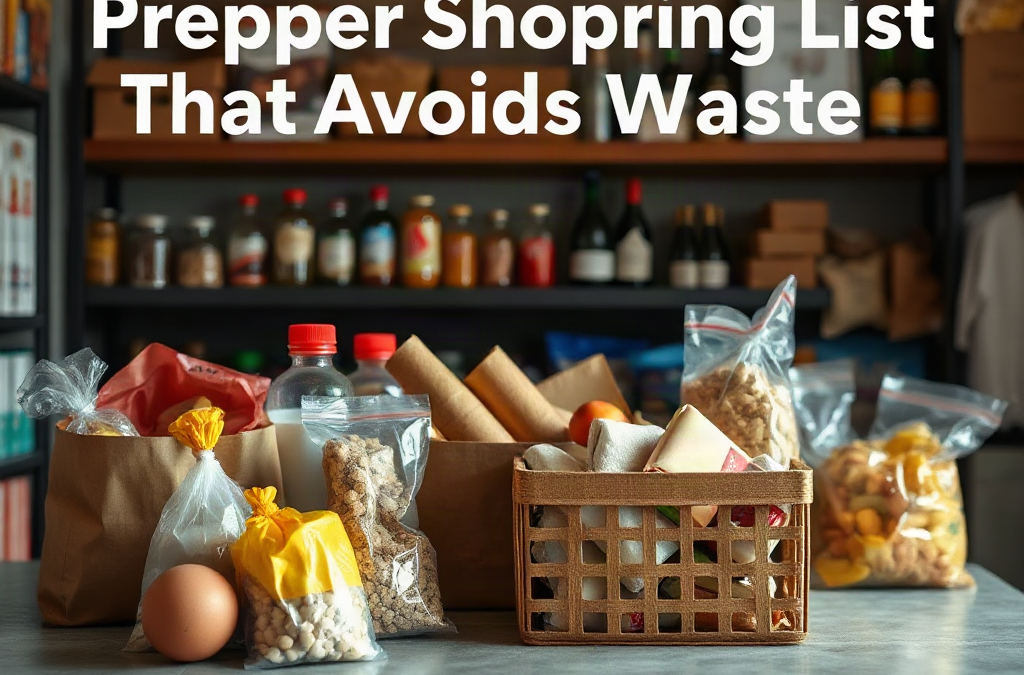
A low-waste preparedness list begins with normal meals, household size, dietary needs, and available storage—not with a generic cart of survival products. A family that regularly eats oatmeal, pasta, canned tomatoes, and peanut butter has a better chance of using those foods than a household that buys unfamiliar freeze-dried entrées simply because they have a long shelf life. Familiarity reduces abandonment, and regular use creates a natural replacement cycle.
Record what the household consumes over two or three ordinary weeks. Note serving sizes, preferred brands, cooking methods, allergies, and foods that repeatedly remain on the plate. That record becomes a more reliable purchasing guide than a preset list. For example, if a household uses one jar of cooking oil every six weeks, buying several years of oil may create rancidity risk before the stock is used. A smaller reserve paired with routine replacement is the more sensible choice.
Separate supplies into three time horizons: items used routinely, items reserved for disruption, and items intended for a longer interruption. Routine items should be the foundation because they are easiest to rotate. Reserved items can include shelf-stable meals and backup snacks, while longer-term items deserve stricter storage and date tracking. The common mistake is treating every purchase as long-term storage. That approach ties up money, fills limited space, and makes forgotten products more likely.
Use the Prepper shopping list that avoids waste as a living inventory rather than a one-time buying challenge. Add a product only when you can answer three questions: Who will use it, when will it be rotated, and where will it be stored? If any answer is unclear, postpone the purchase or buy one trial unit first.
Choose Foods That Store Well and Get Used
Durable foods earn a place on the shelf when they combine reasonable storage life, practical nutrition, acceptable taste, and a realistic preparation method. Rice, oats, pasta, dry beans, lentils, canned vegetables, canned fruit, canned meat, soups, shelf-stable milk, nut butter, and cooking fats can cover different meal roles. No single food solves every need: grains provide energy, legumes add protein and fiber, canned foods reduce cooking demands, and fats supply concentrated calories but may be more sensitive to heat and age.
Compare dry and ready-to-eat options according to available water, fuel, equipment, and time. Dry beans may cost less and store efficiently, but they require soaking, cooking water, and fuel. Canned beans cost more per serving and occupy more space, yet they can be eaten with minimal preparation. A household with limited fuel may sensibly favor canned or quick-cooking foods, while a household with reliable cooking capacity may use dry staples as the economical base. The best choice is not the product with the longest advertised life; it is the product that remains usable under the conditions you expect.
Package size also affects waste. A large container may have a lower unit price but become stale after opening, especially for flour, crackers, cereal, or powdered products. Smaller packages can be worthwhile for low-volume foods, even when the price per ounce is higher. Use resealable containers for products that tolerate repackaging, and follow manufacturer directions for foods that require their original packaging or specific handling. Do not assume that transferring a product automatically extends its safe storage period.
Include flavor builders and meal connectors rather than collecting isolated ingredients. Salt, spices, bouillon, tomato sauce, vinegar, shelf-stable condiments, and powdered drink mixes can make basic staples more usable. A practical example is pairing rice with canned beans, tomatoes, seasoning, and oil; each item has multiple uses and can be rotated through ordinary meals. The failure mode to avoid is buying “complete” emergency meals that nobody has tasted. Test one serving before purchasing a larger supply, and record preparation requirements beside the item.
Buy in Rotatable Quantities
Quantity should follow consumption speed, storage conditions, and replacement access. A three-layer purchase is often more manageable than a large stockpile: keep a small working supply in the kitchen, a reserve nearby, and only then consider a deeper backup. This arrangement makes older products visible and prevents new groceries from being placed in front of forgotten cans.
Apply a first-expiring-first-out routine. When new cans or packages arrive, move older items forward, place the new items behind them, and mark products that need earlier attention. A simple spreadsheet, paper shelf map, or phone note can track product, quantity, purchase date, best-by date, and storage location. Date labels are useful, but they do not replace inspection. Discard containers that are swollen, leaking, badly rusted, punctured, or otherwise compromised, and follow product-specific guidance when deciding whether an older item is suitable.
Budgeting matters because waste often begins with buying too much during a single sale. A discount only saves money when the household uses the product before quality declines and before the cash could have filled a more urgent gap. Compare the cost of a product with its rotation rate. Buying six familiar cans that are used monthly may be more efficient than buying a case of a novelty food that sits untouched. Bulk purchases make more sense for staples used frequently and stored in a cool, dry, pest-resistant place.
A useful buying sequence is:
Replace products already consumed during the month.
Fill missing meal components, such as protein, fat, or flavoring.
Add water, fuel, and sanitation supplies that match the food plan.
Buy trial quantities of unfamiliar products before committing to bulk.
The sign that the system is working is a regular stream of supplies moving into ordinary use. The sign that it is failing is a growing “emergency” shelf containing expired, disliked, damaged, or duplicate items. Treat that shelf as feedback, not as proof that more storage is needed.
Create a Shopping and Rotation System
A shopping system prevents waste by connecting the list to actions at home. Before each trip, count what is on hand, check the use-soon area, and review the next few planned meals. Shopping from a current inventory reduces duplicate purchases and exposes practical gaps, such as having pasta but no sauce, canned food but no manual opener, or dry ingredients without enough fuel to cook them.
Organize shelves by function or meal rather than by the date purchased. One area might hold breakfast foods, another cooking staples, and another ready-to-eat items. Keep heavy containers low, protect food from heat and moisture, and avoid storing supplies where a leak, pest, or appliance failure could damage the entire reserve. Storage limitations change the right answer: an apartment may benefit from compact, frequently rotated foods, while a cool pantry can support larger quantities of dry staples.
Schedule a short monthly check and a more detailed seasonal review. During the monthly check, inspect packaging, count critical items, and move older products forward. During the seasonal review, test can openers, cook a sample meal, inspect water containers, and verify that dietary or household changes are reflected. A child’s changing appetite, a new medication-related diet, or a move to a smaller home can make an older list inaccurate.
Use a “use soon” bin for products approaching their preferred quality window. Plan those foods into lunches or ordinary dinners rather than waiting for a crisis. This is more effective than repeatedly extending dates on a spreadsheet because it converts inventory maintenance into consumption. The opposing approach—leaving all reserves untouched indefinitely—may appear orderly, but it hides taste changes, packaging damage, and preparation problems until replacement is expensive or inconvenient.
For a tailored Prepper shopping list that avoids waste, write the intended rotation meal beside each less-common item. If there is no plausible meal, remove it. Practical preparedness is measured by usable supplies, not by shelf volume.
Avoid Hidden Waste in Water, Fuel, and Supplies
Food cannot be evaluated separately from the resources needed to prepare and manage it. Dry staples may become unusable during a water shortage, canned foods may be difficult to heat without fuel, and a well-stocked pantry may still create sanitation problems without soap, trash bags, paper goods, or a manual can opener. The list should therefore pair each food category with its operating requirements.
Water deserves priority because it supports drinking, cooking, and basic hygiene. Store water in containers intended for that purpose, protect it from contamination and damaging temperatures, and follow current public-health guidance for storage and replacement. Avoid buying more cooking-intensive food than the available water and fuel can support. A shelf of dry rice without a workable cooking plan is not the same as a shelf of ready-to-eat meals.
Fuel selection depends on equipment, ventilation, local rules, and the cooking methods the household already understands. Test any backup stove or heating method before relying on it, and do not use combustion equipment in unsafe indoor conditions. A low-waste list may favor foods that can be eaten cold or prepared with modest heat, especially for short disruptions. That choice can cost more per serving but reduce fuel use, cleanup, and the chance that supplies remain untouched.
Non-food items should be purchased by task. Include a can opener, food-safe storage containers, hand soap, disinfecting supplies used according to their labels, gloves, garbage bags, and a way to manage leftovers. Avoid accumulating specialized gadgets that duplicate ordinary tools. A common mistake is counting equipment as prepared simply because it is owned; capability is demonstrated when the item works, is accessible, and fits the food plan.
Review the complete system after a practice meal or short household exercise. Note what was wasted, which package was awkward, how much water was used, and which tool was missing. Those observations are more valuable than adding another random item to the cart.
For storage decisions, consult current food-safety guidance from the USDA FoodKeeper resources and your state or local university extension service. These sources can help readers evaluate date labels, storage conditions, packaging, and safe handling without relying on unsupported shelf-life claims.
Frequently Asked Questions
What should be bought first to reduce waste?
Buy foods already used at home, then add missing meal components such as protein, cooking fat, and flavoring. Water, a manual can opener, and sanitation supplies should accompany foods that depend on them.
Are canned foods better than dry foods for preparedness?
Neither is universally better. Canned foods need less cooking and water, while dry foods often cost less and store compactly. Choose according to fuel, water, storage space, and normal household preferences.
How often should stored supplies be checked?
Perform a brief monthly count and inspect packaging, then conduct a more detailed seasonal review. Rotate older items into regular meals instead of leaving the reserve untouched.
How can unfamiliar emergency foods be tested?
Buy one small package, prepare it using the intended equipment and water, and serve it as part of a normal meal. Record taste, portion size, cleanup, and preparation time before buying more.
What is the most common source of pantry waste?
Overbuying products the household does not eat is a major cause. Heat, moisture, poor visibility, damaged packaging, and missing cooking equipment also turn apparently useful supplies into waste.
Conclusion
A useful preparedness pantry is a working food system, not a display of unopened packages. Build around meals your household already accepts, select package sizes that match consumption, and compare dry foods with ready-to-eat alternatives based on water, fuel, equipment, and storage space. Keep older products visible, maintain a use-soon bin, and review supplies on a predictable schedule. Add non-food requirements—water containers, sanitation items, cooking tools, and safe fuel—so the food remains practical under pressure. Start with a modest reserve, test unfamiliar items individually, and expand only when the existing stock rotates cleanly. If products keep expiring or remaining untouched, change the buying pattern rather than enlarging the shelf.
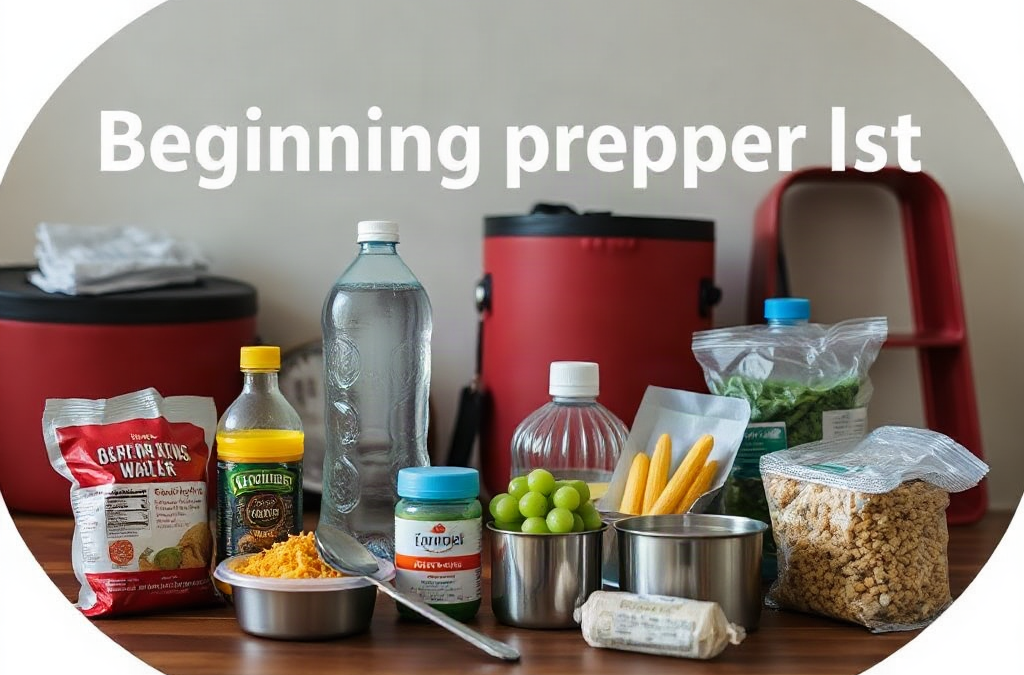
A useful beginning prepper list is ranked by the consequences of shortage, not by how impressive an item looks. Water, food, sanitation, medication access, information, and basic safety usually deserve attention before generators, tactical equipment, or large quantities of specialized supplies. A household facing a short power outage has different needs from one preparing for evacuation, but both benefit from covering everyday disruptions first.
Cost should be measured against usefulness, storage life, and the number of people served. A $10 manual can opener may be more valuable than a costly freeze-dried meal if the household owns canned food but cannot open it. Likewise, a large water container is only an advantage if it can be filled, moved, cleaned, and stored safely. Capacity that cannot be handled becomes wasted spending.
Use three questions for every purchase: What problem does it solve? What will make it fail? Can the household use it without special training or unavailable fuel? A sensible priority order is:
Immediate needs: water, food, medication, sanitation, light, and information.
Continuity needs: cooking, charging, warmth or cooling, cash, documents, and simple repairs.
Resilience upgrades: backup power, improved storage, transport equipment, and specialized tools.
Someone living in an apartment may choose compact water containers and a small indoor-safe cooking alternative, while a homeowner may have room for larger storage and outdoor equipment. The Beginning prepper list by priority and cost should therefore be adjusted for climate, household size, medical needs, pets, and likely local hazards rather than copied item for item.
The Lowest-Cost Starting Stage
The first spending stage should create several days of basic continuity using items that fit normal household life. Store water in clean, food-grade containers and include a method for carrying it. Do not rely on a single large vessel; smaller containers are easier to rotate and move if a leak develops. If local authorities issue a water advisory, follow their instructions rather than assuming a home filter makes every source safe.
Build food reserves from products the household already eats: canned vegetables, beans, fruit, soups, rice, oats, pasta, peanut butter, shelf-stable milk, crackers, and other items suited to allergies and dietary restrictions. A pantry that is regularly used and replaced is more dependable than unfamiliar emergency food purchased in bulk. Include a manual can opener, disposable or washable utensils, and foods that require little or no cooking.
Sanitation often receives too little attention. Soap, hand sanitizer, toilet paper, heavy-duty bags, disinfecting supplies, menstrual products, diapers, and a way to manage waste can prevent a manageable disruption from becoming a hygiene problem. Add flashlights or headlamps, spare batteries, a battery radio or another reliable alert method, basic first-aid materials, and a written list of medications and contacts.
A practical low-cost shopping sequence is water containers first, then ordinary pantry foods, sanitation, lighting, first aid, and document protection. Keep copies of identification, insurance information, prescriptions, and emergency contacts in a sealed folder or secure digital location. The common mistake is buying novelty gear while lacking toilet supplies, safe drinking water, or a way to open food. This stage is not glamorous, but it covers the failures people encounter most directly.
The Mid-Range Supplies That Add Capability
Once the basic supply layer is stable, spend on tools that let the household use what it already owns. A power bank, charging cables, spare batteries, a battery-powered lantern, and a car charger can preserve communication during a short outage. Test the charging system with the actual phones and cables in the home; connector mismatches and dead power banks are common failure points.
Cooking deserves careful attention because indoor fuel-burning devices may create fire or carbon-monoxide hazards. Choose equipment intended for its location, follow the manufacturer’s ventilation instructions, and never use outdoor-only burners inside a home, garage, or tent. A no-cook food reserve may be safer and cheaper for an apartment than buying a stove that cannot be operated properly.
Other mid-range additions include a fire extinguisher, work gloves, protective eyewear, a basic tool set, duct tape, tarps, water-resistant storage, and a modest amount of cash in small denominations. These purchases address predictable problems such as a leaking pipe, broken window covering, blocked door, or payment-system outage. They do not replace professional repair, but they can reduce exposure while help is unavailable.
Consider a household that has food and water but loses power during a winter storm. A lantern, charged phones, warm clothing, blankets, and a safe plan for staying warm may matter more than a large battery station. Conversely, a hot-climate household may prioritize shade, drinking water, cooling strategies, and medication storage. The weak assumption is that one universal “prepper” loadout fits every home. Choose items according to the failure being managed, then practice using them before the purchase becomes urgent.
Higher-Cost Purchases and Testing
Expensive equipment should follow a demonstrated need. A generator, solar charging system, large battery, water storage system, or vehicle evacuation setup can extend capability, but each introduces maintenance, fuel, weight, noise, storage, and safety demands. The purchase price is only part of the cost. Fuel may expire, batteries may lose capacity, and equipment may require outdoor placement or periodic inspection.
Generators illustrate the tradeoff clearly. A small unit may run selected devices but not heating or cooling systems. A larger model costs more and may require proper transfer equipment and installation. A battery station is quieter and simpler to store, yet its runtime depends on the load and recharge options. Compare the actual wattage of the refrigerator, medical device, communication equipment, or other priority load instead of buying from a vague promise of “whole-home” coverage.
Water treatment equipment also needs realistic testing. Confirm what contaminants a filter is designed to address, its replacement schedule, flow rate, and treatment capacity. A filter intended for taste improvement should not be treated as a universal answer to unsafe water. Keep a backup such as stored water and follow public-health instructions during contamination events.
Before buying advanced gear, run a household drill. Turn off selected utilities briefly, prepare meals, locate supplies in darkness, charge devices, and record what was difficult. If the family cannot find the batteries or does not know how to operate the stove, more equipment will not solve the weakness. Testing exposes gaps in placement, instructions, compatibility, and decision-making. Buy the upgrade that removes the most serious observed bottleneck, not the item with the longest feature list.
A Maintenance System That Protects the Budget
Preparedness is a working inventory, not a one-time shopping event. Food dates, battery condition, medication availability, water-container cleanliness, fuel condition, and seasonal clothing all change. A simple monthly inspection can catch problems before an outage or evacuation. Mark purchase dates, keep newer items behind older ones, and use ordinary pantry goods in rotation.
Group supplies by task rather than scattering them across the house. Keep lighting together, place sanitation supplies near the intended waste area, and store documents where they are protected but quickly accessible. Label containers with contents and inspection dates. A small written inventory prevents duplicate purchases and reveals whether supplies cover one person, several people, or pets.
Budgeting works better in stages. Set aside a small amount for the first layer, pause to use and evaluate it, then fund the next weakness. Watch for signs that the system is failing: expired food that no one eats, missing cables, leaking containers, dead batteries, inaccessible storage, or equipment no adult in the home can operate. Those observations are more useful than a shopping list generated without context.
Review plans after a move, new medication, change in household size, severe weather experience, or vehicle change. Evacuation needs may require go-bags, transport arrangements, maps, pet carriers, and destination contacts, while a stay-at-home disruption may call for more water, sanitation, and power support. Linking this work to a broader beginning prepper list by priority and cost keeps purchases tied to decisions rather than accumulation.
Frequently Asked Questions
What should a beginner prepper buy first?
Start with stored drinking water, familiar shelf-stable food, sanitation supplies, lighting, basic first aid, medications, and a way to receive local alerts.
How much should a beginning prepper spend?
Use a staged budget rather than a fixed target. Cover immediate needs first, test them, and then spend on the specific limitation the test reveals.
Is a generator necessary for basic preparedness?
No. A generator may help with selected high-priority loads, but lighting, power banks, warm clothing, and no-cook food can cover many short outages at lower cost.
Should preppers buy freeze-dried food?
It can be useful for long storage, but ordinary foods the household rotates may provide better value initially. Check taste, preparation needs, water requirements, and dietary fit.
How often should preparedness supplies be checked?
Inspect supplies at least monthly for batteries, water containers, medications, food rotation, damaged packaging, and missing equipment. Perform a fuller review when household circumstances change.
Further Reading
Authoritative Sources
Build A Kit ready.gov
Offers government guidance on assembling supplies for common disruptions, including water, food, light, and communication items
Emergency Water Supply cdc.gov
Explains safe handling and use of water when normal service is interrupted or a water advisory is issued
Power Outages ready.gov
Provides practical safety considerations for lighting, backup power, food, and heating or cooling during an outage
Conclusion
A strong starter inventory is built from the problems a household is most likely to face, not from expensive gear marketed as essential. Put water, usable food, sanitation, medical needs, lighting, alerts, and document access at the front of the budget. Add cooking, charging, fire safety, tools, cash, and weather-specific supplies only after the first layer is stored and tested. Advanced purchases deserve a calculation of fuel, capacity, maintenance, placement, and operator skill. Review the supplies monthly, rotate what the household actually uses, and run a short outage drill. The next purchase should remove a known weakness—such as inadequate water storage, unsafe cooking, or poor communication—so each dollar produces a measurable improvement in readiness.