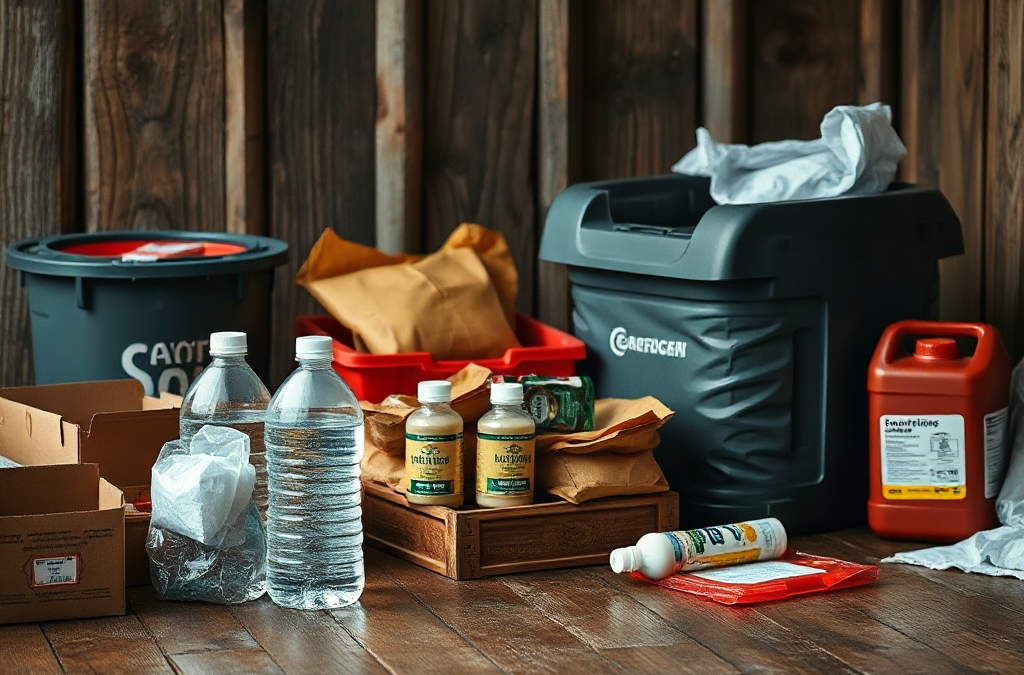
A premade emergency kit reduces the time between deciding to prepare and having a usable collection of supplies. Most packages group items such as flashlights, batteries, a whistle, basic first-aid materials, sanitation products, blankets, and simple tools in a portable bag or tub. That packaging has practical value: supplies are easier to locate, carry, and inspect than loose purchases scattered through a home.
The limitation is that a labeled kit is not automatically a complete solution. A compact product may contain a small amount of water or food, but that does not establish how long it will serve a household. A kit designed for one person may be inadequate for four people, while a general first-aid pouch may omit prescription medicines, infant supplies, allergy products, or equipment used by someone with a disability. Read the itemized contents rather than relying on phrases such as “family emergency pack.”
Premade kits work especially well when time, storage space, or shopping access is limited. A renter moving into a new home, a student keeping supplies in a vehicle, or a person assembling a first workplace kit may reasonably value speed over customization. The purchase also creates a visible starting point for a broader emergency supply system.
Common failure points deserve attention. Batteries may be mismatched with the flashlight, food may require preparation that is impossible during a utility outage, and the carrying case may be too small for water or warm clothing. Treat the package as an inventory to audit, not as proof that every need has been covered.
Where a Custom-Built Kit Has the Advantage
Building your own kit gives you control over quantities, compatibility, and personal requirements. Instead of accepting a generic food bar, you can select shelf-stable foods your household will actually eat, such as canned beans, nut butter, crackers, dried fruit, or ready-to-eat meals. You can choose a water-storage method that fits the available space and add an opener, cups, and sanitation supplies that make those items usable.
Customization matters most where generic products routinely fall short. A household with a baby may need formula, bottles, diapers, and cleaning supplies. A pet owner needs food, a leash, waste bags, and a carrier or restraint plan. Someone who uses a mobility aid may need spare batteries, repair tools, transfer assistance information, or a way to keep the aid accessible if furniture shifts. These needs are rarely handled well by a one-size-fits-all box.
A self-built kit can also reflect the actual hazard and living arrangement. An apartment resident may prioritize a compact fire extinguisher, shoes near the bed, and supplies that can be carried downstairs. A rural household may need larger water containers, animal supplies, and tools for longer interruptions. A driver may build a separate vehicle kit with seasonal clothing, a charger, reflective gear, and items suited to being stranded rather than sheltering at home.
The tradeoff is responsibility. You must compare product quality, track dates, test equipment, and prevent important items from being divided among too many hiding places. A homemade collection can look comprehensive while lacking a working light or a safe way to open food. Use a written inventory and test each powered device with the batteries stored beside it. A custom kit is superior only when it is maintained as deliberately as it was assembled.
Comparing Cost, Quality, and Maintenance
Price comparisons are meaningful only when the contents and quantities match. A low-cost premade kit may appear economical because it includes many small items, but several tiny tools may be less useful than one durable flashlight, a larger first-aid supply, or additional water storage. Conversely, buying every item separately can lead to premium purchases that exceed the household’s realistic budget.
Premade products shift part of the selection work to the seller. That can improve convenience, but quality varies between components. Inspect stitching, zipper strength, battery type, packaging dates, tool construction, and food labels. A kit intended for a closet should not be judged by the same standard as one carried on foot, where weight and durability become more consequential. The bag itself should not consume so much space that essential additions must be left outside.
Building from scratch allows staged spending. A household can first secure light, water, sanitation, basic food, and a way to communicate, then add cooking equipment, comfort items, documents, and specialized needs. This approach often produces better value because each purchase answers a known gap. Its weakness is delay: repeatedly researching options can leave the household without a functional baseline.
Maintenance affects both choices. Replace expired food and damaged packaging, recharge power banks, rotate water according to the container maker’s guidance, and check that seasonal clothing still fits. Store a printed inventory with purchase dates and review it after a move, new prescription, pregnancy, pet adoption, or change in household size. The most expensive mistake is not choosing the wrong format; it is forgetting what was bought and discovering the gap during an outage.
A Practical Hybrid Buying and Building Method
A hybrid method combines the fast starting point of a premade kit with the accuracy of a household-built inventory. Begin by choosing a container or basic package that has a clear contents list and enough room for additions. Before storing it, separate included items into three groups: immediately useful, inadequate in quantity or quality, and irrelevant to the people who will use the supplies.
Next, build around actual functions rather than product categories. Someone needs to drink, eat, see, stay warm or cool, maintain hygiene, manage minor injuries, receive information, and move or communicate when conditions change. This functional check exposes omissions that a long item list can hide. For instance, canned food without an opener is not a complete meal option, and a phone charger without a compatible power source does not solve a prolonged outage.
Use a short priority sequence when money or time is limited:
Immediate operation: water, light, basic food, sanitation, and essential medicines.
Household fit: infant, pet, dietary, medical, mobility, and language needs.
Usability: openers, spare batteries, charging cables, clothing, and labeled storage.
Resilience: duplicates, repair tools, documents, and supplies for a vehicle or evacuation.
Test the result with a simple simulation. Turn off household lighting briefly and ask whether every person can find the kit, produce light, access water, open food, and locate critical medicines without searching online. If the process stalls at a missing cable, confusing packaging, or inaccessible shelf, revise the kit. This exercise is more informative than counting items because it tests whether supplies work together under pressure.
Do not let the hybrid approach become an excuse to buy a poor-quality package. A premade kit with unsuitable food, weak tools, or misleading quantities may take longer to correct than a carefully selected starter set. Compare the cost of replacing weak components with the cost of buying core supplies individually, then keep only items that pass the household’s practical test.
Choosing the Better Fit for Your Household
Choose a premade kit when speed, portability, or limited shopping capacity matters more than exact customization. It is a sensible first move for a new renter, a dorm room, a workplace drawer, or a vehicle where a compact baseline is better than having nothing. Confirm the intended number of people, inspect the food and water provisions, and reserve space for personal additions.
Build your own when the household has specialized requirements, established preferences, or enough time to compare durable equipment. Custom assembly is particularly useful for multiple family members, pets, strict dietary needs, regular prescriptions, extreme seasonal conditions, or separate home and vehicle use. The benefit is not theoretical flexibility; it is having supplies that a particular person can identify, operate, consume, or carry.
Budget and storage can change the answer. A person with limited funds may get more practical coverage by buying a flashlight, water containers, shelf-stable food, sanitation items, and medicines separately rather than paying for a decorative bag full of minor accessories. Someone in a small apartment may need a compact, prioritized kit instead of a large assortment that blocks access or becomes impossible to move.
Avoid two assumptions: that a higher price guarantees better contents, and that a homemade kit is automatically more thoughtful. Ask whether the supplies cover the likely duration, whether every item has a clear use, and whether the kit can be reached quickly. Readers comparing premade and self-built options should make a written gap list after inspecting a product, then buy only what closes those gaps. That creates a measurable decision instead of a label-based one.
For hazard-specific supply quantities, storage guidance, and household planning questions, consult current information from government emergency-management agencies, public health departments, and recognized consumer safety organizations. Those sources can provide advice that changes with local hazards, climate, water conditions, and public alerts.
Frequently Asked Questions
Are premade emergency kits worth buying?
They can be worthwhile as a fast baseline, especially when the contents are clearly listed and the package is easy to carry. Audit the kit before relying on it.
Is it cheaper to build an emergency kit yourself?
Often, separate purchases provide better value because you pay for needed quantities rather than bundled accessories. Staged buying also spreads the cost.
What should be added to a premade kit first?
Add household-specific medicines, water, food that needs no unavailable preparation, sanitation supplies, lighting, batteries, and infant or pet necessities.
How often should an emergency kit be checked?
Review it on a recurring schedule and after household changes. Replace expired food, damaged items, depleted batteries, and supplies that no longer fit.
Can one kit serve both home and car use?
It can serve as a starting point, but home sheltering and roadside delays need different items. A compact vehicle kit should complement, not replace, the home supply.
Conclusion
The better choice depends on how quickly you need a baseline, how specialized your household is, and whether you will maintain what you buy. Premade kits offer speed and organized storage, but their quantities and generic contents require scrutiny. Building your own kit offers stronger control over food, water, medicines, mobility needs, pets, and local conditions, while demanding more time and inventory discipline. For many people, a hybrid delivers the most practical result: purchase a sound starting container, test every component, replace weak items, and add supplies based on actual household use. Keep the finished kit accessible, label it clearly, and review it after meaningful changes. A smaller kit that people can find and use is more valuable than a larger package that remains untested.
How Mitigation and Preparedness Solve Different Problems
Mitigation changes the conditions that make harm more likely or more severe. Preparedness improves the household’s ability to function when a hazard, outage, or disruption occurs despite those changes. The distinction matters because a family can own useful supplies while leaving a preventable physical hazard untouched, or make expensive home improvements without knowing how it will obtain water, medicine, information, or transportation during an interruption.
Consider a home in a wildfire-prone area. Replacing combustible material near the structure, clearing debris from roof valleys, and keeping vents protected may reduce the chance that embers ignite the building. Those are mitigation actions. Storing drinking water, maintaining a battery-powered way to receive alerts, keeping important documents accessible, and deciding where household members will meet are preparedness actions. The first group addresses exposure; the second addresses capability and continuity.
The two approaches overlap but are not interchangeable. A safer roof does not provide a way to leave if an evacuation order is issued. A packed vehicle does not compensate for blocked gutters that allow heavy rain to enter the house. The best choice depends on the hazard, the home’s condition, the likely warning time, and the consequences of failure.
A useful first question is whether the proposed action changes the hazard’s effect on the building or changes the household’s response after the event begins. If it changes the building, site, or exposure, it is usually mitigation. If it supports decisions, sheltering, evacuation, communication, or basic needs during disruption, it is usually preparedness. For a broader comparison, see Mitigation versus preparedness for household risk as a household decision rather than a choice between competing labels.
Household Mitigation Measures That Reduce Exposure
Household mitigation works best when it targets a known pathway of damage rather than adding general protective products. Water enters through low openings, roof failures, overwhelmed drainage, or sewer connections; fire spreads through nearby combustible material, embers, and vulnerable vents; wind damage often begins with weak attachments, unsecured outdoor items, or broken glazing. Identifying that pathway makes the work more precise.
Start with observations that do not require specialized equipment. Look for water stains, recurring dampness, loose railings, overloaded storage on high shelves, trees touching the roof, aging extension cords, and appliances located where a leak could reach them. Anchor heavy furniture where appropriate, keep exits clear, and place breakable or hazardous items away from beds and frequently used paths. These measures may cost little but can reduce injury and make later response easier.
More substantial work requires tradeoffs. A sump pump may reduce basement water risk but depends on electricity and maintenance. Shutters or window protection may reduce wind-related breakage but need to fit correctly and be accessible when a warning is issued. Roof, electrical, plumbing, and structural changes should be evaluated against local conditions and professional requirements rather than copied from a generic checklist. An improvement that is incorrectly installed can create misplaced confidence or introduce a different hazard.
Use a simple priority test: address hazards that are both likely and difficult to manage once they begin. A loose water heater, an obstructed exit, or a known electrical fault deserves attention before buying another specialty container. After each change, check whether it produces a visible improvement: water is diverted away from the foundation, furniture remains stable when gently tested, exits open without moving stored goods, or outdoor objects are no longer available to become projectiles. Mitigation is failing when the underlying exposure remains unchanged or the measure cannot be maintained.
Preparedness Capabilities for Disruption and Recovery
Preparedness gives a household options when normal services, routines, or access routes are interrupted. Its value comes from redundancy: more than one way to obtain information, illuminate a room, contact a person, manage medication, and reach a safer location. Supplies matter, but they are only useful when household members know where they are, how they work, and what limitations apply.
Build around the first problems a household would face. Drinking water and ready-to-eat food support short-term sheltering, while prescription access, glasses, infant supplies, mobility equipment, and pet needs may determine whether staying home is realistic. A flashlight is more useful when its batteries are fresh and every person knows where it is. A phone list is more useful when it includes an out-of-area contact and is available on paper if charging or network access fails.
Preparedness also includes decisions made before pressure rises. Identify two ways out of the home, a meeting location, transportation options, and the conditions that would trigger leaving rather than waiting. Households with children, older adults, disabilities, pets, or limited mobility should test the plan in ordinary conditions. A route that looks short on a map may require stairs, a narrow doorway, or a vehicle transfer that is not workable under stress.
A common weakness is buying supplies without practicing the associated task. A portable stove may require ventilation, fuel management, and a safe operating surface; a radio may need a channel or alert setting configured; stored water may be inaccessible if it is placed in a hot garage behind heavy boxes. Test one capability at a time. Signs of progress include quicker access to essentials, fewer unanswered household decisions, and the ability to operate key items without internet instructions. Preparedness is incomplete when the supplies exist but the process depends on one person’s memory.
A Practical Order for Spending Time and Money
The most efficient household risk program usually combines immediate low-cost mitigation with preparedness for hazards that cannot be removed. Begin with conditions that could cause serious harm quickly: blocked exits, unstable heavy objects, fire sources near combustibles, exposed electrical problems, and water intrusion that is already occurring. Correcting these weaknesses often has greater value than expanding a supply collection.
Next, match preparedness to the household’s plausible operating scenario. A high-rise apartment may prioritize stair access, smoke awareness, and a compact carry kit, while a rural home may need longer travel distances, generator safety knowledge, and water arrangements. A tenant may focus on movable measures and communication with the property manager; a homeowner may have more authority to alter drainage, roofing, landscaping, or utility protection. Budget constraints should shape sequence, not eliminate the effort entirely.
Use this order when priorities compete:
Remove immediate hazards: clear exits, stabilize objects, correct obvious fire or electrical risks, and stop known leaks.
Invest in larger improvements: choose building or site upgrades after identifying the specific exposure they address.
Review and test: reassess after seasonal changes, renovations, new household members, or altered medical needs.
This sequence avoids a false choice between mitigation and preparedness. For example, sealing a basement opening may reduce recurring damage, but stored water and a working light remain necessary during a power outage. Conversely, purchasing a generator without addressing carbon-monoxide risks, fuel storage, transfer arrangements, or maintenance can increase danger rather than improve resilience. Choose the measure that reduces the greatest credible consequence per unit of time or money, then add the capability needed if that measure fails.
Common Mistakes in Household Risk Decisions
The first mistake is treating preparedness supplies as proof that a home is safe. Boxes of food do not correct a blocked exit, and a full vehicle does not make a damaged road passable. Conduct a physical walk-through of the home before expanding inventories. Note where people sleep, how they leave, what could fall, where utilities are controlled, and which items become inaccessible during a power or water interruption.
The second mistake is applying a single solution to every hazard. Sandbags may have limited value in some flood conditions and cannot address water entering through a different route. A generator can provide electricity but may be unsuitable for an apartment, unsafe indoors, or impractical without fuel and maintenance. A fire extinguisher may be useful for a small, early-stage fire but is not a reason to remain near a spreading fire. Match each measure to its mechanism and its stopping point.
Overconfidence creates another failure mode. A household may assume warnings will arrive, roads will remain open, or one person will always be available to make decisions. Build alternatives without claiming certainty: keep paper contact information, know how to shelter if travel is unsafe, and assign more than one person to essential tasks. Review assumptions with anyone who would actually use the plan, including children and people who need assistance.
To wrap up, neglecting maintenance turns both categories into temporary gestures. Check batteries, inspect stored water and food dates, confirm that mobility aids remain accessible, examine seals and fasteners, and revisit outdoor conditions after storms or seasonal growth. A useful household review asks three questions: what exposure has changed, what capability has degraded, and what action would reduce the next likely failure? Recording the answer keeps risk management connected to the actual home rather than to a shopping list. The related household risk comparison can help organize that review.
For hazard-specific decisions, consult local emergency management offices, fire departments, public health agencies, building professionals, and utility providers. Their guidance can reflect local flood, wildfire, storm, earthquake, housing, and evacuation conditions more accurately than a universal household list.
Frequently Asked Questions
What is the main difference between mitigation and preparedness?
Mitigation reduces exposure or expected damage before an event, while preparedness builds the supplies, skills, information, and decisions needed during disruption.
Should a household prioritize mitigation or preparedness first?
Correct immediate physical hazards first, then protect essential functions and build response capabilities. The order may change when a specific local hazard is imminent.
Is buying emergency supplies considered mitigation?
Usually no. Water, food, lighting, medication access, and communication equipment are preparedness resources because they support the household after disruption begins.
Can mitigation eliminate the need for preparedness?
No. Even effective home improvements cannot remove every hazard or guarantee uninterrupted utilities, transportation, warnings, or outside assistance.
How often should household risk measures be reviewed?
Review them after major weather, renovations, moves, new medical or mobility needs, household changes, and at regular seasonal intervals so equipment and assumptions remain usable.
Conclusion
Household risk decisions become clearer when mitigation and preparedness are assigned different jobs. Mitigation should reduce known exposure through actions such as clearing exits, securing heavy objects, controlling water pathways, and addressing fire or electrical hazards. Preparedness should preserve essential functions through accessible supplies, medication arrangements, communication methods, lighting, transportation choices, and practiced decisions. Prioritize the weaknesses that could create severe consequences quickly, then test whether each measure works under the conditions in which it would be used. Avoid expensive equipment that introduces new safety, maintenance, or access problems. A short household walk-through, followed by one physical improvement and one capability test, provides a more reliable starting point than choosing between two labels or building an unexamined stockpile.
Assess Functional Needs Before an Evacuation Order
Effective evacuation planning begins with the adult’s functional needs, not with a generic supply list. A person who walks short distances at home may still need a wheelchair for a long corridor, a rest period between floors, or assistance managing uneven ground. Someone with a sensory, cognitive, or communication disability may need clear instructions, reduced noise, extra processing time, or a familiar support person. These differences determine how quickly an evacuation can occur and which alternatives remain safe.
Write down what assistance is needed for ordinary tasks: moving from bed to a chair, using stairs, opening doors, toileting, eating, communicating pain, and managing equipment. Record preferred language, communication tools, hearing or vision supports, and any movements that cause injury or distress. The adult should lead these decisions whenever possible. A well-intended helper who lifts without consent or training can cause a fall, shoulder injury, or loss of dignity.
Separate essential support from convenience. Essential items might include a power wheelchair, hearing aids, glasses, transfer board, continence supplies, oxygen equipment, glucose supplies, or a communication device. Convenience items may improve comfort but can wait if carrying them delays departure. The distinction matters when a building is filling with smoke, a flood is approaching, or an accessible vehicle has limited space.
A practical assessment should answer four questions:
What can the adult do independently, and for how long?
What task requires another person, specialized equipment, or medical advice?
What changes when the adult is tired, frightened, overheated, or in pain?
Which support is essential if power, elevators, cell service, or a familiar caregiver is unavailable?
Review the answers after a medication change, injury, move, equipment replacement, or change in caregivers. The Preparedness aspects of evacuation for disabled adults are personal and change over time; an outdated profile can be more dangerous than having no written plan because it creates false confidence.
Build Routes, Transportation, and Assistance Around Reality
An accessible evacuation route is more than a marked exit. It must connect the person’s room to a safe meeting point, continue through doors and outdoor surfaces, and remain usable when conditions deteriorate. Check thresholds, narrow hallways, ramps, stair alternatives, automatic doors, lighting, pavement, snow, and likely crowding. Elevators may be unavailable during a fire or power outage, while ramps can become impassable during flooding or debris. Identify at least one route that does not depend on a single feature.
Transportation planning should specify the vehicle, driver, loading method, and destination. A wheelchair-accessible van may solve a mobility problem but still fail if the ramp cannot deploy on a steep street or if the chair cannot be secured. A private car may work for a folding chair and short trip, yet be unsuitable for a heavy power chair or complex medical equipment. Ask transportation providers or emergency managers what information they need, but never assume that a registry guarantees immediate transport.
Assign named people rather than writing “family will help.” The primary helper should know the adult’s transfer method, communication preferences, service-animal arrangements, and limits. A second helper should be prepared to take over if the first person is injured, delayed, or separated. If assistance involves lifting, consult a qualified clinician or trained professional about a safer technique; improvised carrying can harm both people.
Choose destinations for usability, not merely availability. Confirm entrance access, sleeping arrangements, bathroom access, charging options, medication storage, and whether the facility can accommodate a service animal or personal care routine. A shelter may provide protection but not the same equipment or privacy available at home. When a household can safely relocate to a known accessible destination, that may reduce strain, but it should not be treated as a substitute for public emergency options.
Test the route at a realistic time and with the actual mobility device. Notice whether a door closes too quickly, a battery loses charge during the trip, or the adult becomes exhausted before reaching transport. Those observations are more valuable than a map alone. Keep the route plan with the Preparedness aspects of evacuation for disabled adults records, and give a copy to trusted helpers only with the adult’s consent and attention to privacy.
Protect Medical Equipment, Medications, and Communication
Medical and assistive equipment must be planned as part of evacuation operations. List the equipment that keeps the adult mobile, safe, informed, or medically stable, then identify its power source, charging cable, battery type, protective case, and replacement parts. A power wheelchair, ventilatory support device, suction equipment, or refrigerated medication may require a different departure sequence from ordinary belongings. Ask the prescribing clinician, pharmacist, or equipment supplier about safe transport and backup power rather than improvising technical decisions.
Keep medications in labeled containers and carry an updated medication list with doses, prescribing contacts, allergies, and relevant diagnoses. A short grab bag can hold essential daily items, while a larger stored kit can contain backups and maintenance supplies. Avoid transferring medicines into unlabeled bags, and check expiration dates during routine household reviews. The goal is rapid access and accurate identification, not simply having the largest quantity.
Communication plans should work if a phone is lost, a network is congested, or the adult cannot speak. Use plain-language cards, a text template, a picture board, a speech-generating device, or a written description of how the person expresses yes, no, pain, and urgent needs. Include the person’s name, preferred contact, mobility needs, allergies, and instructions for communicating respectfully. Do not mistake an inability to speak for an inability to understand.
Equipment protection involves tradeoffs. A hard case protects fragile devices but adds weight; a spare battery improves resilience but may require careful handling and charging; keeping every accessory together saves search time but creates one point of loss. Divide critical items between two clearly marked bags when practical. Attach identification discreetly, record serial numbers, and photograph equipment for later replacement or insurance discussions without exposing unnecessary personal information.
A common failure is planning for the device but not for its consumables. Catheter supplies, charging adapters, batteries, tubing, cleaning materials, cushions, and repair tools may determine whether the device remains useful. Rehearse packing the exact equipment, then verify that the adult can still reach the vehicle, shelter bed, bathroom, and charging location after arrival.
Practice the Plan and Fix Its Weak Points
Practice converts a written intention into a sequence people can perform under pressure. Begin with a low-stress walk-through rather than a timed drill. The adult can identify which instructions feel confusing, which movement causes fatigue, and which helper actions feel unsafe. Repeat the exercise under different conditions, such as a blocked primary exit, a missing caregiver, or a vehicle parked farther away.
Use a simple order of operations: receive and verify the official alert, contact the designated support person, secure the adult’s immediate needs, collect essential equipment and medication, move by the safest available route, and report arrival. The exact order may change with the hazard. Smoke, fast-moving water, extreme heat, and chemical releases create different time pressures. A plan that works for a planned storm relocation may be too slow for a building fire.
After every practice, record observable results rather than opinions. Could the adult understand the alert? Did the helper know how to open or move the equipment? Was the battery sufficient? Did the destination have an accessible bathroom? Did fatigue require a longer route or earlier departure? Signs of a functioning plan include fewer verbal prompts, a predictable packing sequence, and a clear backup when one step fails. Signs of failure include dependence on an untrained person, a route that requires an elevator, or equipment that cannot be charged after arrival.
Practice should respect autonomy and consent. Adults may reject a proposed method because it is painful, frightening, culturally unsuitable, or inconsistent with their independence. Treat that response as planning information. Compare alternatives: a professional transport service may be safer for complex transfers, while a trusted neighbor may be faster for a short warning window. Neither option is automatically best; availability, training, distance, and the hazard determine the choice.
Keep a short departure card near the main exit and a digital copy with trusted contacts. Update it whenever the adult’s needs, equipment, medications, address, or support network changes. The Preparedness aspects of evacuation for disabled adults work best when they are rehearsed as ordinary household operations rather than saved for the day an evacuation order arrives.
Frequently Asked Questions
Should a disabled adult evacuate with a general household group?
Usually, yes, when the group understands the person’s needs and has a backup helper. The plan should still allow the adult to make choices and should not assume that one caregiver will remain available.
What if the building’s elevator is the only accessible route?
Ask building management and local emergency services about the building’s evacuation procedures and any designated assistance process. Do not use an unsafe stair transfer or improvised carry without appropriate training and hazard assessment.
How should power wheelchair users prepare for an evacuation?
Record the chair’s charging method, battery details, repair contact, and safe transport requirements. Arrange a compatible vehicle and protect the charger, cushion, controls, and other essential components from damage or separation.
What communication information should be carried?
Carry the person’s preferred communication method, emergency contacts, allergies, medications, mobility assistance needs, and instructions for communicating yes, no, pain, and urgent requests. Keep information current and share it appropriately.
How often should an evacuation plan be practiced?
Review it after meaningful changes in health, equipment, medication, housing, or caregivers, and practice whenever the route or destination changes. Short, realistic walk-throughs often reveal more than a single timed drill.
Further Reading
Authoritative Sources
People with Disabilities ready.gov
Offers federal preparedness information focused on disability-related planning, communication, equipment, and support networks
People with Disabilities and Others with Access and Functional Needs fema.gov
Explains emergency-management considerations for access, functional needs, and inclusive response planning
Disaster Preparedness for People with Disabilities redcross.org
Provides practical household planning prompts for mobility, communication, medical needs, and support contacts
Conclusion
Reliable evacuation preparation for a disabled adult depends on fit: the route must fit the mobility device, the transport must fit the equipment, the communication method must fit the person, and the destination must support daily care. Identify functional limits during fatigue and stress, name trained primary and backup helpers, protect medications and power supplies, and verify accessible transport before a warning becomes urgent. A written plan is only a starting point. Walk through it, test the actual doors and surfaces, and correct every step that depends on an elevator, one caregiver, a charged phone, or an unverified shelter. Revisit the plan after health or equipment changes so evacuation remains a practiced, respectful choice rather than a rushed improvisation.
Stored food, water, batteries, and first-aid materials are useful only when they are accessible, suitable, and connected to a plan. A household may own several containers of drinking water yet still struggle if the containers are in a hot attic, if nobody knows how much is available, or if one person cannot lift them. Supplies address particular physical needs; preparedness also addresses decisions, coordination, information, and changing conditions.
Consider a winter power outage. A pantry may provide meals, but the household still needs a safe heating decision, a way to receive local updates, lighting that does not create a fire hazard, and a method for checking on someone who relies on powered medical equipment. A portable generator can add capability while introducing carbon monoxide and fuel-storage risks if it is operated incorrectly. Buying the item without learning its limits creates a false sense of security.
Stockpiling also has a maintenance problem. Batteries age, prescriptions expire, stored water may be neglected, children outgrow clothing, and dietary needs change. A large supply can be less useful than a smaller inventory that is labeled, rotated, and matched to the people who will use it. Use Emergency preparedness means more than storing supplies as a working principle: every purchase should connect to a capability, and every capability should be tested.
A practical household review asks four questions:
Can we access and use this item without outside help?
What condition makes it necessary, and what could make it fail?
Who is responsible for checking or operating it?
What is the backup if the item is lost, damaged, empty, or misunderstood?
These questions expose gaps that shopping lists miss. A radio without spare batteries, a vehicle without fuel planning, or a contact list stored only on a dead phone each solves part of a problem while leaving the operational risk intact.
The Skills and Information a Household Must Practice
Basic skills turn stored equipment into usable protection. Household members should know how to locate water shutoffs, electrical panels, fire extinguishers, first-aid materials, flashlights, and important documents. They should understand which actions are safe for their property and which situations require emergency services or professional assistance. The goal is not to make everyone an expert; it is to prevent confusion during the first minutes of an incident.
Information deserves the same attention as physical supplies. Keep paper copies of phone numbers, medical details, insurance contacts, prescriptions, pet-care instructions, and meeting locations where household members can find them. Digital copies may be helpful, but they should not be the only version. A locked phone, depleted battery, damaged network, or forgotten password can make an otherwise complete record unavailable.
Practice should resemble the conditions people may face. Try finding the shutoff valve with the lights off, assembling a light source without using a phone flashlight, or preparing a meal without the usual appliance. During a drill, notice whether instructions are understandable to a child, visitor, or person who did not make the original plan. A plan that depends on one organized adult is fragile when that person is away, injured, or unable to communicate.
There is a useful difference between memorizing procedures and rehearsing them. Reading how to use a fire extinguisher is not the same as identifying the correct extinguisher, checking its condition, and knowing when leaving is safer than attempting to put out a fire. Similarly, owning a first-aid kit does not establish competence. Training from a recognized provider may be appropriate for first aid, CPR, or other skills, while manufacturer instructions and local authorities should guide equipment use.
Common failure signs include unlabeled supplies, conflicting instructions, missing access keys, and family members giving different answers about where to go. Correct those issues with short practice sessions rather than an elaborate annual event. After each exercise, record one improvement, such as moving documents to a reachable location or adding large-print instructions. For more household-specific planning, Emergency preparedness means more than storing supplies should include the abilities and limitations of every person who may need assistance.
Communication, Mobility, and Household Coordination
Communication planning matters because emergencies separate people, interrupt networks, and create conflicting information. Decide how household members will contact one another, where they will meet if home access is lost, and who outside the area can relay messages. A short text may succeed when voice calls are difficult, but no single method should be treated as guaranteed. Write down alternatives and make sure each person knows when to stop trying one channel and switch to another.
Location-specific decisions are more useful than a vague instruction to “leave if necessary.” Identify at least one nearby meeting place and one location farther away, then account for walking routes, road closures, mobility devices, pets, and public transportation. A person who uses a wheelchair may need a route without blocked curb cuts; a pet owner may need a carrier and a destination that accepts animals. These details determine whether a plan works outside a spreadsheet.
Household roles should be assigned without assuming that one person will always be present. One adult might monitor official alerts, another might gather medications, and an older child might bring the paper contact card. Assign backups and explain the trigger for each action. During a fast-moving event, people should not waste time deciding who is supposed to find the keys or call a relative.
A useful comparison is between a fixed plan and a decision plan. A fixed plan says exactly where everyone will go, which can be simple but may fail when a route or facility is unavailable. A decision plan identifies priorities and alternatives: remain indoors when authorities advise sheltering, leave when an official evacuation order or immediate danger requires it, and use the safest accessible route rather than the familiar route. Official alerts should take precedence over assumptions based on past events.
Test communication under realistic limits. Turn off home Wi-Fi for a brief exercise, use the paper contact list, and ask each person to explain the meeting arrangement. Check whether relatives understand that repeated calls can be less useful than a concise message. Review language, hearing, vision, and cognitive needs as well. A communication method that works for one household member may not work for another, so accessibility is an operational requirement rather than an optional add-on.
Turning Preparedness Into a Maintained System
Preparedness becomes dependable when it is maintained like a household system rather than stored as a one-time project. Start with the disruptions most plausible for the location and the consequences that would be hardest to manage. A short power interruption, severe weather warning, water-service failure, wildfire smoke event, or extended road closure may require different actions. Prioritizing every possible disaster equally can produce an expensive collection of supplies without a clear order of use.
Build the system in layers. The first layer covers immediate safety: alerts, lighting, essential medication access, basic first aid, and a way to obtain safe water. The next layer supports several days of reduced services, including food that household members will actually eat, sanitation supplies, charging options, and practical cooking arrangements. A later layer addresses recovery, such as copies of records, insurance information, cash access, repair contacts, and a process for documenting damage. The layers can expand as time and budget allow.
Budget constraints make prioritization more valuable than chasing a perfect kit. A household with limited funds may gain more from a reliable flashlight, stored water, medication coordination, and a paper contact list than from specialized equipment that no one has tested. Compare the cost of an item with its maintenance burden, training requirement, storage conditions, and likely usefulness. A bargain device that needs an uncommon battery may be less practical than a simpler model supported by supplies already in the home.
Set a recurring review tied to an existing routine, such as a seasonal household inspection. Check expiration dates, battery condition, clothing sizes, food preferences, vehicle needs, and contact details. Confirm that stored items remain reachable if a garage is blocked or a room is unsafe. Look for signs that the approach is working: people can locate key items quickly, explain the communication plan, and perform basic tasks without a single coordinator. Failure signs include forgotten responsibilities, inaccessible supplies, expired information, and drills that reveal no assigned backup.
After a real disruption or practice exercise, revise the plan based on observed friction. If cooking took too long, change the meal approach. If nobody heard the alert, improve notification settings or add another source. If a neighbor needed assistance, coordinate a reciprocal check-in where appropriate. A maintained system stays modest, specific, and adaptable. The purpose is not to predict every event but to reduce avoidable delays when normal routines stop working.
Frequently Asked Questions
Why are emergency supplies not enough?
Supplies cannot replace communication, practiced procedures, accessibility planning, or decisions about sheltering and evacuation. They are one part of a functioning preparedness system.
What should a household practice first?
Practice finding emergency contacts, essential medications, lighting, utility shutoffs, and exits. Then test the plan under a realistic constraint, such as no internet or limited lighting.
How often should preparedness supplies be reviewed?
Review them at least seasonally and whenever household members, medications, vehicles, pets, or local risks change. Replace expired or inaccessible items promptly.
How can people prepare on a limited budget?
Prioritize safe water, lighting, medication access, paper contacts, basic sanitation, and food that is already familiar. Add equipment only after confirming that someone can operate and maintain it.
What makes a household plan fail?
Plans commonly fail when they rely on one person, one communication channel, inaccessible supplies, outdated information, or assumptions that every emergency will unfold the same way.
Further Reading
Authoritative Sources
Make a Plan ready.gov
Provides federal guidance for household communication, shelter, evacuation, and individual needs
How to Prepare for Emergencies redcross.org
Offers practical preparation information for households, including emergency contacts and basic supplies
Emergency Preparedness for Children cdc.gov
Helps families account for children’s health, routines, and support needs during disruptions
Conclusion
A capable emergency setup connects supplies with people, information, skills, and decisions. Review the risks that could interrupt your household first, then confirm that everyone can find essential items, receive official instructions, communicate through an alternate method, and reach an agreed location. Add accessibility needs, medications, pets, transportation limits, and recovery documents instead of treating them as afterthoughts. Keep purchases modest until the basics are tested; an unused device or inaccessible stockpile adds less value than a simple system people understand. Schedule seasonal checks, practice one realistic scenario, and change the plan according to what caused delay or confusion. That process turns emergency preparation from a storage task into a repeatable household capability.
Set Household Priorities and Assign Responsibilities
A useful two-person household plan begins with decisions, not shopping. The residents should identify which disruptions are most plausible in their location, how long they could remain without normal services, and which personal needs would make the first day difficult. A winter power outage, wildfire smoke event, flood warning, water interruption, and medical emergency may require overlapping supplies but different actions. The plan should state what each person does, where they meet, and which decisions can be made independently if they become separated.
Assigning roles prevents a common failure: both people assume the other person charged the phones, collected medication, or checked the official alert. One person might manage communication, documents, and information verification while the other handles water, food, lighting, and utility checks. These roles are not permanent specialties. Each person should be able to perform the other role because injury, work obligations, or a blocked route may leave one resident alone.
Write a one-page action sheet with three branches: shelter at home, leave temporarily, and contact or reunite after separation. Include names and phone numbers on paper, the address of an out-of-area contact, the location of shutoff valves, and two meeting places. A nearby meeting point may be useful when local travel is possible; a second location outside the immediate area is more suitable when a neighborhood or building must be avoided.
Personal circumstances change the plan more than the number of people does. A person who uses refrigerated medication, mobility equipment, hearing assistance, a service animal, or a special diet needs specific backup arrangements. Pets, visitors, building access, and work schedules also affect timing. A compact preparedness plan example for a two-person household should therefore show ownership, location, and an alternative for each essential task rather than merely naming supplies.
Keep the plan realistic. Two adults with a vehicle and a reliable local network have different options from two people in an apartment without storage or one shared car. A printed plan hidden in an inaccessible drawer is less useful than a short copy near the exit, a digital copy available offline, and a second copy in a vehicle or work bag.
Build a 14-Day Supply System for Two People
A 14-day supply system should cover water, food, medication, sanitation, temperature control, lighting, and basic communication. Water deserves first priority because it is difficult to replace during a service interruption and is needed for more than drinking. Store commercially packaged water or clean containers in a cool, accessible place, and follow current public-health guidance for treatment and storage. Include a practical method for obtaining more water if the interruption lasts longer than expected.
Food should be familiar, shelf-stable, and usable with the available equipment. A two-person household might combine canned beans, fish or poultry, vegetables, fruit, oats, rice, pasta, nut butter, crackers, shelf-stable milk, and ready-to-eat meals. Choose foods that match normal eating habits so rotation is simple. A manual can opener, disposable utensils, basic cooking fuel where permitted, and a safe way to heat food matter as much as the cans themselves.
Do not treat calories as the only measure of readiness. A person with diabetes, food allergies, swallowing restrictions, or a low-sodium diet may not be able to use a generic emergency assortment. List routine medicines, backup prescriptions where legally and medically appropriate, first-aid items, glasses, hygiene products, and copies of essential health information. Medication storage may have temperature limits, so the plan should identify what happens if refrigeration fails instead of assuming a cooler solves every problem.
Divide supplies into three layers:
Immediate-use kit: Water, lights, phone power, essential medication, shoes, a radio, and sanitation items kept where they can be reached quickly.
Home reserve: Food, additional water, cleaning materials, batteries, cash, tools, and personal-care supplies organized by category.
Departure kit: Documents, chargers, medication, water, snacks, clothing, masks when appropriate, and small tools packed for each person.
This layered approach is more useful than placing everything in one large container. If broken glass, smoke, flooding, or a rushed departure prevents access to the pantry, the immediate-use and departure kits preserve options. Conversely, keeping all food in go-bags creates unnecessary weight and may leave the home without a practical reserve.
Budget limits should guide order, not eliminate planning. Buy ordinary foods during routine shopping, add a few compatible items over time, and prioritize water containers, lighting, medication needs, and sanitation before comfort products. A stockpile that cannot be carried, opened, cooked, or rotated is an expensive storage problem rather than a functioning household resource.
Plan Communications, Transportation, and Home Safety
Communication planning should answer three questions: how will each person receive verified information, how will they contact one another, and where will they go if the home is unsafe? Phones are useful but depend on battery power, network availability, and charging access. Keep charging cables with a tested power bank, save important numbers offline, and carry a written contact list. A battery or hand-crank radio can provide another information path, but it should be checked in the actual location where it will be used.
Use a contact routine that reduces confusion. For example, the household can agree that each person sends a short text when safe, avoids repeated calls when networks are congested, and contacts one designated person outside the area if direct communication fails. The message should include location, condition, and next intended action. An untested code word or complicated reporting schedule is less useful than plain language that both people can remember.
Transportation requires more than identifying a car. Keep the vehicle reasonably fueled, maintain a paper map, and identify routes that do not depend on one bridge, tunnel, or mountain road. If one person drives and the other does not, the second person should know the route, carry the keys when practical, and understand the household’s alternate transport options. A vehicle kit may include water, food, a flashlight, reflective clothing, a first-aid kit, seasonal clothing, and a phone charger, but it should not become so heavy that it compromises safe driving.
Home safety actions belong on the same sheet as evacuation information. Both residents should know how to shut off electricity, gas, and water when appropriate, but they should not operate equipment they cannot identify safely. Keep shoes, a light, and a way to unlock the exit near the bed. Secure tall furniture, maintain clear paths, and decide which room offers the best protection from the hazards most likely in the area. Smoke, carbon monoxide, and fire risks require working alarms and an exit plan; supplies cannot compensate for delayed detection.
A useful comparison is convenience versus redundancy. One smartphone with a long battery may feel sufficient during normal life, while a phone, paper contacts, radio, and agreed meeting point remain useful when a device is lost or a network fails. The mistake is collecting duplicate gadgets while omitting the simple actions that make them usable. Test every communication and transport step with both residents, including the person who normally handles household logistics.
Test, Rotate, and Adapt the Household Plan
A plan becomes dependable when the household practices it under modest conditions. Begin with a two-hour power interruption simulation: use only stored lighting, prepare a meal without the usual appliances, charge phones from the backup power source, and locate the paper instructions. The purpose is not to create discomfort for its own sake. It exposes practical failures such as a dead battery, an inaccessible can opener, inadequate lighting near the bathroom, or food that neither person will eat.
After the exercise, record what happened rather than relying on memory. Note how much water was consumed, which tasks took longer than expected, whether the radio worked indoors, and whether both people could find the shutoffs and exit supplies. Signs that the plan is working include quick access to essentials, clear role handoffs, usable food preparation, and communication that does not depend on one person’s phone. Signs of failure include repeated searching, conflicting instructions, expired medicines, overloaded bags, and supplies stored where heat, moisture, or theft can damage them.
Rotate consumables through normal use. Place newer items behind older ones, mark purchase or replacement dates, inspect containers for leaks, and check batteries, fuel, first-aid contents, and clothing at least seasonally. Water containers and food need storage conditions that match their labels and local guidance. A reminder on a calendar is more reliable than an annual intention, especially when the household has changing work schedules or frequent moves.
Review the plan after a near miss, illness, move, vehicle change, new pet, or major weather event. A two-person household may need separate office, car, or workplace kits if both residents are away when an incident begins. The plan should also state what happens when one person is unavailable: who checks the home, who contacts family, and which supplies can be carried alone.
Use the household plan as a living document, not a one-time purchase list. Rehearse one shelter-in-place scenario and one departure scenario, then simplify any step that requires too much equipment or memory. Clear instructions, accessible supplies, and practiced alternatives usually provide more value than adding another specialized item.
For hazard-specific advice, consult local emergency-management agencies, public-health departments, utility providers, and official guidance from national emergency agencies. Their instructions can clarify evacuation notices, water safety, medication storage, shelter locations, and local alert systems. Use those sources to adjust this preparedness plan to the hazards, housing type, and services in your area.
Frequently Asked Questions
How much water should two people store?
Use local emergency guidance as the baseline and account for drinking, food preparation, medication, and limited hygiene. Store more when heat, medical needs, pets, or unreliable resupply make the minimum impractical.
Should all preparedness supplies be kept together?
No. Keep immediate-use items accessible, a larger reserve in the home, and separate departure kits. This protects access if one storage area is blocked or evacuation happens quickly.
What food works best for a two-person emergency reserve?
Choose familiar shelf-stable foods that fit dietary needs and can be eaten or prepared with limited power. Include a manual opener and rotate the reserve through ordinary meals.
How often should the household practice the plan?
Run a short practice at least seasonally and whenever the household, vehicle, health needs, or housing changes. A brief exercise can reveal access and equipment problems before a real disruption.
What if one person is away when an emergency begins?
Agree on an out-of-area contact, two meeting locations, and a simple check-in message. Each person should carry essential contacts and know how to act without waiting for the other.
Conclusion
A strong two-person household plan connects supplies with decisions. Assign both residents overlapping responsibilities, protect access to water and medication, keep food usable without normal appliances, and separate immediate-use items from the home reserve and departure kits. Paper contacts, meeting places, utility information, and transportation alternatives address failures that a stocked pantry cannot solve. Practice a short outage simulation, note what was slow or confusing, and correct those weaknesses before expanding the inventory. Recheck the plan after seasonal changes, health changes, moves, or vehicle changes. The next practical step is to write the one-page action sheet, place it where both people can reach it, and test one sheltering and one departure scenario within the next few weeks.
Recognize the Tsunami Threat and Local Warning Signs
A coastal household needs to distinguish between an official warning and a natural warning. Official alerts may arrive through sirens, mobile notifications, radio, television, or local emergency-management channels. Natural signs can occur first, especially when an earthquake near the coast leaves little time for a formal message. A strong or prolonged earthquake, sudden withdrawal or rise of the sea, and an unusual roaring sound from the ocean should be treated as reasons to move inland or uphill immediately.
The danger is not limited to the beach. Low-lying neighborhoods, bays, river mouths, harbors, and coastal roads may funnel water farther inland. A household that lives several blocks from the shoreline should check the local tsunami evacuation map rather than assume distance alone provides safety. Elevation, terrain, bridges, and the shape of the coastline often matter more than a simple mileage estimate.
Do not wait to see whether the water change is temporary. A retreating shoreline may expose the seabed, but the first wave can follow quickly, and later waves may be larger. An official warning can also be issued for a distant earthquake, giving more time but still requiring prompt attention. Subscribe to local alerts and identify the government emergency-management account, radio station, or warning system used in your area. A social-media rumor is not a substitute for those channels.
A common failure is treating an alert as a request to investigate. Household members should already know that a warning changes the task from checking information to leaving the hazard zone. If a person feels strong shaking while near the coast, the immediate sequence is simple: protect against falling objects during the earthquake, then move away from the shore once the shaking stops, using the safest available route. More information can be gathered from a safe location.
Use the Tsunami preparedness plan for coastal households as a written reference, but make the warning response familiar enough that nobody has to search for instructions under pressure.
Build an Evacuation Route That Works on Foot
The most valuable part of a household plan is a route that reaches a designated safe area without depending on a car. Choose the nearest mapped high-ground location or vertical-evacuation structure identified by local authorities, then mark a primary walking route and at least one alternative. The route should avoid beaches, waterfronts, low bridges, creek channels, and roads likely to be closed by debris or traffic.
Walking is often more dependable than driving because evacuation traffic can become congested and roads may be damaged by the earthquake that caused the tsunami. A vehicle may still be appropriate for a person with limited mobility or for transporting someone who cannot safely walk, but that decision should be made before an event. If driving is necessary, the household should know which roads local officials designate for evacuation and should never abandon a vehicle where it blocks emergency access.
Walk the route at different times of day. Note steep grades, stairs, locked gates, construction, poor lighting, loose slopes, and locations where a family member could become separated. A route that looks short on a map may be difficult for a young child, an older adult, or someone using a wheelchair. Ask local emergency managers about accessible routes and evacuation assistance rather than relying on an unverified shortcut.
For households in apartments, hotels, or dense coastal districts, identify exits that do not depend on elevators. An earthquake may disable power or make elevators unsafe. A vertical-evacuation building can be useful where high ground is too distant, but residents should confirm that the structure is officially designated and learn which entrance and upper level to use. Higher ground is not automatically safe if the path crosses a channel or remains inside the mapped inundation zone.
Post a simple route map near exits and store a copy with household documents. Include a meeting point outside the hazard area, such as a named public facility or relative’s property. Avoid choosing a meeting point beside the shoreline or near a major intersection where emergency vehicles need access. The plan should state what happens if one person is away at school, work, or an appointment: each person evacuates independently and reports to the agreed contact when communications function.
Prepare Household Communications, Supplies, and Special Needs
Communication planning should assume that local phone networks may be overloaded or unavailable. Select an out-of-area contact who can collect brief updates from separated family members, and teach everyone to send a short text when possible instead of making repeated calls. A paper card with names, phone numbers, meeting locations, medical information, and nearby contacts is useful when a phone battery is low or a child needs help explaining the plan.
Supplies should support evacuation and temporary shelter, not encourage a household to remain near the coast. Keep shoes, durable clothing, water, ready-to-eat food, essential medicines, a small first-aid kit, a flashlight, spare batteries, a portable charger, a battery or hand-crank radio, hygiene items, cash, copies of key documents, and a whistle where they can be grabbed quickly. Store supplies in a portable container near an exit, but not where falling objects or floodwater can easily block access.
Water and food choices should match the plan. Heavy containers may be unsuitable for a long walk, while individually packed water and compact foods are easier to carry. Medicines should be managed according to the person’s prescription needs; a household should ask a pharmacist or clinician how to maintain an emergency supply rather than improvising. Infants may need formula, diapers, and feeding supplies. Pets require leashes, carriers, food, water, and identification, and not every public shelter accepts animals.
Special-needs planning must be specific. A person who uses mobility equipment may need a buddy, an accessible transport arrangement, or a preidentified refuge. Someone who is deaf or hard of hearing may need visual alert options, while a person with a cognitive disability may respond better to a short practiced instruction than to a detailed explanation. Neighbors can be included with consent, but assistance should not depend on one unavailable person.
A frequent mistake is storing a large home cache while neglecting the first few minutes of evacuation. The priority order is movement, people, essential medication, and only then additional supplies. Do not delay departure to collect valuables, shut off utilities, or assemble a bag from scattered rooms. Utility shutoffs should be addressed only if local authorities or emergency guidance directs it and doing so does not slow evacuation. For more household planning detail, use the household preparedness reference alongside local evacuation instructions.
Practice, Maintain, and Improve the Plan
A tsunami plan becomes useful when household members can perform it without debate. Hold a short practice in which everyone hears the warning cue, puts on shoes, takes the designated supplies, and walks to the meeting point. The goal is not speed for its own sake; it is discovering obstacles before a real evacuation. Time the walk, but pay closer attention to whether people choose the correct turn, remain together when appropriate, and know where to go if the main route is closed.
Practice should include realistic variations. Try the plan when one adult is away, when a child is responsible for carrying the contact card, or when the primary road is unavailable. A household with pets should practice moving animals into carriers or attaching leashes. If a person cannot complete the route, test the backup transport arrangement. These exercises reveal hidden dependencies, such as a garage door requiring electricity, a key stored inside the home, or a phone number known only by one adult.
Review the plan after changes to the household or neighborhood. New construction can alter access, school or workplace locations can change, and a family member’s medical or mobility needs may develop gradually. Check batteries, medication dates, food packaging, chargers, radio operation, and document copies on a regular schedule. Replace items that have been used rather than assuming the kit is still complete.
Information quality also deserves a deliberate check. Confirm the evacuation map, official alert subscriptions, shelter guidance, and local terminology through the relevant emergency-management authority. Do not assume that an old map shows current road access. Conversely, do not let uncertainty about an unverified message delay evacuation after natural warning signs. Move first when the physical signs are clear, then verify details from a safe location.
The plan is working when every household member can answer four questions: what signals require immediate action, where is the first safe destination, which route will be used, and how will separated people reconnect? If anyone gives a different answer, revise the map and practice again. A concise written plan is easier to use than a long document, but it should contain enough detail to cover mobility, pets, medications, children, and communication failures.
Frequently Asked Questions
How quickly should a coastal household evacuate after strong shaking?
Once the shaking stops and it is safe to move, evacuate immediately if you are near the coast. Do not wait for a siren or phone alert when natural warning signs are present.
Should families drive or walk to safety?
Walking is usually preferable when the route is feasible because roads may be congested or damaged. Use a vehicle only when needed for mobility or another specific access requirement, following local routing instructions.
What should be in a tsunami evacuation kit?
Pack portable water, compact food, medicines, sturdy shoes, clothing, a flashlight, batteries, a radio, a phone charger, hygiene items, documents, cash, and supplies for children, pets, or mobility needs.
Is a high-rise building always safe during a tsunami?
No. Use vertical evacuation only in a structure officially identified for that purpose and follow its designated access instructions. A building’s height alone does not confirm its safety.
When can residents return home?
Return only after official authorities announce that the tsunami danger has passed. Multiple waves, flooding, debris, damaged utilities, and unstable structures can remain hazardous after the first wave.
Further Reading
Authoritative Sources
Tsunami Safety weather.gov
National Weather Service guidance explains warning signs, evacuation behavior, and the danger of returning too soon
Tsunamis ready.gov
Federal preparedness information covers alerts, household planning, evacuation, and emergency supplies
U.S. Tsunami Warning System tsunami.gov
The official portal provides current tsunami messages and explains the warning system used in the United States
Tsunami Information noaa.gov
NOAA resources provide background on tsunami hazards, monitoring, and risk information for coastal communities
Conclusion
A dependable coastal evacuation plan is built around immediate recognition, a practiced walking route, and clear household responsibilities. Map the nearest approved high-ground or vertical-evacuation destination, then test the route with the people, pets, mobility equipment, and supplies that will actually accompany you. Keep a compact kit accessible, maintain alternate communication methods, and update the plan whenever the household or neighborhood changes. Strong shaking, unusual sea behavior, or an ocean roar should prompt movement rather than investigation. The next practical step is to check your local tsunami map, choose a meeting point outside the inundation zone, and walk the route this week. Treat official return instructions as mandatory, because later waves and damaged infrastructure may remain dangerous long after the shoreline appears calm.