In a world where natural and man-made disasters can strike without warning, being prepared is not just wise; it’s essential. Understanding the risks that loom in your area is the first step toward fortifying yourself and your loved ones against the unexpected.
*Understanding the Risks: Identify Potential Disasters in Your Area**
Every region has its unique set of hazards. From hurricanes and earthquakes to floods and wildfires, knowing what you’re up against is crucial. Start by researching local history—what types of disasters have occurred in your community before? Engage with local emergency management agencies or visit their websites for insights on prevalent threats. This knowledge empowers you to take specific actions tailored to your environment, helping you anticipate challenges before they arise.
*Creating a Comprehensive Emergency Plan**
Once you’ve identified potential risks, it’s time to craft an effective emergency plan. Involve every member of your household to ensure everyone knows their role during a crisis. Establish meeting points both near home and outside your neighborhood where you can regroup if separated. Discuss evacuation routes and practice them regularly. Importantly, designate a point of contact outside your area who can help coordinate communication if local lines are down. Remember, clear plans minimize panic when disaster strikes.
*Building a Preparedness Kit: Essential Supplies You Must Have**
A well-stocked preparedness kit is your lifeline during emergencies. Gather essential supplies that cater to various scenarios: food and water that can sustain each individual for at least three days, first aid items, flashlights with extra batteries, sanitation products, and any necessary medications should be at the forefront of your collection efforts. Don’t forget important documents—insurance papers, identification cards—and consider including cash since ATMs may be non-operational during crises.
Additionally, think about incorporating specialized items like pet food if you have furry friends or baby supplies if there are young children involved in your household. Customizing kits based on individual needs ensures everyone will be adequately taken care of when faced with adversity.
*Communication Strategies: Staying Connected During a Crisis**
Effective communication during an emergency can save lives. Consider using group texting apps or social media platforms as alternative means to stay connected if traditional telephone services fail. Moreover, familiarize yourself with two-way radios as they often provide reliable communication when cell networks are overwhelmed or out-of-service entirely.
Encourage family members to keep charged power banks handy for their devices; this small effort could make all the difference when trying to reach loved ones amidst chaos.
*Regular Drills and Updates: The Importance of Training and Preparedness Reviews**
Preparedness isn’t a one-time task; it requires ongoing commitment through regular drills and updates. Schedule periodic practice sessions to ensure everyone remembers protocols clearly—rehearsing will help solidify roles within the family unit while building confidence in handling real-life situations efficiently.
Moreover, review and update your emergency plan annually or whenever life circumstances change—new family members arrive or kids grow older may necessitate adjustments in responsibilities or supplies required.
To wrap up, disaster preparedness hinges on awareness and proactive measures tailored specifically to individual needs and environmental realities. By understanding risks, creating robust plans, assembling thorough kits, maintaining open lines of communication, and committing to regular training exercises—all these steps culminate into effective strategies that empower individuals facing the unpredictable storms of life!
In a world where unpredictable events seem to be the new norm, the significance of emergency preparedness cannot be overstated. Whether it’s natural disasters like hurricanes and earthquakes or man-made emergencies such as power outages and pandemics, being ready can mean the difference between chaos and calm. Understanding the importance of emergency preparedness is your first step towards safeguarding yourself and your loved ones.
To embark on this journey, you must begin with a thorough assessment of your risks. Start by identifying potential hazards in your area. Are you living in a flood-prone zone? Is there a history of wildfires nearby? Perhaps severe storms frequently disrupt life in your community? Pinpointing these risks will help shape an effective plan tailored to your unique circumstances. Make a detailed list, categorizing threats based on their likelihood and severity; this will serve as your foundation for further planning.
Once you’re aware of potential dangers, it’s time to create your emergency action plan—a blueprint designed to guide you through various scenarios. Begin by outlining clear roles for every member of your household. Who will grab the emergency kit? Who’s responsible for pets? Establish meeting points both at home and outside, ensuring everyone knows where to go if separated. It’s also crucial to designate an out-of-town contact person—someone who can relay information if local communication is disrupted. Write down these strategies and keep them easily accessible; clarity breeds confidence when chaos strikes.
A well-stocked emergency kit is central to any effective action plan. What should it contain? Start with the essentials—non-perishable food items, water (at least one gallon per person per day), first aid supplies, flashlights, batteries, hygiene products, important documents (like IDs and insurance papers), and any necessary medications. Don’t forget about comfort items! A favorite book or toy can provide solace during stressful times. Regularly review and update this kit; expired food or outdated medicines won’t serve you well when every minute counts.
Communication during a crisis can often become challenging as regular channels may fail or get overwhelmed. Therefore, establishing solid communication strategies beforehand is vital. Ensure all family members have a list of important contacts saved in their phones—and written down somewhere safe in case of battery failure! Consider utilizing messaging apps that function effectively even under pressure since they may work when traditional calls do not. Additionally, familiarize yourself with local alert systems or apps that provide real-time updates during emergencies.
Lastly, remember that practice makes perfect! Conducting drills ensures everyone is familiar with their roles and responsibilities before disaster strikes—think fire drills but for various scenarios like evacuation or shelter-in-place situations. Schedule regular reviews of your plan—perhaps quarterly—to refresh everyone’s memory and adjust any details as needed (after all, life changes!). These practices build confidence among family members while reinforcing readiness.
When faced with uncertainty, preparation transforms panic into empowerment. By assessing risks, crafting a robust action plan complete with essential supplies, maintaining communication strategies, and regularly practicing drills—the path from panic to prepared becomes clearer than ever before. Take charge today; after all, an ounce of prevention is worth a pound of cure!
Urban foraging is essentially the quest for edible plants and food sources within city environments. It can be a thrilling adventure, akin to a treasure hunt, but with a delicious twist! What’s even better is it connects us with nature, even in the most urban settings.
From foraging for berries in a park to harvesting herbs from a community garden, there are plenty of opportunities. Plus, there’s an undeniable joy in finding something fresh and free. It’s about making the best of what our cities can naturally offer.
As I delved into foraging, I discovered the vast amount of edible flora often overlooked. Like, did you know that dandelions are not just pesky weeds, but also packed with vitamins and can be tossed in salads? It’s eye-opening!
Why Urban Foraging is Beneficial
One of the main perks of urban foraging is that it’s eco-friendly. By sourcing food locally, even within our city streets, we reduce our carbon footprint. It’s a win-win for both our health and the planet!
Additionally, foraging can save you some cash. Imagine strolling through your neighborhood and picking fresh herbs instead of buying them at a store. It’s not just budget-friendly; it’s also a fun way to spice up your meals!
In closing, foraging invites curiosity and learning. Every time I headed out, I learned to identify different plants and their uses. This not only sharpened my knowledge but also deepened my respect for local ecosystems.
Getting Started with Foraging
If you’re keen to start your own foraging journey, it’s essential to first educate yourself about what to look for. I recommend using field guides or mobile apps that help identify edible plants. Believe me, it makes a huge difference.
Next, start simple. I remember my first adventure included gathering wild garlic in a nearby park. It was a small step but felt like an epic success. Starting small ensures that you don’t feel overwhelmed.
Lastly, join community foraging groups or workshops. Not only will you learn a lot, but you’ll also meet fellow food lovers. Many of these experiences are filled with laughter and camaraderie—it’s just a bonus!
Identifying Edible Plants
Look at the Environment
When I first started foraging, I quickly learned that the local environment plays a big role in identifying safe edible plants. Certain areas in the city may have pollution or chemicals that can contaminate what you’re looking to eat, so the location matters!
Urban parks, gardens, and even backyards can often provide safer choices compared to well-trafficked streets where dirt and grime may end up on the plants. Pay attention to where the plants grow and avoid areas near roads, factories, or heavy foot traffic.
During my early outings, I’d often take pictures of plants in different environments and research afterward. It’s a fantastic way to learn beyond what you might find in books!
Know Your Plants
Identifying specific plants is pivotal, as many have look-alikes that can be toxic. I’ve made it a habit to get up close and personal with plants—their leaves, stems, and roots all tell a story. Familiarize yourself with the characteristics of common edible plants in your area.
Field guides or apps can be phenomenal resources. One time, a friend and I stumbled upon a patch of stinging nettles. I almost walked away thinking they were weeds, but after checking my app, we were able to identify them and cook them up as a delicious soup!
Also, smell and taste are your friends. Many edible plants have distinct aromas. Just remember to only taste a tiny bit at first to ensure you don’t have any adverse reactions!
Practice Responsible Foraging
As you venture into foraging, it’s crucial to respect the environment. This means only taking what you need and being conscious of the overall ecosystem. Foraging isn’t just about getting your fill; it’s about maintaining the balance of nature.
I’ve experienced cities that have particular regulations on foraging. Researching and ensuring you are complying with local laws is essential, and it helps preserve these areas for other foragers in the future.
Lastly, spread the word about responsible foraging! The more we educate others, the greater the chances we can keep our foraging spots healthy and plentiful for years to come. Plus, it fosters a sense of community!
Cooking and Using Foraged Foods
Experimenting with Recipes
Once you’ve gathered your kitchen treasures, the fun truly begins in the kitchen! Using foraged plants can elevate your meals and add seasonal flair. I’ve experimented with fresh wild greens in salads, added berries to my morning oatmeal, and even made pesto out of dandelion greens!
One delicious find was wild mustard. It added a sharp and piquant twist to my grilled cheese sandwiches—definitely a dish to be proud of. It’s simply amazing how foraged foods can make me feel like a gourmet chef.
Don’t hesitate to get creative. Try making herbal teas from foraged leaves, or use the flowers in your salads for some colorful garnishing. There are endless possibilities, and experimenting is part of the fun!
Preserving Your Finds
If you’ve foraged more than you can eat right away, preserving your foods can ensure their longevity. You can dry herbs, make jams out of fruits, or even pickle wild vegetables. I love making pesto and freezing it in ice cube trays for later use.
Once, I went wild raspberry picking and made a whole batch of raspberry jam. It was nostalgic, reminding me of summer days as a kid. Those flavors captured in jars are perfect for spreading joy on cold winter days!
Don’t forget about freezer space too—blanching and freezing wild greens is a lovely way to have fresh flavors handy when out of season.
Sharing Your Foraging Adventures
Ultimately, sharing your foraging experience with friends and loved ones enhances the joy of this buddy-up journey. Organizing foraging picnics where everyone brings a dish made from foraged foods is an incredible way to celebrate your bounty.
Social media can be fun for this too! I often post my finds and what I’ve cooked up to inspire others. You never know, your adventures might ignite someone else’s passion for nature and foraging!
Plus, sharing knowledge with friends makes it even more fulfilling. I’ve learned so much from friends, and I’ve been happy to pass my knowledge onto others as well.
Safety Tips for Urban Foraging
Stay Informed
As with any culinary endeavor, safety is paramount when foraging. I always research species thoroughly before trying anything new. An evening spent reading up on local flora can make all the difference when you’re outdoors.
Be mindful of potential allergens! That means knowing if you’re allergic to any plants. I’ve shared foraging experiences where someone had a reaction. Ensuring everyone knows what they can and cannot eat is key when foraging in groups.
Remember the old saying: “When in doubt, throw it out.” If you can’t identify a plant confidently, it’s better to err on the side of caution.
Climate Awareness
Climate factors like pollution can affect the edibility of the plants. I always consider the surroundings of where I’m foraging. It’s wise to avoid areas with heavy pesticide or herbicide use. Gathering from well-maintained gardens or community plots is a safer bet.
Also, pay attention to seasonal changes. Some plants may only be edible at certain times of the year, while others may carry toxins in different growth stages. Education and awareness go hand in hand when foraging.
I often jot down notes on when I found which plants, making it easier in future seasons to know the best times to go back for more.
Be Cautious with Wildlife
Be on the lookout for wildlife too! Bugs, snakes, and other critters can sometimes share your foraged space. They might be lurking around, especially in little patches of wild urban greenery.
Always respect their habitats and stay safe. I’ve had my encounters with bees when picking nearby flowers—just a friendly reminder to watch where you tread!
Bringing a buddy along can also be a great safety measure. Sharing this journey with a friend not only boosts morale but ensures you’re safer if an unexpected situation pops up.
Conclusion
Urban foraging has been such a rewarding experience for me, both for my culinary creations and my appreciation for nature within the city. I encourage everyone to give it a shot; you might just find yourself with the tastiest meals and a newfound love for the plants around you!
FAQs
1. What are some common edible plants found in the city?
Common edible plants include dandelions, clover, wild garlic, and various berries. Always research and verify before consumption!
2. How do I know if a plant is safe to eat?
Use reliable field guides, apps, or consult with experienced foragers. If in doubt, don’t consume it!
3. Can I forage anywhere in the city?
Not necessarily. It’s essential to check local laws and regulations regarding foraging in public spaces and parks.
4. What should I bring for a foraging trip?
A good foraging guide, a basket or bag, gloves, a small knife, and possibly a notebook for jotting down notes are excellent essentials.
5. Are there any risks associated with urban foraging?
Yes, risks include polluting, mistaken identity of plants that may be toxic, and potential allergens. Always ensure you know what you’re gathering!
Let’s kick things off by chatting about safety gear. Honestly, having the right equipment can be a real game changer when you’re out on the water. When I first started boating, I didn’t quite grasp just how vital life jackets and other gear were!
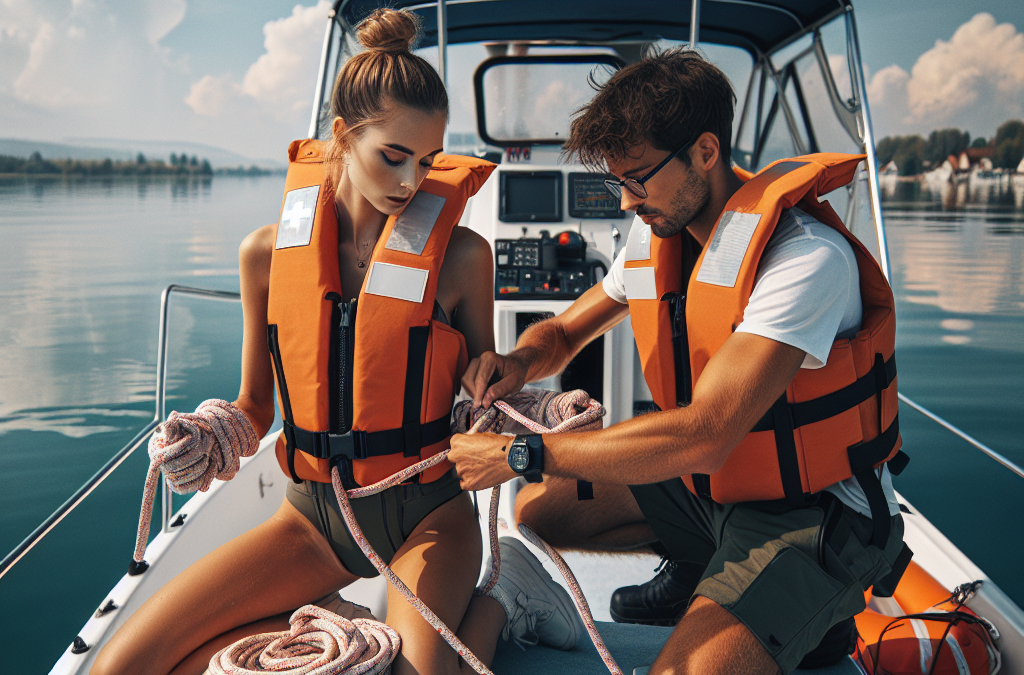
Every time I step onto a boat, I ensure that I have my life jacket on. They come in all shapes and sizes nowadays, so there’s no excuse to go without one. And don’t forget about other essentials like flares, a whistle, and a first aid kit. You never know when you might need them!
Also, ensure your gear is in tip-top shape. A cracked life jacket or faulty flair might just make all the difference in an emergency, and trust me, you don’t want to find that out the hard way.
Understanding Weather Conditions
Another crucial skill I’ve picked up is reading the weather. Before any of my outings, I always check the forecast. Trust me, clear skies can turn stormy in the blink of an eye, and I’ve learned that lesson well!
Pay attention to wind patterns and cloud formations as well. If you see dark clouds rolling in, it might be time to cut your trip short. I’ve had to turn back more times than I can count because I ignored the signs—a real lesson learnt.
Consider downloading a weather app that gives updates in real-time. Having that info at your fingertips can mean the difference between a fun day on the water and a hectic scramble to safety.
Basic Navigation Skills
The first time I hopped on a boat, I thought the GPS was all I needed. Boy, was I wrong! Basic navigation skills are essential. Knowing how to read a compass and understand your maps can save you a ton of trouble.
It’s super important to familiarize yourself with navigational markers and buoys. They’re not just decoration! Each color and shape has a specific meaning, and learning what they are can help you steer clear of hazards.
Also, practice makes perfect. Try to navigate familiar waters first. This way, when you venture into uncharted territory, you’ll feel more confident in your abilities.
Emergency Preparedness and Response
Creating an Emergency Plan
Now, let’s talk about emergency preparedness. Every trip out should start with a solid plan. I like to sit down and outline what I would do in various emergency scenarios the night before my outing. Why? Because it’s better to be safe than sorry!
Think about potential emergencies: capsizing, getting lost, or even medical issues. Your plan should address these situations and cover action steps for everyone on board. Make sure your crew knows the routine!
Make it fun; include role-playing to help everyone understand their responsibilities. You’d be amazed at how much more at ease everyone feels once they know what to do in a crisis.
First Aid Knowledge
I can’t stress how important basic first aid knowledge is. Accidents happen, whether it’s a scrape from fishing or something more serious like a severe allergic reaction. Knowing what to do can literally keep someone alive.
I took a first-aid course a couple of years back, and it wasn’t just helpful; it made me feel empowered. From CPR to bandaging a wound, these skills are invaluable on the water, where help can feel so far away.
Remember to carry a first aid kit, but don’t just stash it away. Familiarize yourself with the contents and ensure it’s stocked up and always accessible. It’s one of those things that could really make a difference.
Staying Calm During Emergencies
In any emergency, staying calm is key. I remember a time when my engine stalled in choppy waters—panic was creeping in, and I had to consciously remind myself to breathe. It’s easier said than done, but keeping a level head can save your life!
When things go south, rely on your training and your emergency plan. If you’ve prepared well, you’ll have a framework to operate within, which can stabilize you when panic tries to take hold.
Practice calming techniques, like deep breathing or counting to ten. The better you are at staying calm, the easier it’ll be to respond rather than react during an actual emergency.
Swimming and Water Survival Techniques
Enhancing Your Swimming Skills
If you’re going to be on the water, you should be able to swim, plain and simple. I took swim lessons to boost my confidence and technique, and that was one of the best decisions I made! Even if you feel like a decent swimmer, there’s always room to improve.
So, hit your local pool and practice. Even doing drills to improve your endurance and speed can make swimming feel second nature when you’re in open water.
Get comfortable with various strokes, and practice swimming in clothes, too. You never know when you might find yourself in that kind of situation, and you need to be prepared for it!
Reaching Safety in Emergencies
Let’s say you fell overboard or your boat capsized; your immediate goal is to reach safety. Familiarize yourself with the safest swimming techniques to get to the nearest shore or floating objects.
Remember to float on your back if you need a breather. This can conserve energy and keep you above water. I’ve found practice in calm waters to be hugely beneficial, as it helps me feel prepared for the chaos of an actual emergency.
If you’re ever stuck in open water, try to stay calm and assess your surroundings. Look for other boats or landmarks to help guide your way. Keeping your wits about you can help tremendously!
Using Personal Flotation Devices (PFDs)
I’ve already harped on the importance of life jackets, but let’s dive deeper into PFDs. Modern flotation devices are designed to keep you safe in style, with options ranging from vests to jackets.
Ensure your PFD fits properly, as an ill-fitting device may not save you. I learned the hard way when my jacket slipped off during a boating mishap. You want it snug but comfortable enough to swim in it!
Lastly, get familiar with how your PFD functions. If you’re in open water, having the confidence to use your flotation device can save lives. Trust me, it can be a lifeline when the unexpected happens!
Regular Maintenance of Your Boating Equipment
The Importance of Routine Checks
Before hitting the water, I always conduct routine checks on my boat. Trust me, doing these checks can prevent a ton of headaches later on! I’ll check the batteries, the engine, and all safety equipment to ensure everything’s in shipshape.
Creating a checklist can be really helpful. I simply go through it before every outing so I don’t forget a crucial piece of equipment or overlook potential issues. This routine has saved me more than a few times!
Staying proactive rather than reactive can truly make a world of difference. Trust me, you don’t want to deal with a breakdown miles from the shore!
Cleaning and Storing Your Equipment
After an outing, I make it a habit to clean and store my gear properly. Saltwater and grime can quickly damage equipment if you leave them unattended. A quick rinse and thorough drying can extend the life of your valuables!
When storing my boat for extended periods, I do a full inspection. I’ll cover it up to protect it from the elements and keep it functioning well for my next adventure.
By taking care of your gear, you’re not just ensuring its longevity; you’re also ensuring safety for yourself and your fellow boaters. It’s vital to keep that cycle going!
Keeping Up with Safety Regulations
Rules and regulations for boating are always evolving, and keeping up with them can be tricky. I make it a point to regularly check local regulations and any updates regarding safety requirements and navigation rules.
Consider joining a local boating community or online forum. Networking with fellow boaters can provide you with valuable insights into the latest safety regulations and best practices in your area.
Staying informed means not only keeping yourself safe but also contributing to the safety of others. When we all adhere to the same set of rules, everyone benefits!
Frequently Asked Questions
What is the most essential survival skill for boating?
One of the most essential skills is understanding basic safety gear and ensuring you have all necessary equipment on board, like life jackets, signal devices, and a first-aid kit.
How can I effectively handle an emergency on the water?
The best way to handle emergencies is through preparation. Have an emergency plan in place, know basic first aid, and practice staying calm under pressure.
Is swimming proficiency necessary for boating?
Yes, swimming proficiency is very important. It’s crucial to feel comfortable in the water in case you need to swim or assist someone in distress.
What should I do if I get caught in rough weather while boating?
If you’re caught in rough weather, execute your emergency plan. Seek shelter if possible, and try to navigate back to shore while staying calm and focused.
How often should I check my boat’s equipment and safety gear?
It’s advisable to conduct routine checks before every outing. Post-outing checks are also critical to ensure everything is maintained and stored properly for future use.
First off, let’s talk about location because, trust me, it’s everything! When I found myself needing to build an emergency shelter, I learned quickly that you want to set up shop in a safe spot. Look for an area that’s away from potential hazards like falling branches, steep slopes, or flash flood zones.
Make sure you check the weather too. If it’s about to rain, don’t pitch your shelter in a basin where water can collect. It’s all fun and games until you wake up floating. Choose a flat, dry area to keep it cozy and secure.
Lastly, give some thought to your surroundings in terms of resources. Are there any nearby trees for support or brush you can use? Also, think about your exit routes. You never know, and it’s always smart to have a plan!
Gathering Materials
What You’ll Need
So, let’s get down to business on the materials. I quickly learned that you don’t need a Home Depot level supply list. All you need is a few essentials to get rolling. Generally, a tarp, rope, or even some branches will do just fine.
If you’re lucky enough to have access to a proper tarp, awesome! If not, any plastic sheet, or even a large garbage bag can be a lifesaver. Remember, the point here is to keep the elements at bay, and a little ingenuity goes a long way.
Rope is super handy too – I can’t tell you how many times I’ve used it to tie things together or create a makeshift structure. If you don’t have rope, paracord or even shoelaces can work in a pinch. Just get creative!
Building the Shelter Structure
Creating a Strong Frame
Once you’ve picked your spot and gathered your materials, it’s time to build! I usually start by creating a frame using branches. The trick is to find some sturdy ones that can handle the weight of your tarp or cover material.
Visualize a shape like a lean-to: one end of the frame should be elevated while the other rests against the ground. This creates a nice slant where rain can run off, keeping you dry. I’ve made a ton of these and don’t forget to secure your branches well so they don’t collapse when you lean against them!
As I build, I always keep the wind direction in mind. You want to have the opening away from the wind to make it more comfortable inside and ensure better protection from the elements. It’s all about maximizing your comfort!
Securing the Shelter
Stability Matters
Now, securing your shelter might just be the most important step. You want your creation to withstand those gusty winds when the weather decides to toss a tantrum! I always make sure that the tarp is tied down tightly to prevent it from flapping around.
If you can, use rocks or logs to weigh down the edges of your tarp. This makes your setup extra stable and keeps it from blowing away. Plus, it adds a little extra insulation to help keep you warm.
Checking for any weak points is vital too. If something seems loose, take the time to reinforce it. I remember a night where I didn’t… and let’s just say it was a very uncomfortable wake-up call when everything collapsed on me!
Maintaining the Shelter
Keeping It Safe and Comfy
All in all, once you’re all set up, maintaining your shelter is key. I always make it a point to check for any wear and tear throughout my stay. If a few branches are starting to buckle or if the tarp seems to be losing tension, I don’t hesitate to fix it right away.
Keep the inside of the shelter clean too! A tidy space can help keep out pests and makes for a much more pleasant experience. I like to use natural materials for bedding, like leaves, to create a comfy little nest.
And, if you can manage it, consider a small fire outside (safely, of course) to provide warmth and light. Just make sure to keep it a safe distance away from your shelter so there’s no risk of fire spreading.
FAQ
1. What materials do I need to build a portable emergency shelter?
You’ll need a tarp or plastic material, rope, and sturdy branches to create the frame. A bit of creativity goes a long way if you don’t have the usual gear!
2. How do I choose the right spot for my shelter?
Look for a flat, dry area away from potential hazards like falling branches or flood zones. Always consider the weather conditions and your exit routes too.
3. How can I secure my shelter against strong winds?
Tie down your tarp securely, and use rocks or logs to weigh down the edges. Ensure that the overall structure is tight and stable to withstand gusts.
4. What should I do to keep my shelter comfortable?
Keep the inside clean, use natural materials for bedding, and make necessary repairs promptly. If possible, set up a fire a safe distance away for warmth and ambiance!
5. Do I need any special skills to build a portable emergency shelter?
Not at all! Basic knowledge of tying knots and arranging materials will suffice. It’s more about being resourceful and proactive than having expert skills.
Adversity is a universal experience. We’ve all faced tough times that make us question our ability to move forward. Personally, my encounters with adversity have often felt like they hit me out of nowhere, knocking me off balance. The truth is, grappling with difficulties is part of life, and understanding this concept is the first step in preparing ourselves for challenges.
When I look back on my life, the hardest moments often came paired with growth. It’s like the universe throws us a curveball, just to see how we’ll adjust our swing. Comprehending adversity not only helps us to define what challenges we face but also empowers us to confront them directly.
It’s essential to recognize that everyone has their own battles. Whether it’s losing a job, dealing with a health crisis, or simply navigating personal relationships, we all face adversity in different forms. Accepting this commonality allows for deeper connections with others who can relate to our struggles.
Shifting Mindsets
The Power of Positivity
After many experiences, I truly believe that keeping a positive mindset is crucial when you’re up against tough times. It might sound cliché, but it works. For me, it’s often about finding those tiny moments of light amidst the chaos. Sometimes, I’d catch myself smiling at a random memory and it would energize me to push through the gloom.
One technique I’ve adopted is reframing negative thoughts into positive ones. Instead of thinking, “Why is this happening to me?” I ask, “What can I learn from this situation?” This shift in perspective has helped me see obstacles more as opportunities for learning rather than just setbacks.
Surrounding myself with positivity has also been life-changing. Whether it’s following uplifting social media accounts or chatting with supportive friends, these influences help me sustain a mindset that is much more resilient in the face of adversity.
Building Resilience
Practice Makes Perfect
Resilience isn’t something you’re born with; it’s like a muscle that needs to be worked out. I remember the first time I had to deal with an unexpected setback—honestly, it was a tough pill to swallow. But over time, I learned that every small challenge I overcame was training me to face the next one even harder.
Setting small, achievable goals has been my go-to strategy for practicing resilience. When I successfully cross a task off my to-do list, regardless of its size, it builds my confidence and reinforces the belief that I can handle more significant challenges down the line.
Another key part of resilience is learning to cope with failure. Instead of viewing failure as a definitive end, I now see it as a stepping stone. It can be painful, but life is full of valuable lessons—and failure is often the best teacher of all.
Developing a Support System
It Takes a Village
No one fights battles alone, and I can confirm that having a solid support system is vital when overcoming adversity. In my experience, revealing our struggles to people we trust can lighten the burden immensely. It’s like sharing the load with someone else; you don’t have to bear it all on your own.
I’ve learned to be vulnerable and open up to close friends and family when I’m facing a tough time. They often offer perspectives I hadn’t considered or simply lend a listening ear, which alone can be incredibly comforting. We all crave connection, especially in dark times.
Joining support groups—whether online or in person—has enriched my life. Meeting others facing similar challenges has not only expanded my understanding of adversity but also forged friendships that are meaningful and supportive. We lift each other up in tough times, which is pretty powerful.
Embracing Change
The Art of Adaptability
Let me tell you, change is the only constant in life. I’ve found that embracing change, rather than resisting it, has been a game-changer for me. When I first faced major transitions, like changing jobs or moving cities, I realized that the more I fought against it, the harder it became. Adapting made things smoother.
One practice I found helpful is to focus on what I can control during times of change. Often, all the accompanying chaos can feel overwhelming, but honing in on my own actions and responses has enabled me to stay grounded. In short, I’ve learned to dance in the rain instead of waiting for the storm to pass.
Ultimately, seeing change as an opportunity for growth transforms the way I approach life. It shifts my focus from loss to potential gain, allowing me to welcome new experiences and challenges with open arms. After all, every change incorporates a new chapter in our story, right?