by Preparation Call Editorial Team | Jul 31, 2025 | Preparedness
Understand What Carbon Monoxide Is
What You Need to Know
Let’s start with the basics. Carbon monoxide (CO) is a colorless, odorless gas that can be super dangerous. I remember the first time I learned about it; I was shocked to find out how easily it could be produced by everyday appliances like gas stoves or heaters. You can’t see it, you can’t smell it, and yet it can sneak up on you. It’s essential to be aware of its nature so that you can take the right steps to protect your family.
This gas comes from burning fossil fuels. Think about your car, your furnace, or even your fireplace. If these appliances aren’t working right, they can release CO into your home. That’s why it’s not just important to know what it is, but to be proactive in understanding where it might come from.
Moreover, symptoms of CO poisoning – headaches, dizziness, and confusion – can often be mistaken for something else, which makes it even more dangerous. Staying educated is really the first step in keeping your family safe.
Install Carbon Monoxide Detectors
Choosing the Right Detectors
One of the best pieces of advice I can offer from my own experience is to invest in good carbon monoxide detectors. When I first moved into my house, I realized I didn’t have one. That made me really nervous, so I did some research. The newer models are pretty affordable and come packed with features, like smart technology that sends alerts to your phone.
Installing these detectors in key areas of your home is crucial. I’ve learned the hard way that kitchens and bedrooms should definitely be top priority. When I added a detector outside my son’s bedroom, I felt a weight lift off my shoulders. It’s a simple step, but it makes a world of difference.
Don’t forget to check the batteries regularly too. Set a reminder in your phone every six months; it’s easy to forget otherwise! Trust me, spending a few minutes checking your detectors is worth it for peace of mind.
Maintain Your Appliances
The Importance of Regular Check-Ups
Let’s talk about maintenance. I can’t stress enough how critical it is to keep your fuel-burning appliances in good shape. When I first bought my furnace, I was tempted to skip the yearly check-up, thinking it would be fine. Well, I quickly learned that neglecting maintenance can lead to some serious issues.
Regular inspections can ensure everything is working properly and dramatically reduce the risk of CO leaks. In fact, most service professionals recommend at least once a year to prevent any hazards. Having a checklist helps too, so you don’t miss anything important.
Plus, I’ve found that keeping my appliances clean and well-ventilated not only helps in avoiding dangerous gases but also boosts their efficiency! Efficient appliances save money and contribute to our family’s safety. It’s a win-win.
Know the Symptoms of CO Poisoning
Be Aware and Educate Your Family
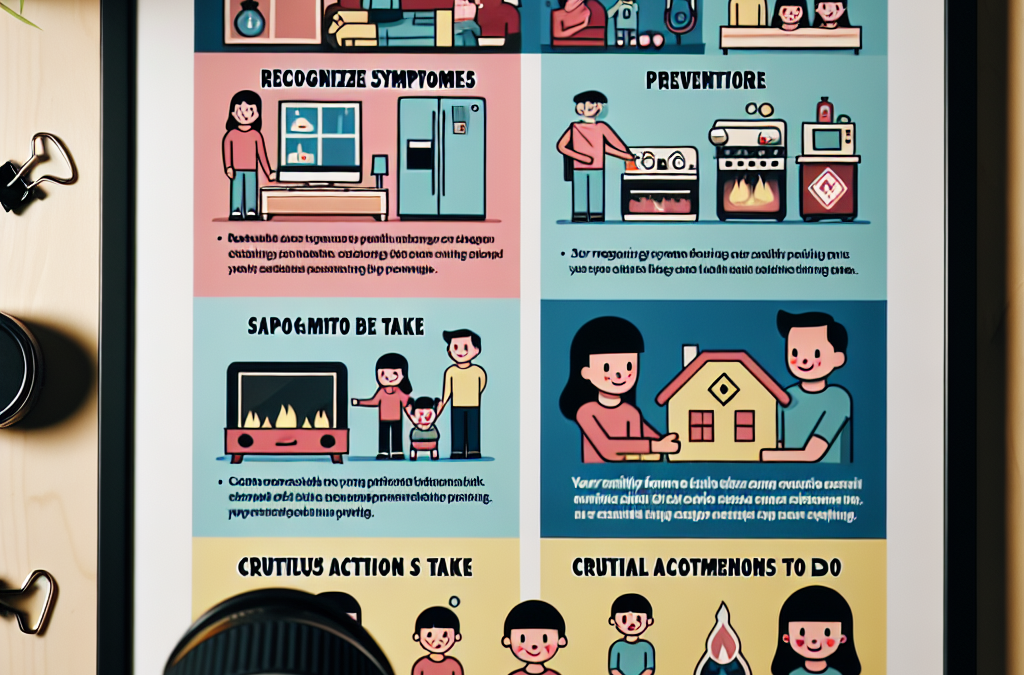
It’s essential to be aware of the signs of carbon monoxide poisoning. I remember when my cousin came to visit, he mentioned he had a headache, and I kicked into high alert mode. It’s so important to know the symptoms like headaches, dizziness, confusion, and even nausea. The more we talked about it, the more my family felt prepared.
Make it a family discussion! Teaching my kids about the symptoms has given them the ability to speak up if something feels off. I put together a little info sheet for my fridge, and it’s been a handy reference. When children understand, it empowers them to take action!
Staying informed helps everyone in the household recognize potential hazards and react more quickly. After all, acting fast is key – it can literally save lives!
Make an Emergency Plan
Preparing for the Worst
Having a plan in place is like having a safety net. My family and I sat down one rainy Sunday to talk through our emergency response plan. It might sound a bit dramatic, but knowing what to do in case of a CO alarm going off brings a lot of peace of mind.
We decided on a meeting spot outside, in case we ever need to evacuate. Everyone should know how to leave the house quickly and safely. We even practiced the drill a few times – it was fun and got everyone involved. It made me feel like I was doing something proactive, which is always nice!
Don’t forget to keep a battery-powered radio nearby for updates if the power goes out. I found one at a yard sale, and it’s a good reminder that you can often find practical solutions without breaking the bank. Stay prepared, and you’ll feel more secure.
FAQs
What are common sources of carbon monoxide in homes?
Common sources include gas furnaces, water heaters, car exhaust from attached garages, fireplaces, and gas stoves. Always ensure these appliances are well-maintained!
How often should I test or replace my carbon monoxide detector?
Test your detectors monthly and replace the batteries at least once a year. Also, replace the entire unit every 5 to 7 years depending on the manufacturer’s recommendation.
What should I do if my carbon monoxide alarm goes off?
If your alarm sounds, immediately evacuate your home and call emergency services. Do not ignore the alarm or try to find the source. Safety first!
Can carbon monoxide poisoning happen in the summer?
Yes, it can! Many people think CO poisoning only occurs in winter, but it can happen anytime there are working appliances that produce exhaust gases.
Is there a safe level of carbon monoxide exposure?
No, there is no safe level of exposure. Even low levels can cause health issues, so it’s best to invest in safety measures to prevent exposure entirely.

by Preparation Call Editorial Team | Jul 31, 2025 | Preparedness
Embracing a Positive Mindset
Why Optimism Matters
When I was navigating tough times, I quickly realized that a positive mindset is like armor against life’s challenges. It’s not just about wishing for good things; it’s a proactive approach to dealing with obstacles. When I embraced optimism, I started noticing how much more resilient I became. It’s like flipping a switch in your brain—suddenly, setbacks feel less daunting and more manageable.
By choosing to see the glass half full, I discovered that my problem-solving skills sharpened. Instead of dwelling on what could go wrong, I focused on potential solutions. This shift changed my life. Positivity isn’t unrealistic; it’s a tool that can help us tackle problems from a different angle.
Moreover, optimism helps us connect better with others. I found that when I radiate positivity, it not only lifts my spirits but also lifts those around me. This creates a supportive atmosphere where solutions can flourish. In tough times, it truly pays off to look at the brighter side.
Setting Realistic Goals
Define Your Objectives
One thing I’ve learned about positivity is that action must follow intention. Setting realistic goals is crucial. If you aim for the stars but neglect the groundwork, you might end up feeling overwhelmed. I like to break my grand ambitions into bite-sized tasks. This way, each small victory fuels my optimism, pushing me along the journey.
It’s also important to write these goals down. When I have my objectives laid out, I can visualize them better. This not only keeps me focused but also serves as a reminder of why I initiated this journey. When I achieve a small goal, I celebrate it. This can really rev up your motivation levels!
Lastly, I think it’s important to keep adjusting your goals. Life is dynamic, and so are our dreams. Whenever I feel the need to pivot, I evaluate my goals and make sure they’re still aligned with my vision. Flexibility alongside optimism is key to success.
Building a Supportive Network
Surround Yourself with Positivity
I’ve always believed in the saying, “You are the average of the five people you spend the most time with.” Over the years, I have learned how powerful a supportive network can be. When I surround myself with positive, uplifting people, their energy rubs off on me. This community becomes a bedrock of strength during difficult times.
Engaging with others who share your optimistic outlook can lead to inspiring discussions. Lately, I’ve joined a local group focusing on personal development. The conversations we have and the encouragement we exchange are invaluable. It’s like this collective optimism pushes us all further, and we hold each other accountable to our goals.
Together, we celebrate successes—big and small. It’s essential to have that cheering squad, especially when the road gets rocky. I always feel more empowered knowing I have people in my corner, ready to lend their support and share their insights.
Practicing Gratitude
Daily Reflections
This one’s a game changer! I started keeping a gratitude journal, and it’s made all the difference in my outlook on life. Reflecting on the good things that happen every day, no matter how small, keeps negativity at bay. It reminds me to appreciate the little wins, and boy, does that boost my optimism!
At the end of each day, I jot down at least three things I’m grateful for. This practice has allowed me to shift my focus from what’s lacking to what I have. It’s amazing how changing your mindset can change your life! Some days I cheer for something as simple as a sunny morning or a good cup of coffee, and you know what? It works wonders.
By routinely practicing gratitude, I’ve become much more resilient. No matter how tough my day is, I can always find something to be thankful for. And that, in itself, is a huge win. This focus on gratitude reinforces my optimism, setting me up for future successes.
Taking Action Towards Change
Start Small and Build Momentum
For a long time, I took a backseat in my own life, waiting for changes to happen rather than making them. Taking action is crucial if you want to harness optimism into something tangible. I started with small steps. When I wanted to get fit, for instance, I didn’t pressure myself to run a marathon. Instead, I committed to walking for 20 minutes a day.
As I gained confidence, I naturally pushed my limits further. The best part? Every small step reinforced my belief that I could create change. It was this build-up of little victories that propelled me forward. Instead of fear holding me back, my optimism became the driving force behind my actions.
I always remind myself that even the mightiest oak was once just a tiny acorn. It might take time, but each step counts. By embracing action and optimism, I feel more in control of my life and my future.
Frequently Asked Questions
1. What is positive preparedness?
Positive preparedness is a mindset that combines optimism with practical action steps to deal with challenges. It’s about being ready for whatever life throws at you while maintaining a positive outlook.
2. Can optimism really affect my problem-solving skills?
Absolutely! When you approach problems with an optimistic mindset, you’re more likely to think creatively and find solutions, rather than getting stuck in negative thoughts.
3. How do I start practicing gratitude?
Start by keeping a daily gratitude journal. Write down a few things you’re thankful for each day. Over time, this practice will help retrain your mind to focus on the positives.
4. What if I don’t have a supportive network?
If your immediate circle isn’t supportive, try joining groups or communities that share your interests. Surrounding yourself with positive people can transform your outlook on life.
5. Can optimism help in overcoming anxiety?
Yes! Cultivating an optimistic mindset can help reduce anxiety levels. By focusing on solutions and maintaining a positive outlook, you can better manage anxious thoughts and feelings.
by Preparation Call Editorial Team | Jul 31, 2025 | Preparedness
Assessing Your Home’s Vulnerabilities
Identifying Weak Points
First things first, I found that it’s crucial to take a good, hard look at your home. Consider which areas might be easier for an intruder to access. Start outside. Are your doors and windows in good shape? I remember when I realized my back door could be opened with just a credit card! Seriously, it wasn’t even locked properly!
Next, move on to your yard. Is it well-lit? Thickets or bushes can provide cover for unwanted visitors. I had to trim back some of my shrubs because they were way too tall. It was like I was offering a welcome mat for anyone trying to sneak in under the cover of night.
Ultimately, think about the interior. Don’t just focus on doors and windows. A sturdy door frame is essential, and I recommend striking plates that can withstand forceful entry. After all, you want to keep what’s important to you safe!
Investing in Quality Security Systems
Choosing the Right Technology
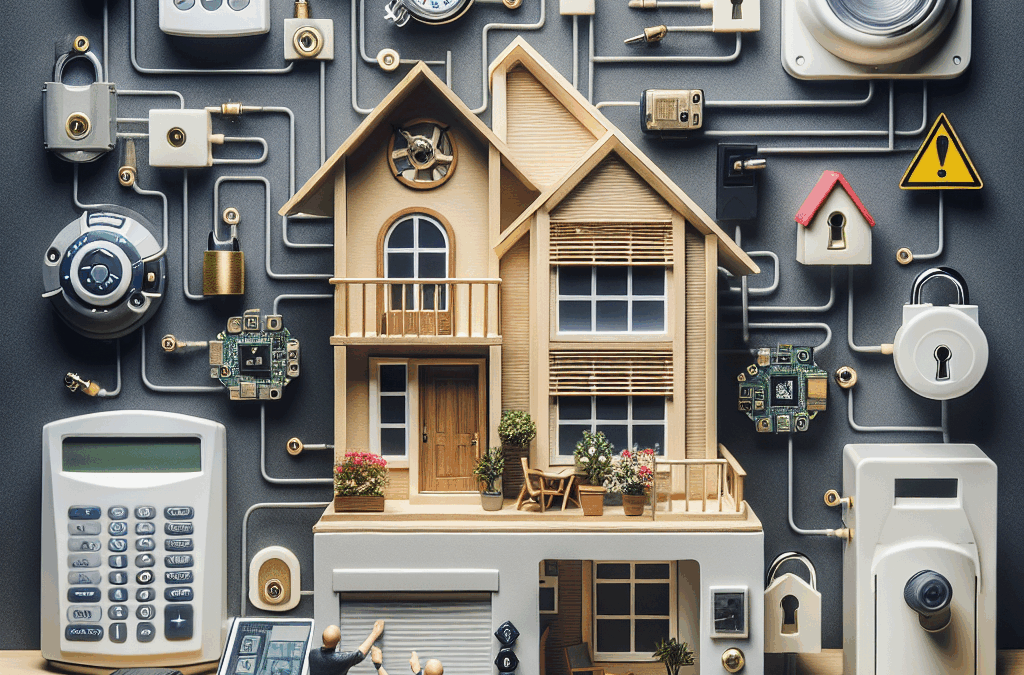
When I decided it was time to upgrade my home security, I dove into the options available. Now, there’s a lot out there—from basic alarm systems to sophisticated smart home networks. I always suggest starting with a system that complements your needs. If you’re away a lot, a smart system that you can manage remotely is a life-saver.
Then there’s the issue of cameras. I’ve got a few around my house, and trust me, they’re worth the investment. You can never be too careful! Look for models with good night vision and those that integrate seamlessly with your phone. You’ll feel empowered knowing you can always check in, even when you’re not at home.
Don’t forget about getting professional installation if you’re not super tech-savvy! It might cost a little extra, but having everything set up correctly is well worth it for your peace of mind. Plus, the tech gurus can usually provide advice on the best spots to mount your equipment.
Developing a Neighborhood Watch Program
Fostering Community Connections
One of the biggest takeaways for me has been the power of community. I started chatting with my neighbors more and found out a few of them felt the same way about security. When you know your neighbors, you naturally look out for one another. It’s like building a mini-guard brigade!
Organizing meetings can be a great way to discuss the concerns we all have. A simple coffee gathering is enough to share ideas on security measures. I was amazed at how many suggestions popped up—everything from better lighting to shared security cameras!
Lastly, don’t forget to establish a means to communicate quickly about any suspicious activity. Whether it’s a group chat or a shared app, having a way to alert your neighbors can make a huge difference. Trust me, when someone’s keeping an eye out, you feel a lot safer!
Practicing Safety Protocols
Daily Routines That Enhance Security
Once I had my systems in place and community connections made, the next step was to adopt some everyday safety habits. One thing I started doing was double-checking that my doors were locked. It sounds silly, but you’d be surprised how many times I’ve left my front door unlocked!
Another thing I practice is keeping my blinds partially closed during the night. It feels cozy and homey, but it also means that nosy passersby can’t see all my belongings just sitting there. Out of sight, out of mind—I live by that motto!
Additionally, I suggest creating a small emergency plan for you and your family. Go over what to do in case of a break-in or any other emergency situations. It’s all about being proactive rather than reactive and can really help ease anxiety.
Ensuring Visibility and Lighting
Implementing Effective Lighting Solutions
One thing I learned about making my home secure is the power of good lighting. Dark areas are the perfect spots for troublemakers to hide. I made sure to install motion-activated lights in my front and back yards. They give a welcoming feel but also deter any unwanted visitors!
Consider the corners of your house and any entry points. I felt a significant difference once I added some solar-powered lights. They’re great because you don’t have to worry about wiring and they charge up during the day. Plus, when they pop on at night, they look super nice!
Lastly, think about the visibility of your home from the street. Trim any tall bushes and consider planting lower shrubs. Not only does it make your home look well-kept, but it keeps those dark corners at bay. No hiding spots means less temptation for anyone looking to break in!
FAQ
1. What are some simple ways to improve home security?
Start by checking for vulnerabilities like weak points in doors and windows, investing in a good security system, and fostering connections with your neighbors. Small changes can make a big difference!
2. How can I involve my neighbors in improving security?
You can start by organizing neighborhood meetings or even just casual gatherings. Sharing concerns and solutions is key to fostering a safer community together.
3. Why is outdoor lighting important for home security?
Good lighting deters intruders by eliminating dark spots where they can hide. Motion-activated lights are a great addition that can increase visibility and safety.
4. How do I choose the right security system?
Consider your specific needs. Find a system that works with technology you’re comfortable with, and opt for cameras and features that provide remote access for peace of mind.
5. What daily practices should I adopt for better home security?
Create a routine of locking doors, securing windows, and reviewing your emergency plan with your family. Consistency is key in practice!

by Preparation Call Editorial Team | Jul 31, 2025 | Preparedness
Choosing the Right Clothing
Layers, Layers, Layers!
When facing the cold, the number one rule is to wear layers. I can’t stress this enough! Starting with a moisture-wicking base layer helps keep sweat from freezing against your skin. The last thing you want is to feel damp and cold when the temperature is already dropping. Then, I typically go for an insulating layer, like a fleece or down jacket, which traps heat without weighing me down too much.
In closing, I top it all off with a waterproof and windproof outer layer. Trust me, having a good shell jacket can make all the difference when you’re battling fierce winds or unexpected snow. I once got caught in a storm and having my outer shell saved me from shivering my way through the night!
Remember, it’s all about the combination of materials! Materials such as wool and synthetic fibers perform exceptionally well in cold weather. And don’t forget your head, hands, and feet—they’re the first to feel the chill. A good beanie, warm gloves, and insulated boots are essentials that I never leave home without.
Building a Shelter
Finding the Perfect Spot
So, when you’re out in the cold and need to set up shelter, the first step is finding the right spot. I usually look for a flat area that’s protected from wind—being nestled close to trees can be a real lifesaver. They act as natural windbreaks, reducing the chill you’ll feel in your cozy little hideout!
Next, it’s vital to stay away from the water sources. Sure, they might seem like a good location, but they can get really cold at night and increase your risk of frostbite. Instead, I choose locations slightly above the ground level to avoid cold air settling around me, which can make my sleeping experience much more comfortable.
Lastly, if you can find a space with some natural materials nearby, you’re in luck. Using fallen branches, leaves, or snow can help insulate your shelter. I’ve built several snow caves that kept me warmer than I ever expected; you’ll be amazed at how effective some simple building techniques can be.
Starting a Fire
The Essentials of Fire-Making
Let’s talk about starting a fire—this skill can really save your life in a cold environment! I always carry waterproof matches and a fire starter; they’re a game changer when the elements are wet. Even in the worst weather, having these helps me get that fire roaring.
Finding the right materials is a crucial step. Dry leaves, small twigs, or even bark can serve as excellent tinder. If you can find some dry wood, that’s even better. I recommend splitting logs to expose fresh wood inside, which ignites much easier than the damp exterior. Just remember: patience is key!
Once you get your fire started, arrange it well for maximum warmth. I like to build a teepee style fire—you get a wonderful flame and lots of heat. Plus, it creates a nice area for cooking if you’re in need of hot meals. Keep adding wood to maintain that fire until you feel secure and warm!
Finding Food and Water
Sourcing Water Safely
Surviving in the cold isn’t just about keeping warm; you need to hydrate, too! Finding water sources is critical, but it’s important to remember that not all water should be consumed straight away. Always look for streams or melted snow, but filter or boil it to avoid any nasty surprises.
If you’re stuck in a pinch, I’ve used snow as a water source before. Just remember not to eat snow directly; instead, melt it on a fire to get clean water! Cold weather makes you need even more fluids, so keeping hydrated is key to maintaining your body heat.
Don’t forget, food can be a challenge during winter. I often look for sources like fish in frozen lakes or small game tracks in the snow. Setting up snares or traps can also yield food, but make sure to follow local guidelines for trapping. Every little action counts when it comes to ensuring your survival!
Navigating in the Cold
Using Natural Landmarks
When you’re out there in the winter wonderland, navigation becomes a true necessity. I always take note of natural landmarks and changes in the landscape. Snow can cover familiar paths, so using the sun’s position can help you find your way. Even though it might be cloudy, tracking the sun when it’s visible gives me a sense of direction.
If I get lost and the conditions are dangerous, I’ve used the stars at night to guide myself back. It’s just a matter of knowing some basics about constellations. And on cloudy days, I stick to the basics—keeping my own tracks visible helps me retrace my steps.
Lastly, always carry a map and a compass if you can. Modern technology can fail, but traditional navigation skills can be lifesavers. Learning how to combine these techniques with technology leads to successful explorations in wintry terrains!
FAQ
1. What are the most important survival skills for cold climates?
The most important skills include choosing the right clothing, building a reliable shelter, starting a fire, sourcing food and water, and navigating using natural landmarks.
2. How can I prevent frostbite while outdoors in cold weather?
Wearing appropriate layered clothing, covering all exposed skin, and taking breaks to warm up are essential in preventing frostbite. Always stay aware of how you’re feeling!
3. What should I do if I can’t find water in the winter?
If you can’t find water, melted snow can be a great alternative, but remember not to eat it directly. You can also check for water sources under snow and ice near rivers or streams.
4. How can I improve my chances of finding food in the winter?
I recommend learning about local wildlife and foraging options. Setting traps and snares, or fishing in frozen lakes can provide sustenance when resources are limited.
5. Why is layering important in cold climates?
Layering is important because it helps manage moisture and trap heat. Each layer serves a purpose, from moisture-wicking to insulation, ensuring you stay warm and dry.
by Preparation Call Editorial Team | Jul 31, 2025 | Preparedness
Assessing Your Water Needs
Understanding Daily Consumption
To kick things off, the first thing you gotta do is genuinely understand how much water you and your family consume daily. This ain’t just about drinking; think cooking, cleaning, and hygiene too. Honestly, you’ll be surprised how quickly those gallons add up when you really start thinking about it!
Start by tracking your usage over a week or so. Grab a notebook or even your phone, and jot down how much water you use for everything. Are you filling the kettle for tea? That’s part of it! Washing the dishes? Don’t overlook that. It all counts!
Once you have a clear picture of your family’s needs, you can assess how much water you’d want to store for emergencies. Trust me, having that knowledge is like having a roadmap—it guides your decisions for how much water you really need to store away.
Choosing the Right Storage Containers
Types of Containers
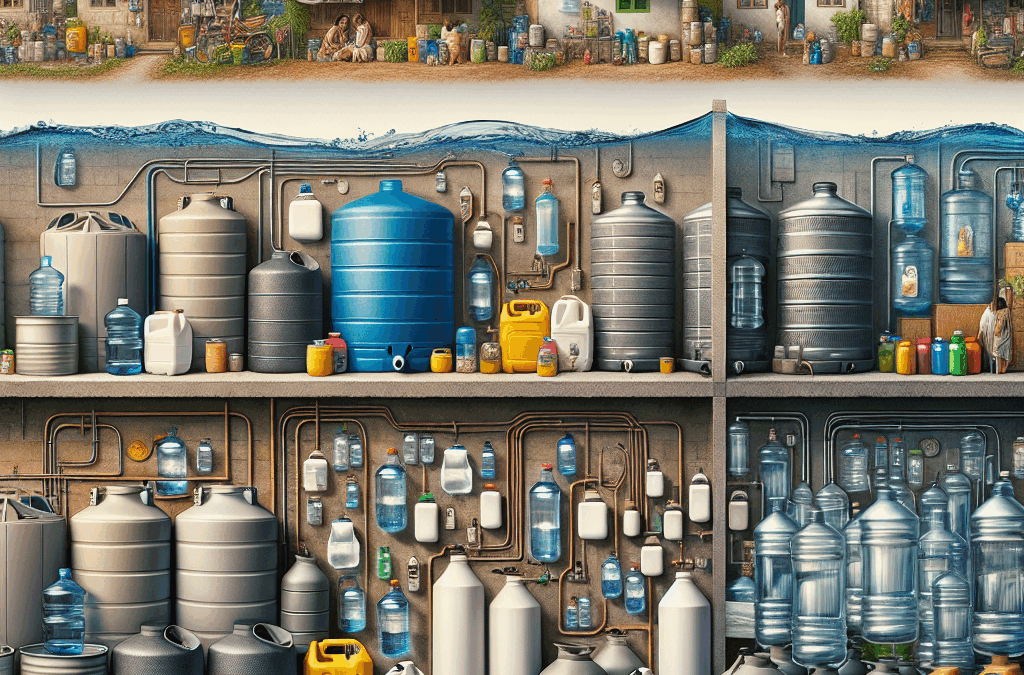
Now that you’ve got an idea of how much water you need, it’s time to talk about containers. You can’t just fill up your old soda bottles and call it a day, folks! There are proper water storage containers designed specifically for this purpose.
You can go for food-grade plastic containers, which are lightweight and durable. There are also glass containers that, while a bit heavier, don’t leach chemicals over time. Then you’ve got stainless steel, which is awesome for keeping things fresh but can be a little pricey. Consider your space and budget before diving in!
Always remember to check for any leaks or cracks before using them. You wouldn’t want to be caught with a busted container when it’s crunch time. It’s all about being proactive instead of reactive when it comes to water storage!
Treating the Water Before Storage
Using Water Purification Methods
So, let’s chat about treating the water before you pop it in the container. Gender aside, I know we all assume water straight from the tap is good to go. But, if you’re storing it long-term, you might wanna jump through a few hoops to treat it properly.
One popular method is using water purifying tablets or drops, which can eliminate bacteria and viruses that might mess with your health. You can also boil the water for a minute or two, depending on where you live. Just remember to let it cool before pouring it into your containers!
Ultimately, treating your water ensures you’re not just hoarding plain old H2O, but really good, clean water that’ll keep your family safe in an emergency. Believe me, it’s worth the extra step!
Proper Storage Practices
Finding a Suitable Location
Alright, let’s get into the nitty-gritty of storage. It’s super important to pick a good spot for your water containers. Ideally, you want them kept in a cool, dark area away from direct sunlight, which can degrade the plastic over time.
If you’re like me, you might think the garage or basement is the perfect spot, but make sure it’s dry and out of reach from potential leaks or flooding. If the containers are in an old shed, check for critters creeping around. Those little guys could make a mess of your supplies!
And, don’t just shove those containers in a corner and forget about them. Rotate your water supply every six months or so, and do a visual check every now and then. It’s a simple task that can save you major headaches later.
Regular Maintenance and Safety Checks
Updating Your Supply
Your long-term water storage isn’t a “set it and forget it” deal. Just like my favorite plants, it needs some maintenance to make sure it’s good to go! This means regularly checking your supply and updating it when necessary.
As mentioned earlier, every six months is a good rule of thumb for rotating out older water supplies, but also keep tabs on the containers. Inspect them for leaks, discoloration, or any signs of wear and tear. If something looks off, it’s best to replace it.
And don’t forget to keep an eye on the overall condition of your storage area too. Keep it tidy and organized; a cluttered storage space can lead to accidents or even mix-ups with different liquids. Practicing regular maintenance feels a little tedious, but trust me, it’ll pay off big time when you’re in a pinch!
Frequently Asked Questions
1. How long can water be stored for?
With proper storage techniques, you can safely store water for 6 months to a year. Just remember to check it periodically!
2. Can I store water in my bathtub?
Yes, in emergency situations, you can fill your bathtub with water. However, make sure it’s clean and consider treating it with purification tablets if you’re going to use it later.
3. Is there a specific way to seal my water containers?
You want to ensure your containers are tightly sealed and that any caps or lids are snug. You can even use tape around the edges for an extra seal if you’re worried.
4. Do I need to treat tap water before storing it?
While tap water is generally safe, treating it with purification methods can help eliminate any pathogens, particularly if it’s going to be stored long-term.
5. How do I know if my stored water is safe to drink?
Before consuming stored water, conduct a visual inspection for any contaminants or odd smells. If everything looks good, you can taste a small amount; trust your instincts, and if anything seems off, don’t drink it.
by Preparation Call Editorial Team | Jul 31, 2025 | Preparedness
1. Basic Supplies for Injury Treatment
Understanding the Basics
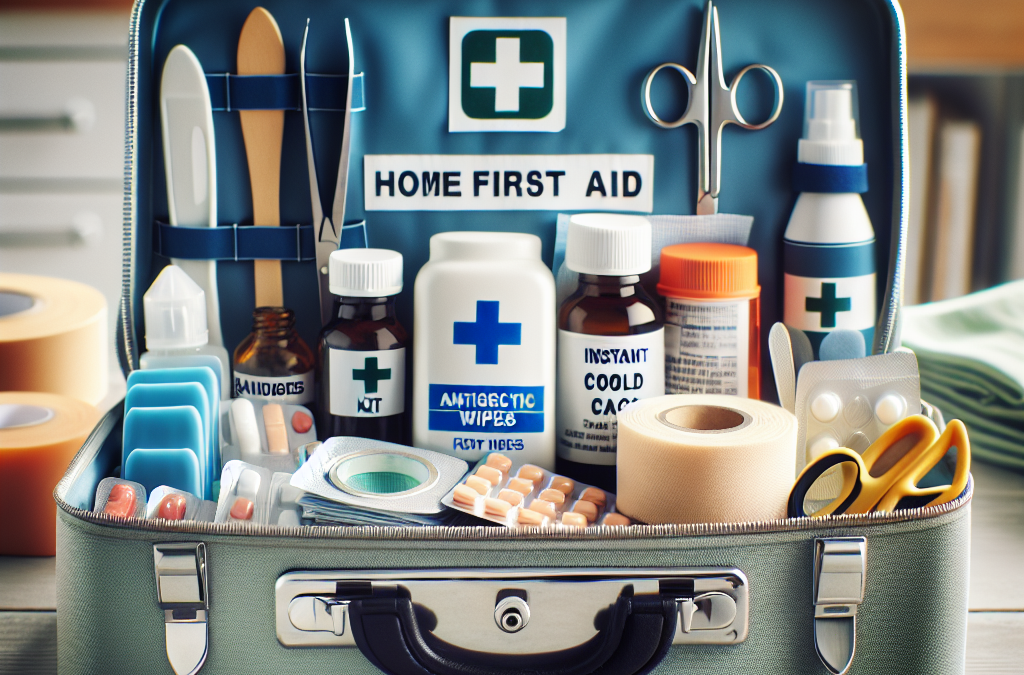
When I first started thinking about putting together a first aid kit, I realized how important it is to have the right supplies on hand. Basic supplies like adhesive bandages, gauze pads, and antiseptic wipes are the fundamental building blocks. Trust me, these items are lifesavers in small accidents, and it’s best to have them close by.
For me, the excitement of creating my own kit made me think of all the “just in case” moments we encounter—tiny cuts, scrapes, and even blister problems. Anyone who’s ever taken a hike knows those shoe blisters can sneak up on you, and having the right band-aid can make all the difference.
Moreover, stocking up on these basics doesn’t need to cost a fortune. You can find most essentials at your local pharmacy or even dollar store. Just remember, you want to ensure everything is easily accessible so you’re not scrambling around when you need it the most.
Choosing the Right Materials
So there’s more to first aid supplies than just what looks nice on the shelf. You really need to think about the materials you’re choosing. For instance, breathable bandages are a must because they help wick moisture away, reducing infection risk.
I like to choose products that come with clear instructions right on the packaging; if I’m in a panic, I don’t want to be deciphering tricky directions. That clarity can save lots of time and keep stress levels down.
Let’s not forget the importance of expiration dates. It’s easy to forget about items hiding at the back of the drawer! I set a reminder to check my kit every six months, so things like antiseptic wipes and ointments don’t go bad.
Special Considerations
Depending on your lifestyle, you might need to include some unique items. For example, if you or someone in your household suffers from allergies, having antihistamines on hand is crucial. Or if you have kids, those adorable cartoon band-aids can encourage them to keep their spirits up after a tumble!
Keep in mind any specific medical needs too. If someone has a prescribed medication or special equipment, that should definitely be included. I’ve learned from experience that incorporating those needs into your first aid plan prevents panic later on.
Last but not least, consider environmental factors. If you enjoy outdoor adventures, some insect bite relief or sunburn cooling gel could come in handy. It’s all about tailoring your kit to fit your personal needs and preferences.
2. Medications You Should Have
Basic Over-the-Counter Medications
I’ve discovered that having a few basic over-the-counter meds in my kit can be a game changer. Pain relievers like ibuprofen or acetaminophen help ease headaches or body aches that can pop up unexpectedly, especially after an active day.
Don’t forget about antacids, either. Those pesky moments when spicy food backfires can be uncomfortable, and having a little something to ease the burn can turn a rough evening into a more bearable one.
And let’s not skip over good ol’ allergy remedies—hay fever can hit hard when the seasons change. Keeping some antihistamines on hand will help you breathe a lot easier during those troublesome months.
Cold and Flu Essentials
No one wants to be caught off guard by a scratchy throat or runny nose, right? I always keep some cold and flu medications in my first aid kit. Syrups, throat lozenges, and nasal decongestants are must-haves for any unexpected illness.
I’ve learned by experience that a little preparation can prevent a lot of discomfort. When those symptoms hit, having the comfort of familiar remedies makes staying cozy on the couch a whole lot better.
Plus, I’ve got to say, it beats making a late-night pharmacy run when you just want to rest up. So stock your kit with what works for you!
Prescription Medications
Now let’s chat about prescription meds. This can get a little tricky because it’s not just about stocking up—it’s about staying organized. I dedicate a little space in my kit for personal prescriptions to ensure I’m always prepared.
One tip I’ve found helpful: keep a list of emergency contacts, including doctors. That way, if something happens and you need a refill or medical advice, you know right where to look.
Make sure to follow the guidelines for storage. Some medications should be kept in specific conditions—like out of sunlight or in a cooler environment. It’s all about keeping everything safe and effective.
3. Tools and Accessories That Matter
Basic First Aid Tools
Definitely don’t overlook the significance of good tools! Scissors, for instance, can help you cut through stubborn bandages quickly when you need to get to an injury.
Also, tweezers are excellent for removing splinters or pulling out ticks, which are way too common in warmer months. Trust me, these tools can make all the difference in an emergency.
Adding a digital thermometer to my kit has truly been a lifesaver. Checking temperatures can guide my responses, especially with the kiddos. A good thermometer means I know when it’s time for a cold compress or a doctor’s visit!
Personal Protection Equipment
When I think about first aid, I always consider personal protection. Disposable gloves have become a staple in my kits ever since I realized how handy they are when dealing with injuries.
Alongside gloves, a basic face mask could come in handy during specific situations, especially if you’re around someone who’s ill. It just adds a layer of safety that goes a long way.
And, don’t forget about a face shield or goggles if there’s a chance for blood sprays, especially in situations where safety is paramount. It might seem like overkill, but being prepared can be a lifesaver!
Storage and Organization
Having all the right tools and supplies is all well and good, but if they aren’t organized properly, it can feel like chaos. I recommend utilizing clear containers or pouches to help keep things sorted and easy to find.
Labeling each section or container makes things super simple. In a moment of panic, you want to grab what you need without hunting through layers of clutter.
Lastly, think about where you’re storing your kit. I’ve created a designated spot in my home that’s both easily accessible but also out of reach from little hands. Finding that balance means I’m ready for anything that comes my way.
4. Tailoring Your Kit to Your Family
Assessing Your Family’s Needs
Taking the time to evaluate my family’s unique needs has made tailoring our first aid kit much more effective. Think about the age of everyone in your household—do you have toddlers or teenagers? Each group brings different challenges.
For parents, adding items like teething gel or pediatric pain relievers can be crucial. And for teens, maybe some acne treatment should be thrown in the mix. It’s all about anticipating what might come up!
Consider any ongoing medical conditions too. Stocking your kit with necessary extras ensures you feel prepared for anything, whether it’s managing a fever for a child or preparing for a fainting spell in a grandparent.
Special Considerations for Pets
And let’s not forget about our furry companions! I’ve found it essential to have pet-specific items in my first aid kit. A basic supply of tweezers or special pet first aid guides can really help in emergencies.
If your pet has allergies, try to keep their antihistamines handy—because trust me; they can suffer too. Canine first aid can sometimes feel like a whole other ballgame, so having resources can ease some worries.
Don’t forget important items, like a muzzle or leash for a scared or injured pet. They can help you manage the situation safely while you access care!
Involving Family Members
One thing I’ve truly enjoyed is involving my family in building and maintaining our kit. It’s a great way to educate everyone about the supplies while also preparing them for possible emergencies.
Each person can take the time to learn what to do in certain situations, from basic CPR to identifying what to grab in a hurry. Plus, having everyone involved sparks interesting conversations about health and fitness!
Make it a family event to restock the kit together—checking expiration dates brings everyone together while also teaching responsibility. It becomes a communal activity, strengthening your family’s preparedness and confidence.
5. Training and Preparedness
Understanding Basic First Aid
If there’s one lesson I’ve learned, it’s that having a well-stocked first aid kit is only part of the equation. Gaining knowledge about how to use those supplies is equally essential. I took a basic first aid course, and it opened my eyes to what I can do in emergency situations.
Learning techniques like CPR, bandaging wounds, or how to treat burns encourages confidence when handling accidents. Plus, it’s empowering to know that I can care for myself and my family when needed.
Many organizations, like the Red Cross, offer great resources and even certifications in first aid and CPR. I highly recommend checking those out—they’ve been game changers for me!
Regular Refresher Courses
Knowledge isn’t enough if it gets rusty over time! I regularly sign up for refresher courses and online webinars, because staying informed is super important. Plus, it’s fun to meet others interested in emergency preparedness!
Even just reviewing materials or reading first aid manuals every now and then can keep life-saving techniques fresh in my memory. Journals and guides often have updated information that may improve my approach to home health emergencies.
Sharing that knowledge with my family can be a good bonding experience too. Together, we work through different scenarios, keeping those important conversations open and ensuring everyone knows what to do when a challenge arises.
Creating a Plan
Beyond gathering supplies, creating a comprehensive emergency plan is essential. I made sure to sit down with my family to discuss what we would do in different situations, like natural disasters or severe injuries. Everyone has a role to play, and knowing that is comforting.
We also set communication plans—deciding who to contact for help or how to find each other in public spaces if separation occurs. It’s all about feeling prepared and knowing we have each other’s backs.
Ultimately, I have a designated spot to keep our plan accessible, so in the heat of the moment, we can refer to it for guidance. It’s all about remaining calm and collected, and knowing what our next steps should be can help with that tremendously.
Frequently Asked Questions
What is the best place to store a first aid kit?
The best place to store a first aid kit is in a location that is accessible to all family members but out of reach of young children. A kitchen cupboard, a hall closet, or under a bathroom sink usually works well.
How often should I check my first aid kit supplies?
It’s a good idea to check your first aid kit every six months. This helps ensure that all items are in good condition and have not passed their expiration dates.
Can I use expired first aid supplies?
While some items might retain their effectiveness past expiration dates, it’s generally best to replace expired supplies to ensure optimal safety and effectiveness.
Should I include specific medications for family members in my first aid kit?
Yes, you should include any specific prescription medications or necessary items for family members who have ongoing medical needs. Just make sure they’re stored properly!
Is it worth it to take a first aid class?
Absolutely! Taking a first aid class prepares you to handle emergencies effectively and gives you confidence in your skills. Plus, it can be quite empowering!





