by Preparation Call Editorial Team | Jul 30, 2025 | Preparedness
Canned Goods
Variety in Choices
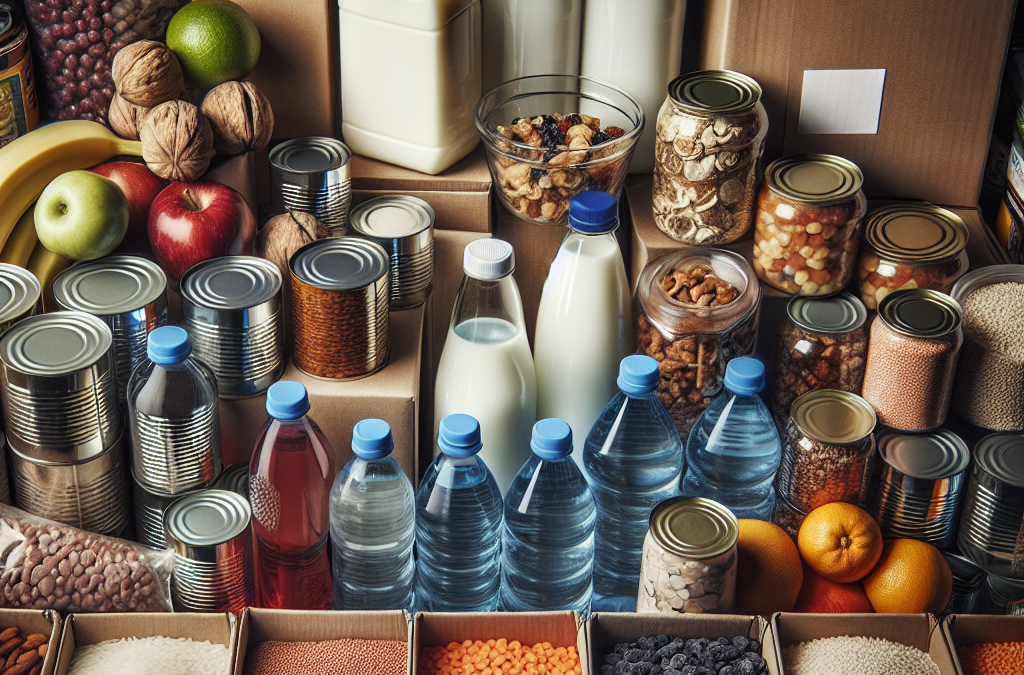
When it comes to canned goods, the options are practically endless. You’ve got everything from soups and stews to fruits and vegetables. Personally, I love stocking up on a selection because it gives me versatility. Not every emergency situation needs to be about survival; sometimes, it’s about comfort food too. So, include a mix of hearty meals like chili and some lighter options like canned peaches.
What I keep in mind is balance. Canned vegetables are crucial as they retain most of their nutrients through the canning process. When selecting your cans, just check the expiration dates and pick your family’s favorites. Trust me; you don’t want to find yourself stuck with a hundred cans of an obscure vegetable no one likes!
Don’t overlook the fun side of canned goods. Many brands offer ready-to-eat meals that taste great and save time when you’re in a bind. Throw in some mixed beans and you can whip up a yummy chili or pasta bake in no time. Now, that’s what I call a win-win situation!
Grains and Pasta
The Heroes of the Pantry
Grains and pasta are like the unsung heroes of your food storage. They last a heck of a long time and provide a solid base for countless meals. Rice, quinoa, and oats are my go-tos because they are super versatile and easy to prepare. Just a little water and heat, and boom—dinner is served!
Buying in bulk can save you some cash too and ensures that you have enough on hand. Just remember to store them properly. I use airtight containers to keep pests at bay, and I’ll label them, so I know what’s what. Organization in your pantry is key, especially during stressful times.
Don’t ignore pasta! It cooks quick, and you can pair it with your canned goods for a filling meal. Try rotating different shapes and sauces to keep things interesting. Spaghetti one night, penne the next—it’s a pasta party every day. And who doesn’t want that?
Dehydrated Foods
Light and Long-Lasting
Dehydrated foods are a boon for emergency storage! They’re lightweight, easy to store, and can last for years without spoiling. I’ve found dried fruits, vegetables, and even freeze-dried meals that can just be rehydrated with water. This is super convenient when you want to maximize space without sacrificing nutrition.
One of my top recommendations is to always have some dehydrated fruits like apples or bananas on hand. They make for an awesome snack and can even satisfy a sweet tooth without the guilt. Plus, they can be a great addition to oatmeal or yogurt if you need a bit of variety in your meals.
When it comes to vegetables, I love using dehydrated versions in soups or casseroles. They rehydrate beautifully, soaking up flavors and adding great nutrition to the mix. Just be sure to check their packaging; organic options are usually the best bet!
Nut Butters
Nutritious and Satisfying
Okay, let’s talk about nut butters—because they’re amazing! Not only do they last for ages, but they’re also packed with protein and healthy fats. I always keep jars of peanut butter and almond butter in my pantry. They’re super filling and can be spread on crackers or bread for a quick meal or snack.
What I love about nut butters is their versatility. You can mix them into smoothies, use them in baking, or just grab a spoon and dig in (totally guilty!). If you decide to go with the natural stuff, just make sure it’s kept sealed properly; you don’t want to end up with rancid nut butter!
For those with nut allergies, don’t forget about sunflower seed butter or tahini! They’re equally delicious and provide a similar nutritional punch. Keep a supply of these fats in your pantry, and you’ll always have a quick and satisfying option when hunger strikes.
Sweeteners
Flavor Enhancers
When it comes to sweetening things up during an emergency, you’re gonna want some non-perishable sweeteners in your stash. Honey, for instance, never goes bad, which makes it a perfect addition to your storage. I use honey for everything from sweetening my tea to slathering on bread.
Then there’s maple syrup—oh man, is it great! Not just for pancakes, it’s also perfect in marinades and glazes for meats. I keep a gallon-sized container in my pantry for those emergency comfort meals. A little drizzle can change the game for so many recipes!
Lastly, I can’t forget about granulated sugar and brown sugar. They have endless uses in baking and cooking. Plus, it’s nice to have a little sprinkle of sugar in your morning oatmeal or on some fresh fruit to elevate the flavors a bit. It’s the little things that count when you’re making the best of a tough situation!
FAQs
What are the best canned foods for emergency storage?
The best canned foods include a variety of soups, stews, vegetables, and fruits that your family enjoys. Make sure to cover nutritional bases and keep comfort items as well.
How long do grains last in emergency storage?
When stored properly in airtight containers, grains can last anywhere from 5-30 years, depending on the type. Rice and wheat are particularly hardy choices.
What type of dehydrated foods are recommended?
Dried fruits, vegetables, and even full meals that can be rehydrated with water are excellent choices. They’re lightweight, nutritious, and perfect for emergencies!
Can I use nut butters in recipes?
Absolutely! Nut butters can be used in a variety of recipes, from smoothies to cookies, making them versatile and enjoyable sources of nutrition.
How do I store sweeteners for longevity?
Honey doesn’t require any special storage as it lasts indefinitely. For maple syrup, granulated, and brown sugars, keep them in cool, dry containers to prevent moisture and pests.
by Preparation Call Editorial Team | Jul 30, 2025 | Preparedness
Understanding the Importance of Hygiene
Why Hygiene Matters
In times of crisis, it can be so easy to let hygiene slide. I’ve been there, and trust me, maintaining hygiene is crucial. It not only helps prevent disease but also boosts morale. Think about a time when you felt clean and fresh amidst chaos. It’s that little bit of comfort that can make a huge difference.
When we’re faced with an emergency, like a natural disaster or a pandemic, germs and bacteria can spread like wildfire. Keeping up with hygiene practices helps us stay healthy, which is the last thing we want to compromise on. Remember that your health is one of the things you have control over when everything else seems out of whack.
Moreover, maintaining hygiene during extended emergencies instills a sense of normalcy. It brings back some of that peace of mind and structure that might otherwise be lost. I can’t tell you how uplifting washing my hands or taking a quick shower felt during stressful times.
Creating a Hygiene Plan
Assessing Your Resources
In my experience, the first step to creating a hygiene plan is to assess what resources you have. Don’t wait until you’re in a bind; evaluate your supplies now. You may think you have enough soap or sanitizers, but when push comes to shove, that might not be the case.
Take inventory of what you have and be creative. In emergencies, you sometimes have to improvise. I remember using vinegar as a natural disinfectant when I ran low on commercial products. It worked just fine and reminded me that there are always alternatives out there.
All in all, do what you can to gather essential items before they’re hard to find. Planning ahead strengthens your hygiene plan. Reassessing your situation regularly will also keep you on top of things, making it easier to adapt as the situation evolves.
Establishing Routine Hygiene Practices
Key Practices to Follow
One of the best pieces of advice I can give you is to establish a daily routine. You might have to push through the fear and uncertainty, but setting aside time for hygiene will help keep those germs at bay. I love starting my day with a refreshing shower and brushing my teeth, and I try to stick to that schedule as much as possible, even when things get crazy.
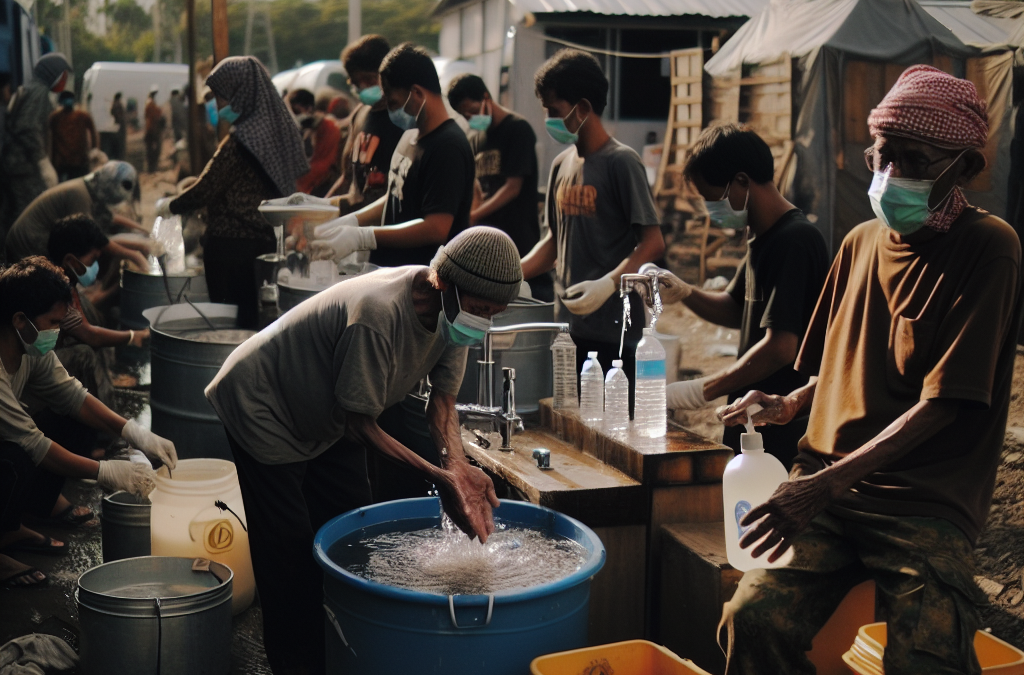
Handwashing is a must! I can’t stress this enough. Once I made it a habit, I began to feel the difference. Wash your hands before eating, after using the bathroom, and whenever you touch something that could be dirty. It’s simple but it works, trust me.
And don’t forget about keeping your living spaces clean. Dusting and sanitizing surfaces can feel like a chore, but I’ve found that it’s a great way to blow off some steam while also maintaining a safe environment. Plus, your space feels so much more inviting when it’s fresh and organized!
Managing Waste Effectively
Understanding Waste Disposal
Let’s talk waste management. This is an area that can be overlooked but is super important. When we don’t manage waste appropriately, it can lead to sanitation issues and possible outbreaks of illness. I remember when we didn’t have power during an emergency, and trust me, waste can pile up quickly if you’re not careful.
Learn about proper waste disposal methods that fit your circumstance. If you can’t take trash out regularly, designate a specific area away from your living space for waste. Just keep it clean and manageable, and always remember to use gloves when handling waste. It’s a small step that keeps contamination to a minimum.
And let’s not forget composting! I’ve started to love composting as a routine in my household, even during emergencies. It reduces waste and provides nutrients to the plants around, creating a lovely symbiotic relationship. It feels good to know that I’m not only cleaning up but also helping the environment in the process.
Staying Informed and Adapting
Researching Best Practices
In our tech-driven world, it’s easier than ever to stay informed. I can spend a few minutes each day reading up on hygiene practices during emergencies. Knowing what’s effective helps me make better choices and also share valuable information with friends and family who might be struggling.
Keeping updated on new guidelines or recommendations is essential, as hygiene standards can change based on emerging threats. Resources like the CDC or local health department updates are great starting points to keep your practices aligned with current health advisories.
In closing, be adaptable. Emergencies can change quickly, and that may require a shift in your hygiene practices. I learned to stay flexible and adjust to new situations, and remember—just because something worked yesterday doesn’t mean it will work the same today. Embrace change as part of the journey.
FAQ
1. Why is it important to maintain hygiene during emergencies?
Maintaining hygiene during emergencies helps prevent the spread of diseases, boosts morale, and instills a sense of normalcy in chaotic situations.
2. What are some essential items for a hygiene kit?
Essential items include soap, hand sanitizer, disinfectant wipes, toothbrushes, toothpaste, toilet paper, and any personal hygiene products necessary for you and your family.
3. How can I establish a hygiene routine at home?
Set specific times throughout the day for washing hands, cleaning surfaces, and taking care of personal hygiene. Stick to these times to create a new routine that feels natural.
4. What should I do with waste during an extended emergency?
It’s crucial to designate waste disposal areas away from living spaces. Learn about proper disposal methods for various types of waste and always wear gloves when handling it.
5. How can I find reliable information on hygiene practices during emergencies?
Check resources like the CDC, WHO, or local health departments. These organizations update their recommendations based on current health threats and best practices.
by Preparation Call Editorial Team | Jul 30, 2025 | Preparedness
Insulating Your Home Effectively
Identify Drafts and Seal Them
One of the first things I always do when winter rolls around is to check for drafts. You wouldn’t believe how much cold air can seep in through tiny gaps around windows and doors! It’s like those little openings are just welcoming the chilly air to come on in.
What I recommend is a simple test: on a windy day, hold a candle near your windows and doors. If the flame flickers, you’ve got a draft. You can seal them up with weatherstripping or even some improvised solutions like old towels or blankets.
This simple step can literally save you energy costs and keep your home feeling a whole lot warmer. Trust me, it makes a difference!
Utilize Heavy Curtains
Another personal favorite of mine has to be heavy curtains. They aren’t just for aesthetics; they act as an additional layer of insulation. I’ve found that closing these before the sun goes down can significantly reduce the amount of cold that creeps into a room.
When the sun is shining, I love to open them up and let that warmth in. But once the golden light fades, I pull them shut tight. Not only do they keep the cold out, they also provide some cozy ambiance.
Moreover, you can even hang blankets over your windows if you’re in a pinch! Just make sure they cover the entire window to block those pesky drafts.
Insulating Floors
Believe it or not, floors can be a major source of heat loss. If you’ve got tile or hardwood, your feet might just turn to ice in the winter months! A good area rug can work wonders here.
When I first got a few thick rugs for my home, it transformed the atmosphere. They not only look great but also keep the chilly air from leeching through the floors. On days when it’s particularly cold, I even layer blankets over the rugs for extra warmth.
For those without rugs, try moving your furniture to create a cozy space that traps warmth. It can make those cold winter nights feel a little more bearable.
Harnessing the Power of Layering
Dressing in Layers
Now let’s talk about the way we dress. If there’s anything I’ve learned, it’s that layering is key! You’ll want to start with a good base layer that hugs your body without being too tight.
I usually go for thermal tops and leggings, which are great for trapping heat. Then I layer on a cozy sweater and my trusty winter coat. Even if I’m just lounging at home, I throw on some comfy socks to keep my toes warm!
Don’t forget about accessories like hats and gloves. Even indoors, keeping your head and hands warm can make a huge difference in how comfortable you feel!
Blankets and Quilts
Nothing says warmth like snuggling under a big blanket. I make it a rule to always have a pile of soft blankets within reach during winter. It’s like wrapping yourself in a hug!
Layering blankets on your bed and couch not only makes them super comfy but also boosts their insulation. On those particularly chilly nights, I’ll pile on an extra quilt or two – it’s pure heaven!
And let’s not forget about heated blankets! If you can make it work safely, they’re an excellent way to preheat your bed before you crawled under the covers.
Hot Drinks and Comfort Foods
One of my favorite winter strategies is indulging in hot drinks. There’s just something about sipping on a warm mug of cocoa or herbal tea that warms the soul. Plus, let’s face it – it’s comfort food season!
I love making soups and stews that not only fill me up but can also warm you from the inside out. There’s nothing like a big bowl of homemade soup to chase away the chill.
Being in the kitchen prepping these warm meals also does wonders for the home temperature. Using the oven and stove naturally increases warmth, which is a happy bonus!
Utilizing Alternate Heating Sources
Space Heaters
If the electricity goes out, I always have a backup heat source prepared. Space heaters are a fantastic alternative but do remember to use them safely! Place them away from flammable materials and never leave them unattended.
Before winter, I usually check that they’re in good working condition. Keeping a few extra bottles of kerosene handy for kerosene heaters is also wise, just in case. I create a warm little nook in my living room with it during the coldest days.
Space heaters can also help warm up specific rooms. So instead of heating the entire house, I’ve found it works great to focus on one area where I spend most of my time.
Wood Burning Stoves or Fireplaces
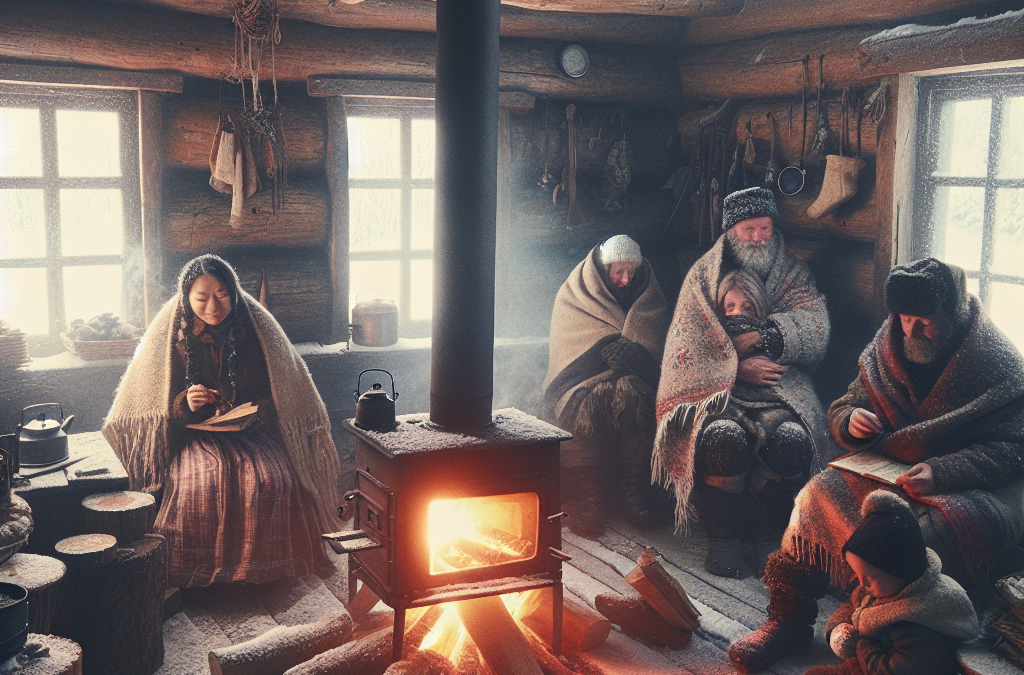
If you’re lucky enough to have a wood-burning stove or fireplace, you’re in for a treat! These things are like little fire pits inside your home. There’s nothing warmer than the cozy glow of a fire on a winter night.
Before winter starts, I stock up on wood and make sure my fireplace is clean and ready to go — safety first! A well-tended fire can not only keep your home toasty but also become a serene gathering spot for friends and family.
Plus, the smell of burning wood adds a lovely ambiance that reminds me of the holidays. Just don’t forget your fire safety protocols while enjoying this warmth!
Thermal Mass Heating Techniques
This one might sound a bit fancy, but thermal mass heating is simply using materials that naturally absorb and retain heat. Things like bricks and concrete can help. I like to set a few big rocks or bricks near my fireplace for an extra heat source.
As the fire warms them up, they’ll radiate that heat for hours. If you don’t have a fireplace, you could even consider using a solar cooker if the sun is out!
They work by capturing sunlight and converting it into warmth that can be released later. It’s a simple, sustainable approach that can add to your winter heat supply.
Creating a Cozy Environment
Decorate with Warm Colors
Believe it or not, the way you decorate your space can affect how warm you feel. I like to use warm colors like reds, oranges, and earth tones during winter. They create an inviting atmosphere that feels warm, even without the heating going strong.
Adding elements like throw pillows and blankets in these colors can instantly make your living area feel cozier. Plus, they’re just plain fun and inviting to snuggle into!
Using soft lighting options like lamps with warm bulbs instead of harsh overhead lights can really change the vibe. It’s like a warm hug every time you walk into the room!
Setting Up a Warm Space
One thing I love to do is create a designated “warm space” in my home. For me, it’s a corner of the living room with blankets, pillows, and everything cozy. I even keep books and games close by for when I want to unwind.
Setting up a small tent-like area with sheets draped can add to the coziness too! Kids love it, but honestly, so do I. It’s a mini adventure right in your living room!
This little oasis makes winter evenings more enjoyable. It promotes togetherness and fun, turning a chilly night into a cherished memory.
Engaging Activities to Drown the Chill
All in all, keeping busy is a great way to combat cold. Rather than sitting still and feeling the frost, I pick engaging activities like puzzles, board games, or crafts. It keeps the mind sharp while keeping the warmth circulating.
Plus, family game nights can keep everyone’s spirits up, and laughter is actually a great way to feel warmer! You might be surprised how quickly time flies when you’re having fun.
So why not invite friends over for a potluck? Cooking together uniquely warms up both body and spirit. It’s one of the best distractions when the cold sets in.
FAQ
1. What are the best ways to insulate my home without electricity?
Check for drafts, use heavy curtains, and add rugs to your floors. These methods are simple yet effective at keeping the warmth inside.
2. How can I layer my clothing effectively during winter?
Start with base layers, add sweaters, and finish with a warm, insulated coat. Don’t forget socks, hats, and gloves to keep extremities warm!
3. Are space heaters safe to use?
Yes, but it’s important to follow safety guidelines. Keep them away from flammable materials and never leave them unattended.
4. How can I create a cozy environment in my home?
Use warm color palettes, soft lighting, and create a dedicated cozy space with blankets and pillows. Personal touches make it feel warm and inviting!
5. What activities can help keep warm during winter?
Engaging in crafts, playing games, or cooking with friends are great distractions from the chill and can create warm memories!
by Preparation Call Editorial Team | Jul 30, 2025 | Preparedness
1. Understanding the Importance of Water Availability
The Essential Role of Water in Survival
Water isn’t just good for quenching your thirst; it’s essential for life. I remember when I first started looking into preparedness, one of the most striking realizations was how quickly I can dehydrate. Without water, I’d only have a few days before I’d be in serious trouble. It’s amazing to think that your body can only last about three days without it!
Think about it: we need water for drinking, hygiene, food preparation, and even medicine. So, when imagining a scenario where resources become scarce, water becomes even more critical. That’s why having a solid plan for water storage is, in my opinion, non-negotiable.
Having a sufficient water supply not only ensures that you will stay hydrated, but it also aids in your overall well-being during emergencies. In the past, I’ve experienced situations where access to clean water was a challenge, and it was a wake-up call to prioritize water storage.
Potential Emergencies That Might Affect Water Supply
Floods, droughts, and natural disasters — these can all wreak havoc on our water supply. I once lived through a major storm that knocked out our power for days. We lost access to tap water because the machinery that pumped it was down. It made me realize that I needed to have a backup plan.
In many areas, if the local water supply becomes compromised, it could take a long while for things to return to normal. Having stored water not only addresses immediate thirst but also prepares you for longer-term disruptions.
Each type of emergency has its twists and turns, but one thing remains constant: people need water. Knowing that I have my bases covered with my water storage gives me peace of mind — a luxury I am always grateful for during turbulent times.
Building a Resilient Community Through Preparedness
Preparedness isn’t just a solo journey. When you invest in water storage, you’re actually contributing to a more resilient community. If we all take steps to have our own water reserves, we can better support each other during times of crisis.
I’ve seen neighbors banding together during emergencies, sharing resources, and helping one another. When everyone has done their part, we create a safety net for our community. Having enough water can help you assist friends or family who might be struggling, and it always feels good to lend a hand.
Ultimately, prioritizing water storage means promoting a culture of preparedness and fostering connections in your community. And trust me, that’s something we all need more of!
2. Simple and Effective Storage Solutions
Choosing the Right Storage Containers
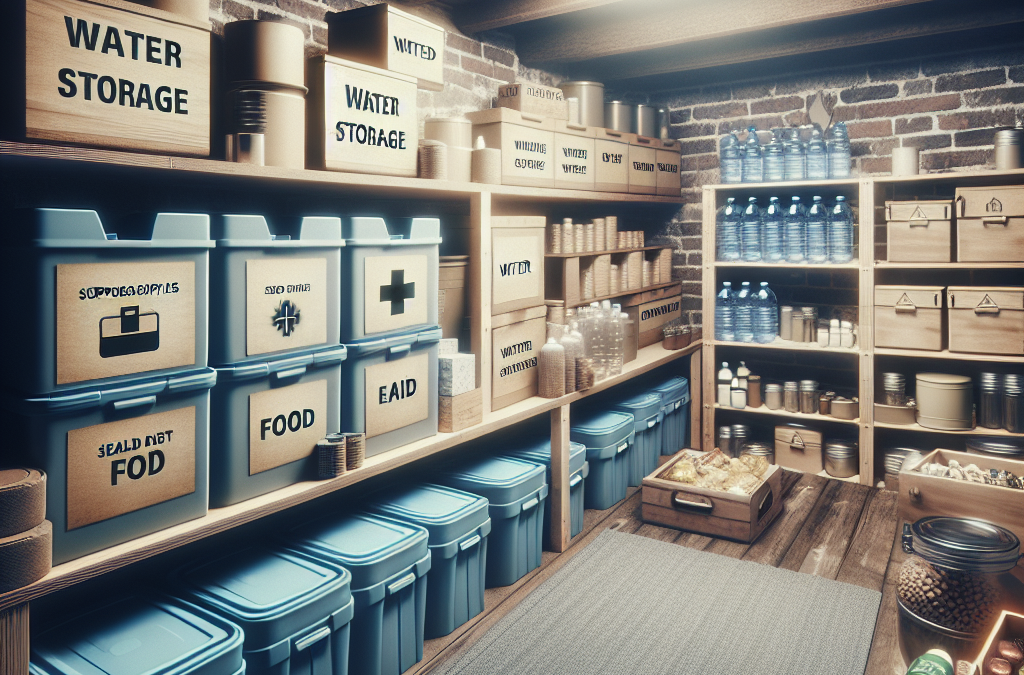
The type of container you choose for your water storage can really make a difference long-term. I’ve learned that not just any old container will do. You want food-grade water containers that are sturdy and free from harmful chemicals.
One of my go-to discoveries has been 5-gallon BPA-free buckets. They’re affordable, easy to store, and with a little bit of care, they can last for years. Plus, they stack nicely, which is always a bonus in our homes where space is tight!
Don’t forget to label your containers with the date they were filled. It’s a simple tip that saves a lot of headaches down the line. You’d be surprised how crammed your mind gets when you’re trying to remember which container is which!
Water Purification Methods
One of the most important takeaways I have from my preparedness journey is learning about purification. It’s not just about having water; it’s about having safe drinking water. There’s nothing worse than having a stash of water that could potentially make you sick.
Boiling is a classic method — just bring your water to a rolling boil for about one minute. I’ve done this many times when we’ve been camping, and it’s super effective. However, in a more extended emergency, this gets tricky due to fuel supply.
Other options include chemical treatments or filters. I came across some handy portable water filters that can eliminate various pathogens. They’ve saved me a few times, and I recommend checking them out if you’re serious about safe water storage.
Regular Maintenance of Stored Water
Your water storage shouldn’t be a “set it and forget it” situation. I learned this the hard way when my stored water didn’t taste quite right. Water can sit too long and lose its quality if you’re not careful.
Depending on how you store it, it’s wise to rotate and refresh your water every six months to a year. I mark my containers with dates, which makes it so much easier to remember when it’s time for a swap.
A clean storage environment is key too! Make sure containers are stored in a cool, dark place to minimize bacterial growth and algae formation. Happy water, happy me!
3. How Much Water Should You Store?
Guidelines for Personal Water Needs
Now, you might be wondering how much water is enough for your specific situation. A common rule of thumb I’ve heard is to store at least one gallon of water per person per day for a minimum of three days. This means if you have a family of four, you’re looking at a minimum of 12 gallons!
That might sound like a lot at first, but once you start breaking it down, it’s more manageable than you think. For instance, if you set a goal to store a couple of extra containers each month, you’ll reach that target sooner than later.
Of course, that’s just the base amount. Consider any special needs in your household as well, like young kids needing extra hydration during play or someone with a specific medical condition. Always be prepared for unique situations!
Factors Influencing Water Storage Volume
Your location and lifestyle can heavily influence how much water you should put aside. I live in an area prone to seasonal hurricanes, so I’ve learned to keep additional reserves on hand during hurricane season. In contrast, someone in a more stable environment might not feel the same urgency.
Also, consider how many days you realistically think you might be cut off from your supply. I typically plan for a week — it gives me peace of mind that I’ll be good to go if something happens unexpectedly.
Lastly, include pets in your calculations! I can’t imagine forgetting my furry friends. Just like us, they need water too. It’s crucial to factor in their needs when planning your water storage.
Strategies for Increasing Storage Capacity
If you’re thinking, “Wow, that sounds like a lot of water!” trust me, I’ve been there. Finding room for it can be a challenge, but it’s definitely doable with some creativity. I’ve repurposed space in my garage and under beds — wherever I can find a nook.
Another tip is to consider water storage bladders. These can be placed in large spaces and are super flexible. Plus, they don’t take up a lot of space when not in use, which is a total win in my book!
In summary, don’t hesitate to join forces with family or friends. Teamwork makes it much easier to get your water storage plans off the ground. Plus, you can share supplies or knowledge, which is always a bonus!
4. Financial Considerations for Water Storage
Budgeting for Water Storage Supplies
I know budgeting can be a bit of a bummer, but setting aside a little cash for water storage each month can really make a difference. It doesn’t have to be expensive, either — I often find great deals on containers at local stores.
I usually keep an eye out during sales events, and I’ve snagged some fantastic discounts. Plus, think of it this way: investing now can save you a lot of headaches down the line.
Aside from the containers, think about any extra purification supplies you might need. And don’t forget the reinforcements to help with maintenance! Every little bit helps when you’re prepping.
Long-term Savings on Emergency Supplies
When you think about it, having a solid water storage plan can save you money in emergencies. Rather than rushing out to buy overpriced bottled water during a crisis, my stored water will keep my costs down significantly.
I remember a time when a natural disaster led to insane price hikes on bottled water. Through my stocking up strategy, I was able to sit back and relax while others scrambled to find supplies.
Not only does proper water storage result in savings, but it can also help avoid impulse buying when emotions are high. My wallet definitely appreciates that!
Potential Financial Assistance for Preparedness Planning
There are communities out there that focus on helping people get prepared. Sometimes, local organizations or government initiatives can offer resources or even discounts on preparedness supplies, including water storage items.
I’ve seen workshops conducted in my area that offer subsidized materials, so it’s worth checking out what’s available. Every little bit counts when it comes to preparedness!
Also, don’t hesitate to reach out to friends or family. They might share some of the supplies or resources they already have. It’s all about being smarter about our investments and supporting one another along the way.
5. Establishing a Practical Water Plan
Setting Realistic Goals
Like any goal, establishing a water storage plan requires realistic expectations. I love starting with small, achievable goals. Whether that means focusing on one water container a week or exploring purification methods, each step is worthwhile!
Build a timeline depending on your family’s needs and lifestyle. For individuals or small families, my favorite approach is to set aside a specific date each month for stocking, cleaning, and refreshing supplies. It’s challenging, but the rewards are worth it!
You know, it’s about making preparedness part of your routine rather than an afterthought that feels overwhelming. It’ll become second nature before you know it — trust me on this!
Planning for Water Distribution
Once your water storage is up and running, think about how you plan to distribute it during an emergency. I like to have a small kit ready with some essentials, including a handy container to take on the go if I ever need to leave home.
Also, consider how you’ll prioritize family needs. If you have children, elderly family members, or pets — their hydration should be a top priority, so have it planned out! Knowing your plan can keep you calmer in stressful situations.
It’s super helpful to discuss these logistics with your family so everyone knows what to do in case of an emergency. Having shared knowledge eases the decision-making process under pressure.
Regular Review of Your Preparedness Plan
Lastly, I can’t stress enough how important it is to routinely review and adjust your preparedness plan. Life changes, and so do our water needs! I’ve found that by re-evaluating my plan a couple of times a year, I can tweak it to meet our current lifestyle.
Whether it’s new family members or shifts in seasons affecting how I store water, being adaptable is key. Don’t let your plan gather dust! Updating and reinforcing your strategy keeps you on top of your preparedness game.
And you know, it’s also a chance for me to get my family involved. Talking about our water plan sparks interesting discussions about the importance of preparedness, and the kids actually get excited about being part of the solution.
FAQ
1. How much water should I store per person?
It’s generally recommended to store at least one gallon of water per person per day for a minimum of three days. This allows for drinking, hygiene, and basic needs.
2. How often should I refresh my stored water?
You should refresh and rotate your stored water every six months to a year to ensure it remains safe and palatable.
3. Can I use regular containers for water storage?
No! You should use food-grade containers specifically designed for water storage to prevent contamination or leaching of harmful chemicals.
4. What are some simple methods for purifying my stored water?
The simplest methods include boiling the water for at least one minute or using chemical treatments like chlorine tablets. Portable water filters are also a fantastic option.
5. How can I get my family involved in water preparedness?
Involve your family by discussing water needs and making it a fun activity. Plan your water storage goals together and assign roles, turning it into a bonding experience!

by Preparation Call Editorial Team | Jul 30, 2025 | Preparedness
Understanding Self-Reliance
What It Means
Self-reliance, to me, is all about being able to take care of my own needs without depending heavily on outside resources. It’s about building confidence in my ability to provide for myself, whether that’s through skills, knowledge, or resourcefulness. It’s empowering, don’t you think? When I first started this journey, I felt like I was stepping into a new world where I could control my own destiny.
I believe that understanding the concept of self-reliance can start with small steps in day-to-day life. For example, learning to cook instead of eating out not only saves money but also gives me a sense of accomplishment. There’s something about whipping up a meal that feels like a win – and trust me, it doesn’t have to come from a fancy restaurant.
Having a self-reliant mindset means being willing to learn and adapt. It’s an ongoing process of discovering new ways to meet my needs creatively and effectively. Plus, this newfound knowledge can be shared with others, growing a community of like-minded folks who support each other.
Building Essential Skills
What to Focus On
One of the biggest areas I tackled was skill-building. I realized that knowing how to do things myself would take me farther than any amount of money could. From basic cooking skills to minor home repairs, I found myself diving into resources such as YouTube tutorials and online courses. It felt like I was going back to school, but way more fun!
Of course, it’s not all about the DIY projects. I also picked up gardening. Just a few herbs on my windowsill made my cooking pop with fresh flavors, and let me tell you – they were cheaper than buying fresh herbs from the store every week.
Getting hands-on experience was key. Whether stumbling through a few failed recipes or fixing a leaky sink, I learned that failure is merely a stepping stone toward mastery. Each small win boosts my confidence, making me more eager to try the next endeavor.
Resourcefulness with Budgeting
Maximizing Your Budget
Now, let’s talk about money, or rather, how to keep it in my pocket! Budgeting is a skill I had to develop to ensure I was making the most of what I have. I started tracking my expenses with simple apps, which helped me see where my money was going and where I could cut back.
One of my favorite budgeting hacks is meal planning. Instead of going into the grocery store blindly and splurging on whatever catches my eye, I map out my meals for the week. Not only does it save me cash, but it cuts down on food waste, too. That makes me feel pretty darn good!
Also, I ventured into thrift shopping and barter systems for clothes and household items. I’ve scored some killer deals and unique finds, all while meeting wonderful people in my community. Who knew being resourceful could be so much fun?
Community Engagement
Finding Like-Minded Individuals
I can’t stress enough the importance of community in this journey. It’s one thing to become self-reliant on my own, but finding others who are on the same path adds so much to the experience. I joined local groups focused on sustainability, skill-sharing, and even a community garden.
These engagements introduced me to a plethora of knowledge! I’ve swapped DIY tips, attended workshops, and even participated in a clothing swap. The connections I’ve made have been invaluable, turning what could be a lonely journey into a shared adventure.
Cultivating these relationships has not only reinforced my skills but also provided a support system when challenges arise. Having someone to lean on makes all the difference in boosting morale – after all, who better to share the highs and lows than fellow self-reliance enthusiasts?
Maintaining a Positive Mindset
Staying Committed
Ultimately, the mental game is where I had to focus quite a bit. Developing resilience was crucial. I set realistic goals for myself, celebrating little victories along the way. It reinforces my belief that self-reliance doesn’t happen overnight – it’s a slow and steady journey.
When setbacks occurred – and they did – I made it a point not to get discouraged. Reflecting on my progress helped me stay motivated. I often remind myself of the skills I’ve gained and how far I’ve come. It’s a lot easier to push through when I can see the light at the end of the tunnel.
Moreover, keeping a journal has been a game-changer for me! Writing down my thoughts, achievements, and areas where I can improve has provided clarity and kept my mindset focused on growth. Plus, it’s fun to read back and see how I’ve evolved over time.
FAQ
1. What is self-reliance?
Self-reliance means taking responsibility for meeting your own needs, whether through skills, knowledge, or resourcefulness. It entails being independent and able to manage challenges without heavily relying on external sources.
2. How can I start becoming more self-reliant?
You can start by building essential skills, such as cooking, gardening, or basic home repairs. Begin with small projects and gradually expand your skill set over time.
3. What budgeting tips do you recommend?
Meal planning, tracking expenses, and using budget-friendly shopping methods like thrift stores or bartering can significantly stretch your budget and reduce unnecessary spending.
4. Why is community important for self-reliance?
Community engagement helps you find support, share knowledge, and encourage each other along the journey. It’s a great way to learn from others and build meaningful relationships.
5. How do I maintain a positive mindset while pursuing self-reliance?
Celebrate small wins, reflect on your progress, and keep a journal to track your journey. Staying committed and being patient with yourself will help you stay motivated through challenges.

by Preparation Call Editorial Team | Jul 30, 2025 | Preparedness
Understanding Emergency Management Laws
Federal Laws Governing Disasters
One of the first things you should know when a disaster hits is the federal laws that come into play. The Stafford Act is central to this, as it governs how federal disaster funds are allocated and how assistance is provided. It’s not just a dry legal document; it essentially outlines how help is supposed to flow from the federal to the local levels during catastrophic events.
Having seen its application firsthand, I can tell you that understanding this law can mean the difference between rapid assistance and bureaucratic delays. Knowing who to communicate with in the face of an emergency can save you loads of time and trouble, allowing you to focus on getting back on your feet.
Additionally, it’s crucial to be aware of the Disaster Relief Fund that the federal government manages. This fund can offer essential resources for rebuilding and recovery, helping communities bounce back as quickly as possible. Familiarizing yourself with these laws will empower you to advocate effectively for the assistance you need.
State and Local Laws
Just like the federal laws, state and local regulations play a vital role in disaster recovery. Each state has its own emergency management plans, which dictate how local agencies respond to disasters. These laws can vary significantly from one state to another, which is why it’s important to understand the specific regulations in your area.
In my experience, building relationships with local emergency services can be incredibly beneficial. They often have insights into what resources are available and can help you navigate local protocols and resources. Plus, absorbing local law through community workshops can give you a curveball understanding of how to manage during a disaster.
Lastly, understanding zoning laws post-disaster can be essential. These laws can impact what you can and cannot rebuild, influencing your ability to regain a hold on your property and business. I truly believe being well-versed in these can save you a lot of headaches down the line.
Liability and Insurance Implications
Disasters can bring a myriad of liability issues your way. For instance, if someone gets injured on your property during an emergency, you might find yourself facing some tricky legal questions. It’s something most people don’t think about until it happens, and that kind of proactive thinking can save you a great deal.
On the flip side, it’s crucial to know how your insurance coverage stands during a disaster. Most standard home insurance policies don’t cover flood damage unless you have specific flood insurance. Trust me when I say, having an in-depth understanding of your policies can really give you peace of mind when Mother Nature starts throwing curveballs.
When you consult with legal or insurance professionals, ask about how to best protect yourself from potential liabilities. Being prepared can make a world of difference when you find yourself in a tight spot. Having that range of options at hand can help you feel more secure, and who doesn’t want that?
Resources for Disaster Assistance
Local Government Resources
Your local government is often one of the first lines of aid following a disaster. They can offer immediate resources, such as shelter and food, but they also provide longer-term assistance through recovery programs. In my experience, reaching out to local agencies can lead to a treasure trove of information on what help is available.
Sometimes, simply paying a visit to your local town hall can uncover programs you didn’t even know existed. It’s not just about financial aid but also about community support. Local workshops can provide a wealth of knowledge—be sure to take advantage of any networking opportunities that might arise.
Keep an eye on announcements by local officials; they often reveal available aid programs that cater to specific needs. Building rapport with your local officials can also facilitate smoother access to these resources. Believe me, having that insider knowledge makes a world of difference!
Non-Profit Organizations
Non-profit organizations often step up in incredible ways to help communities during and after disasters. Groups like the Red Cross and local food pantries are often crucial in delivering emergency aid. From my perspective, the best way to utilize these resources is to reach out and ask what they can offer—it’s undoubtedly a two-way street!
I’ve personally seen how organizations collaborate, sometimes pooling resources for a greater impact in the community. Connecting with multiple organizations can give you a more comprehensive picture of what assistance is available. And let’s be real, it’s usually faster and more flexible than government aid.
Also, don’t forget to check if they offer emotional and psychological help. After a disaster, mental wellness is just as important as tangible aid. Their support can lift spirits and foster community resilience, helping everyone to recover stronger together.
Community Support Initiatives
Community support is often the backbone of disaster recovery. Building a network of neighbors who look out for one another can help establish a robust support system. From sharing resources to organizing clean-up efforts, community initiatives play a huge role in the healing process post-disaster.
In my experience, community meetings after a disaster can lead to long-lasting friendships and alliances. They not only provide immediate help but foster a sense of belonging and security. Plus, the brainstorming that happens in these settings often leads to innovative solutions that might not have come to light otherwise.
Don’t underestimate the power of social media in rallying the community. Platforms like Facebook and Nextdoor can be excellent for organizing resource-sharing initiatives or fundraisers. It’s amazing how neighbors can come together to support each other; it’s all about finding ways to connect!
Long-term Legal Considerations
Documentation and Evidence Gathering
After a disaster, one of the most crucial steps you can take is to document everything. From photos of the damage to records of the assistance you’ve received, keeping detailed documentation is vital. In my experience, the value of having these records can’t be stressed enough when filing claims or seeking aid.
Be diligent about collecting all related documents, including photographs of damage, financial records, and correspondence with agencies. This clear paper trail can significantly expedite processing times when you apply for aid or insurance claims. Trust me, having everything in one place makes a world of difference later on.
Additionally, it’s wise to keep your community updated on any changes in your situation. This communication can help gather support or navigate collective recovery efforts more efficiently. Sometimes, you might even find others who faced similar challenges willing to share advice.
Consulting with Legal Experts
Getting in touch with legal experts is a vital step in navigating the challenging aftermath of a disaster. They can offer tailored advice depending on your situation, which can be invaluable. I remember reaching out to a local attorney who specialized in disaster recovery; their insights were a game-changer for me.
One recommendation I have is to find an attorney familiar with both disaster law and insurance claims. This dual expertise often makes them highly equipped to guide you through the myriad of options available during recovery. They might even point out opportunities for aid that you might not have considered.
In summary, consult regularly with these professionals as your situation evolves—laws and regulations can shift, and staying informed can safeguard your interests. Being proactive with your legal needs means you can focus on recovering without unnecessary stresses hanging over your head.
Restoring Your Rights and Property
Restoring your rights and property can be one of the trickiest aspects of disaster recovery. Post-disaster, zoning laws and property rights can get convoluted quickly, leading to further complications. It’s vital to understand how these laws affect your ability to rebuild or modify your property.
I’ve learned that advocating for your rights and property often requires persistence. This might involve appealing local decisions or understanding how new reforms might affect you. Engaging with local advocacy groups can be an instrumental step; together, the community can push for necessary changes.
Ultimately, rebuilding is just as much about restoring your rights as it is about physical structures. Taking the time to understand these nuances can alleviate stress and set you on a firmer path forward in reclaiming your space.
FAQs
What should I do first after a disaster strikes?
Ensure you’re safe first and foremost. After that, document everything—take photos of damages, and gather any existing insurance policy details, and reach out to local agencies for immediate assistance.
How can I find out what resources are available to me?
Check in with local government websites, community organizations, and even social media groups. Often, resources are shared through these channels to keep everyone informed.
What legal steps should I take after a disaster?
Start by documenting damages and seeking legal advice on how to navigate insurance claims or property rights. Consulting with an attorney specializing in disaster law might provide you with essential guidance.
Is it worth consulting an attorney after a disaster?
Absolutely! An attorney can help you understand your rights and navigate complex insurance and recovery processes. Their expertise can save you time and earn you a better outcome in the long run.
What if I don’t have insurance?
If you’re without insurance, don’t panic! Look into local government programs and non-profit organizations that provide disaster relief. They’re often tailored for those in your situation and can offer a variety of assistance options.





