by Preparation Call Editorial Team | Jul 6, 2025 | Preparedness
As the dust settles on the recent U.S. presidential election, political divisions in the country have reached a fever pitch. In several states, newly elected leaders and state legislatures have already begun to take stances that directly counter the policies of the incoming federal administration. These actions are raising alarms among political analysts, historians, and citizens who see echoes of a darker time in American history—the prelude to the Civil War.
The United States has a long and complicated history of state-federal tensions, with the Civil War of 1861-1865 being the most extreme example of what can happen when these conflicts escalate. While the circumstances today are far from identical, the growing rhetoric of resistance from certain state governments should give us pause. The question must be asked: Are we headed toward a similar crisis? And what steps can we take to prepare for the potential dangers of a deeply divided nation?
In times of political and social instability, it is not only political leaders who must prepare for upheaval—it is families, communities, and individuals. A nation divided by ideological and political battles faces a host of economic and social challenges. From potential civil unrest to disruptions in services, food security, and healthcare, the need for preparedness has never been more urgent.
A History of Conflict: The Civil War as a Cautionary Tale
The Civil War was, at its core, a confrontation between two vastly different visions of the United States—one centered around a federal government that sought to limit the spread of slavery, and the other, a Southern Confederacy that prioritized states’ rights, including the right to maintain and expand slavery. The Southern states, feeling that their way of life and economic interests were under threat, chose to secede from the Union, leading to a bloody, four-year war that tore the nation apart.
While the nation is not currently on the brink of war, we are witnessing growing tensions between state governments and the federal administration that, if not addressed, could escalate into something more dangerous. Just as in the antebellum period, the issue of state rights is coming to the forefront, but this time it is largely about policy disagreements ranging from abortion rights and environmental regulations to healthcare and gun laws. The stark political divide, paired with mounting resistance from both state and federal leaders, makes the need for personal and family preparedness more critical than ever.
Modern-Day Secessionist Movements and State-Federal Disagreements
In the aftermath of the 2020 election, several states, including Texas, Florida, California, and Minnesota, have pushed back against federal policies in areas such as immigration, healthcare, climate change, and other social issues. For example:
- Immigration: States like Texas have implemented tough anti-immigration laws that defy federal guidance on sanctuary cities and border control. California, on the other hand, has continued to protect its sanctuary cities and taken a firm stance against federal deportation policies under both President Trump and Biden.
- Abortion: Following the Supreme Court’s 2022 decision to overturn Roe v. Wade, many Republican-led states moved quickly to enact restrictive abortion laws, while Democratic-led states like California have worked to establish themselves as “sanctuaries” for abortion access, going as far as to introduce legislation that would protect and expand access to abortion services regardless of federal rulings.
- Gun Rights: In states like Arizona and Wyoming, laws have been passed that restrict or reject federal gun control measures. Conversely, California under Governor Newsom has enacted some of the strictest gun laws in the country, countering federal inaction or policy differences on gun regulation.
- Healthcare: As the Biden administration pushes for expanded federal healthcare programs, some states, particularly in the South, have refused to expand Medicaid under the Affordable Care Act, prioritizing state-level decisions over federal mandates. On the flip side, California and Minnesota have actively pushed for progressive health care reforms, with Governor Newsom expanding Medicaid in California and Tim Walz promoting progressive health initiatives in Minnesota that often exceed federal expectations.
In these cases, state leaders—whether from Republican or Democratic-led states—are asserting their autonomy and challenging federal policies that they believe overstep constitutional bounds. While these actions are legal under the doctrine of states’ rights, they also risk deepening divisions and setting the stage for broader confrontation.
A Specific Example: Governors Calling Special Sessions in Defiance
One of the most concerning developments in recent state-federal relations has been the decision by governors in both Republican and Democratic states to call their legislatures into special session specifically to resist the policies of the incoming president.
For example, after the 2020 election of President Joe Biden, several Republican governors, including those in states like Florida and Texas, immediately announced plans to convene special legislative sessions aimed at opposing certain federal measures. Florida Governor Ron DeSantis, for instance, called a special session to fight COVID-19 vaccine mandates, emphasizing state sovereignty over federal health guidelines. Similarly, Texas Governor Greg Abbott issued a call for a special session of the Texas Legislature to address issues such as election integrity and anti-abortion legislation, both of which were seen as counter to federal policies and priorities.
But the actions aren’t limited to Republican states. California Governor Gavin Newsom, a Democrat, also called a special session in the wake of the Roe v. Wade decision to further entrench abortion rights in California’s constitution, signaling a direct defiance of the federal ruling. This move was framed as a statement on protecting reproductive rights, but it also created a sharp contrast with more conservative states that were enacting restrictive abortion laws. Similarly, Minnesota Governor Tim Walz has called for the expansion of progressive climate policies in the face of potential rollbacks by the federal government. In his first term, Walz advocated for ambitious state-level policies on carbon emissions and renewable energy production, in contrast to federal actions that he believed were too lenient on fossil fuel industries.
While these actions may seem like routine political maneuvers, they represent a direct challenge to the authority of the federal government and signal a deeper level of opposition that could escalate over time. By calling these special sessions with the express purpose of defying federal authority, state governors are effectively setting the stage for a broader confrontation. This growing trend of resistance could provoke a cycle of retaliatory actions between state and federal leaders, further eroding national unity and trust.
In extreme cases, such defiant actions could pave the way for more dramatic steps. While secession is still unlikely, the increasing tension between state governments and federal authorities could lead to greater civil unrest or even violent confrontation in the streets. It also raises the specter of states attempting to nullify or ignore federal laws altogether, leading to a fractured, legally inconsistent nation.
The Dangers of a Fragmented Union
The most immediate danger of these escalating state-federal conflicts is the potential for a fractured Union. Although secession is not currently on the table in the same way it was in the 1860s, the actions of states that challenge federal authority could lead to a scenario where regions of the country operate under completely different sets of laws and values. In the worst case, this fragmentation could spiral into political violence, civil unrest, or even calls for secession.
The secessionist rhetoric that once dominated the Southern states has not disappeared. There are still fringe groups advocating for the secession of states like Texas, arguing that the federal government is no longer representing the interests of their citizens. While such movements remain on the periphery, the more pressing concern is the general erosion of trust in federal institutions and the potential for that mistrust to grow into open defiance.
Moreover, the growing ideological divide between red and blue states creates the conditions for “two Americas,” where residents of different states live under vastly different legal, economic, and social systems. This polarization makes it harder for the federal government to enact cohesive policies on issues like climate change, healthcare, and immigration, as states actively resist changes they see as hostile to their interests.
The Critical Need for Preparedness: A Call to Action for Families
Given the mounting risk of social and economic instability, it is no longer a matter of if disruptions will occur, but when. It is vital for families to take steps now to prepare for the potential upheaval that could arise from growing state-federal conflicts. The increasingly polarized political environment means that local communities could face disruptions in everything from supply chains to law enforcement and essential services.
Here are some critical areas where families should focus their preparedness efforts:
- Financial Security: Economic instability can arise quickly during times of political unrest. It’s wise to bolster savings, reduce debt, and consider diversifying investments. Families should also look into securing essential supplies—like food, medicine, and water—to ensure they can weather potential disruptions.
- Community Networks: Strengthening local community ties is more important than ever. In the event of civil unrest, social isolation could become a major vulnerability. Building relationships with neighbors, local leaders, and support groups can provide a safety net during difficult times.
- Emergency Plans: Families should create emergency response plans that address evacuation, communication, and shelter. This plan should include alternative sources of energy, like backup generators, as well as strategies for accessing essential services should they become unavailable.
- Self-Sufficiency: Having a degree of self-sufficiency can mitigate the impact of economic or supply chain disruptions. Families should consider learning basic skills, such as gardening, cooking from scratch, first aid, and basic home repairs, to make themselves less dependent on external systems.
- Physical and Mental Health: Unrest often takes a toll on both physical and mental health. Maintaining a healthy lifestyle and having access to medical supplies, including mental health resources, is essential. Families should also consider ways to protect their homes and personal safety in case of rising crime or political violence.
By preparing for potential disruptions, families not only protect their own well-being but also contribute to the broader stability of their communities. When enough people take action to become more self-reliant, the ripple effect can help ensure that society remains resilient even in the face of growing discord.
A Nation at a Crossroads: The Need for Personal and Collective Action
The United States stands at a crossroads. Just as the nation faced an existential crisis over issues like slavery, states’ rights, and the role of the federal government in the 19th century, we are now grappling with similar questions in the context of modern political and social issues. The lessons of the Civil War—of compromise, diplomacy, and the catastrophic consequences of extreme division—should serve as a powerful reminder of the dangers of unchecked state-federal conflicts.
The next few years may be pivotal in determining whether the U.S. can weather its internal divisions without descending into greater instability. As states and the federal government continue to clash, it is crucial that we remain vigilant, engaged, and prepared for the challenges ahead. Only through dialogue and cooperation can we hope to preserve the Union and ensure that the lessons of history are not repeated.
Ultimately, preparedness—on a personal, family, and community level—can help mitigate the effects of social and economic unrest. By taking proactive steps now, families can better safeguard their future, contributing to a collective resilience that is vital for the preservation of national stability in the face of growing division.
by Preparation Call Editorial Team | Jul 6, 2025 | Preparedness
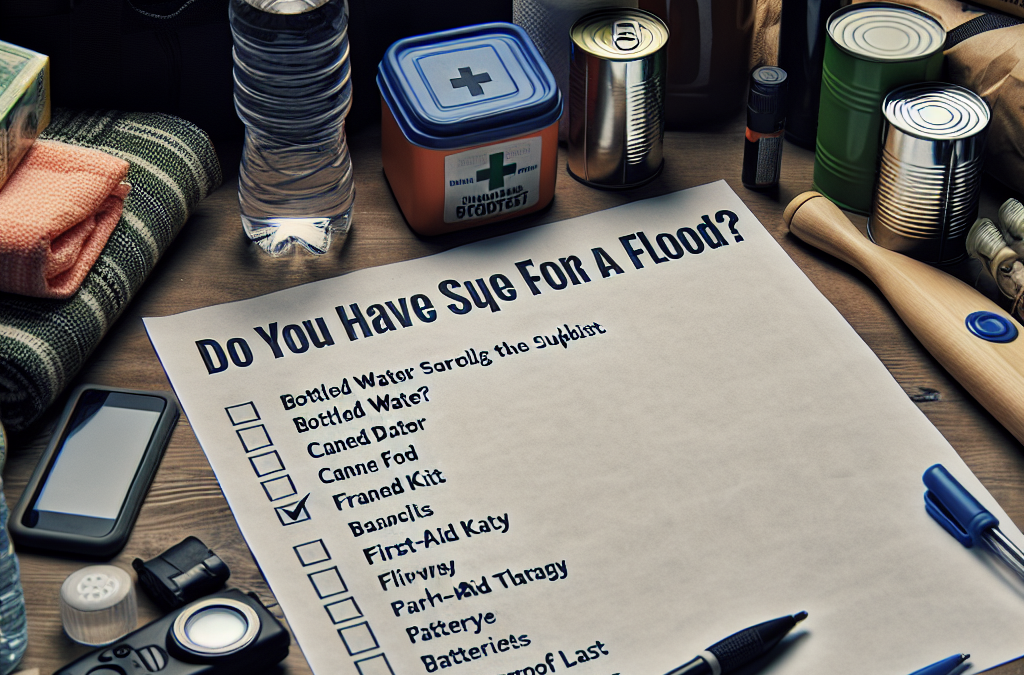
Do You Have Enough Supplies for a Flood? Here’s the Checklist
Top 4 Semantic Keyword Phrases
- Flood preparedness supplies
- Essential items for flooding
- Emergency kit for flood situations
- Safety measures during a flood
Do You Have Enough Supplies for a Flood? Here’s the Checklist
Flood Preparedness Supplies
Understanding the Importance of Flood Preparedness
Floods can hit incredibly fast. Think about it: one moment everything seems fine, and then the rain keeps pouring, and suddenly, you’re in panic mode. Being prepared isn’t just a nice thought; it’s a lifesaver. You have to ask yourself—what essentials do I need to keep my family safe and secure? Making a checklist of flood preparedness supplies is a smart move.
Having the right supplies can mean the difference between safely weathering the storm and feeling completely overwhelmed. It’s like having an insurance policy—not fun to think about, but super important. By putting together a list and checking it twice, you ensure that you’re ready when disaster strikes. Plus, it gives you peace of mind.
Whether you live in a flood-prone area or not, it’s wise to be prepared. Nature can be unpredictable, and floods can affect anyone. It’s all about being proactive instead of reactive when it comes to safety.
What Supplies Do You Really Need?
You shouldn’t just grab random items; you need to have a smart list. Essentials include things like water, non-perishable food, flashlights, batteries, and a first-aid kit. I can’t stress enough how important water is—one gallon per person per day should be the minimum for hydration. Trust me, in a crisis, you won’t want to be without it.
Don’t forget about personal medications, important documents, and items for pets if you have them. I always make sure to keep things like vaccination records for my furry friends in an easily accessible spot. You’d be shocked at how many folks overlook this until it’s too late.
Also, think about hygiene supplies! When the power goes out, sanitation is key. Include things like hand sanitizer, wipes, and toilet paper in your supply stash. Being clean can boost morale in tough times, and it keeps illness at bay.
Creating Your Flood Preparedness Kit
So, how do you start putting your kit together? First things first, I recommend getting a sturdy container or backpack—something that’s easy to grab and carry if you need to evacuate. An old duffle bag could work in a pinch, but a plastic bin might be more waterproof.
As you gather supplies, keep track of expiration dates regularly. You don’t want to end up with a box full of expired energy bars when you need them most. I usually go through my kit every six months or so to refresh it. It’s really just about making sure you are always prepared.
And don’t forget to label everything! This helps you locate items quickly if you need to grab them in a hurry. Simple things like writing “First Aid” or “Food” on the containers can save precious minutes when every second counts.
Essential Items for Flooding
Food and Water Considerations
When it comes to food during a flood, you have to think smart. I always opt for non-perishable items like canned fruits, vegetables, and meats. These are easy to store and can last a long time, even without power. Plus, they’re a quick grab if you have to leave in a hurry.
Now, about that water supply—having enough clean water is crucial. Besides the gallon-per-person-per-day rule, I like to throw in some sports drinks or electrolytes. They really help you stay refreshed and energized if you’re stuck without access to regular food for a while.
Don’t forget to pack a can opener! I can’t tell you how many people forget this little gadget. It’s super important because you don’t want to be wrestling with a can of beans while floodwaters are rising. Be practical, and get the right tools.
First Aid and Safety Supplies
A good first aid kit is your best buddy in emergencies. I personally have a fully stocked kit with band-aids, antiseptic wipes, gauze, and my go-to painkillers. Also, make sure to include a pair of scissors and some tweezers—little things that can come in handy at unexpected moments.
You should also think about flashlights and battery-operated lanterns. Being in the dark can feel disorienting and stressful, and having a way to light your surroundings brings comfort. I always like to toss in extra batteries too, just in case.
Consider adding a multi-tool or a Swiss Army knife to your kit. It’ll cover all sorts of needs, from opening cans to tightening screws. Plus, they’re compact and don’t take up much space, making them perfect for emergency situations.
Documents and Important Items
Storing your important documents is critical. I suggest having a waterproof container or zip-lock bags for things like passports, insurance information, and medical records. It’s all about making sure you can easily access these essential items if you have to leave home quickly.
Don’t forget about backup power supplies! I swear by having a portable charger for my phone. You might not think it’s vital, but being able to communicate with others could make a huge difference during a flood. Also, if you stash a few cash bills in your kit, you’d be surprised at how useful that can be if electronic systems go down.
Taking a few minutes to compile and store these documents can make an intense situation feel a tad easier. You’ll thank yourself later, I promise.
Emergency Kit for Flood Situations
Building Your Emergency Kit
Now, the heart of your flood preparedness is your emergency kit. This is the ultimate go-bag that should be ready to go at a moment’s notice. Start with basics: water, food, and first aid supplies. These are the non-negotiables.
I’m a big fan of keeping a little cash handy. As we all know, ATMs can go dark during emergencies, so having cash on hand means you can buy crucial items if necessary. I generally keep a mix of small bills just in case, so I don’t get stuck without change.
The size of your emergency kit really depends on your family size. If you have kids or pets, consider adding things like diapers, baby formula, or pet food. It’s about customizing it to suit your needs.
Staying Informed and Connected
Part of being prepared is knowing what’s going on in your area. I can’t stress enough how handy a battery-operated weather radio can be. During a power outage, this will be your lifeline to the latest information on the situation outside.
In addition to listening to the radio, I recommend having a plan in place to communicate with family members. If you get separated during a flood, knowing how to reach each other again can bring some peace of mind. Maybe establish a designated meeting spot, or have a group chat that everyone checks in with.
Don’t forget about entertainment! When you’re holed up in a safe space, it can get boring. Pack some books, cards, or games to help the time pass and keep spirits up.
Reviewing and Updating Your Kit Regularly
The last step? Make it a habit to review your emergency kit every so often. Life changes—the kids grow up, you move to a new house, or pets come into the mix. Every six months, I take the time to reassess what’s in my kit.
Don’t just forget about it. Update it based on new family members or changes in your lifestyle. I usually set a reminder on my phone so that I don’t let it slip my mind.
Trust me, you’ll feel so much better knowing you’ve done your part to be prepared. It’s all about taking control and saying, “I got this.”
Safety Measures During a Flood
Listening to Warnings and Evacuation Notices
First off, during a flood, always listen to local authorities. They provide the best guidance on whether to stay put or evacuate. I can’t tell you how many times I’ve seen people ignore evacuation orders only to regret it deeply once the waters rise.
Set up alerts on your phone for weather notifications and emergencies. That way, you’ll be in the loop and ready to act. Sometimes, just getting that little nudge from technology can keep you safe.
Make it a ritual to check the news or your local weather channel, especially during stormy seasons. It’s not just about craving new info; it’s about making smart choices for yourself and your family.
Creating an Evacuation Plan
An important aspect of flood preparedness is having an evacuation plan. Discuss this with your family so that everyone knows what to do when the time comes. I usually create a visual map of escape routes from our home, ensuring that everyone knows the best way out.
Make sure your plan includes where to go—have a friend or family member outside of town that you can stay with. It’s always good to have a safe spot in mind. Writing down this information and keeping it in your emergency kit can save you stress later.
And, of course, practice your plan! It sounds silly, but running through the motions when things are calm can make a world of difference when you’re in a situation.
Practicing Safety Tips During a Flood
If you do find yourself in floodwaters, never underestimate the power of safety tips. Avoid walking through strong currents—they can sweep you away before you even realize what’s happening. And if you’re driving, steer clear of flooded roads. A few inches of water can sweep you off the road; trust me, it’s not worth the risk.
Always look for higher ground. If you find yourself in a vehicle that’s starting to float, abandon it, and head to safer terrain. I know this can be tough to think about in the moment, but staying calm is crucial.
Lastly, don’t forget that floodwaters can be contaminated. It’s so important to avoid coming into direct contact with them if possible. The last thing you want to deal with, after all that chaos, is an infection from exposure to polluted water.
FAQ
What should I include in my flood preparedness kit?
You should include essentials like water, non-perishable food, a first aid kit, flashlights with extra batteries, important documents, and any medications your family may need. Don’t forget hygiene supplies and items for your pets!
How do I stay informed during a flood?
Keep a battery-operated weather radio handy for updates, and ensure you have your phone set to receive emergency alerts. Checking local news channels and government websites can also provide timely information.
How often should I update my emergency kit?
It’s a good idea to review your emergency kit every six months. Check expiration dates on food and medications, and update items as needed based on changes in your family or lifestyle.
What should I do if I receive an evacuation notice?
Act quickly! Gather your emergency kit, secure your home, and follow local evacuation routes. Make sure to have a plan in place for where you’ll go and how you’ll communicate with family members.
by Preparation Call Editorial Team | Jul 6, 2025 | Preparedness
Understanding Natural Disasters
Types of Natural Disasters
Living in a world that’s as unpredictable as a cat on a hot tin roof, I can’t stress enough how crucial it is to acknowledge the different types of natural disasters. Whether it’s hurricanes, earthquakes, or wildfires, each has its own set of challenges. I’ve seen firsthand how easily a calm day can turn into chaos when nature strikes. Being aware of these disasters is the first step to adequately prepare.
It’s not just about having a plan but also about understanding the risks that your area faces. For instance, some regions are prone to floods while others may experience tornadoes. Knowing what you’re up against helps in tailoring your emergency plans specifically for your furry friends.
Moreover, each type of disaster can prompt different actions. For example, if a wildfire is advancing, the need to evacuate quickly becomes critical. I’ve learned this the hard way, and it’s a lesson that I want others to take seriously.
Impact on Pets During Natural Disasters
When we think of disasters, our minds usually jump to the human side of things. But our pets feel the impact too. If a storm hits or there’s an emergency evacuation, pet owners like myself are often left scrambling. Just imagine – your beloved pet is scared and confused, and all you can do is try to get them to safety while maintaining your own composure.
Fear often leads pets to act unpredictably. They may run away, hide, or even lash out. This is why having a plan helps reduce that panic. By preparing in advance, I can keep my pets calm and secure, knowing exactly what actions to take in moments of distress.
Plus, I can’t forget about the logistics involving their needs – food, water, and medical supplies are just as important for them as they are for us. Keeping these essentials on hand can be a lifesaver during an actual emergency.
Creating Awareness Among Family
One of the keys to a solid emergency plan is making sure everyone in the household is on the same page. It doesn’t do much good if I’ve got a plan, but no one else knows about it, right? That’s why I’ve taken it upon myself to educate my family about our emergency procedures.
Creating awareness can be fun too! I’ve turned our preparations into family activities – we run drills and talk about what we’d do in case of an emergency. It’s turned what could be a stressful topic into moments of bonding. The kids now know where the emergency kits are stored, and they can even spot a red flag warning for storms before I do!
This level of awareness helps everyone stay more relaxed when things go south. The last thing I want is for my family to feel overwhelmed or confused when an emergency strikes. And believe me, pets pick up on our energy, so a prepared family leads to less stressed fur babies!
Preparing an Emergency Kit for Pets
Essentials to Include
When it comes to putting together an emergency kit, I like to think of it as my pet’s survival backpack – I even joked about it once and called it “Fluffy’s Bug-Out Bag!” So what goes into this kit? Well, start with the basics like food, water, and bowls.
Don’t forget about a leash, waste bags, and maybe even a favorite toy for comfort. After a stressful experience, having something familiar can make a world of difference for your pet. I know my dog, Rufus, is a bit of a comfort seeker, so he’d definitely appreciate that!
Also, including any necessary medication and a first-aid kit is essential. I learned the hard way when Rufus needed his allergy meds and I hadn’t packed them. Keeping a checklist, like the one I made, can ensure I never overlook anything important again.
Storing and Accessing Your Kit
Once you’ve got your emergency kit ready, the next task is ensuring it’s accessible. Honestly, I’ve made the mistake of storing mine in a space that wasn’t easily reachable. When an emergency strikes, you don’t have time to fumble around looking for supplies.
I recommend keeping the kit in a designated spot that everyone in the family knows about. Maybe in a closet by the front door or in the trunk of your car if you travel a lot with your pets. Whatever works best for your lifestyle!
Also, periodically check the contents of the kit to ensure everything is up to date. Expired food or medications don’t do anybody any good. Every few months, I lay everything out, check dates, and refresh supplies as necessary. Keeping things organized allows me to feel in control against the unexpected.
Training Your Pets for Emergencies
Ever thought about how our pets react during emergencies? Training them can make a monumental difference. I started teaching Rufus some key commands and tricks that could come in handy during a panic situation. It’s all about consistency and patience.
I recommend working on commands like “Come,” “Stay,” and even “Leave it” to help manage their behavior when their adrenaline kicks in. Practicing these can make them easier to control when chaos erupts around you. It’s like assembling a pet-specific disaster response team!
Moreover, introducing them to carriers or crates before emergencies arise can reduce anxiety later on. Take the time to reward them with treats when they enter their crate, making it feel like a safe haven instead of an interrogation chamber. That’s worked wonders for me!
Finding Shelter and Resources
Emergency Shelters with Pet-Friendly Policies
Another crucial aspect is understanding where you can find pet-friendly shelters in case you need a safe place during an evacuation. I’ve done my homework on local facilities that will allow pets because not all shelters accommodate animals. You don’t want to be left out in the rain with nowhere to go and your fur buddy in tow.
Planning ahead means calling these shelters in advance to ask about their policies. Some even have waiting lists, and with our pets being family members, I want to secure a spot for Rufus whenever possible.
Don’t forget to keep this information in an accessible format, like a printed card in your emergency kit. If the time comes, I’d rather not rely on my memory with all that stress swirling around!
Utilizing Local Resources
When emergencies hit, local resources can be incredibly helpful. Many communities provide support through pet rescue organizations, humane societies, and local pet hospitals during disasters. It’s a good idea to have a list of these resources handy.
I’ve reached out to several local pet organizations in my area to see what services they offer during emergencies. Interestingly, they also often host community forums on preparation and even offer free supplies sometimes. It’s fantastic to know others in your community are looking out for pets too!
Staying connected will provide further peace of mind. Establish a network with fellow pet owners, share tips, and create a support system. You never know when you might need an extra pair of hands to help out in a crisis!
Emergency Pet Services
Sometimes, emergencies lead to more than just evacuation – you could find yourself needing veterinary services due to injuries or illness. When preparing for such scenarios, knowing where to find emergency vet services can be a game-changer.
I always keep the contact information of a local 24-hour emergency vet in my phone and also have it written down in my emergency kit. It sounds like something simple, but believe me, in the heat of the moment, it’s one less thing to stress about.
And if you can, establish a relationship with your local vet ahead of time. Trust me, it’ll make communication smoother when you’re in a crisis. Being prepared has allowed me to remain calm and prioritize my pet’s safety above all else.
Maintaining Calm During Emergencies
Recognizing Your Pet’s Stress Signals
Part of keeping calm yourself is understanding how your pet reacts to stress. I’ve learned to recognize Rufus’s signals when he’s anxious – it’s all in the ears and the tail for him! This awareness helps me identify moments when I need to intervene.
Common signs include excessive barking, hiding, or even destructive behavior. It’s important to address their anxiety in a timely manner, whether through soothing words, gentle petting, or offering a favorite toy. The last thing I want is a panicking pet when I’m already feeling frazzled.
Just remember: our own stress can amplify theirs. By maintaining composure and acting decisively, I find that not only am I calmer, but my pets also feel reassured and safe. We’re in this together!
Creating a Calm Space
Before an emergency happens, I’ve found that creating a designated calm space for my pets can really help. This can be a cozy bed or a quiet corner of the house that they associate with comfort and safety. I even keep their favorite blanket there!
When an emergency hits, directing my pets to this space provides them with a refuge – it’s like a little sanctuary amidst the chaos. This helps them feel secure during an otherwise uncertain time. I can’t stress enough how much this has helped Rufus during storms.
The goal is to ease their fears and help them realize that they can feel safe and cozy during times of trouble. And of course, keep some treats handy to reinforce positive associations with this space!
Having a Support Network
Last but definitely not least, having a support network can prove invaluable during a pet emergency. Having friends or family knowing what to do and being available during a crisis can take a load off. I can’t tell you how comforting it is to know I can count on someone who understands the importance of my pets.
Connecting with fellow pet parents also serves to build community solidarity. Knowing that we can exchange tips, pool resources, and support each other creates a safety net that can make a world of difference in tough times.
After all, we share a unique bond with our pets and it’s helpful to bring others along for the ride. Whether organizing pet emergency groups or just casual conversations, it’s all about foster care and understanding for our furry friends!
Frequently Asked Questions
1. Why is it important to have a disaster plan for pets?
It’s crucial because, in an emergency, pets can become scared and confused. Having a plan helps keep them secure and calm, reducing stress for you and your pet.
2. What should I include in my pet emergency kit?
Your emergency kit should include food, water, medication, a leash, waste bags, and a comfort item like a toy or blanket. Always remember to keep these in an accessible location!
3. How can I help my pet during an emergency?
Stay calm, recognize their stress signals, and direct them to a safe, familiar space. Additionally, practicing key commands can help you manage their behavior during chaos.
4. Are there shelters that allow pets during a disaster?
Yes! It’s essential to research pet-friendly shelters in your area and have their information readily available. Not all shelters allow animals, so knowing your options is key.
5. How can I create a support network for pet emergencies?
Connect with fellow pet owners through community groups or social media. Sharing resources, experiences, and tips builds a solid network. Having someone to rely on makes a huge difference!

by Preparation Call Editorial Team | Jul 6, 2025 | Preparedness
1. Financial Readiness
Budgeting Wisely
One of the first things I learned about preparing for an economic downturn is the importance of budgeting. I started by tracking all my expenses for a month. This gave me a clear picture of where my money was going. From there, I was able to adjust my spending habits and prioritize necessities. Living within my means became easier, and I even discovered areas where I could cut back.
After budgeting, I also created a separate emergency fund. It’s a game-changer! Having some savings set aside not only provides peace of mind but also acts as a cushion if income falters or unexpected expenses arise. By setting up automatic transfers to my savings account each month, I built that fund without even noticing the difference in my spending.
In summary, I always revisit and tweak my budget regularly. Economic conditions are ever-changing, so I make it a habit to reassess my finances quarterly. It keeps me acutely aware of any financial pressures that might be on the horizon, allowing me to adapt my strategy as needed.
2. Resource Management
Stocking Up on Essentials
When times are tough, having the right resources can mean the world. I’ve learned that stocking up on essentials like food, hygiene products, and common medications helps in more ways than one. It’s not only useful for unforeseen circumstances but also can save money when buying in bulk. I often check for sales and buy non-perishable goods ahead of time.
Another area of resource management is being savvy about utilizing what I already have. Instead of rushing out to buy the latest gadgets or products, I take time to assess and repurpose. For example, I’ve turned old furniture into useful storage solutions, which helps me avoid spending while maximizing my space. Innovation can stretch resources further than you’d think!
Moreover, I connect with community resources and trade groups, where exchanging goods can be beneficial. This practice has helped me find everything from clothes to tools at little or no cost. Building a network not only enriches my life but also enhances my preparedness for challenging times.
3. Skills Development
Learning New Skills
Investing time in developing new skills has become a crucial part of my preparation strategy. I realized that knowing how to cook from scratch or repair basic home items could save a ton of cash. So, I started watching DIY videos online and even took a few community classes. It was fun, and I felt empowered along the way!
In addition to practical skills, I also focus on financial literacy. Understanding personal finance terms and investment strategies has opened new doors for me. By joining workshops or reading books on the subject, I feel much more in control of my financial future. Plus, having this knowledge helps in making informed decisions during economic uncertainties.
Another area I’ve delved into is self-sufficiency. I’ve taken up gardening and learned how to grow some of my own food. It not only provides fresh produce but also reduces grocery bills significantly. I enjoy sharing the yield with friends and family, which makes the experience even more rewarding.
4. Building Community Connections
Networking with Neighbors
One of the most gratifying aspects of preparedness planning has been building a strong network with my neighbors. During tough economic times, having supportive people nearby can be a lifesaver. I often engage in neighborhood meetings or local gatherings, which helps form connections and share resources.
Pooling resources has worked wonders for me and those around me. Whether it’s organizing community meals, where everyone contributes, or starting a supply swap among families, it brings us together and lessens the impact of any economic strain. Together, we’re able to create a safety net that feels more secure than if we were alone.
Also, community volunteering has both enriched my experience and helped build relationships. Giving back fosters camaraderie, and who knows, those connections might come in handy down the line if resources dwindle or there’s a need for assistance.
5. Mental Resilience
Practicing Mindfulness
Lastly, in times of potential economic stress, keeping a resilient mindset is key. I’ve found mindfulness practices to be invaluable. Simple techniques like meditation or deep breathing help to maintain focus on what I can control, rather than worrying about external stresses. It’s all about staying grounded!
Additionally, I surround myself with positive influences. Whether it’s reading inspiring books, listening to podcasts, or being with uplifting people, it helps combat negativity. This positive attitude reflects in how I handle challenges and prepares me for unexpected events.
To wrap up, embracing adaptability is crucial. Life throws curveballs, and being able to pivot or think creatively during economic hardships has turned out to be one of my greatest assets. I intentionally foster a solution-oriented mindset, which allows me to see opportunities others might miss.
Frequently Asked Questions
1. Why is financial readiness important in economic downturns?
Financial readiness acts as a buffer against unexpected changes in income, allowing individuals to manage essential expenses without panic.
2. What are some key essentials to stock up on?
Non-perishable foods, toiletries, and medical supplies are great essentials. It’s all about ensuring you won’t run out of basics during a tough time.
3. How can I learn new skills effectively?
Online courses, workshops, local classes, and DIY videos are excellent ways to learn new skills that can benefit your preparedness strategy.
4. What’s the benefit of having community connections?
Community connections provide a support system during hardships, enabling resource sharing and emotional support to lessen the burden of tough times.
5. How does mental resilience help in preparedness planning?
Mental resilience boosts your ability to face challenges with a clear mind and positive attitude, allowing for more effective problem-solving and adaptability.

by Preparation Call Editorial Team | Jul 6, 2025 | Preparedness
1. Outdoor Survival Skills
Understanding the Basics of Wilderness Navigation
Let me tell you, knowing how to navigate in the outdoors is a game-changer. I remember the first time I got lost—my heart was pounding; I felt that familiar rush of panic. But that was also the moment I decided to learn about maps and compasses. Understanding how to read a map allows you to find your way back without relying on technology, which is super empowering!
Once I got the hang of cardinal directions and topography, I felt more connected to nature. It wasn’t just about getting from point A to B. Instead, it became about understanding my surroundings and being present in the moment. Exploring how the terrain affects travel can totally change your perspective.
In the age of smartphones, it’s easy to overlook these skills. But trust me, keeping a compass and basic map skills in your toolkit can turn a stressful situation into a little adventure. Plus, it’s like a secret superpower when you can lead a hike confidently!
Building a Fire: The Old School Way
Ah, the flicker of firelight on a cold night—it’s just magical, isn’t it? The first time I built a fire wasn’t pretty; I fumbled around with tinder and kindling, and let me tell you, it wasn’t easy! I learned that there’re various methods—like the bow drill and the fire starter technique. Each has its own charm and challenges, but that’s all part of the fun!
Once I got the basic method down, I also discovered that finding dry materials can be tricky but rewarding. Whether it’s dead bark, twigs, or even old pine needles, knowing where and how to source your materials is half the battle. Creating a scorching fire can keep you warm, cook food, and even boost your morale after a tough day outdoors.
Fire safety is key, too! I’ve learned the hard way about wind and flames. Always have a fire extinguisher nearby when practicing, especially when you’re outdoors. There’s no thrill quite like successfully starting a fire from scratch; it’s like a badge of honor for survivalists!
Foraging & Identifying Edible Plants
Getting into foraging has been one of my favorite adventures! The thrill of recognizing edible plants and wild fruits can lead to delicious meals that you’ve sourced yourself. I started out with some basic books on local flora, which really opened up a new world for me.
It’s not just about finding something to eat; it’s connecting with nature and knowing what the earth provides. I remember the first time I found wild garlic. I couldn’t believe something so tasty was just sitting there! However, understanding which plants are safe to eat is crucial. You definitely don’t want to confuse a wild onion with a poisonous look-alike.
Going out with experienced foragers or joining workshops can be super helpful too. Not only do you learn a ton, but you also meet amazing people who share the same passion. Plus, there’s nothing quite like wild food—it tastes completely different and way fresher than anything from the supermarket!
2. Water Sourcing and Purification
Locating Water in the Wild
Having water on hand is crucial for survival. During my hiking trips, I learned that water can often be found near low-lying areas or in streams. Watching animals can also clue you in on where to find water sources. The first time I stumbled upon a stream, I felt like I’d found hidden treasure!
It’s essential, though, to always consider the cleanliness of the water. Even if it looks clear, it could still carry harmful bacteria. So, get in the habit of treating or filtering any water you find before gulping it down.
Learning to identify different environments and their water sources can be a lot of fun. It’s like being a part of nature’s puzzle, piecing together what you need to survive. If you ever find yourself in the wild, knowing how to source water is a big confidence boost.
Methods of Purification
Finding water is one thing, purifying it is another! I’ve tried various methods like boiling, using filtration systems, and even chemical tablets. I’m a big fan of boiling because it’s effective and simple—just make sure to let it cool before sipping!
Portable filtration systems are a nifty tool too. I’ve found some compact versions that are lightweight and perfect for keeping in my pack. They can filter out contaminants quickly, which is awesome when you’re on the go.
Each purification method has its pros and cons, and figuring out what works best for me has been part of the journey. Just remember—drink up, but be smart about it!
Storing Water Safely
Last but not least is knowing how to store water. When I first started out, I didn’t realize that sunlight can degrade plastic; so, I learned the hard way about keeping water containers in a cool, shaded place. Finding the right containers is vital!
I typically use large plastic bottles; they’re easy to carry and refill. But there’s also something to be said for natural methods like storing in clay pots. Not only are they traditional, but they keep the water cool, too.
Being mindful of your water storage can make a huge difference in survival situations. Plus, passing on this knowledge feels great—it’s all about making life a little easier for the next adventurer!
3. Shelter Building Techniques
Understanding Different Shelter Types
I’ve learned that not all shelters are created equal! Depending on the environment, you might prefer a lean-to, a tarp shelter, or even a snow cave. My first attempt at building a lean-to looked a tad sad, but I quickly realized it’s all about trial and error. Different terrains need different approaches, and that’s part of the adventure!
Weather conditions also greatly affect your shelter choice. Learning to anticipate rain or wind and adapting your shelter accordingly has been a real lesson in adaptability. I advise taking notes during your practice builds—it pays off to reflect on what works and what doesn’t.
Over time, I began to appreciate the creativity involved in building a shelter. It’s like crafting a little home wherever you are, and I found a surprising sense of security in that. Whether you’re out on a camping trip or in a survival situation, having a proper shelter can be your saving grace!
Gathering Materials for Your Shelter
When collecting materials for a shelter, I’ve learned to be resourceful. Sticks, leaves, and even pine needles can be used to form walls and roofs. One thing I didn’t expect was how hard it could be to find the right balance of sturdiness and insulation!
Gathering materials can also turn into a cool scavenger hunt. It’s like channeling your inner builder! Knowing the right kind of trees or plants makes all the difference. I was once stuck for hours looking for the perfect branch only to realize my backyard had everything I needed. Lesson learned!
The more I practiced gathering materials, the faster I got at recognizing what would work best. I recommend always having rope or cordage handy; it makes assembly a breeze! In survival situations, the ability to improvise with what’s around you can be a huge advantage.
Setting Up Shelter in the Right Location
Choosing the right spot for your shelter can be tricky. I once set up camp near a river—great for water access but terrible for potential flooding! After that experience, I learned the importance of high ground versus low areas.
Good visibility and protection from the elements are key factors. I now look for natural windbreaks like hills or trees, which provide extra protection. Trust me, sleeping peacefully during a storm is priceless!
Incorporating lessons from previous trips has made my decisions less stressful over time. Gathering around a cozy shelter feels amazing, especially after a long day of outdoor fun. Always be aware of your surroundings; it’s essential for a comfortable and safe experience!
4. Basic First Aid and Emergency Skills
Learning First Aid Basics
First aid knowledge is essential, and it can literally save lives! I took a basic first aid course once, and it was honestly eye-opening. Learning how to treat cuts, burns, and sprains was super informative and definitely made me feel more equipped during my adventures.
At first, it seemed overwhelming! But practicing on friends or family really helped to cement the skills. Just remember—having a first-aid kit handy can make addressing a situation much easier. I’ve created my own little kit over time, filled with my most-used items!
I also discovered that keeping it organized helps—I label things so I can grab what I need without fumbling around. If you don’t have a kit yet, I highly recommend putting one together; it’s such a comforting feeling to know you’re prepared.
Handling Common Injuries
Real-world scenarios are where the rubber meets the road! I once twisted my ankle during a hike, and let me tell you, it was intense. I had to rely on what I learned about how to treat sprains: RICE (rest, ice, compression, and elevation). It worked wonders and got me back to enjoying my time outdoors faster!
Understanding the signs of hypothermia and heat exhaustion is also key; they’re both sneaky and can sneak up on you if you’re not careful. Paying attention to your body and recognizing when something’s off can keep a minor annoyance from escalating. There’s nothing worse than letting a small issue ruin a great trip.
I regularly practice treating various “injuries” with my friends. Role-playing these situations makes me feel more prepared if something unforeseen happens. Trust me; it’s all about staying calm and collected in high-pressure moments!
When to Seek Help
Knowing when it’s time to call for help is crucial. I’ve had situations where I thought I could handle things alone, but it always pays to be realistic. If it feels serious, don’t wait! My advice? Trust your instincts. If something seems off, it’s better to err on the side of caution.
Understanding how to signal for help is part of the equation too. I’ve practiced using whistles, mirrors, and even smoke signals! It might sound silly, but being prepared to communicate your location doesn’t just help you; it can save others unnecessary searching.
A good motto I live by is: Safety first, adventure second! Stay tuned in to your surroundings and share situations with fellow adventurers. There’s no shame in asking for help; it shows you’re smart and prioritizing safety.
5. Food Preservation Methods
Introduction to Food Preservation
Food preservation has become one of my favorite topics! The thought of enjoying summer produce in the dead of winter feels like I’m tapping into ancient wisdom. I joined workshops exploring methods like dehydrating, canning, and fermenting; it was mind-blowing!
One of the easiest techniques is dehydrating fruits and vegetables. I still remember my first batch of dried apples. The process is simple, and the results are so satisfying! Dehydrating not only extends shelf life but also concentrates flavors, making snack time an adventure of its own!
Each method has its own vibe and personality, which I find fascinating. I used to think preserving was only for grandmas, but now, it’s like an art form I can enjoy. There’s so much creativity involved—pickling, for instance, is just plain fun!
Meats and Protein Preservation
Learning to preserve meats like jerky was a game-changer for me, too. The first time I made my own jerky, I was so stoked—I felt like a real survivalist! It involves curing and drying, but once you understand the process, it becomes second nature.
Experimenting with different flavors has been a blast. I’ve tried teriyaki, spicy, and even sweet marinades, which can dramatically alter the taste. Just make sure to follow safe practices to avoid spoilage; food safety is crucial!
Once I realized I could take preserved meats on hikes, I never looked back. It makes for a filling, energy-boosting snack that’s better than any granola bar, hands down!
Fermentation and Its Benefits
Fermenting foods such as sauerkraut is another delicious way to preserve food! I dove headfirst into fermentation after tasting homemade kimchi at a friend’s dinner. The tangy flavor was addictive, so I wanted to get cooking.
As I researched, I learned how beneficial fermented foods are for digestion and health. It’s like a little science experiment every time you start a new batch, and waiting for it to ferment teaches you patience!
Plus, nothing beats the bragging rights for serving up a homemade condiment. Fermenting is about mindfulness and connection with food—and that’s refreshing in this fast-paced world. So, if you haven’t tried it yet, please do yourself a favor and explore this amazing preservation technique!
FAQs
- 1. What is the most important survival skill I should learn first?
- Outdoor survival skills like finding water and starting a fire are definitely the most critical to master first.
- 2. Can I learn survival skills through online courses?
- Absolutely! Many platforms offer courses on survival skills, but combining online learning with hands-on practice is key for best results.
- 3. How long does it take to become skilled in survival techniques?
- It varies for each individual; some concepts may take a few hours to understand, while others, like shelter building, may require more practice over time.
- 4. Where can I find resources for learning foraging and plant identification?
- Books, local workshops, and community classes are fantastic resources for learning about foraging and plant identification.
- 5. Is it necessary to carry a first-aid kit while hiking?
- Yes! A first-aid kit is essential for anyone venturing into the outdoors. It prepares you for any unexpected situations.
by Preparation Call Editorial Team | Jul 6, 2025 | Preparedness
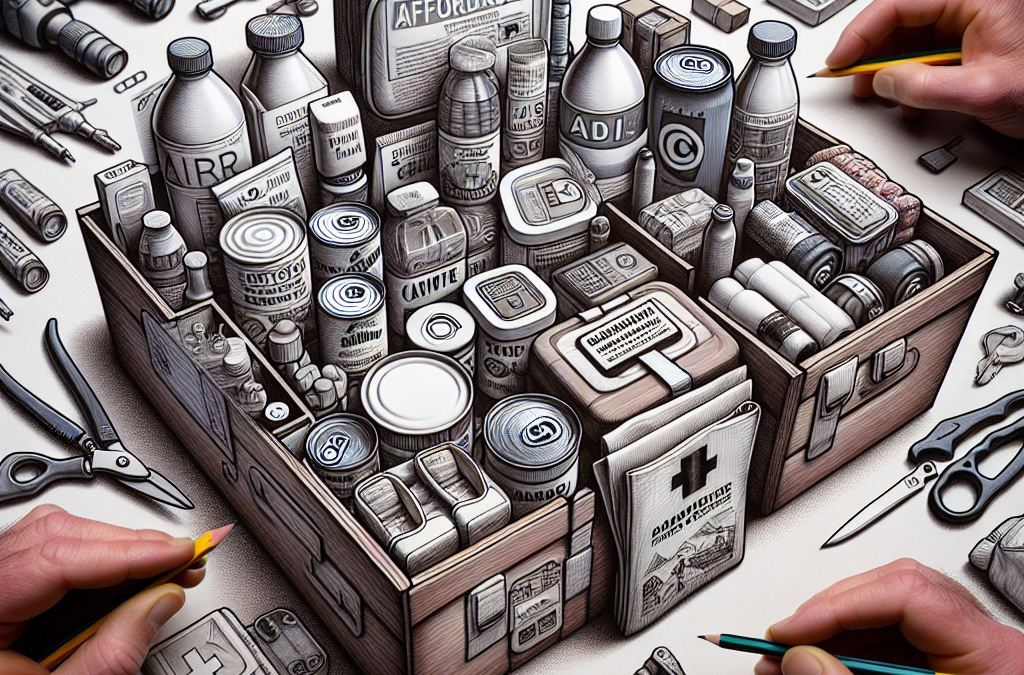
How to Build an Affordable Disaster Preparedness Kit
How to Build an Affordable Disaster Preparedness Kit
Top 4 Semantic Keyword Phrases
- Affordable emergency supplies
- Disaster preparation ideas
- Emergency kit checklist
- Budget-friendly preparedness
Affordable Emergency Supplies
Finding Low-Cost Resources
Every time I think about building my emergency kit, it reminds me of the need for affordable resources. I’ve found that local dollar stores and thrift shops are gold mines for basic supplies. Items like flashlights, batteries, and first aid kits can usually be sourced at a fraction of the cost compared to big-box retailers.
Don’t underestimate community resources, either. Local churches, community centers, and nonprofit organizations sometimes hold supply drives that could save you a buck or two. Remember, every bit counts when you’re trying to be smart about spending.
Another tip is to look for online coupons or cashback offers when shopping. Websites specializing in couponing can help you find deals you wouldn’t see otherwise. I always check for discounts before making any purchase for my emergency kit.
Prioritizing Essential Items
It’s all about knowing what’s essential for any emergency. Start with basics like water, food, and first-aid supplies—these are non-negotiables. I like to prioritize nutrient-dense food items that have a long shelf life. Things like canned goods, peanut butter, and dehydrated meals are great options.
Next, think about personal hygiene products. Items like hand sanitizer, wet wipes, and feminine hygiene products are super important, yet often overlooked. Going without these can lead to discomfort during stressful times, so pack them in there!
Another aspect I focus on is durable gear. Investing in a good multi-tool or a reliable flashlight might cost you a bit upfront but will save you stress in the long run when the lights go out.
Repurposing What You Have
You’d be surprised by how much you already own that can be put to use. Check your kitchen for containers that can hold water or food—think jars or old Tupperware. I often use my old backpacks or duffle bags to store my emergency supplies, which saves me money on new storage solutions.
Remember to check your existing electronics too. Old smartphones can function as independent emergency radios if you have offline maps or stored podcasts.
Lastly, look for skills you already possess. Knowing how to make your own cleaning supplies or even a DIY first aid item can drastically cut down your costs.
Disaster Preparation Ideas
Thinking Outside the Box
To me, disaster preparedness isn’t just about supplies; it’s also about planning. I know many people tend to think of natural disasters first, like hurricanes or earthquakes, but I believe it’s crucial to consider all scenarios—like power outages or job loss.
Brainstorm practical solutions for emergencies. For example, create a safe meeting place for family members in case you get separated during a chaotic event.
I’ve also found it super helpful to have a communication plan. Whether that’s using a group chat or a different device, staying connected is key.
Keeping Your Kit Up-To-Date
A lot of folks forget that an emergency kit isn’t a one-time purchase. I like to check mine every six months to rotate out foods that may be close to expiration and replace supplies like batteries.
I also review any new items that might be useful—like a portable phone charger or a solar-powered lantern—especially if I’ve seen advancements in technology that can make things safer or easier for me.
Take note of any changes in family dynamics too. If you’ve adopted a pet or someone has developed special needs, adapt your kit accordingly.
Practice Makes Perfect
It’s not enough to just have your supplies ready; you need to know how to use them! I always make it a point to go through my kit with friends or family, practicing what to do in case of an emergency.
Hold family drills every now and then. What if there’s a fire? Where do we meet? How do we use the first aid kit? This familiarity can save your life; trust me, you don’t want to be fumbling when every second counts.
A creative exercise I like is to simulate common emergencies. Pretend there’s a power outage one evening and see how well you can manage with your kit. This type of practice will boost your confidence and preparedness.
Emergency Kit Checklist
The Must-Have Items
Compiling a checklist is one of the most straightforward methods for getting your kit together. Here’s what’s essential: non-perishable food, water (a gallon per person, per day), a first aid kit, and basic hygiene supplies. This is where the concept of “keep it simple, stupid” comes in handy for me!
I also recommend including important documents. Having copies of passports, insurance papers, and personal identification tucked away can save loads of headache if things go south—just make sure to keep them in a waterproof container!
Of course, don’t forget about your pets. If you have furry friends, add their food, water, and any necessary medications to your checklist too.
Organization is Key
Once you’ve got your list, organization becomes the next big challenge. I like to categorize my supplies into sections. For example, I keep food, water, hygiene items, and tools separated. It makes finding what I need a breeze when panic sets in.
Clear, labeled containers are your friends. I use big, see-through bins that allow me to take a quick glance at what I have.
And don’t forget about location. Store your kits in easily accessible areas—where you’re going to think to grab them when disaster strikes. I always choose spots that everyone in my household knows about.
Reviewing and Adjusting Your Checklist
Every few months, I take time to sit down and see what I may need to adjust. As life happens—kids grow, interests change—so will your needs. If your little one has become a teenager, maybe they’d like to include their choice of snacks or activities in emergency settings!
Additionally, keep an eye on local situations. If you live in an area with a history of hurricanes, you may want to stock up on specific items that cater to that scenario.
Staying proactive and flexible with your checklist ensures your emergency kit remains relevant and effective.
Budget-Friendly Preparedness
Making Smart Choices
When it comes down to budget-friendly preparedness, I believe that smart choices can save you a ton of stress. Rather than splurging on everything, focus on what truly matters first—like food and water sources.
You don’t always need the most expensive gear. I’ve had luck with brands that are lesser-known but still offer great quality. Reading reviews and seeking recommendations from trusted sources is essential before making any big purchases.
Check for sales during holidays—sometimes, major retailers will put emergency supplies on sale during certain times of the year.
D.I.Y. Solutions
There’s something real satisfying about a good DIY project! I’ve created my own fire starters from cotton balls and Vaseline, and let me tell you—these work wonders in tough situations.
I’ve also made my own basic cleaning supplies using vinegar, water, and a few drops of essential oils. These can be packed away and used in emergencies without a high price tag.
And don’t forget about home remedies! Knowing how to deal with minor injuries or illnesses with ingredients already in my kitchen saves me from the pharmacy during chaotic times.
Seeking Community Help
All in all, I can’t stress enough the value of community. Consider participating in local workshops on emergency preparedness. It’s a fantastic way to learn while networking with people who share the same goals.
Websites offering preparedness resources are also invaluable. Many are nonprofit, giving you access to free materials and checklists you can use as a guide. Plus, there are online communities where people share tips and tricks.
And let’s not overlook friends and family! Sometimes the best resources come from those you know. Swapping or sharing items within your circle can cut costs while ensuring everyone is prepared.
FAQ
What should I prioritize when building my disaster preparedness kit?
Focus on essentials like water, non-perishable food, first aid supplies, and any personal items specific to your family’s needs.
How can I find affordable supplies for my emergency kit?
Check local dollar stores, thrift shops, and community resource drives. Online coupons and cashback offers are also great tools for finding deals.
How often should I review and update my emergency kit?
I recommend reviewing your kit every six months or whenever major changes occur in your life. Keeping your supplies relevant ensures you’re always prepared.
Are there DIY options for emergency supplies?
Absolutely! Many household items can be repurposed or created, like fire starters or cleaning supplies. Getting crafty can be both fun and budget-friendly.





